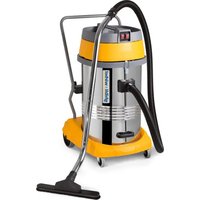
AS 590 IK CBN - Vacuum Cleaner Ghibli & Wirbel - Free user manual and instructions
Find the device manual for free AS 590 IK CBN Ghibli & Wirbel in PDF.


| Product type | Wet and dry vacuum cleaner |
| Model | AS 590 IK CBN |
| Brand | Ghibli & Wirbel |
| Power supply | Mains (power outlet) |
| Main functions | Suction of solids and liquids, adjustable suction power, use with electric brush (max 200 W) |
| Motor configuration | Single or dual motor depending on model |
| Tank capacity | Approx. 30 L (estimate) |
| Filters | Washable polyester filter, paper dust bag (optional) |
| Included accessories | Nozzle, dust brush, flat nozzle, crevice nozzle, flexible hose, rigid extensions, ergonomic handle, cart (depending on model) |
| Maintenance and cleaning | Regular cleaning of the polyester filter with warm water, emptying the tank, replacing the paper bag |
| Safety | Unplug before maintenance, do not vacuum flammable, explosive, corrosive or hot substances |
| Usage | For solids and liquids, do not switch modes without changing accessories |
| Suction adjustment | By selector on ergonomic handle or by opening the window |
| Automatic shut-off | Float indicates full tank (noise increases, suction stops) |
Frequently Asked Questions - AS 590 IK CBN Ghibli & Wirbel
User questions about AS 590 IK CBN Ghibli & Wirbel
0 question about this device. Answer the ones you know or ask your own.
Ask a new question about this device
Download the instructions for your Vacuum Cleaner in PDF format for free! Find your manual AS 590 IK CBN - Ghibli & Wirbel and take your electronic device back in hand. On this page are published all the documents necessary for the use of your device. AS 590 IK CBN by Ghibli & Wirbel.
USER MANUAL AS 590 IK CBN Ghibli & Wirbel
EN Use and Maintenance
EN English ENGLISH-1
Translation of original instructions)
FR Français FRANÇAIS -1
These devices were designed to vacuum liquids or solids or both, according to the technical data table from the introduction to this manual. They were designed only for this use.

DANGER:
The manufacturer can not be held responsible for any damage due to improper or incorrect use.
Any other use releases the manufacturer from liability for harm to persons and/or property and invalidates any warranty condition.
IMPROPER USE
Do not use the appliance to:
- Aspirate flammable, explosive, corrosive and toxic substances.
- Aspirate hot substances.
- Do not use the appliance in liquid suction mode to suction powder and vice versa.
Do not use the appliance in areas at risk of explosion.
PREPARING THE APPLIANCE
Trolley installation (for models equipped with cart)
- Place the trolley on the ground (1 Fig. 1)
- Place the cover (2 Fig. 1) on the trolley, setting the support In the plastic (3 Fig. 1) on the trolley's rod (4 Fig. 1).
Vacuum cleaner
For appliances equipped with suitable accessories.
- Release the levers (5 Fig. 2) and remove the cover (6 Fig. 3) complete with the motor unit.
- Remove the polyester filter (8 Fig. 4).
-
Check, if applicable, that inside the device to be set the paper bag (7 Fig. 4).
-
If the paper bag (7 Fig. 4) is not there, install it, if necessary, acting as follows: Install the paper bag (7 Fig.5) in the nozzle (9 Fig. 5) until it passes the banding (10 Fig. 5)
- Reassemble the polyester filter (8 Fig. 4).
- Place the cover back on (5 Fig. 2) and lock it using the levers.
- Insert, as far as possible, the sleeve (11 Fig. 6) of the suction hose into the nozzle (12 Fig. 6) on the drum.
- To release the sleeve (11 Fig. 6) press and hold the button (13 Fig. 6) and then pull out the sleeve (11 Fig. 6).
- Connect the ergonomic handle (15 Fig. 7) or the hose (16 Fig. 7) depending on the model, with the extension (14 Fig. 7).
- Join the two rigid extensions (17-18 Fig. 8), alining the reference points (19-20 Fig. 8), if applicable.
- Attach to the rigid extension (21 Fig. 9) the desired accessory (the vacuum nozzle, the dust brush, the accessory for tight spaces, the floor nozzle etc..

NOTES:
For models equipped with ergonomic handle is possible to adjust the suction force, by acting the selector (22 Fig. 10).
By opening the window (23 Fig. 10) you get a lower suction force.
Connecting the electrical brush
For devices with socket:
- Lift the shutter (24 Fig. 11).
- Connect the electrical brush's plug to the socket (25 Fig. 11) located on the top of the vacuum (maximum output 200W ).
Liquid suction
For appliances equipped with suitable accessories.
- Release the levers (5 Fig. 2) and remove the cover (6 Fig. 3) complete with the motor unit.
- Remove the polyester filter (8 Fig. 4) if present.
- Remove the paper bag (7 Fig. 4) if present.
- Place the cover back on and lock it using the levers (5 Fig. 2).
- Insert, as far as possible, the sleeve (11 Fig. 6) of the suction hose into the nozzle (12 Fig. 6) on the drum.
- To release the sleeve (11 Fig. 6) press and hold the button (13 Fig. 6) and then pull out the sleeve (11 Fig. 6).
- Merge the ergonomic handle (15 Fig. 7) or hose (16 Fig. 7) depending on the model, with the extension (14 Fig. 7).
- Connect the two rigid extensions (17-18 Fig. 8) by aligning the two reference points (19-20 Fig. 8).
- Mount on the rigid extension (21 Fig. 9) the desired accessory, (vacuum nozzle, floor nozzle etc...)

NOTES:
For models equipped with ergonomic handle it is possible to adjust the suction force acting the nut (22 Fig. 10).
By opening the little window (23 Fig. 10) you get a lower suction force.
USING THE APPLICANCE
- The device is equipped with wheels and thus can be moved with the proper handles, or it can be pushed with the help of the handle (26 Fig. 12)
- To lift it up insert your fingers under the dedicated handle (28 Fig. 13) on the top of the cover of the single version motor or lift with the help of two people using the handles (27 Fig. 12).
Starting up the appliance
- Insert the plug (29 Fig. 14) into the socket.
Single motor
- Press the switch (30 Fig.15) to position "I" to start the vacuum engine; lights, if located on the switch will turn on.
Double motor
Depending on the power required it is possible to start only one motor by pressing the switch (30 Fig. 15) on "l" or both switches (30 e 31 Fig. 15) if a greater suction force is required.
Lights, if located on the switch will turn on.

NOTES:
When the recovery tank is full, the noise intensity increases and the device can no longer aspire. Then you must switch off the device and empty the tank as described in the relevant paragraphs.
Switching off the appliance
- Push the switches (30, 31 Fig. 15) to the "0" position to stop the device; the lights, if any on the switches, will go off.
- Remove the plug (29 Fig. 14) from the electrical socket.
- Wind up the cable (33 Fig. 16) and hook it onto its housing (32 Fig. 16).
CLEANING AND MAINTENANCE

DANGER:
Before performing any maintenance operation, unplug the appliance from the electrical socket.
Removing and replacing the paper dust collection bag (if present)
- Release the levers (5 Fig. 2) and remove the cover (6 Fig. 3) complete with motor.
- Remove the polyester filter (8 Fig. 4).
- Remove the paper bag for collecting dust (7 Fig. 4), and replace it as described above.
- Reassemble all the parts by following the dismantling process steps in the reverse order.
Emptying the recovery tank
- Release the lever (5 Fig. 2) and remove the top (6 Fig. 3) along with the engine.
- Place it on the top of a drain and empty the liquid in the recovery tank (38 Fig. 18).
- Clean the inside of the tank with running water and then re-install everything doing the opposite of the disassembly.
For machines equipped with drain hose
- Release the exhaust tube (36 Fig. 18) from its base.
- Unscrew the button (35 Fig. 18), remove the cap (34 Fig. 18) of the exhaust hose (37 Fig. 18) and drain the liquid in the recovery tank (37 Fig. 18).
For devices with rocking tank
- Release the lever (5 Fig. 2) and remove the top (6 Fig. 3) along with the engine.
- Remove the tank locking device by acting the lever (40 Fig. 19) if any.
- Lift the tank (39 Fig. 17) with the appropriate lever (41 Fig. 20) until completely emptied.
- Replace everything doing the opposite of the disassembly.
Daily cleaning
Checking and cleaning the polyester filter (if present)
- Release the levers (5 Fig. 2) and remove the cover (6 Fig. 3) complete with motor.
- Remove the polyester (8 Fig. 4) filter.
- Clean the filter (Fig. 21) from the inside out with a blast of air; the filter can be washed (Fig. 21) in warm water and must only be replaced once it is completely dry. If it is too dirty, replace it.
- Reassemble all the parts by following the dismantling process steps in the reverse order.
Cleaning the appliance
- Clean the unit body with a cloth dampened with water or a mild detergent.
- Remove the top, as described above and clean the inside with running water and then empty it, as indicated above.
Replace everything doing the opposite of the disassembly.

DANGER:
Do not wash the appliance using jets of water.
Periodic checks
Checking the floater
- Remove the top as shown above
- Check If the floater (43 Fig. 22) is In good condition and if it moves freely in its space.
| PROBLEM CAUSE SOLUTION | ||
| The vacuum cleaner does not work. | Switch not pressed. | Press the switch. |
| Plug not inserted. | Insert the plug into the socket. | |
| No current. | Check the power supply line. | |
| Suction is not satisfactory. Paper bag full. | Replace the dust bag. | |
| Filter elements clogged. | Clean the filter elements. | |
| Accessories or tubes clogged. | Check and clean the flexible hose and the suction nozzle. | |
| Suction nozzle squeezegee worn or damaged. | Check and replace the squeezegee. | |
TYPE D'UTILISATION
B COOTBETCTBUN C Tpe6yemOn MOUHOCTbIO MOXHO BKIIOHTb TOJbKO OINH DBNATeJIb, yCTaHOVB NpeKJIIOUaTeJIb (30 Pnc.15) Ha "I", nII n oBa nepeKIOUaTeJIa (30 n 31 Pnc.15), ecn Tpe6yetc BoJIbSA BCAcbIBAIOUa CnJa.
JAmnoUKNrOpT,ecnOHNpncyTCTByIOT Ha nepeKNIouaTeNe.

ПРИМЕЧАЙ:
Korda BOCCTaHOBNTeNbHbI pe3epByap 3a- NOJHeN, INTEHCNBHOCTb UyMa YBeJIuHBAETcN annapat 6oJbSe He BCaCbIBaet. Torda annapat DoJxeh 6bITb BBIKIOUeyn ONOpOxHnte pe3epByap, KaK OINCAHO B COOTBTETCYIOUX NYKTX.
BbiknloueHne npnbopa
- Haxmnte nepeknoyateenn (30, 31 Pnc. 15) B noJoxeHne "O" dIra OTKIOUyeHn annapata; CBetbl, ecnn haoDntc Ha nepeKnoyateNe, BbIKIOUaOTcR.
- OTKIIOHTb ⅢTeNcJIbHyO BnIKy (29 Pnc.14) ot 3JIeKTPnueCKo po3ETkn.
- CmotaTb Ka6eNb (33 Pnc. 16) n 3aKepeNtB erO B COOTBETCTByHouIeM rHe3Ie (32 Pnc. 16).
YnCTKA N yXoD

ONACHOCTb:
Ipeep BbINOJIHeHem KaKx-Jn6o Onepa- uin no yxOdy, BbITaUHTb WTeNCeIbHyIO BNkY n3 3JIeKTpUuecko po3eTKn.
YdaJIeHHe n 3aMeHa 6yMaJxHOro MeuKa dIra c6opa IIIN (ecnN nMeetc)
- OTKpbIb 3aueKn (5 Pnc. 2) n ChraTb KpbIshky (6 Pnc. 3) BmecTe c DnBuraTeJeM.
- ChTb noJn3ΦnpHbI ΦnJIbTp (8 Pnc. 4).
- CHIMITE 6yMaXHbI MeWOK dJa c6opa nbln (7 Pnc.4) n 3aMeHInTe erO, KaK yka- 3aHO Bblwe.
- CobpaTb BCE, BblnoHra onepaunn B o6paTHOM nopdKe.
OnopoxHHe6aka peReHepaun
- Ocbo6oIte pbyar (5 Pnc. 2) n cHmnte BepxHIOU yactb (6 Pnc. 3) BmecTe c DnIraTeJem.
- PacnoJoxnTecb HaCJIbOM n ONoPoxHnTe BOCCTaHOBtEJIbHbI pe3epByap OxJaDaIOUeJ XnIDKocTn (38 Pnc.18).
- OuNCTNTb BHyTpEHn pe3epByap cTpyeBBObl, a 3aTeM 3aMeHHTb BCE, DeNaTb npOTNBONIOXHbIM MOHTaK.
AnnapaTbIO OchaueHbI DpeHaXHBIM
- OTnyctntb dpehaXHyIO Tpy6ky (36 Pnc. 18) c cboe noDepxke.
-OTBnHTIe KhoNky (35 Pnc.18), CHIMTE npo6ky (34 Pnc.18)dpenHaxhoro 77 Pnc.18) ONOPXHNTe BOCCTaHOBNTeNbHbI pe3epByap OxJaDaIOSei XnIDKocTn (37Pnc.18).
AnnapaTbI OchaueHbI HaKIOHHom pe-3epByapom
- Ocbo6oIte pbIur (5 Pnc. 2) n cHIMTe BepxHIOU yacTb (6 Pnc. 3) BMeCTe C DnIraTeJeM.
- Ocna6bTe yCTpoiCTBO 6JIOKIpOBKn pe3epByapa, nCnOJIb3yra pIur (40 Pnc.19),ecnnecTb.
-ПоднIMTe pe3epByap (39 Pnc.17)c COOTBeTCTBvUOuM pbIyarom (41 Pnc. 20)do noJIHoro onOpoxHeHna. - 3aMeHHTb BCE,ДeJaTb npOTnBONOJIOxHbIM MOHTaX.
EkeHHeBHa qnCTka
KoHTpoJIb N YnCTka POnI3ΦnHOrO ΦnIbTpTa (ecn nmeetc)
- OTKpbItb 3aueIKN (5 Pnc. 2) n cHraTb KpbIshky (6 Pnc. 3) BmecTe c DnurataTeJem.
- YdaIITb pfNlbTp (8 Pnc. 4) n3 noIINaPpa.
- OuNCTnTbФnIbTp (Pnc. 21) n3HyTpNi no HnnpaBHeHnO HApxky C NOMoUbIO CTpyN BO3dYxa; MOXHO BbIMbITbФnIbTp (Pnc. 21) B TeIIOB OBe n ChOba yCTaHOBnTb erO TOnbKO NocNe NOJHOrO BbICbIXaHn; PnI Ype3MepHom 3arp3HeHnФnIbTp a CneDyET 3aMeHnTb erO.
- CobpaTb BCE, BblnoHnra onepaunn B o6paTHOM npRdKe.
Чистka пибopa
OuHCTnTb KOpNyc npnbopa c nomoou TkaHn, CMOueHHo BODOn nIIN HeITpaJIb-HbIM MOIOUcM cpeDCTBOM.
- ChnMnte BepxHIOU qactb, KaK yka3aHO Bblwe N OOHCNTe BHyTpeHHN pe3epByap cTpyeBODbl, ONOPOXHnTe ero KaK yka3aHO Bblwe.
3aMeHHTb BCE, DeJaTb npOTnBONOJX- HbIM MOHTaX.

ONACHOCTb:
He mbItb npn6op noD cTpye BOdbl.
PepnoDnueckne npOBepkn
Проверka pa60тbl nonlaВka
- CHIMITE BepxHIOU yactb, KaK Noka3aHO Bblwe.
- Поверье ecn nonlaBok (43 Pnc. 22) haxoINTcB XOPOwem COCTOHN Mochet cBO6oDNo nepemeaTbcB B npocTpaHCTBe.
- Odczepić zaczepy (5 Rys. 2) i usunar podkrywę (6 Rys. 3) z zespołem napędowym.
- Usunac filtr (8 Rys. 4) z poliestru.
- Wyczyscić filtr (Rys. 21) strumieniem powietrza Rozpoczynajć od wewnatrix do zewnatrix;ość czyscić filtr (Rys. 21) w letniej wodzie i ponownie go załość po.).](20)不同程度 of the problem of the problem of the problem of the problem of the problem of the problem of the problem of the problem of the problem of the problem of the problem of the problem of the problem of the problem of the problem of the problem of the problem of the problem of the problem of the problem of the problem of the problem of the problem of the problem of the problem of the problem of the problem of the problem of the problem of the problem of the problem of the problem of the problem of the problem
- Ponownie zlozyc elementy filtra.
jai jia jia jia jia jia jia jia jia jia jia jia jia jia jia jia jia jia jia jia jia jia jia jia jia jia jia jia jia jia jia jia jia jia jia jia jia jia jia jia
jglsl
y
()
RENGJØRING OG VEDLIKEHOLD

FARE:
System for vatskeupsugning
For apparatus forsedda med lampliga tillbehör.
He n3noJ3BaIte ypeJa BB B3pNBOONaCHn Cpei.
ПОДГOTВЯНЕ 3A PAБOTA МONTЖ на колчkaраза
(3a MoDJIeNTe npEaBnIeHN c KOnuKa)
-ПoctabeteКолчкataHaЗemЯТa(1Pnc. 1).
- MoNTnpaIte pe3epBoapa (2 Pnc. 1) Ha KOJIuKkata,ФИКСИРай КПЯСТмСОВaTа nocTaBka (3 Pnc. 1)Ha Tpb6aTa (4 Pnc. 1)Ha KOJIuKkata.
Ppaxocmykaayka
3a ypeNi c aIeKBaTHN npHaIaeJXHOCTN:
-Повдигнелюста(5Pnc.2)иOTctpa-heTe Kanaka (6Pnc.3)ЗeДносдВигагеля.
- OTeTpaHeTe 6nIbpa (8 Pnc. 4) ot noJIneCTep.
-Проверete,акOBbB bВTpEшнataчт ha ypeda e MOHTnupaHa xapTneHa TOp6nka(7Pnc.4).
-Ako xapTneHaTa TOp6nUka He e cNoXeHa (7 Pnc. 4) MoHTnpaIte a, aKO e HuxHo, nO CNeDHNrT HaUNH:
CnojKeTe xapTneHaTa TOp6nUka (7 Pnc. 5) Bbpxy IIO3aTa (9 Pnc. 5), DOKaTo MInHe cKO6aTa (10 Pnc.5)
- CneTToBa MoHTpaIe 9nITbpa OT noJnecTepe (8 Pnc.4).
- CnojKeTe o6paTHo kanaKa n 6nokpuaTe ro c nomOuTa Ha loCT (5 Pnc. 2).
BbBeTeIoKpaMaHsoHa(11Pnc.6)Ha cmykaTeJnHaMapkyBIO3aTa(12Pnc.6), pa3noJoxHe Bbpype3epBoapa. - 3a npemaxbahe Ha MaHsoHa (11 Pnc.6) HATNCHETe N 3aPbXTe HATNCHaTO KOnyeTo (13 Pnc.6) n cIeT ToBa n3BaJeTe MaHsoHa HABbH (11 Pnc.6).
-Инсташираite pa3шиpeneTo (14 Pnc.7)Ha eproHOMnUHaTa dpbXka (15 Pnc.7)илп ha TbBkabna Марку (16 Pnc.7)В 3aBnCmOcT OT MOneJa. - CbeHHeTe DBaTe TBbpDn CbeHHeHn (17-18 Pnc. 8), Taka Ye da cBbnaDat Dbata pepepeHTn 3HaKa, (19 - 20 Pnc. 8), aKO TaKNaBa ca HAnuHn.
- MoTnpaIte Ha TBbPDoTO pa3wnpeHne (21 Pnc. 9) HJIInuHInTe npHaJnEJxHocTN (cMyKaTeJHa DIO3a, YeTKa 3a npax, HApKpaHnK 3a TECn bTIN, HApKpaHnK 3a NOd n dp.)

3A6EJIEXKKA:
PnMOeJInte c eproHOMuHa dpbXka e Bb3MOxHO HaIacBaHe Ha BCMyKaTeJHa cnJa Upe3 ceIeKTopa (22 Pnc.10). Upe3 OTBapJeHa npo3opeua (23 Pnc.10) Ce HAmJIyBa BCMyKaTeJHaTa cnJa.
Cbbp3BaHe Ha eJneKtpnueckaTa YeTka
3a npnbopnte konto nmat Brpaeden eI. KOHTAKT:
-Повдигнелеkanaka(24Pnc.11).
-ПoctabeteцencelaВКоNTakta(25 Pnc.11),pa3noLoXeHHaKaNaKaHa npaXocmykaUkata(MakcImaHa cna 200 W).
Ppaxocmykaayka 3a Teuhoctn
3a npnbopnte obopydBaHn c noxDxOJaU npHaJnxKHOCTN.
-Повдигнелюста(5Pnc.2)иOTctpa-heTe kanaKa(6Pnc.3)3aeEDHo cbc 3aBnKBaAataчacT.
- OTCTpaHeteФИNTbpa(8Pnc.4)OT noJIneCTep.
-Изва对接хартуненияТорбунka(7Pnc.4),akota3n eMOHTnpaHa.
- CnojTe o6paTHo KaNaka n 6nokpuTero c nOMOHTa Ha loCT (5 Pnc. 2).
- BbBeTe Do Kpa MaHsOHa (11 Pnc. 6) Ha CmyKaTeHnMaPkyB DIO3aTa (12 Pnc. 6) pa3noJoxeHa Ha pe3epBoapa.
- 3a npemaxbahe Ha maHsoHa (11 Pnc.6) HATnCHte N 3aDpBxTe HaTnCHaTO KOnyeto (13 Pnc.6) n cnei TOBa n3BaJeTe MaHsoHa HabbN (11 Pnc.6).
-Инсталар Te pa3шиpeneTo (14 Pnc. 7)Ha eproHOMnUHaTa dpbXka (15 Pnc. 7)Ии Na rBkabMa Mapky (16 Pnc.7)В 3aBnCmOcT OT MOneNa.
- CbeHHeTe DbTa TBbpNcBeHHeHn (17 - 18 Pnc. 8), Taka Ye da cBbnaDat DbaTpepepeHTn 3HaKa, (19 - 20 Pnc. 8), aKO TaKNaBa ca HaJInuHn.
- MoHTnpaIte Ha TBbpDoTo pa3wnpeHne (21 Pnc. 9) HAnuHnTe npHaJnxKocTn (cMyKaTeJIHa dIO3a, YeTKa 3a npax, NaKpaHnK 3a TeCHn bIIn, HApKaHnK 3a nOd n dp.)

3A6EJIEXKA:
При модени се proHOMnHa Дрьжka e Вбзмохно наласяBaHe Ha BCMyKaTeJIHa сиla чe3 сеКтopa (22 Pnc. 10). Чeз оТваряне на позорец (23 Pnc. 10) сe налЯ BA BCMyKaTeJIHaTa сиla.
N3ПОЛ3BAHE HANPNUБОРА
-Прибopa e праздвидан c колега, по ТОЗ И начИн e Вьзможно HeговOTо ппдВиЖВане с помоцта на дрьжкпTe (26 PnC.12).
- 3a TpaHcnpTnpaHe Ha npnbopa BbBeDeTe npbCTnTe B cneuaJHo OTdeJeHo npoctpaHcTBo (28 Pnc.13), pa3noJoxe
HO Ha ropHaTa yact Ha Kanaka 3a BepcnaTc c edn HdbraTeJ, nHn Ie ce npehacr O T Dba Nua C NOMOuTa Ha dpbXknte (27 Pnc.12).
Yuskahe Ha npnbopa
- BbBeTe Σencena (29 Pnc.14) B en. KOHTaKT.
BercnC eDn DBrataTeI
- Hatnchete npebknoybaTeIa (30 Pnc. 15) B no3nua "I" 3a nycKaHe Ha BCMykaTeHHraTEn, OCBetIeHneTo, aKO e HAnuHO Ha dpbXkKaTa, Ie ce BKIOuyi.
BepnCnC DBOeH DBrataTeN
- B 3aBnCmOcT OT Heo6xOdImaTa MOUHOCTe Bb3MOxHO NyckaHeTo CaMo HaeIN HbNraTeJ Upe3 HaTnCKaHe Ha 6yToHa (30 Pnc.15) B No3uZnI "I" nIn HaDbata 6yToHa (30 n 31 Pnc.15), ako e Heo6xOdIma NO rOJIMa MoUHoc T np3acMyKBaHe
OcbTneHneTo, aKO e HAnuHo Ha dpbKKaTa, Ie Ce BKnIOuN.

3A6EJIEXKA:
Korato pe3epBoapa 3a Bb3ctaHOBraHe ige ce HauJIHn, yceuca Ce NO-BUCOKO HNBO Ha Wym I np6opa He 3acMykBa. OTKIoute np6opa I n3TOueTe CbIbpXaHneTo Ha pe3epBoapa no NaunHa ONiCaH B CbOTBeTHna pa3JeI.
OTKJIIOUBAHE HA IPNI6OPA
-ПoctabeTe npeBknHouBaTeIInTe (30,31 Pnc.15)ВпозиЯ"0"3a OTKlnHouBaHe Na npi6opa;
-Изва对接ецencesa (29 Pnc.14)OT KOHTaKT.
- Cb6epeTe 3axpaHbuaaKa6eI (33 Pnc. 16) n ro 3akayete Ha npedHa3NayeHo 3a Ta3n ceI MAcTo (32 Pnc.16).
YHCTEHE N IOIDPbJxka
A INPENEYNPEXKDEHNE:
IpeHn 3BbPwBaHe Ha KaKBnTo n Da e DeHocTn No NODpBxKka, Hau HanpeHn3BaTe UeNceHa OT KOHTaTa.
I3BaJdaHe I NOdMaHa Ha xapTneHa-
Ta Top6nUka 3a npax (ako e npuIoxnMo)
-Повдигнелюста(5Pnc.2)иOTctpa-heTe kanaKa(6Pnc.3),3aeДнос мотopa.
-Изва对接е Фильъра (8 Pnc.4) от полесер.
- ɪəbæte xaptneHaTa TOp6nUka 3a cb-bɪpaHé Ha npax (7 Pɪnc. 4) n ro cmeHeTe KaKTo e yka3aHo No-dOly.
- MoNTIpaHTo ce n3BbPwBa B o6paTHaT a NocJIeIOBaTeJIHOCT.
Pn6opa He ce nouchTba c BODHa cTpy!
IepnoDnHn npOBepkn
PpOBePKa Ha nonJaBbK
-ДемоHTираite Kanaka no NaunHa, yKa3aH no rope.
-Провере te ako nonlaBbka (43 Pnc.22) He e noBpeH n ce npedBnKBa cBo6oHn B onpeJeHTo My npocTpaHCTBO.
| ПОНБЛЕМ ПИ | ЧИHA PEШЕНЕ | ||
| Прaxосмужская на пабо- ту. | He e ha��и chat рисьогия 6by- TOH. Шесела He e вklючев в Контак. Ная мейкtripчески тok. | Натишие письогия 6утон. Въveдete песьела в кон- разк. Проветe сл. зхсанда лини. 3асмужагенTo He e 3адобо- літелно. | Сmenete Topбчкata koilek- Top на прах. Почистe Фильравцпte сlementи. Проветe и почstete Тьвкове маркуи в BCmy- kaтелна дюз. Проветe и сmenete пу- цера. |
TÜÜP KASUTAMISE
Professional Cleaning Machines Since 1968
DEALER
GHIBLI & WIRBEL S.p.A.
Registered office:
Via Enrico Fermi, 43 - 37136 Verona (VR) - Italy
Headquarters:
- DANGER:
- IMPROPER USE
- PREPARING THE APPLIANCE
- Trolley installation (for models equipped with cart)
- Vacuum cleaner
- NOTES:
- Connecting the electrical brush
- Liquid suction
- USING THE APPLICANCE
- Starting up the appliance
- Single motor
- Double motor
- Switching off the appliance
- CLEANING AND MAINTENANCE
- Removing and replacing the paper dust collection bag (if present)
- Emptying the recovery tank
- For machines equipped with drain hose
- For devices with rocking tank
- Daily cleaning
- Checking and cleaning the polyester filter (if present)
- Cleaning the appliance
- Periodic checks
- Checking the floater
- TYPE D'UTILISATION
- ПРИМЕЧАЙ:
- BbiknloueHne npnbopa
- YnCTKA N yXoD
- ONACHOCTb:
- YdaJIeHHe n 3aMeHa 6yMaJxHOro MeuKa dIra c6opa IIIN (ecnN nMeetc)
- OnopoxHHe6aka peReHepaun
- AnnapaTbIO OchaueHbI DpeHaXHBIM
- AnnapaTbI OchaueHbI HaKIOHHom pe-3epByapom
- EkeHHeBHa qnCTka
- KoHTpoJIb N YnCTka POnI3ΦnHOrO ΦnIbTpTa (ecn nmeetc)
- Чистka пибopa
- PepnoDnueckne npOBepkn
- Проверka pa60тbl nonlaВka
- jglsl
- RENGJØRING OG VEDLIKEHOLD
- FARE:
- System for vatskeupsugning
- ПОДГOTВЯНЕ 3A PAБOTA МONTЖ на колчkaраза
- (3a MoDJIeNTe npEaBnIeHN c KOnuKa)
- Ppaxocmykaayka
- 3A6EJIEXKKA:
- Cbbp3BaHe Ha eJneKtpnueckaTa YeTka
- Ppaxocmykaayka 3a Teuhoctn
- 3A6EJIEXKA:
- N3ПОЛ3BAHE HANPNUБОРА
- Yuskahe Ha npnbopa
- BercnC eDn DBrataTeI
- BepnCnC DBOeH DBrataTeN
- OTKJIIOUBAHE HA IPNI6OPA
- YHCTEHE N IOIDPbJxka
- A INPENEYNPEXKDEHNE:
- Ta Top6nUka 3a npax (ako e npuIoxnMo)
- Pn6opa He ce nouchTba c BODHa cTpy!
- IepnoDnHn npOBepkn
- PpOBePKa Ha nonJaBbK
- TÜÜP KASUTAMISE
- GHIBLI & WIRBEL S.p.A.
Brand : Ghibli & Wirbel
Model : AS 590 IK CBN
Category : Vacuum Cleaner