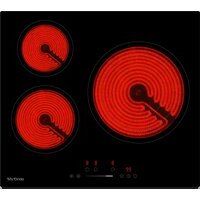
MX-VC2650 - Cooker Mx Onda - Free user manual and instructions
Find the device manual for free MX-VC2650 Mx Onda in PDF.


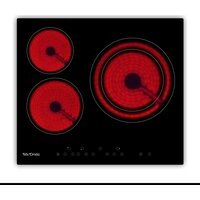
| Product type | Built-in ceramic hob |
| Brand | Mx Onda |
| Model | MX-VC2650 |
| Supply voltage | 220-240 V ~ 50/60 Hz |
| Total power | 5700 W |
| Number of cooking zones | 3 ceramic zones |
| Small zone (diameter / power) | 165 mm / 1200 W |
| Medium zone (diameter / power) | 200 mm / 1800 W |
| Large zone (diameters / powers) | 150/220/300 mm / 1050/1950/2700 W |
| Control type | Electronic touch |
| Power levels | 9 levels (1-9) |
| Timer | Up to 99 minutes, with automatic zone shut-off |
| Safety functions | Automatic shut-off, child safety, residual heat indicator, overflow protection, overheat protection |
| Stop & Go function | Yes, allows pausing and resuming cooking |
| Dimensions (W x D x H) | 590 x 520 x 51 mm |
| Built-in dimensions (W x D) | 555 x 495 mm |
| Net weight | 9.5 kg |
| Surface material | High-strength ceramic glass |
| Recommended cleaning | Special ceramic cleaner, scraper for sugary spills |
| Included accessories | Foam seal, fixing kit |
| Technical support | MX ONDA, phone 902 551 501 |
Frequently Asked Questions - MX-VC2650 Mx Onda
User questions about MX-VC2650 Mx Onda
0 question about this device. Answer the ones you know or ask your own.
Ask a new question about this device
Download the instructions for your Cooker in PDF format for free! Find your manual MX-VC2650 - Mx Onda and take your electronic device back in hand. On this page are published all the documents necessary for the use of your device. MX-VC2650 by Mx Onda.
USER MANUAL MX-VC2650 Mx Onda
natural_image
Three red concentric circular patterns on black background, no text or symbols presentCE
ANTES DE SU USO LEA ATENTAMENTE ESTE MANUAL
¡ATENCIÓN
natural_image
Three identical cooking pots with crossed-out X marks, no text or symbols presentnatural_image
Two cooking pots with crossed arrows indicating heating or cooling conditions (no text or symbols)natural_image
Simple line drawing of a hand pointing upward with a circular marker (no text or symbols)natural_image
Line drawing of a cooking pot on a stand (no text or symbols)| L(mm) | W(mm) | H(mm) | D(mm) | A(mm) | B(mm) | X(mm) |
| 590 | 520 | 52 | 48 | 555+5-0 | 495+5-0 | 50 min. |
natural_image
Diagram showing a rectangular block with an arrow pointing to it, and a magnified view of a mechanical component (no text or symbols present)natural_image
Diagram of a layered structure with arrows indicating downward forces or movement (no text or symbols)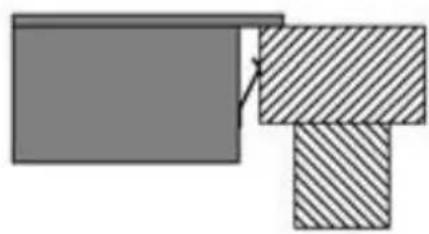
natural_image
Abstract geometric diagram with two shaded rectangles and a diagonal line, no text or symbols present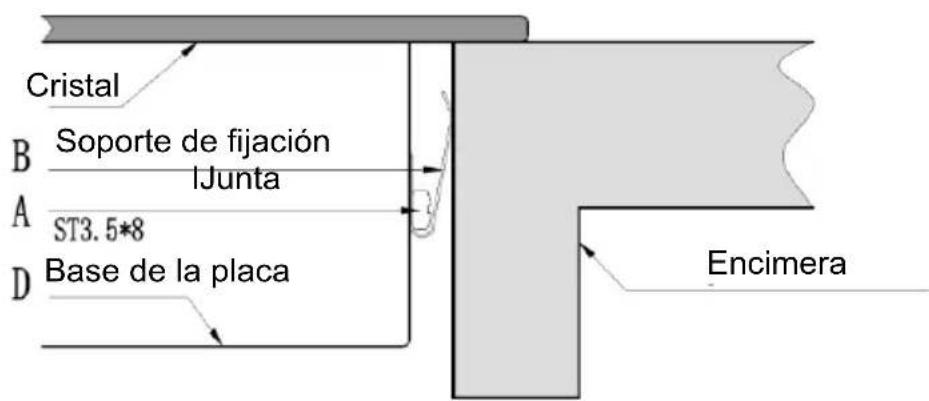
USER AND INSTALLATION MANUAL
Mx Onda
BUILT-IN VITROCERAMIC PLATE WITH THREE COOKING ZONES
MODEL: MX-VC2650
natural_image
Three red concentric circular patterns on black background, no text or symbols presentCE
BEFORE USE, READ THIS MANUAL CAREFULLY
ATTENTION
THIS APPLIANCE WORKS WITH A VOLTAGE OF 240 V, TO AVOID POSSIBLE ELECTRIC SHOCK DO NOT TRY TO
OPEN IT. This device does not have any part that can be repaired by yourself. In the event of a malfunction, do not manipulate it, go to an Official MX ONDA Technical Service.
Once the useful life of this electrical product has expired, do not throw it away with household waste.
Deposit it in the appropriate container at a local recycling point for later recycling.

This product complies with the European RoHS Directive (2011/65/EU), on the restriction of the use of certain hazardous substances in electrical and electronic equipment.
INTRODUCTION
Congratulations on the purchase of your new built-in ceramic hob with three MX ONDA cooking zones model MX-VC2650.
We recommend that you spend some time reading this User and Installation Manual to fully understand how to properly install it and how to use it. For installation, read the installation section.
Please read all safety instructions carefully before use and save this user and installation manual for future reference.
Among others, it incorporates the following features:
• High resistance ceramic glass.
• Maximum power: 5700 W
• Cooking zone 1: Cooking diameter: 165 mm
Power: 1200W
• Cooking zone 2: Cooking diameter: 200 mm
Power: 1800W
- Cooking zone 3: Cooking diameter: 150/220/300 mm
Power: 1050/1950/2700W
- Touch type electronic controls
- 9 power levels
- Timer up to 99 minutes
• Automatic safety shutdown
- Child lock
• Residual heat indication
BEFORE CONNECTING THE APPLIANCE
Your security is important for us. Please read this information before using the board.
Installation (Electric Shock Hazard)
- Disconnect the appliance from the mains before carrying out any work or maintenance on it.
- Connection to a good ground wiring system is essential and mandatory.
- Modifications to the home wiring system should only be carried out by a qualified electrician.
- Failure to follow this advice may result in electric shock or death.
Cutting Hazard
- Be careful: the edges of the panel are sharp.
- Failure to use caution may cause injuries or cuts.
Important safety instructions
- Read these instructions carefully before installing or using this appliance.
- No combustible products or products should be placed in this appliance at any time.
- Make this information available to the person responsible for installing the device, as it could reduce your installation costs.
- To avoid risks, this appliance must be installed in accordance with these installation instructions.
- This appliance should only be installed and grounded by a suitably qualified person.
- This apparatus must be connected to a circuit incorporating an isolation switch that provides complete disconnection from the power source.
- Failure to properly install the device may void warranty or liability claims.
Operation and maintenance
- Do not cook on a broken or cracked cooktop. If the surface of the cooking surface breaks or cracks, disconnect the hob from the mains socket (automatic) and contact a qualified technician.
- Turn off the hob and wait for it to cool completely before cleaning; for maintenance you must disconnect the hob from the mains.
- Failure to follow this advice may result in electric shock or death.
Health Hazard
- This device complies with electrical and electromagnetic safety regulations.
- However, people with pacemakers or other electrical implants (such as insulin pumps) should consult their doctor or the implant manufacturer before using this device to ensure that their implants are not affected by the electromagnetic field.
- Failure to follow this advice may result in death or significant damage to your health.
Hot Surface Hazard
- During use, accessible parts of this appliance will become hot enough to cause burns.
- Do not allow your body, clothing or anything other than the appropriate cookware to come into contact with the ceramic glass until the surface is cool.
- Metal objects such as knives, forks, spoons and lids should not be placed on the countertop surface as they may become hot.
- Pan handles may be hot to the touch.
-
Check that the handles of the saucepans do not protrude from other cooking zones that are on. Keep the handles out of the reach of children.
-
Keep children away.
- Failure to follow this advice may cause burns and scalds.
Cutting Hazard
- The sharp blade of a glass plate scraper is exposed when the safety cover is retracted. Use with great care and always store safely and out of reach of children.
- Failure to take the necessary precautions may cause injuries or cuts.
IMPORTANT SAFETY INSTRUCTIONS
- Never leave the appliance unattended when in use. When oil is overheated it can cause smoke and spills that can ignite.
- Never use your appliance as a work or storage surface.
- Never leave objects or utensils on the appliance.
- Do not place or leave magnetizable objects (e.g., credit cards, memory cards) or electronic devices (e.g., computers, MP3 players) near the device, as they may be affected by its electromagnetic field.
- Never use your appliance to heat or heat the room. After use, always turn off the cooking zones and hob as described in this manual (i.e. using the touch controls).
- Do not allow children to play with the appliance or sit, stand or climb on the plate.
- Do not place toys or products that attract children's attention on the plate; children could climb on the plate and could be seriously injured.
-
Do not leave children alone or unattended in the area where the appliance is used.
-
Children or persons with a disability that limits their ability to use the appliance must have a responsible and competent person to instruct them in its use. The instructor must be convinced that they can use the device without danger to themselves or their environment.
- Do not repair or replace any part of the appliance unless specifically recommended in the manual. All other services must be performed by a qualified technician.
- Do not use a steam cleaner to clean the plate.
- Do not place or drop heavy objects on the plate. Do not lean on the plate.
- Do not use pots, pans or saucepans with uneven edges or drag them across the glass surface as this may scratch the glass surface.
- Do not use scouring pads or any other abrasive cleaning products to clean the hob surface as they may scratch the glass surface.
- If the power cord is damaged, it must be replaced by the manufacturer or qualified personnel to avoid a hazard.
- This appliance is intended for home use only, not professional use. MX ONDA will not accept any responsibility and the guarantee will be void in case of improper use or failure to follow instructions.
- WARNING: The appliance and its accessible parts become hot during use. Care should be taken to avoid touching the cooking zones. Children under 8 years old should be kept away unless continually supervised.
- Children should not play with the appliance. Cleaning and maintenance should not be carried out by children without proper supervision.
-
This device can be used by children aged 8 years and older and persons with reduced physical, sensory or mental capabilities or lack of experience and knowledge if they have been given supervision or instruction concerning use of the device in a safe manner and understand the instructions. dangers involved.
-
WARNING: Unattended cooking on a hotplate with grease or oil can be dangerous and cause a fire. NEVER try to put out a fire with water, turn off the appliance and then cover the flame for example with a lid or a fire blanket.
- WARNING: Fire Hazard: Do not place or store products on cooking surfaces.
- WARNING: If the surface is cracked, turn off the appliance to avoid the possibility of electric shock and do not touch it to avoid cutting the ceramic glass.
- A steam cleaner should not be used.
- The appliance is not designed to be operated by means of an external timer or a separate remote control system.
- CAUTION: The cooking process must be supervised. The short-term cooking process must be continuously monitored.
- WARNING: To prevent the plate from moving, safety anchors must be installed. See installation instructions.
- WARNING: Use only cooktop protectors designed by the manufacturer of the cooking appliance or indicated by the appliance manufacturer in the appropriate instructions for use or cooktop protectors built into the appliance. The use of inappropriate protectors can cause accidents.
- This appliance incorporates a ground connection for functional purposes only.
- Remove any protective film that may be on the glass surface.
CHARACTERISTICS OF THE CONTAINERS Container Base Features
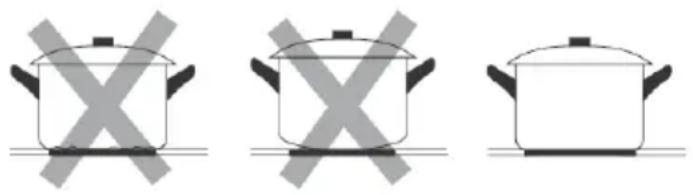
Pay special attention to the shape of the base, since it must be completely flat. Do not use containers with uneven edges or curved bottoms.
natural_image
Three identical cooking pots with crossed-out X marks, no text or symbols presentMake sure the base of the container is smooth, rests flat against the glass and is the same size as the cooking zone. Use containers whose diameter is as large as the selected zone graph. Always center the container on the cooking zone. The base of a container can influence the distribution of heat and therefore the cooking result. Choosing a container with a better quality base will save us cooking time and energy.
Protect the glass surface
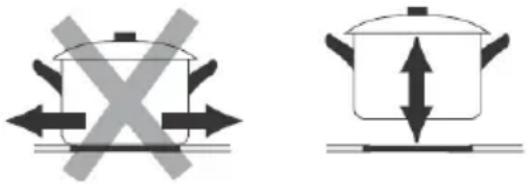
Always lift containers off the glass surface, do not slide it as this could scratch the glass.
natural_image
Two cooking pots with crossed arrows indicating heating or resistance, no text or symbols presentEmpty containers or containers with a very thin base
Never place an empty container on the plate and turn it on, as this can cause the container to overheat (due to excess heat) and damage the ceramic glass or the plate itself. If the base of the container is very thin, it can also become excessively hot, refrain from using this type of container.
CONTROLS AND ELEMENTS
flowchart
graph TD
    A["1"] --> B["Circle"]
    C["4"] --> D["Circle"]
    E["3"] --> F["Circle"]
    G["5"] --> H["Circle"]
    I["Mr. Ondo"] --> J["Circle"]
    style I fill:#f9f,stroke:#333
    style J fill:#ccf,stroke:#333
2
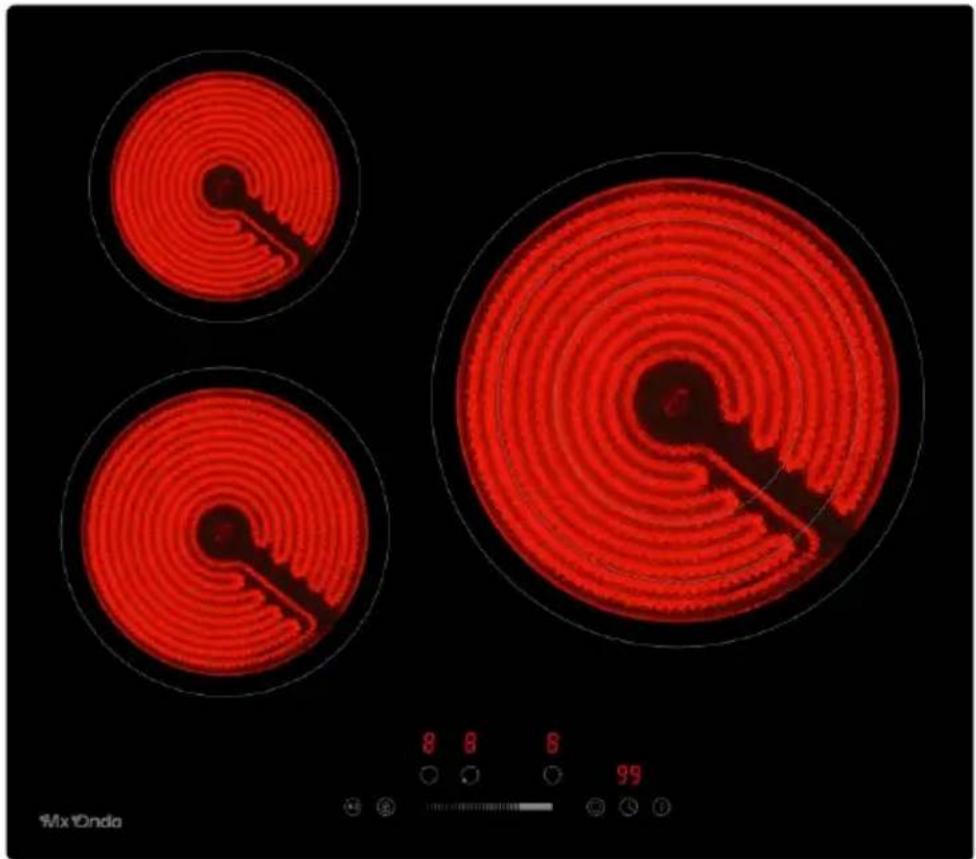
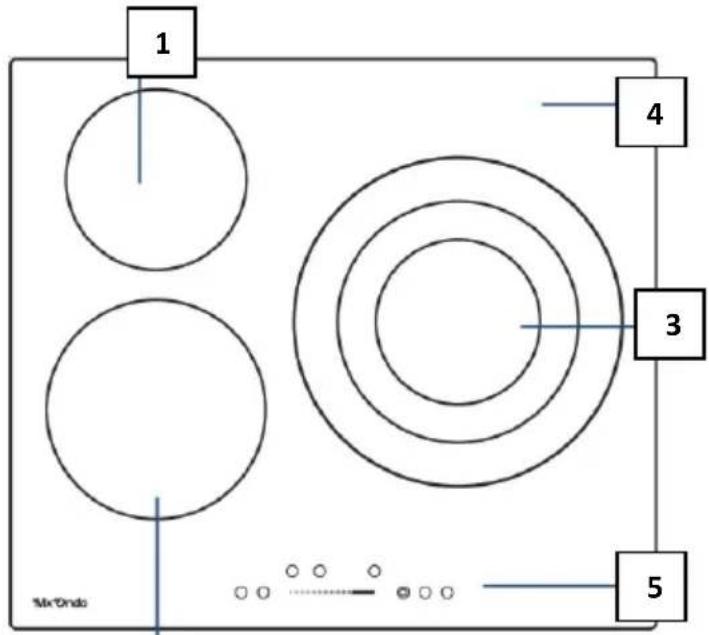
- Small cooking zone Cooking diameter: 165 mm ∅ Power: 1200W
- Medium cooking zone Cooking diameter: 200 mm ∅ Power: 1800W
- Large cooking area Cooking diameter: 150/220/300 mm ∅ Power: 1050/1950/2700W
- Glass plate
- Dashboard
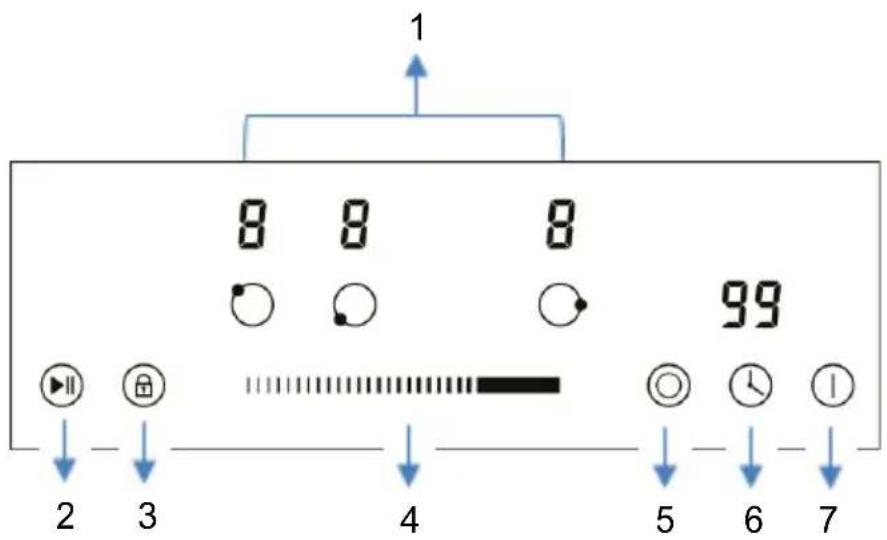
- Indication of the cooking zone
- Stop and continue button
- Child lock control button
- Heating level/timer slider
- Extended cooking zone selection button
- Timer selection button
- On/off button
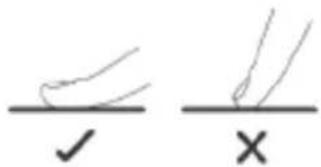
- Controls respond to touch, so no pressure is necessary. - Use the entire tip of your finger, not the tip. You will hear a beep each time a touch is detected.
- Make sure that the controls are always clean, dry, and that no object (for example, a utensil or cloth) is covering them. Even a thin layer of water can make the controls difficult to operate.
USE OF THE VITROCERAMIC PLATE
To start cooking
- After connecting the board to electricity and turning it on. Press and hold the ON/OFF control button for about 3 seconds until you hear a "beep" to turn on the plate on. Now the plate goes into Standby mode, all the heat. The setting indicators and timer setting indicators show "-"
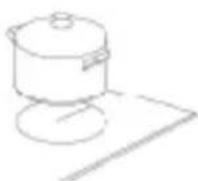
- Place a container suitable for the chosen cooking zone.
- Make sure the bottom of the container and the surface of the cooking zone are clean and dry.
- Set the heating level of the cooking zone.
A Before adjusting the heat level, it is necessary to touch the
Heating zone selection control button to select and activate the cooking zone you want to use. Heat Settings
The selected zone indicator flashes when it is active, then you could adjust its heat level lower:
- Adjust the heat setting by sliding the slider.
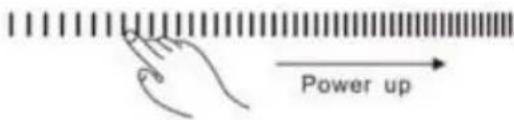
Notes:
- After connecting to electricity, when it is turned on, the plate buzzer rings once, All indicators turn on for 1 second and then turn off.
- When the plate is in standby mode, if not practiced within 1 minute, the electric plate will automatically turn off and the doorbell will beep.
- To turn on the hob, press the ON/OFF control button and hold it for about 3 seconds; To turn it off, you just need to press the ON/OFF button again.
- Power level can be adjusted from 0 to 9, the default setting is level 5.
- The heat setting indicator for the selected zone flashes during setting. After setting, the number flashes for 5 seconds and then stops flashing, then the setting will be confirmed.
To turn off the hob
- You can turn off the cooking zone by adjusting the heat setting to level 0, the indicator of which shows “ Ⓞ -”.
- You can also turn off the entire board by touching the ON/OFF control button.
USING A GLASS CERAMIC PLATE WITH LARGE HEATING AREA
Some models of ceramic hobs may have one or more extended cooking zones (oval/double/triple zone); These extended zones can provide a larger cooking area and additional heat to accommodate different sizes of cooking vessels.
To use the extended zone when the board is working, follow the following:
- Select and activate the cooking zone you want to use extended zones:
Touch the heating zone selection control button to select and activate to make adjustments.
-
The central zone will turn on when the heating is first set. level for extended cooking zone.
-
When the heating zone is selected and active (power level indicator flashing), touch the extended zone control button to activate the extended heating element for a large heating area.
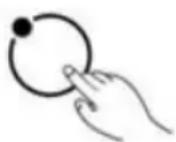
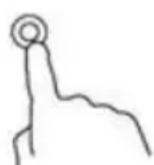
Notes:
- By continuously touching the control button, the extended zones will operate as follows:
-Dual zone: "Central-Dual-Central-Dual-Central Zone..."
-Triple zone: "Central-Dual-Triple-Central-Dual-Triple-Central Zone..."
- When Dual Zone is active, the LED indicator will show the heat setting. An "alternatively; When Triple Zone is active, the LED indicator will show the power setting and " " alternately.
CHILD LOCK SAFETY CONTROL
- You can lock the controls to prevent unwanted use (for example, children accidentally turning on the cooking zones) by activating the child lock function.
- When the controls are locked, except the ON/OFF control button and the child lock control button, all other touch control buttons are disabled.
Touch the child lock control button for about three seconds. The timer indicator will show "Lo" and the child lock function will be active.
To unlock the controls
- Make sure the electric plate is turned on.
- Touch and hold the child lock control button for about 3 seconds, the doorbell rings once and "Lo" disappears on the timer indicator, the child lock will be inactive.
- You can now start using your electric plate.
In child lock mode, all control buttons will be disabled except the ON/OFF but in and child lock button. You can always turn off the board with the Ⓑ/OFF control in case of emergency, but you must unlock the board first in the next operation.
Note: In the child lock function, if you turn off the hob without deactivating the child lock function. When you turn on the hob later, the child lock function will still be valid.
STOP AND CONTINUE FUNCTION
- Make cooking easy! When something unforeseen arises and your attention is required, you will waste time if you turn everything off. For this reason, this function will be very useful on these occasions.
- The Stop and Go function can turn off all zones. When you go back, with one more press of the button, the hob restarts where it was, to continue cooking.
Activate the Stop and Continue function
- To activate the Stop and Go function, you can press the Stop and Go function button once. Then all programmer settings are maintained and the hob stops heating, all heat setting indicators show "P".
Deactivate the Stop and Continue function
To cancel the Stop and Go function, you can press the Stop and Go function again after returning. Then, all programmer settings will return to the way they were, the Stop and Continue "P" indicator will disappear from all indicators.

When the Stop and Go function is active, all control buttons are disabled except the ON/OFF button and Stop and Go.
Note: The hob will automatically turn off if the Stop and Continue function lasts more than 10 minutes.
TIMER
When the hob is on, you can use the timer in two different ways:
- You can use it as a minute tracker. In this case, the timer will not turn off any cooking zone when the set time expires.
- You can set it to turn off one or more cooking zones.
- You can set the minute hand/timer up to 99 minutes.
Timer Description
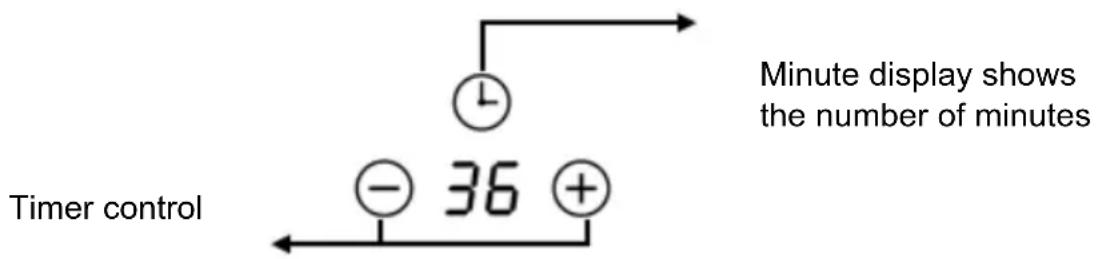
Use the timer as a minute reminder
If you have not selected any cooking zone
-
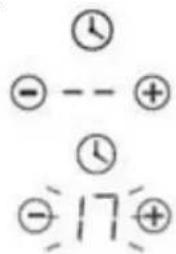
Touch the timer control button, the number on the timer indicator flashing.
-
Touch the timer control button once, the single digit number on the timer indicator flashes, then adjust a single digit of the minute hand setting by sliding the slider.
- Press the timer control button again, the tens digit number on the timer indicator flashing, then adjust the tens digit minute timer setting by sliding the slider.
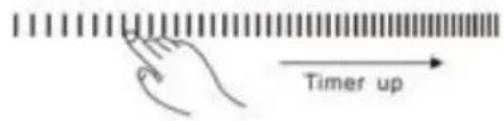
Note: By continuously touching the timer control button, the slider works with the following consequence: "Single digit-Tens digit -Confirm setting-Single digit-..."
- When the minute hand is set, it will start counting down immediately, the screen will show the remaining time.
- The buzzer will ring for 30 seconds and the timer indicator “- - “will be displayed when the timer time ends. Any efficient touch of control buttons during it would end up ringing the doorbell.
Set the timer to turn off the cooking zone
- Touch the cooking zone selection control button to select the cooking zone for which you want to set the timer.
- Touch the timer control button, the number on the timer indicator flashing.
-
Then adjust the timer settings.
-
Touch the timer control button once, the single digit number on the timer indicator flashes, then adjust a single digit of the minute hand setting by sliding the slider.
- Press the timer control button again, the tens digit number on the timer indicator flashing, then adjust the tens digit minute timer setting by sliding the slider.
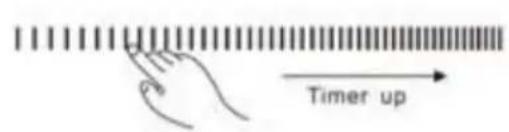
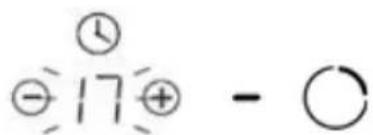
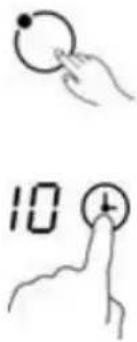
- When the timer is set, it will start counting down immediately, the screen will show the remaining time.
- When the cooking timer expires, the corresponding cooking zone cooking will turn off automatically.
Note: The red dot next to the power level indicator will illuminate for those zones that will be set with a timer. You can check the timer settings of different timer-set cooking zones by activating this cooking zone.
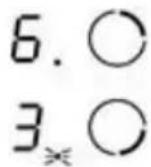
Note: If more than one cooking zone has a timer setting, the timer indicator will show the lowest time. The red dot next to the power level indicator will flash.
RESIDUAL HEAT WARNING
Be careful with hot surfaces
When the board has been running for some time, some residual heat will remain. The letter "H" appears on the setup indicator to warn you to stay away from him.
It can also be used as a power saving function:
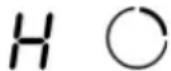
If you want to heat more pans, use the cooking zone that is still hot.
AUTOMATIC SAFETY SHUT OFF
Another safety feature of the board is the automatic shutdown. This happens every time you forget to turn off a cooking zone. Default shutdown times are shown in the following table:
| Power level | 1 | 2 | 3 | 4 | 5 | 6 | 7 | 8 | 9 |
| Auto power off time (hours) | 8 | 8 | 8 | 4 | 4 | 4 | 2 | 2 | 2 |
PROTECTION AGAINST OVERHEATING
An equipped temperature sensor can monitor the temperature inside the plate. When excessive temperature is controlled, the hob will automatically stop its operation.
PROTECTION AGAINST OVERFLOW
For your safety, the programmer will automatically turn off the power if the liquid boils or if you wet a cloth on the touch control panel. All control buttons will become invalid except the on/off button and child lock unless you dry the touch control area.
COOKING GUIDELINES
Be careful when frying, as oil and fat heat up quickly, especially if you use the Turbo function. At extremely high temperatures, oil and grease ignite spontaneously and this presents a fire hazard.
Cooking tips
Energy saving
- When the food comes to a boil, reduce the power.
- Using a lid will reduce cooking times and save energy by retaining heat.
- Minimize the amount of liquid or fat to reduce cooking times.
- Start cooking at a high power level and then reduce the power level when the food is heated.
COOKING SETTINGS
The following configurations are only indicative. The exact setting will depend on factors including your cookware and how much you are cooking.
Experiment with the board to find the configuration that best suits your needs.
| Cooking settings | Suitabilit |
| 1 - 2 | Gentle heating for small quantities of foodMelt chocolate, butter and foods that burn quicklySimmerSlow heating |
| 3 - 4 | ReheatSlow cookingCooking rice |
| 5 - 6 | Pancakes |
| 7 - 8 | SkipCook pasta |
| 9 | SautéedScorchingBring the soup to a boilBoiling water |
CLEANING THE COOKTOP
Cleaning and maintenance
Important: Before carrying out any maintenance or cleaning work, DISCONNECT the appliance from the POWER supply and ensure that it is completely cool.
Clean the countertop surface
Wipe spills from countertop surface as soon as possible after use. Always make sure the surface is cool enough before cleaning.
Use a soft cloth or kitchen paper to clean the surface. If the spill has dried on the surface, you may need to use a specialized glass-ceramic glass cleaner, available in most supermarkets.
Do not use other abrasive cleaners and/or metal wool etc. as it may scratch the ceramic glass surface of your hob.
CLEANING THE VITROCERAMIC PLATE
| Dirt type | How to clean | Important |
| Everyday dirt on the glass surface (fingerprints, marks, food stains, or non-sugar spills) | 5. Disconnect the board's power using the switch or differential enabled for this purpose6. Use a ceramic cooktop cleaner while the surface is warm (but not hot).7. Rinse and dry the plate with a clean cloth or paper towel.8. Reconnect the board to power | When you turn off the power to the board, there will be no indication of hot surface,but the cooking zone may still be hot!Use special scouring pads for glass ceramic plates. Do not use strong, corrosive or abrasive cleaning products that may damage the plate. Always read the label to check if your cleaner or scrubber is suitable. Never leave residue on the surface, the glass may stain. |
| Spills caused by sugary foods | Remove them immediately using a spatula or scraper suitable for ceramic hobs, be careful with the hot surfaces of the cooking zone:1. Disconnect the board's power using the switch or differential enabled for this purpose2. Hold the spatula or scraper at a 30° angle and scrape any dirt or spill onto a cool area of the plate.3. Wipe up any dirt or spills with a kitchen towel or paper towel. | Remove stains left by melting and sugary foods or spills as soon as possible. If allowed to cool on the glass, it may be difficult to clean or even permanently damage the surface of the plate.Cutting Hazard: When the safety cover is retracted, the blade on a scraper becomes sharp. Use with great care and always store safely and out of reach of children. |
| Dirt and spill stains on control panel | 5. Disconnect the board's power using the switch or differential enabled for this purpose6. Clean the control panel area with a clean, damp sponge or cloth.7. Dry the control panel area completely8. Reconnect the board to power. | Liquid spills in the control panel area may cause the ceramic hob to malfunction, the touch buttons may not function correctlyBe sure to clean and dry the control panel area completely before connecting the board to power again. |
Maintenance of the Vitroceramic
If you find that something is wrong with your board, before contacting technical support or where you bought it, check the following:
-
No power reaching the device:
-
Check if there is a power outage in your apartment;
- Check if the appliance is properly connected to electricity;
- Has the timer setting elapsed?
- If it reaches the longest cooking time and turns off automatically;
- If there is boiling liquid on the touch control panel and overflow protection devices turn off automatically;
-
Touch control panel buttons cannot be active:
-
Whether in "Child Lock", "Lo" is displayed on the timer screen;
-
Whether liquid/wet cloth on the touch control panel, active overflow protection;
-
After cooking, an "H" appears on the screen:
-This is normal. The hob has residual heat warning safety functions. It will remain until the surface is cool enough to touch.
- After shutdown, the induction hob fan continues to work for a while:
-This is normal, this is to help the appliances cool completely.
- Some pans make crackling or clicking noises while using the induction hob:
-This is normal, it is the sound of the induction coils during operation and depending on the construction of your cookware, the click may be slightly different.
- The glass is scratching:
-Check if you are using inappropriate cookware, such as cookware with rough edges.
-Check if abrasive or inappropriate scouring pads or cleaning products are being used.
- The heating element of the ceramic hob alternately turns on and off when in operation:
-This is a normal and natural characteristic of glass ceramic. The ceramic hob programmer, together with the thermostat or thermocouple on the heating element, can control the operation of the hob at the set power level and prevent overheating by alternately turning the heating element on and off.
-If you work at the highest power level, the heating element will continue to turn on for a certain time and then turn on/off alternately.
-If you work at another lower power level, the heating element will alternately turn on and off at a certain frequency from the beginning according to the power setting of the cooking zone.
TROUBLESHOOTING
| Problem | Possible causes | To do? |
| E1/E2 | Abnormal supply voltage | Please check if the power supply is normal. Turn on after the power supply is normal. |
| E3 | Pan sensor high temperature | Check if there is no liquid in the pan, fill it with liquid and then restart. |
| E5 | IGBT temperature sensor high temperature | Please restart after the induction cooktop cools down. |
FACILITY
Make a hole in the countertop based on the following suggestions:
- You must leave at least a minimum of 5 cm around the hole, free of obstacles (furniture, appliances, etc.).
• The thickness of the countertop is at least 30 mm. - Choose heat-resistant countertop material to avoid deformation caused by heat radiation from the glass-ceramic hob.
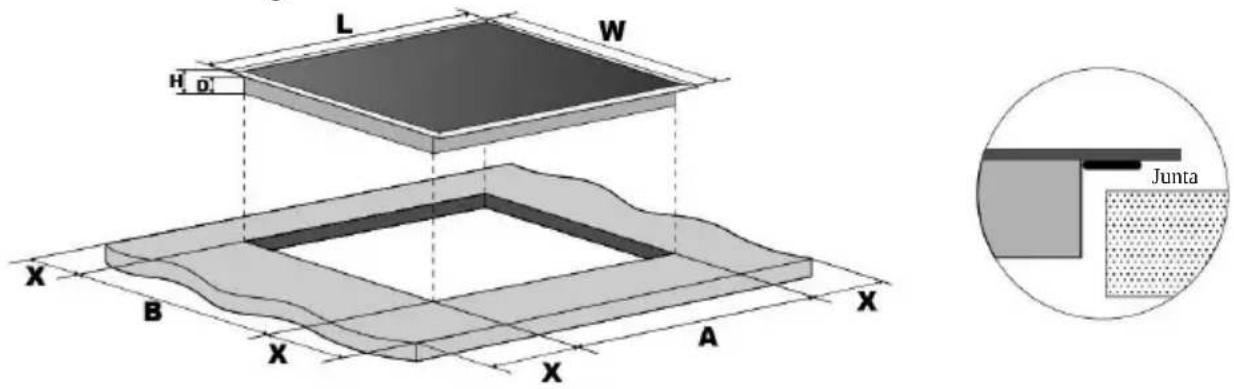
| L(mm) | W(mm) | H(mm) | D(mm) | A(mm) | B(mm) | X(mm) |
| 590 | 520 | 52 | 48 | 555+5-0 | 495+5-0 | 50 min. |
Under any circumstances, make sure that the ceramic hob is well ventilated and that the air inlet and outlet are not blocked.
Make sure the ceramic hob is in good working order. As shown below:
Note: The safety distance between the glass-ceramic plate and the cabinet or extractor hood above the glass-ceramic plate must be at least 760 mm.
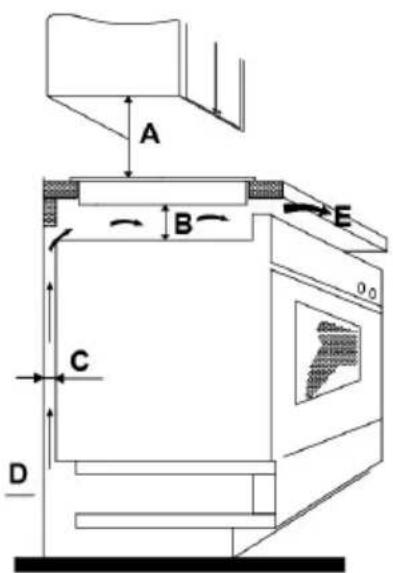
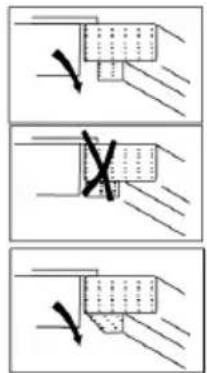
| A(mm) | B(mm) | C(mm) | D | E |
| 760 | 50 mm | 20 mm | Air entrance | Air vent 5mm |
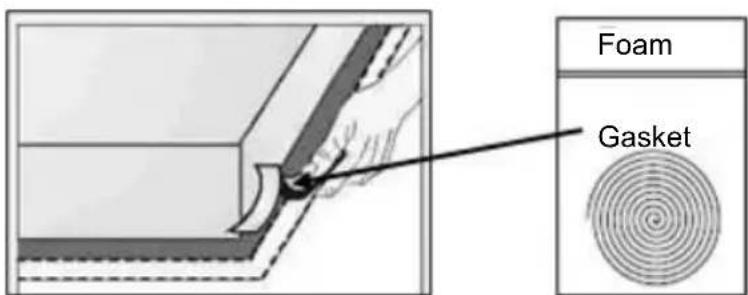
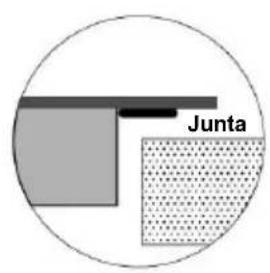
Before inserting the hob into the kitchen worktop opening, the supplied foam gasket (in a plastic bag) must be placed on the bottom of the hob.
Do not install the plate without the foam gasket!
The gasket must be fixed to the countertop by the following method:
- Remove the protective film from the gasket.
- Then place the gasket on the bottom of the glass, next to the edge.
- The gasket must be placed along the entire edge of the glass and must not overlap in the corners.
- When installing the gasket, make sure that the glass does not come into contact with any sharp objects.
Before installing the ceramic hob, make sure that
- The countertop surface is smooth and level, and no structural elements interfere with space requirements.
- The countertop is made of heat-resistant material.
- If the ceramic hob is installed on top of an oven, the oven must have a built-in cooling fan.
- The facility will comply with all permitting requirements and applicable rules and regulations.
- The electrical installation complies with local safety rules and regulations and incorporates a suitable isolating switch or circuit breaker that provides total disconnection from the electrical network.
- The isolating switch or circuit breaker must be suitable and provide an air gap contact separation of 3 mm on all poles (or on all live [phase] conductors if local wiring rules allow this variation from requirements)
- The isolation switch is easily accessible to the user.
- Consult a licensed electrician or local authorities regarding installation and statutes if you have questions about installation.
- Use heat-resistant, easy-to-clean finishes (such as ceramic tile) for wall surfaces surrounding the countertop.
When completing the installation of the ceramic hob make sure that...
- The power cord is not accessible through drawer or drawer doors.
- There is adequate flow of fresh air from the outside of the cabinet to the base of the countertop.
- If the ceramic hob is installed over a drawer or cupboard space, a thermal protection barrier is installed under the base of the hob.
- The isolation switch is easily accessible by the user.
•
Before placing the fixing brackets.
The unit must be placed on a stable and smooth surface (use the packaging). Do not apply force to the controls that protrude from the plate.
Easy Fit Kits
There is a pack of easy installation kits for each plate, including clips and fixing screws. Look for the easy fit kit package first.
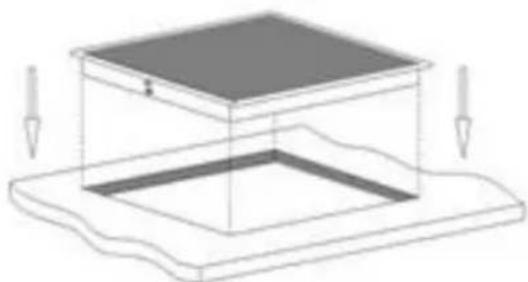
Attach the clips to the countertop: Insert the fixing clips into the reserved fixing holes on 2 sides of the shell, fix the clip to the shell with a screw, and then insert the countertop into the cabinet/work surface.
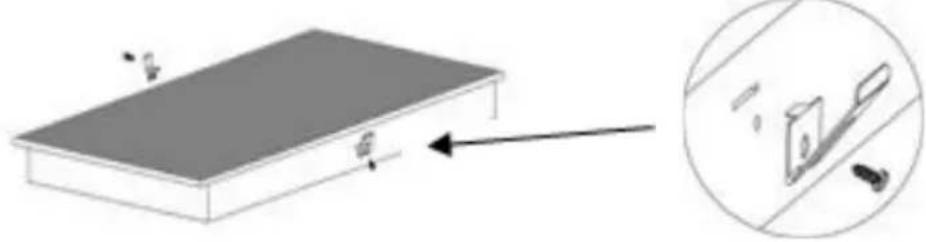
natural_image
Diagram showing a rectangular block with arrows pointing to a magnified view of a mechanical component (no text or symbols present)Attach the plate to the cabinet: Insert the plate into the cabinet/work surface as shown below, the side-mounted clips can secure your plate sturdily.
natural_image
Isometric diagram of a layered structure with arrows indicating direction (no text or symbols)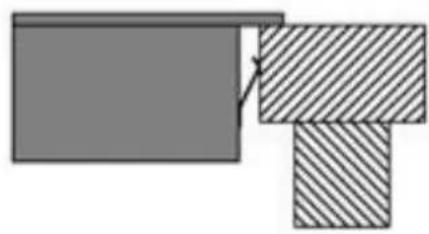
natural_image
Abstract geometric diagram with two shaded rectangles and a diagonal hatching, no text or symbols present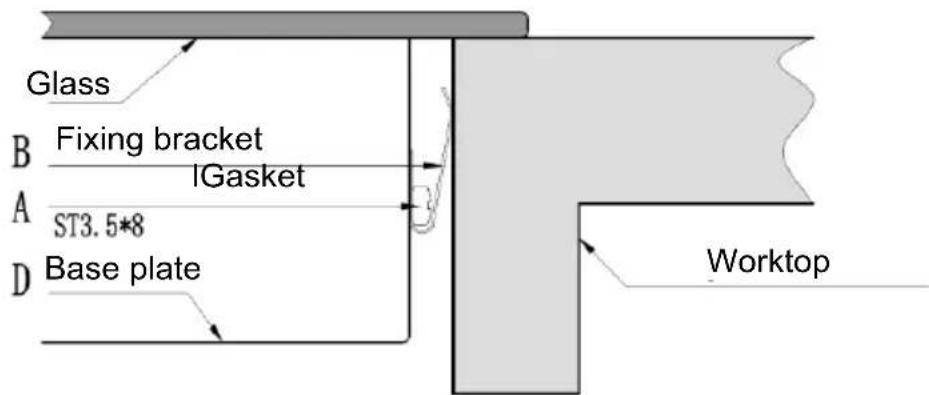
Precautions
- The ceramic hob must be installed by authorized electricians or qualified technicians. Please never perform the operation on your own.
- The ceramic hob cannot be installed directly on a dishwasher, refrigerator, freezer, washing machine or dryer, as moisture can damage the electronic components of the ceramic hob.
- The glass-ceramic plate will be installed so that better heat radiation can be ensured to improve its reliability.
- The wall and the induced heating zone on the table surface must withstand the heat.
- To avoid any damage, the countertop must be heat resistant.
CONNECTION OF THE VITROCERAMIC PLATE TO THE ELECTRICAL MAINS

The ceramic hob must be installed by a licensed electrician or a suitably fied technician.
Before connecting the ceramic hob to the mains, check that:
- The electrical installation where you are going to connect the glass-ceramic plate must be suitable for the power consumed by the glass-ceramic plate.
- The voltage must correspond to the nominal value specified in the characteristics described in this manual.
- The section of the power cables must withstand the current specified on the rating plate.
To connect the ceramic hob to the mains outlet, you should not use adapters, reducers or splitters, as these devices can heat up and cause a fire.
The power cable of the ceramic hob must not touch any part or area where it acquires high temperatures and must be placed so that the temperature will not exceed 75^ C at any point.
- If the cable is damaged or needs to be replaced, this must be done by an after-sales technician using the appropriate tools, to avoid accidents.
- If the appliance is connected directly to the mains, an omnipolar circuit breaker must be installed with a minimum gap of 3 mm between the contacts.
- The installer must ensure that the correct electrical connection has been made and that it complies with safety regulations.
- The cable must not be bent or compressed.
- The cable should be checked periodically and replaced only by a qualified technician.
Check with a licensed and qualified electrician for proper electrical installation. Any modification to the electrical installation must be carried out only by a licensed electrician.
The electrical connection of the ceramic hob must be made in accordance with current regulations and protected by a single-pole magneto-thermal or automatic switch. The connection is shown below:

- If the cable is damaged, to be replaced or replaced, the operation must be carried out by an Official Mx Onda Technical Service.
- If the ceramic hob is connected directly to the mains, a single-pole switch must be installed with a minimum opening of 3 mm between the contacts.
- The authorized installer must ensure that the correct electrical connection has been made and that it complies with safety regulations.
- The cable must not be bent or compressed.
- The cable should be checked regularly and replaced only by authorized technicians.
- The yellow/green wire of the power cable must be connected to the ground of the mains socket.
- The manufacturer is not responsible for any accident resulting from the use of an ungrounded appliance or defective grounding continuity.
- If the device has a power outlet, it must be installed so that the power outlet is accessible.
TECHNICAL
CHARACTERISTICS
| Supply voltage | 220 - 240 V ~ 50/60 Hz |
| Consumption | 5700 W |
| Cooking surface Large cooking zone | High-strength ceramic glass |
| Maximum Power | 1050/1950/2700 W |
| Cooking Diameter | 150/220/300 mm ∅ |
Medium cooking zone
Maximum power 1800 W
Cooking diameter 200 mm ∅
Small cooking zone
Maximum Power 1200 W
Cooking Diameter 165 mm ∅
Controls Touch
Power Levels 9 levels
Timer Up to 99 minutes
Dimensions 590 x 520 x 51 mm (l, a, alto)
Recess dimensions for recess 555 x 495 mm (l, a)
Weight 9,5 Kg
Technical specifications subject to change without notice.
This product complies with European Directives 2014/30/EC (EMC) on Electromagnetic Compatibility and 2014/35/EC (LVD) on low voltage safety.
"MX, MX ONDA" and its logos are registered trademarks of MX ONDA, S.A.
Information and Technical Service telephone number: 902 551 501
C / Matabueyes, 7 nave 1A
19171 - Cabanillas del Campo
(Guadalajara)
natural_image
Three red concentric circular patterns on black background, no text or symbols presentCE
ANTES DE USAR, LEIA ATENTAMENTE ESTE MANUAL
ATENÇÃO
ESTE APARELHO FUNCIONA COM UMA TENSÃO DE 240 V, PARA EVITAR POSSÍVEIS CHOQUES ELÉTRICOS NÃO TENTE
flowchart
graph TD
    A["1"] --> B["Circle"]
    C["4"] --> D["Circle"]
    E["3"] --> F["Circle"]
    G["5"] --> H["Circle"]
    I["Mr. Ondo"] --> J["Circle"]
    style A fill:#fff,stroke:#000
    style C fill:#fff,stroke:#000
    style E fill:#fff,stroke:#000
    style G fill:#fff,stroke:#000
    style I fill:#fff,stroke:#000
    style J fill:#fff,stroke:#000
2
USE OF THE VITROCERAMIC PLATE
Maintenance of the Vitroceramic
| L(mm) | W(mm) | H(mm) | D(mm) | A(mm) | B(mm) | X(mm) |
| 590 | 520 | 52 | 48 | 555+5-0 | 495+5-0 | 50 min. |
natural_image
Diagram showing a rectangular block with arrows pointing to a magnified view of a mechanical component (no text or symbols present)natural_image
Diagram of a layered structure with arrows indicating force or movement (no text or symbols)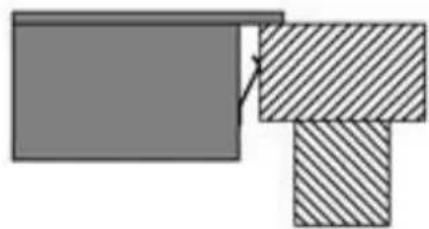
natural_image
Abstract geometric diagram with two shaded rectangles and a diagonal line (no text or symbols)
natural_image
Three circular red spiral patterns on black background, no text or symbols presentCE
AVANT UTILISATION, LISEZ ATTENTIVEMENT CE MANUEL
ATTENTION
natural_image
Three identical cooking pots with crossed X marks, no text or symbols presentflowchart
graph TD
    A["1"] --> B["Circle"]
    C["4"] --> D["Circle"]
    E["3"] --> F["Circle"]
    G["5"] --> H["Circle"]
    I["Mr Ondo"] --> J["Circle"]
    K["Circle"] --> L["Circle"]
    M["Circle"] --> N["Circle"]
    O["Circle"] --> P["Circle"]
    Q["Circle"] --> R["Circle"]
2
UTILISATION DE LA PLAQUE VITROCÉRAMIQUE
FONCTION D'ARRÊT ET DE CONTINUATION
| L(mm) | W(mm) | H(mm) | D(mm) | A(mm) | B(mm) | X(mm) |
| 590 | 520 | 52 | 48 | 555+5-0 | 495+5-0 | 50 min. |
natural_image
Diagram showing a rectangular block with arrows pointing to a magnified view of a mechanical component (no text or symbols present)natural_image
Diagram of a layered structure with arrows indicating force or movement (no text or symbols)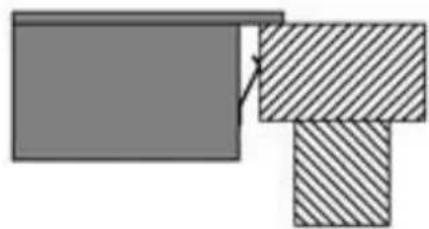
natural_image
Abstract geometric diagram with two shaded rectangles and a diagonal line, no text or symbols present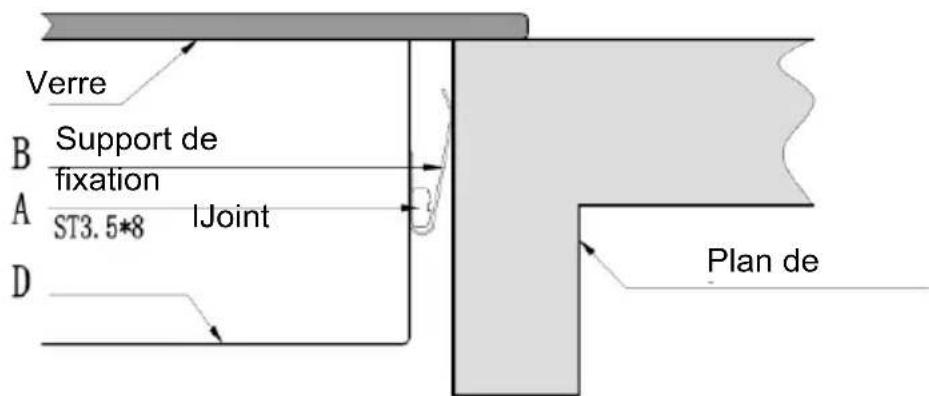
Précautions
natural_image
Three circular red spiral patterns on black background, no text or symbols presentCE
PRIMA DELL'USO, LEGGERE ATTENTAMENTE QUESTO MANUALE
ATTENZIONE
QUESTO APPARECCHIO FUNZIONA CON UNA TENSIONE DI 240 V, PER EVITARE POSSIBILI SCOSSE ELETTRICHE NON TENTARE DI
natural_image
Three identical cooking pots with crossed-out X marks, no text or symbols presentUTILIZZO DELLA PIASTRA IN VETROCERAMICA
Maintenance of the Vitroceramic
| L(mm) | W(mm) | H(mm) | D(mm) | A(mm) | B(mm) | X(mm) |
| 590 | 520 | 52 | 48 | 555+5-0 | 495+5-0 | 50 min. |
natural_image
Diagram showing a rectangular block with arrows pointing to a magnified view of a mechanical component (no text or symbols present)natural_image
Isometric diagram of a layered structure with arrows indicating direction (no text or symbols)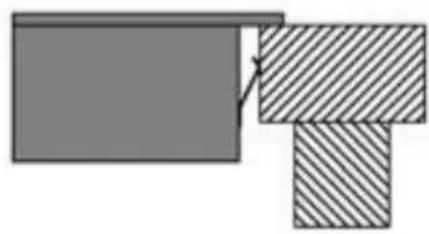
natural_image
Abstract geometric diagram with two shaded rectangles and a diagonal hatching (no text or symbols)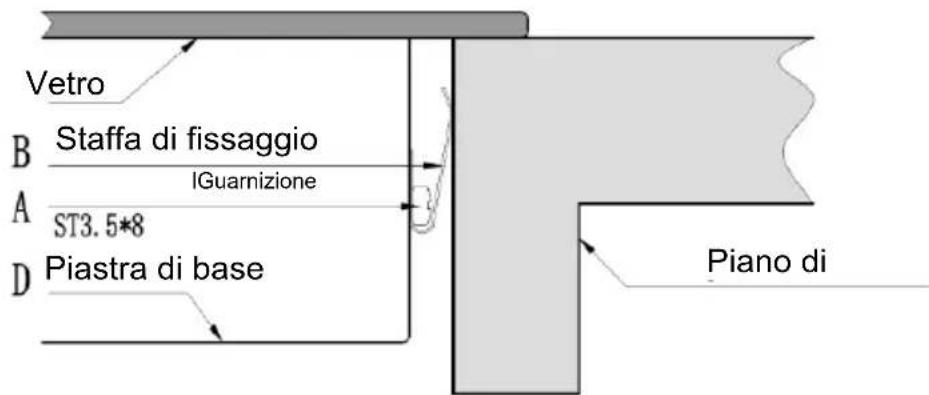
natural_image
Three red concentric circular patterns on black background, no text or symbols presentCE
AUFMERKSAMKEIT
natural_image
Three identical cooking pots with crossed-out X marks, no text or symbols presentnatural_image
Two cooking pots with crossed arrows indicating heating or cooling conditions (no text or symbols)VERWENDUNG DER VITROCERAMIC-PLATTE
-Dual-Zone: "Central-Dual-Central-Dual-Central Zone..."
-Triple Zone: "Central-Dual-Triple-Central-Dual-Triple-Central Zone..."
| L(mm) | W(mm) | H(mm) | D(mm) | A(mm) | B(mm) | X(mm) |
| 590 | 520 | 52 | 48 | 555+5-0 | 495+5-0 | 50 min. |
natural_image
Diagram showing a rectangular block with arrows pointing to a magnified view of a mechanical component (no text or symbols present)natural_image
Diagram of a layered structure with arrows indicating force or movement (no text or symbols)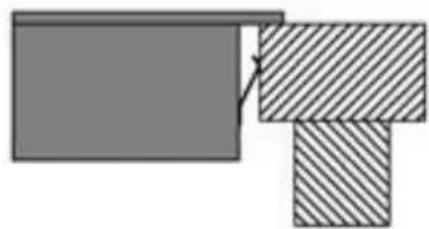
natural_image
Abstract geometric diagram with two shaded rectangles and a diagonal line, no text or symbols present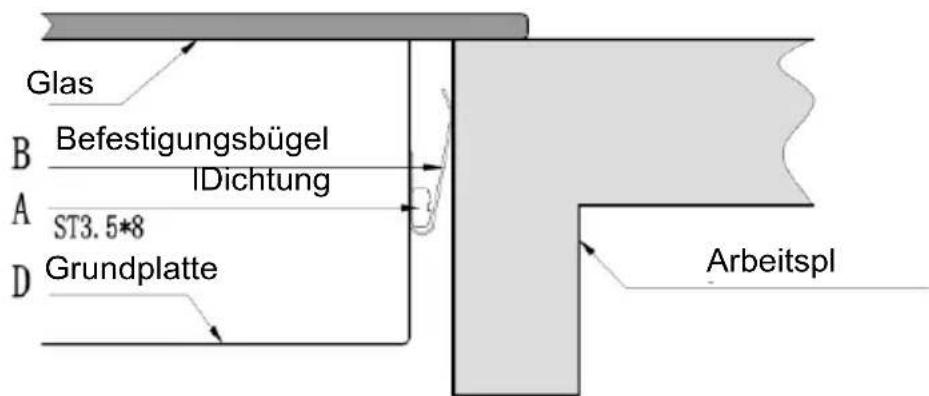
- ¡ATENCIÓN
- USER AND INSTALLATION MANUAL
- Mx Onda
- BUILT-IN VITROCERAMIC PLATE WITH THREE COOKING ZONES
- ATTENTION
- INTRODUCTION
- BEFORE CONNECTING THE APPLIANCE
- Installation (Electric Shock Hazard)
- Cutting Hazard
- Important safety instructions
- Operation and maintenance
- Health Hazard
- Hot Surface Hazard
- CHARACTERISTICS OF THE CONTAINERS Container Base Features
- Protect the glass surface
- Empty containers or containers with a very thin base
- CONTROLS AND ELEMENTS
- USE OF THE VITROCERAMIC PLATE
- To start cooking
- Notes:
- To turn off the hob
- USING A GLASS CERAMIC PLATE WITH LARGE HEATING AREA
- To use the extended zone when the board is working, follow the following:
- CHILD LOCK SAFETY CONTROL
- To unlock the controls
- STOP AND CONTINUE FUNCTION
- Activate the Stop and Continue function
- Deactivate the Stop and Continue function
- TIMER
- Use the timer as a minute reminder
- Set the timer to turn off the cooking zone
- RESIDUAL HEAT WARNING
- Be careful with hot surfaces
- AUTOMATIC SAFETY SHUT OFF
- PROTECTION AGAINST OVERHEATING
- PROTECTION AGAINST OVERFLOW
- COOKING GUIDELINES
- Cooking tips
- Energy saving
- COOKING SETTINGS
- CLEANING THE COOKTOP
- Clean the countertop surface
- Maintenance of the Vitroceramic
- If you find that something is wrong with your board, before contacting technical support or where you bought it, check the following:
- TROUBLESHOOTING
- FACILITY
- Do not install the plate without the foam gasket!
- The gasket must be fixed to the countertop by the following method:
- Before installing the ceramic hob, make sure that
- When completing the installation of the ceramic hob make sure that...
- Before placing the fixing brackets.
- Easy Fit Kits
- Precautions
- CONNECTION OF THE VITROCERAMIC PLATE TO THE ELECTRICAL MAINS
- TECHNICAL
- CHARACTERISTICS
- ATENÇÃO
- UTILISATION DE LA PLAQUE VITROCÉRAMIQUE
- FONCTION D'ARRÊT ET DE CONTINUATION
- Précautions
- ATTENZIONE
- UTILIZZO DELLA PIASTRA IN VETROCERAMICA
- AUFMERKSAMKEIT
- VERWENDUNG DER VITROCERAMIC-PLATTE
Brand : Mx Onda
Model : MX-VC2650
Category : Cooker