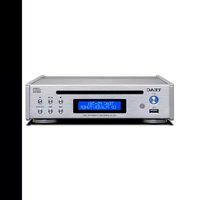
PD-301DAB-X - Audio Receiver TEAC - Free user manual and instructions
Find the device manual for free PD-301DAB-X TEAC in PDF.


| Product type | Audio receiver with CD player, DAB/FM tuner, USB port |
| Brand | TEAC |
| Model | PD-301DAB-X |
| Power supply | 12 V DC power adapter (GPE015A-120125-D), 220-240 V AC, 50/60 Hz |
| Power consumption | 8 W |
| Playable formats | CD-DA, MP3, WMA (CD/USB); WAV, AAC (USB only) |
| FM frequency range | 87.5 MHz - 108.0 MHz |
| DAB frequency range | Band III, 174 MHz - 240 MHz |
| Analog audio output | Stereo RCA (2 channels), max level 2.0 Vrms |
| Digital audio output | Coaxial (RCA) and optical (TOSLINK) |
| USB port | Type A, compatible with USB 2.0/1.1/3.0, FAT16/FAT32, 500 mA max |
| Playback functions | Repeat, random, program (CD), search, skip, pause |
| DAB tuner | Automatic search, presets (20 stations), DRC, DLS |
| RDS functions (FM) | PS display, PTY, RT, PTY search |
| Included accessories | Power adapter, power cord, RCA audio cable, remote control (RC-1323), AAA batteries (×2), DAB/FM antenna, instruction manual |
| Display | Digital display of information (source, track, time, etc.) |
| Maintenance and cleaning | Wipe with a soft, slightly damp cloth (diluted neutral cleaner); disconnect before cleaning |
| Safety | Do not open the casing (Class 1 laser); avoid exposure to water, heat, blocking ventilation; use in a well-ventilated area |
| Repairability | Have all repairs carried out by qualified technician; disconnect during thunderstorms or prolonged non-use |
| Remote control batteries | 2 AAA batteries (supplied); remove if not used for more than one month |
Frequently Asked Questions - PD-301DAB-X TEAC
User questions about PD-301DAB-X TEAC
0 question about this device. Answer the ones you know or ask your own.
Ask a new question about this device
Download the instructions for your Audio Receiver in PDF format for free! Find your manual PD-301DAB-X - TEAC and take your electronic device back in hand. On this page are published all the documents necessary for the use of your device. PD-301DAB-X by TEAC.
USER MANUAL PD-301DAB-X TEAC
IMPORTANT SAFETY INSTRUCTIONS
CAUTION
●DO NOT REMOVE THE EXTERNAL CASES OR CABINETS TO EXPOSE THE ELECTRONICS. NO USER SERVICEABLE PARTS ARE INSIDE.
- IF YOU ARE EXPERIENCING PROBLEMS WITH THIS PRODUCT, CONTACT THE STORE WHERE YOU PURCHASED THE UNIT FOR A SERVICE REFERRAL. DO NOT USE THE PRODUCT UNTIL IT HAS BEEN REPAIRED.
- USE OF CONTROLS OR ADJUSTMENTS OR PERFORMANCE OF PROCEDURES OTHER THAN THOSE SPECIFIED HEREIN MAY RESULT IN HAZARDOUS RADIATION EXPOSURE.
1) Read these instructions.
2) Keep these instructions.
3) Heed all warnings.
4) Follow all instructions.
5) Do not use this apparatus near water.
6) Clean only with dry cloth.
7) Do not block any ventilation openings. Install in accordance with the manufacturer's instructions.
8) Do not install near any heat sources such as radiators, heat registers, stoves, or other apparatus (including amplifiers) that produce heat.
9) Do not defeat the safety purpose of the polarized or grounding-type plug. A polarized plug has two blades with one wider than the other. A grounding type plug has two blades and a third grounding prong. The wide blade or the third prong are provided for your safety. If the provided plug does not fit into your outlet, consult an electrician for replacement of the obsolete outlet.
10) Protect the power cord from being walked on or pinched particularly at plugs, convenience receptacles, and the point where they exit from the apparatus.
11) Only use attachments/accessories specified by the manufacturer.
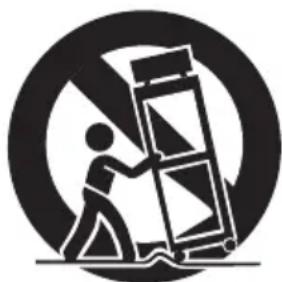
12) Use only with the cart, stand, tripod, bracket, or table specified by the manufacturer, or sold with the apparatus. When a cart is used, use caution when moving the cart/apparatus combination to avoid injury from tip-over.
natural_image
Symbolic icon of a person lifting a ladder inside a circle (no text or symbols)13) Unplug this apparatus during lightning storms or when unused for long periods of time.
14) Refer all servicing to qualified service personnel. Servicing is required when the apparatus has been damaged in any way, such as power-supply cord or plug is damaged, liquid has been spilled or objects have fallen into the apparatus, the apparatus has been exposed to rain or moisture, does not operate normally, or has been dropped.
●The apparatus draws nominal non-operating power from the AC outlet with its POWER or STANDBY/ON switch not in the ON position.
●The mains plug is used as the disconnect device, the disconnect device shall remain readily operable.
- Caution should be taken when using earphones or headphones with the product because excessive sound pressure (volume) from earphones or headphones can cause hearing loss.
CAUTION
- Do not expose this apparatus to drips or splashes.
- Do not place any objects filled with liquids, such as vases, on the apparatus.
- Do not install this apparatus in a confined space such as a book case or similar unit.
●The apparatus should be located close enough to the AC outlet so that you can easily reach the power cord plug at any time. - If the product uses batteries (including a battery pack or installed batteries), they should not be exposed to sunshine, fire or excessive heat.
●CAUTION for products that use replaceable lithium batteries: there is danger of explosion if a battery is replaced with an incorrect type of battery. Replace only with the same or equivalent type.
Precautions concerning batteries
Misuse of batteries could cause them to rupture or leak leading to fire, injury or the staining of nearby things. Please read and observe the following precautions carefully.
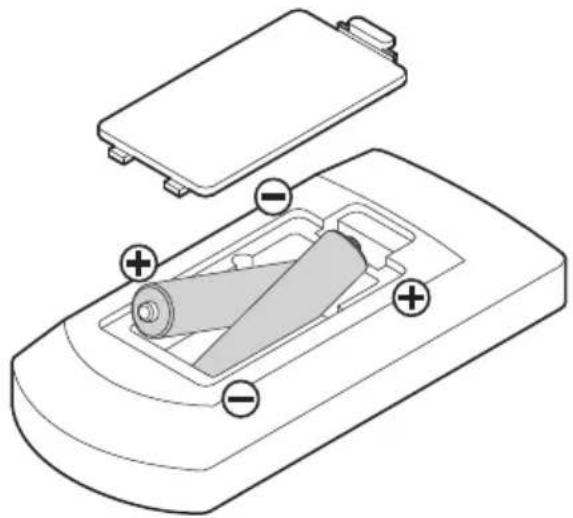
- Be sure to insert the batteries with correct positive (⊕) and negative (⊖) orientations.
- Use batteries of the same type. Never use different types of batteries together.
- If the remote control is not used for a long time (more than a month), remove the batteries to prevent them from leaking.
- If the batteries leak, wipe away the leakage inside the battery compartment and replace the batteries with new ones.
- Do not use batteries of types other than those specified. Do not mix new batteries with old ones or use different types of batteries together.
- Do not heat or disassemble batteries. Never throw batteries into fire or water.
- Do not carry or store batteries with other metallic objects. The batteries could short circuit, leak or explode.
●Never recharge a battery unless it is confirmed to be a rechargeable type.
IMPORTANT SAFETY INSTRUCTIONS (continued)
The nameplate is located on the bottom of the unit as shown below.
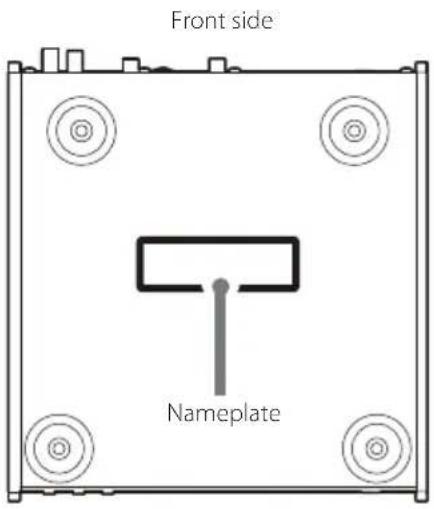
Model for Europe
CE
This product complies with the European Directives request, and the other Commission Regulations.
Laser information
This product contains a semiconductor laser system inside the cabinet and is classified as a "CLASS 1 LASER PRODUCT".
To prevent being exposed to the laser beam, do not try to open the enclosure.
Laser:
Type: EP-C250L
Manufacturer: GUANGDONG EVER BRIGHT GROUP CO.,LTD
Laser output: Less than 0.30 mW on the objective lens
Wavelength: 792 +8 nm / -12 nm
CAUTION
Changes or modifications not expressly approved by the party responsible for compliance could void the user's authority to operate the equipment.
For European Customers
Disposal of electrical and electronic equipment and batteries and/or accumulators
(a) All electrical/electronic equipment and waste batteries/accumulators should be disposed of separately from the municipal waste stream via collection facilities designated by the government or local authorities.
(b) By disposing of electrical/electronic equipment and waste batteries/accumulators correctly, you will help save valuable resources and prevent any potential negative effects on human health and the environment.
(c) Improper disposal of waste electrical/electronic equipment and batteries/accumulators can have serious effects on the environment and human health because of the presence of hazardous substances in the equipment.
(d) The Waste Electrical and Electronic Equipment (WEEE) symbols, which show wheeled bins that have been crossed out, indicate that electrical/electronic equipment and batteries/accumulators must be collected and disposed of separately from household waste.
If a battery or accumulator contains more than the specified values of lead (Pb),
mercury (Hg), and/or cadmium (Cd) as defined in the Battery Directive (2006/66/EC), then the chemical symbols for those
elements will be indicated beneath the WEEE symbol.
(e) Return and collection systems are available to end users. For more detailed information about the disposal of old electrical/electronic equipment and waste batteries/accumulators, please contact your city office, waste disposal service or the shop where you purchased the equipment.
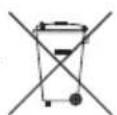
Pb, Hg, Cd
Included accessoriesTable
Thank you for choosing TEAC.
Read this manual carefully to get the best performance from this unit. After reading it, keep it in a safe place for future reference.
IMPORTANT SAFETY INSTRUCTIONS 2
Using the TEAC Global Site....6
Included accessories....6
Before use....6
Notes about discs 7
Notes about USB flash drives....8
Names and functions of parts (main unit) 9
Connections....10
Connecting the DAB/FM antenna....11
Names and functions of parts (remote control)....12
Using the remote control 13
Basic operation....14
Display information....16
Listening to files on a CD or USB flash drive ..... 18
Listening to FM radio 25
RDS 27
Using DAB tuner....29
Settings 32
Troubleshooting.... 34
Specifications....35
Using the TEAC Global Site
You can download updates for this unit from the TEAC Global Site: http://teac-global.com/
1) Open the TEAC Global Site.
2) In the TEAC Downloads section, click the desired language to open the Downloads website page for that language.
NOTE
If the desired language does not appear, click Other Languages.
3) Click the product name in the "Products" section.
4) Select and download the updates that are needed.
Check to be sure the box includes all the supplied accessories shown below.
Please contact the store where you purchased this unit if any of these accessories are missing or have been damaged during transportation.
AC adapter (GPE015A-120125-D) × 1
Power cord for AC adapter × 1
RCA audio cable × 1
Remote control (RC-1323) × 1
Batteries for remote control (AAA) × 2
DAB/FM antenna × 1
Owner's manual (this document) × 1
- See the back of this document for information about the warranty.
Before use
Placement precautions
- Avoid placing it in high temperature environments such as in direct sunlight or close to a source of heat. Moreover, do not place the unit on an amplifier or any other device that generates heat. Doing so could cause discoloration, deformation or malfunction.
Maintenance
Wipe dirt from the top cover and other panel surfaces using a soft cloth that has been slightly dampened with a diluted neutral cleanser.
Do not use chemically-treated wipes, thinner or similar substances because they could damage the surface of the unit.
For safety, disconnect the power cord from the outlet before cleaning.
Notes about discs
Types of discs that can be played by this unit
CDs (12cm) with the Compact Disc Digital Audio logo

●This logo appears on disc labels and packaging.
●This unit cannot play 8cm CDs.
CD-R and CD-RW discs that have been properly recorded and finalized using the audio CD format. CD-R discs that have been written with MP3 or WMA files and finalized.
●Multi-session discs are not supported.
This unit cannot play discs of types other than those above.
If you try to play any other type of disc with this unit, loud noises that damage speakers or harm hearing could occur. Never try to play any type of disc other than those shown above.
●WMA files
Windows Media Audio Professional (WMA Pro) and Windows Media Audio Lossless (WMA Lossless) formats are not supported.
- Depending on the quality of the disc and the condition of the recording, playback might not be possible.
●This unit cannot read or play the following types of discs. Video CDs
Super Audio CDs
DVD video discs
DVD audio discs
DVD-ROM discs
If you load a DVD video, DVD audio, DVD-ROM or similar disc into this unit, the unit will try to play it and spin at high speed. If you accidentally load such a disc, the disc could be damaged, so do not try to remove it until it stops spinning.
●This unit might not be able to properly play Copy Control CDs, Dual Discs or other special CDs that do not conform to the Red Book CD standard. Operation and sound quality cannot be guaranteed when special discs are used in this unit. If playback of a special disc should cause trouble, contact the seller of the disc.
CD-R/CD-RW discs
This unit can play CD-R/CD-RW discs that have been recorded in audio CD format (CD-DA) and CD-R discs that contain MP3 or WMA format files.
- In order to play a disc created by a CD recorder, be sure to finalize it.
- Depending on the quality of the disc and the condition of the recording, playback might not be possible. For details, see the operation manual for the device you are using.
- If you have any questions about how to handle a CD-R or CD-RW disc, contact the seller of the disc directly.
Precautions for use
- Do not use cracked discs because they could damage the unit.
- Do not apply labels or other materials to discs. Do not use discs that have had tape, stickers or similar materials removed from them as they may have left a sticky residue on the disc's surface. Other discs to avoid are ones that have exposed glue around the edges of stickers, for example. Using such a disc in this unit could cause the disc to become stuck or could damage the unit.
- When writing something on the label side of a disc, use a felt tip permanent marker. The use of a ballpoint pen or other pen with a hard tip could damage the disc, making it unplayable.
●Never use commercially-available CD stabilizers. Doing so could make the disc unplayable or damage the unit.
●Never use discs with irregular shapes, including heart-shaped and octagonal discs, because they could damage the unit.
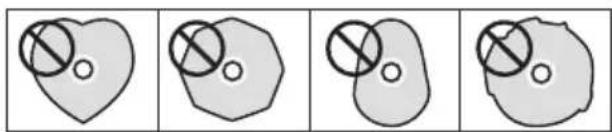
- To remove a disc from its case, while pressing down on the center of the case, hold the disc by its edges. Do not touch the side of the disc that has the data encoded on it (unlabeled side).
Notes about discs (contd.)
If a disc will not load properly
If a disc becomes caught or is otherwise difficult to insert, do not push it in forcefully. Press the EJECT (▲) button and remove the disc once before trying to reinsert it. (Pushing a disc forcefully could damage the unit.)
Storing discs
●Discs should be stored in their cases when not being used. Failure to do so could result in warping and scratches.
- Do not leave discs in places that are exposed to direct sunlight or that are very humid or hot. Doing so could cause discs to become deformed or degraded, making them unplayable.
- CD-R and CD-RW discs are more susceptible to the impacts of heat and ultraviolet rays than ordinary CDs. For this reason, do not leave them for long times in places that are exposed to direct sunlight or near devices that generate heat, for example.
●Always clean discs before storing them. Leaving a disc in an unclean state might result in skipping or degraded sound quality.
Cleaning discs
- If the side of the disc that has the data encoded on it (unlabeled side) becomes dirty with fingerprints or dust, use a soft cloth to wipe the surface from the center directly toward the edge.
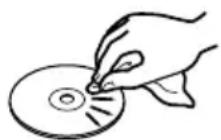
●Never use record cleaners, antistatic treatments, thinners or similar chemicals to clean discs. Such chemicals could harm the surface of the disc.
Notes about USB flash drives
This unit can use USB flash drives.*
*The USB ports on this unit only support USB flash drives (also known as "thumb drives" and "jump drives"). They do not support standard USB hard drives.
●FAT16 and FAT32 formats are supported for USB flash drives.
●This unit does not support USB hubs or devices with USB hub functions. Never connect such devices to this unit.
ATTENTION
- If the connected media is not supported, "Media Error!" appears on this unit's display.
- This unit cannot play back audio files if copyright protection is used.
- Do not connect computers to this unit's USB ports. Audio from computers cannot be input through this unit's USB ports.
●This unit might not be able to use media that is loaded into a USB card reader. - Depending on the USB flash drive and its contents, reading data from it might take some time.
- Depending on the USB flash drive, the unit might not be able to read its data correctly or supply power properly.
●During the use of USB flash drives, please be aware that our company will take no responsibility should data be lost or changed, a USB flash drive become damaged or other harm occur. - We recommend backing up data saved on a USB flash drive before using it with this unit.
●This unit does not support USB flash drives with security functions.
Names and functions of parts (main unit)
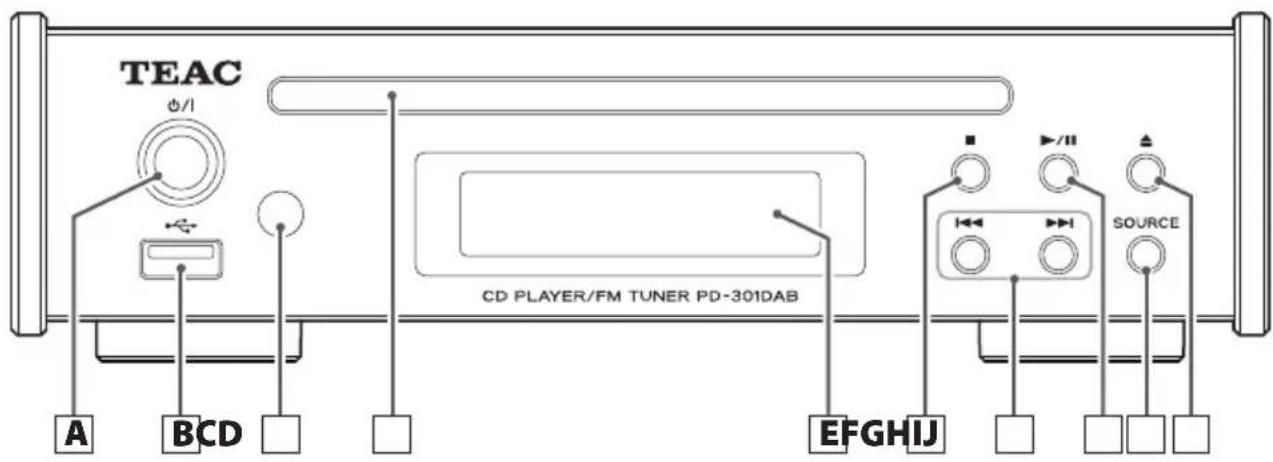
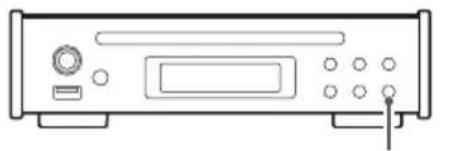
A Standby/on ( ⏻/l ) button
Press this button to turn the unit on and put it in standby. When the unit is ON, the ring around the button lights blue.
- When this unit is in standby mode, it consumes standby power. For this reason, we use the term "standby" rather than "off".
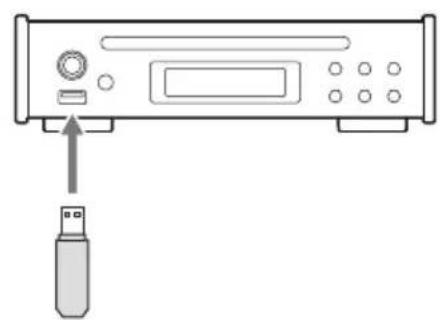
B USB port
Connect a USB flash drive to the unit.
- Do not connect this unit's USB port to a computer or similar device. Audio from computers cannot be input through this USB port.
C Remote control signal receiver
This receives signals from the remote control. When using the remote control, point the remote control here.
D Disc slot
Insert a disc here. After a disc is inserted partway, the unit will automatically draw it in.
E Display
This shows a variety of information.
F Stop (■) button
Press during playback to stop playback.
When the input source is DAB/FM, use to switch between frequency and preset modes.
G Skip (|◀◀/▶▶|) buttons
Use to skip to the previous or next track. During play-back, press and hold to search backward/forward.
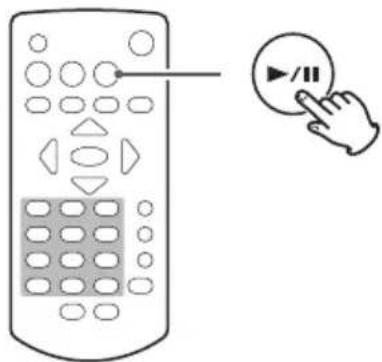
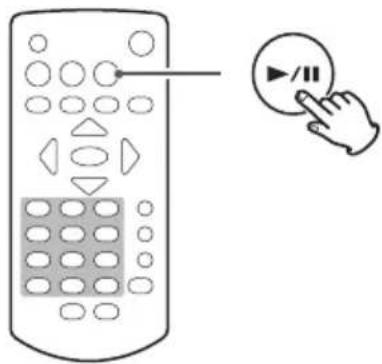
H | Play/pause (▶ /II) button
Press when stopped or paused to start playback.
Use this button to pause playback during playback.
I SOURCE button
Use this button to select the input source.
J Eject (▲) button
Press to partially eject the disc. Hold the disc by its edges and pull it out.
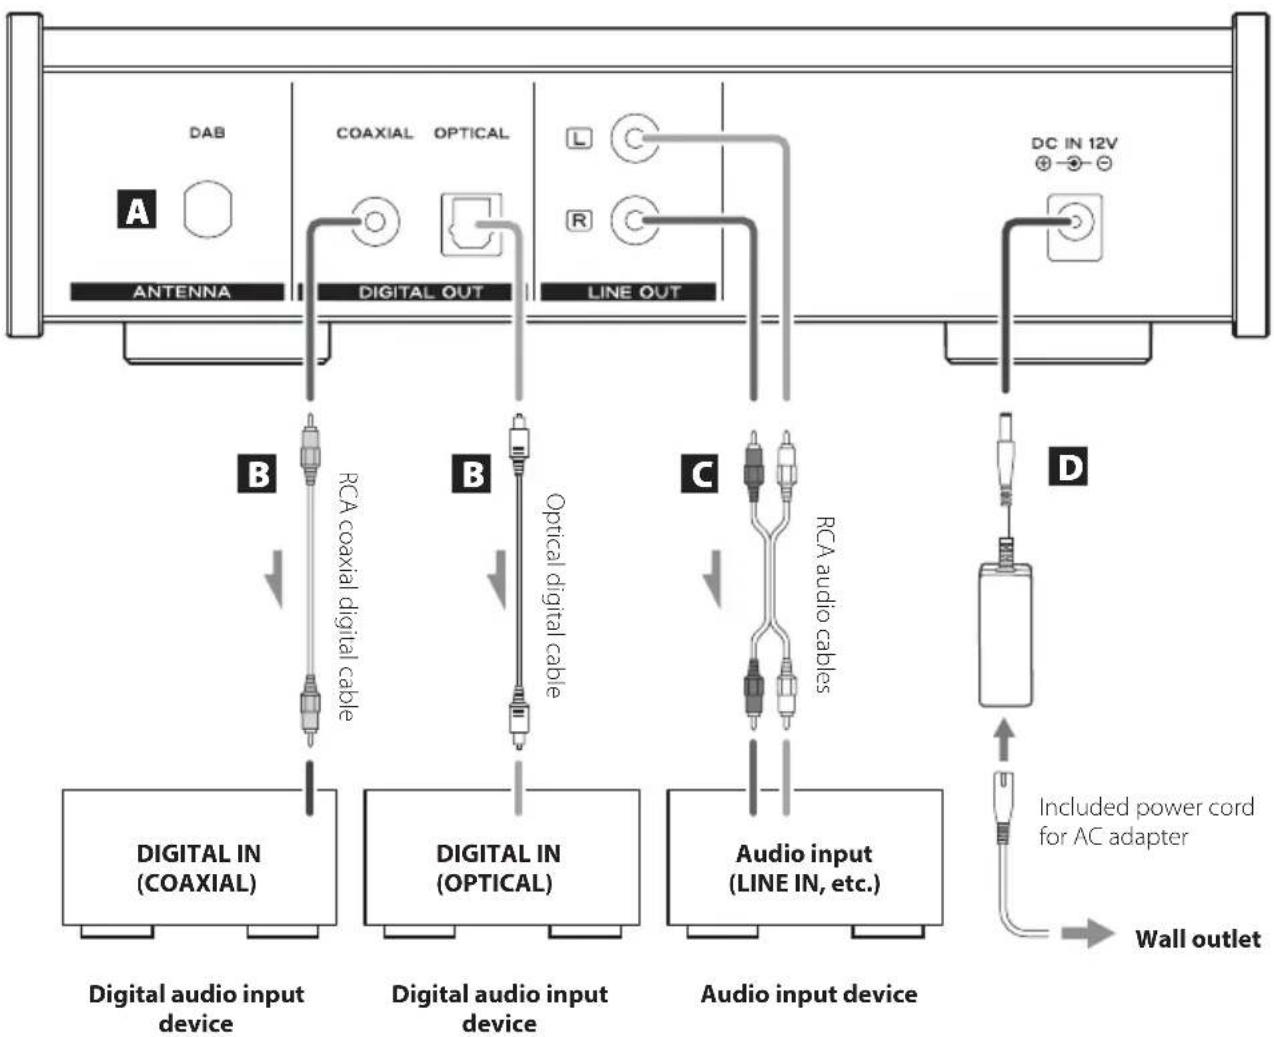
After all connections are complete, connect the power cord's plug to the AC wall outlet.
- Read the instructions of each device that you intend to use with this unit.
- Do not bundle connecting cables with power cords. Doing so could cause noise.
- Be sure to connect each plug securely.
flowchart
graph TD
    A["Antenna"] --> B["Digital input device"]
    C["Coaxial"] --> D["Digital output"]
    E["Optical"] --> F["Digital input device"]
    G["Line OUT"] --> H["Digital output"]
    I["DAB"] --> J["Digital input device"]
    K["DC IN 12V"] --> L["Digital output"]
    M["B"] --> N["Digital input device"]
    O["B"] --> P["Digital output"]
    Q["C"] --> R["Audio input device"]
    S["D"] --> T["Audio input device"]
    U["Included power cord for AC adapter"] --> V["Wall outlet"]
Connecting the DAB/FM antenna
A DAB/FM antenna connector
When receiving a DAB/FM broadcast, extend this antenna and position it for the best reception.
After moving this unit, readjust the position again.
For detailed information about how to make DAB/FM antenna connections, see page 11.
B Digital audio output connectors
These output digital audio. Connect these to the audio input connectors of devices capable of receiving digital audio.
COAXIAL: RCA coaxial digital cable
OPTICAL: Optical digital cable (TOS)
C Analog audio output connectors
These output 2 channels of analog audio. Connect a stereo amplifier or powered speakers to them.
Use RCA audio cables for connections.
Connect the R connector of this unit to the right (R) connector (or equivalent) of the amplifier and the L connector of this unit to the left (L) connector (or equivalent) of the amplifier.
D DC power connector (DC IN 12V)
After all other connections have been completed, connect the included GPE015A-120125-D AC adapter to this connector and connect the AC adapter power cord to the adapter.
Then, connect the AC adapter power cord plug to an AC power outlet.
Do not use any power cord other than the one included with this unit. Use of other power cords could result in fire or electric shock. Unplug the cord from the outlet when not using the unit for a long time.
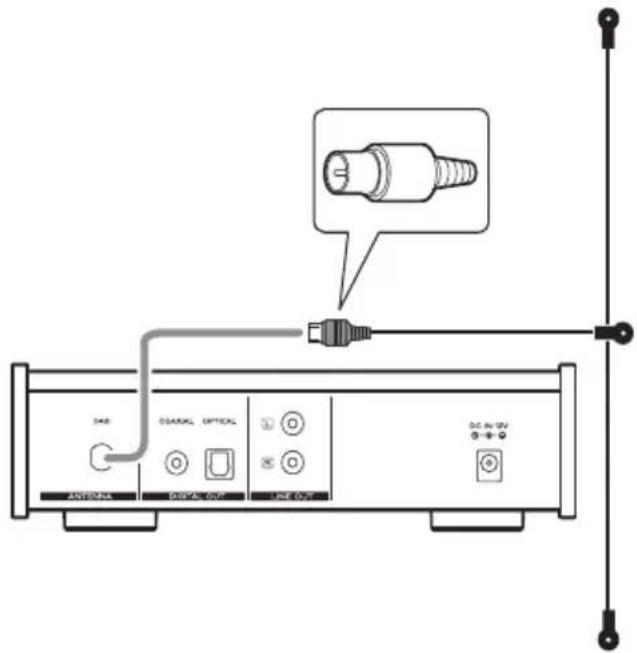
Indoor antenna
Connect the included antenna to the antenna connector on the rear panel and extend the antenna.
Fix the antenna to a window frame, wall or other position that improves reception the most.
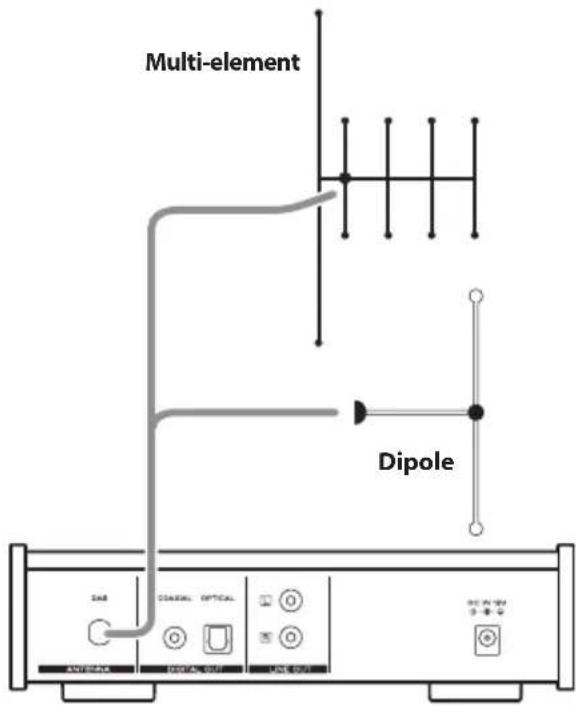
Outdoor antenna
In an area where DAB signals are weak, use an outdoor DAB antenna.
There are two main types of antennas available.
Names and functions of parts (remote control)
flowchart
graph TD
    a --> SOURCE
    b --> REPEAT
    c --> REPEAT
    d --> REPEAT
    e --> ENTER
    f --> PROGRAM
    g --> PROGRAM
    h --> RDS/INFO
    SOURCE --> ○/I
    REPEAT --> ←/← → ▶/|| → RANDOM
    ENTER --> ▶/← → ▶/→ ▶/→ ▶/→ ▶/→ ▶/→ ▶/→ ▶/→ ▶/→ ▶/→ ▶/→ ▶/→ ▶/→ ▶/→ ▶/→ ▶/→ ▶/→ ▶/→ ▶/→ ▶/→ ▶/→ ▶/→ ▶/→ ▶/→ ▶/→ ▶/→ ▶/<nl>
    ■ --> ○/I
    ○/I --> i
    ○/I --> j
    ○/I --> k
    ○/I --> l
    ○/I --> m
    ○/I --> n
    ○/I --> o
    ○/I --> p
    ○/I --> q
    ○/I --> r
    ○/I --> s
    ○/I --> t
    ○/I --> ▶/|| / |
    ○/I --> ▶/|| / |
    ○/I --> ▶/|| / |
    ○/I --> ▶/|| / |
    ○/I --> ▶/|| / |
    ○/I --> ▶/|| / |
    ○/I --> ▶/|| / |
    ○/I --> ▶/|| / |
    ○/I --> ▶/|| / |
    ○/O|
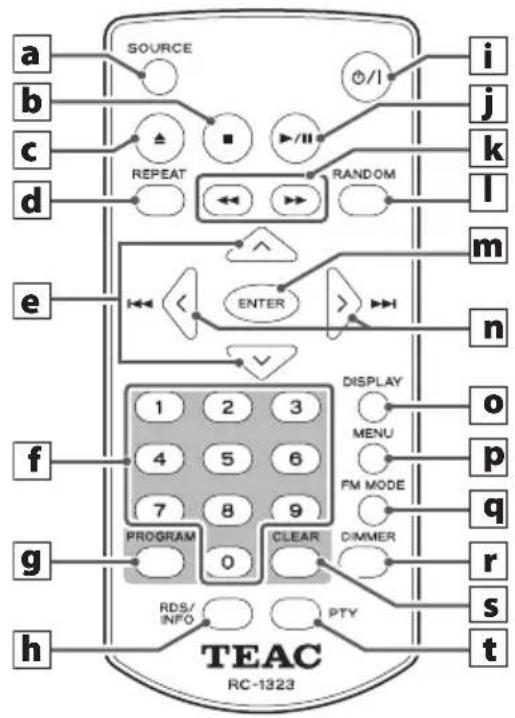
When both the main unit and the remote control have buttons with the same functions, the instructions in this manual refer only to one, but the other can be used in the same way.
a SOURCE button
Use this button to select the input source.
b Stop (■) button
Press during playback to stop playback.
C Eject (▲) button
Press to partially eject the disc. Hold the disc by its edges and pull it out.
d REPEAT button
Use for repeat playback.
e Scroll (^\/∨) buttons
When the input source is USB and folder mode is enabled, use to select folders.
When the input source is DAB/FM, use to change preset numbers.
f Number buttons
Use to select and program tracks, for example.
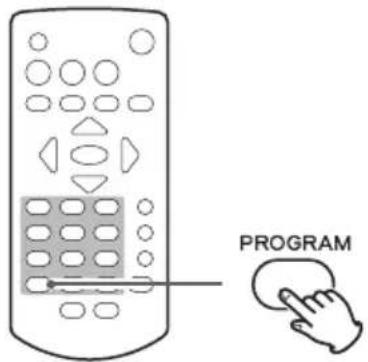
g PROGRAM button
When the input source is CD, use with program playback.
When the input source is DAB/FM, use with radio station presets.
h RDS/INFO button
When the input source is FM, use this button to select an RDS mode. Please ignore "INFO" on the remote control unit. (INFO function does not work on this unit.)
i Standby/on ( ⏻/|) button
Press this button to turn the unit on or put it in standby. When the unit is ON, the ring around the main unit standby/on button lights blue.
j Play/pause (▶ /II) button
Press when stopped or paused to start or resume playback.
Press during playback to pause.
k Search (◀◀/▶▶) buttons
When the input source is CD/USB, press during play-back to search backward/forward.
When the input source is FM, press to start automatic station selection.
I RANDOM button
Use for random playback.
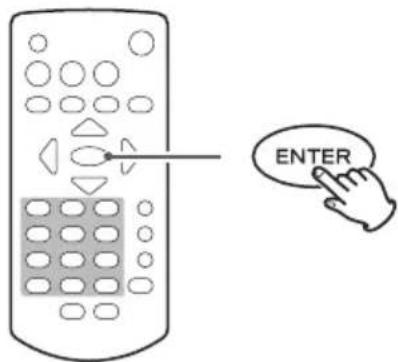
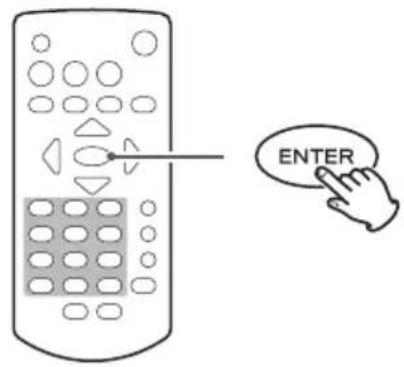
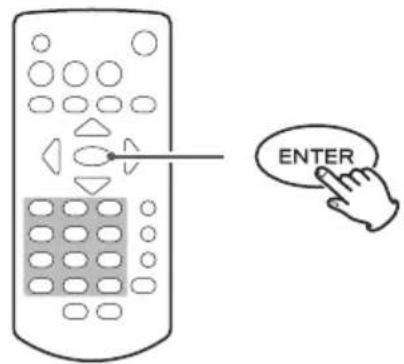
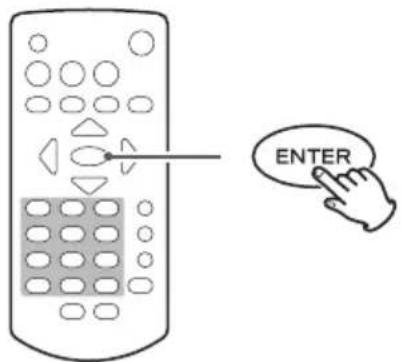
m ENTER button
Use to confirm after entering a track number.
Using the remote control
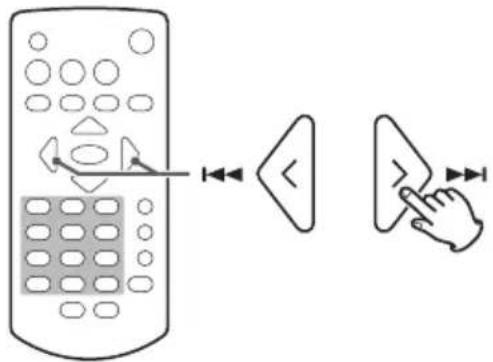
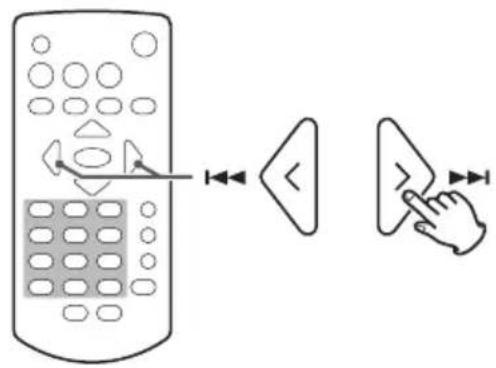
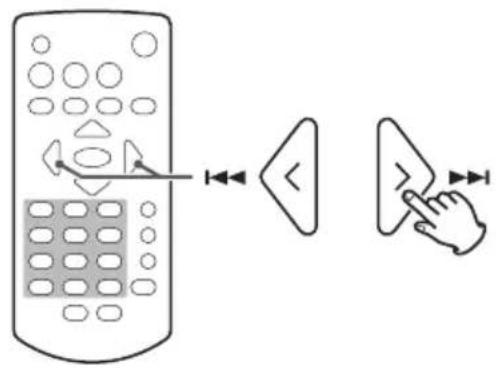
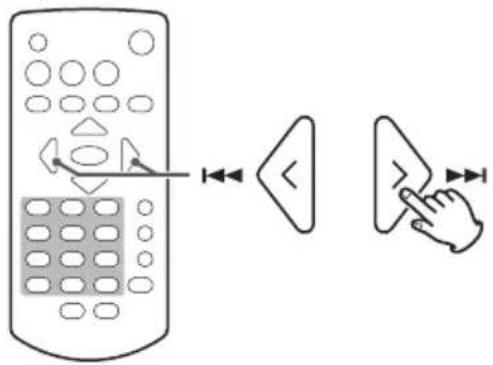
n Skip (|◄◄/►►|) buttons
Direction (〈/〉) buttons
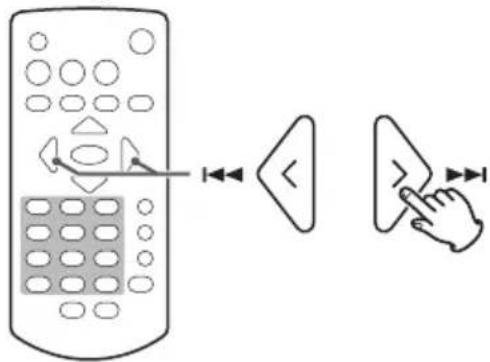
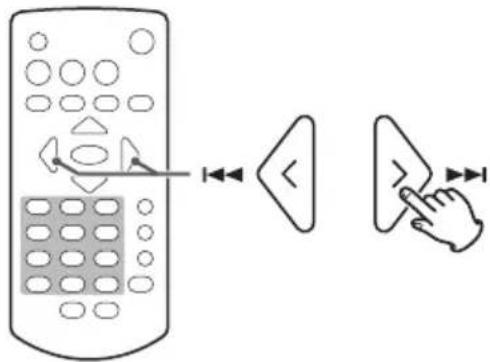
When the input source is CD/USB and file mode is enabled, use to skip to the previous or next track.
When the input source is USB and folder mode is enabled, use to select files.
When the input source is FM, use to decrease/increase the frequency received. Press and hold for at least one second to begin automatically selecting stations.
When the input source is DAB, press to start automatic station selection.
DISPLAY button
Press to change what is shown on the display.
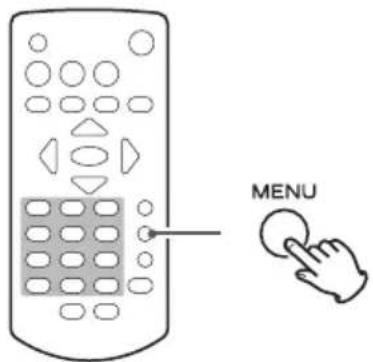
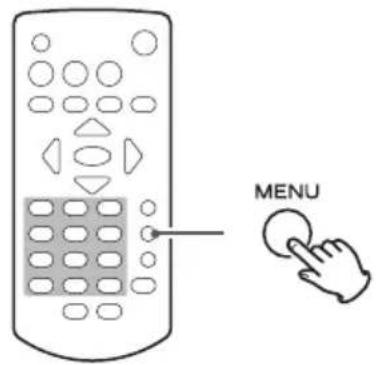
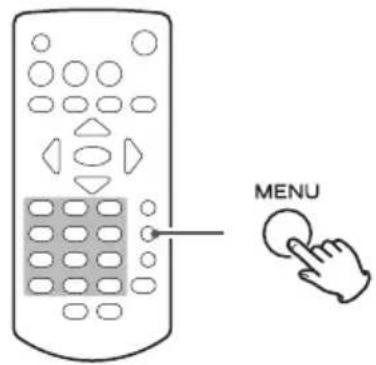
p MENU button
Press to enter setting mode.
q FM MODE button
When receiving an FM broadcast, use to switch between stereo and mono.
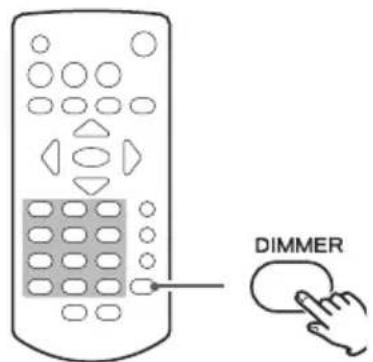
r DIMMER button
Use to adjust the display brightness.
S CLEAR button
Use to clear programmed tracks.
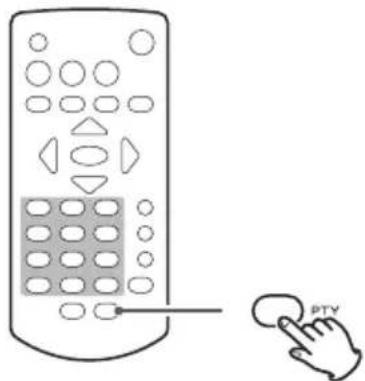
t PTY button
Use to search for stations by program type (PTY).
Precautions for use
Misuse of batteries could cause them to rupture or leak leading to fire, injury or the staining of items nearby. Please read and observe the precautions on page 3 carefully.
- When using the remote control, point it toward the remote control signal receiver on the main unit from a distance of 5 m (16 ft) or less. Do not place obstructions between the main unit and the remote control.
●The remote control might not work if the remote control signal receiver on the main unit is exposed to sunlight or bright lights. In this case, try moving the main unit.
●Beware that use of this remote control could cause the unintentional operation of other devices that can be controlled by infrared rays.
Installing batteries
Remove the cover on the back of the remote control, and insert 2 AAA batteries into the case, aligning them with the ⊕ and ⊖ indications. Replace the cover.
natural_image
Diagram of a battery pack with an open rear panel and internal components, showing charge distribution (no text or labels)When to replace batteries
If the operation range of the remote control decreases, the batteries have become exhausted. In this case, replace the batteries with new ones.
Dispose of the used batteries according to the instructions on them or requirements set by your local municipality.
Basic operation
Selecting the input source
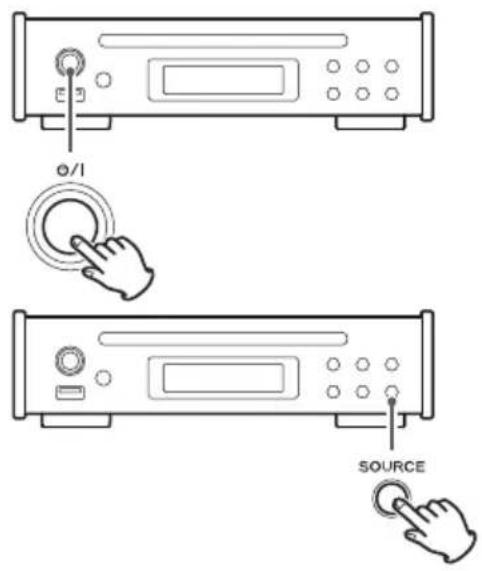
1 Press the standby/on ( ⏻/l ) button to turn the unit on.
When the unit is ON, the ring around the button lights blue.
CAUTION
In order to prevent sudden loud noises, turn the amplifier ON last.
2 Press the SOURCE button to select the input source.
Press the SOURCE button repeatedly to cycle through the inputs as shown below.

Playing a CD
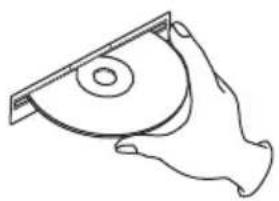
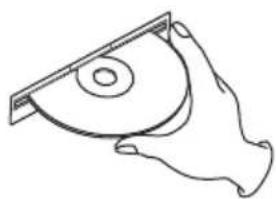
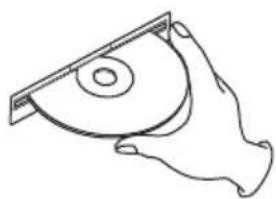
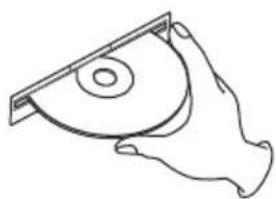
1 Hold the disc by its edges with the labeled side up and insert it partway.
2 Push the disc in further until just before it disappears. It will automatically be drawn in to the slot.
If a disc becomes caught or is otherwise difficult to insert, do not push it in forcefully. Press the EJECT (▲) button and remove the disc once before trying to reinsert it. (Pushing a disc forcefully could damage the unit.)
●The input source will change to CD (unless USB playback is active).
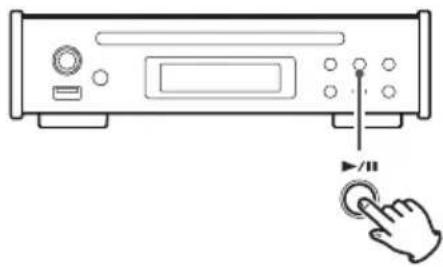
3 Press the play/pause (▶/II) button.
natural_image
Line drawing of a hand holding a circular object with a ring (no text or symbols)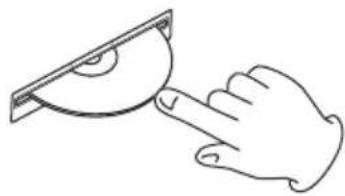
natural_image
Simple line drawing of a hand pointing at a curved object on a rectangular base (no text or symbols)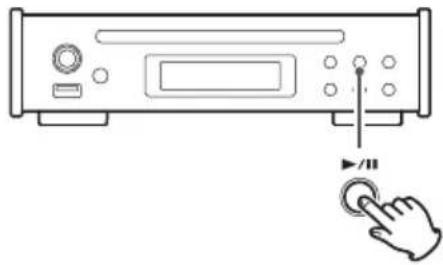
natural_image
Line drawing of a CD-ROM front panel with a hand cursor clicking the button (no text or symbols)Playing files from a USB flash drive
1 Connect a USB flash drive to the USB port.
2 Use the skip (|◄◄/►►|) buttons to select a track.
3 Press the play/pause (▶ /II) button.
Selecting FM stations
Use the remote control scroll (^^/∨) buttons to select preset stations.
If the current preset stations do not match the stations in your area, follow the instructions in "Setting presets automatically" on page 26.
Dimmer
Press the remote control DIMMER button to cycle through display brightness levels.
natural_image
Diagram of a computer monitor with an attached USB port, showing ports and control panel (no text or symbols)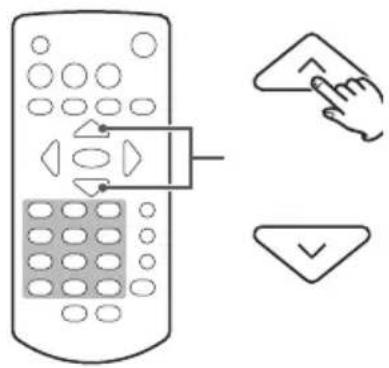

flowchart
graph LR
    A["Ordinary"] --> B["Dim"]
    B --> C["Dark"]
Display information
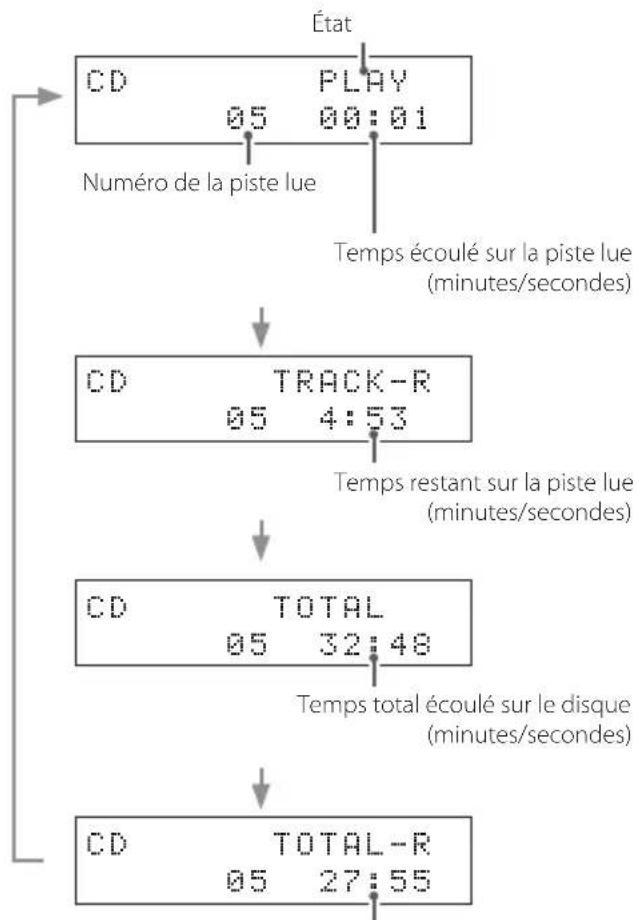
The name of the input source appears at the top left of the display.
Press the DISPLAY button to change the information shown on the display.
●The display contents shown below are examples.
Audio CD
Stopped
Input source name Status
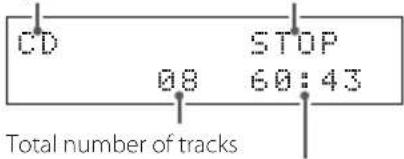
Total playback time (minutes/seconds)
Playing back
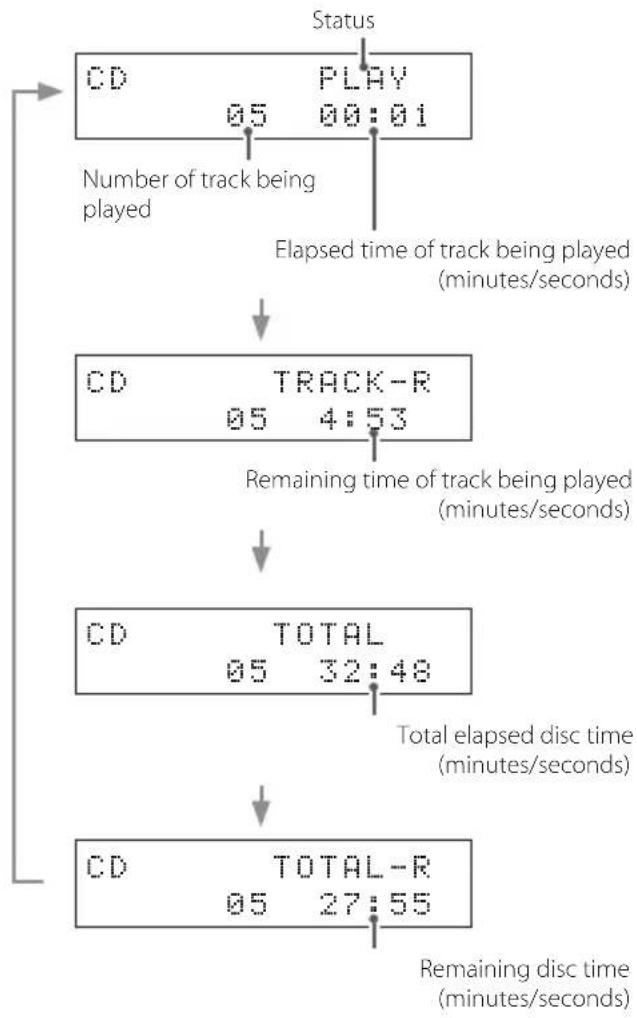
flowchart
graph TD
    A["Status"] --> B["CD PLAY 05 00:01"]
    B --> C["Number of track being played"]
    C --> D["Elapsed time of track being played (minutes/seconds)"]
    D --> E["CD TRACK-R 05 4:53"]
    E --> F["Remaining time of track being played (minutes/seconds)"]
    F --> G["CD TOTAL 05 32:48"]
    G --> H["Total elapsed disc time (minutes/seconds)"]
    H --> I["CD TOTAL-R 05 27:55"]
    I --> J["Remaining disc time (minutes/seconds)"]
Disc/USB flash drive with audio files
The following examples are of use with a USB flash drive.
Stopped
Input source name Status
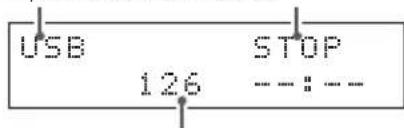
Total number of files
Playing back
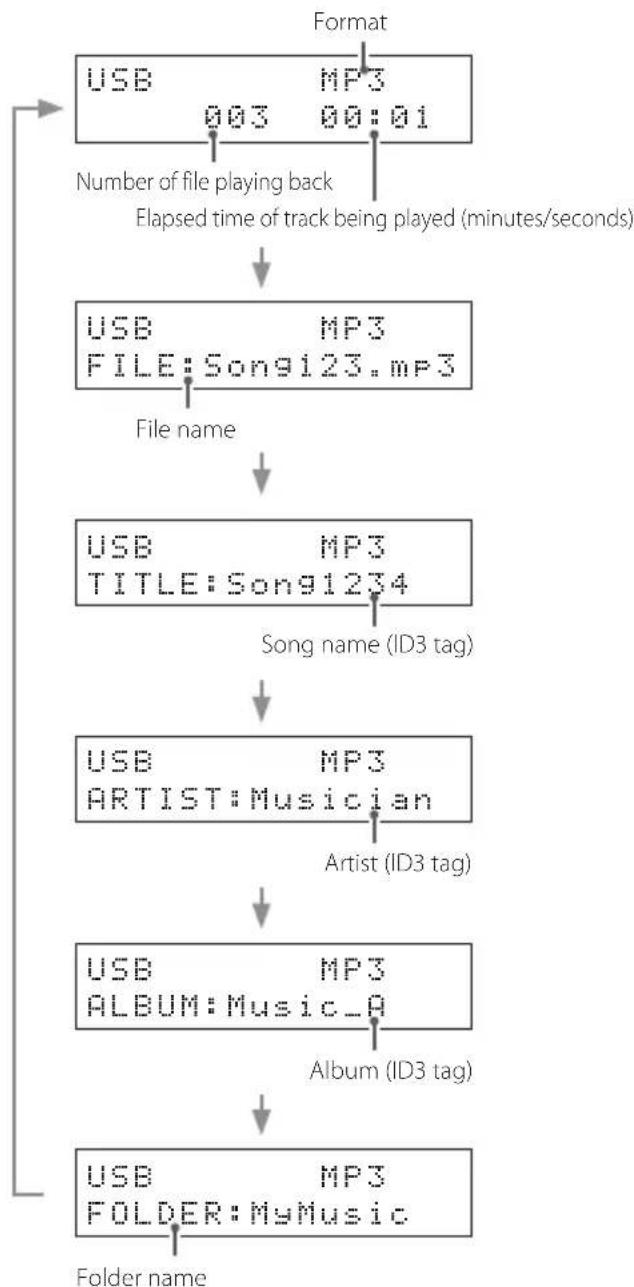
flowchart
graph TD
    A["Format"] --> B["USB MP3\n003 00:01"]
    B --> C["Elapsed time of track being played (minutes/seconds)"]
    C --> D["USB MP3\nFILE: Song123.mp3"]
    D --> E["File name"]
    E --> F["USB MP3\nTITLE: Song1234"]
    F --> G["Song name (ID3 tag)"]
    G --> H["USB MP3\nARTIST: Musician"]
    H --> I["Artist (ID3 tag)"]
    I --> J["USB MP3\nALBUM: Music_A"]
    J --> K["Album (ID3 tag)"]
    K --> L["USB MP3\nFOLDER: MyMusic"]
    L --> M["Folder name"]
●A maximum of 62 characters, including the header, will scroll across the screen for the folder name, file name and ID3 tags (title, artist, album).
DAB display
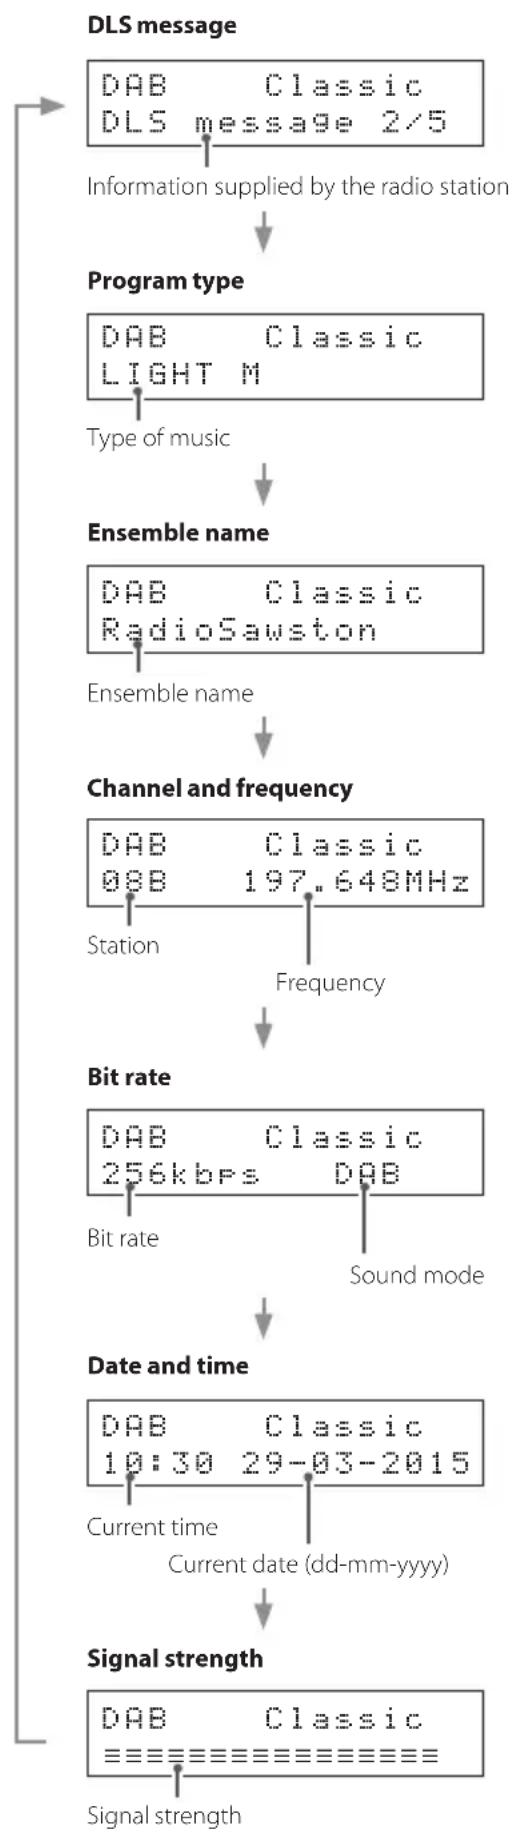
flowchart
graph TD
    A["DLS message"] --> B["Information supplied by the radio station"]
    B --> C["Program type"]
    C --> D["Type of music"]
    D --> E["Ensemble name"]
    E --> F["Ensemble name"]
    F --> G["Channel and frequency"]
    G --> H["Station"]
    G --> I["Frequency"]
    I --> J["Bit rate"]
    J --> K["Bit rate"]
    K --> L["Sound mode"]
    L --> M["Date and time"]
    M --> N["Current time"]
    N --> O["Current date (dd-mm-yyyy)"]
    O --> P["Signal strength"]
    P --> Q["Signal strength"]
Listening to files on a CD or USB flash drive
The formats that can be played back from each kind of media are as follows.
CD: CD-DA (audio CD), MP3, WMA
USB: WAV, MP3, WMA, AAC
Starting playback
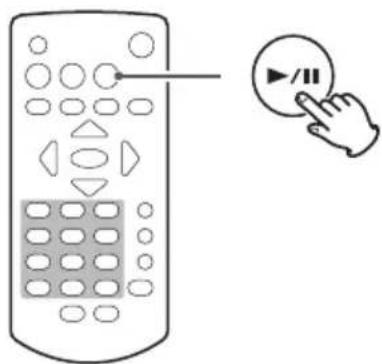
Press the play/pause (▶/Ⅱ) button.
During playback, PLAY appears on the upper line of the display.
Pausing playback
Press the play/pause (▶/Ⅲ) button to pause playback.
To resume playback from the position where it was paused, press the play/pause (▶/■) button again.
When paused, PAUSE appears on the upper line of the display.
Stopping playback
Press the stop (■) button to stop playback.
Ejecting a disc
When playback is stopped, press the eject (▲) button.
The disc will be partially ejected. Hold the disc by its edges and pull it out.
natural_image
Line drawing of a CD-ROM with a finger pointing to the right button (no text or symbols)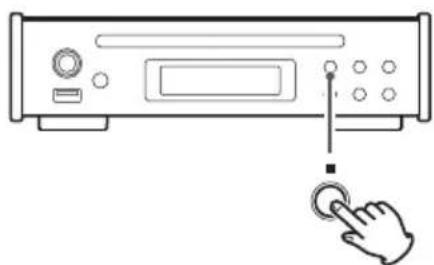
natural_image
Line drawing of a CD-ROM with a hand cursor clicking a button (no text or symbols)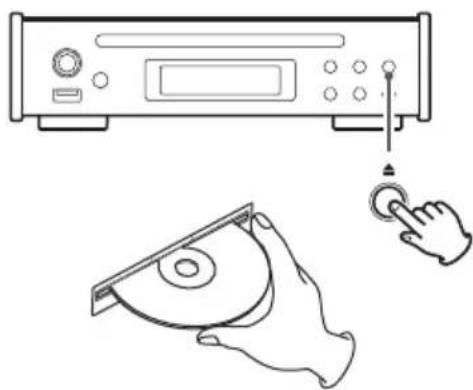
natural_image
Illustration of a CD-ROM front panel, a hand inserting a button to a CD, and a close-up of its disc (no text or symbols)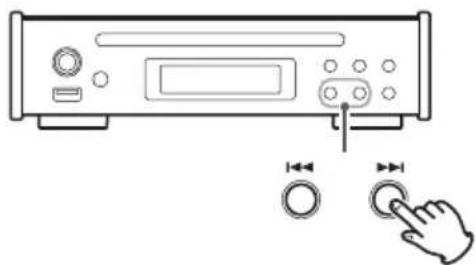
natural_image
Line drawing of a CD-ROM front panel with buttons and a finger pointing to the right button (no text or symbols)Skipping to search for a track
Press a skip (◄◄/►►I) button to skip to the previous or next track.
- During playback, press the ◀◀ button once to return to the beginning of the current track. When you want to play an earlier track, press the ◀◀ button repeatedly until you reach that track.
- During program playback, tracks from earlier or later in the program will be played back.
Searching for part of a track
Press and hold a skip (◄◄/►►) button to search backward/forward. Release the button when you find the desired part.
Press a remote control search (◀◀/▶▶) button to search backward/forward. Release the button when you find the desired part.
Direct playback using track numbers (audio CD only)
In addition to using the skip (I◄◄/►►I) buttons to select tracks, you can input a track by number and start playback.
During playback or when stopped, you can use the remote control number buttons to select a track by number.
- During program or random playback, the number buttons cannot be used to select tracks.
Selecting and playing CD/USB tracks
Select tracks on CDs in file mode.
Select tracks on USB flash drives in file or folder mode.
- See "USB Mode" on page 32 for how to set the mode. When the input source is USB, you can also press and hold the stop (■) button to change the mode.
File mode
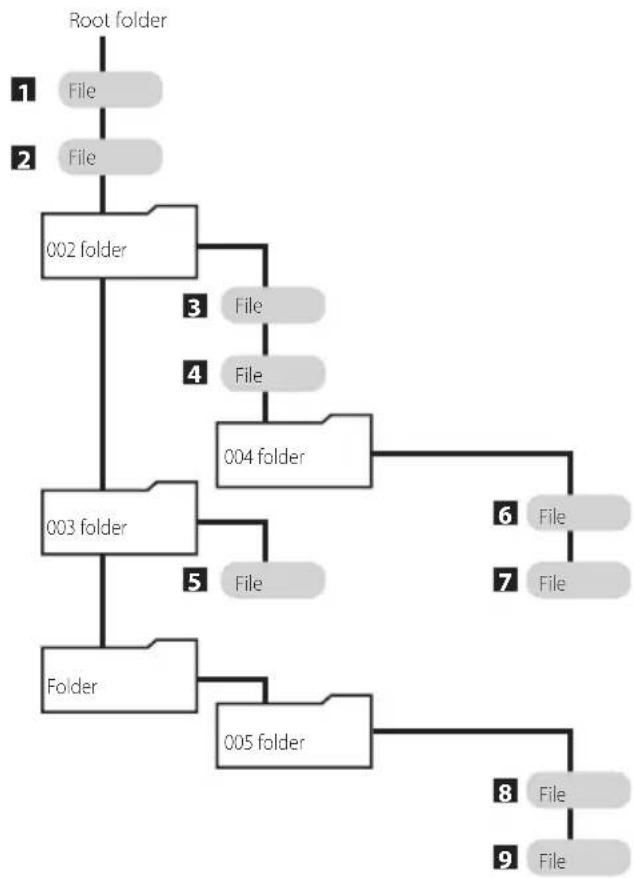
You can select files in this mode with all folders treated equally regardless of folder level.
flowchart
graph TD
    A["Root folder"] --> B["1 File"]
    A --> C["2 File"]
    B --> D["002 folder"]
    C --> D
    D --> E["3 File"]
    D --> F["4 File"]
    E --> G["004 folder"]
    F --> G
    G --> H["6 File"]
    G --> I["7 File"]
    D --> J["003 folder"]
    J --> K["5 File"]
    J --> L["Folder"]
    L --> M["005 folder"]
    M --> N["8 File"]
    M --> O["9 File"]
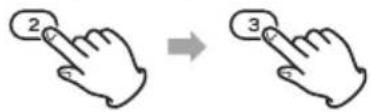
Example: entering track number 7

Example: entering track number 23
Selecting files
1 - 9 is the file playback order when a CD is loaded or a USB flash drive is connected.
Listening to files on a CD or USB flash drive (continued)
Folder mode
You can select files and folders using the folder hierarchy.
In folder mode, the folder icon appears at the bottom right of the display. The folder icon also appears before the folder name.

flowchart
graph TD
    A["Root folder"] --> B["File (FILE01.mp3)"]
    A --> C["File (FILE02.mp3)"]
    B --> D["Folder FOLDER01"]
    C --> D
    D --> E["File (FILE03.mp3)"]
    D --> F["File (FILE04.mp3)"]
    E --> G["Folder FOLDER04"]
    F --> G
    G --> H["File (FILE05.mp3)"]
    G --> I["File (FILE06.mp3)"]
    G --> J["File (FILE07.mp3)"]
    H --> K["Folder FOLDER02"]
    I --> K
    J --> K
    K --> L["Folder FOLDER03"]
    L --> M["Folder FOLDER05"]
    M --> N["File (FILE08.mp3)"]
    M --> O["File (FILE09.mp3)"]
Moving between folders
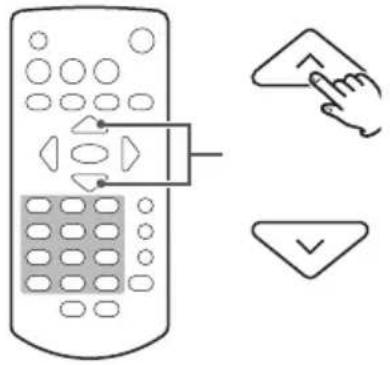
Selecting files in folders
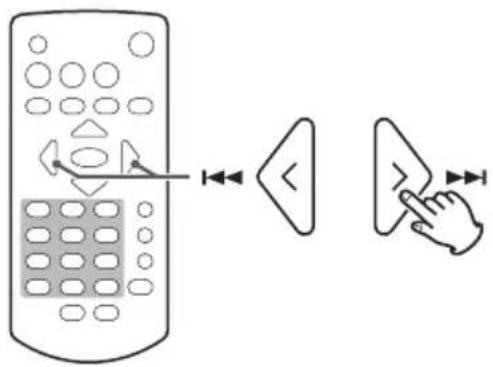
Folder mode operation examples
●These examples use the file/folder structure shown in the illustration on the previous page.
NOTE
When the input source is changed to USB, the file name will not be shown, but FILE01.mp3 will be selected.
Selecting files/folders on the same level
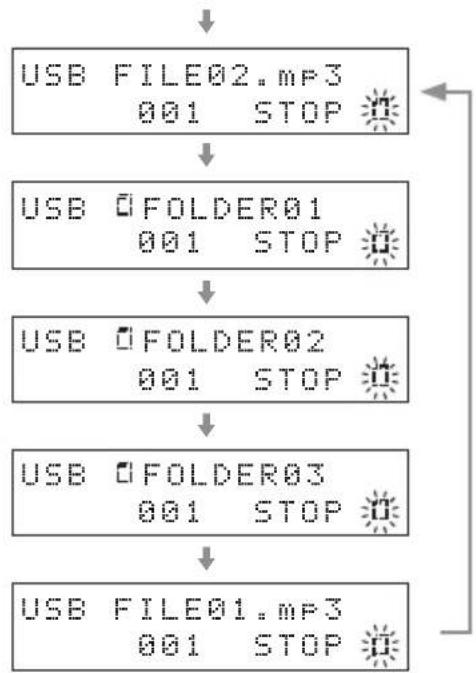
Press the skip (▶▶▶) button to select files and folders as shown in the illustrations below. Press the skip (▶◀◀) button to select them in reverse order.
●The display contents shown are examples.
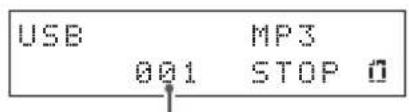
Number of file in selected folder
flowchart
graph TD
    A["USB FILE02.mp3\n001 STOP"] --> B["USB FOLDER01\n001 STOP"]
    B --> C["USB FOLDER02\n001 STOP"]
    C --> D["USB FOLDER03\n001 STOP"]
    D --> E["USB FILE01.mp3\n001 STOP"]
Icon is not blinking. Icon is blinking.
Changing the folder level
Select a folder and press the scroll (√) button or ENTER button to show the files/folders inside the current folder.
Press the scroll (^) button to move up one level and show the files/folders in that folder.
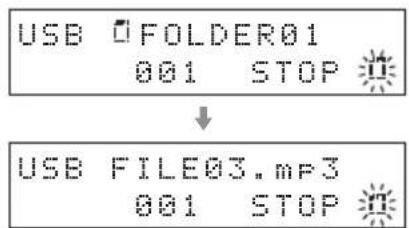
Starting playback
When a file is shown on the upper line, press the scroll (√) button or ENTER button to select that file and start playing it.
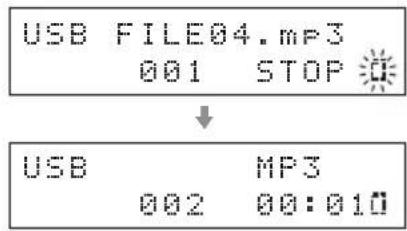
NOTE
●The folder icon blinks when a file/folder is selected.
●To cancel file/folder selection, press the CLEAR button.
Skip mode
In folder mode, press and hold the ENTER button for 5 seconds to enable skip mode. "S" appears at the right end of the upper line.
Example of display in skip mode
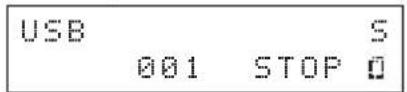
In this mode, the skip (I◄◄/►►I) buttons do not select files. Instead, you can use them to skip, which enables playback without pressing the ENTER button.
Press and hold the ENTER button for 5 seconds again to return to ordinary folder mode. (The "S" disappears.)
NOTE
●The file number shown is the number of a file in the selected folder.
Listening to files on a CD or USB flash drive (continued)
Repeat playback
Each time you press the REPEAT button, the repeat mode changes as shown in the illustration to the right.
●During program playback, repeat playback is not possible.
●This cannot be used at the same time as random playback.
*“RP-FOLDER” only appears when in USB folder mode.
Random playback
Press the RANDOM button to turn random playback on/off. When ON, the tracks on the disc will play back in random order. Playback will not stop until you press the stop (■) button.
●This cannot be used at the same time as repeat playback.
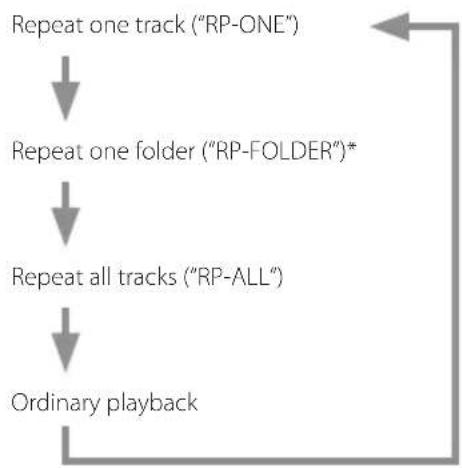
flowchart
graph TD
    A["Repeat one track ("RP-ONE")"] --> B["Repeat one folder ("RP-FOLDER")*"]
    B --> C["Repeat all tracks ("RP-ALL")"]
    C --> D["Ordinary playback"]
Program playback
Program playback is only possible with audio CDs.
Using program playback
1 Press the PROGRAM button.
MEM and the track number blink.

- Press when stopped.
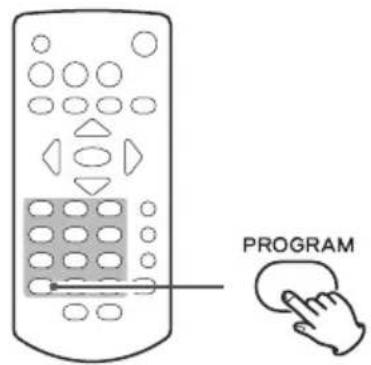
2 Use the skip (1◄◄/►►) or number buttons to select a track and press the PROGRAM button to add it to the program.
Add all the tracks that you want to the program.
- If no action is taken for 20 seconds, the program will be canceled.

3 Press the play/pause (▶/Ⅱ) button to start program playback.
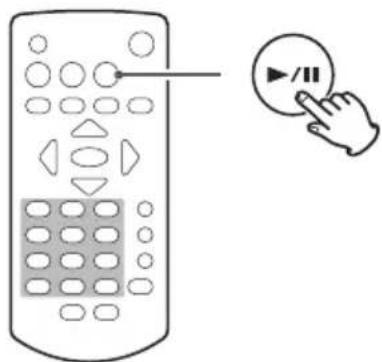
Checking and changing the program
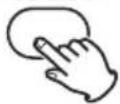
1 Press the PROGRAM button twice.
MEM and the program number blink.
2 Use the skip (|◄◄/►►|) buttons to change the program number and check track numbers.
Changing the program
- Show the track that you want to change.
- Press the PROGRAM button.
- Select a track and press the PROGRAM button to add it to the program in place of the original track.
Removing a track from the program
- Show the track that you want to remove.
- Press the CLEAR button.
3 Press the play/pause (▶/II) button to start program playback.
PROGRAM
PROGRAM

Adding tracks to the program
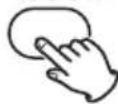
1 Press the PROGRAM button.
MEM and the program number blink.
2 Select a track and press the PROGRAM button to add it to the program.
Repeat to add more tracks as desired.
3 Press the play/pause (▶/II) button to start program playback.
Listening to files on a CD or USB flash drive (continued)
Removing all tracks from the program
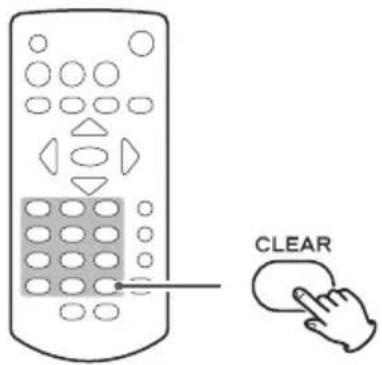
1 When stopped, press and hold the CLEAR button.
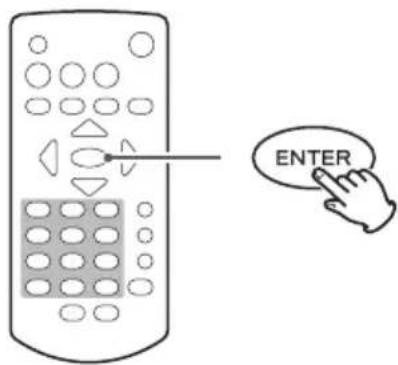
2 When "Program clear?" appears, press the ENTER button to remove all tracks from the program.
| CD | STOP |
| Program | Clear? |
To cancel the operation, press the stop (■) or CLEAR button.
Any of the following operations will also clear all the tracks from the program.
●Ejecting the disc
- Pressing the unit's standby/on (⏻/l) button to put it in standby mode
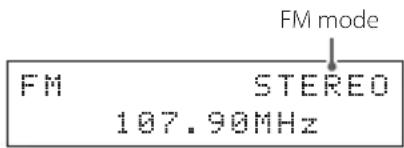
FM mode
Press the FM MODE button to switch between stereo and mono reception.
Stereo
Receive stereo FM broadcasts in stereo.
- If reception is poor, switch to Mono.
Mono
Receive FM broadcasts in mono. When the reception of an FM stereo broadcast is poor, select this mode. The sound becomes mono, but noise is also reduced, making it sound better.
Display example
Changing the received frequency
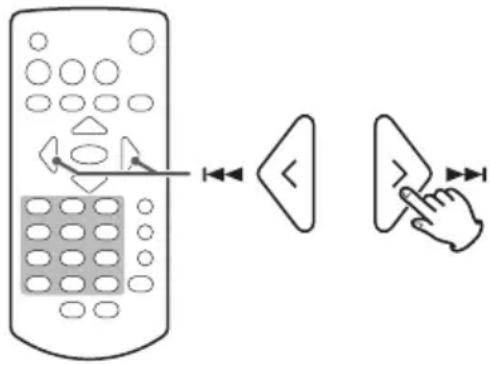
When a preset number is shown, press the stop (■) button to enable frequency selection mode.
Increasing the received frequency
Press the direction (>) button to increase the received frequency one step.
Press the search (▶▶) button to automatically search toward higher frequencies.
Decreasing the received frequency
Press the direction ( ) button to decrease the received frequency one step.
Press the search (◀◀) button to automatically search toward lower frequencies.
Changing the frequency from the main unit
Press the stop (■) button and use the skip (I◄◄/►►I) buttons in frequency selection mode (preset number not shown).
When a preset number appears, use the skip (I◄◄/►►I) buttons to change the preset number.
Listening to FM radio (continued)
Broadcast station presets
This unit can have up to 20 FM station presets.
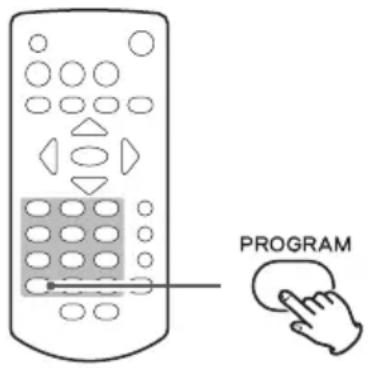
Setting presets automatically
Press and hold the remote control PROGRAM button.
The unit will automatically search for radio stations and set them in order, starting with preset 01 (P01). The unit will stop automatically adding presets when 20 have been added or the reception frequency range has been searched completely.
Setting presets manually
1 Tune in the station that you want to add as a preset.
2 Press the PROGRAM button.
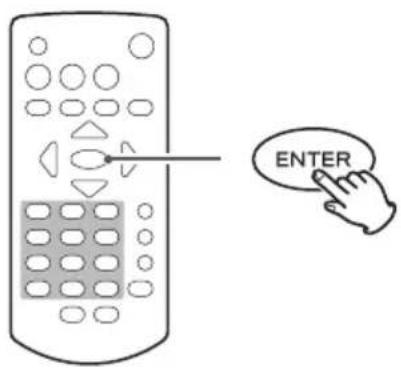
3 Use the direction ( / ) buttons to select the number to preset and press the ENTER button.
FM P03 82.5MHz
Preset number
RDS
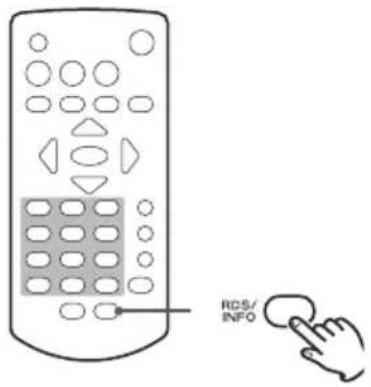
The Radio Data System (RDS) is a broadcasting service that allows stations to send additional information along with the regular radio program signal.
1 Tune in to an FM RDS station (see page 25).
2 Press the remote control RDS button.
Pressing the RDS button cycles through RDS modes as follows:
Program service (PS)
When you select Program service, "PS" will appear to the right of "FM" and then the program service name or station's name will be displayed. If there is no program service data, the frequency will be displayed.
RDS Program type (PTY)
When you select RDS Program type, "PTY" will appear to the right of "FM" and then the program type will be displayed.
RDS Radio text (RT)
When you select RDS Radio text, "RT" will appear to the right of "FM" and then information from the station consisting of up to 64 characters will be displayed.
PTY search
You can search for stations by program type. This function is available only through the RDS services of FM frequency stations in Europe.
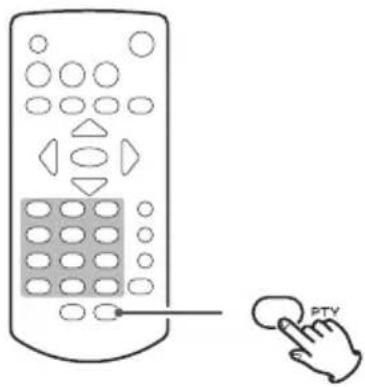
1 Press the PTY button.
"PTY SEARCH" appears on the display.
2 Use the direction ( / ) buttons to select the desired program.
You can select from 31 program types (PTY).
3 Press the ENTER button.
The unit starts searching.
- When the program type that you have selected is found, searching stops and the program type will be displayed.
- If a matching program type is not found during PTY Search, it will stop at the frequency set before searching started.
- If you want to stop searching, press the PTY button.
natural_image
Line drawing of a remote control with a hand pressing a button labeled 'PTY' (no text or symbols on the device itself)FMPTYSEARCH < NEWS >
RDS (continued)
NEWS:
Brief announcements, events, public opinion, reports and real situations.
AFFAIRS:
Suggestions, including practical announcements other than news, documents, discussion and analysis.
INFO:
Useful and reference information, such as weather forecasts, consumer guides and medical advice.
SPORT:
Sports-related programs.
EDUCATE:
Educational and cultural information.
DRAMA:
All kinds of radio concerts and serial dramas.
CULTURE:
All aspects of national or local culture, including religious events, philosophy, social science, language and theatre.
SCIENCE:
Programs on natural science and technology.
VARIED:
Popular programs such as quizzes, entertainment news, interviews, comedy and satire.
POP M:
Programs of commercial and popular songs, including music sales volumes, etc.
ROCK M:
Modern music generally composed and played by young musicians.
EASY M:
Popular music usually lasting for less than 5 minutes.
LIGHT M:
Classical music, instrumental music, chorus, and light music favored by general audiences.
CLASSICS:
Orchestral music including great operas and symphonies, chamber music and so on.
OTHER M:
Other music styles, including rhythm & blues and reggae.
WEATHER:
Weather reports and forecasts.
FINANCE:
Financial reports, commerce and trading.
CHILDREN:
Children's programs.
SOCIAL:
Social affairs.
RELIGION:
Religious programs.
PHONE IN:
Programs in which the public expresses its views by phone.
TRAVEL:
Travel reports.
LEISURE:
Programs concerning recreational activities.
JAZZ:
Jazz music.
COUNTRY:
Country music.
NATION M:
National music.
OLDIES:
Music from the so-called golden age of popular music.
FOLK M:
Folk music.
DOCUMENT:
Documentaries.
TEST:
Broadcast when testing emergency broadcast equipment or receivers. Not intended for searching or dynamic switching for consumer receivers.
ALARM!
A program with notifications about emergencies and natural disasters.
Setting up your DAB tuner
The first time you listen to the DAB radio, it will scan for DAB stations and build a station list.
The unit will scan for broadcast services in the local area and add them to the station list as they are found.
Listening to DAB Radio
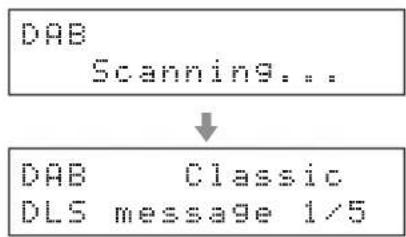
1 Press the SOURCE button to select DAB.
When the scanning process has finished, the DLS (Dynamic Label Segment) will appear on the second line of the display.
flowchart
graph TD
    A["DAB Scanning..."] --> B["DAB Classic DLS message 1/5"]
2 Select the station you want to listen to using the direction (>) button.
Setting the DAB display
You can change what is shown on the second line of the display while listening to DAB.
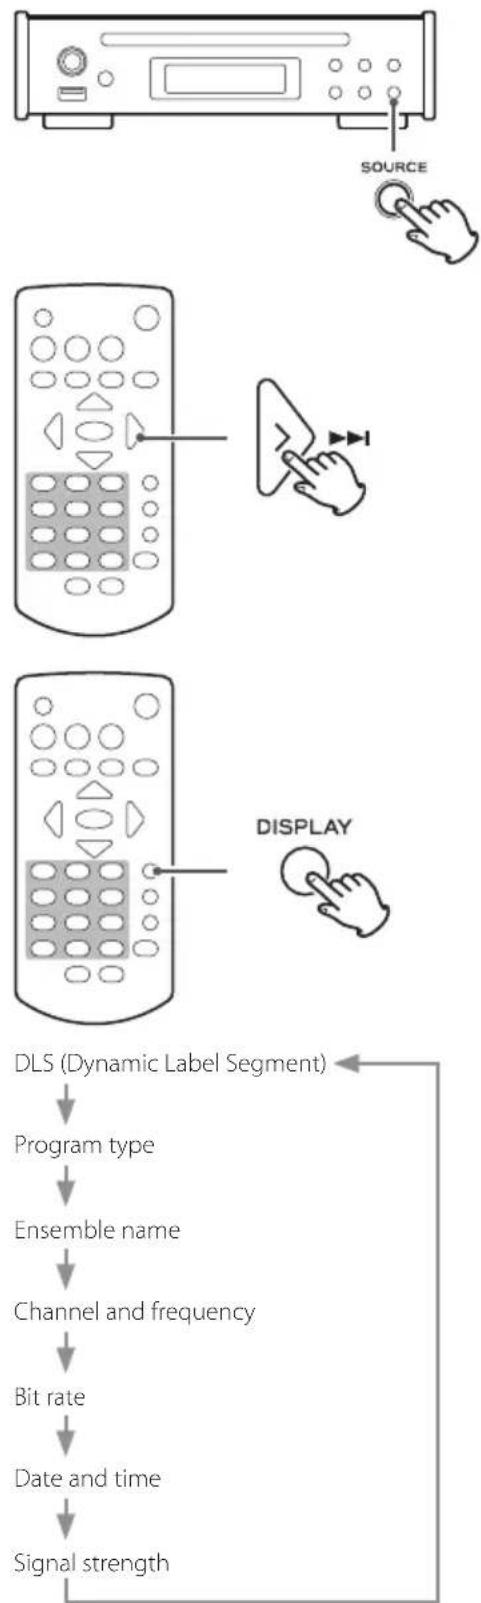
Each time you press the DISPLAY button, the information shown changes as shown in the illustration to the right.
DLS message
The Dynamic Label Segment (DLS) is a scrolling text label supplied by the radio station. It may be information about music titles or details regarding the program or station.
Program type
This is a description of the type of music broadcast by the radio station such as Pop, Rock or Classical music.
Ensemble name
This is the name of the ensemble that is broadcasting the program.
Channel and frequency
This is the station and frequency of the currently playing broadcast.
Bit rate
The is the bit rate and sound mode of the broadcast currently being received.
Date and time
This is the current date and time.
Signal strength
Use this to check the signal strength of the current station.
flowchart
graph TD
    A["SOURCE"] --> B["Remote Control Panel"]
    B --> C["Display"]
    C --> D["DLS (Dynamic Label Segment)"]
    D --> E["Program type"]
    E --> F["Ensemble name"]
    F --> G["Channel and frequency"]
    G --> H["Bit rate"]
    H --> I["Date and time"]
    I --> J["Signal strength"]
Using DAB tuner (continued)
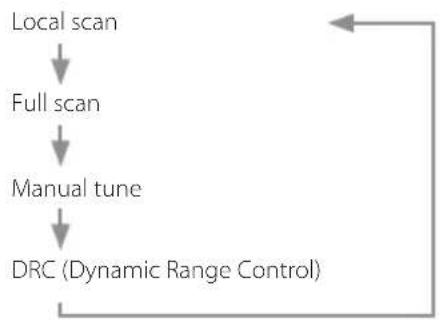
Using the DAB menu
In DAB mode, use the DAB menu to access various functions.
1 In DAB mode, press the remote control MENU button.
2 Press the direction ( / ) buttons to select the menu item you want, and press the ENTER button.
flowchart
graph TD
    A["Local scan"] --> B["Full scan"]
    B --> C["Manual tune"]
    C --> D["DRC (Dynamic Range Control)"]
    D --> E["Feedback Loop"]
Local scan
The unit will scan the DAB bands between 10A and 13F and add the stations found to the station list.
$$ \begin{array}{c} \text {DAB Local scan} \ \text {L.scan - sure?} \end{array} $$
Press the ENTER button to start scanning.
$$ \begin{array}{c} \text {DAB Local scan} \ \text {Scanning...} \end{array} $$
Full scan (auto scan)
The unit will scan the DAB bands between 5A and 13F and add the stations found to the station list.
$$ \begin{array}{c} \text {DAB Full scan} \ \text {Full scan - sure?} \end{array} $$
Press the ENTER button to start scanning.
$$ \begin{array}{c} \text {DAB Full scan} \ \text {Scanning...} \end{array} $$
Manual tune
This option allows you to manually tune in a station and view the strength of the signal as it changes. This could be useful when adjusting or positioning an antenna for better reception.
$$ \begin{array}{l} \text {DAB Manual Tune} \ 7 A 1 8 8. 9 2 8 M H z \end{array} $$
Use the direction ( I ) buttons to select the desired station, and press the ENTER button to show the signal strength of that station.
$$ \begin{array}{c} \text {DAB Manual Tune} \ = = = = = = = = = = = = = = \end{array} $$
- Press the ENTER button again to return to the ordinary display.
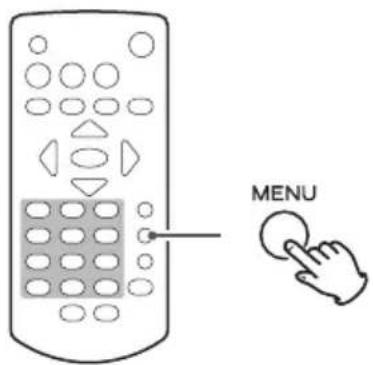
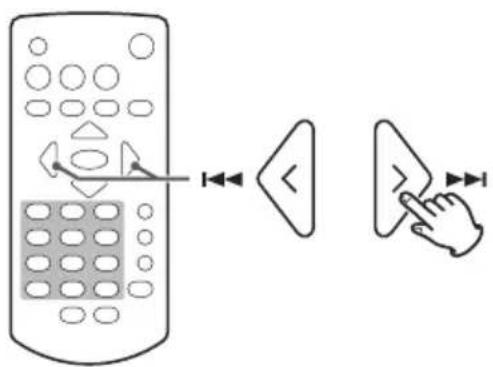
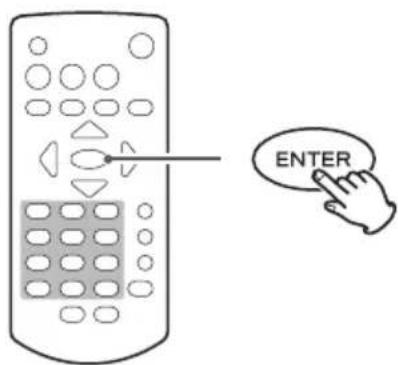
DRC
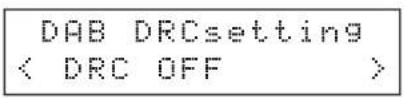
Use this option to adjust the amount of Dynamic Range Control (DRC) applied to received broadcasts. DRC is used to reduce the range between high and low volumes of audio and is sometimes applied at the broadcast source. Pop music might have a high value of DRC applied, appropriate for constantly high listening levels, while classical music broadcasts might have no DRC applied to allow the listener to hear the full dynamic range of the source volume.
●You can select one of the three DRC settings: off, low, high.
When set to high, the broadcast DRC is applied. Set to low, only half the broadcast DRC value is applied. Set to off, no DRC is applied.
Broadcast station presets
This unit can have up to 20 DAB station presets.
Setting presets manually
1 Tune in the station that you want to add as a preset.
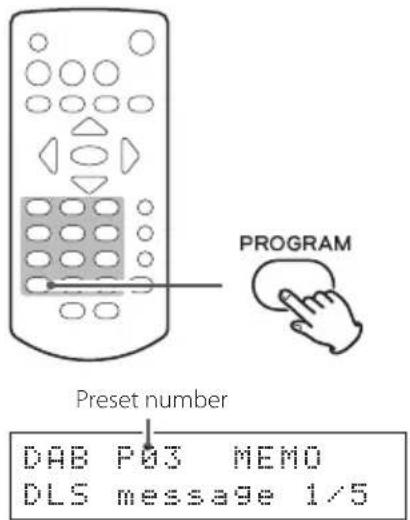
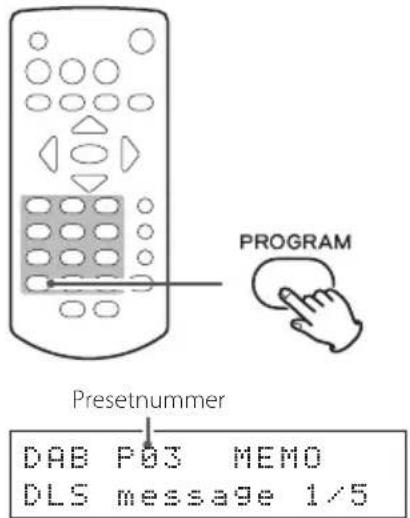
2 Press the PROGRAM button.
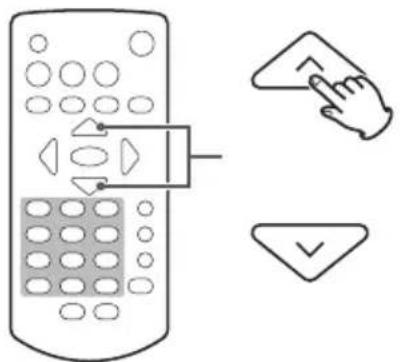
3 Use the direction ( / ) buttons to select the number to preset and press the ENTER button.
Selecting presets
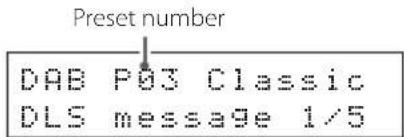
Use the remote control scroll (^\/∨) buttons to select preset stations.
NOTE
●There is no automatic preset function.
- Using Local scan or Full scan will erase presets that have already been added.
The first station found using Local scan or Full scan will automatically be added to P01.
- Presets that have not had a station assigned to them will be skipped and cannot be selected.
In the following example, P01, P05, P06 and P08 have stations assigned, while P02-04 and P07 do not.

1 Press the MENU button.
2 Use the direction (</>) buttons to select the item that you want to set and press the ENTER button.
Press the ▶▶▶ button to cycle through the following items.
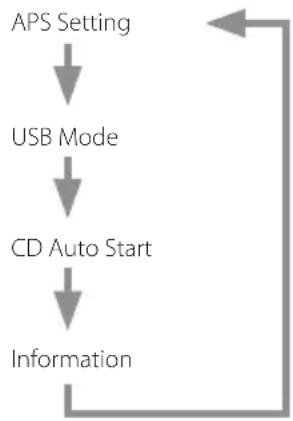
flowchart
graph TD
    A["APS Setting"] --> B["USB Mode"]
    B --> C["CD Auto Start"]
    C --> D["Information"]
    D --> E["Feedback Loop"]
Press the ◀◀◀ button to cycle through these items in reverse order.
3 Use the direction ( I ) buttons to change the setting, and press the ENTER button to confirm the change.
The previous screen will reappear after confirming.
- Press the MENU button instead to cancel the setting change.
Setting the automatic power saving function (APS Setting)
- When shipped new from the factory, the automatic power saving function is set to OFF in models for the US and Canada and ON in models for Europe.
ON
When the input source is CD/USB, the unit will enter standby if playback is stopped or paused for 30 minutes.
OFF
The unit will not enter standby automatically.
USB Mode
●This is set to File (file mode) when shipped new from the factory.
File (file mode)
Select files with all folders treated equally regardless of folder level.
Folder (folder mode)
Select files and folders using the folder hierarchy.
Display example
Menu < APS Setting >
Display example
APS Setting < APS ON >
The automatic power saving function setting appears when the unit is turned on.
Display example
TEAC PD-301 APS ON
Display example
USB Mode < FILE >
CD Auto Start
●This is set to Stop (OFF) when shipped new from the factory.
Stop(OFF)
When a CD is inserted, it will not start automatically playing back.
Playback(ON)
When a CD is inserted and the source is set to CD, playback will start automatically.
Information
This shows the current firmware version.
Display example
CD Auto Start
< Stop(OFF) >
Display example
Information
Ver 1.00
Troubleshooting
General
The unit does not turn on.
(The standby/on ( ⏻/l) button LED does not light.)
→Check that the power cord is completely plugged into the power outlet. If the outlet is switched, confirm that the switch is in the ON position.
→Connect a different electrical device to the outlet to confirm that it is supplying power.
Remote control does not work.
→Point the remote control at the front panel of the unit from a distance of less than about 5 m (16 ft).
The remote control will not work if there is an obstruction between it and the main unit. In this case, try changing the position.
→If the batteries are exhausted, replace both of them with new ones.
A television set or another device operates in error.
→Some televisions that are able to receive signals from wireless remote controls might be operated in error by this unit's remote control. If this should occur, use the main unit's buttons.
No or very little sound is output.
→Confirm connections with the amplifier.
→Confirm connections with the speakers and other devices.
There is noise.
→ Place the unit as far away as possible from TVs, microwave ovens and other devices that have strong magnetism.
Radio
A station cannot be received. The reception is poor.
→Select a broadcast station.
→If reception is poor, try repositioning the antenna.
→If a TV is near the unit, turn the TV off.
→Keep USB flash drives disconnected from the unit when receiving radio signals. A connected USB flash drive could cause noise or other issues.
Stereo broadcasts become mono.
→Press the remote control FM MODE button to select stereo.
CD Player
Playback is not possible.
→If the disc is upside down, reload it with the labeled side up.
→If the disc is dirty, wipe it clean.
→Depending on the quality and recording conditions of the disc, some CD-R/CD-RW discs cannot be played back.
→CD-R/CD-RW discs that have not been finalized cannot be played back.
→Vibrations can cause the sound to skip. Install this unit in a stable location.
→If the disc is dirty, wipe it clean.
→Do not use discs that are scratched or cracked.
The sound skips.
MP3, WMA, AAC and WAV files
Playback is not possible.
→Check the file extension. Files are recognized by their extensions: ".mp3" for MP3 files, ".wma" for WMA files, ".m4a" for AAC files and ".wav" for WAV files.
→The MP3/WMA/AAC/WAV file might be damaged.
→Check the file format. This unit can play MP3, WMA, AAC and WAV files. However, it cannot play WAV and AAC files from a CD (page 35).
"NO USB" appears and the USB flash drive is not recognized.
→Try formatting the USB flash drive with a computer. This should rewrite the FAT data, making it possible for this unit to recognize it. (WARNING: formatting will erase all files on the USB flash drive.)
The names of tracks, artists and albums are not shown.
→There is no ID3 tag information for the music file. Use a computer, for example, to prepare MP3/WMA/AAC files with corrected ID3 tag information. ID3 tags cannot be used with WAV files.
Some characters are not shown correctly.
If the file information uses Japanese, Chinese or other double-byte characters, playback is possible but the name will not be shown correctly.
"No Music file" appears on the display
The disc or USB flash drive does not contain any playable audio files. Load a disc or USB flash drive that contains playable audio files.
Since this unit uses a microcontroller, external noise and other interference can cause the unit to malfunction. If this occurs, unplug the power cord, wait for a while, and then turn the power back on to restart operations.
Specifications
CD Player
Playback media....CD-DA, CD-ROM/R/RW*
Only 12cm discs can be used
Format ISO9660 LEVEL 1/2/JOLIET
Maximum number of files ..... 300 (including folders)
Maximum number of folders....50
*Only CD-RW discs in CD-DA format supported
USB
Supported USB devices..... USB mass storage device class
Interface compatibility.... USB 2.0 (Full speed)
USB 1.1 (High speed)
USB3.0
File systems....FAT16, FAT32
Maximum number of files .... 300 (including folders)
Maximum number of folders....50
USB output voltage.... DC 5 V
USB power supply current .... 500 mA maximum
playable audio formats
WAV (USB only)
Extension.....".wav",".WAV"
Quantization bit depth 16-bit
Sampling frequency....44.1 kHz, 48 kHz
MP3
Extension.....".mp3",".MP3"
Bit rate .... 32 kbps – 320 kbps or VBR
Sampling frequency
16 kHz, 22.05 kHz, 24 kHz, 32 kHz, 44.1 kHz, 48 kHz
Supported standards ..... MPEG-1/2 Audio Layer-3
WMA
Extension.....".wma",".WMA"
Bit rate .... 32 kbps – 320 kbps or VBR
Sampling frequency
8 kHz, 11.025 kHz, 16 kHz, 22.05 kHz,
32 kHz, 44.1 kHz, 48 kHz
Supported standard......WMA ver.9
(DRM not supported)
AAC (USB only)
Extension.....".m4a",".M4A"
Bit rate 8 kbps - 320 kbps or VBR
Sampling frequency
8 kHz, 16 kHz, 32 kHz, 11.025 kHz, 22.05 kHz,
44.1 kHz, 12 kHz, 24 kHz, 48 kHz
Supported standard ..... MPEG4 AAC-LC (Audio Stream)
Tuner
Frequency range
FM 87.5 MHz to 108.0 MHz
DAB tuner
Tuning range....Band III, 174 MHz – 240 MHz
Input 50 Ω, unbalanced
Max signal.... 0 dBm
Sensitivity .... -100 dBm typ
Adjacent channel rejection .... 38 dB typ
Analog audio output
Connector.... RCA connectors (2 channels) × 1
Output impedance 470 Ω or less
Maximum output level (1 kHz/full-scale, into 10 kΩ) .. 2.0 Vrms
Frequency response 20 Hz - 20 kHz (-3 dB)
S/N ratio....113 dB
Distortion 0.005% (1 kHz)
Digital audio output
COAXIAL digital connector × 1
Output impedance....75 Ω
Output level....0.5 Vp-p
OPTICAL digital connector × 1
TOS (JEITA RC-5720C)
Sampling frequency
CD, USB 44.1 kHz
DAB, FM 24 kHz, 32 kHz, 48 kHz
Quantization bit depth 16-bit
General
Power supply....AC 220–240 V (50 Hz, 60 Hz)
Power consumption 8 W
External dimensions
215 × 61 × 232 ~mm (8 1/2'' × 21/2'' × 91/4'' )
(W × H × D, including protrusions)
Weight 2.1 kg (4 3/4 lb)
Operating temperature....+5°C to +35°C
Operating humidity .... 5% to 85% (no condensation)
Storage temperature -20^ to +55^
Included accessories
AC adapter (GPE015A-120125-D) × 1
Power cord for AC adapter × 1
RCA audio cable × 1
Remote control (RC-1323) × 1
Batteries for remote control (AAA) × 2
DAB/FM antenna × 1
Owner's manual (this document) × 1
- Specifications and appearance are subject to change without notice.
●Weight and dimensions are approximate.
●Illustrations in this manual might differ slightly from production models.
INSTRUCTIONS DE SÉCURITÉ IMPORTANTES
ATTENTION
- NE RETIREZ PAS LES CAPOTS EXTERNES OU BOÎTIERS POUR EXPOSER L'ÉLECTRONIQUE. AUCUNE PIÈCE INTERNE N'EST RÉPARABLE PAR L'UTILISATEUR.
- SI VOUS RENCONTREZ DES PROBLÈMES AVEC CE PRODUIT, CONTACTEZ LE MAGASIN OÙ VOUS AVEZ ACHETÉ L'UNITÉ. N'UTILISEZ PAS LE PRODUIT TANT QU'IL N'A PAS ÉTÉ RÉPARÉ.
- L'UTILISATION DE COMMANDES, DE RÉGLAGES OU LE SUIVI DE PROCÉDURES AUTRES QUE CE QUI EST DÉCRIT DANS CE DOCUMENT PEUT PROVOQUER UNE EXPOSITION À UN RAYONNEMENT DANGEREUX.
natural_image
Symbolic icon of a person lifting a ladder inside a circle (no text or symbols)H Touche Lecture/Pause (▶/II)
Antenne extérieure
j Touche Lecture/Pause (▶/II)
natural_image
Diagram of a battery pack with an open casing and internal components, showing charge distribution (no text or labels)natural_image
Line drawing of a hand holding a circular object with a flat top (no text or symbols)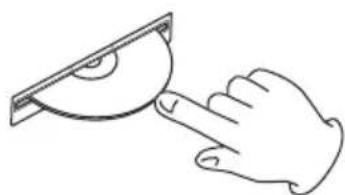
natural_image
Line drawing of a hand pointing at a curved object on a rectangular stand (no text or symbols)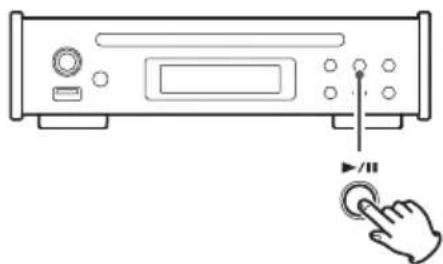
natural_image
Line drawing of a CD-ROM front panel with a finger pointing to the right button (no text or symbols present)natural_image
Diagram of a computer monitor with an arrow pointing to the left port, showing no text or symbols.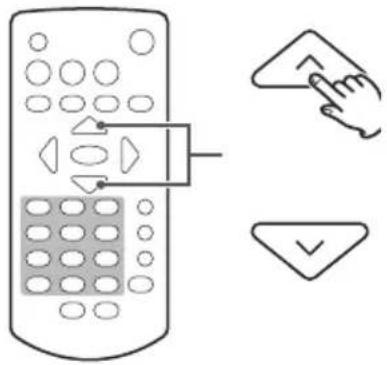
Dimmer
Temps total de lecture (minutes/secondes)
En lecture
natural_image
Line drawing of a CD-ROM with a finger pointing to the right button (no text or symbols present)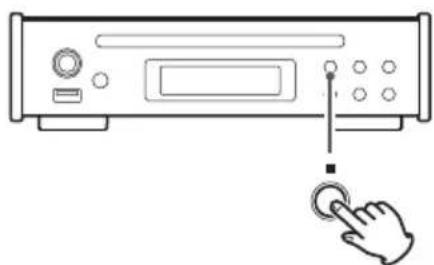
natural_image
Line drawing of a CD-ROM with a hand cursor clicking a button (no text or symbols)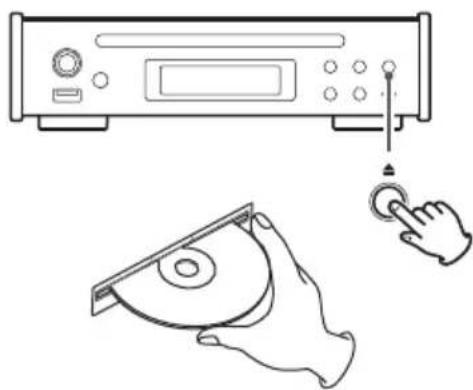
natural_image
Illustration of a CD-ROM front panel, a hand inserting a button to a CD, and a close-up of its disc (no text or symbols)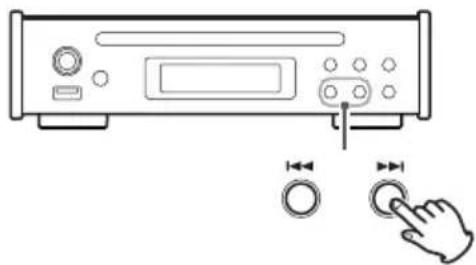
natural_image
Line drawing of a CD-ROM front panel with buttons and a finger pressing the button (no text or symbols)flowchart
graph TD
    A["USB FILE02.mp3\n001 STOP"] --> B["USB □FOLDER01\n001 STOP"]
    B --> C["USB □FOLDER02\n001 STOP"]
    C --> D["USB □FOLDER03\n001 STOP"]
    D --> E["USB FILE01.mp3\n001 STOP"]
CD STOP Program Clear?
Préréglages (presets) de stations de radio
natural_image
Line drawing of a remote control with a hand pressing a button labeled 'PTY' (no text or symbols on the device itself)FMPTYSEARCH < NEWS >
RDS (suite)
NEWS (nouvelles) :
Émissions sportives.
flowchart
graph TD
    A["Local scan"] --> B["Full scan"]
    B --> C["Manual tune"]
    C --> D["DRC (Dynamic Range Control)"]
    D --> E["Feedback Loop"]
Local scan (balayage local)
DAB Local scan L.scan-sure?
DAB Local scan Scanning...
Full Scan (balayage automatique complet)
DAB Full scan
Full scan-sure?
DAB Full scan Scanning...
Manual tune (syntonisation manuelle)
Folder (mode dossier)
Dimensions externes .... 215 × 61 × 232 mm (L × H × P, hors saillies)
Poids 2,1 kg
natural_image
Symbolic icon of a person climbing a ladder inside a circle (no text or symbols)This product is protected by certain intellectual property rights of Microsoft. Use or distribution of such technology outside of this product is prohibited without a license from Microsoft.
COAXIAL: cable digital coaxial RCA.
Antena exterior
natural_image
Diagram of a battery pack with an open casing and internal components, showing charge distribution (no text or labels)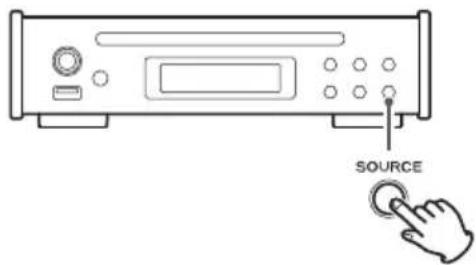
natural_image
Line drawing of a hand holding a circular object with a flat top (no text or symbols)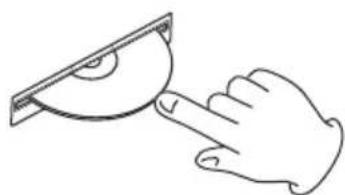
natural_image
Line drawing of a hand holding a protractor and pointing at it (no text or symbols)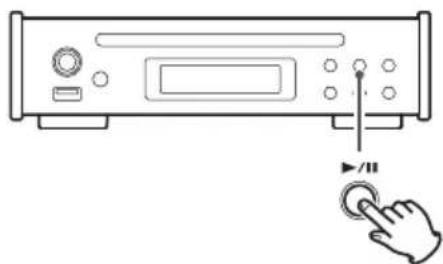
natural_image
Line drawing of a CD-ROM front panel with a finger pointing to the right button (no text or symbols present)natural_image
Diagram of a computer monitor with an attached USB port, showing no text or symbolsAtenuador
USB: WAV, MP3, WMA, AAC.
natural_image
Line drawing of a CD-ROM with a finger pointing to the right button (no text or symbols)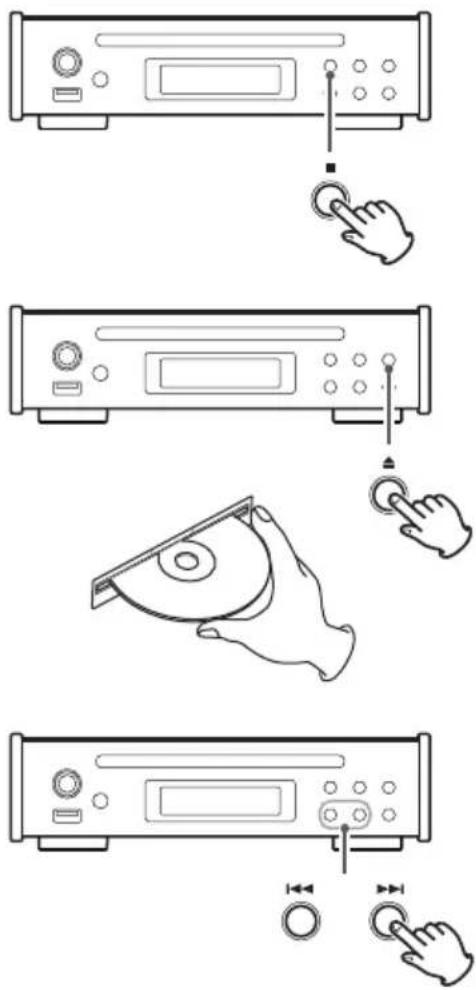
flowchart
graph TD
    A["USB FILE02.mp3\n001 STOP"] --> B["USB □FOLDER01\n001 STOP"]
    B --> C["USB □FOLDER02\n001 STOP"]
    C --> D["USB □FOLDER03\n001 STOP"]
    D --> E["USB FILE01.mp3\n001 STOP"]
flowchart
graph TD
    A["USB FOLDER01\n001 STOP"] --> B["USB FILE03.mp3\n001 STOP"]
CD STOP Program Clear?
Búsqueda PTY
FMPTYSEARCH < NEWS >
RDS (continuación)
NEWS:
DAB Local scan L.scan-sure?
DAB Local scan Scanning...
DAB Full scan Full scan-sure?
DAB Full scan Scanning...
flowchart
graph TD
    A["Local scan"] --> B["Full scan"]
    B --> C["Manual tune"]
    C --> D["DRC (Dynamic Range Control)"]
    D --> A
DRC
APS Setting < APS ON >
16 kHz, 22.05 kHz, 24 kHz, 32 kHz, 44.1 kHz, 48 kHz
8 kHz, 11.025 kHz, 16 kHz, 22.05 kHz,
32 kHz, 44.1 kHz, 48 kHz
8 kHz, 16 kHz, 32 kHz, 11.025 kHz,
22.05 kHz, 44.1 kHz, 12 kHz, 24 kHz, 48 kHz
FM De 87.5 MHz a 108.0 MHz
Terminal digital ÓPTICO × 1
TOS (JEITA RC-5720C)
DAB, FM 24 kHz, 32 kHz, 48 kHz
natural_image
Symbolic icon of a person lifting a ladder inside a circle (no text or symbols)Außenantenne
natural_image
Diagram of a battery pack with an open rear panel and internal components, showing charge distribution (no text or labels)Batteriewechsel
natural_image
Line drawing of a CD-ROM with a dial and a hand cursor icon (no text or symbols)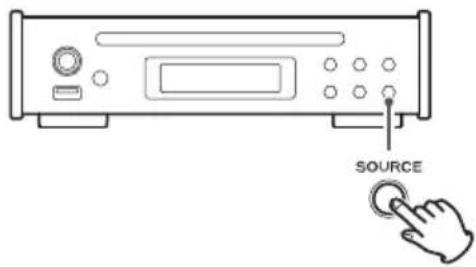
Wiedergabe einer CD
natural_image
Line drawings of two hands holding a CD or DVD disc, showing different angles (no text or symbols)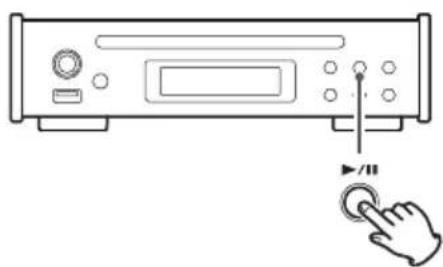
natural_image
Line drawing of a CD-ROM with a finger pressing a button, no text or symbols presentnatural_image
Diagram of a CD-ROM device with an external USB port and indicator lights (no text or symbols)Dimmer
CD: CD-DA (Audio-CD), MP3, WMA
USB: WAV, MP3, WMA, AAC
natural_image
Line drawing of a CD-ROM with a finger pointing to the right button (no text or symbols)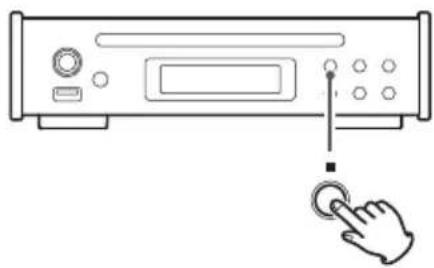
natural_image
Line drawing of a CD-ROM with a finger pointing to the right button (no text or symbols)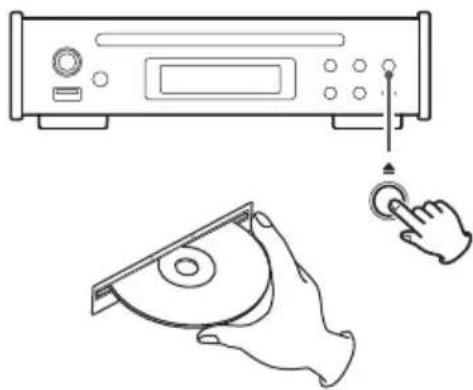
natural_image
Illustration of a CD-ROM with a hand interacting with a circular button (no text or symbols)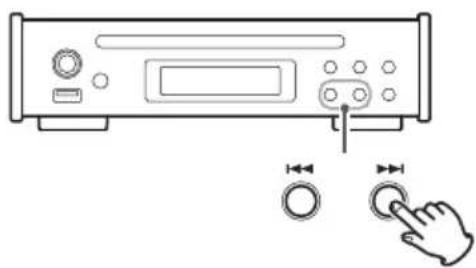
natural_image
Line drawing of a CD-ROM front panel with buttons and a finger pointing to the right button (no text or symbols present)flowchart
graph TD
    A["USB FILE02.mp3\n001 STOP"] --> B["USB OFOLDER01\n001 STOP"]
    B --> C["USB OFOLDER02\n001 STOP"]
    C --> D["USB OFOLDER03\n001 STOP"]
    D --> E["USB FILE01.mp3\n001 STOP"]
flowchart
graph TD
    A["USB FOLDER01\n001 STOP"] --> B["USB FILE03.mp3\n001 STOP"]
CD STOP Program Clear?
Preset-Nummer
RDS
Program service (PS)
RDS Program type (PTY)
FMPTYSEARCH < NEWS >
RDS (Fortsetzung)
NEWS:
$$ \begin{array}{c} \text {DAB Local scan} \ \text {L.scan - sure?} \end{array} $$
$$ \begin{array}{c} \text {DAB Local scan} \ \text {Scanning...} \end{array} $$
Full scan (auto scan)
$$ \begin{array}{c} \text {DAB Full scan} \ \text {Full scan - sure?} \end{array} $$
$$ \begin{array}{c} \text {DAB Full scan} \ \text {Scanning...} \end{array} $$
Manual tune
$$ \begin{array}{c} \text {DAB ManualTune} \ = = = = = = = = = = = = = \end{array} $$
flowchart
graph TD
    A["Local scan"] --> B["Full scan"]
    B --> C["Manual tune"]
    C --> D["DRC (Dynamic Range Control)"]
    D --> E["Feedback Loop"]
DRC
APS Setting < APS ON >
16 kHz, 22,05 kHz, 24 kHz, 32 kHz, 44,1 kHz, 48 kHz
8 kHz, 11,025 kHz, 16 kHz, 22,05 kHz,
32 kHz, 44, 1 kHz, 48 kHz
8 kHz, 16 kHz, 32 kHz, 11,025 kHz, 22,05 kHz,
44,1 kHz, 12 kHz, 24 kHz, 48 kHz
DAB, FM 24 kHz, 32 kHz, 48 kHz
natural_image
Symbolic icon of a person pushing a ladder inside a circle (no text or symbols)Antenna esterna
natural_image
Diagram of a battery pack with an open casing and internal components, showing charge distribution (no text or labels)natural_image
Line drawing of a CD-ROM with a dial and a hand cursor icon (no text or symbols)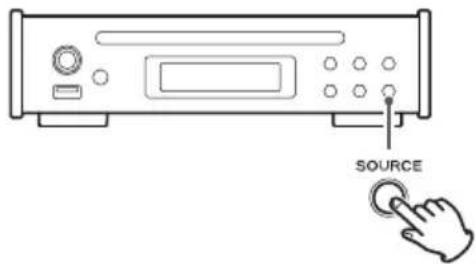
natural_image
Line drawing of a hand holding a circular object with a flat top (no text or symbols)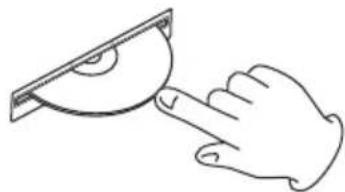
natural_image
Line drawing of a hand pointing at a curved object with angular markings (no text or symbols)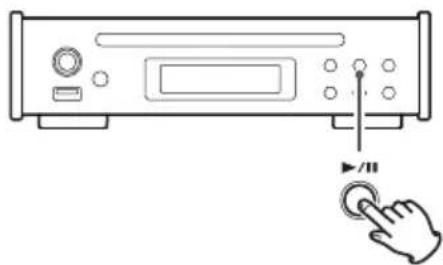
natural_image
Line drawing of a CD-ROM with a finger pressing the button (no text or symbols)natural_image
Diagram of a computer monitor with an attached USB port, showing no text or symbols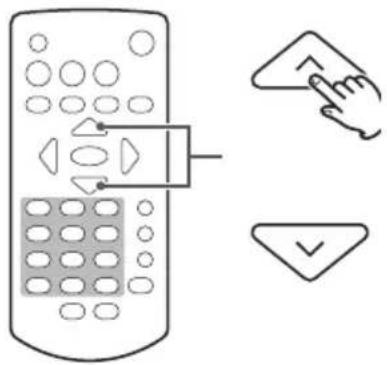
Dimmer
natural_image
Line drawing of a CD-ROM with a finger pointing to the right button (no text or symbols)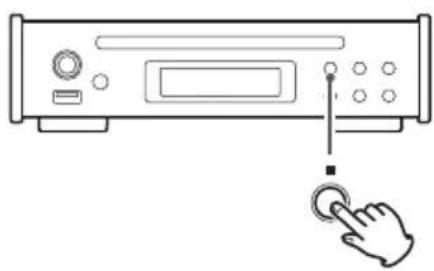
natural_image
Line drawing of a CD-ROM device with a finger pointing to the right button (no text or symbols)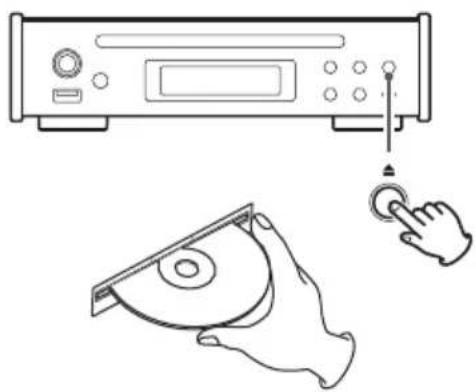
natural_image
Illustration of a CD-ROM front panel, a hand inserting a button to a CD, and a separate close-up of its disc (no text or symbols)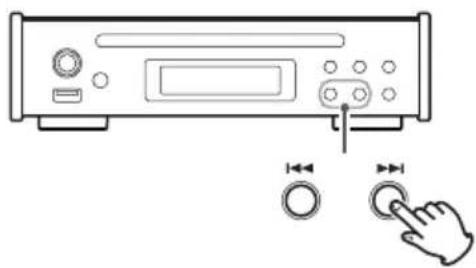
natural_image
Line drawing of a CD-ROM front panel with buttons and a finger pressing the button (no text or symbols)Selezione dei file
![Diagram showing a remote control with directional buttons and a hand clicking a play button labeled '[///]](/content/2026/04/694154/images/a6d157cafeddb8721def59aeed3c8f96d02b20e11a70206d79f0c372bc13b4ff.jpg)
| CD | STOP |
| Program | Clear? |
Program service (PS)
RDS Program type (PTY)
Ricerca PTY
FMPTYSEARCH < NEWS >
RDS (continua)
NEWS:
flowchart
graph TD
    A["Local scan"] --> B["Full scan"]
    B --> C["Manual tune"]
    C --> D["DRC (Dynamic Range Control)"]
    D --> E["Feedback Loop"]
Local Scan
$$ \begin{array}{c} \text {DAB Local scan} \ \text {L.scan - sure?} \end{array} $$
$$ \begin{array}{c} \text {DAB Local scan} \ \text {Scanning...} \end{array} $$
Full scan (auto scan)
$$ \begin{array}{c} \text {DAB Full scan} \ \text {Full scan - sure?} \end{array} $$
$$ \begin{array}{c} \text {DAB Full scan} \ \text {Scanning...} \end{array} $$
Manual tune
DRC
APS Setting < APS ON >
File MP3, WMA, AAC e WAV
USB 1.1 (High speed)
USB3.0
File system ...... FAT16, FAT32
16 kHz, 22.05 kHz, 24 kHz, 32 kHz, 44.1 kHz, 48 kHz
Standard supportati ..... MPEG-1/2 Audio Layer-3
WMA
Estensione .....".wma",".WMA"
Bit rate 32 kbps - 320 kbps or VBR
8 kHz, 11.025 kHz, 16 kHz, 22.05 kHz,
32 kHz, 44.1 kHz, 48 kHz
Standard supportati ...... WMA ver.9
8 kHz, 16 kHz, 32 kHz, 11.025 kHz,
22.05 kHz, 44.1 kHz, 12 kHz, 24 kHz, 48 kHz
Standard supportati ..... MPEG4 AAC-LC (Audio Stream)
Sintonizzatore
Gamma di frequenze
FM.....da 87.5 MHz a 108.0 MHz
Sintonizzatore DAB
DAB, FM 24 kHz, 32 kHz, 48 kHz
(L× A × P, parti sporgenti incluse)
Peso....2,1 kg
natural_image
Symbolic icon of a person pushing a ladder inside a circle (no text or symbols)Specificaties....205
Buitenantenne
natural_image
Diagram of a battery pack with an open rear battery and internal components (no text or symbols)natural_image
Line drawings of two hands holding a CD or DVD disc, showing different angles (no text or symbols)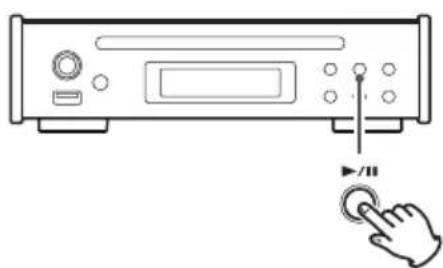
natural_image
Line drawing of a CD-ROM with a finger pointing to the right button (no text or symbols present)natural_image
Diagram of a computer monitor with an arrow pointing to the left port, showing no text or symbols.FM-stations kiezen
Dimmer
natural_image
Line drawing of a CD-ROM with a finger pointing to the right button (no text or symbols present)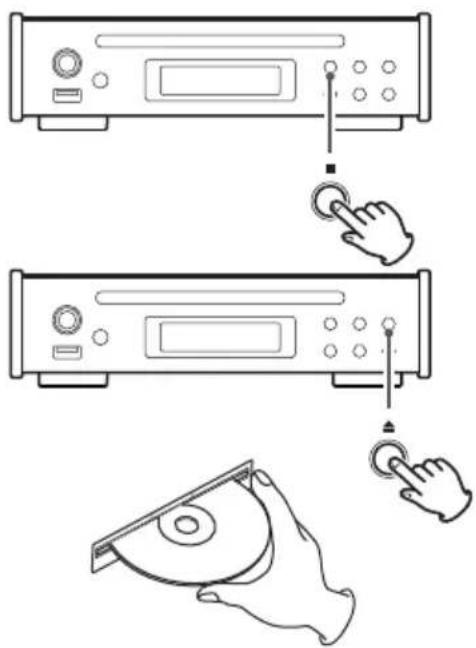
natural_image
Line drawing of a CD-ROM front panel with buttons and a finger pointing to the right button (no text or symbols present)flowchart
graph TD
    A["USB File02.mp3\n001 STOP"] --> B["USB OFOLDER01\n001 STOP"]
    B --> C["USB OFOLDER02\n001 STOP"]
    C --> D["USB OFOLDER03\n001 STOP"]
    D --> E["USB FILE01.mp3\n001 STOP"]
Pictogram knippert niet. Pictogram knippert.
De ontvangstfrequentie verlagen
RDS programmatype (PTY)
PTY-zoekactie
natural_image
Line drawing of a remote control with a hand pressing a button labeled 'PTY' (no text or symbols on the device itself)FMPTYSEARCH < NEWS >
RDS (vervolg)
NEWS:
flowchart
graph TD
    A["Local scan"] --> B["Full scan"]
    B --> C["Manual tune"]
    C --> D["DRC (Dynamic Range Control)"]
    D --> A
Local scan
DAB Local scan L.scan-sure?
DAB Local scan Scanning...
DAB Full scan
Full scan-sure?
DAB Full scan Scanning...
Manual tune (handmatige afstemming)
DRC

USB 1.1 (high-speed)
USB 3.0
Bestandssystemen....FAT16, FAT32
16 kHz, 22,05 kHz, 24 kHz, 32 kHz, 44,1 kHz, 48 kHz
Ondersteunde standaarden . . . . MPEG-1/2 Audio Layer-3
WMA
Extensie.....".wma",".WMA"
Bit rate 32–320 kbps of VBR
Samplingfrequentie
8 kHz, 11,025 kHz, 16 kHz, 22,05 kHz,
32 kHz, 44, 1 kHz, 48 kHz
8 kHz, 16 kHz, 32 kHz, 11,025 kHz, 22,05 kHz,
44,1 kHz, 12 kHz, 24 kHz, 48 kHz
Ondersteunde standaard .MPEG4 AAC-LC (Audio Stream)
Tuner
Frequentiebereik
FM 87,5–108,0 MHz
DAB-tuner
Afstemmingsbereik.....Band III, 174 MHz – 240 MHz
DAB, FM 24 kHz, 32 kHz, 48 kHz
natural_image
Symbolic icon of a person pushing a ladder inside a circle (no text or symbols)Utomhusantenn
natural_image
Diagram of a battery pack with an open rear panel and internal components, showing charge distribution (no text or labels)natural_image
Line drawing of a front-mounted electronic device with ports and a central screen (no text or symbols)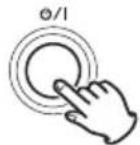
natural_image
Line drawing of a front panel with buttons and a display (no text or symbols)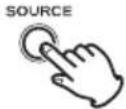
natural_image
Line drawing of a hand holding a circular disc with a flat top (no text or symbols)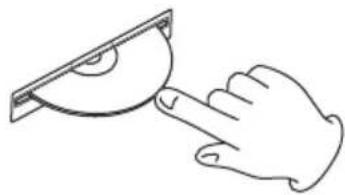
natural_image
Line drawing of a hand pointing at a curved object on a rectangular plate (no text or symbols)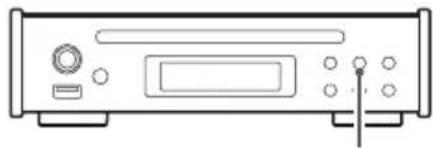
natural_image
Line drawing of a CD-ROM front panel with buttons and indicator lights (no text or symbols)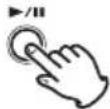
natural_image
Diagram of a CD-ROM device with an external USB port and indicator lights (no text or symbols)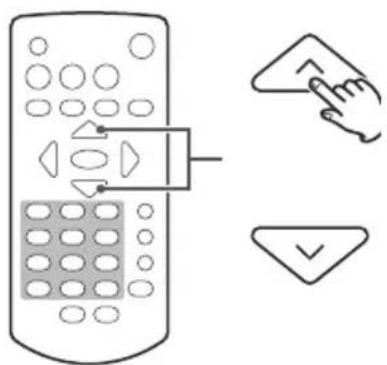
Dimmer
natural_image
Line drawing of a CD-ROM with a finger pressing a button labeled '▶/II' (no text or symbols on the device itself)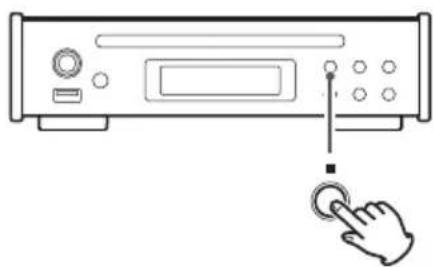
natural_image
Line drawing of a CD-ROM front panel with a finger pressing the button (no text or symbols)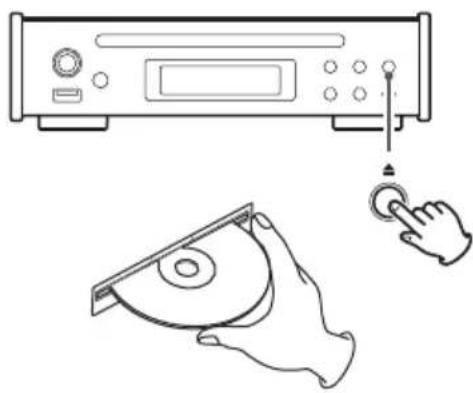
natural_image
Illustration of a CD-ROM front panel, a hand inserting a CD into a slot, and a finger pressing a button (no text or symbols)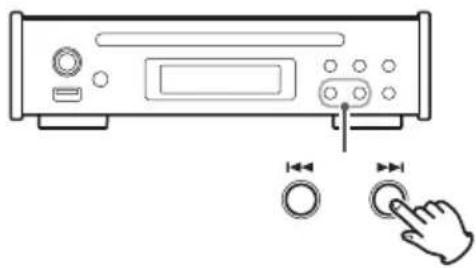
natural_image
Line drawing of a CD-ROM front panel with buttons and a finger pressing the button (no text or symbols)Välja filer i mappar
flowchart
graph TD
    A["USB FILE02.mp3\n001 STOP"] --> B["USB OFOLDER01\n001 STOP"]
    B --> C["USB OFOLDER02\n001 STOP"]
    C --> D["USB OFOLDER03\n001 STOP"]
    D --> E["USB FILE01.mp3\n001 STOP"]
□konen blinkar inte.

Ikonen blinkar.
Ändra mappnivån
| CD | STOP |
| Program | Clear? |
Minska den mottagna frekvensen
PTY-sökning
natural_image
Line drawing of a remote control with a hand pressing a button labeled 'PTV' (no text or symbols on the device itself)FMPTYSEARCH < NEWS >
RDS (fortsättning)
NEWS:
flowchart
graph TD
    A["Local scan"] --> B["Full scan"]
    B --> C["Manual tune"]
    C --> D["DRC (Dynamic Range Control)"]
    D --> E["Feedback Loop"]
Local scan
DAB Local scan L.scan-sure?
DAB Local scan Scanning...
Full scan (automatisk skanning)
DAB Full scan
Full scan-sure?
DAB Full scan Scanning...
Manual tune
APS Setting < APS ON >
USB 1.1 (High speed)
USB 3.0
Filsystem....FAT16, FAT32
Maximalt antal filer .... 300 (inklusive mappar)
Maximalt antal mappar 50
16 kHz, 22,05 kHz, 24 kHz, 32 kHz, 44,1 kHz, 48 kHz
Standarder som stöds ..... MPEG-1/2 Audio Layer-3
WMA
Tillägg.....".wma",".WMA"
Bithastighet....32–320 kbps eller VBR
Samplingsfrekvens
8 kHz, 11,025 kHz, 16 kHz, 22,05 kHz,
32 kHz, 44, 1 kHz, 48 kHz
Stödjad standard ...... WMA ver.9
(DRM stöds inte)
AAC (enbart USB)
Tillägg.....".m4a",".M4A"
Bithastighet 8–320 kbps eller VBR
Samplingsfrekvens
8 kHz, 16 kHz, 32 kHz, 11,025 kHz, 22,05 kHz,
44,1 kHz, 12 kHz, 24 kHz, 48 kHz
Stödjad standard .....MPEG4 AAC-LC (Audio Stream)
Kanalväljare
Frekvensområde
FM 87,5–108,0 MHz
DAB-radio
Mottagningsområde....Band III, 174 MHz – 240 MHz
DAB, FM 24 kHz, 32 kHz, 48 kHz
Kvantisering bitdjup....16 bitars
Allmänt
This product is subject to the legal warranty regulations of the country of purchase. In case of a defect or a problem, please contact the dealer where you bought the product.
In countries/regions other than Europe
This warranty gives you specific legal rights, and you may also have other rights that vary by country, state or province.
If you have a warranty claim or request, please contact the dealer where you bought the product.
1834 Gage Road, Montebello, California 90640 U.S.A. Phone: +1-323-726-0303
TEAC AUDIO EUROPE Gutenbergstr. 3, 82178 Puchheim, Germany Phone: +49-8142-4208-141
This device has a serial number located on its back panel. Please record the serial number and retain it for your records.
Model name: PD-301DAB Serial number

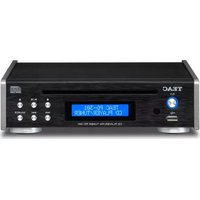
- IMPORTANT SAFETY INSTRUCTIONS
- CAUTION
- Precautions concerning batteries
- IMPORTANT SAFETY INSTRUCTIONS (continued)
- Model for Europe
- Laser information
- Laser:
- For European Customers
- Disposal of electrical and electronic equipment and batteries and/or accumulators
- Included accessoriesTable
- Using the TEAC Global Site
- NOTE
- Before use
- Placement precautions
- Maintenance
- For safety, disconnect the power cord from the outlet before cleaning.
- Notes about discs
- Types of discs that can be played by this unit
- CD-R/CD-RW discs
- Precautions for use
- Notes about discs (contd.)
- If a disc will not load properly
- Storing discs
- Cleaning discs
- Notes about USB flash drives
- ATTENTION
- Names and functions of parts (main unit)
- A Standby/on ( ⏻/l ) button
- B USB port
- C Remote control signal receiver
- D Disc slot
- E Display
- F Stop (■) button
- G Skip (|◀◀/▶▶|) buttons
- H | Play/pause (▶ /II) button
- I SOURCE button
- J Eject (▲) button
- After all connections are complete, connect the power cord's plug to the AC wall outlet.
- Connecting the DAB/FM antenna
- A DAB/FM antenna connector
- B Digital audio output connectors
- C Analog audio output connectors
- D DC power connector (DC IN 12V)
- Indoor antenna
- Outdoor antenna
- Names and functions of parts (remote control)
- a SOURCE button
- b Stop (■) button
- C Eject (▲) button
- d REPEAT button
- e Scroll (^\/∨) buttons
- f Number buttons
- g PROGRAM button
- h RDS/INFO button
- i Standby/on ( ⏻/|) button
- j Play/pause (▶ /II) button
- k Search (◀◀/▶▶) buttons
- I RANDOM button
- m ENTER button
- Using the remote control
- n Skip (|◄◄/►►|) buttons
- Direction (〈/〉) buttons
- DISPLAY button
- p MENU button
- q FM MODE button
- r DIMMER button
- S CLEAR button
- t PTY button
- Installing batteries
- When to replace batteries
- Basic operation
- Selecting the input source
- Press the standby/on ( ⏻/l ) button to turn the unit on.
- Press the SOURCE button to select the input source.
- Playing a CD
- Playing files from a USB flash drive
- Selecting FM stations
- Use the remote control scroll (^^/∨) buttons to select preset stations.
- Dimmer
- Display information
- Audio CD
- Stopped
- Playing back
- Disc/USB flash drive with audio files
- Listening to files on a CD or USB flash drive
- Starting playback
- Pausing playback
- Stopping playback
- Ejecting a disc
- Skipping to search for a track
- Searching for part of a track
- Direct playback using track numbers (audio CD only)
- Selecting and playing CD/USB tracks
- File mode
- Listening to files on a CD or USB flash drive (continued)
- Folder mode
- Folder mode operation examples
- Selecting files/folders on the same level
- Changing the folder level
- Skip mode
- Repeat playback
- Random playback
- Program playback
- Using program playback
- Press the PROGRAM button.
- Use the skip (1◄◄/►►) or number buttons to select a track and press the PROGRAM button to add it to the program.
- Press the play/pause (▶/Ⅱ) button to start program playback.
- Checking and changing the program
- Press the PROGRAM button twice.
- Use the skip (|◄◄/►►|) buttons to change the program number and check track numbers.
- Changing the program
- Removing a track from the program
- Press the play/pause (▶/II) button to start program playback.
- Adding tracks to the program
- Select a track and press the PROGRAM button to add it to the program.
- Removing all tracks from the program
- FM mode
- Stereo
- Mono
- Changing the received frequency
- Increasing the received frequency
- Decreasing the received frequency
- Changing the frequency from the main unit
- Listening to FM radio (continued)
- Broadcast station presets
- Setting presets automatically
- Setting presets manually
- RDS
- Tune in to an FM RDS station (see page 25).
- Press the remote control RDS button.
- Program service (PS)
- RDS Program type (PTY)
- RDS Radio text (RT)
- PTY search
- Press the PTY button.
- Use the direction ( / ) buttons to select the desired program.
- Press the ENTER button.
- RDS (continued)
- NEWS:
- AFFAIRS:
- INFO:
- SPORT:
- EDUCATE:
- DRAMA:
- CULTURE:
- SCIENCE:
- VARIED:
- POP M:
- ROCK M:
- EASY M:
- LIGHT M:
- CLASSICS:
- OTHER M:
- WEATHER:
- FINANCE:
- CHILDREN:
- SOCIAL:
- RELIGION:
- PHONE IN:
- TRAVEL:
- LEISURE:
- JAZZ:
- COUNTRY:
- NATION M:
- OLDIES:
- FOLK M:
- DOCUMENT:
- TEST:
- ALARM!
- Setting up your DAB tuner
- Listening to DAB Radio
- Press the SOURCE button to select DAB.
- Select the station you want to listen to using the direction (>) button.
- Setting the DAB display
- DLS message
- Program type
- Ensemble name
- Channel and frequency
- Bit rate
- Date and time
- Signal strength
- Using DAB tuner (continued)
- Using the DAB menu
- Local scan
- Full scan (auto scan)
- Manual tune
- DRC
- Selecting presets
- Setting the automatic power saving function (APS Setting)
- ON
- OFF
- USB Mode
- File (file mode)
- Folder (folder mode)
- CD Auto Start
- Stop(OFF)
- Playback(ON)
- Information
- Troubleshooting
- General
- The unit does not turn on.
- (The standby/on ( ⏻/l) button LED does not light.)
- Remote control does not work.
- A television set or another device operates in error.
- No or very little sound is output.
- There is noise.
- Radio
- A station cannot be received. The reception is poor.
- Stereo broadcasts become mono.
- CD Player
- Playback is not possible.
- The sound skips.
- MP3, WMA, AAC and WAV files
- "NO USB" appears and the USB flash drive is not recognized.
- The names of tracks, artists and albums are not shown.
- Some characters are not shown correctly.
- "No Music file" appears on the display
- Specifications
- USB
- playable audio formats
- Tuner
- DAB tuner
- Analog audio output
- Digital audio output
- Included accessories
- INSTRUCTIONS DE SÉCURITÉ IMPORTANTES
- H Touche Lecture/Pause (▶/II)
- Antenne extérieure
- j Touche Lecture/Pause (▶/II)
- Préréglages (presets) de stations de radio
- RDS (suite)
- NEWS (nouvelles) :
- Local scan (balayage local)
- Full Scan (balayage automatique complet)
- Manual tune (syntonisation manuelle)
- Folder (mode dossier)
- Antena exterior
- Atenuador
- Búsqueda PTY
- RDS (continuación)
- Außenantenne
- Batteriewechsel
- Wiedergabe einer CD
- RDS (Fortsetzung)
- Antenna esterna
- Ricerca PTY
- RDS (continua)
- File MP3, WMA, AAC e WAV
- Sintonizzatore
- Sintonizzatore DAB
- Buitenantenne
- FM-stations kiezen
- De ontvangstfrequentie verlagen
- RDS programmatype (PTY)
- PTY-zoekactie
- RDS (vervolg)
- Manual tune (handmatige afstemming)
- DAB-tuner
- Utomhusantenn
- Ändra mappnivån
- Minska den mottagna frekvensen
- PTY-sökning
- RDS (fortsättning)
- Full scan (automatisk skanning)
- Kanalväljare
- DAB-radio
- Allmänt
- In countries/regions other than Europe
Brand : TEAC
Model : PD-301DAB-X
Category : Audio Receiver