
SL-D800BT - Audio Receiver TEAC - Free user manual and instructions
Find the device manual for free SL-D800BT TEAC in PDF.


| Product Type | Audio Receiver |
| Brand | TEAC |
| Model | SL-D800BT |
| Power Supply | 230 V ~ 50 Hz |
| Power Consumption | 65 W |
| Dimensions (W x H x D) | 430 x 105 x 380 mm |
| Weight | 5.2 kg |
| Main Functions | CD player, FM/AM tuner, Bluetooth, auxiliary input, amplification 2 x 50 W |
| Output Power | 2 x 50 W (RMS) |
| Audio Inputs | 2 x RCA, 1 x optical, 1 x coaxial |
| Audio Outputs | 2 x speakers, 1 x headphone (3.5 mm) |
| Wireless Connectivity | Bluetooth 4.2 |
| Supported Audio Formats | CD, MP3, WMA, WAV |
| Maintenance and Cleaning | Unplug the device, clean with a soft, dry cloth. Do not use abrasive products. |
| Safety | Do not expose to humidity, do not block ventilation, use only the supplied adapter. |
| Spare Parts and Repairability | Contact TEAC after-sales service for spare parts and repairs. |
| Included Accessories | Remote control, FM antenna, power cable, user manual |
| Protection Rating | IP20 (indoor use only) |
| Operating Temperature | 5 °C to 35 °C |
| Operating Humidity | 20 % to 80 % (without condensation) |
Frequently Asked Questions - SL-D800BT TEAC
User questions about SL-D800BT TEAC
0 question about this device. Answer the ones you know or ask your own.
Ask a new question about this device
Download the instructions for your Audio Receiver in PDF format for free! Find your manual SL-D800BT - TEAC and take your electronic device back in hand. On this page are published all the documents necessary for the use of your device. SL-D800BT by TEAC.
USER MANUAL SL-D800BT TEAC
CD RADIO WITH BLUETOOTH
Bluetooth®
OWNER'S MANUAL MODE D'EMPLOI

IMPORTANT SAFETY INSTRUCTIONS
CAUTION
RISK OF ELECTRIC SHOCK DO NOT OPEN

CAUTION: TO REDUCE THE RISK OF ELECTRIC SHOCK, DO NOT REMOVE COVER (OR BACK). NO USER-SERVICEABLE PARTS INSIDE. REFER SERVICING TO QUALIFIED SERVICE PERSONNEL.

The lightning flash with arrowhead in an equilateral triangle is intended to alert the user to the presence of uninsulated "dangerous voltage" within the product's enclosure that could be of sufficient magnitude to constitute a risk of electric shock to persons.

The exclamation point in an equilateral triangle is intended to alert the user to the presence of important operating and maintenance (servicing) instructions in the literature accompanying the appliance.
WARNING: TO PREVENT FIRE OR SHOCK HAZARD, DO NOT EXPOSE THIS APPLIANCE TO RAIN OR MOISTURE.
CAUTION
- DO NOT REMOVE EXTERNAL CASES OR CABINETS TO EXPOSE THE ELECTRONICS. NO USER SERVICEABLE PARTS ARE INSIDE.
- IF YOU ARE EXPERIENCING PROBLEMS WITH THIS PRODUCT, CONTACT THE STORE WHERE YOU PURCHASED THE UNIT FOR A SERVICE REFERRAL. DO NOT USE THE PRODUCT UNTIL IT HAS BEEN REPAIRED.
- USE OF CONTROLS OR ADJUSTMENTS OR PERFORMANCE OF PROCEDURES OTHER THAN THOSE SPECIFIED HEREIN COULD RESULT IN HAZARDOUS RADIATION EXPOSURE.
IN USA/CANADA, USE ONLY ON 120 V SUPPLY.
1) Read these instructions.
2) Keep these instructions.
3) Heed all warnings.
4) Follow all instructions.
5) Do not use this apparatus near water.
6) Clean only with dry cloth.
7) Do not block any ventilation openings. Install in accordance with the manufacturer's instructions.
8) Do not install near any heat sources such as radiators, heat registers, stoves, or other apparatus (including amplifiers) that produce heat.
9) Do not defeat the safety purpose of the polarized or grounding-type plug. A polarized plug has two blades with one wider than the other. A grounding type plug has two blades and a third grounding prong. The wide blade or the third prong are provided for your safety. If the provided plug does not fit into your outlet, consult an electrician for replacement of the obsolete outlet.
10) Protect the power cord from being walked on or pinched particularly at plugs, convenience receptacles, and the point where they exit from the apparatus.
11) Only use attachments/accessories specified by the manufacturer.
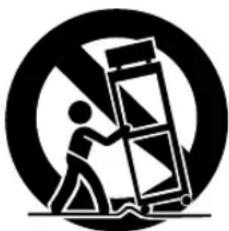
12) Use only with the cart, stand, tripod, bracket, or table specified by the manufacturer, or sold with the apparatus. When a cart is used, use caution when moving the cart/apparatus combination to avoid injury from tip-over.
natural_image
Symbolic icon of a person lifting a large object, enclosed in a circle (no text or symbols)13) Unplug this apparatus during lightning storms or when unused for long periods of time.
14) Refer all servicing to qualified service personnel. Servicing is required when the apparatus has been damaged in any way, such as power-supply cord or plug is damaged, liquid has been spilled or objects have fallen into the apparatus, the apparatus has been exposed to rain or moisture, does not operate normally, or has been dropped.
- The apparatus draws nominal non-operating power from the AC outlet with its POWER or STANDBY/ON switch not in the ON position.
- The mains plug is used as the disconnect device, the disconnect device shall remain readily operable.
- Caution should be taken when using earphones or headphones with the product because excessive sound pressure (volume) from earphones or headphones can cause hearing loss.
CAUTION
- Do not expose this apparatus to drips or splashes.
- Do not place any objects filled with liquids, such as vases, on the apparatus.
- Do not install this apparatus in a confined space such as a book case or similar unit.
- The apparatus should be located close enough to the AC outlet so that you can easily reach the power cord plug at any time.
- If the product uses batteries (including a battery pack or installed batteries), they should not be exposed to sunshine, fire or excessive heat.
- CAUTION for products that use replaceable lithium batteries: there is danger of explosion if a battery is replaced with an incorrect type of battery. Replace only with the same or equivalent type.
This product is protected by certain intellectual property rights of Microsoft. Use or distribution of such technology outside of this product is prohibited without a license from Microsoft.
MPEG Layer-3 audio coding technology licensed from Fraunhofer IIS and Thomson.
The Bluetooth® word mark and logos are registered trademarks owned by Bluetooth SIG, Inc. and any use of such marks by TEAC CORPORATION is under license.
Other company names and product names in this document are the trademarks or registered trademarks of their respective owners.
IMPORTANT SAFETY INSTRUCTIONS (continued)
Precautions concerning batteries
Misuse of batteries could cause them to rupture or leak leading to fire, injury or the staining of nearby things. Please read and observe the following precautions carefully.
- Be sure to insert the batteries with correct positive (⊕) and negative (⊖) orientations.
- Use batteries of the same type. Never use different types of batteries together.
- If the remote control is not used for a long time (more than a month), remove the batteries to prevent them from leaking.
- If the batteries leak, wipe away the leakage inside the battery compartment and replace the batteries with new ones.
- Do not use batteries of types other than those specified. Do not mix new batteries with old ones or use different types of batteries together.
- Do not heat or disassemble batteries. Never throw batteries into fire or water.
- Do not carry or store batteries with other metallic objects. The batteries could short circuit, leak or explode.
- Never recharge a battery unless it is confirmed to be a rechargeable type.
WARNING
DO NOT INGEST BATTERY, CHEMICAL BURN HAZARD
- The remote control supplied with this product contains a coin/button cell battery. If the coin/button cell battery is swallowed, it can cause severe internal burns in just 2 hours and can lead to death.
- Keep new and used batteries away from children. If the battery compartment does not close securely, stop using the product and keep it away from children.
If you think batteries might have swallowed or placed inside any part of the body, seek immediate medical attention.
Laser Information
This product contains a semiconductor laser system inside the cabinet and is classified as a "CLASS 1 LASER PRODUCT".
To prevent being exposed to the laser beam, do not try to open the enclosure.
Laser:
Type: SF-P101VZ
Manufacturer: LIAN ZHONG ELECTRONIC TECHNOLOGY (HK) Co., LTD.
Laser output: Less than 0.5 mW
Wavelength: 790 ± 10 nm
Model for USA
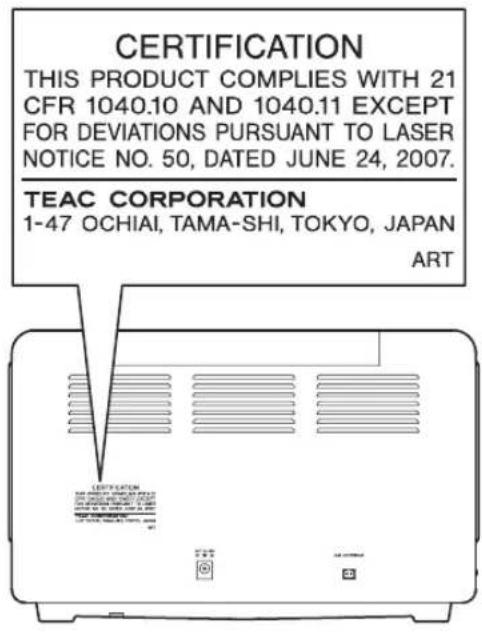
This product has been designed and manufactured according to FDA regulations "title 21, CFR, chapter 1, subchapter J, based on the Radiation Control for Health and Safety Act of 1968", and is classified as class I laser product. There is not hazardous invisible laser radiation during operation because invisible laser radiation emitted inside of this product is completely confined in the protective housings.
The label required in this regulation is as follows:
Wireless equipment precautions
Compliance of radio transmitter and interference
Model for USA
This device complies with Part.15 of FCC Rules.
Operation is subject to the following two conditions:
1) This device may not cause interference, and
2) This device must accept any interference, including interference that may cause undesired operation.
Labeling of authorization
FCC ID: TZI-SLD800BT
Model for Canada
Compliance of radio transmitter
This device complies with Industry Canada licence-exempt RSS standard(s). Operation is subject to the following two conditions: (1) this device may not cause interference, and (2) this device must accept any interference, including interference that may cause undesired operation of the device.
Labeling of authorization
IC: 7234A-SLD800BT
CAUTION
Changes or modifications not expressly approved by the party responsible for compliance could void the user's authority to operate the equipment.
CAUTION
Authorization of wireless devices are different in countries or regions. Please use only in the country where you purchased the product.
- Depending on the country, restrictions on the use of Bluetooth wireless technology might exist.
Radiation Exposure requirements
This equipment meets the regulation, which is recognized internationally, for the case of human exposure to radio waves generated by the transmitter.
Statement of compliance
Model for USA
This device complies with FCC radiation exposure limits set forth for an uncontrolled environment.
Model for Canada
The device meets the exemption from the routine evaluation limits in section 2.5 of RSS 102 and compliance with RSS-102 RF exposure, users can obtain Canadian information on RF exposure and compliance.
Information for interference
(FCC requirements)
This equipment has been tested and found to comply with the limits for a Class B digital device, pursuant to Part 15 of the FCC Rules. These limits are designed to provide reasonable protection against harmful interference in a residential installation.
This equipment generates, uses, and can radiate radio frequency energy and, if not installed and used in accordance with the instructions, may cause harmful interference to radio communications.
However, there is no guarantee that interference will not occur in a particular installation.
If this equipment does cause harmful interference to radio or television reception, which can be determined by turning the equipment off and on, the user is encouraged to try to correct the interference by one or more of the following measures.
- Reorient or relocate the equipment and/or the receiving antenna.
- Increase the separation between the equipment and receiver.
- Connect the equipment into an outlet on a circuit different from that to which the receiver is connected.
- Consult the dealer or an experienced radio/TV technician for help.
Bluetooth® notes
When using this unit with a mobile phone or other Bluetooth devices, they should be no more than about 10 m (33 ft) apart. Depending on the circumstances of use, however, the effective transmission distance might be shorter.
Wireless communication with every device that supports Bluetooth wireless technology is not guaranteed.
To determine the compatibility between this unit and another device that supports Bluetooth wireless technology, refer to that device's operation manual or contact the shop where you purchased it.
Contents
Thank you very much for purchasing this TEAC product. Please read this manual carefully before using the unit.
IMPORTANT SAFETY INSTRUCTIONS ..... 2
Wireless equipment precautions....5
Bluetooth ^® notes 5
Before use....6
MP3/WMA files 7
Discs 8
Names and functions of parts (main unit) 10
Names and functions of parts (remote control)....12
Using the remote control 13
Preparation....14
Setting the clock....15
Basic operation....16
Listening to a CD....18
Programmed playback (CD)....20
Repeat/intro/shuffle playback (CD)....22
About MP3/WMA file playback. 24
Listening to audio from a Bluetooth device 25
Pairing with another Bluetooth device 26
Listening to the radio....27
Preset tuning 28
Wakeup timer 30
Sleep timer....32
Troubleshooting....32
Specifications....34
Before use
Included items
Check to be sure the box includes all the supplied accessories shown below. Please contact the store where you purchased this unit if any of these accessories are missing or have been damaged during transportation.
Remote control (RC-1317) × 1
CR2032 button cell battery for remote control × 1
AM antenna × 1
PS-M0926 AC adapter × 1
Owner's manual (this document) × 1
- Keep this manual in a safe place for future reference.
Warranty card × 1
Precautions for use
- Avoid placing the unit in direct sunlight, close to a source of heat or in other similar conditions. Do not place the unit on top of an amplifier or other equipment that might generate heat that exceeds the operating temperature range of this unit. Doing so could cause discoloration, deformation or malfunction.
- As the unit could become warm during operation, always leave sufficient space around it for ventilation. When installing this unit, leave a little space (at least 20 cm (8")) between it and other devices and walls to allow good heat dissipation. When placing it in a rack, for example, leave at least 5 cm (2") open above it and 10 cm (4") open behind it. Failure to provide these gaps could cause heat to build up inside and result in fire.
- DO NOT MOVE THE UNIT DURING PLAYBACK. During playback, the disc rotates. Do not lift or move the unit during playback. Doing so may damage the disc or the unit.
- Always remove the disc before relocating or moving this unit. Moving the unit with a disc inside could damage the disc or could cause a malfunction.
MP3/WMA files
- Do not open the cabinet as this might result in damage to the circuitry or electrical shock. If a foreign object should get into the unit, contact your dealer.
- If a TV is turned on while the unit is on, static might appear on the TV screen depending on the characteristics of the TV broadcast signal. If this occurs, put this unit into standby mode (off) when using the TV.
Product registration
Customers in the USA, please visit the following TEAC website to register your TEAC product online. http://audio.teac.com/support/registration/
Maintenance
If the surface of the unit gets dirty, wipe it with a soft cloth or use diluted mild liquid soap. Allow the surface of the unit to dry completely before using.
Do not use chemical cleaning cloths, thinner or similar substances as they could damage the surface of the unit.
CAUTION
For safety, disconnect the power cord from the socket before cleaning.
This unit can play MP3 and WMA files that are on CD-R/CD-RW discs.
- Audio file formats that can be played back MP3 (file extension: .mp3)
Bit rate: 8 kbps to 320 kbps
Sampling frequency: 16 kHz to 48 kHz
WMA (file extension: .wma)
Bit rate: 8 kbps to 320 kbps
Sampling frequency: 32 kHz, 44.1 kHz, 48 kHz
Note: Digital Rights Management (DRM) is not supported.
- Up to eight levels of folders supported.
Precautions when creating MP3/WMA files on a computer
- Only discs that have been recorded using the ISO 9660 standard can be played by this unit.
- MP3 and WMA files are recognized by their file extensions (".mp3" for MP3 files and ".wma" for WMA files.) Always include the extension in the file name.
- Files without extensions cannot be recognized. A file cannot be played back regardless of the file name extension, if the data is not in the MP3 or WMA format.
- After recording to a CD-R/CD-RW, always close the session (complete disc creation). This unit cannot play a disc if its session has not been closed.
- A maximum of 999 files and 99 folders on a disc can be played. If the media has more than these maximums, this unit might not be able to correctly play any file that is the 1000th or higher or any folder that is the 100th or higher.
- Discs made with multi-session recording are not supported. Only the first session can be played back.
- Depending on the condition of the disc, playback might not be possible or the sound might skip.
- This unit cannot play copyright-protected audio files.
Discs that can be played on this unit
CDs with the Compact disc Digital Audio logo

CD-R and CD-RW discs that have been created in the audio CD format and finalized correctly. CD-R and CD-RW discs that have been written with MP3 or WMA files and finalized.
This unit can play the above types of discs (without adapters). This unit cannot play any other types of discs.
CAUTION
If you try to play any other type of disc with this unit, loud noises that damage speakers or harm hearing could occur. Never try to play any other type of disc with this unit.
- This unit might not be able to properly play back Copy Control CDs, Dual Discs and other special CDs that do not conform to the Red Book CD standard. Operation and sound quality cannot be guaranteed when special discs are used in this unit. If playback of a special disc should cause trouble, contact the seller of the disc.
CD-R/CD-RW discs
This unit can play back CD-R and CD-RW discs that have been recorded in the audio CD format (CD-DA) and the MP3 or WMA format.
- Discs created by a CD recorder must be finalized with the CD recorder that was used to create the discs before being used with this unit.
- Depending on disc quality and recording conditions, playback of some discs might not be possible. Please see the manual for the device that you used to create the disc.
- If you are uncertain about the handling of a CD-R or CD-RW disc, please contact the seller of the disc directly.
Precautions for use
- Do not use cracked discs because they could damage the unit.
- When writing something on the label side of a disc, use a felt tip permanent marker. The use of a ballpoint pen or other pen with a hard tip could damage the disc, making it unplayable.
- Never use commercially-available CD stabilizers. Doing so could make the disc unplayable or damage the unit.
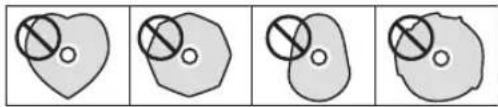
- Never use CDs with irregular shapes, including heart-shaped and octagonal discs because such discs could damage the unit.
natural_image
Four abstract diagrams showing overlapping circles within irregular shapes, no text or symbols presentHandling precautions
● Always load the disc with the label side up.
- If the side of the disc that the signal is recorded on (unlabeled side) has scratches, fingerprints or dirt on it, for example, playback errors could occur. Please handle discs with care.
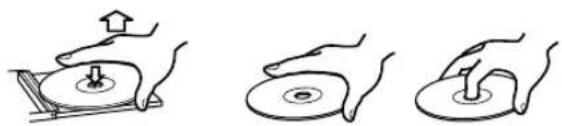
- To remove a disc from its case, press down on the center of the case and hold the disc by its edges. Do not touch the side of the disc that has the data encoded on it (unlabeled side).
natural_image
Three hand-drawn diagrams showing a mechanical press or press operation with no text or symbolsRemoval from case Holding by edges
Storage precautions
- Discs should be stored in their cases when not being used. Failure to do so could result in warping and scratches.
- Do not leave discs in places that are exposed to direct sunlight or that are very humid or hot. Long exposure to such conditions could warp or degrade discs, making them unplayable.
- Since CD-R/CD-RW discs are more susceptible to the effects of heat and ultraviolet rays compared to commercial CDs, do not leave them for long periods of time in places that are, for example, exposed to direct sunlight or near equipment that generate heat.
- Smudges on a disc might cause the sound to skip or degrade the sound quality. Always clean discs before storing them.
Maintenance
- If the side of the disc that has the data encoded on it (unlabeled side) becomes dirty with fingerprints or dust, use a soft cloth to wipe the surface from the center directly toward the edge.
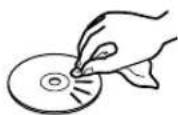
- Never use record cleaners, antistatic treatments, thinners or similar chemicals to clean discs. Such chemicals could harm the surface of the disc.
Names and functions of parts (main unit)
Top
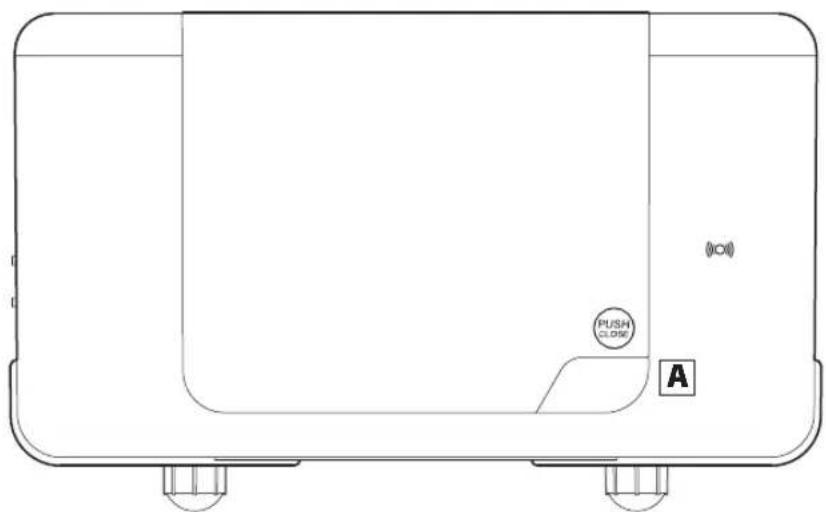
A Open/close button (▲)
Push to open the lid.
B STANDBY/ON button
Press this button to turn the unit on or put it in standby.
C Function buttons
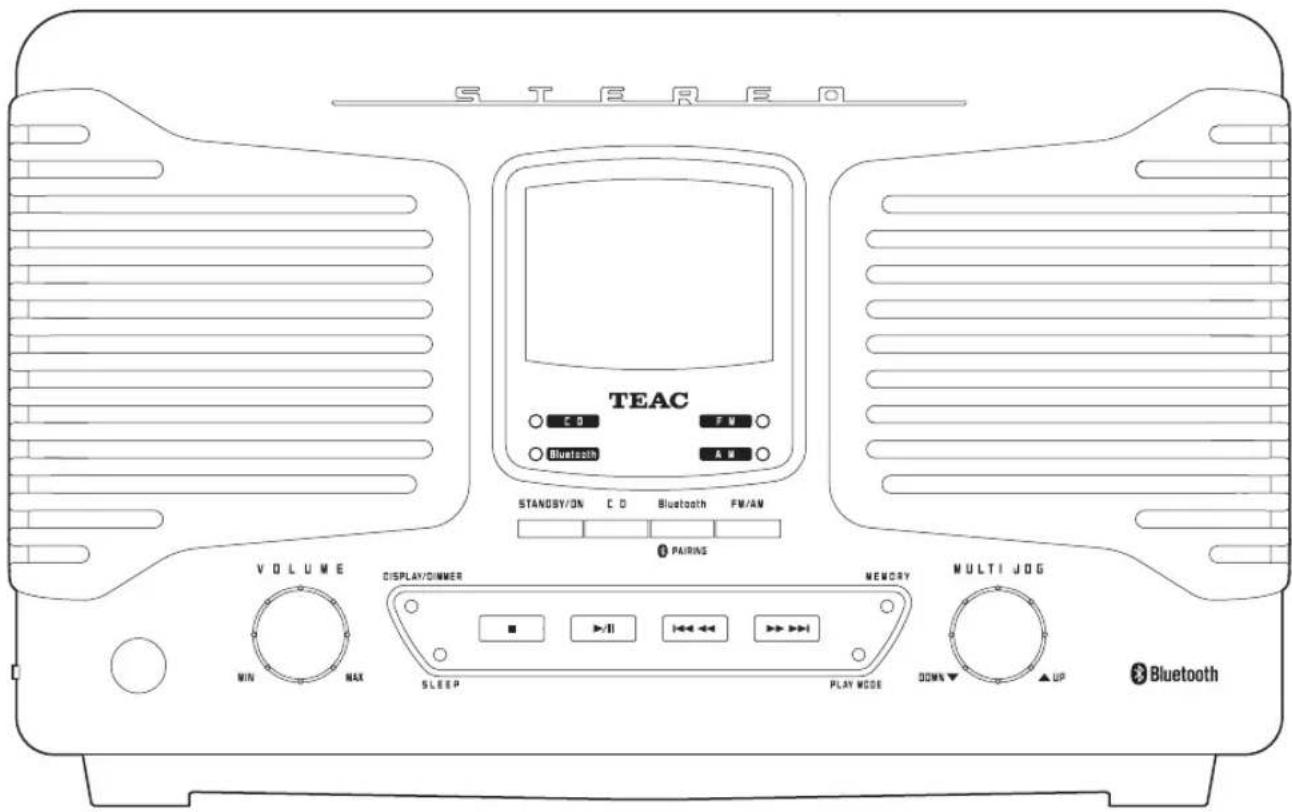
To listen to a CD, press the CD button.
To listen to a Bluetooth device, press the Bluetooth button.
To listen to the radio, press the FM/AM button. Each time you press the FM/AM button, the unit will switch between FM and AM broadcast reception.
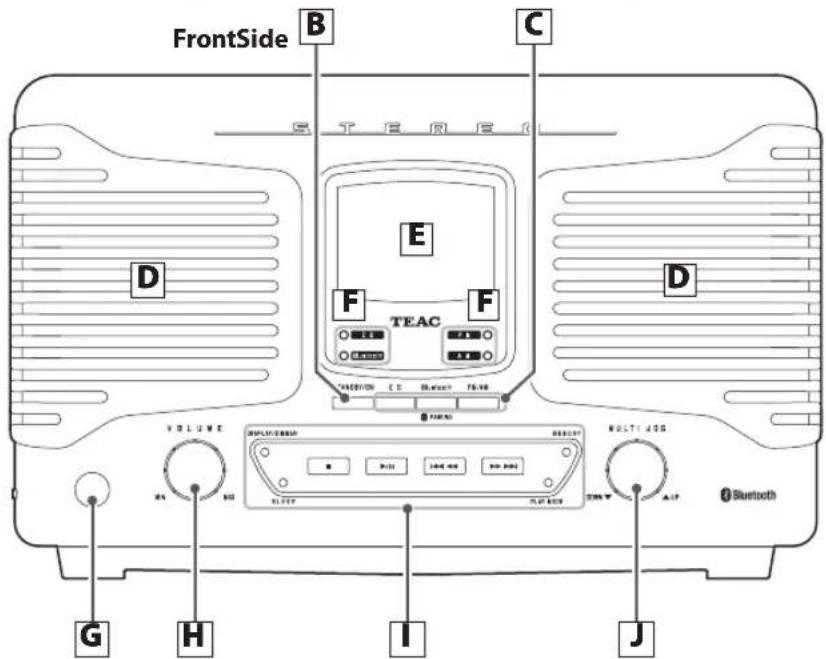
D Speakers (stereo)
E Display
F Indicators
The indicator for the selected source lights.
G Remote control signal receiver
Signals sent from the remote control are received here. When using a remote, point it toward this spot.
H VOLUME knob
Use to adjust the volume. Turn right to raise the volume and left to lower it.
I Control buttons
Stop (■) button
Press to stop playback.
Play/pause (▶ /II) button
Press to start or pause playback.
If a disc is loaded, playback will start. If no disc is loaded, "NO DISC" will appear on the display.
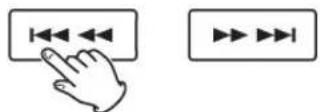
Skip/search (|◀◀ ◀◀/▶▶ ▶▶|) buttons
Use to select tracks/files. Press the ◀◀◀◀◀ or ▶▶▶▶▶ button to skip to the previous or next track/file (page 19).
During playback, press and hold the ▶▶▶▶I button to search forward or the ◀◀◀◀◀ button to search backward (page 19).
Use when setting radio station presets (AM, FM) and to select them (page 27).
PLAY MODE button
When listening to a CD or an MP3/WMA file, use to change the play mode (normal, repeat, intro, shuffle) (page 22).
When listening to FM radio, use to switch between stereo and mono (page 28).
DISPLAY/DIMMER button
Each time this button is pressed, the display changes (page 17).
Press and hold to adjust the display brightness (page 17).
SLEEP button
Use to set the sleep timer (page 32).
MEMORY button
Use for CD programmed playback (page 20).
When listening to the radio, use when setting radio station presets (page 29).
J MULTI JOG dial
Use when tuning the radio to select stations (page 27).
Use this also to set the current time and the wakeup timer (pages 15 and 30).
When listening to MP3/WMA files, use to select folders (page 24).
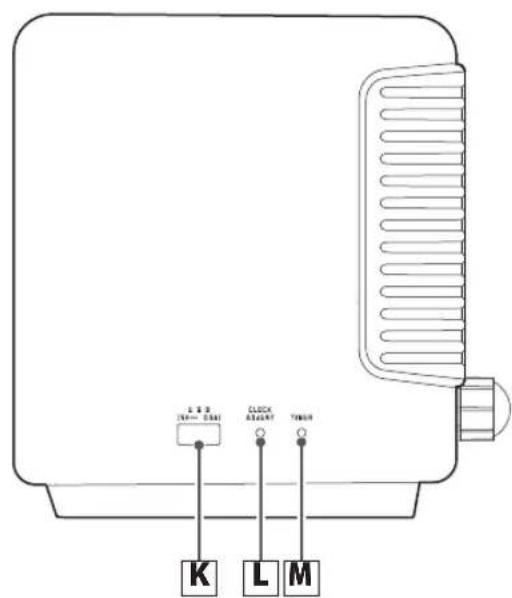
K USB port for charging
Devices can be recharged by connecting them using a USB-A type connector (0.5 A maximum).
L CLOCK ADJUST button
Use to adjust the clock (page 15).
M TIMER button
Use to set the wakeup timer (page 30).
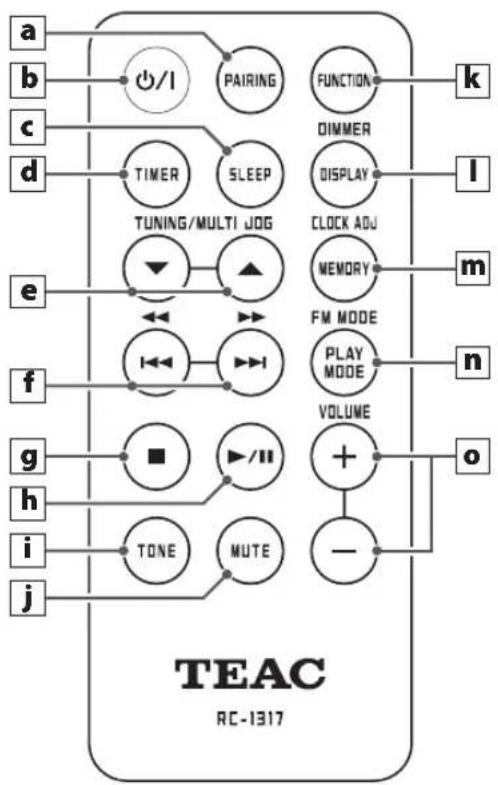
Names and functions of parts (remote control)
flowchart
graph TD
    a --> A["//"]
    b --> A
    c --> C["TIMER"]
    d --> D["SLEEP"]
    e --> E["TUNING/MULTI JOG"]
    f --> F["<<"]
    g --> G["■"]
    h --> H["//"]
    i --> I["TONE"]
    j --> J["MUTE"]
    K --> K1["FUNCTION"]
    L --> L1["DIMMER"]
    M --> M1["CLOCK ADU"]
    N --> N1["MEMORY"]
    O --> O1["PLAY MODE"]
    P --> P1["VOLUME"]
    Q --> Q1["+"]
    R --> R1["-"]
    S --> S1["<<"]
    T --> T1["<<"]
    U --> U1["<<"]
    V --> V1["<<"]
    W --> W1["<<"]
    X --> X1["<<"]
    Y --> Y["<<"]
    Z --> Z1["<<"]
    AA --> AA1["<<"]
    AB --> AB1["<<"]
    AC --> AC1["<<"]
    AD --> AD1["<<"]
    AE --> AE1["<<"]
    AF --> AF1["<<"]
    AG --> AG1["<<"]
    AH --> AH1["<<"]
    AI --> AI1["<<"]
    AJ --> AJ1["<<"]
    AK --> AK1["<<"]
    AL --> AL1["<<"]
    AM --> AM1["<<"]
    AN --> AN1["<<"]
    AO --> AO1["<<"]
    AP --> AP1["<<"]
    AQ --> AQ1["<<"]
    AR --> AR1["<<"]
    AS --> AS1["<<"]
    AT --> AT1["<<"]
    AU --> AU1["<<"]
    AV --> AV1["<<"]
    AW --> AW1["<<"]
    AX --> AX1["<<"]
    AY --> AY1["<<"]
    AZ --> AZ1["<<"]
    BA --> BA1["<<"]
    BB --> BB1["<<"]
    BC --> BC1["<<"]
    BD --> BD1["<<"]
    BE --> BE1["<<"]
    BF --> BF1["<<"]
    BG --> BG1["<<"]
    BH --> BH1["<<"]
    BI --> BI1["<<"]
    BJ --> BJ1["<<"]
    BK --> BK1["<<"]
    BL --> BL1["<<"]
    BM --> BM1["<<"]
    BN --> BN1["<<"]
    BO --> BO1["<<"]
    BP --> BP1["<<"]
    BQ --> BQ1["<<"]
    CA --> CA1["<<"]
    CB --> CB1["<<"]
    CC --> CC1["<<"]
    CD --> CD1["<<"]
    CE --> CE1["<<"]
    CF --> CF1["<<"]
    CG --> CG1["<<"]
    CH --> CH1["<<"]
    CI --> CI1["<<"]
    CJ --> CJ1["<<"]
    CK --> CK1["<<"]
    CL --> CL1["<<"]
    CM --> CM1["<<"]
    CN --> CN1["<<"]
    CO --> CO1["<<"]
    CP --> CP1["<<"]
    CS --> CS1["<<"]
    CT --> CT1["<<"]
    CU --> CU1["<<"]
    CV --> CV1["<<"]
    CW --> CW1["<<"]
    CX --> CX1["<<"]
    CY --> CY1["<<"]
    CZ --> CZ1["<<"]
When both the main unit and the remote control have buttons with the same functions, the instructions in this manual refer to only one set of buttons, but the other set of buttons can be used in the same way.
a PAIRING button
Use this when pairing with other Bluetooth devices and when ending Bluetooth connections (pages 25 and 26).
b Standby/on ( ⏻/l) button
c SLEEP button
Use this button to set the sleep timer (page 32).
d | TIMER button
Use to turn the wakeup timer on and off (page 30).
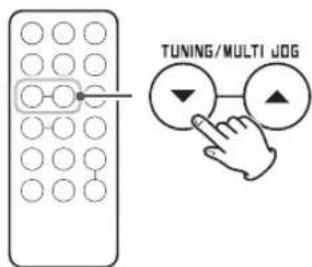
e TUNE/MULTI JOG buttons
When setting the clock and the wakeup timer, use to set the time (pages 15 and 30).
When listening to an MP3/WMA file, use to select the folder number (page 20).
f Skip/search (|◀◀ ◀◀/▶▶ ▶▶|) buttons
When listening to the radio, use to select preset radio stations (page 29).
When listening to a CD, use to skip to the previous or next track/file. Press and hold during CD or MP3/WMA file playback to search forward/backward (page 19).
g Stop ( ■ ) button
Press to stop playback.
h Play/pause (▶ /II) button
Press when stopped or paused to start playback. Use this button to pause playback during playback (page 19).
i TONE button
Use to adjust the bass and treble (page 16).
j MUTE button
Use this button to mute the sound temporarily (page 17).
k Function button
Each time you press this button, the source will change as shown below.

flowchart
graph LR
    A["CD"] --> B["Bluetooth FM AM"]
    B --> C["End"]
- Press when the unit is in standby mode to turn it on.
I DISPLAY/DIMMER button
Each time this button is pressed, the display changes (page 17).
Press and hold to adjust the display brightness (page 17).
m MEMORY/CLOCK ADJ button
Use for CD programmed playback (page 20).
When listening to the radio, use when setting radio station presets (page 28).
Use to adjust the clock (page 15).
Using the remote control
n PLAY MODE/FM MODE button
When listening to a CD, use to change the play mode (normal, repeat, intro, shuffle) (page 22).
When listening to FM radio, use to switch between stereo and mono (page 28).
o VOLUME (+/-) buttons
Use to adjust the volume. Press the + button to raise the volume, and press the - button to lower the volume.
Precautions for use
- When using the remote control, point it toward the remote control signal receiver on the main unit from a distance of 5 m (16 ft) or less. Do not place obstructions between the main unit and the remote control.
- The remote control might not work if the remote control signal receiver on the main unit is exposed to sunlight or bright lights. In this case, try moving the main unit.
- Beware that use of this remote control could cause the unintentional operation of other devices that can be controlled by infrared rays.
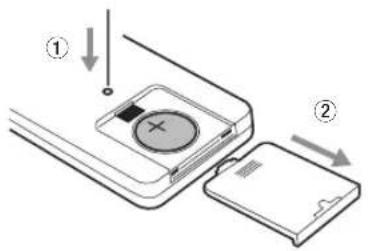
Installing the battery
Insert a fine rod into the hole on the back of the remote control and pull the cover forward while pushing down. Insert the lithium button cell battery (CR2032) with the + side up, and close the cover.
When to replace the battery
If the distance from the main unit that the remote can be used becomes shorter or if the unit stops responding to the remote buttons, replace the battery with a new one. Dispose of the used battery according to the instructions on it or the requirements set by the local government.
CAUTION
Misuse of batteries could cause them to rupture or leak, which might result in fire, injury or the staining of nearby materials. Please read and observe the precautions on page 4 carefully.
Preparation
Precautions when making connections
- Do not plug the unit in until all connections have been completed.
- Carefully read the manuals of the devices that you are connecting and follow their instructions when making connections.
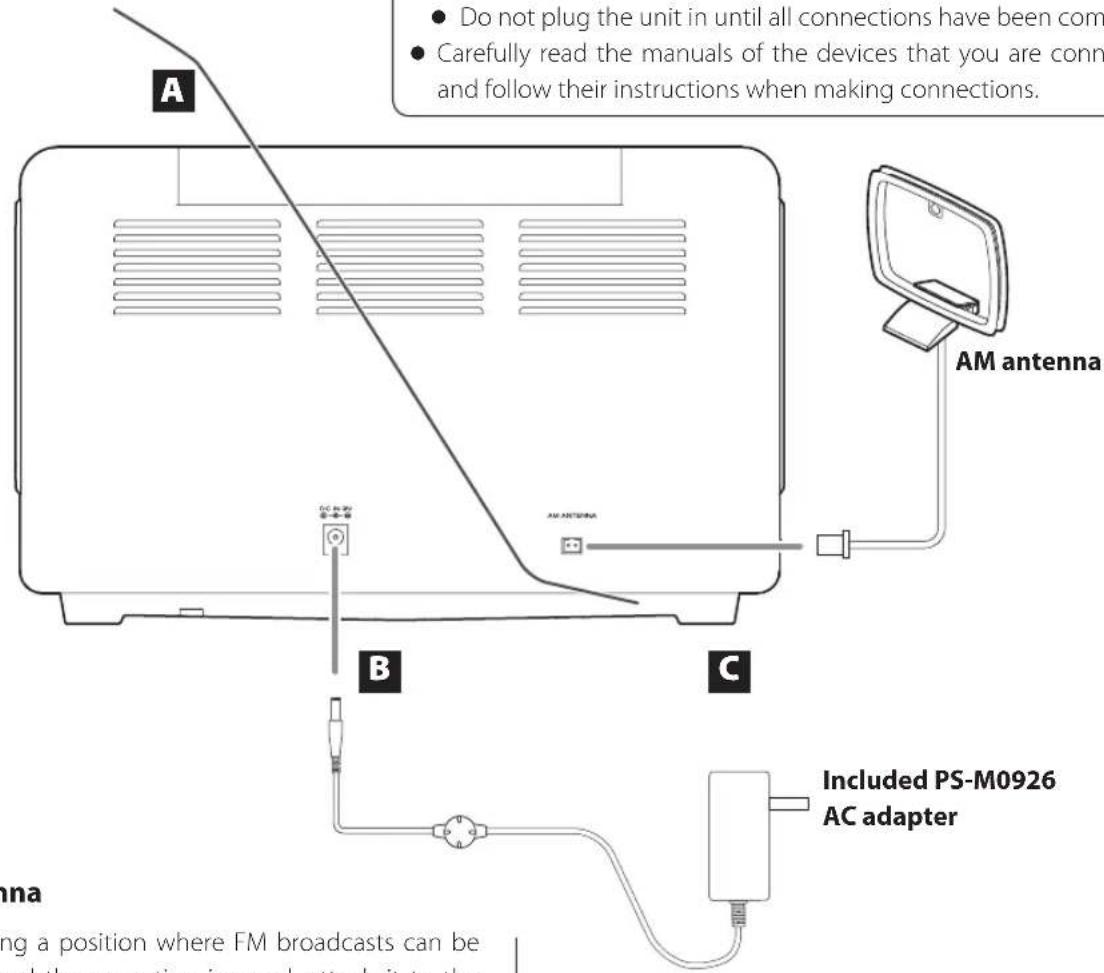
A FM antenna
After finding a position where FM broadcasts can be received and the reception is good, attach it to the wall or ceiling using tacks or tape, for example.
- See page 27 for instructions about how to receive radio signals.
- Do not bundle the antenna with other wires because doing so will reduce its sensitivity.
B DC input connector (DC IN 9V)
After completing all the connections, connect the included AC adapter (PS-M0926) to this jack.
Next, plug the AC adapter into a power outlet.
Unplug the power adapter from the outlet when you are not planning to use the unit for an extended period of time.
Do not use any AC adapter other than the one included (PS-M0926).
C AM antenna connector
Assemble the included AM loop antenna and connect it to the AM antenna connector on the back of the unit.
Place the antenna in the position that provides the best AM reception.
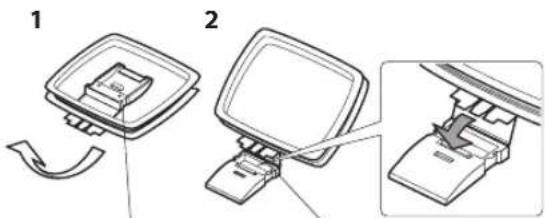
Assembling the AM antenna
To assemble the AM antenna, turn the base in the direction of the arrow. Then, insert the hook at the bottom of the loop into the slot in the base.
Antenna base Hook
Setting the clock
Set the current time before using the unit.
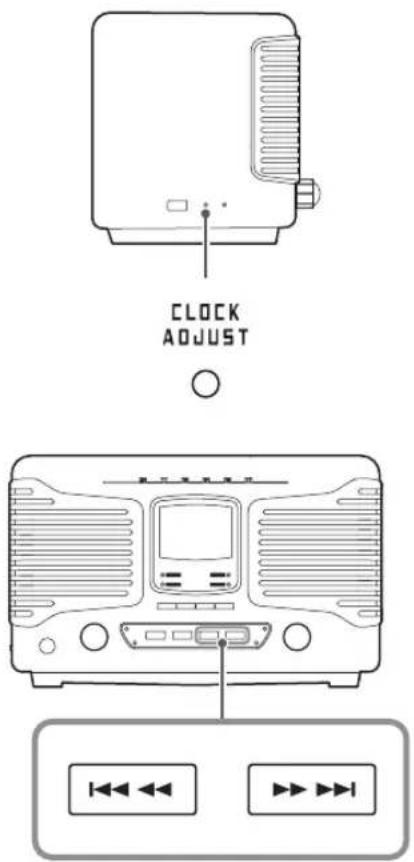
1 Press the STANDBY/ON button to put the unit into standby.
2 Press and hold the CLOCK ADJUST button for at least two seconds.
3 Press the skip/search (|◀◀ ◀◀/▶▶ ▶▶|) buttons to switch between "24H" (24-hour) and "12H" (12-hour) time display.
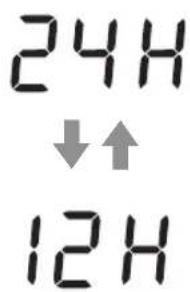
4 Press the CLOCK ADJUST button.
The "hour" value blinks.
5 Use the skip/search (|◀◀ ◀◀ /▶▶ ▶▶▶) buttons to set the hour.
6 Press the CLOCK ADJUST button.
The minute value blinks.
7 Use the skip/search (|◀◀ ◀◀ /▶▶ ▶▶▶) buttons to set the minute.
8 Press the CLOCK ADJUST button.
This completes the procedures for setting the time.
The clock will start from the set minute at 0 seconds.
- The unit's current time data will be erased if the power supply is interrupted for about 10 minutes because a power outage occurs or the power plug is disconnected from an outlet.
Basic operation
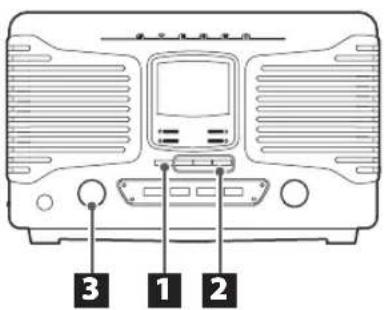
1 Press the STANDBY/ON button to turn the unit on.
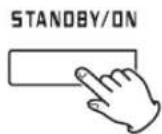
- Even when in standby (unit off), pressing a function button will turn the unit on.
2 Press a function button to set the playback source.
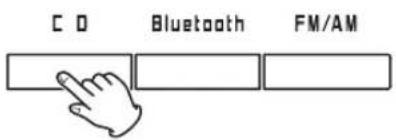
When a playback source is selected, the corresponding indicator lights.
- When using the remote control, press the FUNCTION button repeatedly until the indicator for the desired audio source lights.
3 Turn the VOLUME knob to adjust the volume.
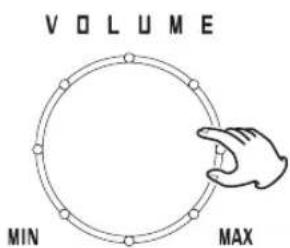
00 (MIN): minimum volume (no sound)
36 (MAX): maximum volume
Turn the VOLUME knob right to raise the volume and left to lower it.
- The default value is 12. - When you turn the VOLUME knob, the volume will be shown for about three seconds.
Sudden loud noises could damage your hearing or cause other harm. Set the volume to minimum. After sound output begins, adjust the volume to a suitable level.
NOTE
When not using this unit, press the STANDBY/ON button to put the unit into standby.
Changing the tone
1 Press the TONE button
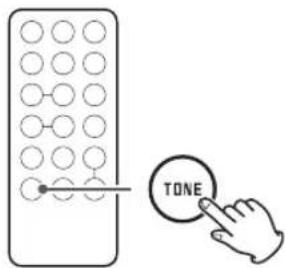
In the middle of the display "tone" will appear and the "b" above it will blink.
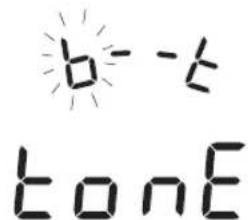
2 Use the MULTI JOG buttons to set the low frequency value.
- The default setting is 0 for both the low-frequency and high-frequency bands. They can be set between -5 and 5.
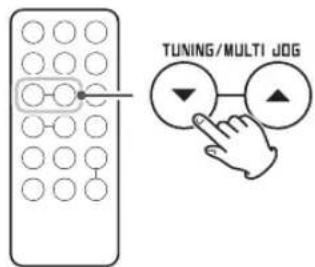
3 Press the TONE button.
The "t" at the top of the display will blink.
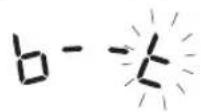
4 Use the MULTI JOG buttons to set the high frequency value.
5 If 10 seconds pass without any adjustment, the setting mode will end.
Adjusting the brightness of the display
Press the DIMMER button for at least two seconds to dim the display. Press it again for at least two seconds to restore normal display brightness.
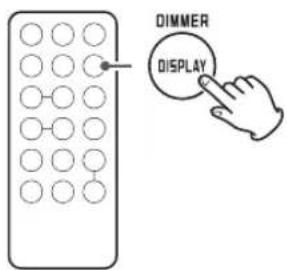
- When the unit enters standby, the dimmer setting is reset to normal brightness.
Muting the output
Press the MUTE button to temporarily silence the output. Press the MUTE button again to resume output at the previously set volume level.
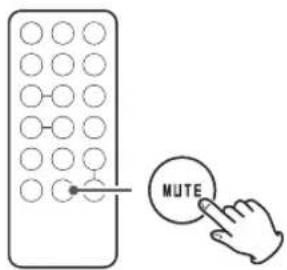
- When the mute function is active, "00" blinks on the display.
- When the mute function is active, adjusting the volume will unmute the output.
- When the mute function is active, changing the source will unmute the output.
Changing the display
Each time the DISPLAY button is pressed, the display changes as follows.
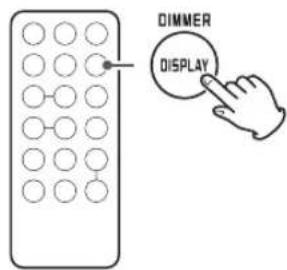
When an audio CD is playing
Track elapsed time Track remaining time Clock display ← Total remaining time
When an MP3/WMA disc is playing
File elapsed time -Clock display
When a Bluetooth device is playing
Clock only
When the function is AM/FM
Clock only
- When the function is AM or FM and a preset station is selected, press this button to alternately display the preset number and the time.
Listening to a CD
1 Press the CD function button.
The CD indicator lights when CD mode is active.
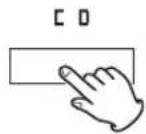
- When using the remote control, press the FUNCTION button repeatedly until the CD indicator lights.
2 Press the open/close (▲) button to open the lid. Place a disc with the labeled side facing up and close the lid.
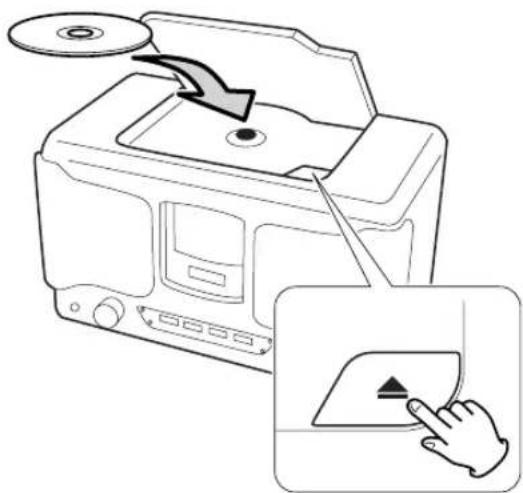
- Do not load multiple discs at the same time. Doing so could cause malfunction.
- Loading a disc takes a few seconds.
- "NO DISC" will be displayed if a disc has not been loaded.
- When closing the lid, press the "PUSH CLOSE" spot near its right front corner. The lid might not close if you press the left side.
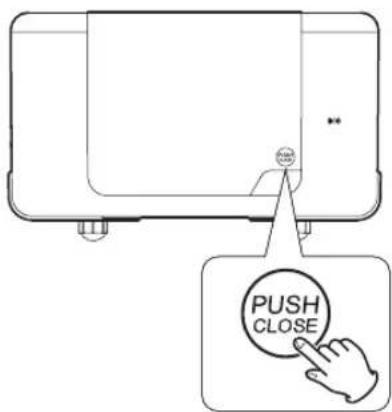
- Be careful not to let your fingers get caught when closing the lid.
- A non-audio disc might be "played" in the same manner as an audio disc, but sound will not be output.
- When the current file is a WMA file, "WMA" will appear at the bottom of the display.
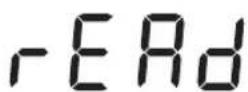
- When a disc is being read, "rEAd" appears on the display.
3 Press the play/pause (▶/Ⅱ) button.
Playback will start from the first track/file and ▶ will appear on the display.
Display example
Folder number
(When an audio
CD is loaded, "Cd"
appears on the
display.) Track/file number
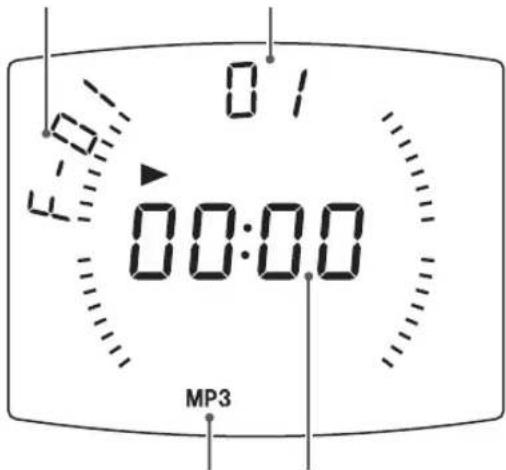
Data format Elapsed time of currently playing track/file
- This unit treats MP3/WMA files that are not in folders as being in the 01 folder. Playback starts with the first track in the 01 folder.
- For details about the playback order of MP3/WMA files, see page 24.
- After all tracks/files have played, playback will automatically stop.
● During playback, a pair of lines moves around the outer edge of the display.
Never open the disc lid during playback. Doing so could cause the disc to fly out, possibly resulting in injury or damage.
Pausing playback
Press the play/pause (▶/■) button to pause playback. When paused, press the play/pause (▶/■) button to resume playback from the paused point.
- When paused, the playback time will blink.
Stopping playback
Press the stop (■) button to stop playback.
Skipping tracks/files
During playback and when paused, press a skip/search (I◄◄◄◄/►►►►►) button to skip to the previous or next track/file. Press repeatedly until you reach the song you want.
Playback will start from the beginning of the selected track/file.
When stopped, press a skip (1 ◀ ◀ ◀ ◀ / ▶ ▶ ▶ ▶) button repeatedly until the desired track/file is found and press the play/pause (▶ / ||) button to start playback.
During playback and when paused, press the ◀◀◀◀◀ button once to return to the beginning of the track/file being played. To play an even earlier song, press the ◀◀◀◀◀ button repeatedly.
During programmed playback (page 20), the next or previous track/file in the program will be played.
Search for a part of a track/file
During playback, press and hold a skip/search (▶◀◀/▶▶▶▶) button to search backward/forward. At the point where you want to listen, press the play/pause (▶/▶) button.
Programmed playback (CD)
Up to 32 CD tracks or MP3/WMA files can be programmed in the desired order.
Program tracks/files when playback is stopped.
Programming tracks/files
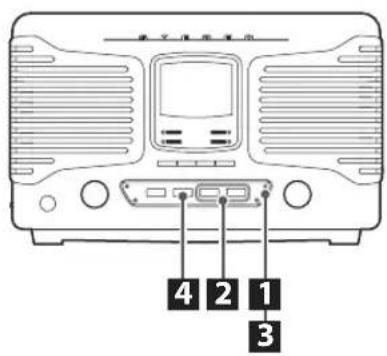
1 When the CD function is active, press the MEMORY button when stopped.
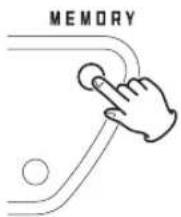
The track number (or folder and file numbers) and the MEMORY indicator blink.
- To stop programming, press the stop (■) button or wait 20 seconds or more.
- During programming if you do nothing for 20 seconds or more, the program will be confirmed.
2 Select a track/file to add to the program.
With an audio CD
Use the skip/search (I◄◄◄◄/►►►►►►) buttons to select a track by number.
MP3/WMA file example
To select a folder by number, turn the MULTI JOG dial.
To select a file by number, use the skip/search (I◄◄◄/►►►►) buttons.
- This unit treats MP3/WMA files that are not in folders as being in the 01 folder.
- If you change the folder or file number, only the MEMORY indicator will blink.
3 Press the MEMORY button.
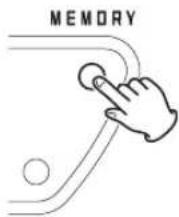
The selected track/file is added to the program, and "P02" appears on the display.
- To program multiple tracks/files, repeat step 2 to 3.
- To stop programming, press the stop■) button.
4 When you have finished adding tracks/files to a program, press the play/pause (▶/Ⅱ) button to start programmed playback.
- To stop programmed playback, press the stop (■) button. The contents of the program are retained.
- During programmed playback, use the skip/search (1 ◀◀ ◀◀/▶▶ ▶▶ I) buttons to select different tracks/files in the program.
- During programmed playback, intro and shuffle playback are not possible.
Checking the program order
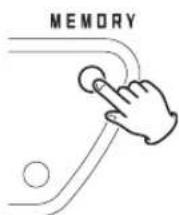
When stopped, press the MEMORY button to cycle through the program numbers and the programmed track/file numbers in order.
Adding tracks/files to the end of the program
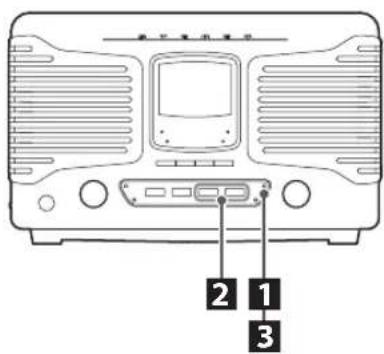
1 When stopped, press the MEMORY button repeatedly to show the number which is one higher than the last program number.
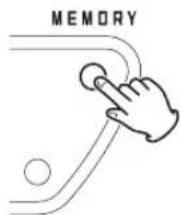
When using an audio CD, the track number and MEMORY indicator will blink. When using MP3/WMA files, the folder number, file number and MEMORY indicator will blink.
2 Press the skip/search (|◄◄◄◄/►►►►|) button to select a track/file.
3 Press the MEMORY button. The track/file is added to the end of the program.
Changing a track/file within the program
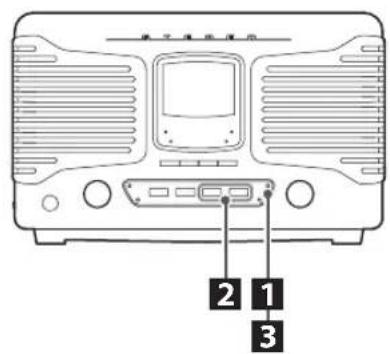
1 When programmed playback is stopped, press the MEMORY button repeatedly until the program number of the track/file you want to change appears on the display.
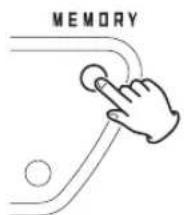
2 Use the skip/search (|◀◀ ◀◀ /▶▶ ▶▶1) button to select the track/file that you want to use as a replacement in the program.
3 Press the MEMORY button.
The selected track/file is added at the selected program number, replacing the track/file that was there.
Programmed playback (CD) (cont'd)
Clearing all the program contents
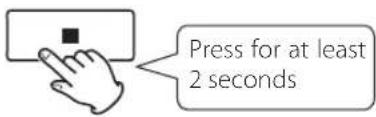
Press and hold the stop (■) button for at least two seconds when stopped.
The contents of the program are cleared, and the display MEMORY indicator becomes unlit.
● The program is also cleared in the following cases.
•The unit enters standby mode
- When you press a function button (Bluetooth or FM/AM) on the main unit or the FUNCTION button on the remote control to change the function
•The disc lid is opened
Repeat/intro/shuffle playback (CD)
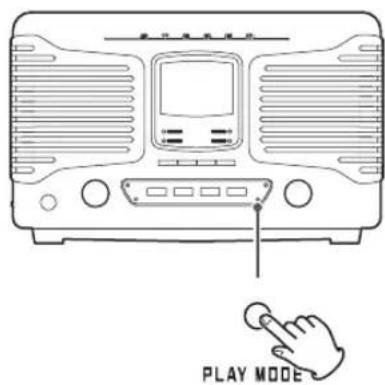
When the CD function is active, press the PLAY MODE button to cycle through the following playback modes.
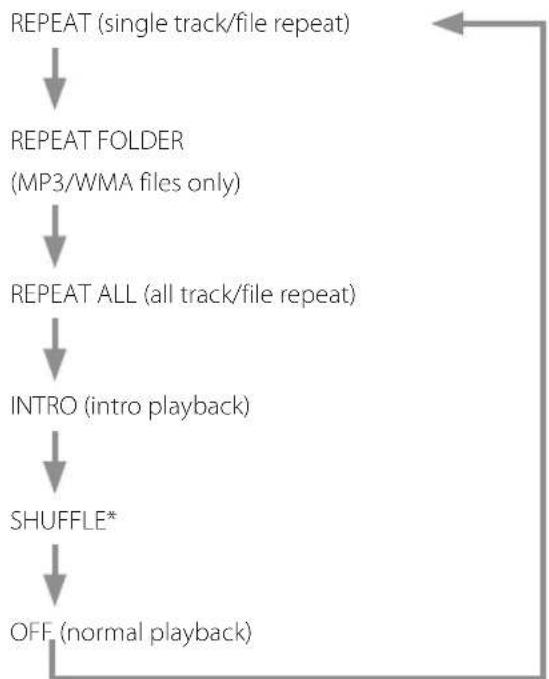
flowchart
graph TD
    A["REPEAT (single track/file repeat)"] --> B["REPEAT FOLDER (MP3/WMA files only)"]
    B --> C["REPEAT ALL (all track/file repeat)"]
    C --> D["INTRO (intro playback)"]
    D --> E["SHUFFLE*"]
    E --> F["OFF (normal playback)"]
    F --> A
Press the play/pause (▶/■) button when the mode you want to select appears to start playback.
*If shuffle is selected, playback starts automatically.
- You can also change the playback mode by pressing the PLAY MODE button during playback.
- Any of the following operations will end repeat or shuffle playback mode.
•The stop (■) button is pressed
•The unit enters standby mode
- When you press a function button (Bluetooth or FM/AM) on the main unit or the FUNCTION button on the remote control to change the function
•The disc lid is opened
Repeat playback
REPEAT (single track/file repeat)
During playback, press the PLAY MODE button once to repeat playback of the currently playing track/file. "REPEAT" appears on the display.
- If you press a skip/search (I◄◄◄◄ /►►►►►) button to select another track/file, that track/file will be played repeatedly.
- When stopped, press the PLAY MODE button and then use the skip/search (◀◀ ◀◀/▶▶ ▶▶▶) buttons to select a track/file. Press the play/pause (▶/■) button to start single repeat playback.
● During programmed playback, the track/file being played will be played repeatedly.
REPEAT ALL (all track/file repeat)
Press the PLAY MODE button twice (or three times for MP3/WMA files).
"REPEAT ALL" appears on the display and all tracks/files are played back repeatedly.
- During programmed playback, the programmed tracks/files will be played repeatedly.
REPEAT FOLDER
(MP3/WMA files only)
Press the PLAY MODE button twice.
"REPEAT" blinks on the display, and the files in the selected folder are played back repeatedly.
Intro playback
You can play back just the beginnings of tracks/files one after another.
INTRO
Press the PLAY MODE button repeatedly until "INTRO" appears to play back only the first 10 seconds of all tracks/files.
During programmed playback, intro playback is not possible.
Shuffle playback
All the tracks/files are played back randomly.
SHUFFLE
Press the PLAY MODE button repeatedly until "SHUFFLE" appears on the display.
- During shuffle playback, press the skip/search (▶▶▶▶▶I) button to start playback of the next random track/file.
Press the skip/search (◀◀◀◀◀) button to return to the beginning of the current track/file. - Shuffle playback is not possible during programmed playback.
About MP3/WMA file playback
File playback order
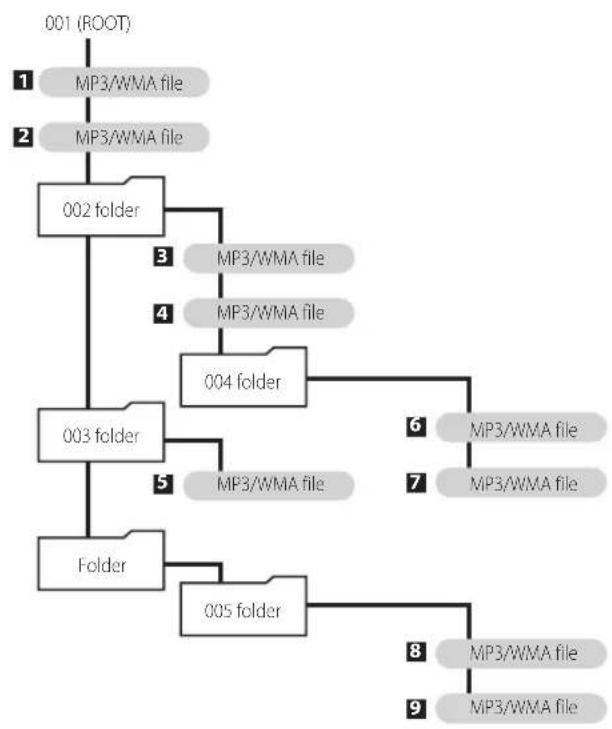
A disc that contains MP3/WMA files can have the files in folders in the same manner that files are managed on an ordinary computer. One folder can also contain multiple subfolders.
Example of folder numbers and file playback order (1 to 9) during normal playback of a disc that contains MP3/WMA files
flowchart
graph TD
    A["001 (ROOT)"] --> B["1 MP3/WMA file"]
    A --> C["2 MP3/WMA file"]
    B --> D["002 folder"]
    C --> D
    D --> E["3 MP3/WMA file"]
    D --> F["4 MP3/WMA file"]
    E --> G["004 folder"]
    F --> G
    G --> H["6 MP3/WMA file"]
    G --> I["7 MP3/WMA file"]
    G --> J["5 MP3/WMA file"]
    J --> K["003 folder"]
    K --> L["Folder"]
    L --> M["005 folder"]
    M --> N["8 MP3/WMA file"]
    M --> O["9 MP3/WMA file"]
- Adding, removing or relocating files and folders could change the order shown in the above illustration.
Selecting folders and files
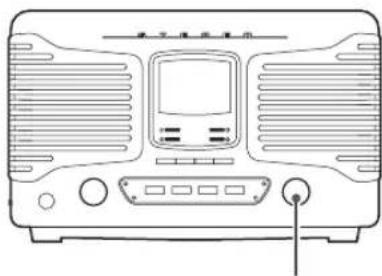
To select a folder by number, turn the MULTI JOG dial.
natural_image
Front view of a portable electronic device with front panel, buttons, and indicator lights (no visible text or symbols)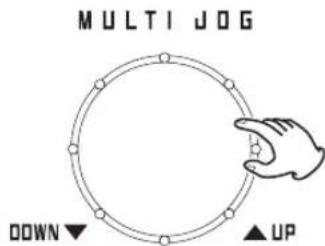
When using the remote control, press the TUNING/MULTI JOG buttons.
To select a file by number, use the skip/search (I◀◀ ◀◀/▶▶ ▶▶ I) buttons.
- After selecting the folder/file number, press the play/pause (▶/■) button to start playback.
Listening to audio from a Bluetooth device
With this unit, you can enjoy listening to music played back on another Bluetooth device wirelessly.
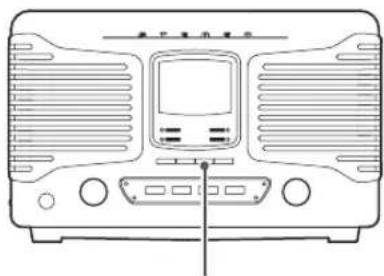
natural_image
Front view of a portable electronic device with front panel and control buttons (no visible text or symbols)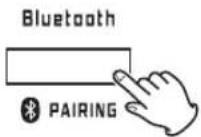
1 Press the Bluetooth function button.
The Bluetooth icon (blinks, and the unit searches for paired devices.
- When using the remote control, press the FUNCTION button repeatedly until the Bluetooth indicator lights.
● The Bluetooth indicator lights when Bluetooth is selected.
When connection with another Bluetooth device succeeds, the Bluetooth icon (✗) will appear on the display without blinking.
- The unit will automatically try to connect to the previously connected device.
- Pairing is necessary before using the Bluetooth function of this unit for the first time and when you want to connect a new Bluetooth device.
- If connection fails, confirm that the other Bluetooth device is ready to make a Bluetooth connection.
- If the connection is lost during use, and the Bluetooth icon (blinks) on the display, conduct the connection operations again on this unit and the other Bluetooth device.
2 Operate the Bluetooth device to start playback.
If the connected Bluetooth device supports AVRCP, you can use this unit or the remote control to play, pause or stop audio on that device.
Depending on the Bluetooth device being used, remote control operation might not be supported or actual operations might differ.
● The volume, however, cannot be adjusted remotely.
Audio/Video Remote Control Profile (AVRCP)
To control playback of a Bluetooth device, the Bluetooth device must support AVRCP.
Some Bluetooth devices, however, have different functions depending on their specifications.
- If you cannot control another Bluetooth device with this unit, operate the other Bluetooth device directly.
Unpairing a device
To disconnect, press and hold the Bluetooth function button for at least two seconds or the remote control PAIRING button.
- If you later want to use a Bluetooth connection with that Bluetooth device, you must pair them again.
- This deletes all pairing information. Unpairing with just one device is not possible.
Pairing with another Bluetooth device
Pairing is necessary before using the Bluetooth function of this unit for the first time and when you want to connect a new Bluetooth device.
Follow these procedures to pair the unit with the other device.
Pairing
1 Press the Bluetooth function button.
The Bluetooth indicator lights and the Bluetooth icon
*blinks, showing that pairing is possible.
- When using the remote control, press the FUNCTION button repeatedly until the Bluetooth indicator lights.
2 Enable the Bluetooth communication function on the other Bluetooth device.
3 From the Bluetooth device select "SL-D800BT" (this unit).
- If a passkey is required during pairing, input "0000".
When connection succeeds, the Bluetooth icon will appear on the display without blinking.
- This unit can retain pairing data for up to five devices. After five devices have been paired, if a new device is paired, the oldest pairing will be overwritten.
- When a Bluetooth device is connected, if you change the source with a function button or press the STANDBY/ON button to put the unit into standby mode, the next time the unit is turned on, the unit will try to connect automatically with the last connected Bluetooth device.
- When the other Bluetooth device is disconnected, the Bluetooth icon (✗) will appear blinking on the display of this unit.
- If the other Bluetooth device is waiting to pair, pairing will occur automatically when this unit enters pairing mode.
Touch pairing
If the other Bluetooth device supports NFC, you can pair it with this unit using the following procedures.
1 Press the Bluetooth function button.
- You cannot use touch pairing if another function is selected.
2 Hold the antenna of the device that supports NFC toward the touch pairing reader.
Do this within two minutes of selecting "Bluetooth".
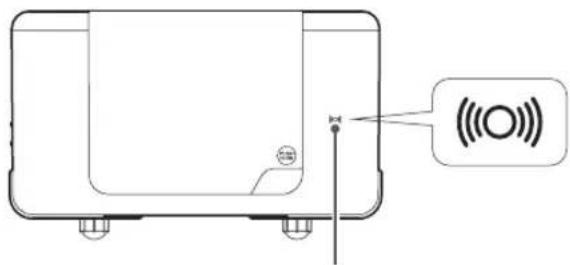
Touch pairing reader
- Hold the device that supports NFC within 2 cm of the touch pairing reader.
- Be sure to enable both the Bluetooth and NFC functions on the other Bluetooth device (smart phone, etc.) before using touch pairing.
Listening to the radio
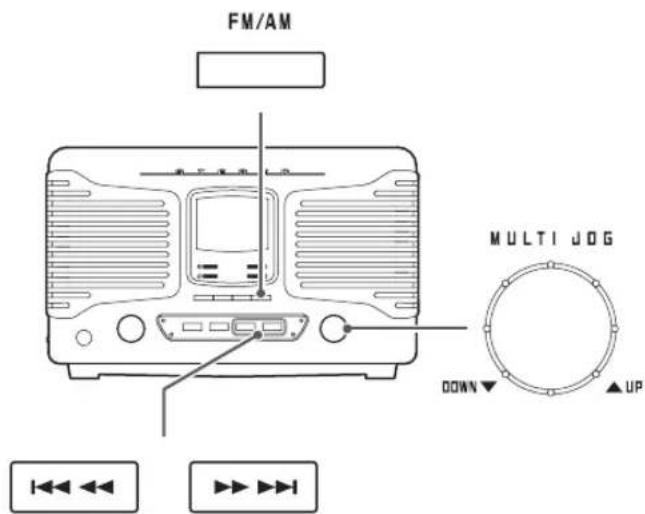
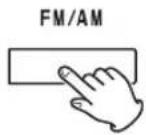
Press the FM/AM button to select FM or AM broadcast reception.
When using the remote control
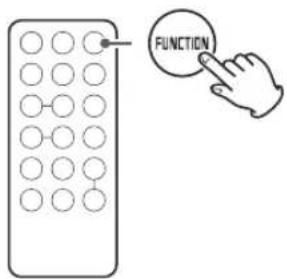
- Press the FUNCTION button repeatedly until the FM or AM indicator lights.
FM radio reception example
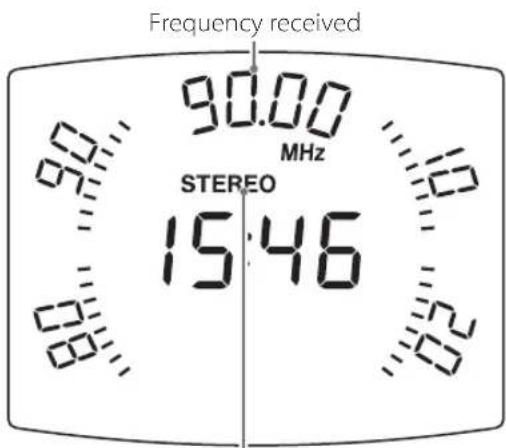
Stereo indicator
Automatic station selection
Press a skip/search (I◄◄◄/►►►►►) button until the frequency begins to change. After the frequency starts changing, stop pressing the button to start automatic station selection.
- When a radio station is received, automatic station selection ends.
- To cancel automatic station selection, press a skip/search (I◄◄◄◄/►►►►►) button.
- If the reception is poor or the antenna is disconnected, "PLEASE CHECK ANTENNA" scrolls across on the display. Check the antenna position and connection and then try the operation again.
Manual station selection
Turn the MULTI JOG dial to change the reception frequency. Turn right to increase the reception frequency and left to decrease it.
When using the remote control
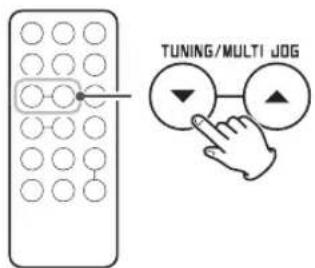
Press a TUNING (√/∧) button briefly to change the frequency by a fixed step.
Press the TUNING (√/∧) button repeatedly until you find the station that you want.
Listening to the radio (cont'd)
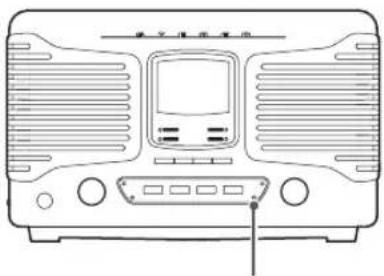
FM MODE button
natural_image
Front view of a portable electronic device with front panel and control buttons (no visible text or symbols)PLAY MODE
When a stereo FM program is tuned in, you can switch between stereo and mono by pressing the PLAY MODE button.
Stereo mode: 510n
Mono mode: ScoF
Stereo mode selection
When an FM stereo broadcast is being received in stereo, the STEREO indicator appears.
- If reception is poor, the STEREO indicator will not appear.
Mono mode selection
When the reception of an FM stereo broadcast is poor, select this mode.
Use to receive broadcasts in mono to improve the sound.
eset tuning
You can store FM and AM stations into preset numbers 1 to 20 respectively.
1 Press the FM/AM button to select FM or AM broadcast reception.
Each time you press the FM/AM button, the unit will switch between FM and AM broadcast reception.
2 Turn the MULTI JOG dial to search for the desired radio station.
3 After selecting a radio station, press the MEMORY button.
The preset number and the MEMORY indicator blink on the display.
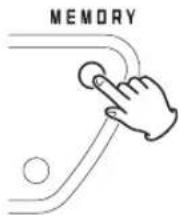
4 Use the skip/search (|◀◀ ◀◀ /▶▶ ▶▶|) buttons to select the preset number that you want to use to store that radio station.
5 Press the MEMORY button.
The radio station will be stored, and the preset number and the MEMORY indicator will stop blinking and continue to appear on the display.
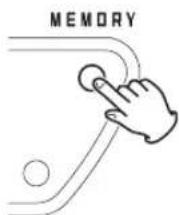
To save more radio station presets, repeat procedures 2 to 5.
Automatic presets
The unit can automatically search for and add presets for the stations that it can receive.
1 Press the FM/AM button to select FM or AM broadcast reception.
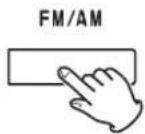
Each time you press the FM/AM button, the unit will switch between FM and AM broadcast reception.
2 Press and hold the MEMORY button for at least two seconds.
"AUTO" appears on the display and the unit automatically adds presets for the stations that it can receive.
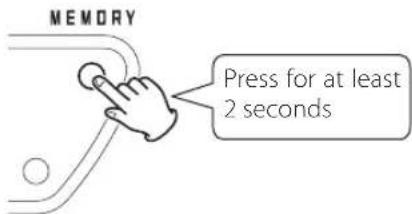
- After 20 presets have been added automatically, "FULL" will appear followed by preset 01 and reception of that station will start.
Listening to a preset station
1 Press the FM/AM button to choose the band.
2 Press a skip/search (|◄◄◄◄/►►►►|) button repeatedly until you find the preset number of the radio station you want.
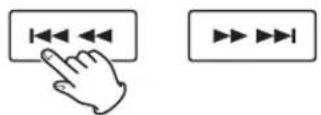
The preset number appears on the display.
- When a preset station is selected, the MEMORY indicator appears.
- After manually selecting a station, the preset number and MEMORY indicator will disappear.
Wakeup timer
At the set time, sound will be output from the speakers.
- Adjust the clock before setting the timer (page 15).
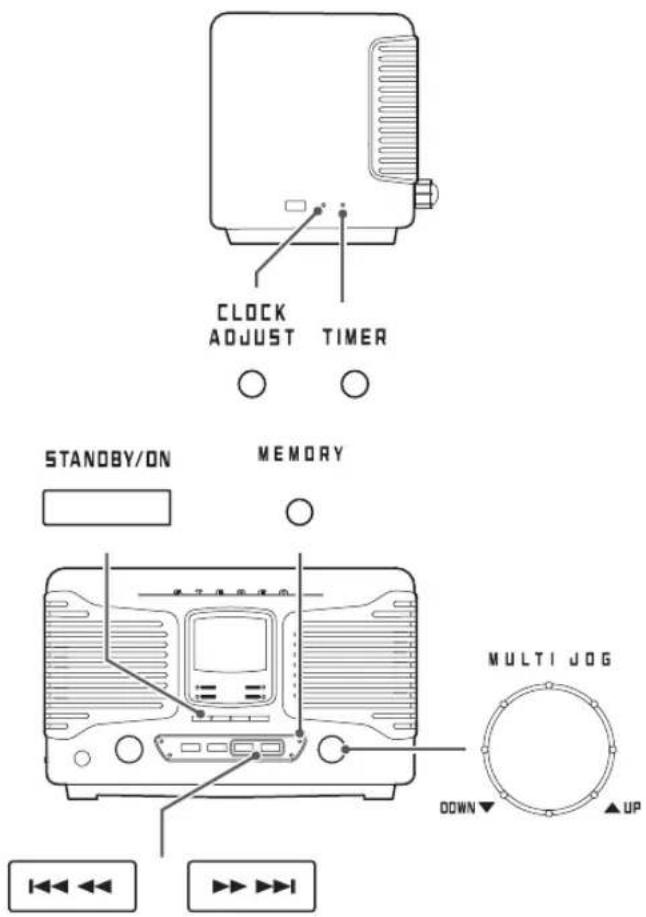
Setting the timer
1 Put the unit into standby (power off).
The unit must be in standby to set the timer. Press the STANDBY/ON button to put the unit into standby.
2 Press and hold the TIMER button for at least two seconds.
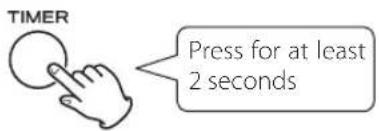
The timer indicator (blinks and "SET TIMER" scrolls across the display once. "ON TIME" appears and then the time input mode becomes active.
The "hour" value blinks.
- If no action is taken for 20 seconds, timer setting will end automatically.
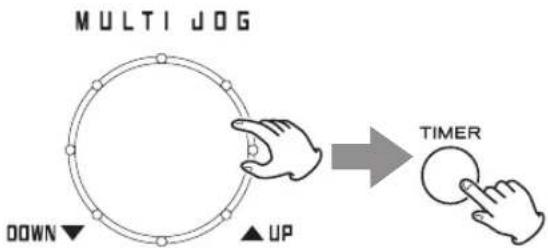
3 Turn the MULTI JOG dial to set the timer starting hour, and press the TIMER button.
● After setting the hour, the minutes blink.
4 Turn the MULTI JOG dial to set the timer starting minute, and press the TIMER button.
flowchart
graph TD
    A["MULTI JOG"] --> B["Down"]
    B --> C["UP"]
    C --> D["TIMER"]
After making the TIMER ON setting, "OFF TIME" appears and the hour value blinks.
5 Repeat steps 3 and 4 to set the TIMER OFF time.
If the TIMER OFF time is set to the same time as the TIMER ON time, setting will fail and "Err" will appear on the display. Then, the unit will become ready for the TIMER OFF hour to be set again.
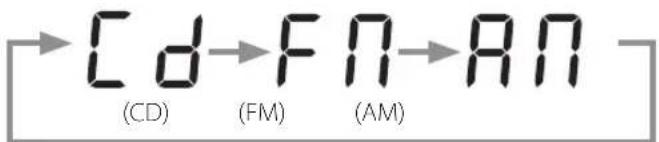
6 Turn the MULTI JOG dial to set the audio source, and press the TIMER button.
The sources that can be selected are CD, FM TUNER and AM TUNER.
Turn the MULTI JOG dial to cycle through the following source settings.
flowchart
graph LR
    A["CD (CD)"] --> B["FM (FM)"]
    B --> C["AM (AM)"]
    C --> D["AN (AN)"]
You cannot select "Bluetooth".
7 Turn the MULTI JOG dial to set the volume.
You can set the volume between 5 (minimum) and 32 (maximum).
- When the wakeup timer turns the unit on, the volume will gradually increase until the set volume is reached.
8 Press the TIMER button.
The timer indicator appears.
This completes wakeup timer setting.
- At the TIMER ON time, operation starts and the timer indicator blinks.
Prepare the playback source before the wakeup timer turns the unit on.
If you have selected "CD", place a disc.
- If a disc is not loaded, the FM tuner will be used.
- If you have set it to FM or AM radio, select the desired station.
Turning the timer off
When you do not want to use the wakeup timer, press the TIMER button to turn it off.
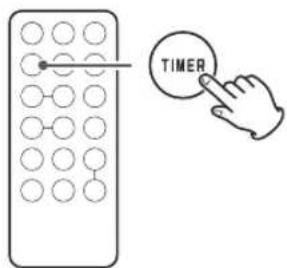
The timer indicator disappears.
- You can turn the timer off whether the unit is on or in standby.
Turning the timer on
To use the wakeup timer, press the TIMER button again. The timer settings are shown in the following order: TIMER ON time, TIMER OFF time, playback source and volume. The timer indicator also appears on the display, showing that the unit is waiting for the TIMER ON time.
- During timer playback, press the TIMER button to disable the timer. In this case, the unit will not enter standby mode (turn off) automatically when the TIMER OFF time is reached.
Sleep timer Troubles
The unit can be set to enter standby after a specified amount of time.
Setting the sleep timer
Press the SLEEP button repeatedly until the desired setting appears on the display.
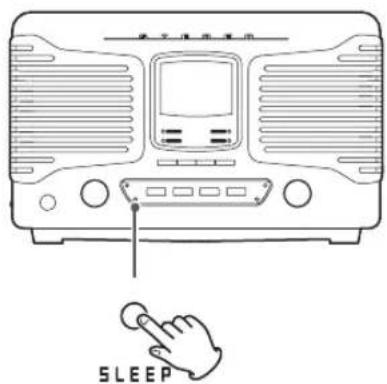
The settings for the time until the unit enters standby change as follows (shown in minutes).

flowchart
graph LR
    A["90"] --> B["75"] --> C["60"] --> D["45"] --> E["30"]
    E --> F["Off"] <--_G["15"]
When the sleep timer is active, the SLEEP indicator appears at the bottom right of the display.
● The display is dimmed when the sleep timer is active.
- When the sleep timer is active, press the SLEEP button once to show for a few seconds the amount of time until the unit enters standby.
pting
If you experience a problem with this unit, please check the following items before requesting service. Something other than this unit could also be the cause of the problem. Please also check that the connected devices are also being used properly.
If it still does not operate correctly, contact the retailer where you purchased the unit.
The unit will not turn on.
→ Confirm that the power plug is plugged into a working outlet. Then, press the STANDBY/ON button to turn the unit on. Confirm that there is power to the outlet by plugging in another device such as a desk lamp or tabletop fan (page 17).
There is no sound.
→ Turn the VOLUME knob right to raise the volume.
Remote control does not work.
→ Press the main unit's STANDBY/ON button to turn it on.
→ If the battery is dead, replace it with a new one.
→ Clear obstructions that are between the remote control unit and the main unit. Use the remote control unit within the 5 m (16 ft) range and pointed at the front panel.
→ If a lamp or other strong light source is near the unit, turn the light source off.
A nearby TV or other device is malfunctioning.
→ Some TVs with wireless remote control functions might malfunction in response to the operation of this unit's remote control. In this case, turn the other device off while using this unit's remote control.
There is noise.
→ Place the unit as far away as possible from TVs, microwave ovens and other devices that emit electromagnetic waves.
CD player
Playback is not possible.
→ If the disc is upside down, reload it with the labeled side up.
→ If the disc is dirty, wipe it clean.
→ Discs that do not have any recordings on them or that have not been finalized cannot be played back. Make sure that CD-R/CD-RW discs that you want to play back have recordings on them and have been finalized.
→ Depending on disc quality and recording conditions, playback of some CD-R/CD-RW discs might not be possible.
→ Programmed playback works with finalized discs only
The sound skips.
→ Vibrations will cause skipping. Place this unit in a stable location.
→ If the disc is dirty, wipe it clean.
→ Do not play any disc that is warped, deformed or damaged.
MP3/WMA files
Playback is not possible.
→ Check the file format. MP3 files are recognized by the ".mp3" file extension and WMA files by the ".wma" extension.
→ The MP3/WMA file might be damaged.
→ Confirm that the file format is one that this unit can play back (page 7).
Bluetooth function
Pairing fails.
→ Refer to the Bluetooth device's operation manual.
→ Put this unit into standby and turn the other Bluetooth device off and on once. Then, try pairing again.
→ Turn off all Bluetooth devices other than the one you are trying to pair the unit with.
→ After deleting the "SL-D800BT" data from the other Bluetooth device, try pairing again.
Cannot connect.
→ Confirm that the other Bluetooth device is on and its Bluetooth function is enabled.
→ Are the unit and the other Bluetooth device too far apart?
Is there a wall or other obstruction between them? As much as possible, use them close together in an environment without obstructions.
→ Put the unit into standby and then on again.
→ Unpair the "SL-D800BT" from the Bluetooth device and follow the instructions in "Pairing with another Bluetooth device" on page 26.
The touch pairing reader does not work.
→ Press the Bluetooth function button on the unit. When using the remote control, press the FUNCTION button repeatedly until the Bluetooth indicator lights.
→ Check the settings of the other device that you are using.
The sound skips or there is noise.
→ Is there a wireless LAN, other Bluetooth device, microwave oven or similar electronic equipment nearby?
Keep such devices as far away as possible.
→ Reduce the distance between the other Bluetooth device and this unit during use.
→ Try moving the other Bluetooth device and this unit.
SpecificationsTroubleshood
Radio
A station cannot be received. The reception is poor.
→ Tune in the station properly.
→ If FM broadcast reception is poor, try relocating the FM antenna.
→ If AM broadcast reception is poor, try changing the orientation of the AM antenna.
→ If a TV is near the unit, turn the TV off.
FM stereo broadcasts become mono.
→ Press the FM MODE button to select stereo.
→ The signal from the station might be poor. Adjust the position of the FM antenna.
Since this unit uses a microcontroller, external noise and other interference can cause the unit to malfunction. If this should occur, unplug the power cord from the outlet and wait for about 20 minutes. Then plug the power cord in and try the operation again.
Amplifier
Output power....5 W + 5 W
Frequency response 50 Hz to 20 kHz
CD player
Playable disc types.....CD, CD-R, CD-RW
Frequency response 20 Hz to 20 kHz
Signal to noise ratio....70 dB or more
Bluetooth function
Bluetooth version....3.0
Profiles....A2DP, AVRCP
Codec.... SBC
Class ..... 2 (maximum reception distance of about 10 m)
Tuner
Frequency range (FM) 87.5 MHz to 108.0 MHz
Frequency range (AM) 530 kHz to 1710 kHz
Speakers
Enclosure type..... Bass reflex (rear port)
Unit 3-inch
Impedance....6Ω
General - Main unit
Power supply.... PS-M0926 AC adapter
AC input: 100 - 240 V, 0.55 A
DC output: 9 V, 2.6 A
Power consumption 18 W
Dimensions (W × H × D) (including protrusions)
$$ 2 9 1 \times 1 8 2 \times 1 7 9 \mathrm{mm} (6 ^ {\prime \prime} \times 9 7 / 8 ^ {\prime \prime} \times 9 1 / 8 ^ {\prime \prime}) $$
Weight 2.5 kg (5 5/8 lb)
Operating temperature range .... 5°C to 35°C
Included accessories
Remote control (RC-1317) × 1
Remote control battery (CR2032) × 1
AM antenna × 1
PS-M0926 AC adapter × 1
Owner's manual (this document) × 1
Warranty card × 1
- Specifications and appearance are subject to change without notice.
● Weight and dimensions are approximate.
- Illustrations in this owner's manual might differ slightly from production models.
natural_image
Four abstract diagrams showing irregular shapes with circles and cross symbols, no text or labels presentPrécautions de manipulation
natural_image
Three hand-drawn diagrams showing a mechanical press or stamping process, with no visible text or symbols.Touche Lecture/Pause (▶ /II)
h Touche Lecture/Pause (▶ /II)
00 (MIN) : volume minimal (pas de son) 36 (MAX) : volume maximal
natural_image
Front view of a portable electronic device with ventilation grilles and a central display (no text or symbols visible)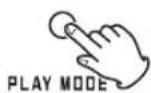
OFF (lecture normale)

natural_image
Front view of a portable electronic device with front panel and control buttons (no visible text or symbols)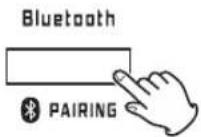
natural_image
Front view diagram of a portable electronic device with front panel and control buttons (no text or symbols)PLAY MODE
flowchart
graph TD
    A["MULTI JOG"] --> B["Hand pointing to a circular path"]
    B --> C["Down"]
    B --> D["UP"]
    C --> E["TIMER"]
    D --> E
    E --> F["Hand pointing to a circle"]
TEAC AMERICA, INC. 1834 Gage Road, Montebello, California 90640 U.S.A. Phone: +1-323-726-0303
TEAC AUDIO EUROPE Liegnitzer Straße 6, 82194 Gröbenzell, Germany Phone: +49-8142-4208-141
This appliance has a serial number located on the rear panel. Please record the model number and serial number and retain them for your records.
Model name: SL-D800BT Serial number:
- CD RADIO WITH BLUETOOTH
- IMPORTANT SAFETY INSTRUCTIONS
- CAUTION
- IMPORTANT SAFETY INSTRUCTIONS (continued)
- Precautions concerning batteries
- WARNING
- DO NOT INGEST BATTERY, CHEMICAL BURN HAZARD
- Laser Information
- Laser:
- Model for USA
- Wireless equipment precautions
- Compliance of radio transmitter and interference
- Model for Canada
- Radiation Exposure requirements
- Statement of compliance
- Information for interference
- (FCC requirements)
- Bluetooth® notes
- Contents
- Before use
- Included items
- Precautions for use
- MP3/WMA files
- Product registration
- Maintenance
- Precautions when creating MP3/WMA files on a computer
- Discs that can be played on this unit
- CD-R/CD-RW discs
- Handling precautions
- Storage precautions
- Names and functions of parts (main unit)
- A Open/close button (▲)
- B STANDBY/ON button
- C Function buttons
- D Speakers (stereo)
- E Display
- F Indicators
- G Remote control signal receiver
- H VOLUME knob
- I Control buttons
- Stop (■) button
- Play/pause (▶ /II) button
- Skip/search (|◀◀ ◀◀/▶▶ ▶▶|) buttons
- PLAY MODE button
- DISPLAY/DIMMER button
- SLEEP button
- MEMORY button
- J MULTI JOG dial
- K USB port for charging
- L CLOCK ADJUST button
- M TIMER button
- Names and functions of parts (remote control)
- a PAIRING button
- b Standby/on ( ⏻/l) button
- c SLEEP button
- d | TIMER button
- e TUNE/MULTI JOG buttons
- f Skip/search (|◀◀ ◀◀/▶▶ ▶▶|) buttons
- g Stop ( ■ ) button
- h Play/pause (▶ /II) button
- i TONE button
- j MUTE button
- k Function button
- I DISPLAY/DIMMER button
- m MEMORY/CLOCK ADJ button
- Using the remote control
- n PLAY MODE/FM MODE button
- o VOLUME (+/-) buttons
- Installing the battery
- When to replace the battery
- Preparation
- Precautions when making connections
- A FM antenna
- B DC input connector (DC IN 9V)
- C AM antenna connector
- Assembling the AM antenna
- Setting the clock
- Basic operation
- NOTE
- Changing the tone
- Press the TONE button.
- Use the MULTI JOG buttons to set the high frequency value.
- If 10 seconds pass without any adjustment, the setting mode will end.
- Adjusting the brightness of the display
- Muting the output
- Changing the display
- When an audio CD is playing
- When an MP3/WMA disc is playing
- When a Bluetooth device is playing
- When the function is AM/FM
- Listening to a CD
- Press the CD function button.
- Press the open/close (▲) button to open the lid. Place a disc with the labeled side facing up and close the lid.
- Press the play/pause (▶/Ⅱ) button.
- Display example
- Pausing playback
- Stopping playback
- Skipping tracks/files
- Search for a part of a track/file
- Programmed playback (CD)
- With an audio CD
- MP3/WMA file example
- Checking the program order
- Adding tracks/files to the end of the program
- Changing a track/file within the program
- Programmed playback (CD) (cont'd)
- Clearing all the program contents
- Repeat/intro/shuffle playback (CD)
- Repeat playback
- REPEAT (single track/file repeat)
- REPEAT ALL (all track/file repeat)
- REPEAT FOLDER
- (MP3/WMA files only)
- Intro playback
- INTRO
- Shuffle playback
- SHUFFLE
- About MP3/WMA file playback
- File playback order
- Selecting folders and files
- Listening to audio from a Bluetooth device
- Press the Bluetooth function button.
- Operate the Bluetooth device to start playback.
- Audio/Video Remote Control Profile (AVRCP)
- Unpairing a device
- Pairing with another Bluetooth device
- Pairing
- Enable the Bluetooth communication function on the other Bluetooth device.
- From the Bluetooth device select "SL-D800BT" (this unit).
- Touch pairing
- Hold the antenna of the device that supports NFC toward the touch pairing reader.
- Listening to the radio
- Automatic station selection
- Manual station selection
- Listening to the radio (cont'd)
- FM MODE button
- Stereo mode selection
- Mono mode selection
- eset tuning
- Automatic presets
- Listening to a preset station
- Wakeup timer
- Setting the timer
- Put the unit into standby (power off).
- Press and hold the TIMER button for at least two seconds.
- Turn the MULTI JOG dial to set the timer starting hour, and press the TIMER button.
- Turn the MULTI JOG dial to set the timer starting minute, and press the TIMER button.
- Repeat steps 3 and 4 to set the TIMER OFF time.
- Turn the MULTI JOG dial to set the audio source, and press the TIMER button.
- Turn the MULTI JOG dial to set the volume.
- Press the TIMER button.
- Prepare the playback source before the wakeup timer turns the unit on.
- Turning the timer off
- Turning the timer on
- Sleep timer Troubles
- Setting the sleep timer
- pting
- The unit will not turn on.
- There is no sound.
- Remote control does not work.
- A nearby TV or other device is malfunctioning.
- There is noise.
- CD player
- Playback is not possible.
- The sound skips.
- Bluetooth function
- Pairing fails.
- Cannot connect.
- The touch pairing reader does not work.
- The sound skips or there is noise.
- SpecificationsTroubleshood
- Radio
- A station cannot be received. The reception is poor.
- FM stereo broadcasts become mono.
- Amplifier
- Tuner
- Speakers
- General - Main unit
- Included accessories
- Précautions de manipulation
- Touche Lecture/Pause (▶ /II)
- h Touche Lecture/Pause (▶ /II)
Brand : TEAC
Model : SL-D800BT
Category : Audio Receiver