
FKS 8839 - Freezer SEVERIN - Free user manual and instructions
Find the device manual for free FKS 8839 SEVERIN in PDF.

| Product type | Freezer (bottle refrigerator) |
| Brand | Severin |
| Model | FKS 8839 |
| Dimensions (H x W x D) | 1160 x 605 x 540 mm (estimated) |
| Gross volume | 290 L |
| Energy efficiency class | E |
| Annual energy consumption | 902 kWh/year |
| Refrigerant type | R600a (isobutane) |
| Adjustable temperature range | 0 °C to 10 °C |
| Power supply | 220-240 V, 50 Hz |
| Interior lighting | LED, on/off switch |
| Ventilation | Built-in fan |
| Shelves | Several removable shelves (max. load 50 kg per shelf) |
| Door lock | Yes, with set of keys |
| Maintenance and cleaning | Warm water with mild detergent; do not use steam cleaner |
| Safety | Do not obstruct ventilation grilles; do not damage cooling circuit; unplug before cleaning |
| Manufacturer warranty | 2 years |
| After-sales service | Contact customer service (see manual for contact details) |
Frequently Asked Questions - FKS 8839 SEVERIN
User questions about FKS 8839 SEVERIN
0 question about this device. Answer the ones you know or ask your own.
Ask a new question about this device
Download the instructions for your Freezer in PDF format for free! Find your manual FKS 8839 - SEVERIN and take your electronic device back in hand. On this page are published all the documents necessary for the use of your device. FKS 8839 by SEVERIN.
USER MANUAL FKS 8839 SEVERIN
natural_image
Exterior view of a modern stainless steel refrigerator with clear glass doors (no visible text or symbols)ART.-NO. FKS 8839
GB Instructions for use
FR Mode d'emploi
Refrigerator for bottles 11
natural_image
Diagram showing two labeled components (1 and 2) with arrows indicating direction, no text or symbols present.natural_image
Diagram of a mechanical component with labeled section A (no text or symbols present)Translation from original operating manual
Refrigerator for bottles
Dear Customer,
Before using the appliance, read the following instructions carefully and keep this manual for future reference. The appliance must only be used by persons familiar with these instructions.
Connection to the mains supply
- The appliance should only be connected to an earthed socket installed in accordance with the regulations. Make sure that the supply voltage corresponds with the voltage marked on the rating label. This product complies with all binding CE labelling directives (see EC-Declaration of Conformity at the end of the manual).
- Do not operate this unit by means of a transformer or, together with other electrical appliances, by means of an extension cable.
- To prevent noise vibration, ensure that the power cord does not touch any part of the rear of the unit (e.g. the heat-exchanger).
- When setting up the appliance, ensure that the power cord is not pinched or damaged.
-
Portable multiple sockets or power supplies must not be placed on the rear of the appliance.
-
Ensure that you can pull out the power plug at any time.
- A complete switch-off will only occur by pulling out the power plug.
Designated use
- The appliance is a compressor cooling device that is exclusively intended for the cooling and storage of bottles. No other food may be stored in this appliance.
- The appliance can be used in a maximum ambient temperature of 32^ C.
- No responsibility is accepted if damage results from improper use, or if these instructions are not complied with.
Important safety instructions
- This appliance is intended for commercial use.
The cooling circuit in this appliance contains the refrigerant isobutane (R600a), a natural gas
The cooling circuit in this appliance contains the refrigerant isobutane (R600a), a natural gas
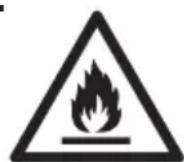
with a high level of environmental compatibility, which is nevertheless flammable. Ensure, therefore, that none of the components of the refrigerant circuit become damaged during transportation and installation of the appliance. If damage to the cooling circuit does occur, do not switch on or connect the appliance to the mains power. In the case that there is an open fire or any other sources of ignition in the vicinity of the
refrigerant gas, make sure it is removed immediately from this area and that the room is then thoroughly ventilated.
- Warning: Keep ventilation openings, in the appliance enclosure or in the built-in structure, clear of obstruction. Sufficient ventilation must be ensured at all times.
- Warning: Do not damage the cooling circuit. Any escaping refrigerant causes damage to the eyes; there is also a danger of the gas igniting.
- Warning: Do not use any external device (e.g.; heaters or heating fans) to accelerate de-frosting; follow only the methods recommended in this manual.
- Warning: Do not operate any electrical appliances (e.g. ice makers) inside the storage compartment that are not specifically permitted in these instructions.
- Before connecting the appliance, check that the appliance and the power cord have not been damaged during transit. Check the power cord regularly for damage. In the event of damage, the appliance must not be put into operation.
- This appliance is not designed for the storage of explosive substances such as aerosol cans with a flammable propellant.
- The storage racks may be loaded with a maximum of 50 kg.
- Never misuse the shelves, compartments, doors, etc. as a step or
support.
- If the unit is sold, handed over to a third party or disposed of at a suitable recycling facility, attention must be drawn to the presence of the insulation agent ‘cyclopenthane’ as well as to the refrigerant R600a. For additional information on correct recycling please refer to the section Disposal.
• In order to comply with safety regulations and to avoid hazards, any repairs or modifications to this unit must be carried out by our authorised service personnel, including the replacement of the power cord.
• Children must not be permitted to carry out any cleaning or maintenance work on the appliance. - For frequent cleaning we recommend the use of warm water with some mild detergent. For detailed information on cleaning the appliance, please refer to the section Cleaning and defrosting.
- Caution: Do not remove the cover of the interior LED light. If there should be any malfunction, please contact the customer service for assistance.
- This appliance is designed for storing bottled beverages only.
- To prevent the risk of personal injury or damage to the unit, it must only be transported while in its original packaging.
- Unevenness in the floor can be compensated for by the adjustable feet, so that there is a secure stability.
- Caution: Keep any packaging materials well away from children:
there is a risk of suffocation.
- To avoid the risk of fire, do not place any thermo-electric appliances on top of the unit. Do not place liquid containers on top of the unit, to prevent any leaking or escaping liquid damaging the electrical insulation.
- Protect the inside of the cabinet at all times from open flames and any other sources of ignition.
-
Remove the plug from the wall socket
-
in case of any malfunction,
- before de-frosting,
- during cleaning,
-
during maintenance/work on the appliance.
-
When removing the plug from the wall socket, never pull on the power cord; always grip the plug itself.
- During all cleaning and maintenance work, the power plug must be pulled out in such a way that the operator can check from any place that the plug is still removed.
- Warning! Do not remove the cover of the LED interior lighting. Call customer service in the event of a defect in the LED light.
- If the unit is not used for an extended period of time, we recommend keeping the door open.
- At all times, make sure that there is no risk of children playing with this appliance, and becoming accidentally trapped by it.
• We reserve the right to introduce technical modifications.
Familiarisation

- On/Off switch for interior light
- Temperature control
- Temperature indicator
- Mains indicator light
- LED interior lighting
- Fan
- Storage racks
- Drain channel cleaning tool
- Condensor
- Compressor with mains power plug
- Door lock with set of keys
Before using for the first time
- Remove any exterior and interior packaging materials.
- Please ensure proper disposal of all packaging materials.
- Fit the two spacer elements (1), provided, into the corresponding guide slots (2) on the rear.

natural_image
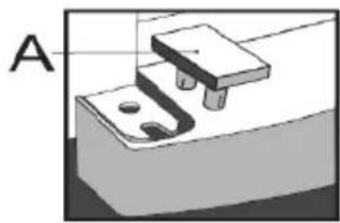
Diagram showing two labeled components (1 and 2) with downward arrows indicating motion or force, no text or symbols present.- Remove the red transport securing device (A); this is for transport purposes only and can be disposed of.
natural_image
Mechanical component diagram showing a bracket and mounting base (no text or symbols)- Clean the appliance as described under Cleaning and defrosting.
- For positioning, we recommend that you tilt the unit slightly backwards. In this way, the transport rollers can be used to move it to its intended place of installation.
- The unit should only be transported in its vertical position; do not tilt any more than 30^ .
- Once the unit has been positioned, wait for about 30 minutes before it is connected to the mains.
- If the unit has been tilted more than 30^ during transport, allow it to stand upright for at least 4 hours before it is connected to the mains.
- When the unit is first switched on, a slight 'new' smell may be noticed. However, this will disappear once the cooling process has begun.
Installation
- The appliance should be set up in a well-ventilated, dry room.
- It should be operated in conditions where the relative humidity is no more than 60 %.
- The product data sheet contains details of the ambient temperature range suitable for this appliance.
- Do not use the appliance outdoors.
- Ensure that the plug is accessible and can be removed from the wall socket at any time.
- Do not expose the appliance to direct sunlight, and do not position it next to any heat sources (radiators, cookers etc). If this cannot be avoided, however, suitable insulation must be in installed between the heat source and the unit.
- The unit must not be installed inside a cabinet, nor directly below a hanging cupboard, shelf or similar object.
- If the unit is installed next to a wall, a minimum lateral distance of 10 mm is necessary for the door to fully open.
- If the floor is uneven, the adjustable feet on the unit can be used to compensate and ensure optimum stability.
Set-up dimensions Ventilation


The heated air around the rear of the unit must be able to circulate freely. Therefore, ensure that the air circulation is not obstructed.
Warning: Take special care that the ventilation openings in the upper part of the rear panel are not blocked or obstructed.
Temperature control
- The unit is activated by connecting it to the mains. It is only switched off completely when the plug is removed from the wall socket.
- The green mains indicator light shows that the unit is connected to the mains.
- The temperature in the refrigerator cabinet can be adjusted by setting the temperature control (0-5). Turning the control clockwise will decrease the temperature, while turning it anti-clockwise will increase it.
The temperature can be set within a 0 to 10^ range.
- The temperature in the cabinet largely depends on factors such as the ambient temperature, the setting and the number of bottles stored.
• We recommend using a thermometer to check the actual temperature inside the cabinet and make adjustments as necessary.
• Always ensure that the door is properly closed and that the seal is not obstructed by bottles stored inside the cabinet.
- Following a power interruption, or if the unit has been switched off on purpose, it may take 3 to 5 minutes before it switches on again.
- Note: With the temperature control in position '0', only the compressor is switched off, while the fan is still running.
Interior lighting
- The interior light can be switched on by means of the separate On/Off switch.
- Caution: Do not remove the cover of the interior LED light. If there should be any malfunction, please contact the customer service for assistance.
Cleaning and defrosting
During operation, you may notice a build-up of frost around the integral evaporator sealed into the rear of the inside cabinet. This layer of frost will start melting when the compressor is not working. Through a system of hoses, the melt-water drains into the collection tray below the compressor, where it will be absorbed into the surrounding air.
- The unit does not therefore require de-frosting, but only proper cleaning.
• To enable the melt-water to drain freely, always ensure that the channel and discharge opening in the cabinet are free of any blockage.
• Any water collecting in the bottom should be removed.
• Always remove the plug from the wall socket before cleaning.
- Do not use aggressive cleaning detergents or those containing alcohol. Also, do not use electrical devices such as steam cleaning devices for defrosting or cleaning.
- For frequent cleaning we recommend the use of warm water with some mild detergent.
• The cabinet should be cleaned once a month.
- Any accessories should be cleaned separately with soapy water. Do not put them in a dishwasher.
• After cleaning, thoroughly clean all surfaces with fresh water before wiping them completely dry. When re-inserting the plug into the wall socket ensure that you have dry hands.
- To save energy and to ensure optimum performance, the compressor (at the rear) should be carefully cleaned at least twice a year, with a brush or a vacuum cleaner.
Trouble-shooting
Certain typical sounds can be heard when the appliance is switched on. These sounds are caused by:
- the electric motor within the compressor assembly; during compressor start-up the sound level will be slightly higher for a short time.
• the cooling agent flowing through the circuit.
The following table lists possible malfunctions, their probable causes and solutions. In the event of operational problems, check first whether a solution can be found
using this table. If the problem persists, disconnect the appliance from the mains power and contact our Customer Service Department.
| Problem Possible cause and solution | |
| The appliance is not working at all. | There is a power failureThe main fuse has blown.The temperature control is set to ‘0’.The fuse in the wall socket (if applicable) has blown. This can be checked by connecting another electrical device to the socket and checking for function. |
| The temperature inside the compartment is not low enough. | The cabinet has been overloaded.The door is not properly closed.There is too much dust on the condenser.Insufficient ventilation: the unit is too close to a wall or other structure or object.The temperature setting is too low |
| The normal operating sound changes or becomes louder. | Check the following:Check for proper positioning (uneven floor).Are any adjacent objects affected by the running of the cooling unit (i.e. causing them to vibrate?)Are there any objects on top of the unit which might be vibrating? |
| Water is collecting on the bottom of the unit. | The melt-water drain system is blocked. Remove the blockage and clean the system. |
Transporting the appliance
To prevent damage to the unit during transport, ensure that all accessories and components inside and around the appliance are securely fastened.
The unit must only be transported in its vertical position; do not tilt any more than 30^ .
Once the unit has been positioned, wait for about 30 minutes before it is connected to the mains.
If the unit has been tilted more than 30^ during transport, allow it to stand in an upright position for at least 4 hours before it is connected to the mains.
Disposal
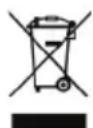
Devices marked with this symbol must be disposed of separately from your household waste, as they contain valuable materials which can be recycled. Proper disposal protects the
environment and human health. Your local authority or retailer can provide information on the matter. Remove the plug from the wall socket and render the unit unusable by cutting off the power cord prior to disposal.
The cooling medium Isobutane (R600a) and the propellant in the isolation Cyclopentane (C5H10) are inflammable substances, thus, need to be appropriately disposed of.
- Make sure the tubes of the cooling circuit don't get damaged before the proper disposal.
Manufacturer
SEVERIN grants you a manufacturer's guarantee of two years from the date of purchase. During this period, we will eliminate all defects free of charge that are demonstrably based on material or manufacturing defects and that significantly impair function. Further claims are excluded. The following are excluded from the guarantee: Damage that can be traced back to non-observance of the instructions for use, improper handling or normal wear and tear, as well as easily breakable parts such as glass, plastic or incandescent lights. The guarantee expires in the event of any interference not authorised by SEVERIN. The statutory guarantee rights toward the seller and any seller guarantees remain unaffected.
Information needed by the Customer Service
Should repairs to the appliance become necessary, please contact our Customer Service, providing a detailed fault description and quoting the article number KS ... on the rating label of the appliance (inside the cabinet at the bottom left). This information will help us to handle your request efficiently.
In case of problems or malfunction, or if spare parts are required, contact only the Service hotline.
| Product data sheetDelegated Regulation (EU) 2019/2018 | |||
| Supplier's name or trademark: Severin Elektrogeräte GmbH | |||
| Supplier's address: Röhre 2759846 Sündern Nordrhein-Westfalen, Germany | |||
| Model identifier: FKS 8839 | |||
| Use: Presentation and retail | |||
| Type of refrigerator with direct sales function: Beverage cooler | |||
| Code of the refrigerated cabinet family according to the harmonised standards or other reliable, accurate and reproducible processes in accordance with Annex IV | VC4 | ||
| Product-specific parameters | |||
| 1. Beverage cooler | |||
| Gross volume (in dm3 or l) | Ambient conditions for which the appliance is suitable (According to Table 6) | ||
| Maximum temperature (°C) Relative humidity (%) | |||
| 290 +32 65 | |||
| General product parameters: | |||
| Annual energy consumption (kWh) 902 | Recommended temperature(s) for optimal food storage (in °C)(These settings must not contradict the temperature conditions according to Annex IV Tables 4, 5 or 6) | +5.0 | |
| EEI 64.5 Energy efficiency class E | |||
| Light source parameters | |||
| Light source type LED | |||
| Energy efficiency class D | |||
| Minimum duration of the guarantee offered by the manufacturer: 24 months | |||
| Further information: | |||
| Web link to the manufacturer's website where the information according to Number 3 of Annex II of Commission Regulation (EU) 2019/2024 can be found: www.severin.de | |||
Chère cliente, Cher client,
natural_image
Diagram showing two labeled components (1 and 2) with arrows pointing to a surface, no text or symbols present.natural_image
Technical diagram of a mechanical component with labeled section A (no text or symbols present)natural_image
Diagram showing two labeled components (1 and 2) with arrows indicating direction, no text or symbols present.natural_image
Diagram of a mechanical component with a bracket and mounting base, labeled 'A' (no text or symbols on the diagram itself)natural_image
Diagram showing two labeled components (1 and 2) with downward arrows indicating motion or force, no text or symbols present.natural_image
Pure mechanical component diagram without any text, numbers, or symbolsnatural_image
Diagram showing two labeled components (1 and 2) with arrows pointing to a surface, no text or symbols present.natural_image
Pure mechanical component diagram without any text, numbers, or symbolsnatural_image
Diagram showing two labeled components (1 and 2) with arrows indicating direction, no text or symbols present.natural_image
Mechanical component diagram showing a bracket and mounting base (no text or symbols)natural_image
Diagram showing two labeled components (1 and 2) with arrows indicating direction, no text or symbols present.natural_image
Pure mechanical component diagram without any text, numbers, or symbolsnatural_image
Diagram showing two labeled components (1 and 2) with arrows indicating direction, no text or symbols present.natural_image
3D diagram of a mechanical component with labeled section A (no text or symbols on the object itself)natural_image
Diagram showing two labeled components (1 and 2) with arrows indicating direction, no text or symbols present.natural_image
Technical diagram of a mechanical component with labeled section A (no text or symbols present)natural_image
Diagram showing two connected components with arrows indicating direction (no text or symbols)natural_image
Technical diagram of a mechanical component with labeled section A (no text or symbols present)Regulator temperature
natural_image
Diagram showing two labeled components (1 and 2) with arrows indicating direction, no text or symbols present.natural_image
Pure mechanical component diagram without any text, numbers, or symbolsEU-Declaration of Conformity
We herewith confirm that the product as detailed below complies with the governing EU-directives and bulk production will be manufactured accordingly.
EN-Normen / EN-Standards
The article complies with the standards as mentioned below which are necessary to obtain CE-symbol:
| EN 55014-1:2017 | EN 60335-1:2012+A11:2014+A13:2017+A1:2019+A14:2019+A2:2019 |
| EN 55014-2:2015 | |
| EN 61000-3-2:2014 EN 60335-2-89:20 | 10+A1:2016+A2:2017 |
| EN 61000-3-3:2013 | EN 62233:2008 |
This declaration is for all above mentioned types beginning with the production code:
This EU declaration will be invalid if the appliance will be changed without any agreement.
Hersteller:
Supplier:
Head of quality development and safety department
Unterschrift:
Signature:
AVEDA Lifestyle EOOD
ul. Angel Kanchev 1, et. 5
BG 1124
Sofia
Croatia
Koracell d.o.o.
Donje Svetice 40
26 Oaktree Business Park
Trim Co., Meath
Tel.: 046 94 83100
Fax: 046 94 83663
Web: www.bluestone.ie
Italia
ASSISTENZA POST-VENDITA
NUMERO VERDE 800224155
E-Mail: assistenza@severin.com
Indonesia
PT. Setai Modern Elektronik
Email.: info@severin.co.id
Web.: www.severin.co.id
Jakarta
Komp. Glodok Plaza Blok F No. 9, Jl. Pinangsia Raya,
Jakarta Barat
021 65911888 / 021 6592889
Medan
Dr.Waleed Maraga commercial center, Level 1
Khalda, Amman Zip code: 11953
Tel: +962 6 5346429
Fax: +962 6 5341706
Mob Jordan : +962 797426108
Kuwait
Mohammed Abdulrahman Al Bahar
Al Bahar Building P.O. Box 148
Safat 13002 Kuwait
Tel.: +965 4810855
Latvia
SIA GTCL BALTIC
Piedrujas iela 7
LV - Riga 1073
Tel.: +371 29119989
Fax: +371 67297769
Lebanon
Khoury Home
7th Floor, Cité Dora 3 Building, Dora
P.O.Box 70611
Antelias, Lebanon
Tel.: +961 1 244200
Fax:+966 1 253535
E-Mail: info@khouryhome.com
Internet: www.khouryhome.com
Lithuania
UAB Topo Grupe
Savanoriu PR. 206A,
50193 Kaunas, Lithuania
Tel.: +370 660 00200
A.A.K & Partners L.L.C.
P.O Box:-1650, Muttrah
Postal Code - 114
Sultanate of Oman
Tel.: +968 24834470
Fax.: +968 24835186
E-Mail: aakpllc@gmail.com
Peru
SEVERIN PERU / Comercial Rebeca S.R.L
Mezzanine 1, South Center Tower
2206 Venture Street, Madrigal Business Park
Alabang, Muntinlupa City
Tel.: 809 34 41
E-Mail: severinconsumercare@colombophils.com.ph
Polska
Severin Polska Sp.z o.o.
6 Tagore Drive, #03-04
Singapore 787623
Tel.: +65 6455 0005
Fax: +65 6455 4010
Web: www.beste.com.sg
E-Mail: info@beste.com.sg
Slovenia
SEVTIS d.o.o.
Smartinska 130
1000 Ljubljana
Tel.: +386 1 542 1927
Fax: +386 1 542 1926
Slowak Republic
BVZ Commerce s.r.o.
Odbavovací centrum
Závodu míru 974/66a
360 17 Karlovy Vary
Tel.: +420 233 557 825
3rd Floor, Grove Exchange
Grove Avenue
Claremont
South Africa
7708
Tel: +27 21 674 0294
Fax: +27 21 674 0295
Web: http://www.alcdashley.co.za
Mail: service@alcdashley.co.za
Svenska
El & Digital Service AB
Folkungagatan 144
11630 Stockholm
Tel.: +46 8 845180
www.eldigital.se
E-Mail: info@eldigital.se
Switzerland
SPC Electronics AG
Mövenstrasse 12
CH-9015 St. Gallen
Tel.: +41 71 227 99 99
E-Mail: service@spcag.ch
www.spc.ch
Thailand
Verasu Ltd. part.
83/7 Wireless Rd., Lumpini,
Patumwan, Bangkok 10330
Tel.: +662 254 81 008
E-Mail: askverasu@verasu.com
Tunisie
GEI
54, rue du Mercure
Zone Industrielle 2013-BEN AROUS
TUNISIE
Ukrayina
Service for Modern Electronics LLC
Sim'i Khokhlovykh Str.8
4119 Kiev
Tel.: + 38 044 247 67 34
E-Mail: info1@photoservice.com.ua
United Kingdom
Homespares Centres Limited
Peel House
2 Chorley Old Road
BL13AA
Tel.: 01204 558160
Fax: 01204 558169
E-Mail: office@homespares.co.uk
Web: www.homespares.co.uk
Vietnam
BRAND PARTNER
CTY TNHH DOI TAC NHAN HIEU
FLOOR 8, DAG HOLDINGS
87A HAM NGHI
NGUYEN THAI BINH WARD, DISTRICT 1
HO CHI MINH CITY, VIETNAM
Tel.: +84-28-62 899 648
E-Mail: kenny.clark@brandpartner.vn
trang.hau@brandpartner.vn
Stand: 09.2021 (Special Edition)

- ART.-NO. FKS 8839
- Refrigerator for bottles
- Dear Customer,
- Connection to the mains supply
- Designated use
- Important safety instructions
- Familiarisation
- Before using for the first time
- Installation
- Set-up dimensions Ventilation
- Warning: Take special care that the ventilation openings in the upper part of the rear panel are not blocked or obstructed.
- Temperature control
- Interior lighting
- Cleaning and defrosting
- Trouble-shooting
- Transporting the appliance
- Disposal
- Manufacturer
- Information needed by the Customer Service
- Chère cliente, Cher client,
- Regulator temperature
- EU-Declaration of Conformity
- EN-Normen / EN-Standards
- Croatia
- Italia
- Indonesia
- Jakarta
- Medan
- Kuwait
- Latvia
- Lebanon
- Lithuania
- Peru
- Polska
- Slovenia
- Slowak Republic
- Svenska
- Switzerland
- Thailand
- Tunisie
- Ukrayina
- United Kingdom
- Vietnam
Brand : SEVERIN
Model : FKS 8839
Category : Freezer