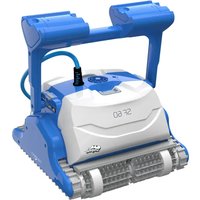
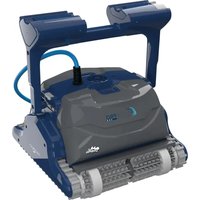
Dolphin Supreme M3 - Robot mower MAYTRONICS - Free user manual and instructions
Find the device manual for free Dolphin Supreme M3 MAYTRONICS in PDF.

User questions about Dolphin Supreme M3 MAYTRONICS
0 question about this device. Answer the ones you know or ask your own.
Ask a new question about this device
Download the instructions for your Robot mower in PDF format for free! Find your manual Dolphin Supreme M3 - MAYTRONICS and take your electronic device back in hand. On this page are published all the documents necessary for the use of your device. Dolphin Supreme M3 by MAYTRONICS.
USER MANUAL Dolphin Supreme M3 MAYTRONICS
EN User Instructions
natural_image
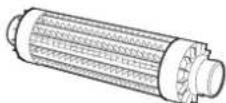
Exterior view of a modern vacuum cleaner with coiled wheels and a handle (no visible text or symbols)MBC8-UNI
What You'll Find Inside the Box
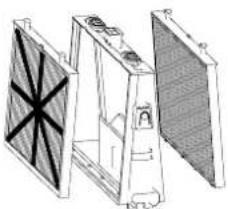
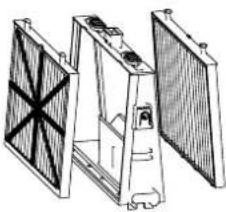
Filter and cartridges
natural_image
Diagram of a mechanical device with two upward arrows indicating direction, no text or symbols presentRobot pool cleaner
natural_image
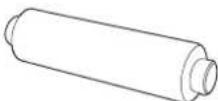
Line drawing of a power supply device with no visible text or symbols on the bodyPower supply Unit
| Part X Comment | ||
| Base frame for filter elements 2 | ||
| Ultra-fine filter 4 filters | ||
| Bag for filters storage 1 | ||
| Spring filter | 4 filters | |
| "S" clip 4 | ||
| Power supply unit 1 | ||
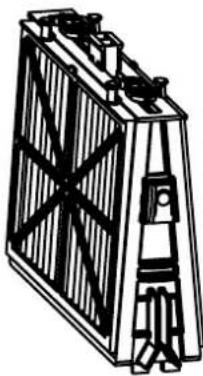
| Robot pool cleaner 1 | ||
| Optional components available on request from your robot pool cleaner distributor | ||
Section 1 - Description of Main Components
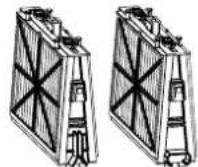
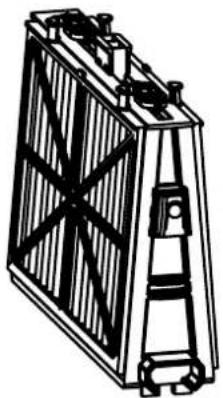
1. Filters
Dual-level filtration system:
natural_image
Technical line drawing of a mechanical or electronic component with no visible text or symbolsSpring filter + base frame
For dirty pools with large debris such as leaves etc. – Useful for beginning of season.
natural_image
Technical line drawing of a mechanical assembly with no visible text or symbolsUltra-fine filter cartridge + base frame
For day-to-day use.
Factory default.
2. Brushes
There are three types of optional brushes, each designed to provide optimal traction on different pool surfaces.
Only one type set is provided with your robot pool cleaner.
PVC Brush
For concrete, PVC, fiberglass and liner.
Combined Brush
For rough ceramic surface and mosaic tiles.
Wonder Brush
For smooth ceramics.
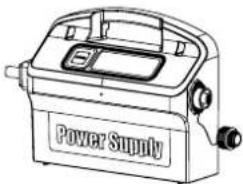
3. Power supply unit
Digital, "Switch-Mode" power supply:
• Input - 100-250 AC Volts
50-60 Hertz
• 180 Watt
• Output - 30 VDC
IP 54

text_image
Power Supply On/Off switchSection 2 – Robot pool cleaner Operation
Part 1 – Preparing the Robot Pool Cleaner for Use
Laying out the cable
Unwind minimal required cable to cover the entire pool size, straight the cable along the pool side. Make sure there are no twists or kinks.
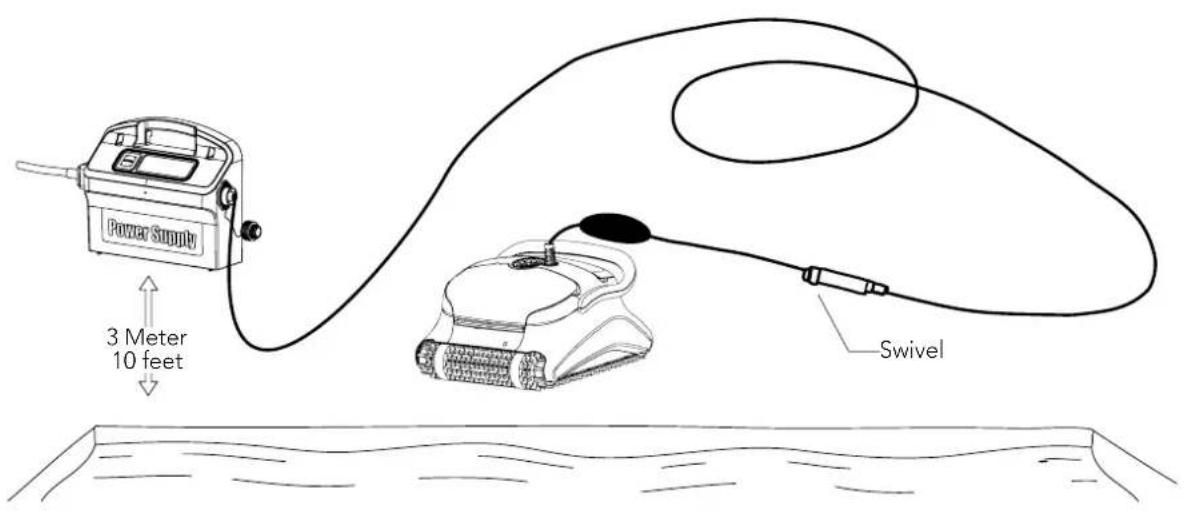
text_image
Power Supply 3 Meter 10 feet SwivelOnly use the original supplied power supply unit.
The Power supply unit is splash proof – do not immerse it in water.
⚠️ Unplug the power supply unit before any servicing activity.
Do not plug the power supply unit in before placing the pool cleaner in the water.
⚠ Ensure the mains outlet is protected by a ground fault interrupter (GFI) or an earth leakage interrupter (ELI).
Important: Do not enter the swimming pool while the pool cleaner is working.
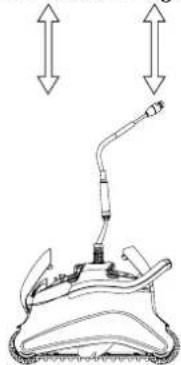
Part 2 - Into the water
Inserting the robot pool cleaner into the pool.
Place the robot pool cleaner into the pool and release the handle.
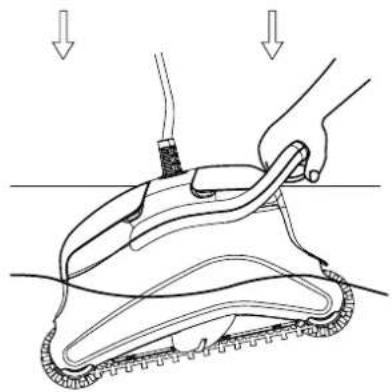
natural_image
Diagram of a hand holding a tool interacting with a mechanical device, showing motion lines and force arrows (no text or symbols)Note: When using the combined brushes or Wonder brushes, gently squeeze the Wonder brush material until it is totally wet.
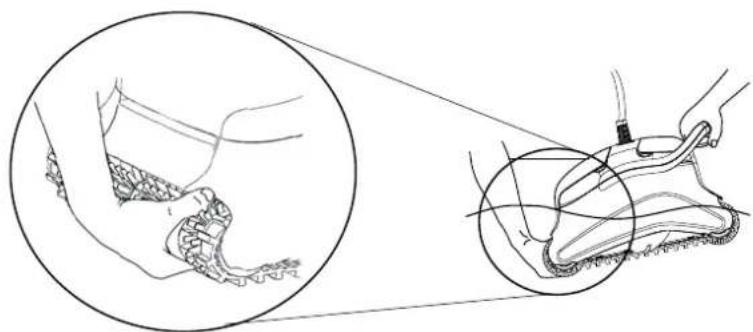
natural_image
Line drawing of a shoe being protracted, showing part of the shoe and foot (no text or symbols)Turning the robot pool cleaner ON
- Plug the floating cable from the robot pool cleaner into the power supply unit.
-
Plug the electrical cable from the power supply unit into the mains.
-
Press the ON/OFF switch
- The robot pool cleaner will now start to work.
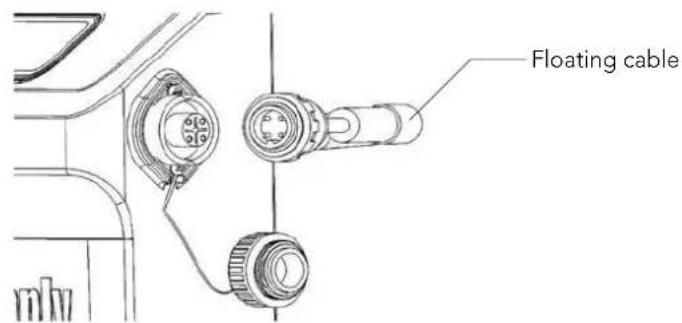
text_image
Floating cable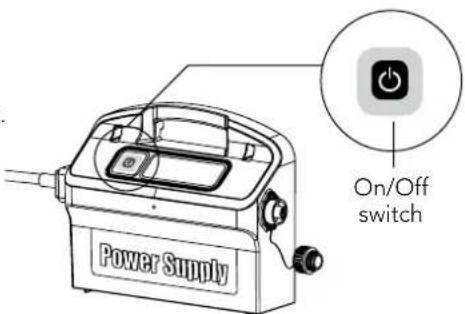
text_image
Power Supply On/Off switch
Important: Do not enter the swimming pool while the pool cleaner is working.
Part 3 - Taking the robot pool cleaner out of the water

Unplug power supply before any servicing activity.
- If the robot pool cleaner has not finished its cycle, turn off the power supply unit and unplug the mains.
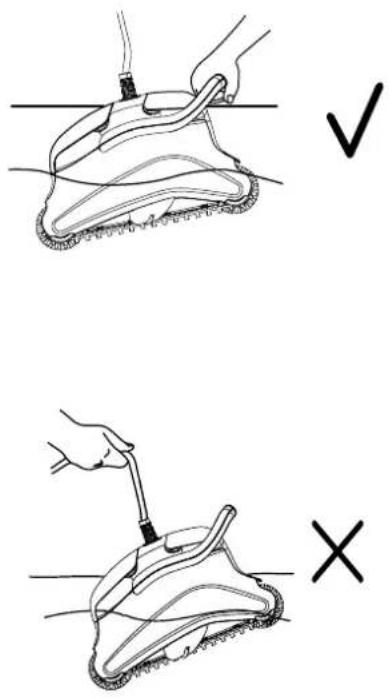
- Pull the floating cable gently until the robot pool cleaner has risen to the surface, then lift by the handle.
text_image
Diagram showing two-step cleaning or repair procedure with check and cross icons indicating correct and incorrect states.Important: Do NOT lift the robot pool cleaner from the water by its cable.
Section 3 - Routine Maintenance
Part 1 - Extracting and cleaning the filter elements

plug power supply before any servicing activity.
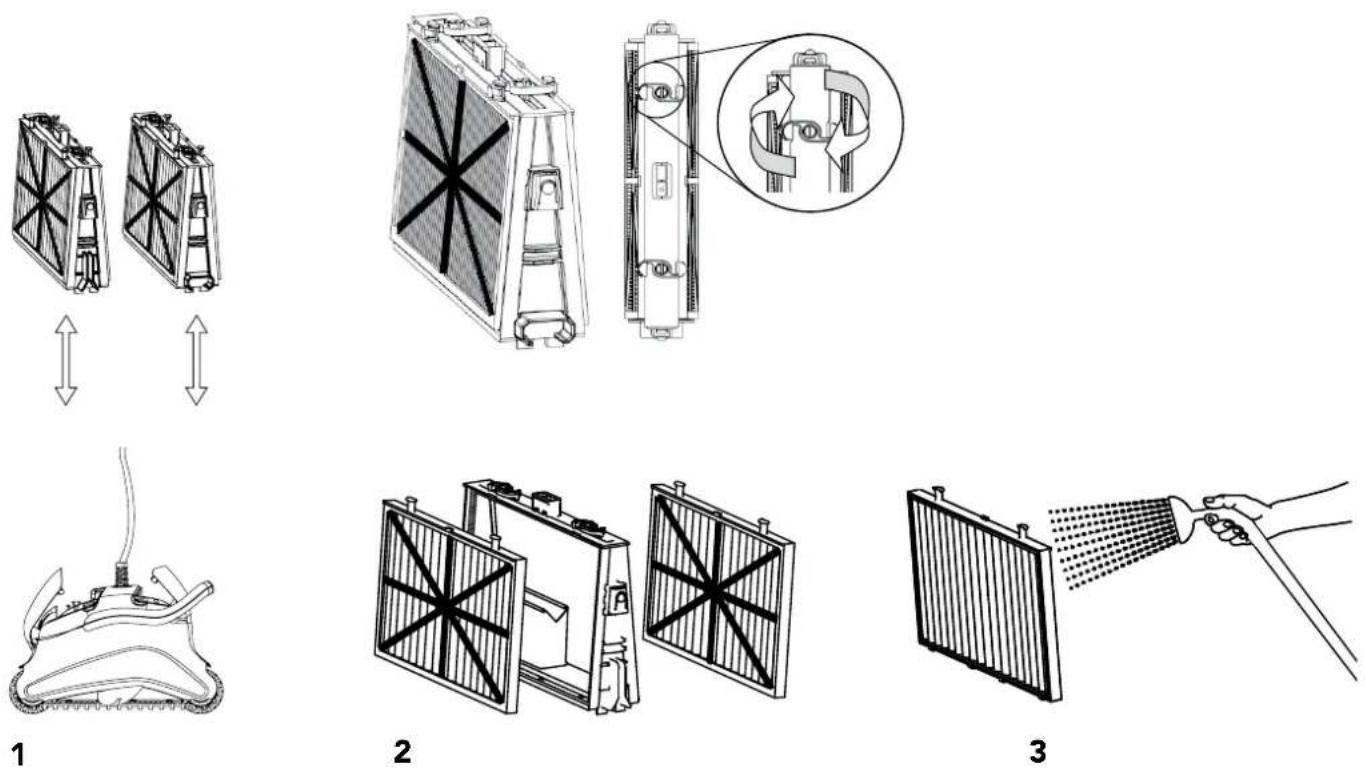
Reassembling the filter elements
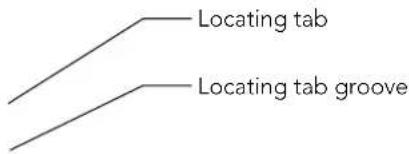
Insert the locating tabs at the bottom of the filter element into their groves on the base frame, then close the "S" clip.
text_image
Locating tab Locating tab groove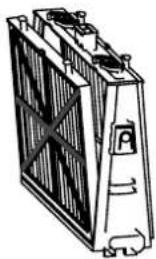
natural_image
Illustration of a heat exchanger or cooling unit with visible cooling fins and cooling elements (no text or symbols)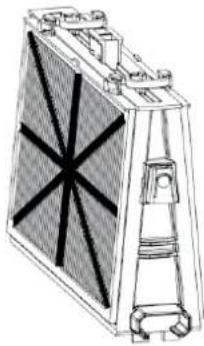
natural_image
Technical line drawing of a mechanical or electrical component with no visible text or symbols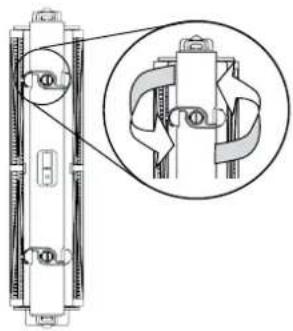
natural_image
Technical diagram of a mechanical assembly with a magnified inset showing internal components (no text or labels)Reinstall the filters according to the diagram DO NOT FORCE THE FILTERS INTO PLACE.
natural_image
Technical line drawing of a battery with internal structure and mounting bracket (no text or symbols)Groovedendfitting

natural_image
Line drawing of a rectangular battery with internal circuitry and mounting feet (no text or symbols)Octagonal end fitting
Recommendation: Rinse all brushes with clean water after each cleaning cycle.
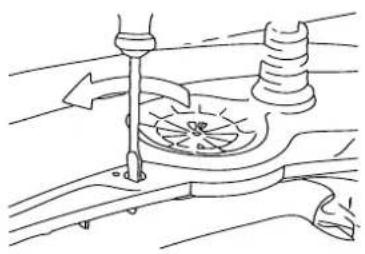
Part 2 - Dismantling and cleaning the impeller

Unplug power supply before any servicing activity.
Dismantle the impeller cover and clean around the impeller housing, then reassemble.
natural_image
Diagram of a mechanical assembly with a rotating component and a lever (no text or symbols)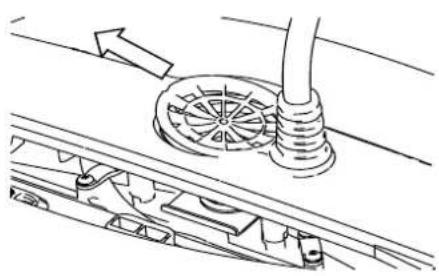
natural_image
Technical line drawing of a mechanical assembly with gears and a pipe (no text or symbols)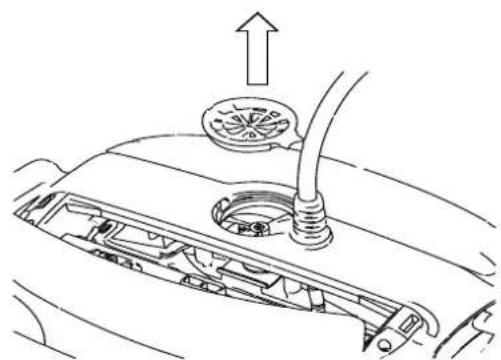
natural_image
Diagram of a car's front engine compartment showing intake manifold and exhaust pipe (no text or labels)1
2
3
Section 4 – Storage Advice
Coil the cable and store in dry cool area.
✗ Do NOT store the robot pool cleaner exposed to direct sunlight.
✗ Do NOT store the robot pool cleaner exposed to excessive heat.
✗ Do NOT store the robot pool cleaner exposed to frost.
Troubleshooting Guide
Before contacting your robot pool cleaner distributor please read through this guide.
The pool water condition must be within the following parameters:
| PH: 7.0 – 7.8 NaCl: Max 5,000 ppm | |
| Temperature: 6°C(43°F) to 34°C(93°F) Chlorine: Max 4 ppm |
| Symptom Solution | |
| Cable twisting or cable coils up Check for any obstruction in the pool | Remove excess cable from the pool |
| Make sure filter cartridge is clean | |
| Straighten cable and lay it in the sun periodically | |
| Robot pool cleaner is moving in circles or does not reach all pool areas | Check for foreign objects in moving parts |
| Make sure filter elements are clean and that the filter doors are closed | |
| Make sure that there is enough cable laid out to cover the whole pool | |
| Before using the robot pool cleaner at the beginning of the season you should brush any algae from the floor and walls of the pool | |
| Robot pool cleaner not sinking Make sure the Wonder brushes or the combined brushes are soaked in water | |
| Motor is not working | Check if the impeller is blocked |
| Check if the drive system is blocked | |
| Electrical problem (power supply), check power source. If power source is in order, please contact your robot pool cleaner distributor | |
| Robot pool cleaner flips on its side Clean the filter cartridge | |
| Additional troubleshooting is available at our Website: www.maytronics.com | |
natural_image
Diagram of a mechanical device with two upward arrows indicating direction (no text or symbols)natural_image
Line drawing of a power supply device with no visible text or symbols on the bodynatural_image
Technical line drawing of a mechanical assembly with no visible text or symbolsFiltre Printemps
natural_image
Technical line drawing of a mechanical assembly with multiple blades and mounting holes (no text or symbols)text_image
Power Supply 3 metres 10 feet Pivot (Swivel)natural_image
Diagram of a hand holding a tool above a mechanical device with arrows indicating motion or force (no text or symbols present)natural_image
Illustration of a shoe being processed with a tool, showing foot and ankle details (no text or symbols)text_image
Diagram showing two-step cleaning or repair procedure: one with checkmark and cross, the other with checkmark and X.natural_image
Illustration of a hand spraying water onto a panel with a hose (no text or symbols)1
2
3
Remontage
natural_image
Illustration of a battery with heat exchanger and cooling unit (no text or symbols)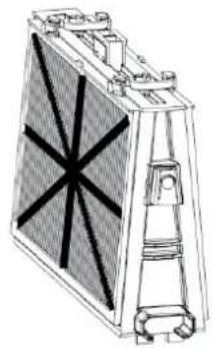
natural_image
Technical line drawing of a mechanical component with no visible text or symbols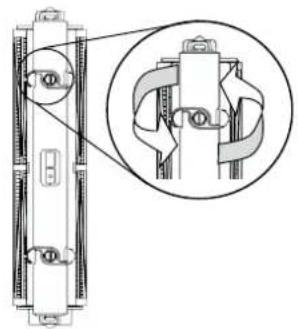
natural_image
Technical diagram of a mechanical assembly with an inset close-up showing internal components (no text or labels)natural_image
Technical line drawing of a battery with internal structure and mounting feet (no text or symbols)Embout à rainure
natural_image
Technical line drawing of a rectangular battery with internal circuitry and mounting feet (no text or symbols)Embout octogonal
natural_image
Technical line drawing of a mechanical assembly with no visible text or symbols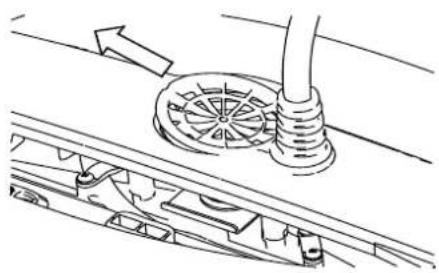
natural_image
Technical line drawing of a mechanical assembly with gears and a pipe (no text or symbols)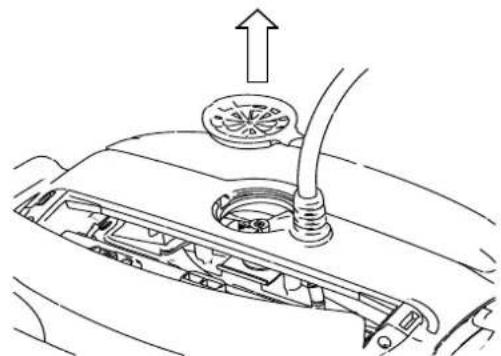
natural_image
Diagram of a car's front engine compartment showing intake manifold and exhaust pipe (no text or labels)1
2
3
text_image
Power Supplynatural_image
Technical line drawing of a mechanical assembly with three views (front, side, and top) showing internal components without any text or symbols.natural_image
Technical line drawing of a mechanical assembly with no visible text or symbolstext_image
Power Supply Interruttore On/Offtext_image
Power Supply 3 metri Mulinellonatural_image
Diagram of a hand holding a tool over a mechanical device with arrows indicating motion or force (no text or symbols present)natural_image
Illustration of a shoe being handled with a tool, showing foot positioning and measurement lines (no text or symbols)text_image
Power Supply Interruttore On/Offnatural_image
Illustration of a hand holding a rope tied to a surface, with a checkmark (no text or symbols present)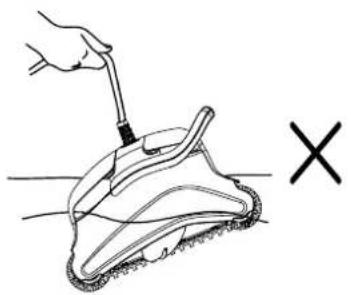
natural_image
Illustration of a hand using a tool to lift a textured off-lying surface, with a 'X' symbol indicating cancellation or failure (no text or symbols present)natural_image
Illustration of a hand spraying water onto a panel (no text or symbols)1
2
3
Rimontaggio
natural_image
Technical line drawing of a battery or heat exchanger unit (no text or symbols visible)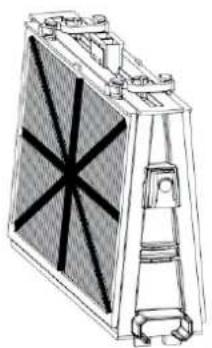
natural_image
Technical line drawing of a heat exchanger or cooling unit with no visible text or symbols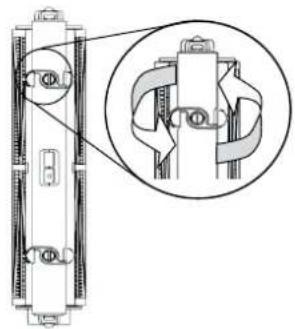
natural_image
Technical line drawing of a mechanical assembly with an inset close-up showing internal components (no text or symbols)natural_image
Technical line drawing of a battery with internal structure and mounting feet (no text or symbols)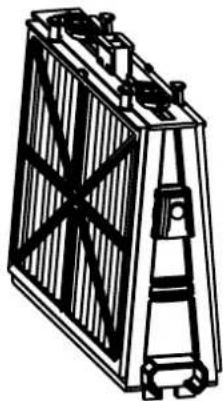
natural_image
Technical line drawing of a battery with internal structure and mounting feet (no text or symbols)natural_image
Diagram of a mechanical device with rotating components and directional arrows (no text or symbols)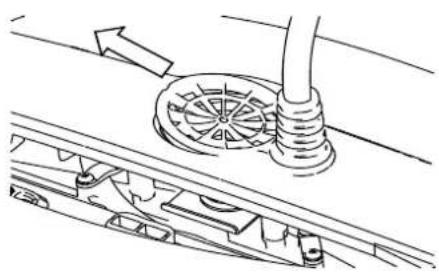
natural_image
Technical line drawing of a mechanical assembly with no visible text or symbols
natural_image
Diagram of a car engine compartment showing intake manifold and exhaust pipe (no text or symbols)1
2
3
natural_image
Diagram of a mechanical device with a lever and two upward arrows indicating motion or force (no text or symbols present)natural_image
Line drawing of a power supply device with no visible text or symbols on the bodynatural_image
Technical line drawing of a mechanical device with internal components and mounting brackets (no text or symbols)Filtro de Resorte + Bastidor de Base
natural_image
Technical line drawing of a mechanical assembly with three views (front, side, and top) showing internal components without any text or symbols.natural_image
Diagram of a hand holding a tool over a mechanical device with arrows indicating motion or force (no text or symbols present)natural_image
Medical illustration showing a surgical procedure on a foot with an inset close-up of the incision (no text or labels)natural_image
Illustration of a hand holding a tool above a foot with a checkmark (no text or symbols present)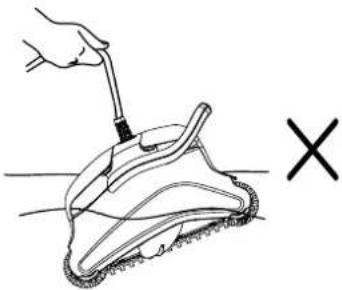
natural_image
Hand using a tool to lift a textured surface, marked with an 'X' symbol (no text or symbols on the diagram itself)natural_image
Two identical diagrams of a battery pack with internal components and upward/downward arrows indicating direction (no text or symbols)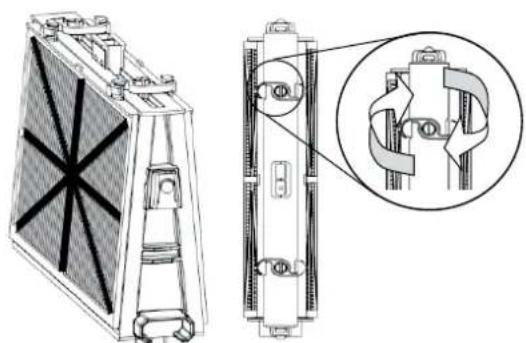
natural_image
Technical line drawing of a heat exchanger or cooling unit with internal components and a magnified inset showing internal structure (no text or symbols)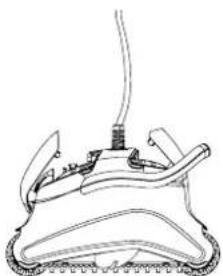
natural_image
Line drawing of a mechanical device with a central spring and attached cable (no text or symbols)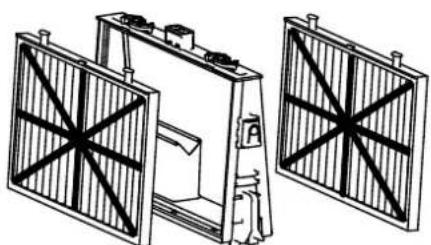
natural_image
Technical line drawing of a mechanical assembly with two vertical panels and a central component (no text or symbols)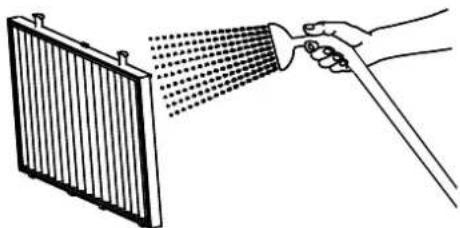
natural_image
Illustration of a hand spraying water onto a radiator panel (no text or symbols)1
2
3
Reensamblar
natural_image
Technical line drawing of a heat exchanger or cooling unit (no text or symbols visible)
natural_image
Technical line drawing of a mechanical component with no visible text or symbols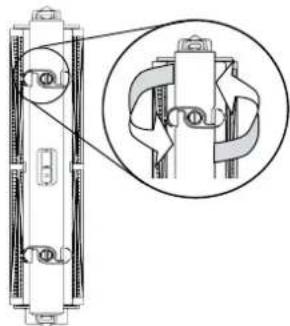
natural_image
Technical line drawing of a mechanical assembly with a magnified inset showing internal components (no text or symbols)natural_image
Technical line drawing of a battery pack with internal structure (no text or symbols)natural_image
Technical line drawing of a rectangular battery with internal circuitry and mounting base (no text or symbols)natural_image
Technical line drawing of a mechanical assembly with no visible text or symbols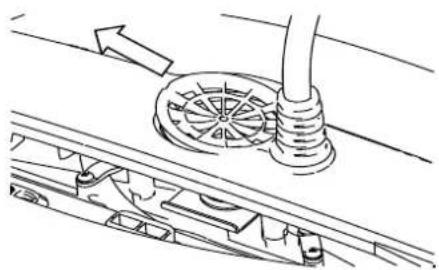
natural_image
Technical line drawing of a mechanical assembly with a central rotating component and directional arrows (no text or symbols)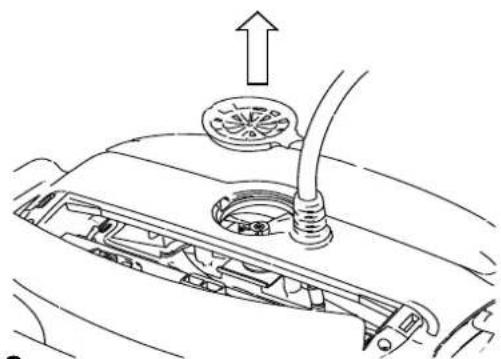
natural_image
Diagram of a car's engine compartment showing intake manifold and exhaust pipe (no text or labels)1
2
3
natural_image
Diagram of a mechanical device with two upward arrows indicating direction, no text or symbols presenttext_image
Power Supplynatural_image
Technical line drawing of a mechanical assembly with no visible text or symbolsnatural_image
Technical line drawing of a three-tiered solar panel assembly (no text or symbols)natural_image
Diagram of a hand holding a tool above a mechanical device with arrows indicating motion or force (no text or symbols present)natural_image
Medical illustration showing a surgical procedure on a patient's foot, with magnified inset detail (no text or labels)natural_image
Illustration of a hand holding a rope tied with a cable, with a checkmark (no text or symbols present)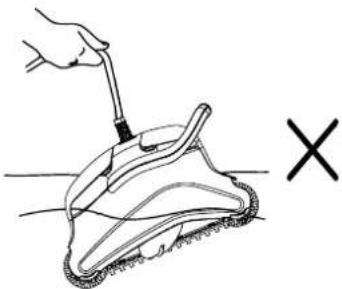
natural_image
Hand holding a tool applying material to a textured surface, marked with an 'X' symbol (no text or symbols on the diagram itself)natural_image
Illustration of a hand spraying water onto a radiator panel (no text or symbols)1
2
3
Wiedereinbau
natural_image
Illustration of a heat exchanger or cooling unit with visible cooling fins and cooling elements (no text or symbols)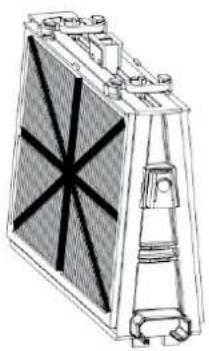
natural_image
Technical line drawing of a mechanical or electrical component with no visible text or symbols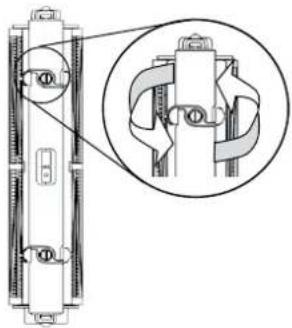
natural_image
Technical diagram of a mechanical assembly with an inset close-up showing internal components (no text or labels)natural_image
Technical line drawing of a battery with internal structure and mounting base (no text or symbols)GeriffeltesEndstück

natural_image
Technical line drawing of a battery pack with internal circuitry and mounting bracket (no text or symbols)natural_image
Technical line drawing of a mechanical assembly with no visible text or symbols1

natural_image
Technical line drawing of a mechanical assembly with gears and a shaft (no text or symbols)2

natural_image
Diagram of a car's front engine compartment showing intake manifold and exhaust pipe (no text or symbols)3