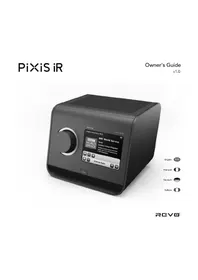
PiXiS IR - Radio REVO - Free user manual and instructions
Find the device manual for free PiXiS IR REVO in PDF.


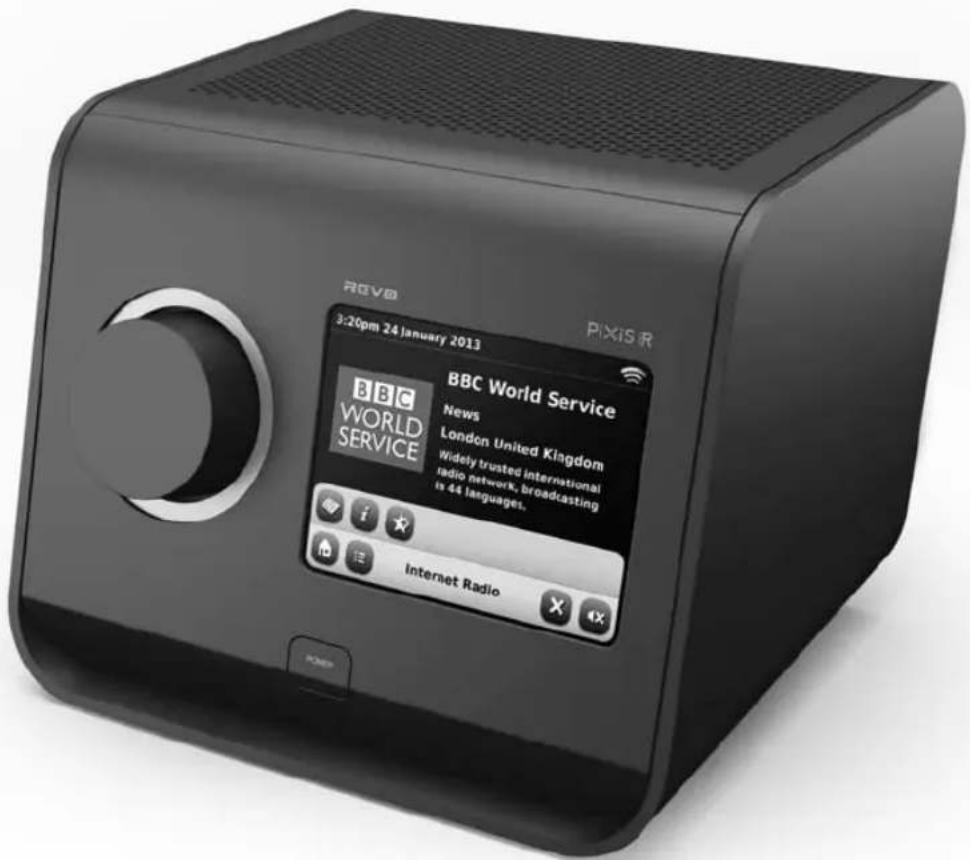
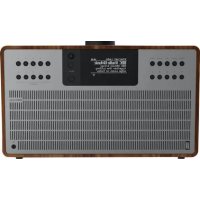
| Product type | Internet radio with 3.5 inch colour touch screen |
| Brand | REVO |
| Model | PiXiS IR |
| Dimensions (approx.) | 200 x 120 x 80 mm |
| Weight (approx.) | 0.6 kg |
| Power supply | Multi-region mains adapter (UK, Europe, USA, Australia) |
| Power consumption | Not specified |
| Main functions | Internet radio, podcasts, network audio streaming (UPnP), alarms (2 alarms), touch screen, programmable sleep timer, equalizer |
| Connectivity | Wi-Fi (WEP, WPA, WPA2), USB port for software update |
| Supported audio formats | MP3, AAC, WMA, FLAC |
| Care and cleaning | Clean with a soft dry cloth. Avoid water and abrasive products. |
| Safety | Do not use near water, do not open the casing, use only the provided power supply, keep away from small objects and liquids. |
| Spare parts and repairability | Contact REVO for spare parts. Repairs only by authorized technician. |
| Warranty | 1 year against manufacturing defects |
| General information | Compliant with RoHS and CE directives. Do not dispose of with household waste (WEEE). |
Frequently Asked Questions - PiXiS IR REVO
User questions about PiXiS IR REVO
0 question about this device. Answer the ones you know or ask your own.
Ask a new question about this device
Download the instructions for your Radio in PDF format for free! Find your manual PiXiS IR - REVO and take your electronic device back in hand. On this page are published all the documents necessary for the use of your device. PiXiS IR by REVO.
USER MANUAL PiXiS IR REVO
English

Français

Deutsch

Italiano

Technical Support
Should you encounter problems using this product, please refer to the troubleshooting section on page 20 of this owner's guide. Alternatively, call Revo technical support on :
UK 01555 666 161 From outside the UK + 44 1555 666 161
Alternatively, e-mail support@revo.co.uk or visit the troubleshooting section of our website at: www.revo.co.uk
Environmental Info
PRODUCT DISPOSAL INSTRUCTIONS (WEEE DIRECTIVE)

The symbol shown here and on the product means that it is classed as Electrical or Electronic Equipment and should not be disposed with other household or commercial waste at the end of its working life.
The Waste of Electrical and Electronic Equipment (WEEE) Directive (2002/96/EC) has been put in place to recycle products using best available recovery and recycling techniques to minimise the impact on the environment, treat any hazardous substances and avoid the increasing landfi II.
For more information please contact your local authority or the retailer where the product was purchased.
RoHS COMPLIANT & CE MARK

This product has been designed to comply with international directives on the Restriction of Hazardous Substances (RoHS) and has been designed and type-tested to comply with EU requirements and carries a CE mark.
SAFETY WARNINGS
- Do not operate this radio near water
- Do not remove screws or casing parts
- Use only the power supply unit supplied
- Avoid small objects and liquids from entering the product

Warranty
Revo Technologies Ltd warrants to the end user that this product will be free from defects in materials and workmanship in the course of normal use for a period of one year from the date of purchase. This guarantee covers breakdowns due to manufacturing faults and does not apply in cases such as accidental damage, general wear and tear, user negligence, modification or repair not authorised by Revo Technologies Ltd.
To register your purchase please visit www.revo.co.uk
Copyrights and Acknowledgements
Copyright 2012 Revo technologies Ltd. All rights reserved.
No part of this publication may be copied, distributed, transmitted or transcribed in any form or by any means, electronic, mechanical, magnetic, manual or otherwise, without the permission of Revo Technologies Limited.
REVO and PiXiS IR are trademarks or registered trademarks of Revo Technologies Ltd.
Revo Technologies Ltd
The Inox Building, Caldwellside, Lanark, Scotland, United Kingdom, ML11 7SR
Tel: 01555 66 61 61 Int. Tel: +44 1555 66 61 61
Fax: 01555 66 33 44 Int. Fax: +44 1555 66 33 44
Email: enquiries@revo.co.uk Website: www.revo.co.uk
Disclaimer
Revo Technologies Limited makes no representation or warranties with respect to the content of this publication, and specifically disclaims any implied warranties of merchantability or fitness for any particular purpose. Further, Revo Technologies Limited reserves the right to make changes to this publication from time to time, without notification to any person or organisation.
Contents
| 2 | Support, Warranty and Environmental Information |
| 3 | Contents / Welcome / Unpacking PiXiS / Power Supply |
| 4 | Guiding Principles / Home Screen |
| 5 | Second-Level Navigation |
| 6 | Internet Setup |
| 7 | Internet Radio Mode |
| 8 | Finding Stations |
| 9 | Podcasts / Listen Again / Presets |
| 10 | Internet Radio Portal |
| 11 | Network Audio Mode |
| 12 | Network Audio Setup |
| 13 | Network Audio Finding Tracks |
| 14 | Alarms |
| 15 | Alarm Snooze / Sleep / USB Update |
| 16 | System Settings |
| 18 | Miscellaneous Settings |
| 20 | Troubleshooting |
Power Supply
Your PiXiS radio is supplied with a multi-region power supply, meaning that it can be operated in a number of countries around the world.
Simply choose the correct adaptor for your country from the selection supplied, then follow the instructions opposite.

natural_image
Four line drawings of electrical plug components: a three-pin socket, two multi-pin blocks, and a circular socket (no text or symbols)UK EURO U.S.A AUSTRALIA
Welcome
Thank you for purchasing PiXiS. We are sure that it will provide you with years of enjoyment and reliable service.
This guide has been designed to quickly get you up and running with your radio, offer guidance on the product's features and provide information on operation, safety, warranty details and troubleshooting.
Unpacking PiXiS
Carefully remove your radio from its packaging and remove the other items from the box.
The box should contain the following:
- PiXiS touchscreen radio
- Multi-region power supply with adaptors for UK, Europe, USA and Australia
- Operating guide
- Warranty Card
If any items are missing or damaged, please contact your point of purchase or call Revo directly on +44 (0) 1555 66 61 61

natural_image
Line drawing showing two hand positions: one holding a tool, the other handling a tool with a screwdriver (no text or symbols)Guiding Principles
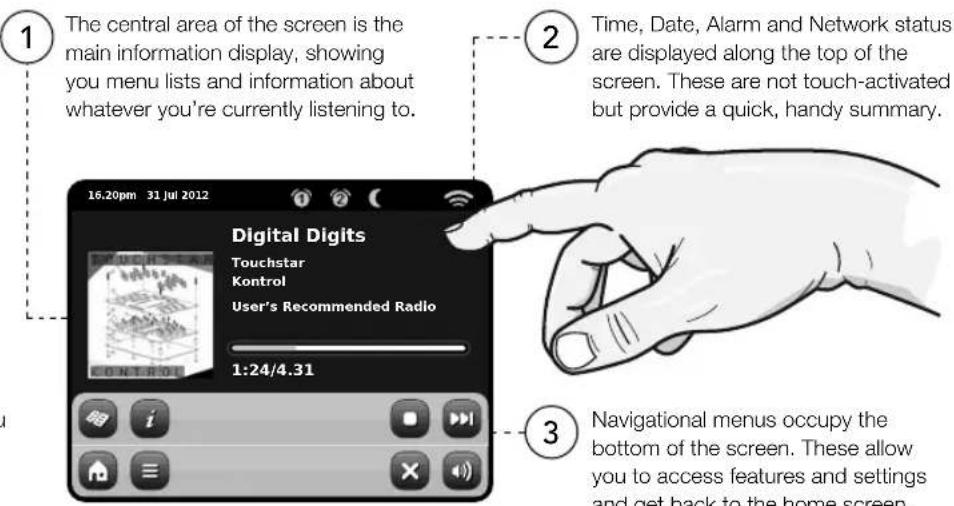
One of PiXiS IR's defining features is its 3.5 inch colour touchscreen, which puts you in direct contact with the radio's many functions.
PiXiS IR's controls are very intuitive, so should require little explanation. The graphical representation of features and the ability to directly touch words and buttons to activate them should feel natural after just a few minutes of use.
To get you started, the following two pages aim to offer a summary of what you can expect to see in the different areas of your PiXiS IR's screen and provide an outline of how to find your way around.
Home Screen
Your first point of contact with PiXiS's interface is the home screen. We think the various modes will be fairly self-explanatory and easy to find but here we offer a short description of the function of each of the homepage icons.
Gently press an icon to access the relevant mode.
Sleep
The Sleep setting allows you to set PiXiS IR to automatically switch itself into standby mode. See page 15 for further information.
Internet Radio
Internet Radio mode allows you to access tens of thousands of online radio stations and podcasts from around the World. As long as you have a broadband internet connection, you don't even need a computer to use this mode. Details on page 6.
Network Audio / Network Music Player
PiXiR IR's network music player mode "Network Audio" lets you stream audio files across your network from PC or Mac. This turns PiXiR IR into a multi-room system for your existing music collection. See page 11.
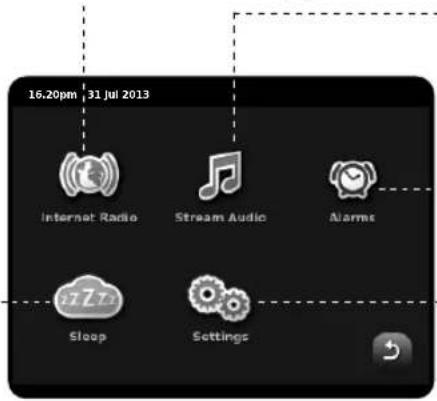
Alarms
PiXiS's alarms allow you to wake up to any of the audio modes or a buzzer. Alarms are fully confi gurable to specify dates, recurrence, volume etc. See page 14.
Settings
The Settings menu provides you with controls to tailor the setup of your PiXiS. For example, time settings, audio EQ, and display brightness can be controlled from here. See page 16 for details.
Second-Level Navigation
After you've clicked an option on the home screen to enter one of the modes, the layout of the screen will change slightly.
While each mode looks unique to a certain extent, depending on the information to be displayed, there are several features in common throughout the system.
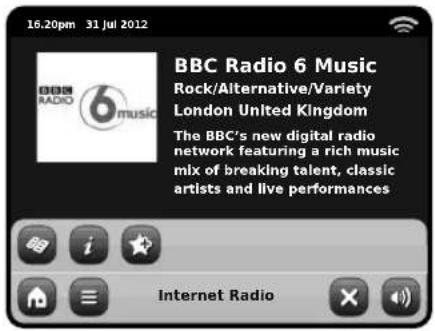
When using any of PiXiS IR's modes, you'll notice at the foot of the screen are one or two rows of contextual menu buttons. These are your main means of interacting with PiXiS IR.
The bottom row remains on screen in all modes and provides system-level navigation, enabling you to return to the home-screen at any time, or bring up a contextual menu for your current mode
Home – click to return to the main menu screen while maintaining audio playback of current mode
Contextual Menu – click to view and configure user options for current mode.
The current mode name is displayed in the centre of the bottom menu bar.

Volume - click to mute volume.
Close – click to return to the home screen and stop playback of current mode.

As you navigate through context-specific sub-menus, the "Close" button will change to a "Back" button, which takes you back up to the previously viewed screen.

If you press the 'Home' button, the current mode will continue to play until you select an alternative audio source. This means you can adjust PiXiS IR's alarm settings or change your system configuration without interrupting your listening.

If you press the Home button, you'll notice that a "Back" button appears in the lower right hand corner of the main menu screen. Pressing this will take you back to the currently playing mode.
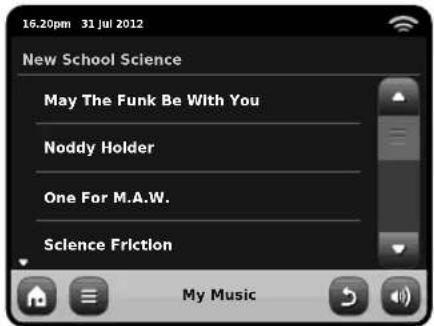
When you enter a navigational menu, the available choices will be shown as a list. Just touch any option in a list to select it.
On longer lists, a scrollbar will appear to the right of the screen. Use the Up and Down buttons to scroll through the list one screen at a time, or press part of the scrollbar background to jump to a point.
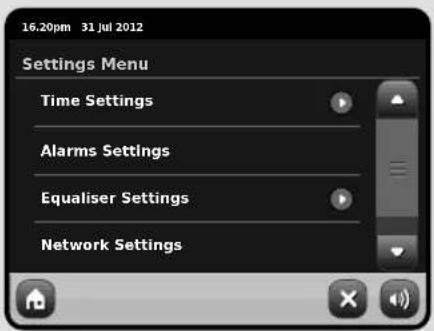

An arrow next to an item in a list indicates that there are further options associated with that item.
Internet Setup
PiXiS IR makes connecting to the internet via your local wireless or wired network very straightforward.
The easiest way to get started is simply to enter Internet Radio mode, where PiXiS IR will lead you through the process of connecting to your network and getting online.
The main steps are illustrated below:
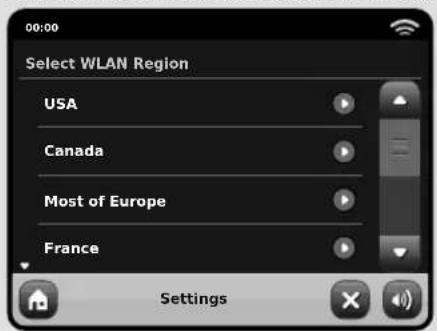
- Select your WLAN region from the list.
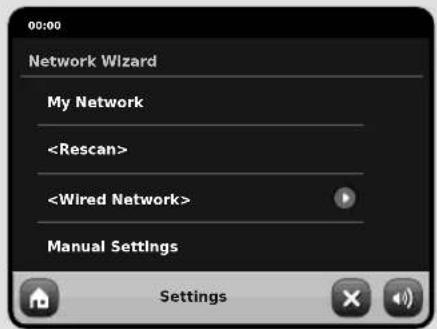
- PiXiS IR automatically scans for networks. As in the example shown, any networks within range of your PiXiS IR will be listed by name.
- Select your preferred network from the list.
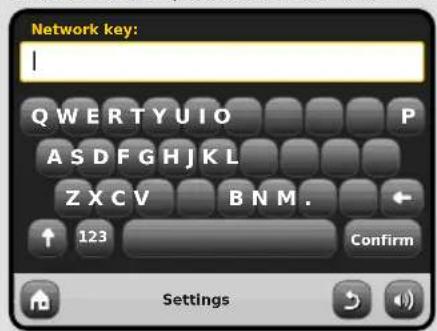
- If your network is not password protected, PiXiS IR will now connect to it. If you do
use password protection, you will be prompted to enter your access code as shown. Type your password using the on-screen keyboard, then press "Confirm".
- PiXiS IR will now connect to your network. Your password is saved to PiXiS IR's memory so you don't need to enter it every time you reconnect.
Select your region... Wireless networks within range will be listed.

Select your preferred network.
Enter your network password and click "Confirm".

After following the steps above you should be able to access the Internet Radio mode. You've also taken the first step towards streaming audio wirelessly from computers on your network.
All your network settings will be saved to PiXiS IR's memory until you choose to manually update them.
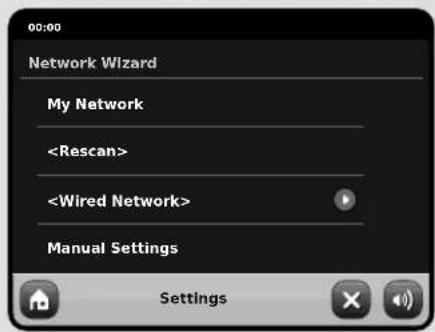
If you want to manually check or change your network settings at any time, you can do so via the "Settings" section. Go to "Network Settings" then select "Network Wizard".
If you have advanced settings you wish to configure yourself, select the "Manual settings" option. For more information, see page 17.
Saved Network Profi les: If you move your PiXiS IR to a different location, when you enter one of the internet modes it will automatically re-scan for available networks.
Only networks within range will be listed but don't worry, your old settings are saved safely and will automatically find your network again if you move your PiXiS IR back to that location.
Internet Radio Mode
PiXiS IR's Internet Radio mode is a fantastic way to receive interesting broadcasts of every imaginable type from all around the World. It also allows you to listen to podcasts, enabling you to catch up or listen on demand to many broadcasts you may have missed on their first airing.
From PiXiS IR's home screen, click the Internet Radio icon to start.
Getting Started...
The first time you enter Internet Radio mode (after you've successfully set up your internet connection – see page 6), you'll be taken to the main Station Directory menu screen.
You'll find the following options on the main Internet Radio Station List:
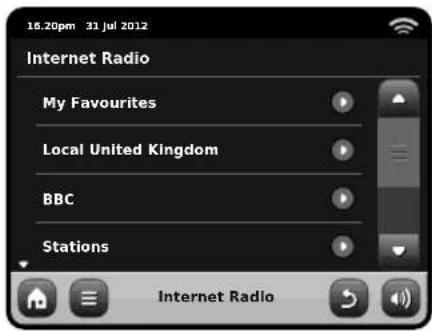
My Favourites
Provides a quick route to access stations which you select as favourites. For more information on using favourites see page 9.
Local
A comprehensive list of all the internet radio stations being broadcast from within your country or geographical region.
BBC
A handy shortcut to all BBC stations.
Stations
The big list! Find thousands of stations either by browsing categories such as location, genre and popularity or by searching for a station by name.
Podcasts
Find podcasts and "listen-again" broadcasts by location, genre or by searching for a name.
My Added Stations
Shows stations that you've personally added to your station list by accessing the Frontier Silicon Radio Portal. See page 14 for more details.
Help
Find your PiXiS IR's access code.
Main IR Playing Screen
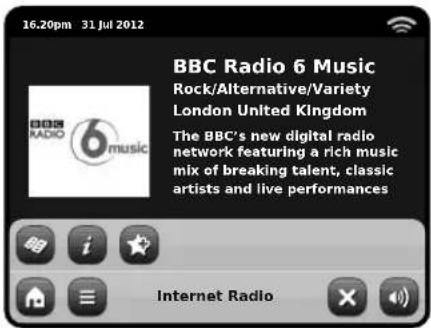
Station information, including name, genre, location, logo and description data where available from broadcaster.
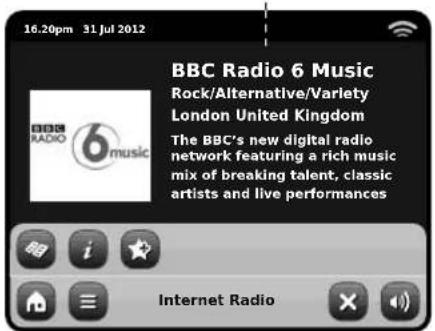

The main contextual menu button in IR mode simply offers you two options:
Return to playing screen: Takes you back to the main station info screen.
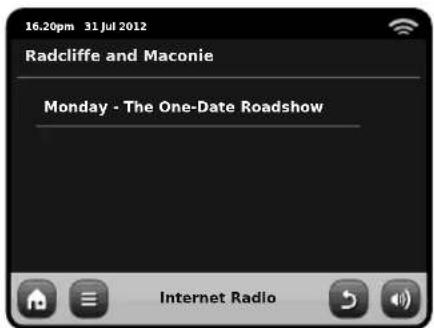
Last Listened: Offers you a list of shortcuts to your recently accessed stations.

View Station Directory List

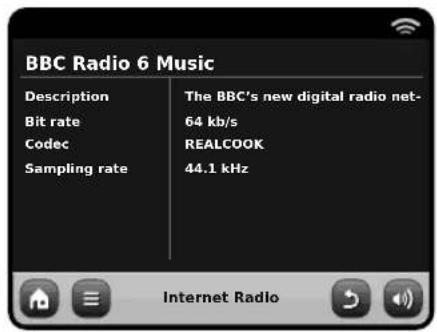
View Technical Information

Add Current Station to Favourites
Depending on broadband connection and network speeds, stations may need to preload (buffer) for a few seconds before playback starts.

Finding IR Stations
The first time you run Internet Radio mode, you'll be taken straight to the main station list as described overleaf.
This directory offers you a great variety of methods to browse and search for radio stations and podcasts.
Broadly speaking, all the list items operate in a similar manner, so in the following example we'll focus on one item from the menu: the "Stations" heading, which provides the most comprehensive range of broadcasts.
After clicking "Stations", you'll see the options listed as below:
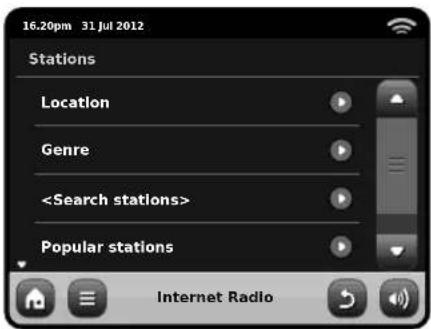
Station Directory

To access PiXiS IR's Internet Radio Station List, press the directory button any time you're in IR mode.
Browsing for Stations
By Location
Choose a continent, then a country, then browse all available stations for that location, or delve deeper into sub-categories for specific genres etc.
It's worth noting that if you're looking for a station from your own country, it's probably quicker to access it by going to the main station directory and clicking the heading "Local".
By Genre
Categorises all available stations by programme type, based on the descriptions provided by broadcasters.
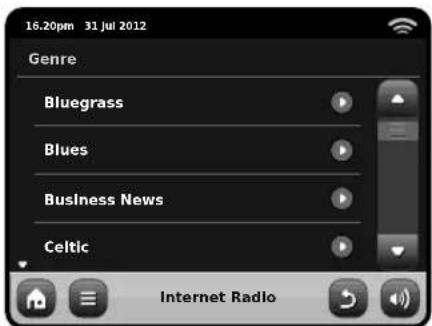
After selecting an option from the list, you can then browse a complete list of that entire genre, or refi ne your results further, based on sub-categories such as country of origin.
Popular Stations
A list of the 100 most listened-to stations via the Frontier Silicon Internet Radio Portal.
New Stations
A list of the 50 stations most recently added to the Frontier Silicon Internet Radio Portal.
Searching for Stations
If you have a specific radio station in mind, you can search for it by name or by a keyword from its title or description.
From the main Station List, select "Stations", then click "<Search stations)". This brings up a keyboard search box:
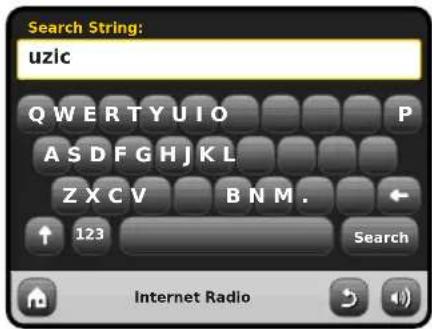
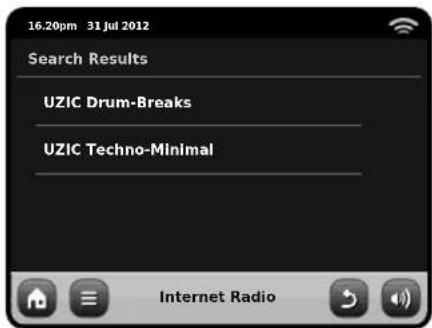
Input a word, phrase or part of a station name and click "search". Any matching results will be listed as pictured below. Simply select a station from the list to begin playing it.
Click "Back" to search again if you didn't find what you were looking for.
Podcasts / Listen Again
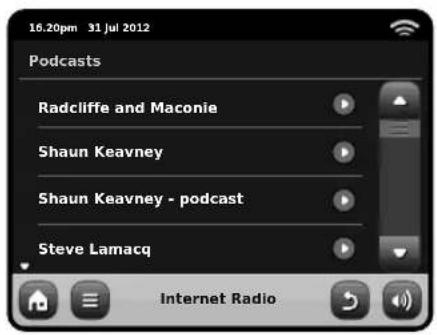
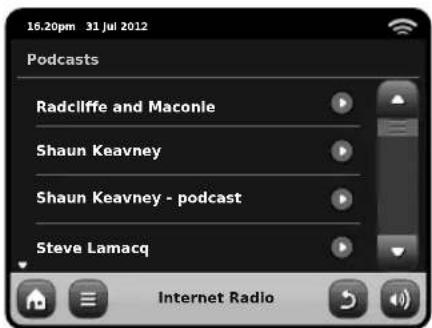
Podcasts offer you the ability to listen to a huge array of programmes on-demand, giving you a chance to catch up with broadcasts you may have missed, or to listen again to something you enjoyed.
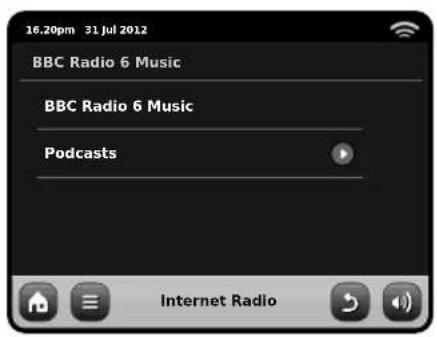
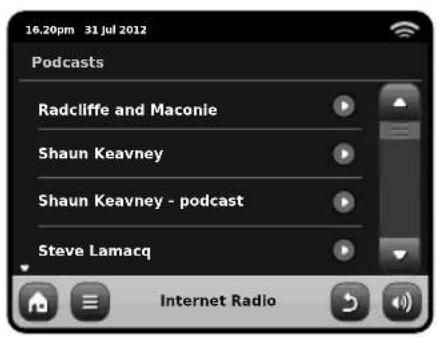
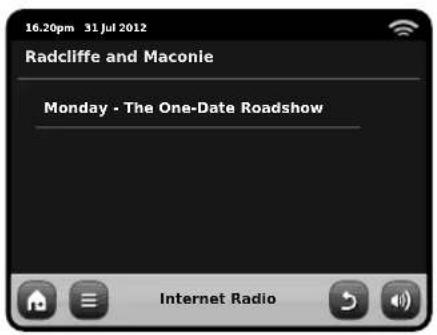
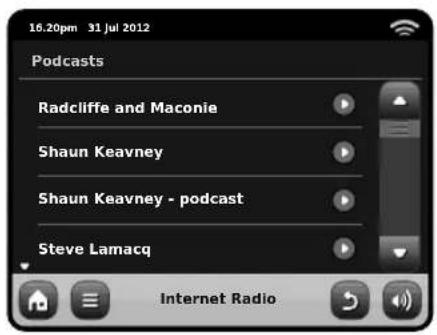
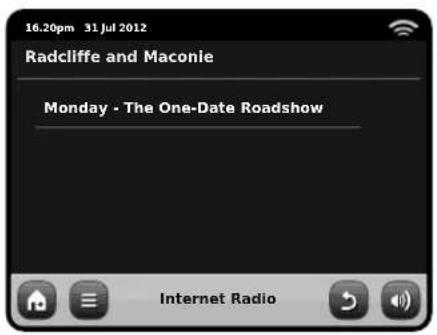
Tofi nd podcasts, search for a radio station as normal, but instead of clicking the station name to listen live, select the Podcasts option. This will bring up a list of available programmes. Select a show to bring up a list of the podcasts available for it.
Note: not all stations make their programmes available as podcasts. Also, the length of time that podcasts are available is dictated by the station. In many cases, podcasts will be made available for one week, although many are also available for longer periods.
Favourite Station Presets
PiXiS IR lets you save separate lists of favourite internet radio stations and podcasts.

To add the station or podcast you're listening to as a new favourite, click the Add Favourite button.
You can also register an unlimited number of favourites via the Frontier Silicon Radio Portal, which means they're stored independently of your PiXiS IR. If you carry out a factory reset, your favourites will still be retained. You can even share these favourites with other interest radio devices. See page 10 for more details.

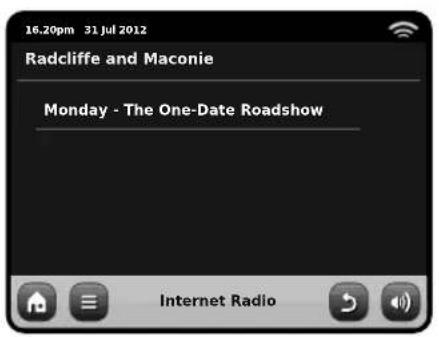
Favourite Added

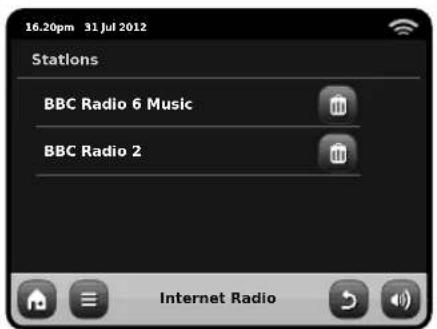
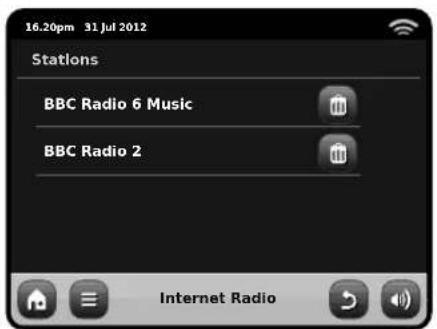
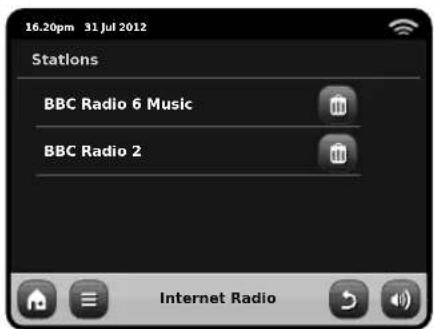
To review your favourites, click the Station List button and select "My Favourites".
When you browse one of the options, you'll see your favourites listed in the order you saved them. You can easily remove items from the lists by pressing the corresponding trashcan icon:

When you exit Internet Radio mode, your last listened-to radio station is saved to PiXiS IR's memory and will be automatically restored next time you use Internet Radio.

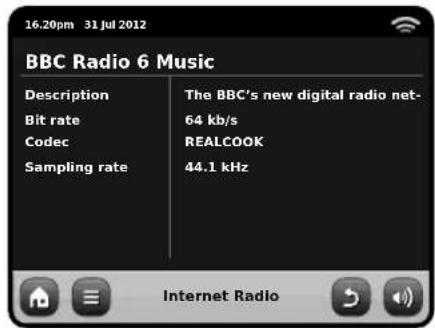
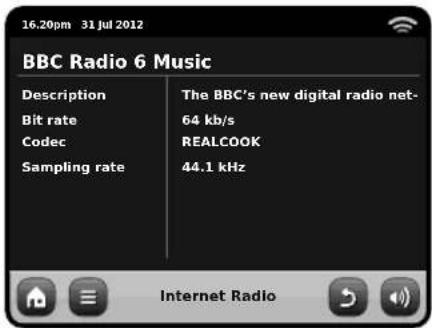
The Information button takes you to a screen displaying technical specifications for the station you're listening to.
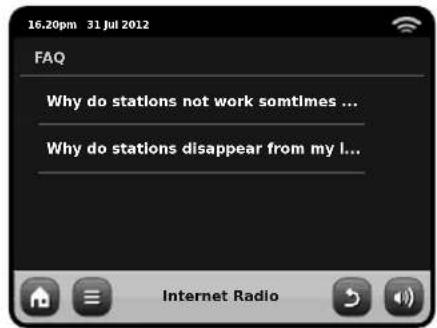
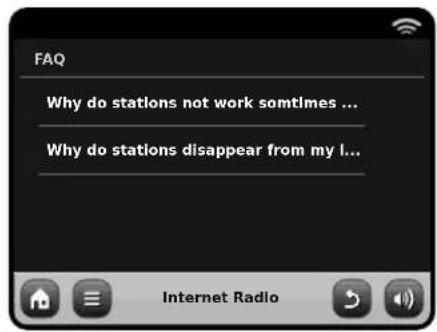
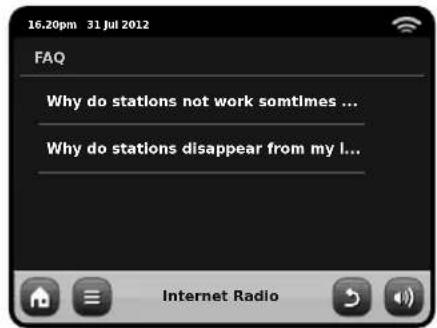
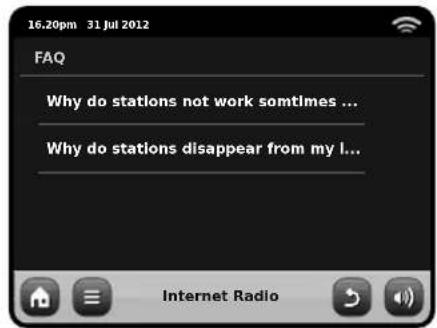
Under the "Help" section, you'll find your PiXiS IR's access code plus the heading "FAQ". This contains a couple of short audio tracks offering guidance.
Internet Radio Portal
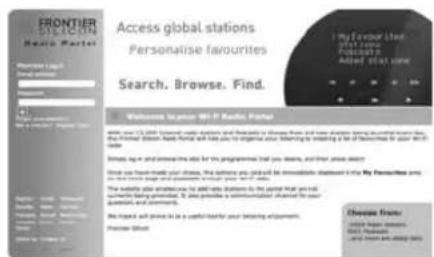
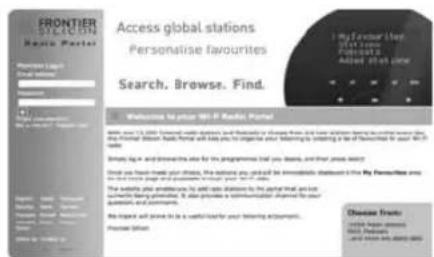
PiXiS IR can use the Frontier Silicon Internet Radio Portal to access some advanced internet radio features. To access the portal you need to register your PiXiS IR on the Frontier Silicon website at:
www.wifi radio-frontier.com
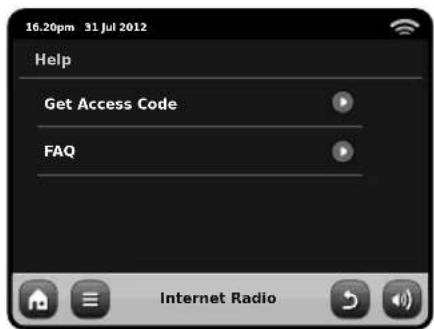
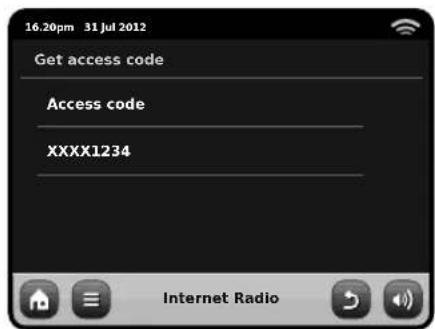
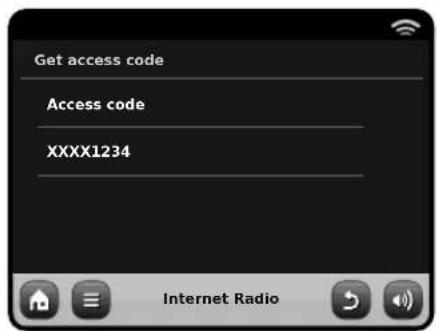
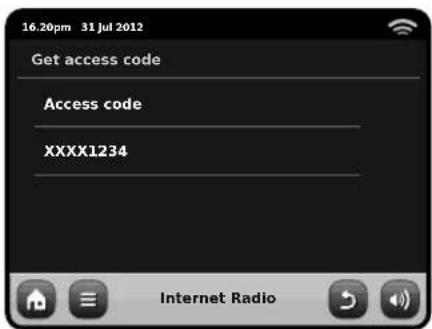
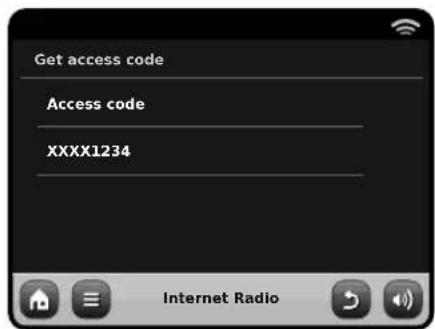
Your PiXiS IR has a unique access code. Tofi nd it, enter Internet Radio mode. On the menu screen, scroll down and press Help. Now press Get Access Code.
Make a note of this code, then use your computer to access the website. Click on the "Register Here" link on the left side of the screen, then follow the instructions.
If you already have an account on the Portal, you can register your PiXiS IR as an additional radio. Log into your account then select My Preferences, then "Add Another Wi-Fi Radio".
Now you'll be able to take advantage of features such as manually adding your own stations, or creating shared favourites lists to use with multiple devices.
www.wifi radio-frontier.com
Network Audio Mode
PiXiS IR's network music player mode is accessed by selecting "Network Audio" from the Home menu. The mode utilises the Universal Plug and Play ("UPnP") protocol to let you browse and play audio files wirelessly across your network from PC or Mac computers. Once you've set up your computer for sharing, PiXiS IR can remotely navigate through your digital music collection by categories such as Artist Name, Album Title or Musical Genre.
In order for PiXiS IR to play your audio fi les from computer, the computer must fi rst be configured for media sharing.
Recommended system requirements for straightforward setup of your computer are:
- Windows PC using Windows Media Player (WMP) version 11 or later.
or
- Apple Mac running OS X or later with a UPnP application installed to access an iTunes library.
For information about setting up your computer to share music with PiXiS IR, please see the instructions overleaf.
Playback of Network Audio
Track, Artist and Album information is displayed on screen, along with Track Duration and Current Position.
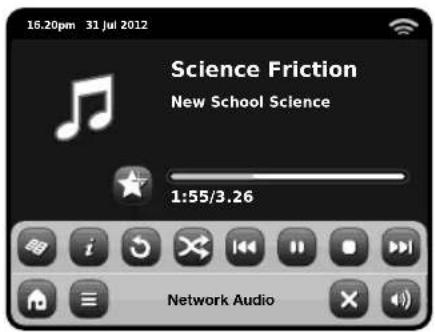

Stream Audio Menu
You can set tracks to "Repeat" or "Shuffle" by accessing toggle controls within the menu.

Play / Pause toggle

Repeat

Shuffle

Add to Playlist

Music Directory Menu
Click to navigate through your shared music library and find new tracks.

Information
View technical details of File Type, Bitrate and Sample Rate.

Stop
Stop playback and return to your music directory list.

Fast Forward
Press once to skip to next track. Press and hold to quickly scan forward through current track.

Rewind
Press once to skip to start of previous track. Press and hold to quickly scan back through current track.
Using PiXiS IR with iTunes
Please note: iTunes does not currently operate a UPnP media server, but there are a number of third-party software applications (many of them free) which can enable you to access your iTunes music library. See "Streaming from an Apple Mac" on page 12.
Network Audio: Setting Up
Streaming from Windows PC using Windows Media Player
Windows Media Player (version 11 or newer) is the most popular UPnP server client. There are alternative UPnP platforms which can be used, but this description deals with the process of configuring your WMP system.
First, ensure that your PC and PiXiS IR are both connected to the same network.

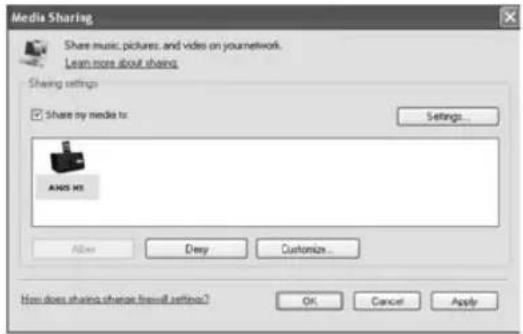
In WMP, add the audio files and folders you want to share with your PiXiS IR to the Media Library. Select "Library", then "Add to Library".

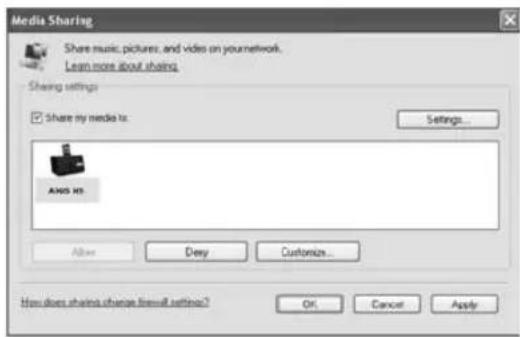
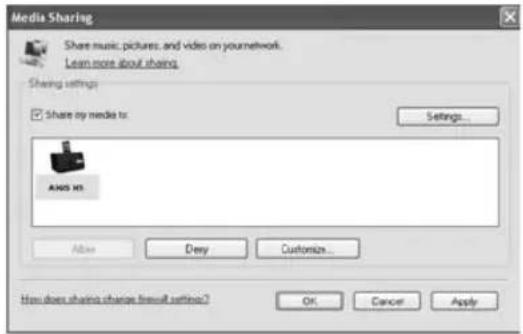
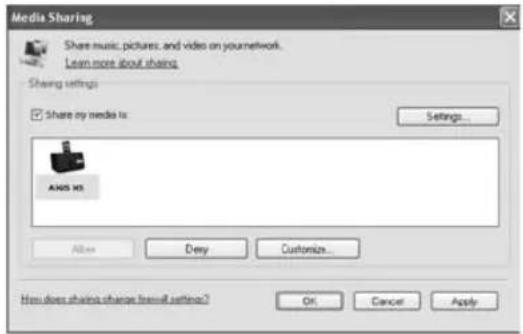
To ensure that PiXiS IR will be able to gain access to your shared media, turn Media Sharing on. Select PiXiS IR and click "Allow" as pictured. Your PC is now ready to stream music to PiXiS IR.
The WMP UPnP service runs in the background, so you don't actually need to have the WMP software running to access your files from PiXiS IR.

Streaming from an Apple Mac
To connect PiXiS IR to your Apple Mac computer, a third-party UPnP server application is required.
There are a number of these apps available for download online. One of the most common and easy-to-use is called EyeConnect. This is available from: www.elgato.com
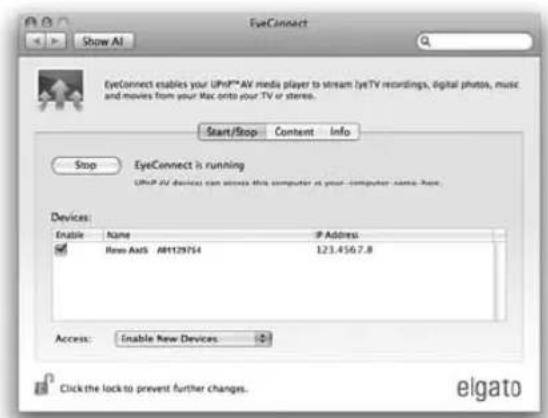
Once you've downloaded and installed EyeConnect to your MAC, open up your System Preferences control panel and under "Other", select EyeConnect.
Ensure that PiXiS IR is connected to the same network as your Mac - PiXiS IR will appear on your EyeConnect devices list as pictured, right.
Make sure the "Enable" box next to PiXiS IR is ticked and that the "Access" drop down menu is set to "Enable New Devices".
Your MAC is now ready to stream to PiXiS IR. EyeConnect runs discreetly in the background, so there's no need to open the control panel each time you wish to stream.
Network Audio: Finding Tracks
PiXiS IR can play the major audio file formats from a computer or server on your local wireless network, including: MP3, AAC, WMA and FLAC
When you enter Network Audio mode, you'll be asked to select your music source. Click on "Shared Media".
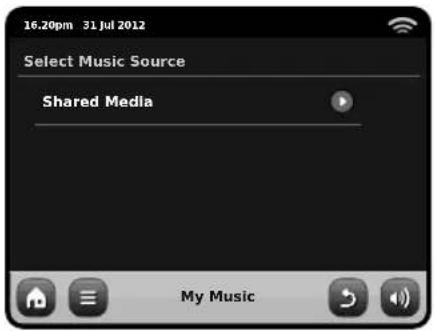
All available computers on your network which have been configured to share fi les via UPnP will be listed:
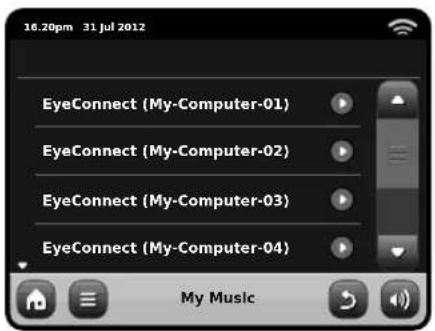
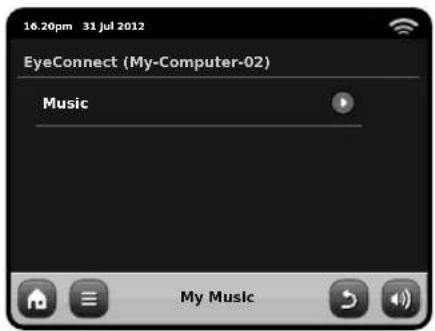
After selecting your desired computer from the list, you'll see a list of available media types. Click "Music" to find your shared tracks.
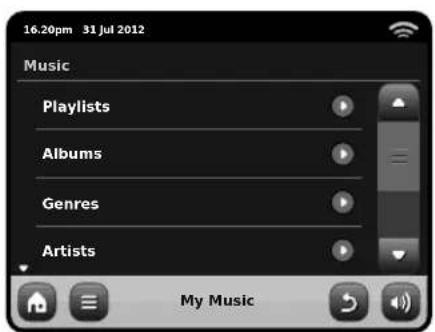
You can browse your collection by criteria such as Album Title, Artist Name and Genre.
If you like, you can also set up playlists on your computer, then access these from your PiXiS IR.
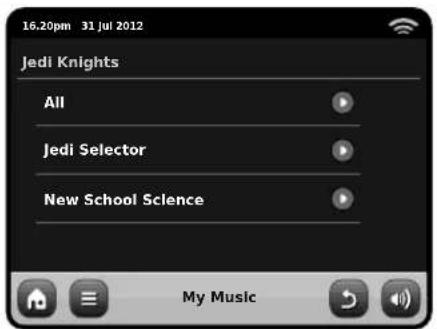
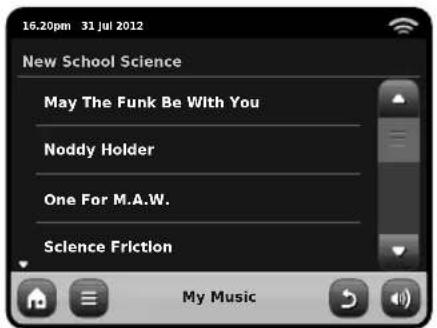
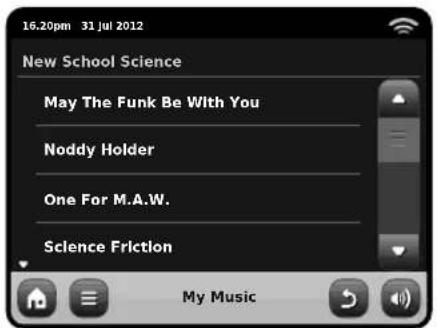
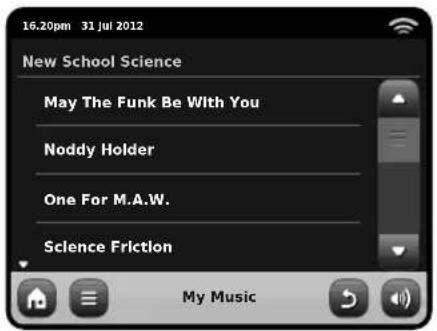
Select an option and you'll be presented with an alphabetically sorted list (top right).
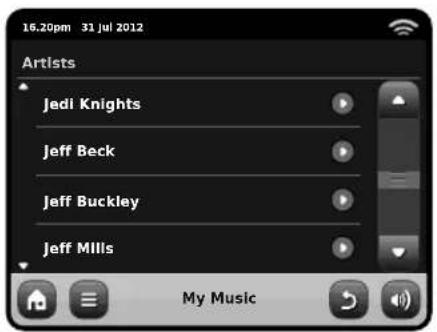
You can then browse down through sub-categories to find specific pieces of music. Just click a track name to play it.
Alarm Settings
PiXiS IR is equipped with two programmable alarm clocks. From the Home Screen, press "Alarms" then press "Alarm settings".
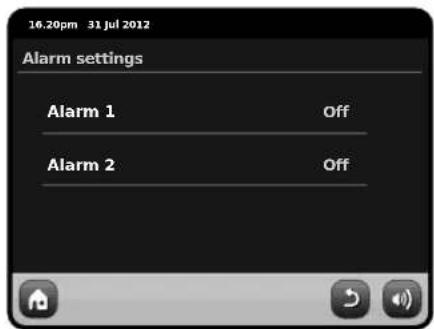
To edit or review an alarm, press either "Alarm 1" or "Alarm 2". A summary screen displaying the current alarm selections will be displayed. There are five adjustable settings:
- Alarm Enable / Frequency selection
- Time
- Mode
• Volume (0 - 16)
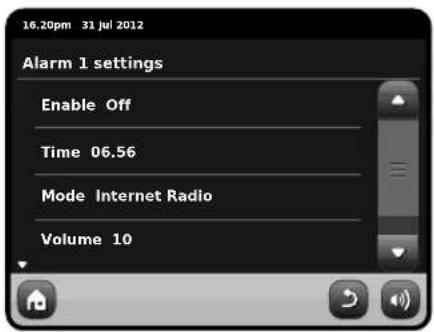
Simply press any setting to review or edit it. Pressing the Back button will save your changes and take you back to the main summary screen.
Alarms can be set to activate Daily, Once, Weekends or on Weekdays.
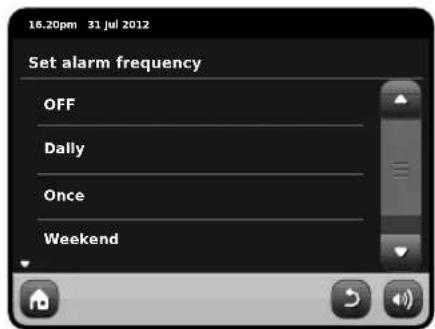
If you select "Once", in addition to setting the alarm time, you will also need to set a specific date. The date setting screen behaves in the same manner as the time setting screen.
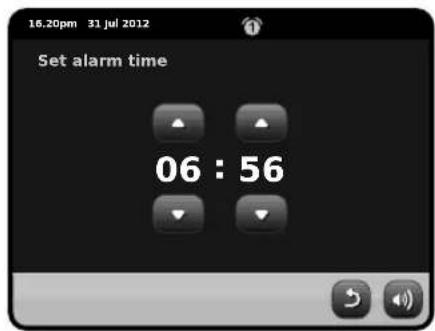
Press "Time" to adjust the time of alarm activation. Using the up and down arrows above the hours and minutes, set the specific time that you wish the alarm to sound.
Alarms can be set to wake you with audio from any one of the following modes: Internet or Buzzer.
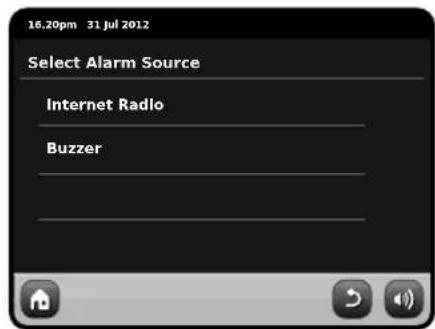
If Internet Radio is chosen for the alarm source, you will also be awoken to the last listened station.
Pressing "Volume" will display the "Select Alarm Volume" screen, where you can predefi ne the volume level that you wish your alarm to activate at.
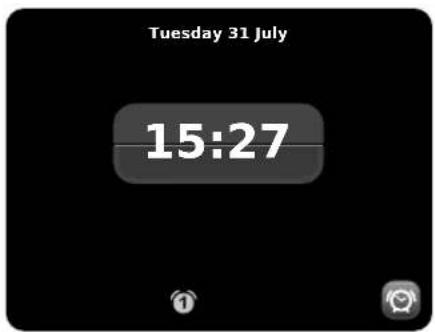
When either alarm is activated, mini icon(s) as picture below will appear in the top section of your radio's screen.


Alarms in Standby Mode
When PiXiS is in standby mode, if an alarm is set an alarm icon will be displayed on screen.
In the bottom right hand corner of this screen, a shortcut button is also provided which returns you to the main alarm summary screen at any time.
Alarm Snooze
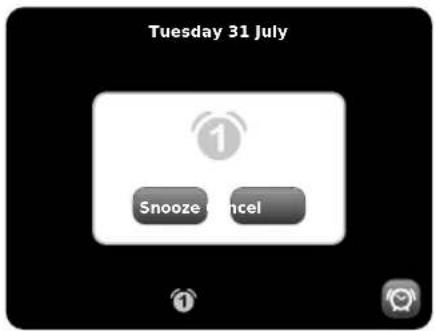
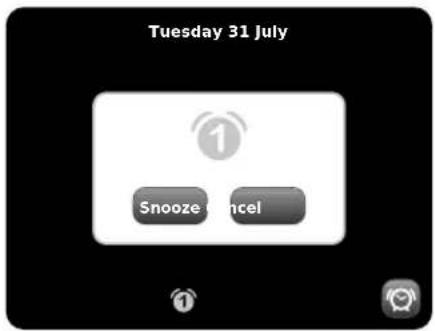
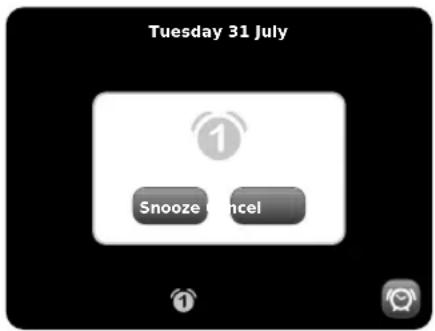
When an alarm goes off, you'll get the option to either "Snooze" or "Cancel".
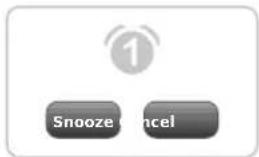
" Snooze" puts PiXiS IR back into standby mode for a specified period before repeating the alarm.
The snooze interval duration can be set in the Alarms Menu, simply press the Alarms Icon then press "Alarm Snooze". The Snooze interval can be set from between 1 to 30 minutes.
"Cancel" switches the alarm system off while allowing you to continue listening.
To switch the alarm off and also stop audio playback, press the standby button on PiXiS IR.
Sleep Function
PiXiS IR has a handy sleep function which automatically switches PiXiS IR into standby mode after a specified time period.
Simply press the "Sleep" icon on the Homepage. The default setting is "Off", but by pressing the "+" icon, you can cycle through the options to send PiXiS IR to standby in 15, 30, 45 or 60 Minutes.
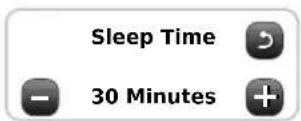
If Sleep mode is activated, a crescent moon icon will show in the top part of the screen.
USB Update Port
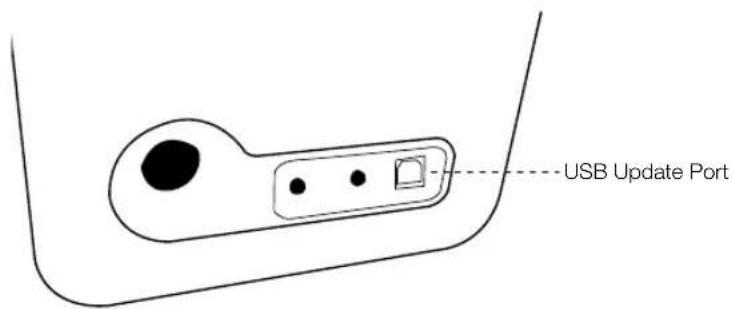
PiXiS IR has a USB software upgrade facility. You can connect the radio to your PC via its USB socket, located on the units back panel.
If a new software revision becomes available, it will be downloadable from www.revo.co.uk, where explicit instructions on how the upgrade should be executed will also be provided. Connecting PiXiS IR to your PC without following these instructions is not advised and could permanently damage your radio.
System Settings
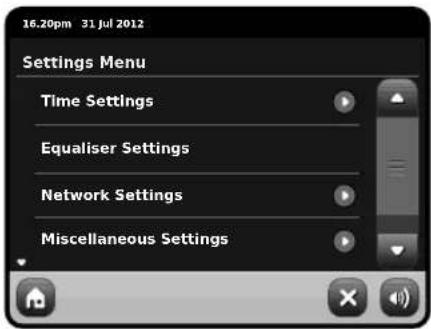
The System settings menu is accessible from PiXiS IR's main menu screen. The following options are available, allowing you to manually view and change PiXiS IR's settings:
- Time
Equaliser
Network - Miscellaneous
Alarm Settings
This is an alternative route to access your PiXiS IR's alarm clock settings, as you would via the main "Alarms" mode. See page 14 for details.
Time & Date Settings
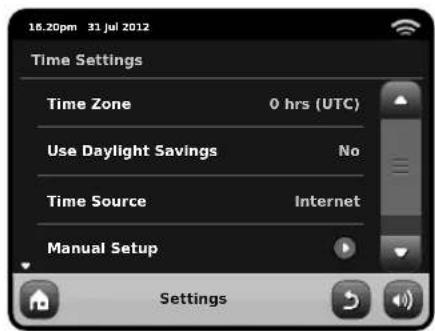
By default, PiXiS IR will automatically set its time and date when you connected to the internet, so you may not ever need to worry about manually setting it. However, if you do need to set or change it yourself, the Time Settings menu includes the following options:
- Time Zone
- Use Daylight Saving
- Time Source
- Manual Setup
- Time Format
Time Zone
This setting simply offers you a list of global timezones to choose from. The current setting is highlighted in yellow.
Use Daylight Savings
A simple toggle button. Touch to select Yes / No to turn daylight saving on or off.
Time Source
Allows you to specify where PiXiS IR should sync its clock from. By default this is set to fetch the time from the internet. You can also set the time sync source to "None", if you wish to set it yourself and don't wish any external updates.
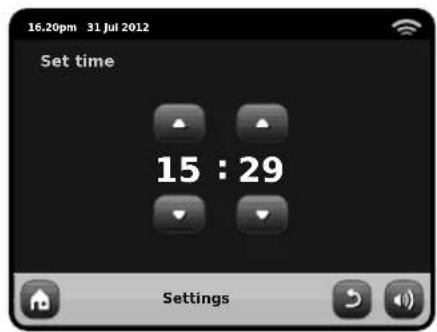
Manual Setup
Allows you to easily set the time and date yourself. Use the Up / Down buttons as illustrated. Clicking the Back button will save your changes and take you to the previous screen.
Time Format
A simple toggle to select either 12 or 24 hour clock.
Network Settings
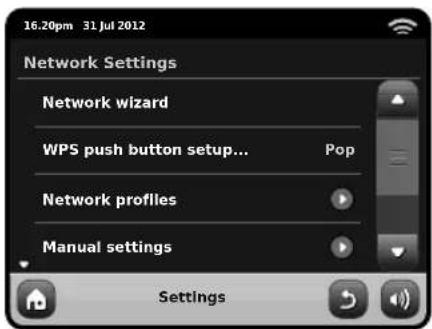
PIXIS IR will attempt to ease the process of connecting to your local area network the first time you use it to access one of the internet modes. If you wish to view or change these preferences manually, you can do so via the Network Settings menu, where you'll see the following headings:
- Network Wizard
- WPS Push Button Setup
• Network Profiles - Manual Settings
- Current Settings
- WLAN Region
Network Wizard
This utility greatly simplifi es the setup of PIXIS IR's internet connection by leading you step-by-step through a largely automated network setup process. Please see page 6 for more details.
Network Profi les
PiXiS IR stores a list of wireless networks it has connected to and automatically tries to connect to any one of them which it can find within range.
You can check details of these saved networks and easily delete any unwanted connections by clicking "Network Profi les".
There's also a link here to the network wizard, if you wish to add a new profile.
Note: you cannot delete the currently active network profile.
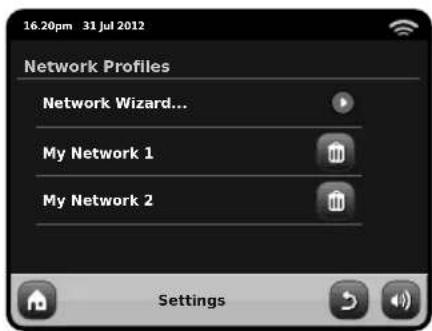
Manual Settings
For advanced users, the Manual Settings option walks you through a detailed and customisable 11-step process to add a new wireless network profile.
Current Settings
Shows you the full details of your currently active network setup. Potentially useful for troubleshooting, the info displayed here includes IP addresses and MAC addresses related to your PiXiS IR's network.
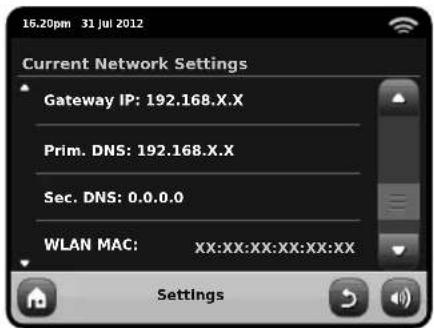
WLAN Region
Lets you change your global location if you move your PiXiS IR to a new region. As your network will doubtless change anyway in this instance, we would recommend simply using the Network Wizard to add a new network.
WPS Push Button Setup
Is useful if you want to pair your PiXiS IR with a router that uses WPS security.
Miscellaneous Settings
Allows control over a range of assorted preferences for your PiXiS IR.
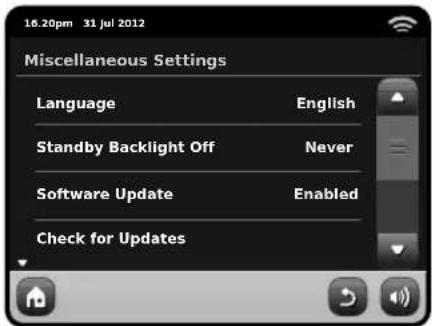
In order, the miscellaneous settings are:
Language
The default language on your PiXiS IR is English. To change, just pick an option from the available list.
Alarm Snooze
Lets you specify the delay interval between alarms (see page 14). Configurable from 1 to 30 minutes.
When using your radio in a dark location, such as a bedroom, the light from PiXiS IR's touchscreen may prove to be a distraction, even when the radio is in standby mode. To avoid this situation, we have provided the option to switch off the touchscreen backlight when in standby mode.
Standby Backlight
When this feature is activated, the PiXiS IR display will switch off after a pre-defined period of time. The display can be easily re-activated by simply moving the volume dial in either direction, allowing you to check the time or alarm status. The display will then 'go to sleep' again after the pre-defi ned timeout period has elapsed.
To activate this feature, select "Miscellaneous Settings" from the "Settings" menu, then "Standby Backlight Off", then choose your desired timeout period from the available list. After selecting your desired timeout duration, the feature will now be activated. To de-activate, select "Standby Backlight Off", then choose "Never".
Please note that this setting is only applicable to standby mode, and will not have an effect on the operation of the touchscreen backlight in any other mode.
Software Update
From time to time, software updates will become available for your PiXiS IR. Some of these will be for maintenance, but some will also add new features to the PiXiS IR system. These updates will download via your network connection.
If you have the Software Update option enabled, PiXiS IR will automatically check for new software every time it connects to the internet. If an update is available, it will ask for your confirmation before commencing download.
Software updates will allow all your user settings to be maintained, although will take a few moments to download and require a restart of your PiXiS IR.
Please note: Before carrying out any software update, ensure that your PiXiS IR is connected to a stable power supply.
Disconnecting the power during a critical phase of an update could result in permanent damage to your PiXiS IR.
Check for Updates
If you don't want PiXiS IR to automatically check for new software, you can still check for updates on-demand by clicking on Check for Updates. This will use your internet connection to access the latest version and tell you whether or not your PiXiS IR is up-to-date. If there is new software available, you will be asked to confirm whether you wish to proceed to download.
Software Version
Simply displays your PiXiS IR's current software installation version. This will be potentially useful if you need to seek technical support with some aspect of your PiXiS IR.
Factory Reset
This option resets PiXiS IR to its default factory values, erasing any personal settings which may have been configured, such as Time & Date, Network Profi les and Favourite Station Presets.
Your PiXiS IR's current software version will be maintained, as will its registration with the Internet Radio Portal. If you have registered favourite stations via the internet portal, these will be maintained, unless you re-register your PiXiS IR with another account on the portal.
Equaliser Settings
PiXiS IR gives you control over its default audio settings.
Select "Custom" to set your own preferences for Bass and Treble.
Press the "Back" button to save your settings and return to the equaliser options list.
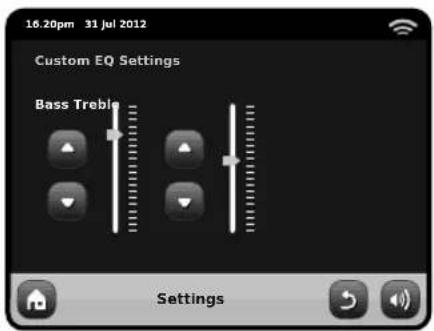
Troubleshooting
| Problem | Possible Cause | Try This |
| Cannot connect to network | Network down. | Check that network is working between computer and router. |
| Router restricts access to listed MAC addresses. | Obtain your PiXiS IR's MAC address from System Settings > Network Settings > Current Settings and add to router list. | |
| Note: PiXiS IR has separate MAC addresses for wired and wireless networks. | ||
| Insuffi client Wi-Fi signal strength. | Check distance to router. See if a computer can connect to the network in this location. | |
| Unknown encryption method. | Change encryption method on router. PiXiS IR supports WEP, WPA and WPA2. | |
| Unusual network configuration. | Setup network manually through System Settings > Network Settings > Manual Settings. | |
| Firewall preventing access. Cannot connect to Check the following ports are open on the router: UDP and TCP ports 80 and123. DNS port 53 | ||
Problem Possible Causes Try This
| Cannot connect to Internet | Internet connection down. | Check that the Internet is working for a computer connected to the same network. |
| Firewall preventing access. | Check the following ports are open: UDP and TCP ports 80 and 123. DNS port 53. Some Internet radio stations may require additional ports to be opened. | |
| Cannot play a particular internet radio station | • Station not broadcasting.• Overloaded or insufficient bandwidth.• Station broadcasting using unknown codec.• Link out of date. | Try other stations.Try listening on computer via Internet Radio Portal website (see page 10).Try again later. |
PiXiSiR
Owner's Guide
v1.0
Français

REVO.
Support Technique
INSTRUCTIONS POUR L'ÉLIMINATION DU PRODUIT (directive DEEE)

CONFORME RoHS & MARQUAGE CE

Revo Technologies Ltd
The Inox Building, Caldwellside, Lanark, Scotland, United Kingdom, ML11 7SR
Tel: 01555 66 61 61 Int. Tel: +44 1555 66 61 61
Fax: 01555 66 33 44 Int. Fax: +44 1555 66 33 44
Email: enquiries@revo.co.uk Website: www.revo.co.uk
natural_image
Four line drawings of electrical socket components, no text or symbols presentUK EURO U.S.A AUSTRALIA
Bienvenue
natural_image
Technical line drawing showing two hands operating a mechanical clamp or tool (no text or symbols present)


Mes préférés
Podcasts (Baladodiffusions)

Station Directory

To access PiXiS IR's Internet Radio Station List, press the directory button any time you're in IR mode.
Internet Radio Portal

www.wifi radio-frontier.com

Once you've downloaded and installed EyeConnect to your MAC, open up your System Preferences control panel and under "Other", select EyeConnect.
Réglages Alarme
Fonction de sommeil
Réglages Alarmes
Time Zone
Format Horloge
Réseau Wizard
Réglages manuels
WLAN Region
WPS Push Button Setup
Guide de Dépannage
Deutsch

REVO.
Copyright 2012 Revo technologies Ltd. All rights reserved.
Revo Technologies Ltd
The Inox Building, Caldwellside, Lanark,
Scotland, United Kingdom, ML11 7SR
Tel: 01555 66 61 61 Int. Tel: +44 1555 66 61 61
Fax: 01555 66 33 44 Int. Fax: +44 1555 66 33 44
Email: enquiries@revo.co.uk Website: www.revo.co.uk
Haftungsausschluss
natural_image
Four line drawings of electrical socket components, no text or symbols presentUK EURO U.S.A AUSTRALIA
Willkommen
natural_image
Line drawing showing two hands operating a mechanical device with adjustment knobs (no text or symbols)Bedienprinzip

Meine Favouriten

Station Directory

Internetradiportal

www.wifi radio-frontier.com
Netz-Audios-Modus

Stream Audio Menü
Please note: iTunes does not currently operate a UPnP media server, but there are a number of third-party software applications (many of them free) which can enable you to access your iTunes music library. See "Streaming from an Apple Mac" on page 12.
Sleep Funktion
Alarmeinstellungen
Zeitzone
Zeitformat
Netzwerkassistent
WLAN Region
WPS Push Button Setup
Fehlerbehebung
Italiano

REVO.
Assistenza Tecnica
UK 01555 666161 From outside the UK + 44 1555 666161
CONFORMITA' RoHS & MARCHIO CE

Revo Technologies Ltd
The Inox Building, Caldwellside, Lanark, Scotland, United Kingdom, ML11 7SR
Tel: 01555 66 61 61 Int. Tel: +44 1555 66 61 61
Fax: 01555 66 33 44 Int. Fax: +44 1555 66 33 44
Email: enquiries@revo.co.uk Sito: www.revo.co.uk
Disclaimer
natural_image
Four line drawings of electrical plug components: a two-pin socket, two three-pin blocks, and a three-pin socket (no text or symbols)UK EURO U.S.A AUSTRALIA
Benvenuti
natural_image
Technical line drawing showing two hands operating a mechanical clamp or tool (no text or symbols present)Principi Guida



Preferiti

Directory Stazioni


Portale Radio Internet
www.wifi radio-frontier.com

Stream Audio Menu
Streaming da Apple Mac

Funzione Sleep
Fuso Orario
Formato Ora
Wizard Rete
Regione WLAN
www.revo.co.uk/support


- Technical Support
- Environmental Info
- PRODUCT DISPOSAL INSTRUCTIONS (WEEE DIRECTIVE)
- RoHS COMPLIANT & CE MARK
- SAFETY WARNINGS
- Warranty
- Copyrights and Acknowledgements
- Disclaimer
- Contents
- Power Supply
- Welcome
- Unpacking PiXiS
- Guiding Principles
- Home Screen
- Sleep
- Internet Radio
- Network Audio / Network Music Player
- Alarms
- Settings
- Second-Level Navigation
- Internet Setup
- Internet Radio Mode
- Getting Started...
- My Favourites
- Local
- BBC
- Stations
- Podcasts
- My Added Stations
- Help
- Main IR Playing Screen
- Finding IR Stations
- Station Directory
- Browsing for Stations
- By Location
- By Genre
- Popular Stations
- New Stations
- Searching for Stations
- Podcasts / Listen Again
- Favourite Station Presets
- Favourite Added
- Internet Radio Portal
- Network Audio Mode
- Playback of Network Audio
- Stream Audio Menu
- Repeat
- Shuffle
- Add to Playlist
- Music Directory Menu
- Information
- Stop
- Fast Forward
- Rewind
- Using PiXiS IR with iTunes
- Network Audio: Setting Up
- Streaming from Windows PC using Windows Media Player
- Streaming from an Apple Mac
- Network Audio: Finding Tracks
- Alarm Settings
- Alarms in Standby Mode
- Alarm Snooze
- Sleep Function
- USB Update Port
- System Settings
- Time & Date Settings
- Time Zone
- Use Daylight Savings
- Time Source
- Manual Setup
- Time Format
- Network Settings
- Network Wizard
- Network Profi les
- Manual Settings
- Current Settings
- WLAN Region
- WPS Push Button Setup
- Miscellaneous Settings
- Language
- Standby Backlight
- Software Update
- Check for Updates
- Software Version
- Factory Reset
- Equaliser Settings
- PiXiSiR
- Support Technique
- CONFORME RoHS & MARQUAGE CE
- Bienvenue
- Mes préférés
- Podcasts (Baladodiffusions)
- Réglages Alarme
- Fonction de sommeil
- Réglages Alarmes
- Format Horloge
- Réseau Wizard
- Réglages manuels
- Haftungsausschluss
- Willkommen
- Bedienprinzip
- Meine Favouriten
- Internetradiportal
- Netz-Audios-Modus
- Stream Audio Menü
- Sleep Funktion
- Alarmeinstellungen
- Zeitzone
- Zeitformat
- Netzwerkassistent
- Assistenza Tecnica
- CONFORMITA' RoHS & MARCHIO CE
- Benvenuti
- Principi Guida
- Preferiti
- Directory Stazioni
- Portale Radio Internet
- Streaming da Apple Mac
- Funzione Sleep
- Fuso Orario
- Formato Ora
- Wizard Rete
- Regione WLAN
Brand : REVO
Model : PiXiS IR
Category : Radio