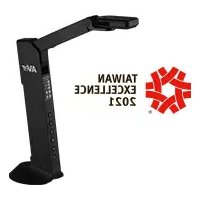
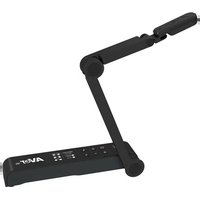
AVerVision M11-8MV - Document camera AVer - Free user manual and instructions
Find the device manual for free AVerVision M11-8MV AVer in PDF.


| Product Type | Document Camera |
| Brand | AVer |
| Model | AVerVision M11-8MV |
| Sensor | CMOS 1/3.06" 8 megapixels |
| Maximum capture resolution | 3168 x 2376 pixels |
| Display frame rate | Up to 60 frames per second |
| Focus | Automatic and manual |
| Shooting area | A3 (420 mm x 315 mm) |
| Zoom | Digital 20x |
| Lighting | Built-in LED lamp |
| Microphone | Built-in |
| Power supply | USB 5V/1A (via mini USB port) |
| Power consumption | 4.5 W (lamp on) / 4 W (lamp off) |
| Ports | 1 x USB 2.0 Type-A, 1 x mini USB (power), 1 x HDMI output, 1 x VGA output |
| External storage | micro SD card (FAT32, 32 GB max) or USB flash drive (FAT32, 32 GB max) |
| HDMI/VGA output resolutions | 1920x1080, 1280x720, 720x480 |
| Dimensions (operating) | 360.4 x 116.7 x 303.4 mm |
| Dimensions (folded) | 296.1 x 116.7 x 143.1 mm |
| Net weight | 0.83 kg |
| Included software | AVerTouch (downloadable) |
| Special features | Annotation, PIP, PBP, image capture, video recording, slideshow |
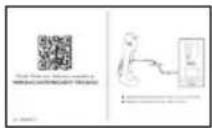
| Package contents | M11-8MV unit, USB cable, QR code card, warranty card |
| Maintenance | Clean gently with a soft dry cloth. Avoid moisture and abrasive products. |
| Safety | Use the specified power supply. Do not expose to rain. Do not pull on the mechanical arm. |
Frequently Asked Questions - AVerVision M11-8MV AVer
User questions about AVerVision M11-8MV AVer
0 question about this device. Answer the ones you know or ask your own.
Ask a new question about this device
Download the instructions for your Document camera in PDF format for free! Find your manual AVerVision M11-8MV - AVer and take your electronic device back in hand. On this page are published all the documents necessary for the use of your device. AVerVision M11-8MV by AVer.
USER MANUAL AVerVision M11-8MV AVer
natural_image
Line drawing of a handheld device with a vertical arm and control buttons (no text or symbols)M11-8MV
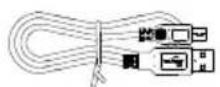
The items below are included with this product. If any item is missing, contact the dealer from whom you purchased this product.
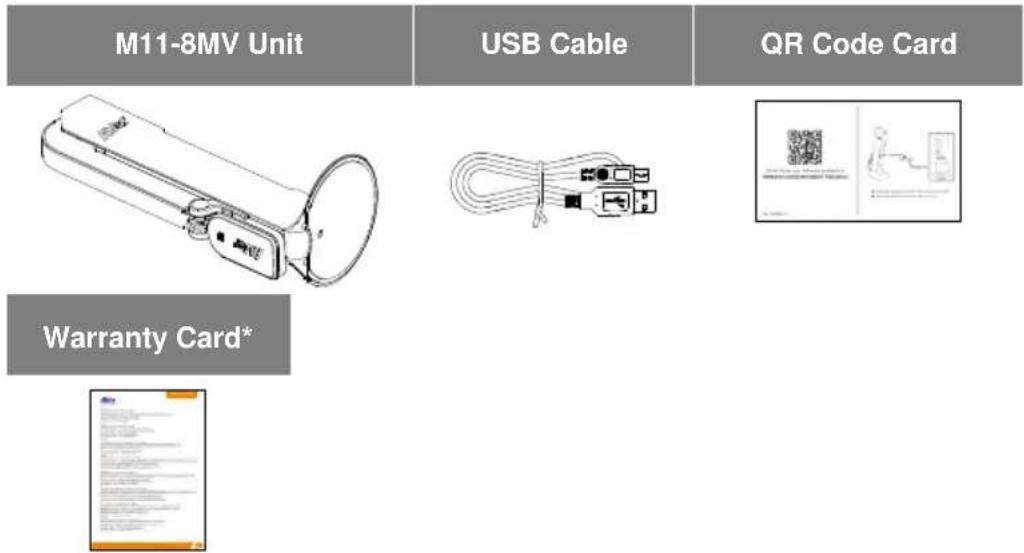
* Only for Europe, Japan, and Taiwan
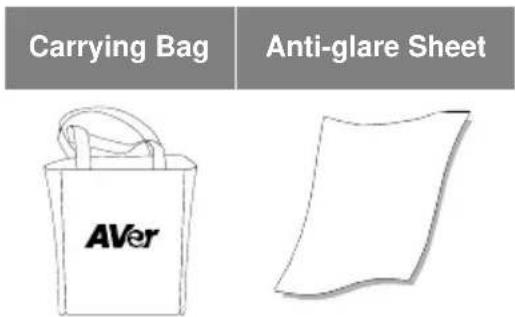
Optional Accessories
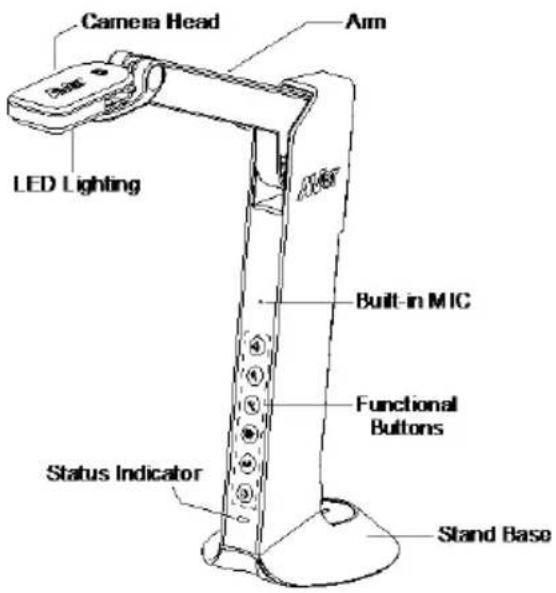
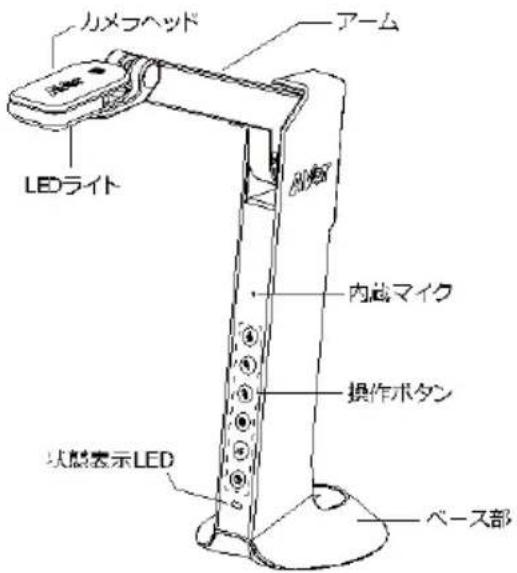
Overview
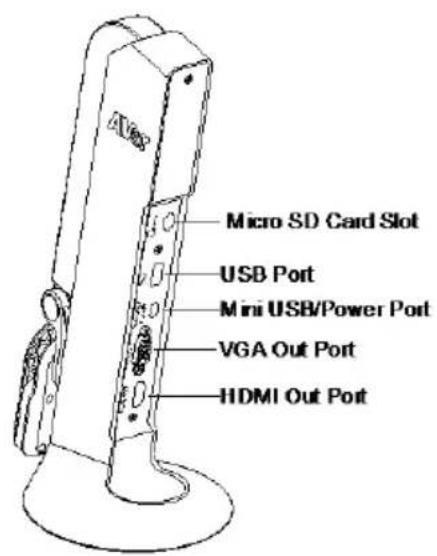
Function Buttons
Control Panel
| Button | Function |
 | Lamp on/offPress and hold 3 seconds to call out OSD menu. |
 | Zoom in |
 | Zoom out |
 | Rotate 0/180^ Press and hold 3 seconds to freeze the screen. To un-freeze, press and hold 3 seconds again. |
 | Auto focusPress and hold 3 seconds to start recording.To stop recording, press and hold seconds again. |
 | Power on/off |
OSD Mode
| Button | Function |
 | ■ Back to last menu level page■ Exit from OSD menu |
 | Up (selection item) |
 | Down (selection item) |
 | Selection enter |
Compound Key
Press keys to operate the compound key function.
| Button | Function |
| Back to factory default settings | |
| Capture image |
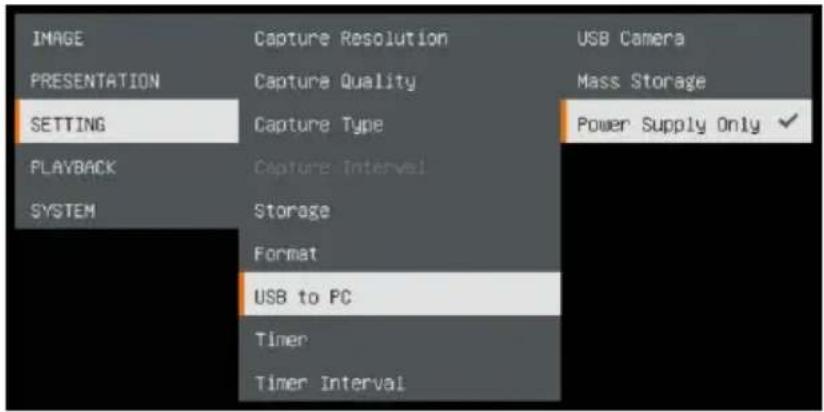
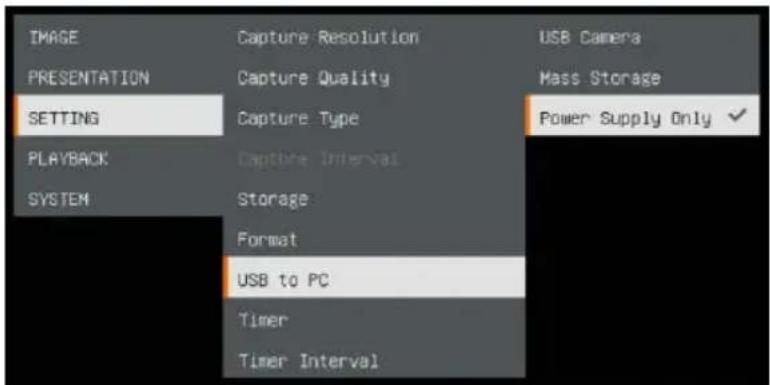
[Note] For Recording and Capture, please change to "Power Supply Only" mode.
LED Indicator
| Power | Solid green: Power onSolid red: StandbyFlashing red: The camera is in start-up process. |
Device Connection
Power Connection to Wall Outlet
1 Plug in power and turn on M11-8MV.
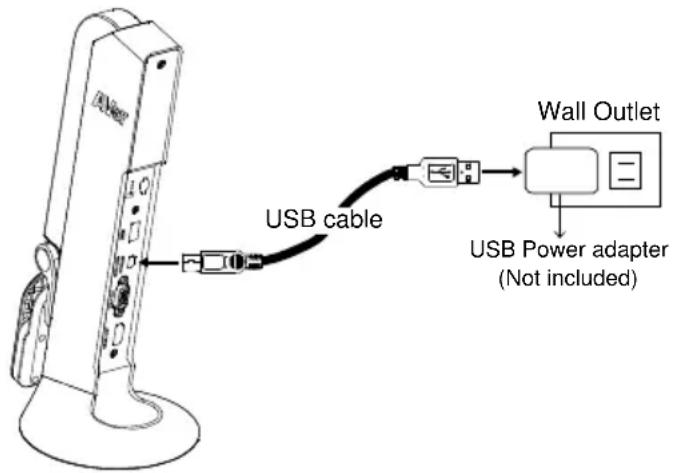
[Note]
■ Use the USB cable included in the package to connect to mini USB/Power port of M11-8MV with USB power adapter (not included) to wall outlet.
■ User needs to purchase a 5V/1A USB power adapter (not included) to connect the USB cable to wall outlet.
■ When the camera is start-up, the power indicator is in flashing red.
Power Connection to PC/Laptop
1 Connect to USB port of PC/laptop for power supply.
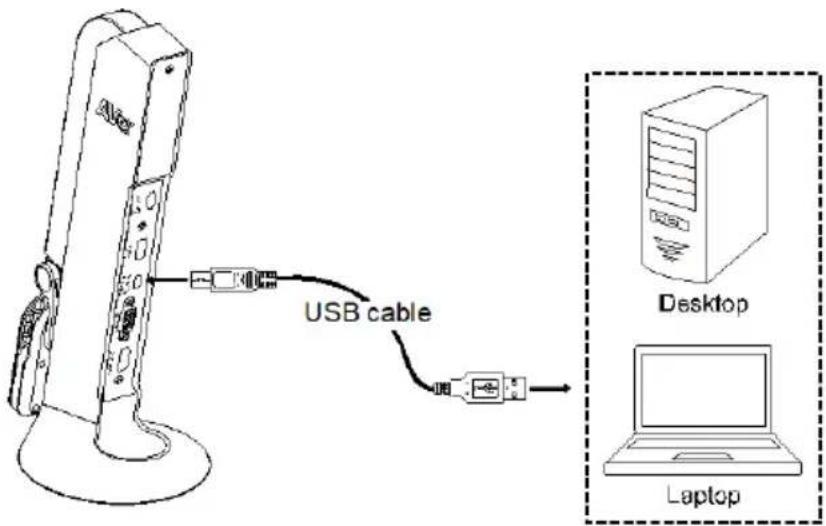
[Note]
■ Use the USB cable included in the package to connect to mini USB/ Power port of M11-8MV with laptop/PC.
■ When the camera is start-up, the power indicator is in flashing red.
■ USB power requirement of M11-8MV is USB 5V/1A.
■ For Storage, Format, Capture, Recording and Playback functions, please change to "Power Supply Only" mode
HDMI Connection
Connect M11-8MV to HDMI display with HDMI output port.
VGA Connection
Connect M11-8MV to VGA display with VGA output port.
USB Connection
1 Connect USB flash drive to USB port to save the capture and recording file.
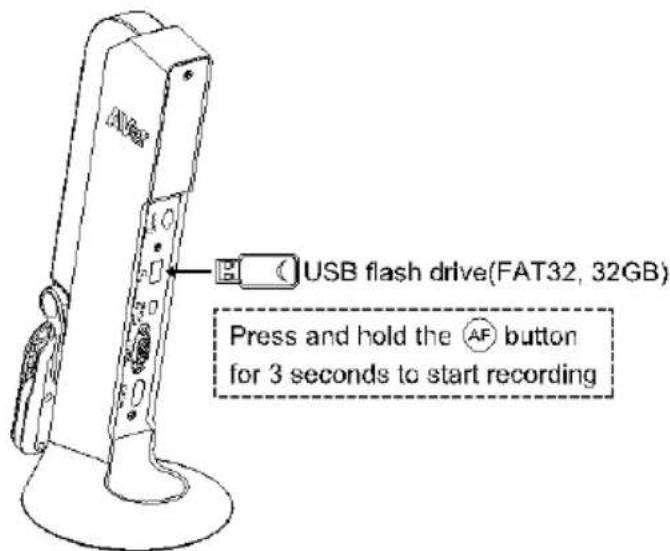
[Note] The supported USB flash drive maximum is 32G (FAT32).
Insert a Micro SD Card
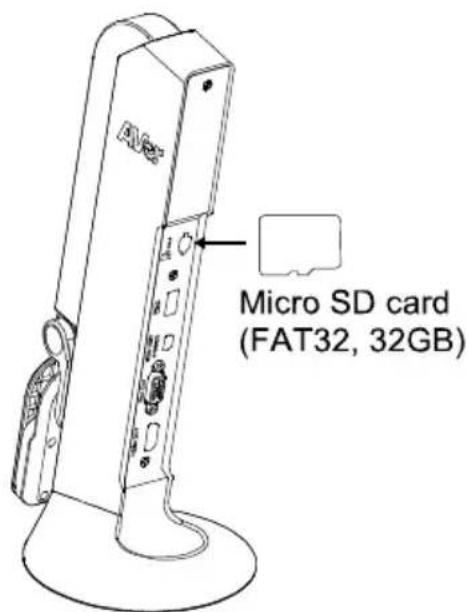
1 Insert the card to micro SD card slot.
[Note]
■ Micro SD card can store capture images and recording files.
■ The supported micro SD card capacity maximum is 32G (FAT32).
Operate the Camera with AVerTouch
1
Connect the camera to PC/laptop and Install the AVerTouch application.
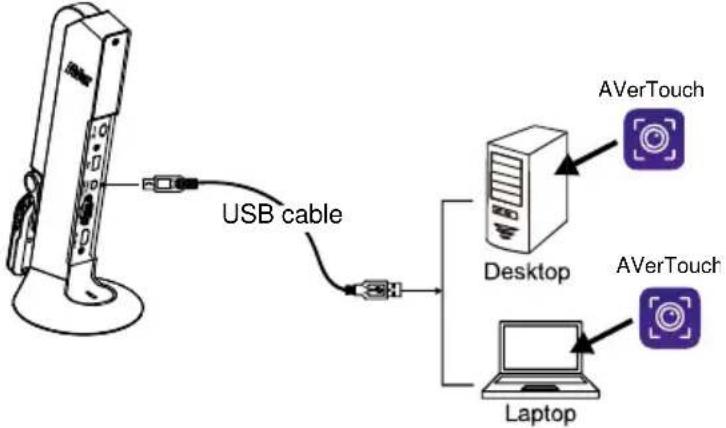
flowchart
graph TD
    A["USB cable"] --> B["Desktop"]
    B --> C["Laptop"]
    D["AVerTouch"] --> E["Desktop"]
    F["AVerTouch"] --> G["Laptop"]
[Note]
■ Download AVerTouch application at: https://www.aver.com/download-center/
■ Please set the camera to USB mode. Go to OSD menu > SETTING > USB to PC > USB Camera.
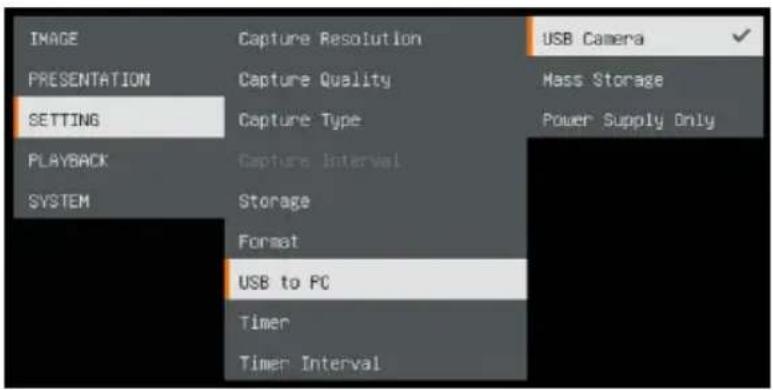
2
Open AVerTouch application, click to connect the camera.
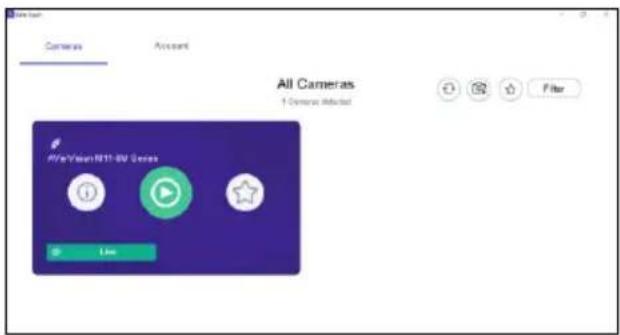
Presentation Mode (Live)
[Note] Before using annotation feature or PIP/PBP function of presentation mode, set the camera to Power Supply Only mode first. Go to OSD menu > SETTING > USB to PC > Power Supply Only.
Annotation
In single image live (preview) mode, user can use the annotation feature to overlay straight line or freeform line on the captured image with the USB mouse connected to the USB port of M11-8MV.
- Connect the mouse to USB port of M11-8MV.
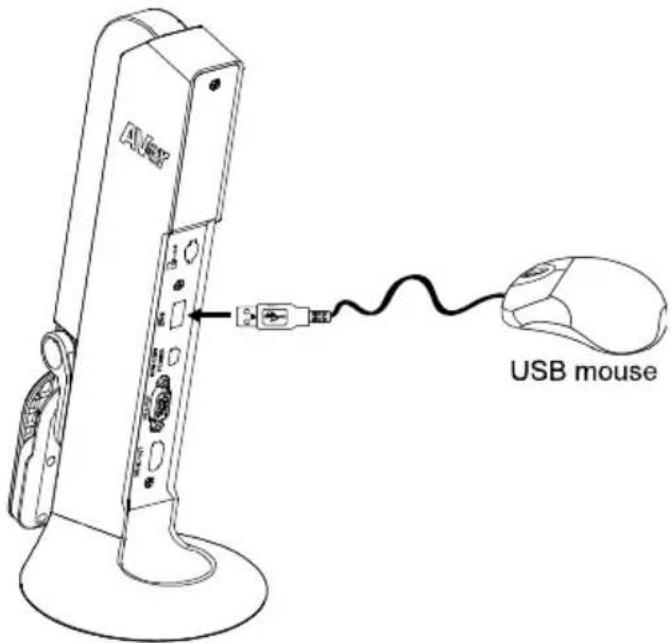
- Go to OSD menu > PRESENTATION > Annotation.
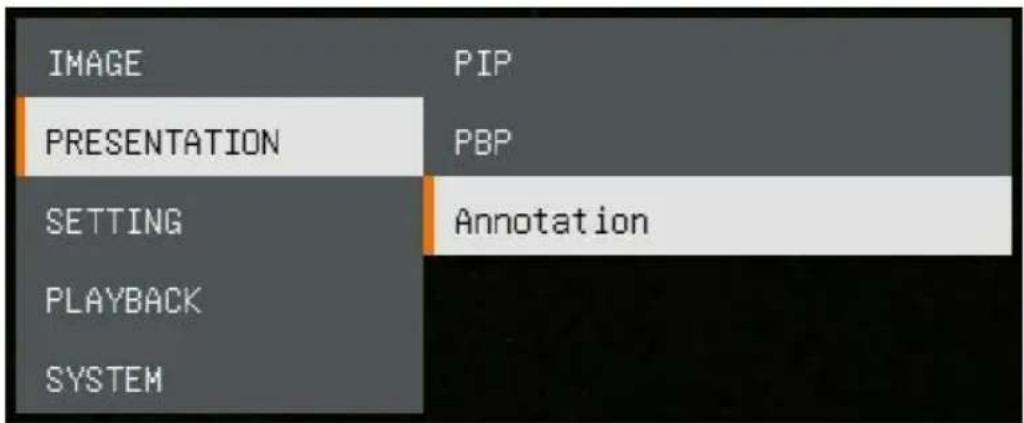
- In live screen, right-click mouse to call out annotation bar.
Annotation bar description

natural_image
Toolbar with icons including water drop, menu, camera, edit, and trash bin (no text or labels visible)| Button | Function | |
 | Color Palette | Select the line color.   |
 | Line Thickness | Select the thickness of the line. |
 | Line | Select a straight line, freehand or sharp to draw. |
 | Capture | Capture the image with the annotation and save it as a new file. |
 | Eraser | Select to erase any part of the annotation that it comes in contact with or delete all annotation. |
 | Delete | Clear all annotation on the screen. |
 | Back | Exit annotation bar. |
PIP Function
Select the thumbnail playback screen location and show the thumbnail playback screen at the corner of the screen to recall the captured image from the SD card.
- In camera mode, press and hold button for 3 seconds to call out OSD menu.
- Use 🔒 and 🔒 buttons to move to PRESENTATION > PIP. Press AF to confirm the selection.
- Select the display location of thumbnail playback screen – Upper Left, Upper Right, Lower Left, or Lower Right. Press AF to confirm the selection.
| IMAGE | PIP | Upper Left |
| PRESENTATION | PBP | Upper Right |
| SETTING | Annotation | Lower Left |
| PLAYBACK | Lower Right | |
| SYSTEM |
- The PIP display screen shows as following.
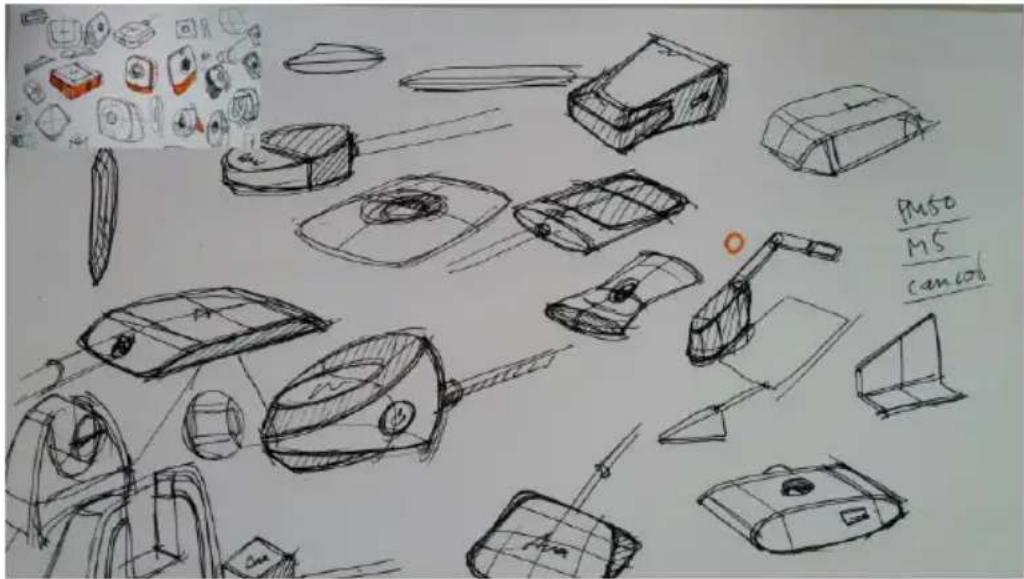
PBP Function
Select the captured image location and show the capture image on the screen to recall the captured image from the SD card.
- In camera mode, press and hold button for 3 seconds to call out OSD menu.
- Use 🔒 and 🔒 buttons to move to PRESENTATION > PBP. Press AF to confirm the selection.
- Select the display location of thumbnail playback screen – Upper Left, Upper Right, Lower Left, or Lower Right. Press AF to confirm the selection.
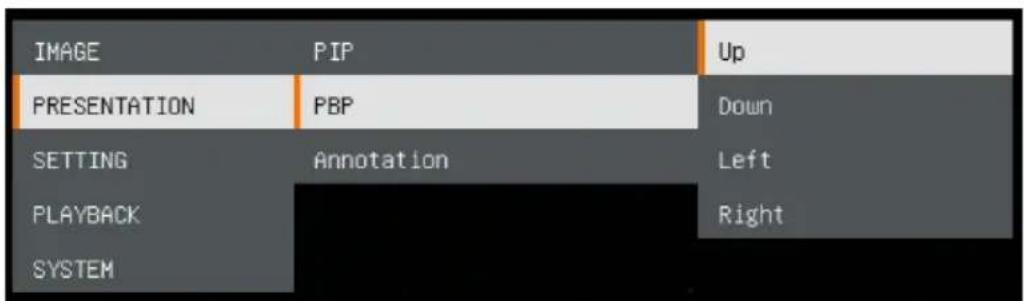
- Use 🔒 and 🔒 buttons to select the captured image from the list
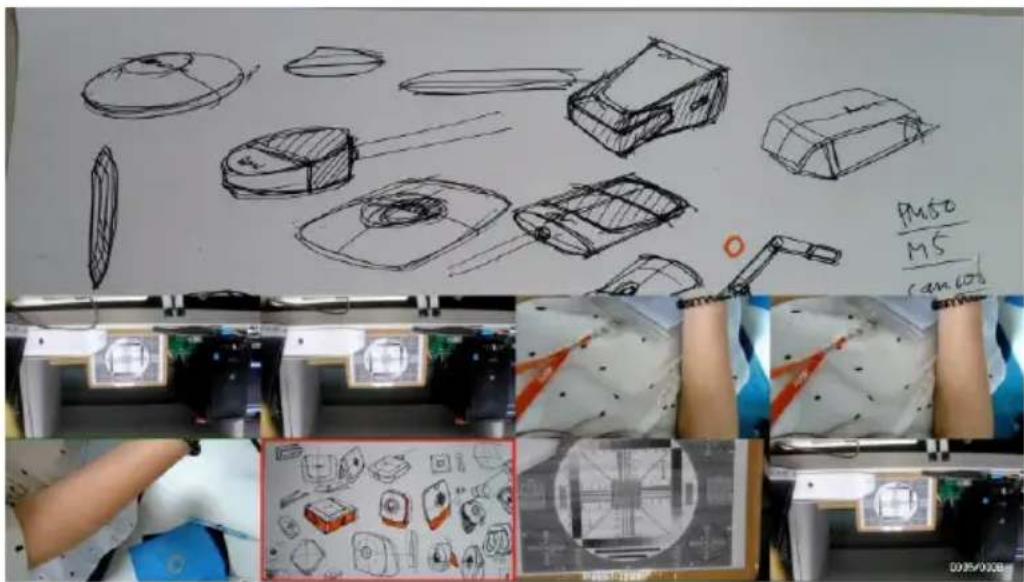
- The PBP display screen shows as following (PBP is down location). Use

and buttons to move the captured image up and down to view.
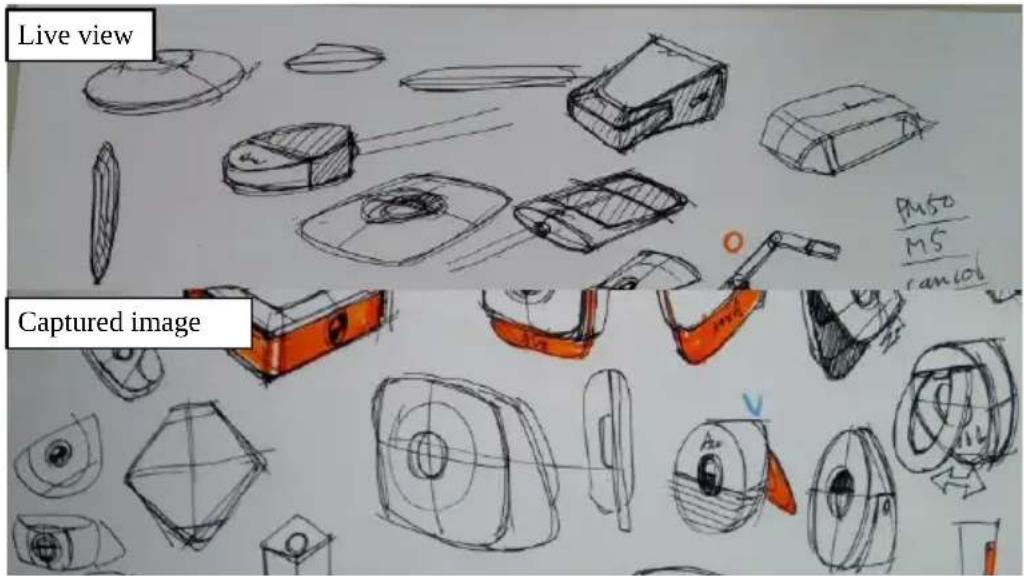
Playback Mode
View the capture images and recording files.
Switch to Playback Mode
- In camera mode, press and hold button for 3 seconds to call out OSD menu.
- Use 🔒 and 🔒 buttons to move to SETTING > USB to PC > Power Supply Only.
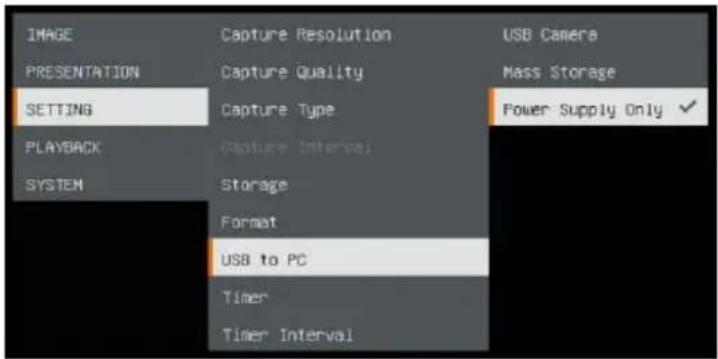
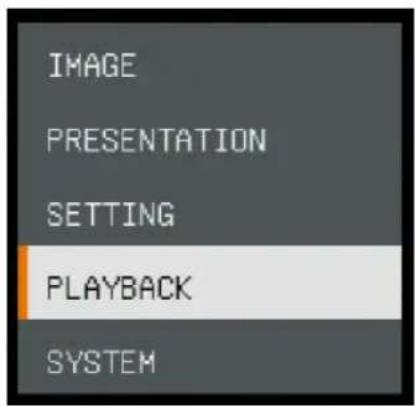
- Use, and buttons to move to PLAYBACK selection.
- Then, press A confirm the selection and switch to playback mode.
- In Playback mode, use

and

buttons to
select image or video to view manually. To play a video, press

button to start playback.
To pause playback, press

button again. Press playback.

OSD Menu Buttons
| Button | Function |
 | Back to last menu level page |
 | Up (selection item) |
 | Down (selection item) |
 | Selection enter |
Playback Menu Buttons
| Button | Function |
  | ■ Image / video selection■ + Fast forward while playback video■ + Fast rewind while playback video |
 | Zoom in image |
 | Zoom out image |
 | ■ Play video■ Press and hold to pause while video is playback |
 | Stop play video |
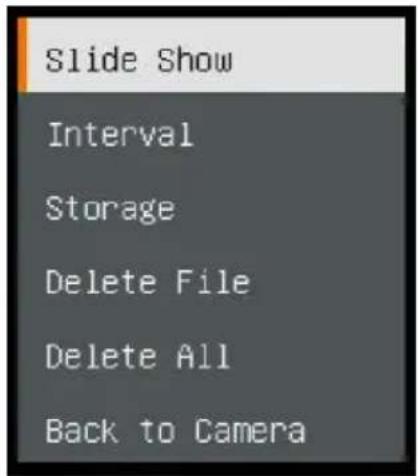
Slide Show
To automatically play all capture images and recorded videos; but videos only display files and will not play video contents.
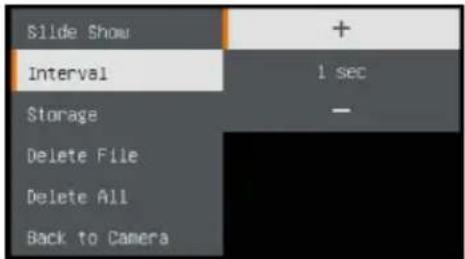
Interval
Set the interval before displaying the next picture. The length can be set up to 120 sec.
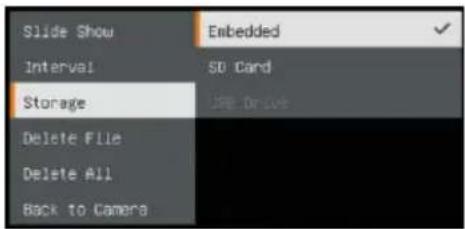
Storage
Select the source of the images and videos.
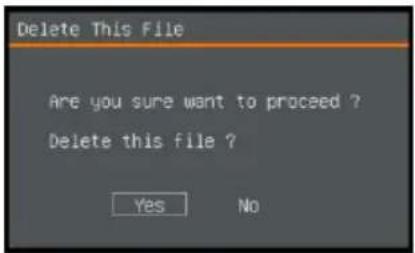
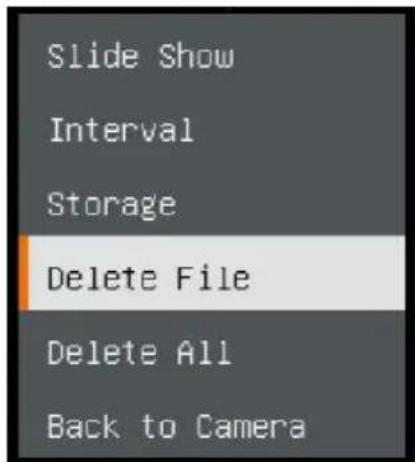
Delete File
Permanently delete the image or video in selected. A Warning Message will appear. Select Yes to continue and No to cancel the deletion.
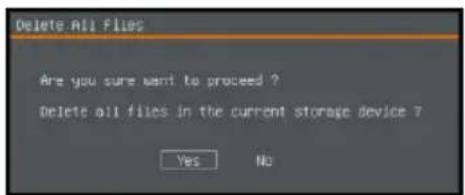
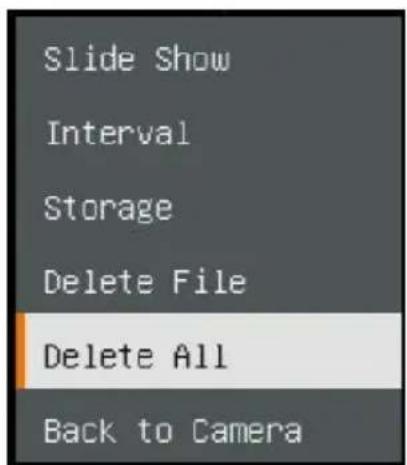
Delete All
Permanently delete all the data in selected memory source. A Warning Message will appear. Select Yes to continue and No to cancel the deletion.
Annotation
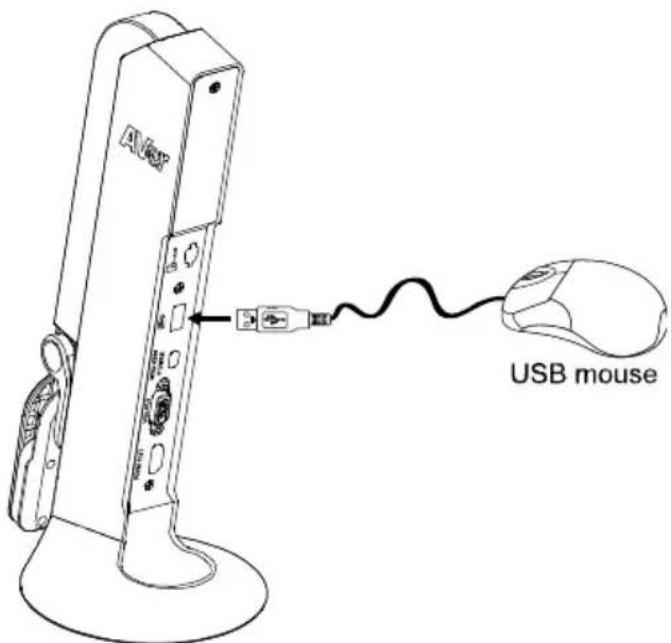
In single image playback mode, user can use the annotation feature to overlay straight line or freeform line on the captured image with the USB mouse connected to the USB port of M11-8MV.
[Note] Annotation function is not supported with video file.
- Connect the mouse to USB port of M11-8MV.
- Press to call out OSD menu.
- Select "Playback".
- Select the image and playback tool bar is displayed. Or right-click mouse to call out playback tool bar.
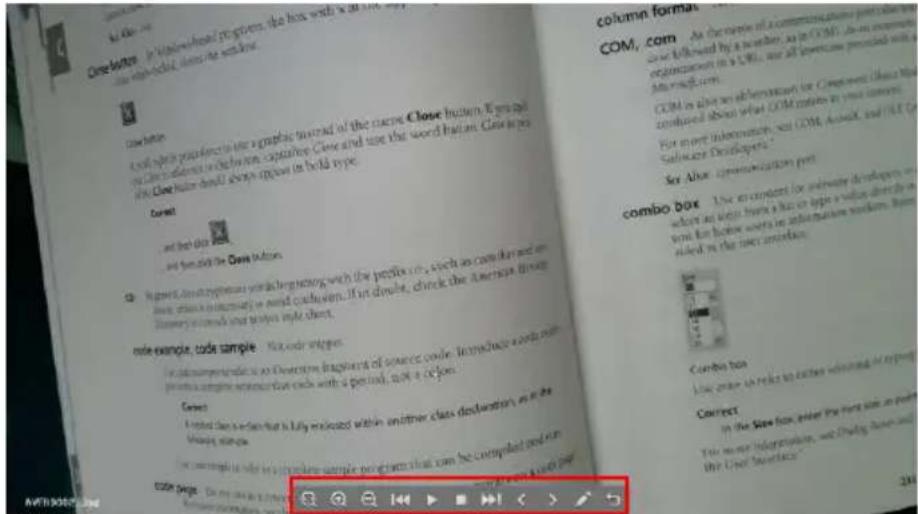
Playback tool bar description

| Button | Function |
 | Move the image to left, right, up, and down.Select  expand the direction buttons. expand the direction buttons. |
 | Zoom in image |
 | Zoom out image |
 | Fast rewind |
 | Start to play video |
 | Stop playing video |
 | Fast forward |
 | Go to next or back to last image or file |
 | Switch to annotation function. |
 | Back to image or file list |
- To switch to annotation mode, select on playback tool bar.
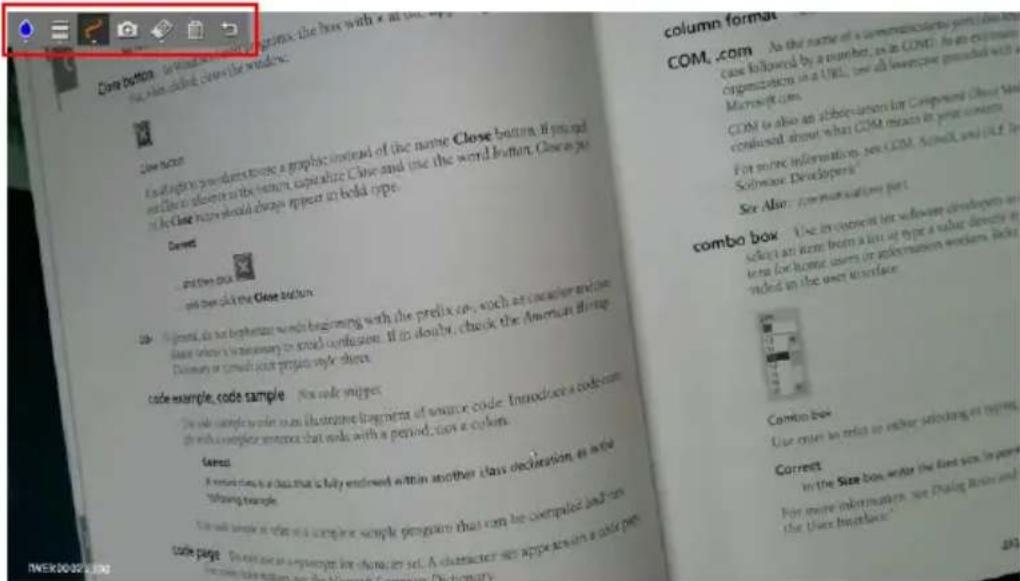

natural_image
Toolbar with icons including water drop, menu bar, camera, pencil, and refresh arrow (no text or symbols)| Button | Function | |
 | Color Palette | Select the line color. |
 | Line Thickness | Select the thickness of the line.[IMAGE] |
 | Line | Select a straight line, freehand or sharp to draw.[IMAGE] |
 | Capture |    the annotation and save it as a new file. the annotation and save it as a new file. |
 | Eraser | of the annotation that it comes in contact with or delete all annotation. |
 | Delete | on the screen. |
| [Drawed] | Back | [Drawed] [Drawed] [Drawed] back to occur. |
Use the Camera
Camera Head Angle
Move the camera head as figure shown.
[CAUTION] To avoid damage the camera head, hold the edge of the camera head to rotation the camera head.

natural_image
Three identical line drawings of a robotic arm with control knobs, shown from different angles (no text or symbols)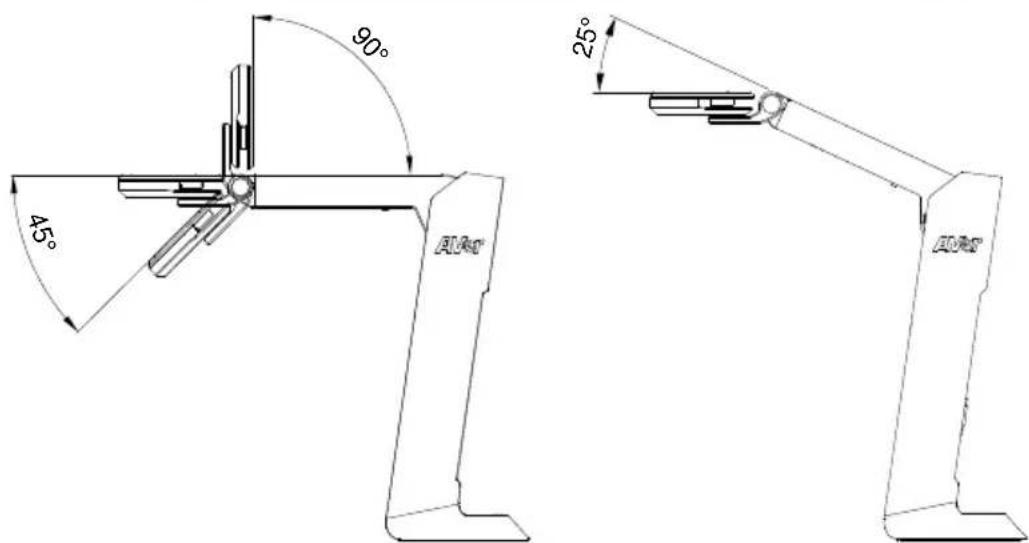
Camera Body Angle
[CAUTION] To avoid damage the camera unit, DO NOT pull the arm angle over 107^ .
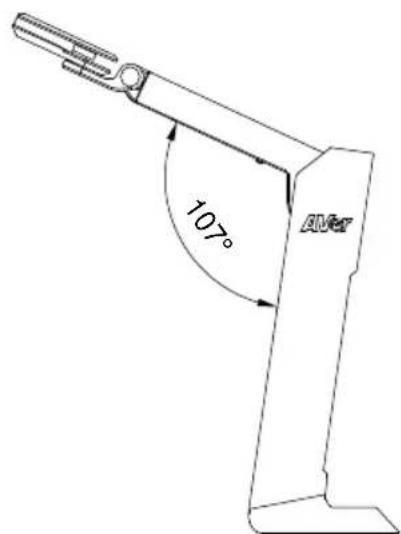
English-21
Shooting Area
When camera position is 342.4mm high, the shooting area will be A3 size.
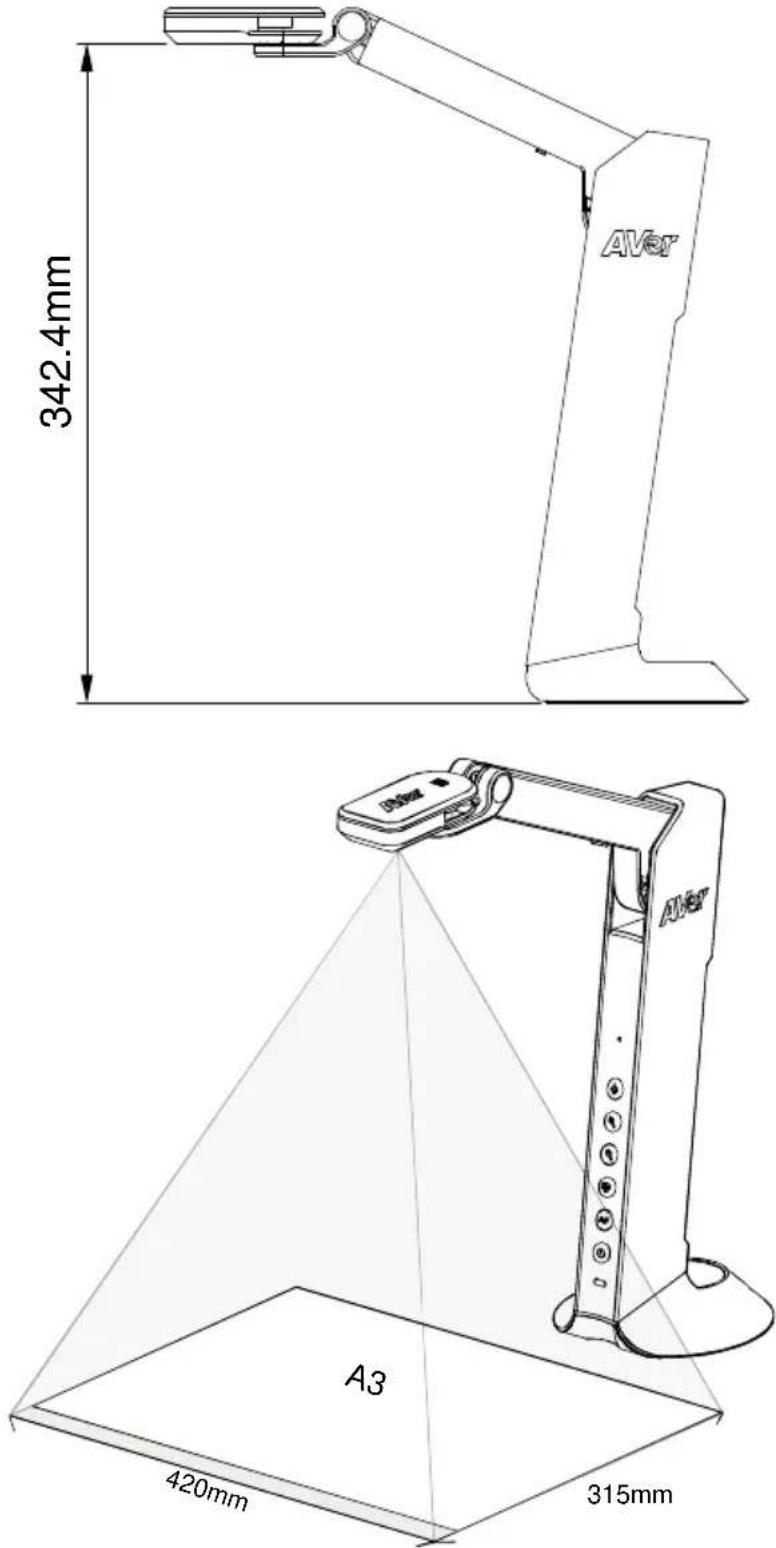
English-22
Object Position
The icon on top of camera head can help user to place objects in a positive direction.
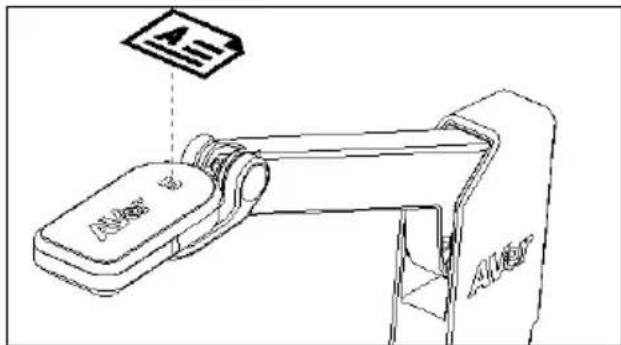
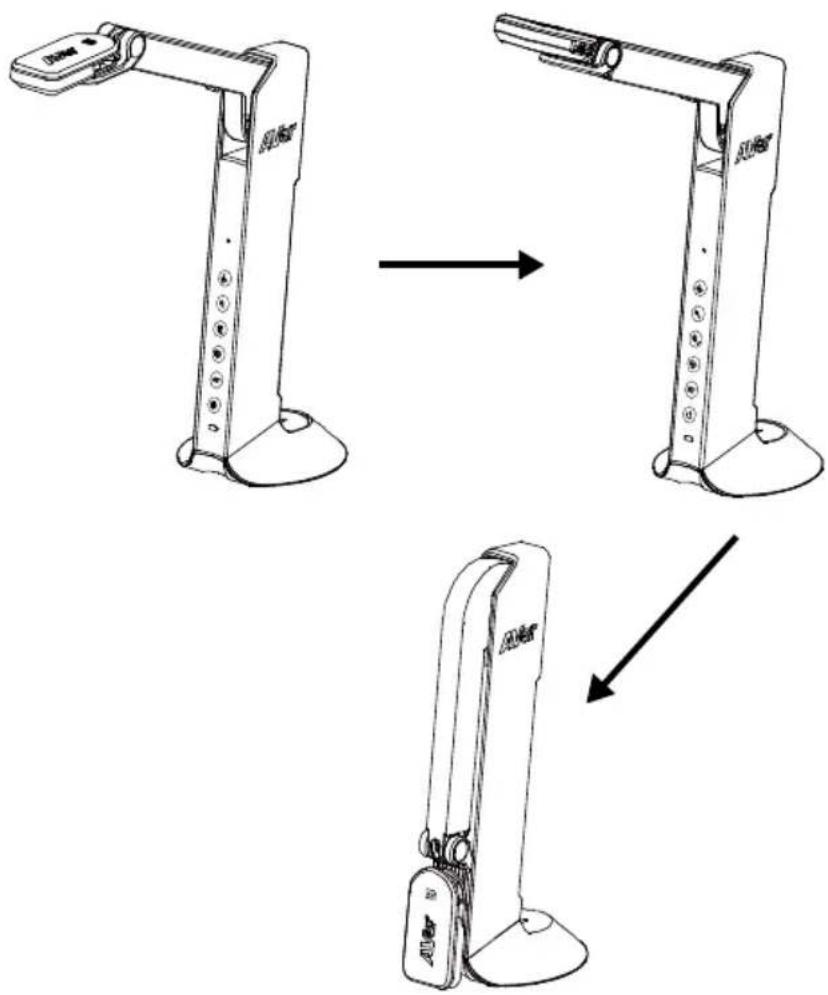
Store the Camera
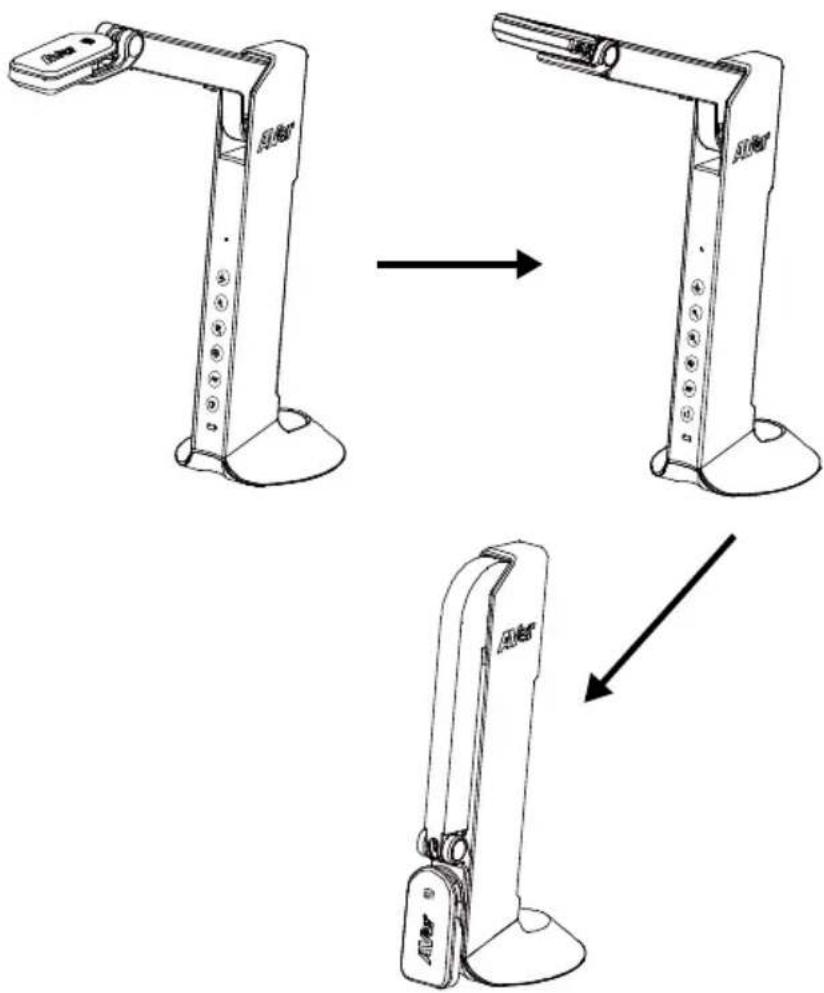
flowchart
graph TD
    A["Step 1: Top Lateral臂"] --> B["Step 2: Vertical-mounted device"]
    B --> C["Step 3: Lower arm with labeled sensors and base"]
    C --> D["Step 4: Lower arm with labeled sensors and base"]
English-23
Specification
| Sensor | 1/3.06" CMOS sensor |
| Pixel Count | 8MP |
| Frame Rate | Max.60fps (display) |
| Image Mode | Normal / Motion / High Quality |
| Effect | Color / B&W / Negative |
| Focusing | Auto / Manual |
| Shooting Area | A3, 420mm (H) * 315mm (V) |
| Zooming | 20x digital zoom |
| Power Source | Mini-USB in, 5V/1A |
| Consumption | 4.5 Watts (lamp on)4 Watts (lamp off) |
| USB Bus Power | Yes, via mini-USB port |
| Lamp Type | LED light |
| USB | USB2.0 Type-A x1 (< 5V/0.1A, USB flash drive FAT32, 32GB)USB Type mini-B x 1(Power) |
| USB Output | 3168 x 2376, 1920 x 1080, 1280 x 720, 1024 x 768, 800 x 600, 640 x 480 |
| HDMI Output | 1920 x 1080, 1280 x 720, 720 x 480 |
| VGA Output | 1920 x 1080, 1280 x 720, 720 x 480 |
| Image Capture | 120 pictures (2 megapixel) |
| Built-in MIC | Yes |
| Micro SD Card Slot | FAT 32, 32GB |
| Operating | 360.4mm (H) * 116.7mm (W) * 303.4mm (D) |
| Folded | 296.1mm (H) * 116.7mm (W) * 143.1mm (D) |
| Net Weight | 1.83 lbs (0.83 Kg) |
| Gross Weight | 2.87 lbs (1.301 Kg) |
| Software Support | AVerTouch |
WARNING
■ To reduce the risk of fire or electric shock, do not expose this appliance to rain or moisture. Warranty will be void if any unauthorized modifications are done to the product.
■ Do not drop the camera or subject it to physical shock.
■ Use the correct power supply voltage to avoid the damaging camera.
■ Do not place the camera where the cord can be stepped on as this may result in fraying or damage to the lead or the plug.
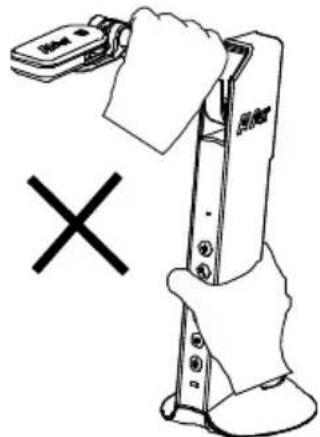
■ Hold the bottom of the camera with both hands to move the camera. Do not grab the lens or arm to move the camera.
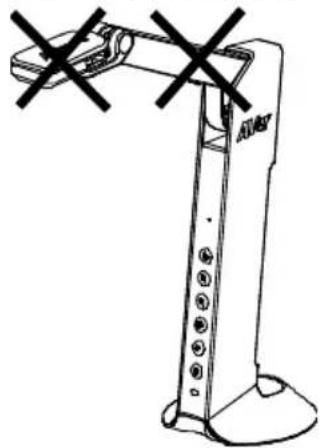
natural_image
Technical line drawing of a robotic arm with two cross marks (no text or symbols)■ Do not pull the camera arm and camera part in the opposite direction.
COPYRIGHT
© 2024 AVer Information Inc. All rights reserved.
FEDERAL COMMUNICATIONS COMMISSION
NOTE: This equipment has been tested and found to comply with the limits for a Class A digital device, pursuant to part 15 of the FCC Rules. These limits are designed to provide reasonable protection against harmful interference when the equipment is operate in a commercial environment. This equipment generates, uses, and can radiate radiofrequency energy and, if not installed and used in accordance with the instruction manual, may cause harmful interference to radio communications. Operation of this equipment in a residential area is likely to cause harmful interference in which case the user will be required to correct the interference at his own expense.
FCC Caution: Any changes or modifications not expressly approved by the party responsible for compliance could void the user's authority to operate this equipment.
This device complies with part 15 of the FCC Rules.
Operation is subject to the following two conditions:
(1) This device may not cause harmful interference, and
(2) this device must accept any interference received, including interference that may cause undesired operation.
Warning:
This is a class A product. In a domestic environment this product may cause radio interference in which case the user may be required to take adequate measures.
THE MARK OF CROSSED-OUT WHEELED BIN INDICATES THAT THIS PRODUCT MUST NOT BE DISPOSED OF WITH YOUR OTHER HOUSEHOLD WASTE. INSTEAD, YOU NEED TO DISPOSE OF THE WASTE EQUIPMENT BY HANDING IT OVER TO A DESIGNATED COLLECTION POINT FOR THE RECYCLING OF WASTE ELECTRICAL AND ELECTRONIC EQUIPMENT. FOR MORE INFORMATION ABOUT WHERE TO DROP OFF YOUR WASTE EQUIPMENT FOR RECYCLING, PLEASE CONTACT YOUR HOUSEHOLD WASTE DISPOSAL SERVICE OR THE SHOP WHERE YOU PURCHASED THE PRODUCT.
DISCLAIMER
No warranty or representation, either expressed or implied, is made with respect to the contents of this documentation, its quality, performance, merchantability, or fitness for a particular purpose. Information presented in this documentation has been carefully checked for reliability; however, no responsibility is assumed for inaccuracies. The information contained in this documentation is subject to change without notice.
In no event will AVer be liable for direct, indirect, special, incidental, or consequential damages arising out of the use or inability to use this product or documentation, even if advised of the possibility of such damages.
More Help
For FAQs, technical support, software and instruction manual download, please visit:
Non-USA
Download Center: https://www.aver.com/download-center
Technical Support: https://www.aver.com/technical-support
USA
Download Center: https://www.averusa.com/education/support
Technical Support: https://averusa.force.com/support/s/contactsupport
Contact Information
Headquarters
AVer Information Inc.
8F, No.157, Da-An Rd., Tucheng Dist.,
New Taipei City 23673, Taiwan
Tel: +886 (2) 2269 8535
USA Branch Office
AVer Information Inc., Americas
44061 Nobel Drive, Fremont, CA
94538, USA
Tel: +1 (408) 263 3828
Toll-free: +1 (877) 528 7824
Europe Branch Office
AVer Information Europe B.V.
Westblaak 134, 3012 KM,
Rotterdam, The Netherlands
Tel: +31 (0) 10 7600 550
Japan Branch Office
アバー・インフォメーション株式会社
Vietnam Branch Office
Công ty TNHH AVer Information (Việt Nam)
natural_image
Line drawing of a handheld electronic device with a circular lens and handle (no text or symbols)USB 連接線
QR Code 卡
保固卡*
*只有歐洲、日本和台灣使用
選購配件
手提袋

防眩光片
natural_image
Simple line drawing of a folded paper or document (no text or symbols)硬體介紹

https://tw.aver.com/download-center/
繁體中文-46
播放工具列說明


收納 M11-8MV
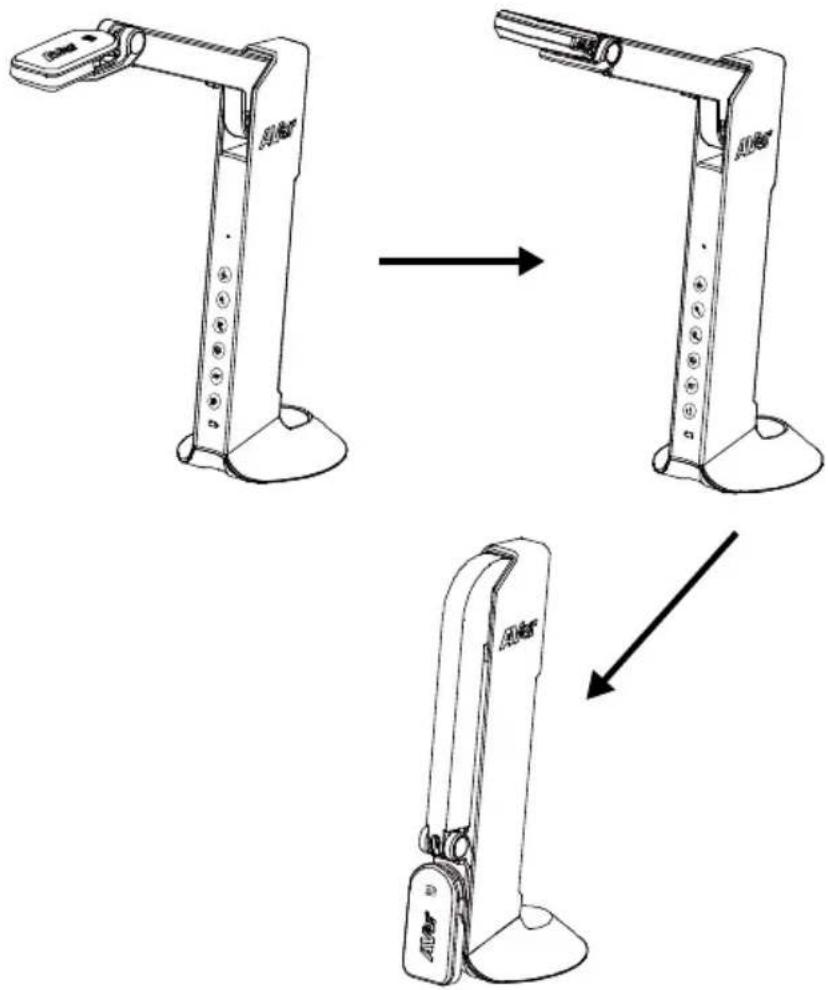
flowchart
graph TD
    A["Top Arm"] --> B["Left Arm"]
    B --> C["Right Arm"]
    C --> D["Bottom Arm"]
繁體中文-51
規格
natural_image
Line drawing of a robotic arm with two black X marks (no text or symbols)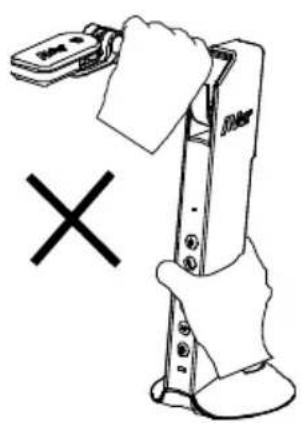
natural_image
Illustration of a robotic arm with a hand holding a tool, marked with an 'X' symbol (no text or symbols present)免責聲明
natural_image
Line drawing of a handheld device with a circular lens and handle (no text or symbols)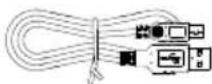
保証書*
*日本・ヨーロッパのみ
オプション(別売)
キャリーバッグ
反射防止シート

natural_image
Simple line drawing of a folded paper or document (no text or symbols)ハードウェア部位 名称
https://jp.aver.com/download-center/
プレゼンテーションモード(ライブ)

natural_image
Toolbar with icons including water drop, menu, camera, edit, and trash bin (no text or labels)日本語-74
再生ツール バーの説明


natural_image
Toolbar with icons including water drop, menu, camera, and trash bin (no text or labels)日本語-78
摄影方向
カメラの収納
flowchart
graph TD
    A["Device with sensor icon"] --> B["Assembly"]
    B --> C["Final assembly with device"]
日本語-79
製品仕様
natural_image
Line drawing of a robotic arm with two crossed arms (no text or symbols)著作權
https://www.aver.com/download-center/
日本
https://jp.aver.com/
技術的なご質問・
https://jp.aver.com/technical-support
修理のご依頼:
https://jp.aver.com/repair-request
Deutsch-101

Kameragehäusewinkel
natural_image
Line drawing of a robotic arm with two crossed X marks (no text or symbols)COPYRIGHT
https://www.avereurope.com/download-center/
Westblaak 134, 3012 KM, Rotterdam, The Netherlands
Tel: +31 (0) 10 7600 550
[Remarque]
Français-129

natural_image
Line drawing of a mechanical device with a labeled component (no text or symbols present)flowchart
graph TD
    A["Step 1: Top-mounted device"] --> B["Step 2: Vertical arm mechanism"]
    B --> C["Step 3: Lower arm mechanism"]
Français-134
Caracté ristiques
natural_image
Technical line drawing of a robotic arm with no visible text or symbolsnatural_image
Illustration of a hand holding a handheld device with a 'X' symbol below (no text or symbols on the device itself)COPYRIGHT
https://www.avereurope.com/download-center/
Support Technique :
Westblaak 134, 3012 KM, Rotterdam, The Netherlands
Tel: +31 (0) 10 7600 550
natural_image
Line drawing of a portable electronic device with a circular lens and handle (no text or symbols)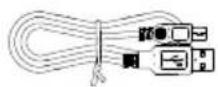
natural_image
Simple line drawing of a folded paper or sheet (no text or symbols)Función PBP
Español-157

natural_image
Toolbar with icons including water drop, menu, pen, camera, folder, and refresh arrow (no text or symbols)flowchart
graph TD
    A["Top Arm"] --> B["Left Arm"]
    B --> C["Right Arm"]
    C --> D["Bottom Arm"]
Español-162
Especificaciones
natural_image
Technical line drawing of a robotic arm with no visible text or symbolsnatural_image
Illustration of a hand holding a device with a 'X' symbol below (no text or symbols on the device itself)COPYRIGHT
https://www.avereurope.com/download-center/
Soporte técnico:
Westblaak 134, 3012 KM, Rotterdam, The Netherlands
Tel.: +31 (0) 10 7600 550
[Nota]
Funzione PBP
Italiano-184
Playback tool bar description


natural_image
Toolbar with six icons including a water droplet, menu bar, camera, edit, and refresh (no text or labels visible)natural_image
Line drawing of a mechanical device with a labeled component (no text or symbols present)flowchart
graph TD
    A["Top Support"] --> B["Left Support"]
    B --> C["Right Support"]
    C --> D["Bottom Support"]
Italiano-189
Specifiche tecniche
natural_image
Line drawing of a robotic arm with no visible text or symbolsCOPYRIGHT
European Headquarters:
https://www.avereurope.com/download-center/
Assistenza tecnica:
https://www.avereurope.com/technical-support
Westblaak 134, 3012 KM, Rotterdam, The Netherlands
Tel: +31 (0) 10 7600 550
- M11-8MV
- Optional Accessories
- Function Buttons
- Compound Key
- LED Indicator
- Device Connection
- Power Connection to Wall Outlet
- Plug in power and turn on M11-8MV.
- [Note]
- Power Connection to PC/Laptop
- Connect to USB port of PC/laptop for power supply.
- HDMI Connection
- VGA Connection
- USB Connection
- Insert a Micro SD Card
- Operate the Camera with AVerTouch
- 1
- 2
- Presentation Mode (Live)
- Annotation
- PIP Function
- PBP Function
- Playback Mode
- Switch to Playback Mode
- Slide Show
- Interval
- Storage
- Delete File
- Delete All
- Playback tool bar description
- Use the Camera
- Camera Head Angle
- Camera Body Angle
- Shooting Area
- Object Position
- WARNING
- COPYRIGHT
- FEDERAL COMMUNICATIONS COMMISSION
- Warning:
- DISCLAIMER
- More Help
- Non-USA
- USA
- Contact Information
- Headquarters
- USA Branch Office
- Europe Branch Office
- Japan Branch Office
- Vietnam Branch Office
- 選購配件
- 播放工具列說明
- 免責聲明
- オプション(別売)
- プレゼンテーションモード(ライブ)
- 摄影方向
- 著作權
- 日本
- Kameragehäusewinkel
- [Remarque]
- Función PBP
- Soporte técnico:
- [Nota]
- Funzione PBP
Brand : AVer
Model : AVerVision M11-8MV
Category : Document camera