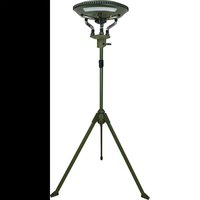
CALED200 - Lighting Schwaiger - Free user manual and instructions
Find the device manual for free CALED200 Schwaiger in PDF.


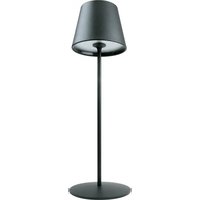
| Product type | Multifunction floor lamp with Bluetooth speaker and solar panel |
| Brand | Schwaiger |
| Model | CALED200 |
| Adjustable height | 1.5 m - 2.1 m |
| Housing material | ABS (flame retardant) |
| Protection rating | IP43 |
| Ambient temperature | -20°C to +60°C |
| Ambient humidity | <95% |
| Main power supply | Rechargeable lithium-ion battery 10400 mAh (3.7V) |
| Backup power supply | 3 C batteries (LR14) (not included) |
| Charging via | Micro USB (5V 1500mA) or polysilicon solar panel |
| Charging time (USB) | Approximately 10 hours (with additional units) |
| Charging time (solar) | Approximately 16 hours (with additional units) |
| Main unit - LED | 6.5W, luminous flux 700/480/350 lm |
| Detachable lighting units | 3x LED 1W, 100 lm each |
| Bluetooth speaker | 3W, version 4.2, range 10 m |
| Powerbank function | USB output 5V 1000 mA |
| Lighting duration (main) | 8-14 hours depending on mode |
| Lighting duration (detachable units) | 6-8 hours depending on mode |
| Cleaning | Soft, lint-free cloth slightly damp, no solvents |
| Safety | Do not look directly at the beam, keep out of reach of children |
Frequently Asked Questions - CALED200 Schwaiger
User questions about CALED200 Schwaiger
0 question about this device. Answer the ones you know or ask your own.
Ask a new question about this device
Download the instructions for your Lighting in PDF format for free! Find your manual CALED200 - Schwaiger and take your electronic device back in hand. On this page are published all the documents necessary for the use of your device. CALED200 by Schwaiger.
USER MANUAL CALED200 Schwaiger
D BEDIENUNGSANLEITUNG UND SICHERHEITSHINWEISE
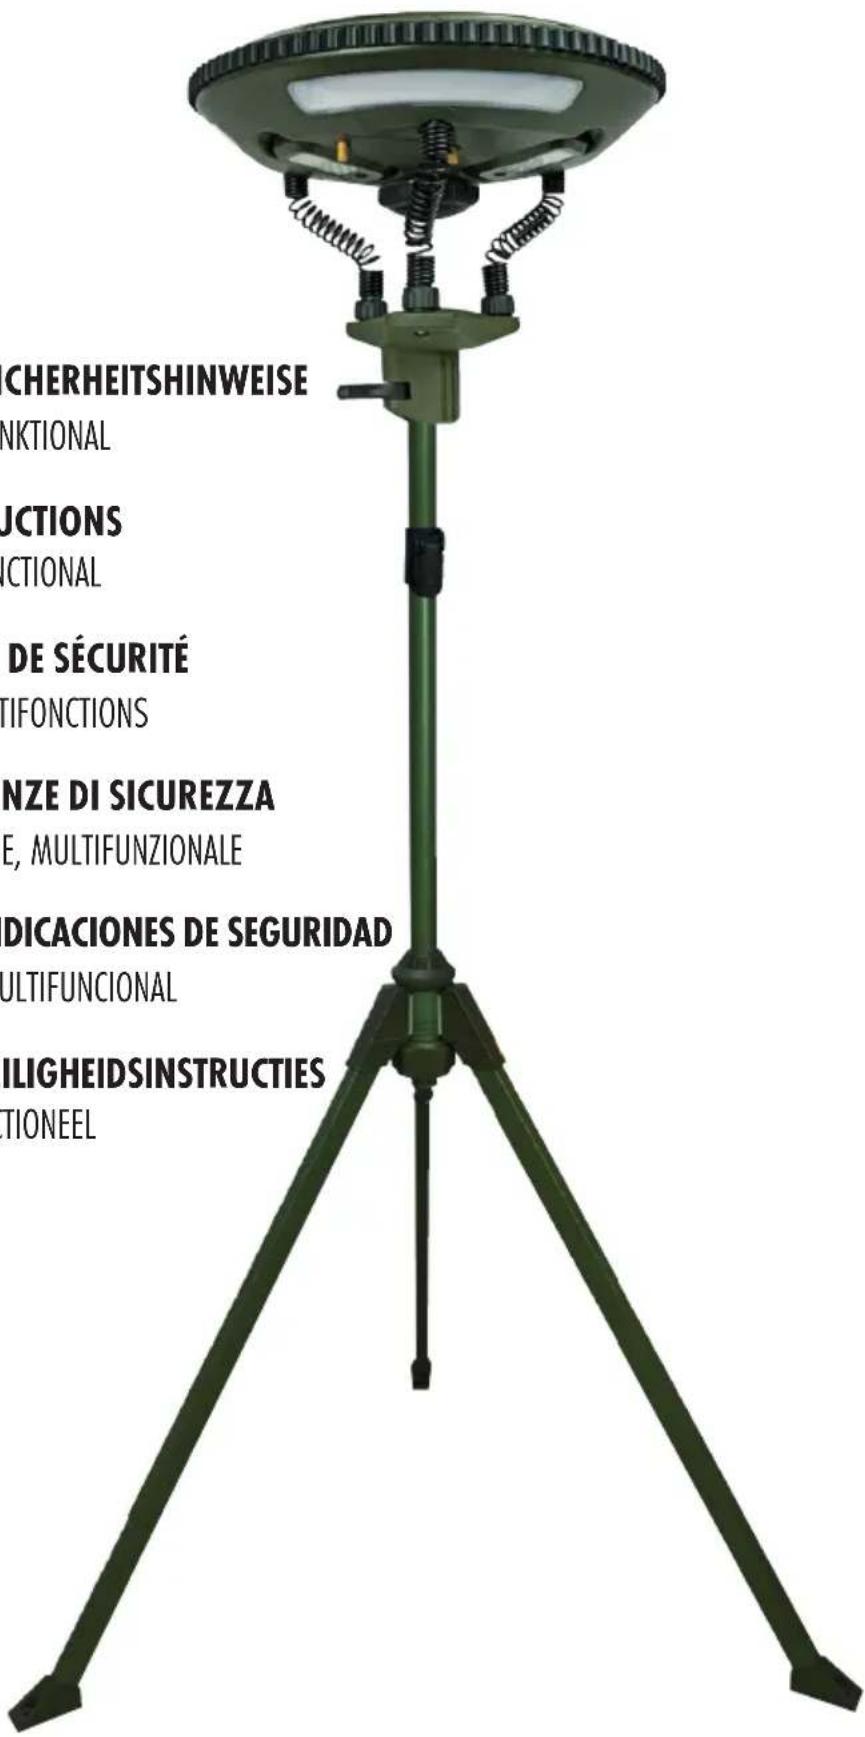
CAMPING LEUCHTE MIT STATIV, MULTIFUNKTIONAL
GB USER GUIDE AND SAFETY INSTRUCTIONS
CAMPING LAMP WITH TRIPOD, MULTIFUNCTIONAL
F MODE D'EMPLOI ET CONSIGNES DE SÉCURITÉ
LAMPE DE CAMPING AVEC TRÉPIED, MULTIFONCTIONS
GUIDA PER L'UTENTE E AVVERTENZE DI SICUREZZA
LAMPADA DA CAMPEGGIO CON TREPPIEDE, MULTIFUNZIONALE
E MANUAL DE INSTRUCCIONES Y INDICACIONES DE SEGURIDAD
LÁMPARA DE CAMPING CON TRÍPODE, MULTIFUNCIONAL
NL BEDIENINGSHANDLEIDING EN VEILIGHEIDSINSTRUCTIES
CAMPINGLAMP MET STATIEF, MULTIFUNCTIONEEL
natural_image
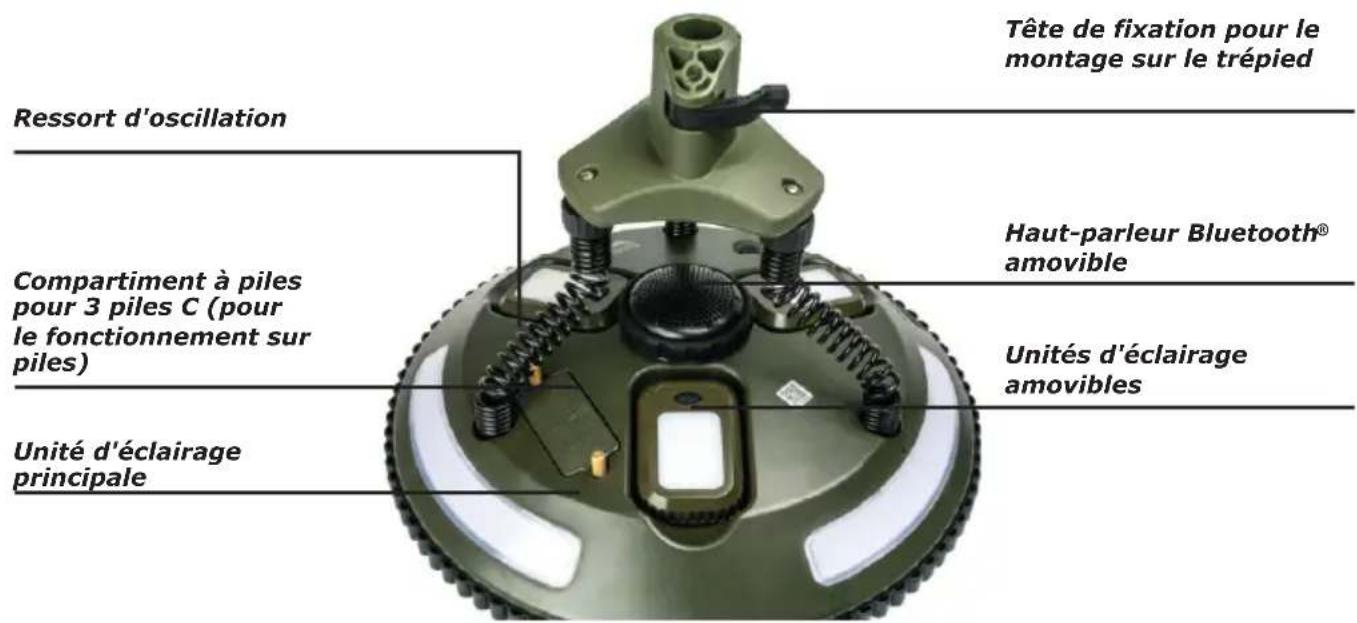
Top-down view of a mechanical component with labeled parts (no text or symbols visible)natural_image
Three black plastic connectors with coiled springs, arranged diagonally (no text or symbols visible)3x Schwingungsfeder

natural_image
Green cylindrical military weapon with attached bracket (no visible text or markings)natural_image
Three identical metallic cutting tool blades arranged horizontally (no text or symbols visible)natural_image
Close-up of a mechanical component with a circular feature and mounting holes (no visible text or symbols)natural_image
Three parallel horizontal lines with no text or symbols3x Montageheringe Micro-USB Ladekabel
natural_image
Coiled black cable with two USB connectors (no text or symbols visible)
natural_image
A beige circular object with green handles and a matching strap, placed on a brown surface (no text or symbols visible)Tragetaschen
natural_image
Close-up of a mechanical component being adjusted with forceps, showing a spring and hook (no text or symbols visible)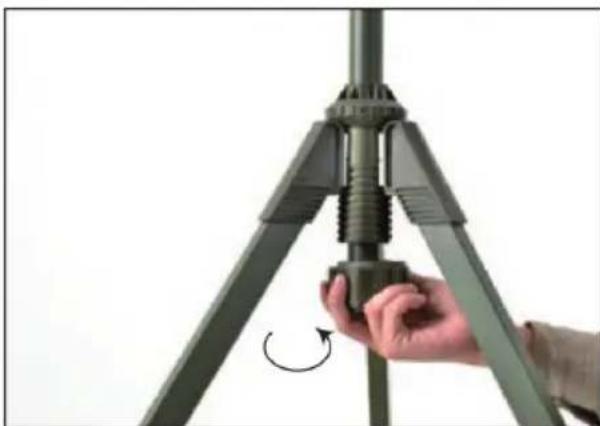
natural_image
Close-up of a hand adjusting a mechanical component with a curved arrow indicating rotation (no text or symbols visible)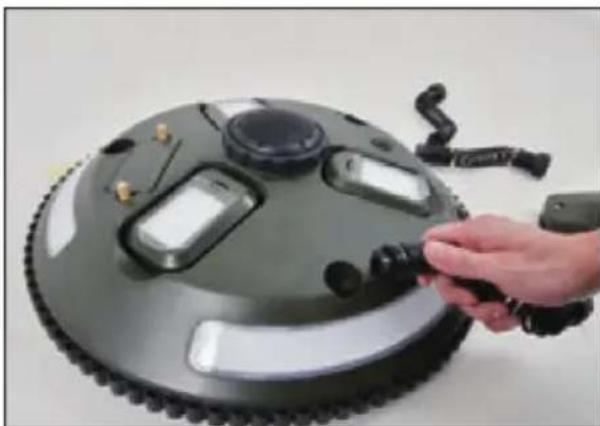
natural_image
Hand holding a small robotic vacuum cleaner next to a circular mechanical device with multiple sensors and control buttons (no visible text or symbols)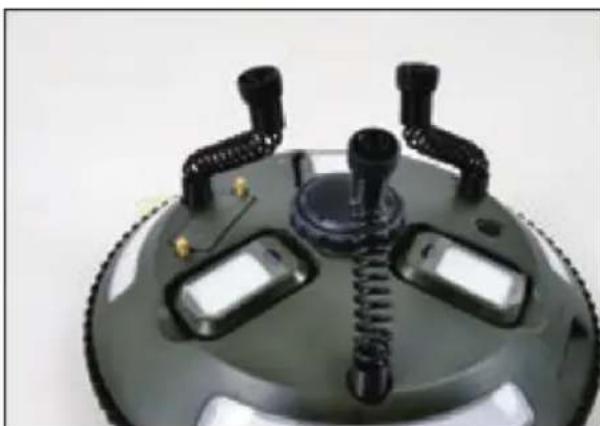
natural_image
Close-up of a mechanical device with black connectors and a central hub (no visible text or symbols)Schritt 1
Congratulations and thank you for purchasing this Schwaiger product.
This user guide is designed to help you use and operate the device.
Read through the User guide carefully. Store this guide safely throughout the product's entire service life and pass it on to any subsequent users or owners.
Check that the supplied package is complete and ensure that none of the parts are defective or damaged.
1. GENERAL SAFETY & WARNING INSTRUCTIONS!
- This product is intended for private, non-commercial household use.
- This product is an electronic product that must be kept away from children. Therefore, keep it out of reach of children.
- The product is not intended for use by children, or by adults with visual or other impairments preventing them from using it safely. In such cases, it should be used under supervision.
- Never expose the product to high temperatures or extreme cold. Please observe the operating temperatures specified in the technical data.
- Do not intentionally drop the product or expose it to extreme vibrations.
- Do not introduce any objects into the product's connections or openings.
- Do not disassemble the product into its individual parts. The unit does not contain any user serviceable parts. Incorrect assembly can cause electric shocks or malfunctions.
- The product is not user serviceable, and any attempt to do so will invalidate the guarantee.
- Never dazzle other people or animals with the light.
- Misuse of the lamp can lead to eye injuries as it is very bright.
For safety reasons and reasons related to official approvals (CE), you must not convert and/or modify the product. The product may become damaged if you use it for purposes other than the one described. In addition, improper use may result in hazards such as short circuits, fire, electric shock, etc.

Special notice concerning the battery
- The battery is permanently installed in the casing of the product. It cannot be replaced.
- Never throw the product into a fire as the battery may explode or cause a flame hazard!
- Charge the battery of the product roughly every three months, even if you are not using it. Otherwise, it may get deeply discharged and become permanently unfit for use. The battery does not need to be discharged before being recharged.
- Place the product on a surface which is not sensitive to heat when recharging. It is normal for the product to become slightly warm when recharging.
- Dead or damaged batteries may cause skin irritation, so use suitable protective gloves when handling them.
- Leaking battery fluids are highly corrosive, and may seriously damage objects or surfaces they come into contact with.

Warnings concerning the battery (when leaking)
This product is powered by a built-in lithium battery. In normal use, the battery is enclosed and protected by the device. If battery fluid leaks from the unit, follow these safety precautions:
- If battery fluid is swallowed, seek medical attention immediately! Do not induce vomiting and do not eat or drink anything.
- If you have inhaled battery fluid, go to fresh air immediately and seek medical attention.
- If skin contact with battery fluid occurs, rinse thoroughly with water and avoid contact with eyes.
- If battery fluid has come in contact with your eyes, immediately rinse them thoroughly under running water for at least 15 minutes and seek medical attention.

IMPORTANT!
look directly into the light beam (especially from a short distance).
2. INTENDED USE
This multi-function floor lamp with removable lighting units and Bluetooth speaker is specially designed for outdoor use. The product is charged exclusively via Micro USB or the integrated solar panel. The product is designed for private use and is not intended for use in commercial or industrial environments.

This light is not suitable as conventional household lighting!
Information on the protection class
This product is IP43 certified and protected.
The first code digit indicates that the product is protected against contact with tools or wires and against foreign bodies ≥ 1.0 mm. The second code digit indicates that the product is protected against falling spray water up to 60° from the vertical.
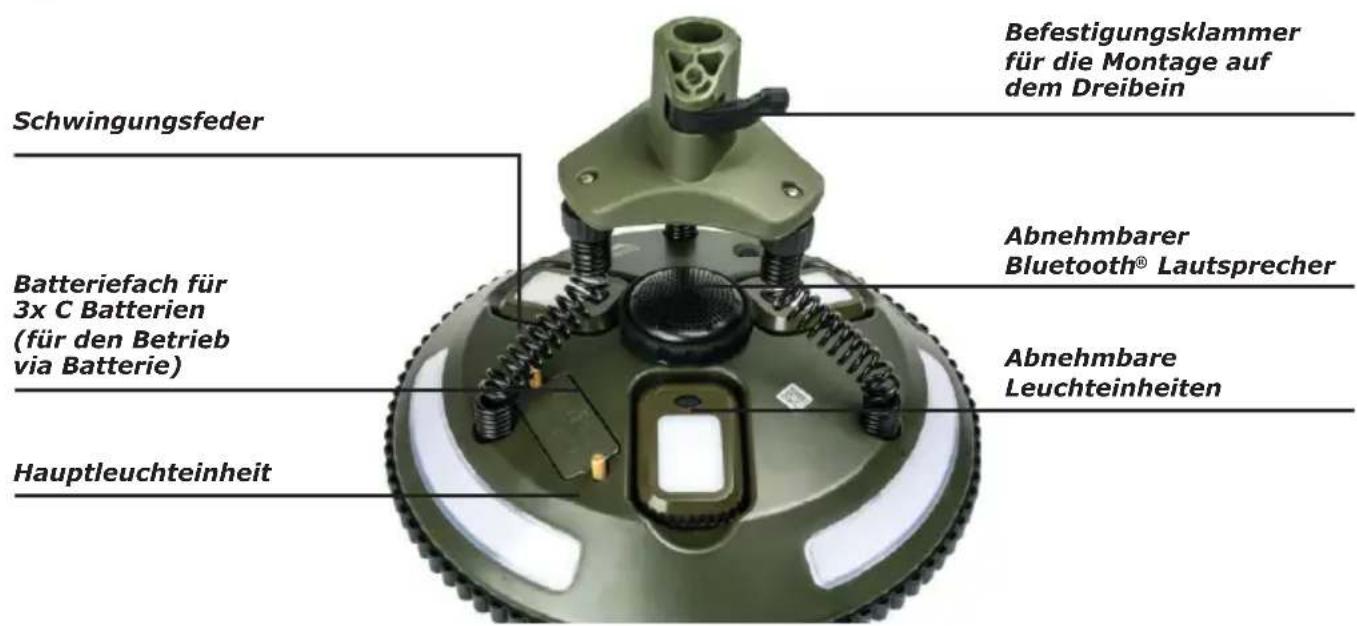
3. PRODUCT DETAILS
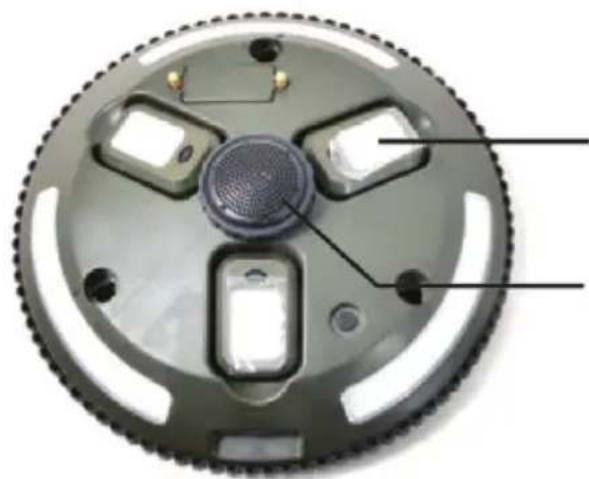
natural_image
Top-down view of a mechanical component with labeled parts (no text or symbols visible)3x Removable lighting units
Removable Bluetooth® speaker
natural_image
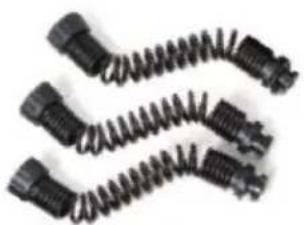
Three black plastic connectors with coiled springs, arranged diagonally (no text or symbols visible)3x vibration springs

Middle unit (tripod)
Main lighting unit
natural_image
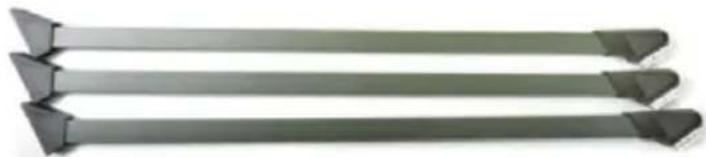
Three identical metallic cutting tool blades arranged horizontally (no text or symbols visible)
natural_image
Close-up of a mechanical component with a circular hole and radial grooves (no text or symbols visible)Mounting clamp (tripod)
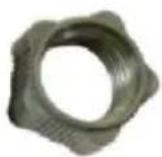
Mounting nut3x support
natural_image
Three parallel horizontal lines with no text or symbols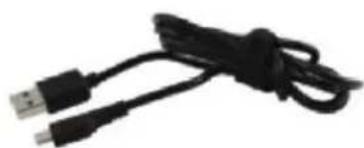
natural_image
Black USB cable with two connectors, no text or symbols visible
natural_image
A beige circular object with green handles placed on a brown fabric bag, no visible text or symbols.Carrying bags
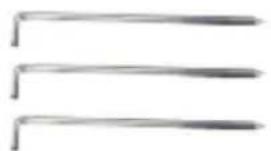
3x mounting pegs Micro USB charging cable
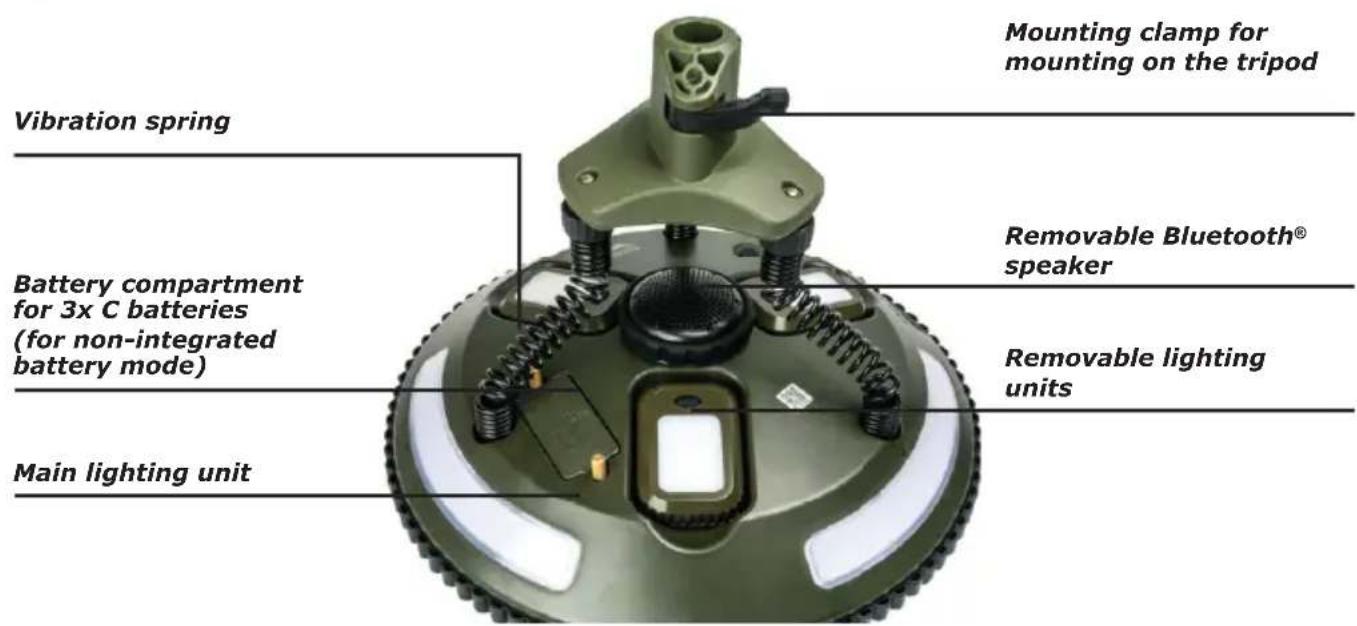
Solar panel (polysilicone)
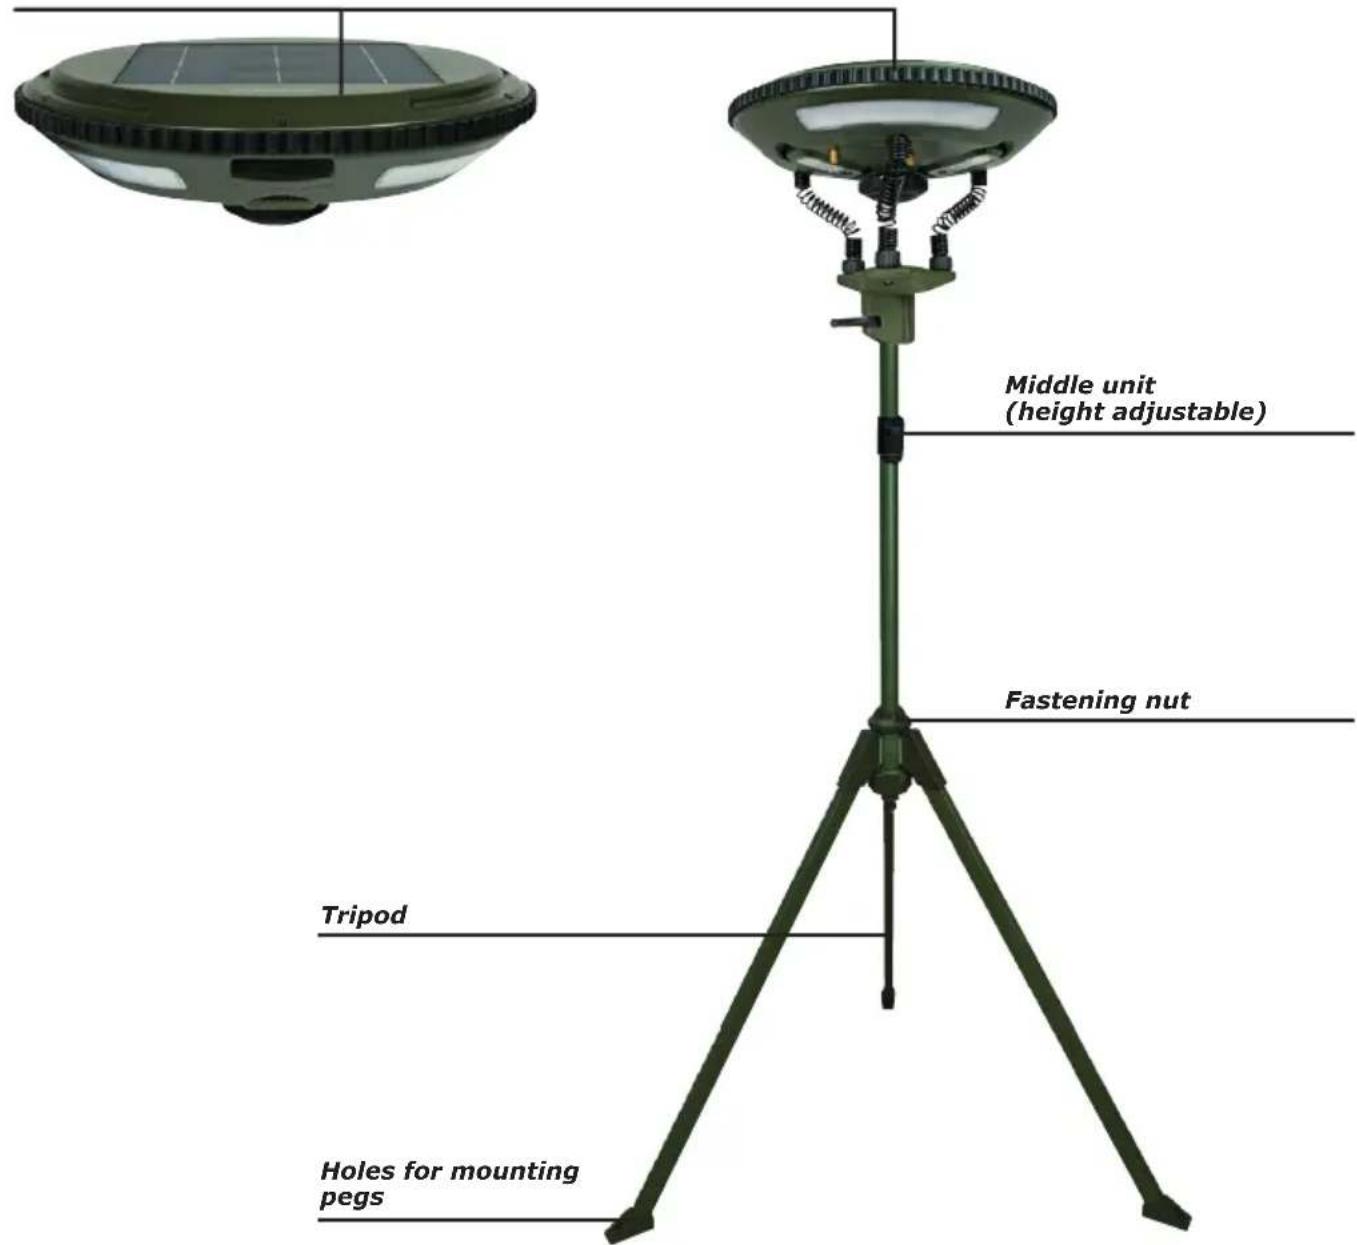
4.1. Mounting the tripod
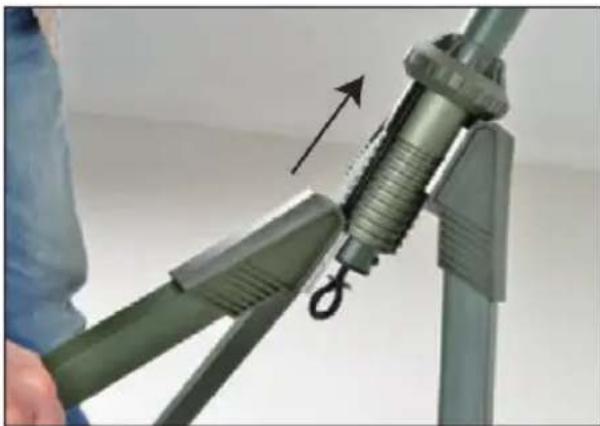
The tripod is mounted using a connector system, please proceed as follows:
natural_image
Close-up of a mechanical component being adjusted with forceps, showing a spring and hook (no text or symbols visible)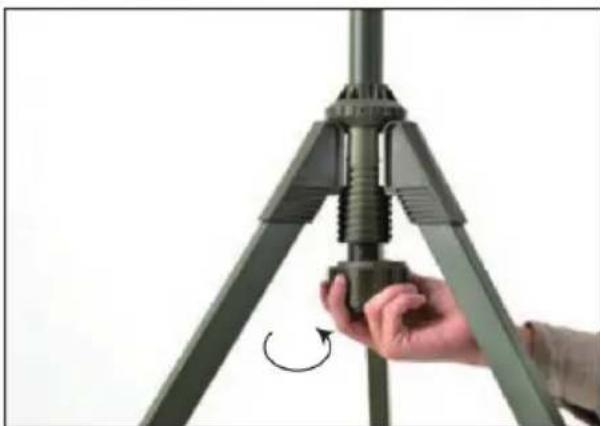
natural_image
Close-up of a hand adjusting a mechanical component with a curved arrow indicating rotation (no text or symbols visible)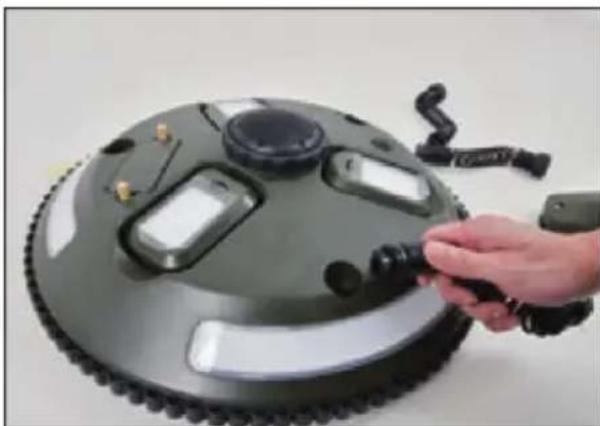
natural_image
Hand adjusting a robotic vacuum cleaner on a circular mechanical component (no visible text or symbols)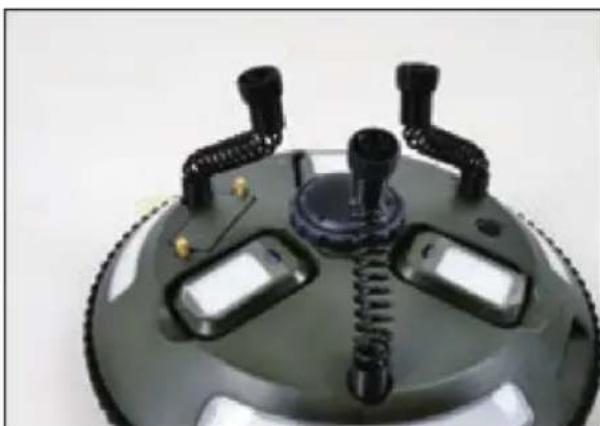
natural_image
Close-up of a mechanical device with black connectors and a central hub (no visible text or symbols)Step 1
Mount the support feet on the middle unit of the tripod. Carefully slide the support feet upwards into the rails provided.

CAUTION!
Position your fingers/hands carefully during assembly in order to avoid pinching them!
Step 2
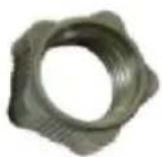
Screw the mounting nut onto the thread at the lower end of the middle unit. The mounting nut secures the support feet against falling out later.
Turn the nut hand-tight until you feel resistance.
Direction of rotation of the nut:
Screw (counterclockwise), Unscrew (clockwise)
Step 3
Mount the vibration springs on the main lighting unit.

NOTE
Pay attention to the marking on the main unit and the springs. The arrows / triangles must face each other during insertion.
The bayonet lock consists of two narrow and one wide plastic noses. Make sure that they are correctly aligned with each other.
After successful insertion, turn the vibration springs so that they point towards the centre of the unit.
Step 4
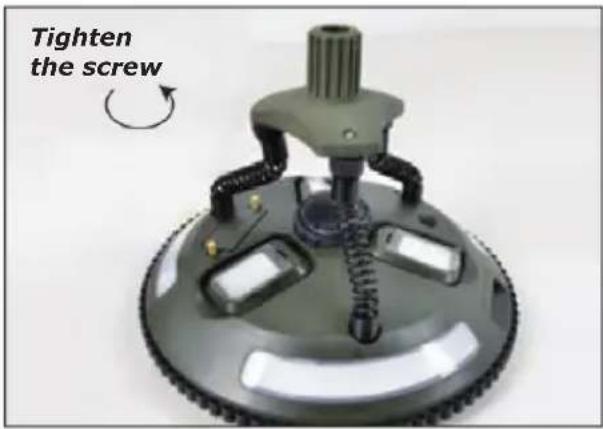
Mount the main unit with the inserted vibration springs on the mounting clamp for the tripod.
For this purpose, screw the 3 union nuts on the threads of the mounting clamp.
Step 5
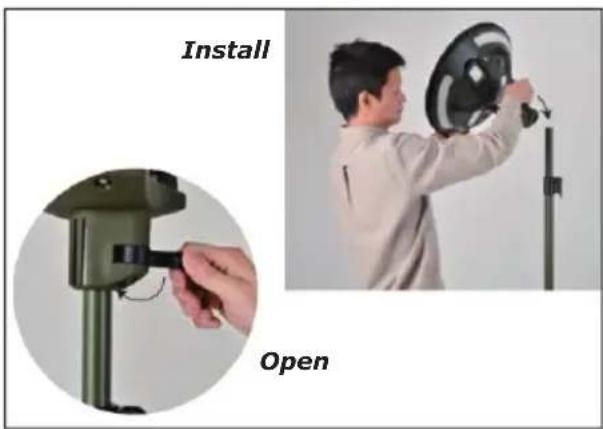
Open the lock of the mounting clamp and put the main light unit on the tripod.
Then close the clamp again.

IMPORTANT:
Make sure that the lamp is securely seated on the tripod.
Step 6
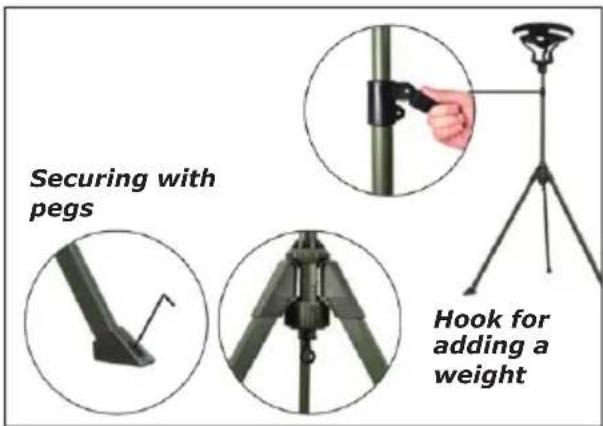
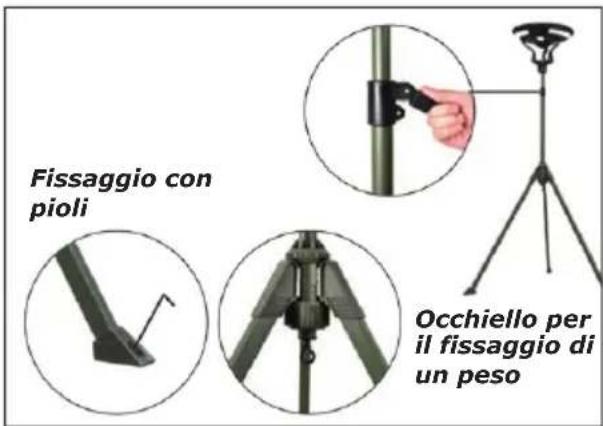
Now that the lamp is assembled / mounted, it should be provided with additional support.
To ensure a secure stand even in windy conditions, either anchor the support feet to the ground or attach an additional weight to the hook on the middle unit.
For anchoring to the ground you can use the supplied mounting pegs.

WARNING!
Ensure stable positioning during installation, otherwise there is a risk of tipping over! Do not use the product as a coat stand! Do not use it if it is not stably installed!
This lamp has an integrated lithium-Ion battery, which is charged either via Micro USB or the solar panel on the top of the product. The lighting units located at the bottom of the product have been designed so that power is supplied via charging contacts from the main unit. Therefore, the solar panel supplies power to all attached units including itself when lighting conditions are good.

NOTE
The battery is supplied partially precharged, and should be fully charged before being used for the first time. The charging time is approx. 6 1/2 hours.
5.1. Charging via Micro USB
Use the supplied Mirco USB cable to charge the main unit. You will also need a suitable charging adapter with at least 2 A output power.
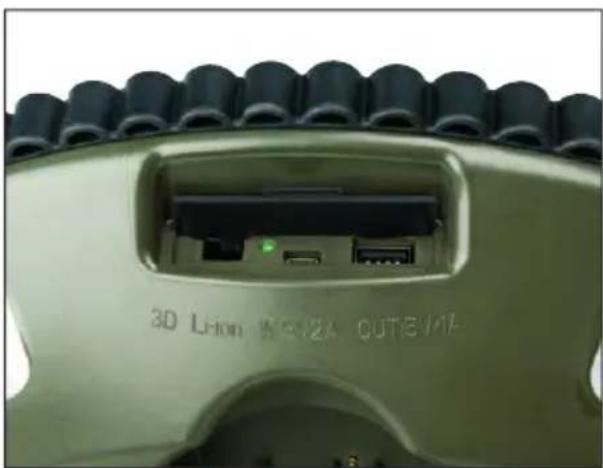
To connect the Micro USB cable, open the rubber protection cap on the side and plug in the cable.

IMPORTANT!
During the charging process, make sure that the LED indicator next to the Micro USB connector lights up and the slide switch is set to "Li-Ion"! If the slide switch is set to "3D", the integrated battery will not be charged!
Meaning of "Li-Ion" & "3D"
This marking indicates the two operating modes of the lamp. With "Li-Ion" the light is powered by the integrated rechargeable battery, while with "3D" power is supplied by the three C (LR14) batteries.
Explanation of the LED codes
The light has a status LED (combination of a red and a green LED), which indicates the charge level of the battery.
| Explanation of the LED codes | |||
| During operation During charging | |||
| Charge level LED code | Charge level LED code | ||
| 0% - 25 % Flashing red | 0% - 25 % Flashing red | ||
| 25% - 50% Glowing red | 25% - 50% Flashing yellow | ||
| 50% - 75% Glowing yellow | 50% - 75% Flashing green | ||
| 75% - 100% Glowing green | 75% - 100% Glowing green | ||
5.2. Power supply selection
As already described in the previous section, the lamp can be operated using both the integrated rechargeable battery and non-integrated batteries. The non-integrated batteries should only be used as an emergency power source.
The power supply can be selected by means of a slide switch (next to the Micro USB connector) behind the rubber cover.
In non-integrated battery mode, please insert 3x C (LR14) batteries.
To do so, unscrew the two screws on the bottom of the product by hand and open the battery compartment. Insert the appropriate batteries and close the battery compartment.

NOTE
We advise you not to operate the lamp exclusively via the non-integrated batteries! Lighting duration is significantly reduced in this mode! Also be aware that mobile devices can also be charged via the USB port in non-integrated battery mode. This shortens the service life / lighting duration even more.

IMPORTANT! SOLAR PANEL
Charging the battery via the solar panel works only if the slide switch is set to "Li-Ion"! The solar panel is deactivated when "3D" is selected.
6. FUNCTIONS
6.1. Main unit
Switch the light ring of the main unit on by pressing the button at the bottom for approx. 2 seconds.
You can switch between different lighting modes by pressing the on/off switch again.
Available options are: High (100% luminosity), Medium (50% luminosity), Low (30% luminosity).
To switch the light off, press the on/off switch again for approx. 2 seconds.
6.2. Removable lighting units
The lights located at the bottom of the main unit also have multiple lighting modes.
These lights are activated by removing them from the magnetic holder and pressing the button on the front for approx. 2 seconds. You can then change the lighting modes using this same button. Switch the light off by pressing and holding the button for 2 seconds.

NOTE
The units at the bottom can be interchanged.

NOTE ON CHARGING!
The removable lighting units are normally charged via the magnetic contacts on the back of the product. Alternatively, they can also be charged directly via the Micro USB connector.
6.3. Bluetooth ^® speaker
The product also has a removable Bluetooth ^® speaker in the middle of the bottom of the main unit. To activate the speaker, remove it from the main unit and switch it on using the on/off switch on the side.
During powering on, a melody will be played and the speaker will start in pairing mode.
In the Bluetooth® settings of your smartphone or tablet, search the model name: "CALED200" and connect to it. If the connection is successfully established, a signal tone sounds again.
During music playback, you can also stop / resume playback using the on/off switch.

IMPORTANT NOTE!
The Bluetooth ^® speaker is charged exclusively via Micro USB! To do this, connect the speaker to a suitable charging adapter using a micro USB cable.

NOTE
Please ensure that you familiarize yourself with the Bluetooth® settings on your player device beforehand, so that you can avoid any potential errors.

NOTE
If your smartphone or tablet prompts you to enter a password, please enter "0000" or "1234".

NOTE
Music can only be played from one device at a time.
Automatic switch-off
The product has an automatic switch-off function to prevent unnecessary discharge of the battery.
The device is automatically switched off in the following situations:
• After 6 minutes with no active connection or pairing
- As soon as the battery reaches a low or critical level.

Switch the device off in aircrafts, hospitals, operating rooms or in the vicinity of medical electronic systems. The transmitted radio signals can affect the functionality of sensitive electronic devices.

The magnetic fields generated by the product can affect pacemakers and implanted defibrillators. Therefore, keep a minimum distance of 10 - 15 cm between the product and the pacemaker / defibrillator.
6.4. Emergency power bank function
A further feature of the product is the additional charging function via the USB port. This can be used to charge mobile devices such as smartphones (max. 1 A).
Both functions (lighting and charging) can be used simultaneously.

NOTE
The charging function is designed as an emergency charging option. When using it, the battery is discharged more quickly and lighting duration is reduced.

IMPORTANT!
If the battery voltage is below 3V, all outputs are deactivated to prevent a deep discharge of the product. In this case, recharge the lamp immediately.
7. TECHNICAL DATA
| General | |
| Casing material ABS (fire retardant) | |
| Protection Degree IP43 | |
| Adjustable height 1.5 m - 2.1 m | |
| Ambient temperature -20% to +60° | |
| Ambient humidity <95% | |
| Main unit | |
| Solar panel Polysilicone (248 x 248 mm) | |
| Illuminants 6.5W LED (dimmable) | |
| Lumen 700lm / 480lm / 350lm | |
| Lighting duration (max.) 8-14 hours (depending on the lighting mode) | |
| Service life (illuminants) 20,000 hours | |
| Battery type Lithium-Ion (rechargeable) | |
| Battery capacity 10,400 mAh (3.7V) | |
| Power input (via Micro USB) DC 5.0V - 1.500 mA | |
| Power input (via solar panel) | DC 5.0V - 1.500 mA |
| Power input (via battery) | 3x C (LR14) batteries |
| Output (via USB) | DC 5.0V - 1,000 mA |
| Charging time (via solar panel) | 16 hours (with additional units) |
| Charging time (via Micro USB) | 10 hours (with additional units) |
| Lighting units (removable) | |
| Illuminant type 1W LED | |
| Lumen 100 lm | |
| Lighting duration (max.) 6-8 hours (depending on the lighting mode) | |
| Service life (illuminants) 20,000 hours | |
| Modes 100% / 50% / headlight | |
| Battery type Lithium-Ion (rechargeable) | |
| Battery capacity 1,800 mAh (3.7V) | |
| Power input (via Micro USB) DC 5.0V – 200 mA | |
| Power input (via magnetic contact) DC 5.0V – 200 mA | |
| Bluetooth® speaker | |
| Driver 1x 3W speaker | |
| Bluetooth® version 4.2 | |
| Bluetooth® coverage 10m | |
| Bluetooth® display name CALED200 | |
| Frequency band 20 Hz – 20,000 Hz | |
| Battery type Lithium-Polymer (rechargeable) | |
| Battery capacity 1,100 mAh | |
| Power input (via Micro USB): DC 5.0V – 500 mA | |
| Frequency band 2,402 – 2,480 GHz | |
| Transmission power | 4.0 dBm |
8. CLEANING
Ensure that no liquids get into the product while you are cleaning it. The use of solvent-containing or aggressive cleaning agents as well as alcohol or thinners is prohibited as it could damage the coating or the surface of the product. You should therefore clean the product with a lint-free, ever so slightly damp soft cloth only.

NOTE LED
This product is maintenance free, and the illuminants are not replaceable.
9. DISPOSAL
The product is delivered in packaging made of recyclable materials to protect against damage during transport. Sort and dispose of these materials in the designated containers. Ask your local disposal company or local council about how to dispose of the product in an environmentally correct way.
Do not dispose of batteries or electric and electronic devices in the normal household waste. The consumer is legally obliged to return electrical and electronic devices, and batteries that are at the end of their useful life to the point of sale or public collection points that have been set up for this purpose. The details are regulated by the respective national law. The symbol on the product, user guide or the packaging indicates this legal requirement.
Disclaimer
Schwaiger GmbH does not accept any liability or warranty for damages that are sustained due to improper installation or mounting, improper use of the product or non-compliance with the safety instructions.
Manufacturer's information
Please contact our Technical Support if you need technical advice and your retailer is unable to help you. Our technical support is available in English or German.
Simplified declaration of conformity as per the RED Directive
Schwaiger GmbH hereby declares that the described radio system product complies with Directive 2014/53/EU and other directives applicable to the product. The complete EU declaration of conformity is available online at: http://konform.schwaiger.de
Office Hours
Monday to Friday: 8:00 a.m. - 5:00 p.m.
Warranty
The warranty period starts when the product is purchased. You are requested to prove this date of commencement of the guarantee by means of a proof of purchase (receipt, invoice or delivery slip). Keep these documents in a safe place. Our warranty is based on our warranty conditions valid at the time of purchase.
Features and specifications are subject to change without prior notice.
natural_image
Top-down view of a mechanical component with labeled parts (no text or symbols visible)natural_image
Three black plastic connectors with coiled springs, arranged diagonally (no text or symbols visible)3x ressorts d'oscillation
natural_image
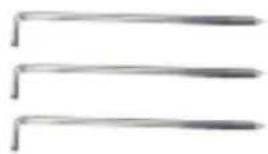
Three elongated metallic cutting tool blades with pointed tips, shown against a plain background (no text or symbols)natural_image
Close-up of a mechanical component with a circular opening and threaded end (no visible text or symbols)Tête de fixation (trépied)
Écrou de montage
natural_image
Three parallel horizontal lines with no text or symbolsnatural_image
Coiled black USB cable with two connectors (no text or symbols visible)Micro USB

natural_image
A beige circular object with green handles placed on a brown fabric bag, no visible text or symbols.Sacs de transport
natural_image
Close-up of a mechanical component being adjusted with forceps, showing a hook and arrow (no text or symbols)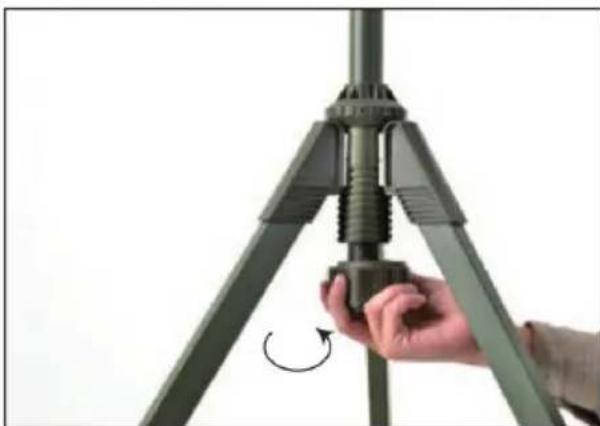
natural_image
Close-up of a hand adjusting a mechanical component with a curved arrow indicating rotation (no text or symbols visible)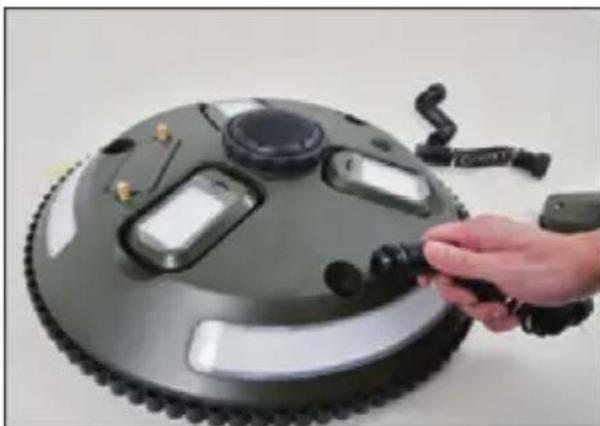
natural_image
Hand adjusting a robotic vacuum cleaner's wheel component (no visible text or symbols)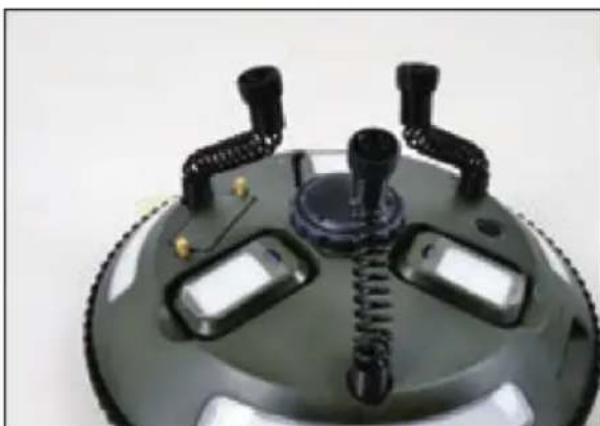
natural_image
Close-up of a mechanical device with black connectors and a central hub (no visible text or symbols)Étape 1
natural_image
Top-down view of a mechanical component with labeled parts (no text or symbols visible)natural_image
Three black plastic connectors with coiled springs, arranged diagonally (no text or symbols visible)natural_image
Green cylindrical military weapon with attached bracket (no visible text or markings)natural_image
Three elongated metallic cutting tool blades arranged diagonally (no text or symbols visible)natural_image
Close-up of a mechanical component with a circular hole and ribbed internal structure (no visible text or symbols)natural_image
Three parallel horizontal lines with no text or symbolsnatural_image
Coiled black USB cable with two connectors (no text or symbols visible)Micro-USB

natural_image
A beige circular object with green handles placed on a brown fabric bag, no visible text or symbols.natural_image
Close-up of a mechanical component being adjusted with forceps, showing a spring and hook (no text or symbols visible)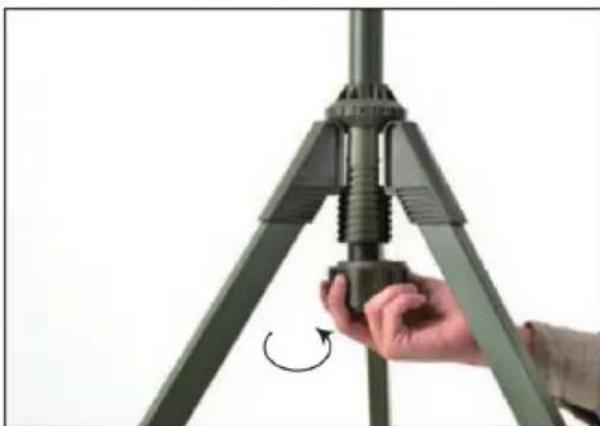
natural_image
Close-up of a hand adjusting a mechanical component with a curved arrow indicating rotation (no text or symbols visible)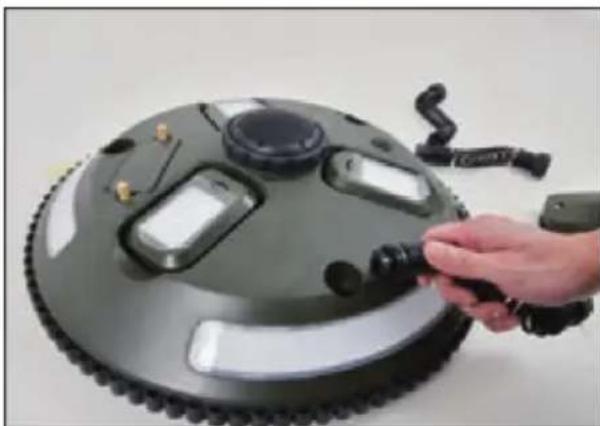
natural_image
Hand holding a robotic vacuum cleaner with attached sensors and control buttons (no visible text or symbols)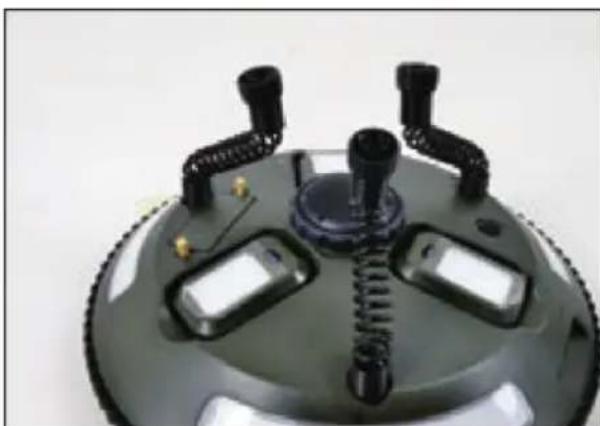
natural_image
Close-up of a mechanical device with black connectors and a central hub (no visible text or symbols)Fase 1
natural_image
Top-down view of a mechanical component with labeled parts (no text or symbols visible)natural_image
Three black plastic connectors with coiled springs, arranged diagonally (no text or symbols visible)natural_image
Three identical metallic cutting tool blades arranged horizontally (no text or symbols visible)natural_image
Close-up of a mechanical component with a circular hole and radial grooves (no text or symbols visible)natural_image
Three parallel horizontal lines with no text or symbols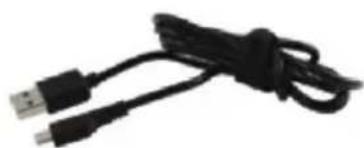
natural_image
Coiled black cable with two USB ports (no text or symbols visible)natural_image
A beige circular object with green handles placed on a brown fabric bag, no visible text or symbols.natural_image
Close-up of a mechanical component being adjusted with forceps, showing a hook and arrow (no text or symbols)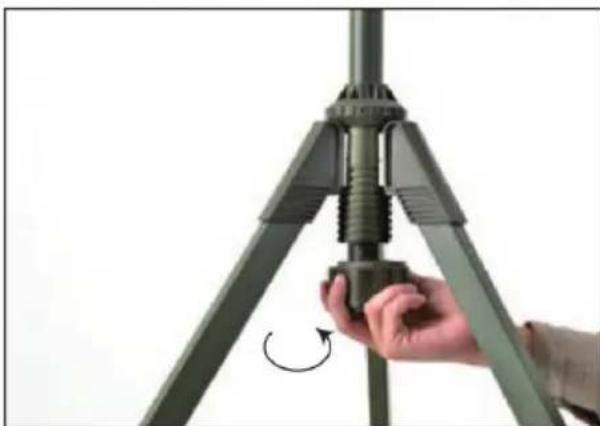
natural_image
Close-up of a hand adjusting a mechanical component with a curved arrow indicating rotation (no text or symbols visible)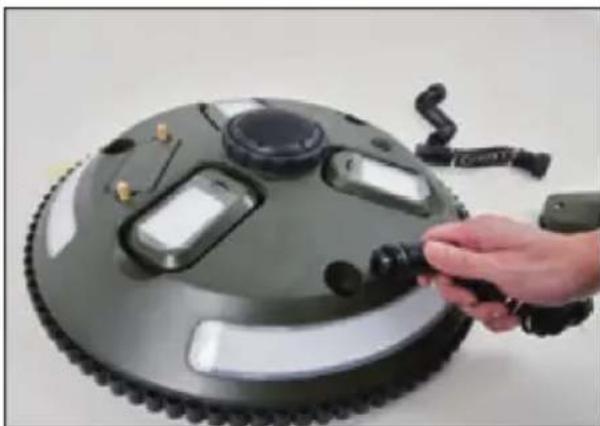
natural_image
Hand holding a robotic vacuum cleaner next to a circular mechanical device with multiple sensors and control buttons (no visible text or symbols)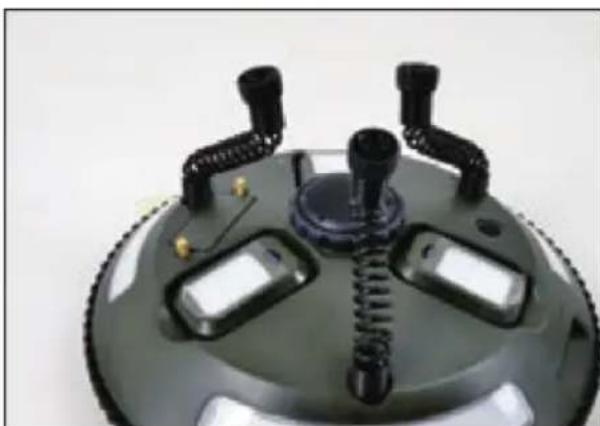
natural_image
Close-up of a mechanical device with black connectors and a central hub (no visible text or symbols)Paso 1
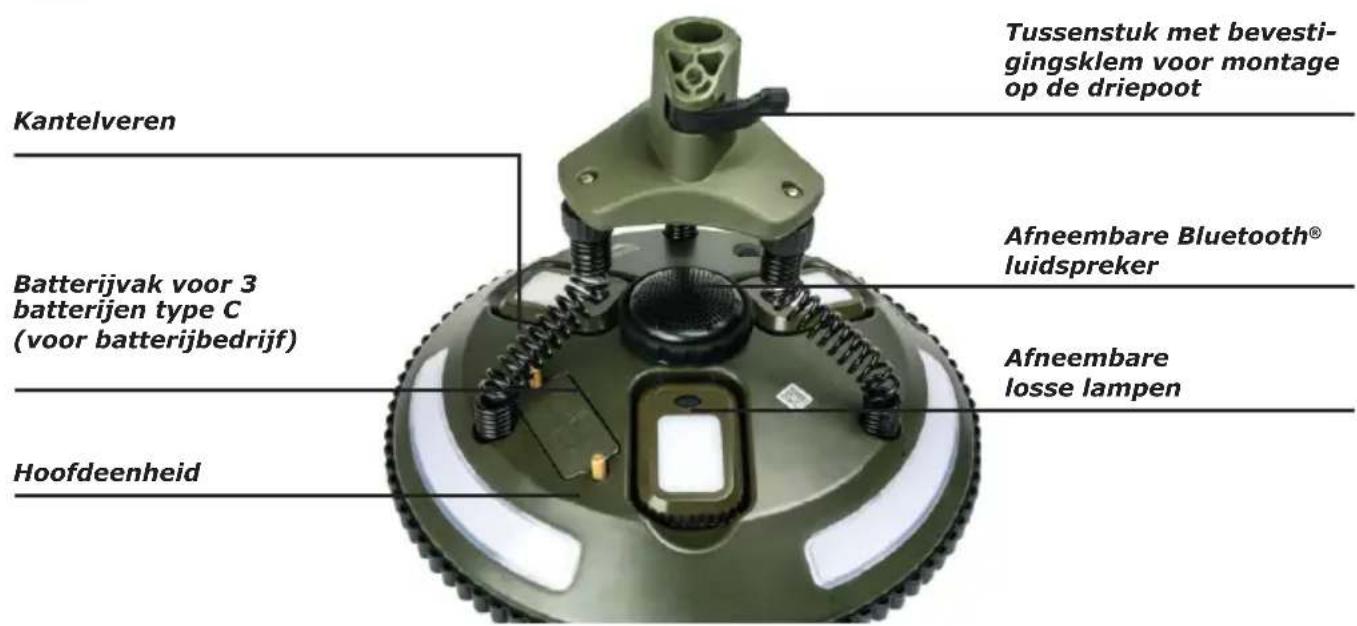
3. HET PRODUCT IN DETAIL
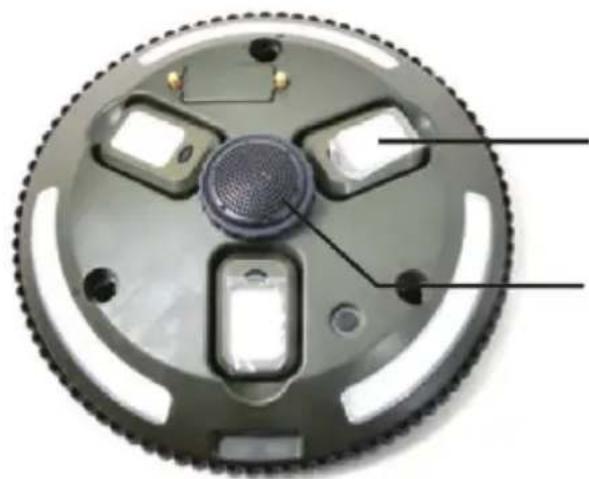
natural_image
Top-down view of a mechanical component with labeled parts (no text or symbols visible)3 afneembare
losse lampen
Afneembare Bluetooth® luidspreker
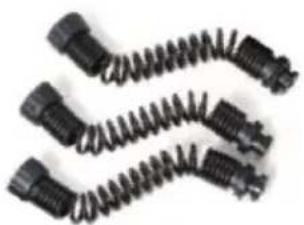
natural_image
Three black plastic-coated spring connectors arranged diagonally (no text or symbols visible)3 kantelveren

natural_image
Green cylindrical military weapon with attached bracket (no visible text or markings)natural_image
Three identical metallic cutting tool blades arranged horizontally (no text or symbols visible)natural_image
Close-up of a mechanical component with a circular opening and mounting holes (no visible text or symbols)natural_image
Three parallel horizontal lines with no text or symbols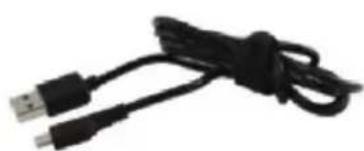
natural_image
Black USB cable with two connectors, no text or symbols visible
natural_image
A beige circular object with green handles and a matching strap, placed on a brown surface (no text or symbols visible)Draagtas
3 verankeringsharingen Micro USB-laadsnoer
natural_image
Close-up of a mechanical component being adjusted with forceps, showing a spring and hook (no text or symbols visible)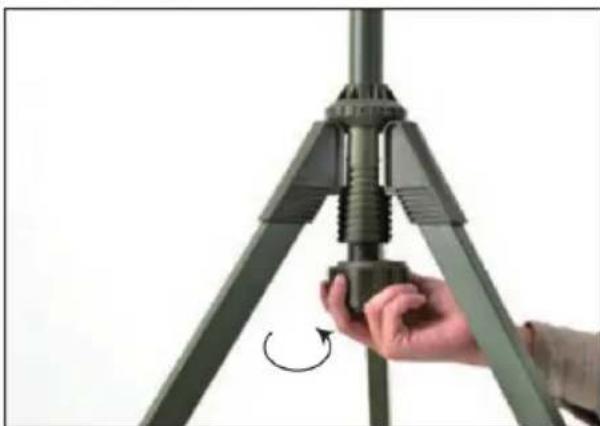
natural_image
Close-up of a hand adjusting a mechanical component with a curved arrow indicating rotation (no text or symbols visible)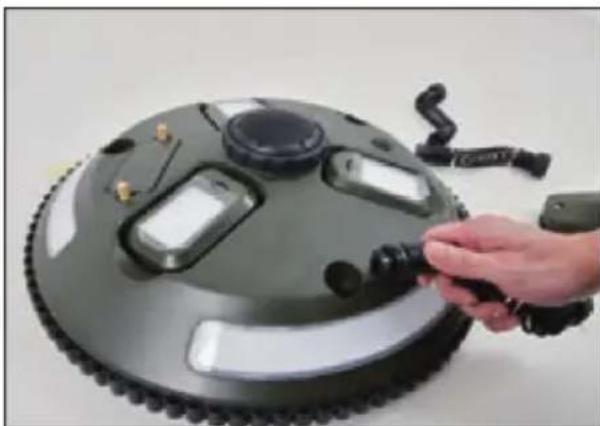
natural_image
Hand holding a robotic vacuum cleaner next to a circular mechanical device with multiple sensors and control buttons (no visible text or symbols)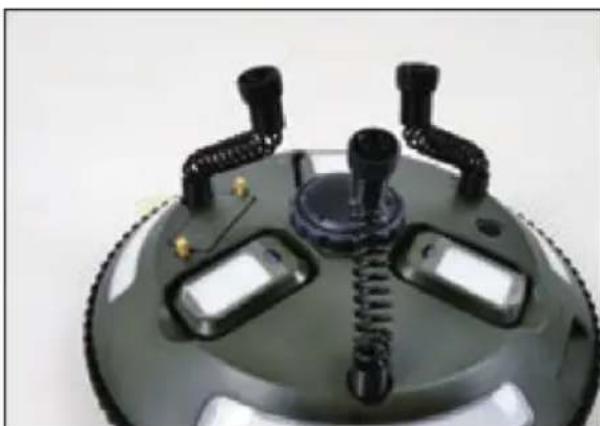
natural_image
Close-up of a mechanical device with black connectors and springs on a circular base (no visible text or symbols)Stap 1
The Bluetooth® word mark and logos are registered trademarks owned by Bluetooth SIG, Inc. and any use of such marks by Schwaiger GmbH is under license.
Other trademarks and trade names are those of their respective owners.
SERVICEKARTE
SCHWAIGER®
- Schritt 1
- GENERAL SAFETY & WARNING INSTRUCTIONS!
- Special notice concerning the battery
- Warnings concerning the battery (when leaking)
- IMPORTANT!
- INTENDED USE
- This light is not suitable as conventional household lighting!
- Information on the protection class
- PRODUCT DETAILS
- Mounting the tripod
- Step 1
- CAUTION!
- Step 2
- Direction of rotation of the nut:
- Step 3
- NOTE
- Step 4
- Step 5
- IMPORTANT:
- Step 6
- WARNING!
- Charging via Micro USB
- Meaning of "Li-Ion" & "3D"
- Explanation of the LED codes
- Power supply selection
- IMPORTANT! SOLAR PANEL
- FUNCTIONS
- Main unit
- Removable lighting units
- NOTE ON CHARGING!
- Bluetooth ® speaker
- IMPORTANT NOTE!
- Automatic switch-off
- The device is automatically switched off in the following situations:
- Emergency power bank function
- TECHNICAL DATA
- CLEANING
- NOTE LED
- DISPOSAL
- Disclaimer
- Manufacturer's information
- Simplified declaration of conformity as per the RED Directive
- Office Hours
- Warranty
- Étape 1
- Fase 1
- Paso 1
- HET PRODUCT IN DETAIL
- Stap 1
- SERVICEKARTE
- SCHWAIGER®
Brand : Schwaiger
Model : CALED200
Category : Lighting