TD 101 A - Turntable THORENS - Free user manual and instructions
Find the device manual for free TD 101 A THORENS in PDF.

| Product type | Vinyl record turntable |
| Brand | Thorens |
| Model | TD 101 A |
| Drive system | Belt drive |
| Motor | DC motor |
| Speeds | 33 1/3 rpm and 45 rpm |
| Wow and flutter | 0.1 % |
| Signal-to-noise ratio | ≥67 dB (A-weighted, 20 kHz LPF) |
| Platter material | Die-cast aluminum |
| Platter diameter | 300 mm |
| Tonearm type | Static balanced, straight, aluminum tube |
| Effective tonearm length | 214.5 mm |
| Tracking force | 3 g |
| Supported cartridge weight | 3.5 to 6.0 g |
| Cartridge output voltage | 4.0 mV ±3 dB |
| Stylus pressure | 3 g ±0.5 g |
| Power supply | AC 100-240 V, 50/60 Hz |
| Standby power consumption | Less than 0.5 W |
| Dimensions (W x D x H) | 420 x 138.6 x 355 mm |
| Weight | 4.7 kg (dust cover included) |
| Included accessories | Dust cover, 45 rpm adapter, audio cable, power supply |
| Maintenance | Clean with a soft cloth and diluted neutral detergent |
| Precautions | Do not place on heat source, avoid vibrations, do not move during playback |
Frequently Asked Questions - TD 101 A THORENS
User questions about TD 101 A THORENS
0 question about this device. Answer the ones you know or ask your own.
Ask a new question about this device
Download the instructions for your Turntable in PDF format for free! Find your manual TD 101 A - THORENS and take your electronic device back in hand. On this page are published all the documents necessary for the use of your device. TD 101 A by THORENS.
USER MANUAL TD 101 A THORENS
natural_image
Technical line drawing of a circular mechanical device with adjustment knobs and a separate view of its internal components (no text or symbols)ACHTUNG
- Schalter 33/44 U/min.
Precautions for use 22
Preparing the record player 23
How to install a drive belt on the turntable 24
Preparing the record player 25
Connections 26
Attaching the dust cover 28
Names and functions of parts 29
Notes about record styluses 30
Handling records 31
Basic operation 32
Specifications
34
Before use
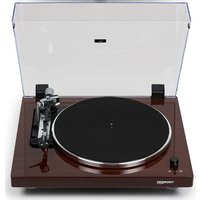
Thank you for choosing THORENS.
Read this manual carefully to get the best performance from this unit.
Precautions for use
Do not place anything on the dust cover. Objects on the cover might cause noise due to vibrations or fall off, especially during playing.
Do not place the unit on an amplifier or any other device that generates heat. Doing so could cause discoloration, deformation or malfunction.
Also avoid locations that are subject to vibrations or exposed to excessive dust, cold or moisture.
As the unit could become warm during operation, always leave sufficient space around it for ventilation. When installing this unit, leave a little space between it and other devices and walls to allow good heat dissipation.
Do not move the unit during playing, the record rotates. Do not lift or move the unit during playing. Doing so may damage the record, the stylus, the cartridge or the unit.
Always remove the record before relocating or moving this unit. Moving the unit with a record on the platter could damage the record, the stylus and the cartridge or could cause a malfunction.
The voltage supplied to the unit should match the voltage as printed on the rear panel. If you are in any doubt regarding this matter, consult an electrician.
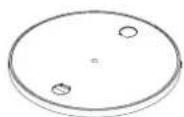
Preparing the record player
The heights of this unit's feet cannot be adjusted, so place it on a level surface. Place the rubber mat on the turntable platter.
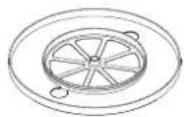
How to install a drive belt on the turntable
Lift the platter straight up off the spindle and then slip the belt around the underside of the platter.
Place the platter back on the spindle.
Pull the belt on the motor pulley and then spin the platter so the belt can run over the motor pulley.
natural_image
Technical line drawing of a circular disc mounted on a square base with a separate view showing internal components (no text or symbols)ATTENTION
During playback, do not touch the tonearm or the record. Doing so could damage the stylus tip and cause scratches on the record.
Do not forcibly stop platter rotation during playback. Since this product is not a turntable designed for DJs (direct drive), doing something like this could cause malfunction.
During record playback, feedback could occur if the volume is too loud. If this happens, lower the volume of the amplifier.
24 HOW TO INSTALL A DRIVE BELT ON THE TURNTABLE
Preparing the record player
Place the unit on a flat surface.
The heights of this unit's feet cannot be adjusted, so place it on a level surface.
Place the rubber mat on the turntable platter.
Connections
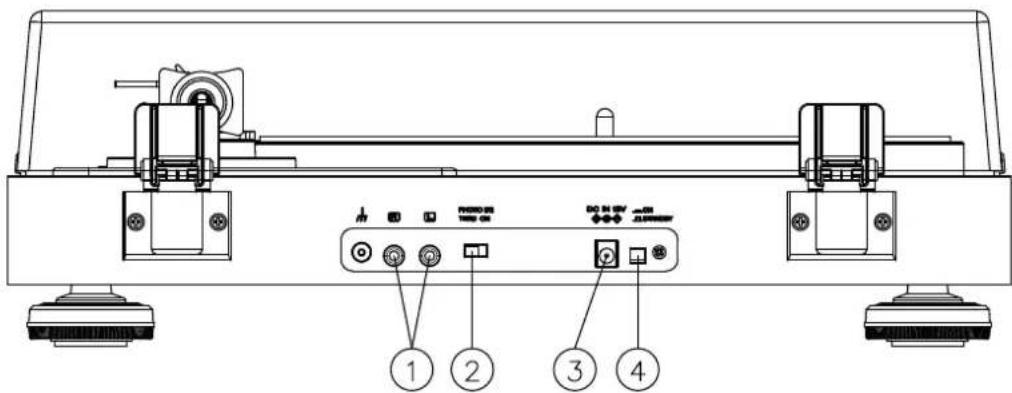
01. Analog audio output connectors (L/R)
These output analog audio signals.
The PHONO EQ switch setting changes the type of output signal.
Use the included audio cable (or commercially-available ones) to connect other equipment to the output connectors of this unit.
02. PHONO EQ (audio output setting) switch ON
Signals that have been amplified by the built-in equalizer amp are output from the analog audio output connectors (L/R).
THRU
The VM cartridge signal is output directly through the analog audio output connectors (L/R). Use this when connecting to equipment that has PHONO inputs. When shipped new from the factory, this is set to ON.
26 CONNECTIONS
ATTENTION
When set to ON, if connected to the PHONO inputs of an amplifier, for example, the output from speakers and headphones will be very loud, which could damage equipment or harm hearing.
3. DC input connector
After completing all other connections, connect the included AC adapter to this connector.
Confirm that the power plug of the AC adapter is plugged into a power outlet.
Do not use any AC adapter other than the one included.
The included AC adapter has plugs that can be changed. Attach the plug that suits the region where it is being used.
4. STANDBY/ON button
Press the STANDBY
Attaching the dust cover
Insert the hinges completely into the hinge holders at the left and right ends of the back of the main unit. Align the tops of the hinges with the dust cover hinge holders and insert them.
Removing the dust cover
Hold both edges of the dust cover and lift it slowly to remove it along with the hinges from the unit. Then, remove the hinges from the dust cover.
Opening and closing the dust cover
Opening
Hold the front edge of the dust cover and gently lift it open completely until it stops. The dust cover will stay open in this position.
Closing
Gently lower the dust cover until it is closed.
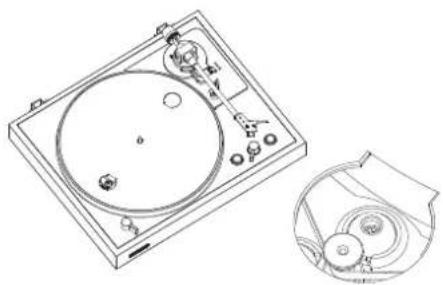
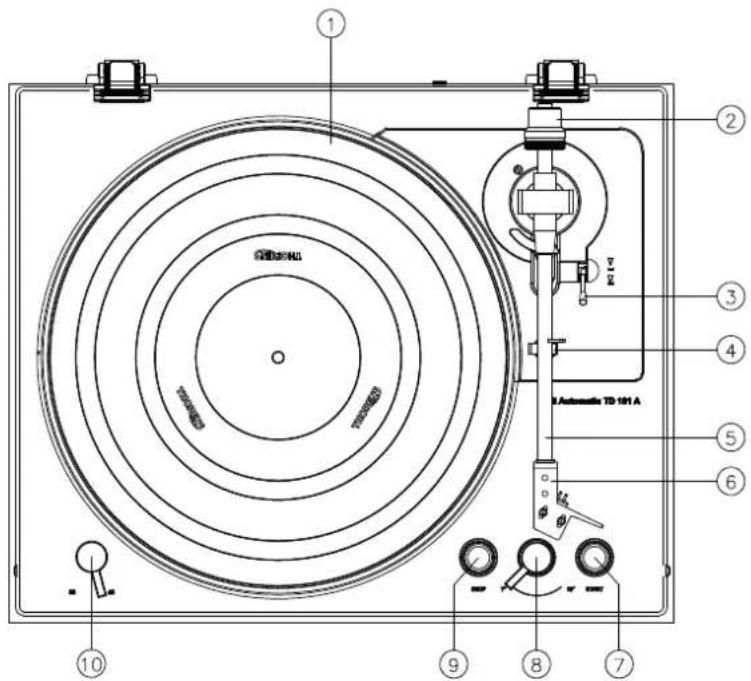
Names and functions of parts
- 1 Platter
Place records centered on the platter.
- Counterweight
To properly balance the tonearm (Not an adjustable)
- Tonearm lifter lever
Use this lever to lower and raise the tonearm.
- Tonearm holder
To lock the tone arm in place when not in use.
-
Tonearm
-
Headshell
-
START button
This starts record playback.
- Record size selection lever
Select the size of the record to be played.
- STOP button
This stops record playback
- 33/44 RPM switch
Select 33 or 45 rpm for playing a vinyl
Notes about record styluses
If the stylus becomes bent (damaged), it will no longer be able to accurately trace the groove. Since a bent stylus could also damage records and cause malfunction, handle styluses carefully.
Always use a commercially-available stylus cleaner to clean a stylus. Use of anything other than a stylus cleaner could damage the stylus.
ATTENTION
Be aware that bent styluses, for example, that result from insufficient customer caution or an outside cause are not covered by the warranty.
Handling records
Holding records
When holding a record or removing it from its sleeve, avoid touching the grooves by holding the record by its label and edge with one hand or by holding it by its edge with both hands.
Cleaning
Fingerprints and dust on a record can cause noise and the sound to skip, as well as damage the record itself and the stylus. Use a commercially-available record cleaner to clean records. Do not use thinner or anything other than a record cleaner. Such chemicals could harm the surface of the record.
When using a record cleaner, wipe the surface of the record in a circular motion, following the grooves.
Precautions for use
Do not leave records in places that are exposed to direct sunlight or are very hot or very humid. Leaving a record in such a condition for a long time could result in warping, mold growth or other damage.
Do not stack multiple records or place heavy objects on top of them. Do not leave records at an angle for long amounts of time, either. Doing so could result in warping or other damage.
Do not allow hard objects to directly touch the audio grooves. Doing so could cause scratches.
After you finish playing a record, always put it back into its sleeve for storage. Leaving a record unprotected could result in warping or scratching.
Do not use cracked records.
Basic operation
Playing records
Remove the protective cap from the cartridge stylus before using the turntable.
- Press the STANDBY/ON button on the back of the unit to turn it on.
-
Open the dust cover slowly. Be careful not to pinch your hand, for example, when opening and closing the dust cover.
-
Place a record on the platter. When playing a 45 RPM large-hole single record, use the included adapter.
-
Turn the record size selection lever to select the record size.
-
Select the rotation speed indicated on the record. The rotation speed can be set to 33 RPM or 45 RPM.
-
Press the START button to start playback. The platter begins to turn, the tonearm moves to the outer edge of the record, the stylus lowers to the record, and playback begins. This playback operation cannot be stopped in the middle.
Do not place anything on top of the dust cover.
Before playing, please make sure the belt is installed.
When playback finishes
When the tonearm reaches the lead-out groove of the record, it will automatically rise and return to the tonearm holder, and the platter will stop turning.
32 BASIC OPERATION
Starting playback from a track in the middle of the record
- Use the tonearm lifter lever to raise the tonearm.
- Move the tonearm so the cartridge stylus is at the track to be played back.
When the tonearm is moved above the record, the platter will start turning. - Use the tonearm lifter lever to lower the tonearm.
The tonearm lowers slowly until the stylus touches the record and playback begins.
Stopping playback in the middle
Press the STOP button during playback to make the tonearm rise and return to the tonearm holder. This also stops the platter turning.
Specifications
Turntable section
Drive System Belt Drive
Motor DC Motor
Speed 33 1/3 RPM, 45 RPM
Rotation Speed Variation ±2%
Wow and Flutter 0.1%
Signal-to-Noise Ratio 67dB or higher (A-weighted, 20kHz LPF)
60dB or higher (unweighted, 20kHz LPF)
Platter Aluminum Die-cast
Diameter of Platter 300mm
Tonearm section Aluminum tube
Type Static Balance, Straight
Effective Arm Length 214.5mm
Tracking force 3g
Supported Cartridge Weight 3.5 to 6.0g
Overhang 19mm
Anti-skating Adjustment Supported
Cartridge section
Type Audio-Technical AT 3600L
Output Voltage 4.0mv ±3db
Stylus Pressure 3g ±0.5g
Cartridge Weight 6.1g ±0.2g
Power AC 100 to 240V, 50/60Hz
Power Consumption Less than 0.5W at Standby
Overall Dimensions (dust cover included) 420 x 138.6 x 355mm (W x D x H)
Weight (dust cover included) 4.7 kg
TD 101 A
BEDIENUNGSANLEITUNG
USER GUIDE
MANUEL D'UTILISATION
natural_image
Technical line drawing of a circular mechanical device with adjustment knobs and a separate view of its internal components (no text or symbols)ATTENTION
Type Audio-Technical AT 3600L
natural_image
Technical line drawing of a circular disc mounted on a square base with a separate view showing internal components (no text or symbols)ВНИМАНИЕ
natural_image
Simple line drawing of a circular fan or dial with internal blades and a small protrusion (no text or symbols)natural_image
Technical line drawing of a mechanical component with gears and shafts (no text or symbols)74 如何在轉盤上安裝皮帶:
整備唱機
本機平置在平面上
1 Analog音频输出端子(左/右)
输出音频信号
唱針注意事項
功耗 Less than 0.5W at Standby
尺寸 (含防塵蓋) 420 x 138.6 x 355mm
(W × D × H)