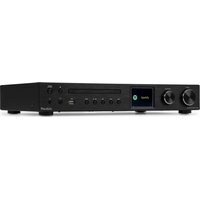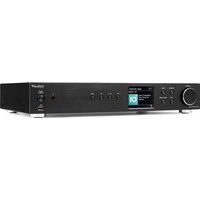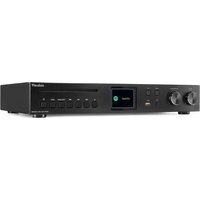
Lucca - Radio Audizio - Free user manual and instructions
Find the device manual for free Lucca Audizio in PDF.


User questions about Lucca Audizio
0 question about this device. Answer the ones you know or ask your own.
Ask a new question about this device
Download the instructions for your Radio in PDF format for free! Find your manual Lucca - Audizio and take your electronic device back in hand. On this page are published all the documents necessary for the use of your device. Lucca by Audizio.
USER MANUAL Lucca Audizio
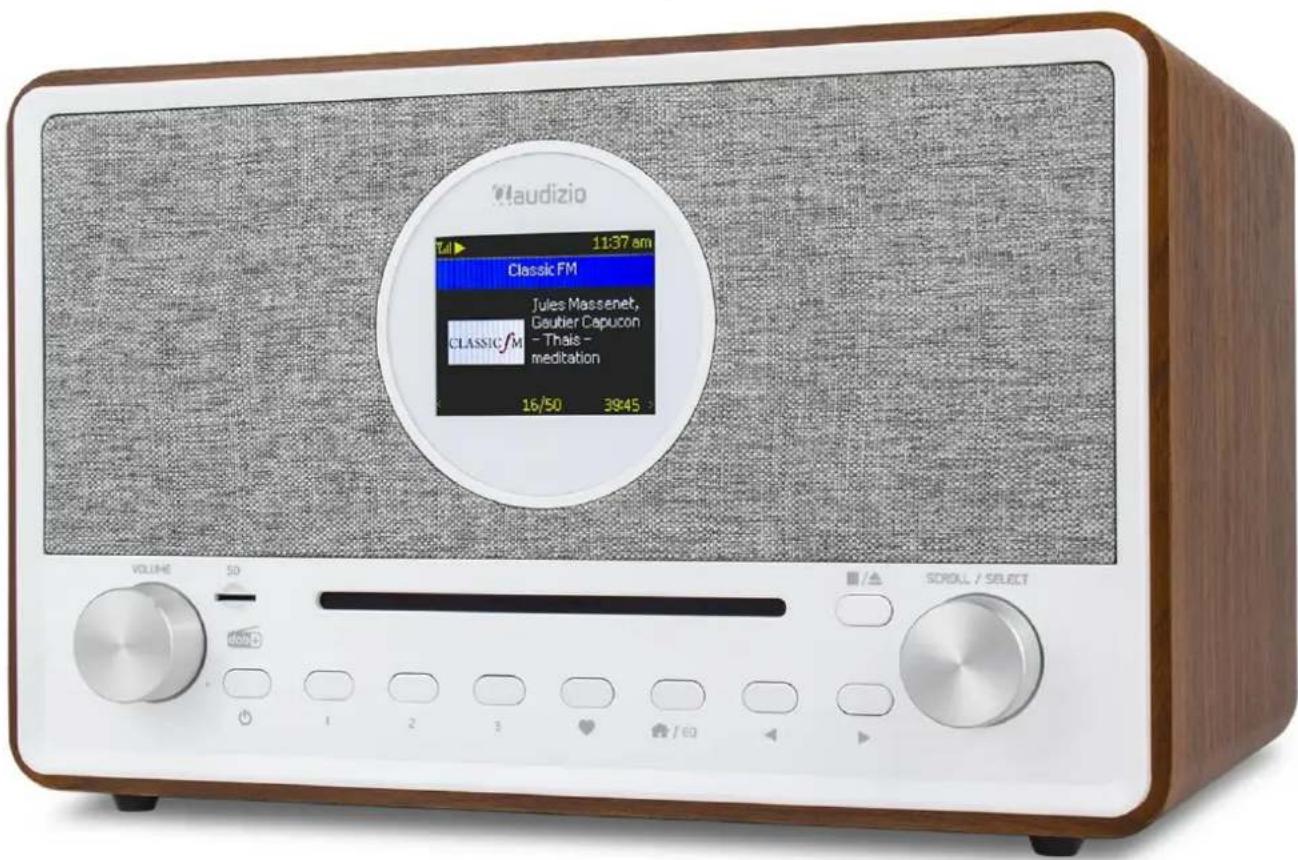
LUCCA WIFI DAB+ RADIO
Ref. nr.: 102.252 / 102.254
text_image
taudizio 11:37 am Classic FM Jules Massenet, Gebier Capucon CLASSIC/M - Thais - meditation 16/50 39:45 VOLUME 50 ROLL / SELECT 1 2 3 / 60INSTRUCTION MANUAL GEBRUIKSAANWIJZING BEDIENUNGSANLEITUNG MANUAL DE INSTRUCCIONES MANUEL D'INSTRUCTIONS
V1.2
ENGLISH ....5
UNPACKING INSTRUCTION....6
POWERSUPPLY 6
CONTROLS 6
REMOTE CONTROL....7
USING REMOTE CONTROL....7
USING CONTROL BUTTON ON THE RADIO UNIT....7
BEFORE YOU START 8
GETTING STARTED....8
NETWORK SETUP....8
OVERVIEW OF FEATURES AND FUNCTIONS 8
INTERNET RADIO 9
MEDIA CENTRE....10
DAB + 10
FM RADIO 10
BT PLAYBACK 11
AUX IN....11
CD PLAYER 11
USB PLAYBACK....11
MICRO SD PLAYBACK 12
ALARM SETTING 12
SLEEP TIMER 12
CONFIGURATION....12
REMOTE CONTROL VIA PC / SMART PHONE....15
HELPFUL TIPS 16
TROUBLE SHOOTING....17
NEDERLANDS....18
UITPAKKEN 19
AANSLUITSPANNING 19
BEDIENING 19
AFSTANDSBEDIENING 20
GEBRUIK VAN DE AFSTANDSBEDIENING....20
GEBRUIK VAN DE BEDIENINGSKNOP OP DE RADIOAPPARATUUR 20
VOORDAT JE BEGINT 20
AAN DE SLAG GAAN 21
NETWERK INSTELLING....21
OVERZICHT VAN KENMERKEN EN FUNCTIES....21
INTERNET RADIO 22
MEDIA CENTRE 23
DAB+ 23
FM RADIO 24
BT AFSPELEN 24
AUX IN....24
CD SPELER....25
USB PLAYBACK......25
MICRO SD....25
ALARM INSTELLEN 25
SLEEP TIMER 25
CONFIGURATIE....26
BEDIENING VIA PC/SMARTPHONE....28
TIPS....29
PROBLEEMOPLOSSING 30
DEUTSCH....31
AUSPACKEN 32
NETZANSCHLUSS 32
BEDIENUNG 32
FERNBEDIENUNG....33
AVANT DE DEMARRER....59
DEMARRER....60
CONNEXION RESEAU 60
PRESENTATION DES CARACTERISTIOUES ET FONCTIONS....60
RADIO INTERNET 61
MEDIA CENTER....62
DAB + 62
FM RADIO 62
LECTURE BT 63
AUX IN....63
CD PLAYER....63
PLAYBACK USB....63
MICRO SD PLAYBACK 64
REGLAGE ALARME 64
MINUTERIE DE SOMMEIL 64
CONFIGURATION....64
TELECOMMANDE VIA PC / SMART PHONE....67
ASTUCES....68
PROBLEMES 69
TECHNICAL SPECIFICATION / TECHNISCHE SPECIFICATIE / TECHNISCHE DATEN / SPECIFICACIONES TÉCNICAS / SPÉCIFICATIONS
TECHNIQUES....71
ENGLISH
Congratulations to the purchase of this Audizio product. Please read this manual thoroughly prior to using the unit in order to benefit fully from all features.
Read the manual prior to using the unit. Follow the instructions in order not to invalidate the warranty. Take all precautions to avoid fire and/or electrical shock. Repairs must only be carried out by a qualified technician in order to avoid electrical shock. Keep the manual for future reference.
- Prior to using the unit, please ask advice from a specialist. When the unit is switched on for the first time, some smell may occur. This is normal and will disappear after a while.
- The unit contains voltage carrying parts. Therefore do NOT open the housing.
- Do not place metal objects or pour liquids into the unit This may cause electrical shock and malfunction.
- Do not place the unit near heat sources such as radiators, etc. Do not place the unit on a vibrating surface. Do not cover the ventilation holes.
- The unit is not suitable for continuous use.
- Be careful with the mains lead and do not damage it. A faulty or damaged mains lead can cause electrical shock and malfunction.
- When unplugging the unit from a mains outlet, always pull the plug, never the lead.
- Do not plug or unplug the unit with wet hands.
- If the plug and/or the mains lead are damaged, they need to be replaced by a qualified technician.
- If the unit is damaged to such an extent that internal parts are visible, do NOT plug the unit into a mains outlet and DO NOT switch the unit on. Contact your dealer. Do NOT connect the unit to a rheostat or dimmer.
- To avoid fire and shock hazard, do not expose the unit to rain and moisture.
- All repairs should be carried out by a qualified technician only.
- Connect the unit to an earthed mains outlet (220-240Vac/50Hz) protected by a 10-16A fuse.
- During a thunderstorm or if the unit will not be used for a longer period of time, unplug it from the mains. The rule is: Unplug it from the mains when not in use.
- If the unit has not been used for a longer period of time, condensation may occur. Let the unit reach room temperature before you switch it on. Never use the unit in humid rooms or outdoors.
-
To prevent accidents in companies, you must follow the applicable guide lines and follow the instructions.
-
Do not repeatedly switch the fixture on and off. This shortens the life time.
- Keep the unit out of the reach of children. Do not leave the unit unattended.
- Do not use cleaning sprays to clean switches. The residues of these sprays cause deposits of dust and grease. In case of malfunction, always seek advice from a specialist.
- Do not force the controls.
- This unit is with speaker inside which can cause magnetic field. Keep this unit at least 60cm away from computer or TV.
- If this product have a built-in lead-acid rechargeable battery. Please recharge the battery every 3 months if you are not going to use the product for a long period of time. Otherwise the battery may be permanently damaged.
- If the battery is damaged please replace with same specifications battery. And dispose the damaged battery environment friendly.
- If the unit has fallen, always have it checked by a qualified technician before you switch the unit on again.
- Do not use chemicals to clean the unit. They damage the varnish. Only clean the unit with a dry cloth.
- Keep away from electronic equipment that may cause interference.
- Only use original spares for repairs, otherwise serious damage and/or dangerous radiation may occur.
- Switch the unit off prior to unplugging it from the mains and/or other equipment. Unplug all leads and cables prior to moving the unit.
- Make sure that the mains lead cannot be damaged when people walk on it. Check the mains lead before every use for damages and faults!
- The mains voltage is 220-240Vac/50Hz. Check if power outlet match. If you travel, make sure that the mains voltage of the country is suitable for this unit.
- Keep the original packing material so that you can transport the unit in safe conditions.

This mark attracts the attention of the user to high voltages that are present inside the housing and that are of sufficient magnitude to cause a shock hazard.

This mark attracts the attention of the user to important instructions that are contained in the manual and that he should read and adhere to.
The unit has been certified CE. It is prohibited to make any changes to the unit. They would invalidate the CE certificate and their guarantee!
NOTE: To make sure that the unit will function normally, it must be used in rooms with a temperature between 5^ C/41°F and 35^ C/95°F.

Electric products must not be put into household waste. Please bring them to a recycling centre. Ask your local authorities or your dealer about the way to proceed. The specifications are typical. The actual values can slightly change from one unit to the other. Specifications can be changed without prior notice.
Do not attempt to make any repairs yourself. This would invalid your warranty. Do not make any changes to the unit. This would also invalid your warranty. The warranty is not applicable in case of accidents or damages caused by inappropriate use or disrespect of the warnings contained in this manual. Audizio cannot be held responsible for personal injuries caused by a disrespect of the safety recommendations and warnings. This is also applicable to all damages in whatever form.
UNPACKING INSTRUCTION
CAUTION! Immediately upon receiving the product, carefully unpack the carton, check the contents to ensure that all parts are present, and have been received in good condition. Notify the shipper immediately and retain packing material for inspection if any parts appear damage from shipping or the package itself shows signs of mishandling. Save the package and all packing materials. In the event that the product must be returned to the factory, it is important that the product be returned in the original factory box and packing. If the device has been exposed to drastic temperature fluctuation (e.g. after transportation), do not switch it on immediately. The arising condensation water might damage your device. Leave the device switched off until it has reached room temperature.
POWERSUPPLY
On the label on the backside of the product is indicated on this type of power supply must be connected. Check that the mains voltage corresponds to this, all other voltages than specified, the light effect can be irreparably damaged. The product must also be directly connected to the mains and may be used. No dimmer or adjustable power supply.

Always connect the device to a protected circuit (circuit breaker or fuse). Make sure the device has an appropriate electrical ground to avoid the risk of electrocution or fire.
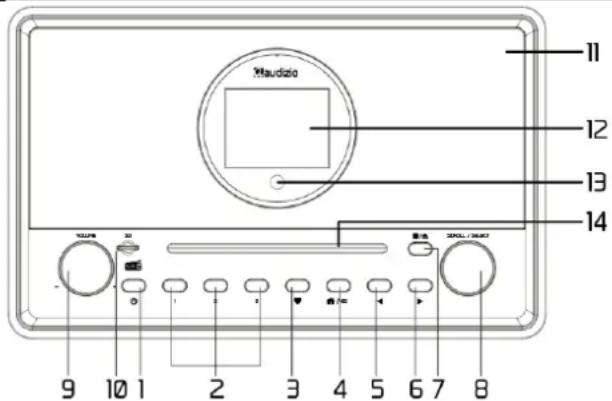
CONTROLS
text_image
Maudizio 11 12 13 14 100% 200L/1000 9 10 1 2 3 4 5 6 7 8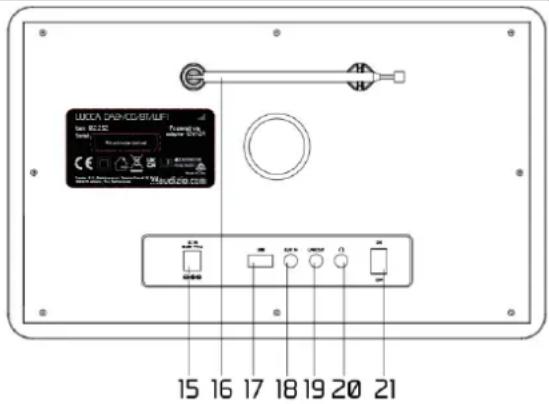
text_image
UCCA PRINCESKLE Unit: 80.120 Signal: Magnetic sensor CE Magnetic sensor 15 16 17 18 19 20 211. Power
On/standby
2. Quick preset 1-3
Press and hold to preset the currently playing station. Press to recall the saved station
3. Favourite
Press and hold to preset particular station to favourite list Press to recall the favourite list
4. /EQ
Access the home screen/press this button to return to the playing screen. Press and hold to access the EQ settings
5. Left
Back to previous menu/left cursor [Internet radio/DAB/FM]
Short press to return to the last level of the menu
Press and hold to skip to the previous preset / station
[Media player: UPnP/USB/CD/Micro SD]
Short press to return to the list of media files. Press and hold to rewind the track
[BT]
Press and hold to exit the BT mode
6. Right ▶
Next menu/right cursor
[Internet radio/DAB/FM]
Under the radio playing display, short press repeatedly to view the radio info/display the big time clock
Press and hold to skip to the next station/preset
Under My Favorite list, short press to enter edit menu
[Media player UPnP/USB/CD/Micro SD]
Press and hold to fast forward
[BT]
Press and hold to disconnect the paired device
7. ■/ (CD)
Press to stop CD playback. Press and hold to eject the disk
8. Scroll/Select
Rotate to scroll up/down on the menu. Press to confirm / select menu options [FM]
Rotate the knob to manual tune FM frequencies
[Internet radio/DAB]
Rotate to change to next/previous station
[Media player UPnP/BT/USB/CD/MicroSD]
Rotate to skip to next or previous track. Press to pause/play the music
- Volume control
Rotate to adjust the volume level. Press to mute
- Micro SD memory card slot
- Speaker
- 2.8" color display
- Infrared sensor for remote
- CD disk slot
- DC IN Jack
- Telescopic antenna
- USB port (for playback only)
- Aux in jack 3.5 mm
- Line output
- Earphone jack 3.5 mm
- Power on/off switch
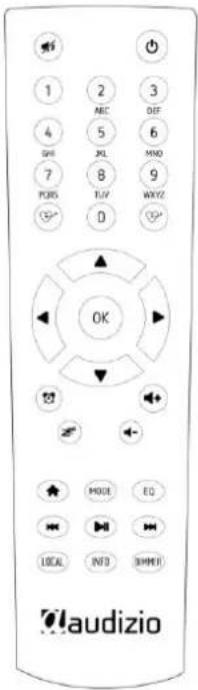
REMOTE CONTROL
: Press to toggle between Standby and Operation
: Mute
0-9: Input index number on the list / input characters for WiFi password
: Preset the current playing station to Favorite
▲ : Cursor up
◀ : Cursor left / back to previous menu
Alarm button
Z: Sleep Timer
Mode: Switch between radio modes
: Home
: Previous station on the list/previous track on media sources
Local: Access the local station list (Local area set up in Configuration)
: Recall the favorite list
OK: Confirm button
▶ : Cursor right
▼: Cursor down
Vol+: Volume up
Vol-: Volume down
EQ: Equalizer
▶ Next station on the list/next track on media sources
▶: Play/pause for media sources, Play/stop for Internet radio
Dimmer: Access the Dimmer menu to adjust the brightness of the display
Info: Quick access to Network and System information
text_image
1 2 3 4 5 6 7 8 9 PUBS TUV WXYZ OK MOUT EQ LOCAL INFO DIMMIT laudizioUSING REMOTE CONTROL
On the alpha-numeric keypad, press the button repeatedly to cycle through the characters assigned to each button. Refer to the following list. To input a character, highlight it and press the [OK] button to confirm and input the next character. When it comes to the last character of the password, press and hold [OK] to complete the entry.
Button 1: 1 and different kind of symbols !@#\$%^&*()_+[]{};:"|,/<>?
Button 2: 2ABCabc
Button 3: 3DEFdef
Button 4: 4GHIghi
Button 5: 5JKLjkl
Button 6: 6MNOmno
Button 7: 7PQRSpqrs
Button 8: 8TUVtuv
Button 9: 9WXYZwxyz
Button 0: 0
USING CONTROL BUTTON ON THE RADIO UNIT
Rotate the [Scroll/Select] knob to scroll through the characters, highlight it and press [Scroll/Select] to confirm and input the next character. When it comes to the last character of the password, press and hold [Scroll/Select] to confirm and complete the entry.
Note: The password is case sensitive.
BEFORE YOU START
Please ensure the following is ready: You have a broadband internet connection. A wireless broadband router is connected to the internet successfully. The radio supports Wireless B, G and N connection (Wireless N router can also be used with the setting on B or G). You know the Wired Equivalent Privacy (WEP) or Wi-Fi Protected Access (WPA) data encryption code/password. You need to key in the correct code when the radio is connected to the wireless router for network connection. If you do not know the code/password, please contact the person/technician who set up the router/network for you. The radio can work via Wireless network connection (Wi-Fi connection).
GETTING STARTED
- Remove internet radio from the package box.
- Plug in the power adapter and switch the Power on/off switch (on the rear cabinet) to ON.
Caution: Use only the adaptor supplied with the radio. Connecting a power supply with a different rating can cause permanent damage to the radio and may be hazardous.
NETWORK SETUP
Internet connection can be setup via Wireless LAN (WiFi). Your Radio requires a broadband Internet connection.
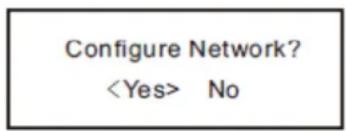
- If this is first time use, the Configure Network wizard will be displayed. Choose Yes to start configuring network. Press the [◀] button to highlight Yes and press [Scroll/Select] to confirm.
text_image
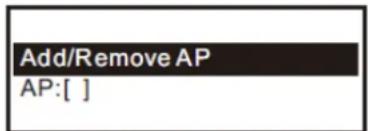
Configure Network?- Select Add/Remove AP from the list, use the [Scroll/Select] knob to scroll and press it to confirm, then choose Add AP (Scan):
text_image
Add/Remove AP AP:[ ]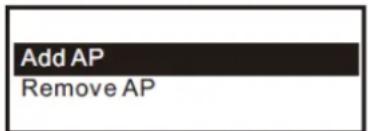
text_image
Add AP Remove AP- It will start scanning the Wi-Fi networks available. Scroll to your network and press [Scroll/Select] to confirm. If your wifi network is password protected, it will ask you to enter the passphrase/password.
Note: The password is case sensitive. Please consult with the one who setup your network if you don't know the password.
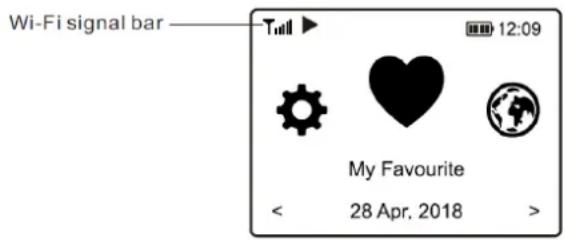
- When the Wi-Fi connection is successful, "Association Complete" will be shown briefly. The WiFi signal bar will appear on the top left corner of the display:
text_image
Wi-Fi signal bar Tull ▶ 12:09 My Favourite < 28 Apr. 2018 >OVERVIEW OF FEATURES AND FUNCTIONS
Press [#/EQ] to enter the home screen. Scroll by rotating the [Scroll/Select] knob or by pressing the [◀▲/▶▼] buttons on the remote:
My Favorite - Shows the list of favorite stations which have been assigned to the presets. There are up to 150 presets available.
Internet Radio - Start exploring the worldwide radio stations and music here.
Media Centre - You can browse and stream music from your network via UPnP or DLNA compatible devices.
DAB+/DAB Radio - Pick up DAB+ and DAB radio signal if available in your local area (no internet connection required).
FM Radio - Receive ordinary FM radio stations in your local area (no internet connection required).
BT - BT playback, to play audio stream from another BT enabled device after pairing.
AUX-IN - Plays music from external media devices after connecting them to the AUX-IN jack.
CD Player - Play CDs.
USB - Play music from USB drive.
Micro SD - Plays music from Micro SD card.
Alarm - Alarm clock. Two alarm settings available.
Sleep Timer - Enable the timer to turn the radio in standby after the selected time elapsed.
Configuration - More options/settings available to personalize as you desire.
On the home screen, choose Internet Radio and you will find the options below:
| Skylune |
| Search |
| History |
Skytune
Select Skytune to start enjoying thousands of radio stations over the world. You can filter your search by Region, Music genre and talks. The Local Radio let you access quickly the stations available in your local area through internet connection.
| Local Radio |
| Globe All |
| Globe By Genre |
| Globe By Region |
Note: You can change the Local Radio area under Configuration> Local radio.
When you scroll along the list of Globe All and want to quickly reach to a certain point of the long list, input the index number on the remote control to quickly jump to that point. For example, on the remote control, input 28 and press OK, it will highlight the station no. 28.
Search
Instead of browsing the radio station list, you can input a few characters of the desired station to filter out / short list the stations.
History
The radio memorizes the stations you have listened up to 99 stations. If you have listened more than 99 stations, it will supersede the first station that you have listened.
Start playing internet radio
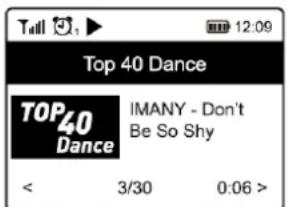
When a radio station starts playing, more radio information can be displayed. Press the [▶] button in the state of the playing screen below:
text_image
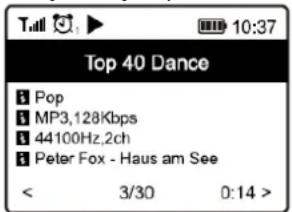
Tull 12:09 Top 40 Dance TOP40 Dance IMANY - Don't Be So Shy < 3/30 0:06 >Every time you press the [▶] button, it will toggle between the big clock and the radio channel information:
text_image
Top 40 Dance Pop MP3,128Kbps 44100Hz,2ch Peter Fox - Haus am See < 3/30 0:14 >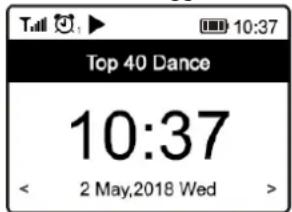
text_image
Top 40 Dance 10:37 < 2 May,2018 Wed >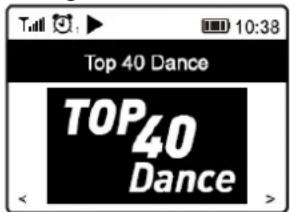
text_image
Top 40 Dance TOP40 DanceMy Favorite
This is to show the list of your Favorite stations which have been assigned to the presets.
Preset a station
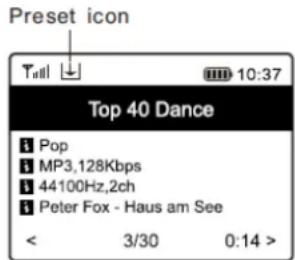
When a radio station is playing, press the [♥] button on the remote control or press and hold [♥] on the unit, you will see the Hicon appear as below. It means the station is added to the Favorite list.
text_image
Preset icon Top 40 Dance Pop MP3,128Kbps 44100Hz,2ch Peter Fox - Haus am See < 3/30 0:14 >The new added station will always show in the last item on the Favorite list. You can store up to 150 presets.
Recall a station
Press the [♥] button on the remote control or press the [♥] briefly on the radio unit to recall the list of presets or navigate to My Favourite on the home screen and select it to confirm.
Edit your favorite list
On the Favorite list, choose the radio station you want to edit then press the [▶] button on the remote control (or press [▶] on the unit). It will enter the Edit menu with the following options:
- Move down - To move down the ranking of a station
- Move up - To move up the ranking of a
- Delete - To delete a particular station
- Move to top - To move a station to the top of the favorite list
- Move to bottom - To move a station to the bottom of the favorite list
MEDIA CENTRE
The device supports UPnP and is DLNA-compatible. This provides the opportunity to stream music from your network. However, this requires you to have a compatible device in your network that can function as a server. This can be e.g., a network hard drive or a conventional PC with e.g., Windows 8 via which access to the shared folder or media sharing is permitted. The folders can then be browsed and played on the radio. Note: Please make sure your computer laptop is on the same Wi-Fi network as the Radio before you start using this function.
Music streaming
- Once the UPnP/DLNA compatible server is configured to share media files with your radio, you can start streaming music.
- On the home screen, select Media Centre and choose UPnP.
- It may take a few seconds for the radio to complete the scan for available UPnP servers. If no UPnP servers are found, it will show Empty List.
• After a successful scan is done, select your UPnP server.
• The radio will show the media categories available from the UPnP server, e.g. 'Music', 'Playlists' etc. - Choose the media files you wish to play. You can set the mode of playback under Configuration > Playback setup.
My Playlist
You can make your own playlist for the UPnP music files. Choose and highlight the song you want to add to playlist, press and hold the [Scroll/Select] knob or press and hold the [OK] button on remote, until the sign ⊥ appears. The song will be added to My playlist.
Clear My Playlist
Remove all songs in "My Playlist" to allow a new playlist to be prepared.
Note: If you have DLNA compatible servers available, follow the steps described above to browse the audio files from DLNA compatible device on the radio to play.
DAB +
If there is Digital Audio Broadcasting (DAB) in your area, the Radio can pick up the DAB stations as well (no internet connection is required). The radio supports both DAB and DAB+.
Place the radio close to the window and extend the antenna as far as it can go to get the best reception. Sometimes you may need to adjust the direction of the antenna to improve reception.
On the home screen, scroll to DAB Radio or use the [Mode] button on remote to switch to DAB Radio. Press [OK] to start.
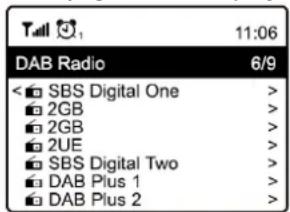
It will ask whether you want to Scan DAB Station. Press [Scroll/Select] to start scanning and it will show the progress on the number of channels received. When it is done, a preset page will be displayed for your action.
text_image
11:06 DAB Radio 6/9You can select the channel and start listening to it. Whenever you want to add to My Favourite, press the 📋 button on remote or press and hold the [button on the unit, and it will add to the favourite list.
Press the [◀] button to return to the Preset list.
Note: When a DAB radio is playing, press the [▶] button to view more radio information, each time you press the [▶] button, it will display various information at a time such as radio frequency, rolling texts (if available) and big time clock. New digital radio stations should be picked up automatically by the radio if they are part of a multiplex you already received. Otherwise, you need to do the Preset Scan again.
FM RADIO
To receive the ordinary FM stations (no internet connection is required), place the radio close to the window and extend the antenna as far as it can go to get the best reception. You may need to adjust the direction of the antenna to improve reception.
On the home screen, scroll to FM Radio or use the [Mode] button on remote to switch to FM Radio. Press [Scroll/Select] to start.
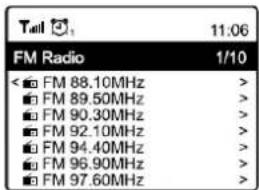
It will ask whether you want to Scan FM Station. Confirm to start scanning and it will show the progress on the number of channels are found. When it is done, it will automatically save the found channels on presets and display the list for your action.
text_image
Tall 11:06 FM Radio 1/10 < □ FM 88.10MHz > □ FM 89.50MHz > □ FM 90.30MHz > □ FM 92.10MHz > □ FM 94.40MHz > □ FM 96.90MHz > □ FM 97.60MHz >You can select the channel and start listening to it. Whenever you want to add to My Favourite, press the [♥] button on remote or press and hold the [♥button on the unit, and it will add to the favourite list.
Press the [◀] button to return to the Preset list.
Note: When it is playing FM radio, press the [▶] button to view more radio information. Each time you press the [▶] button, it will display various information at a time such as radio frequency and big clock display.
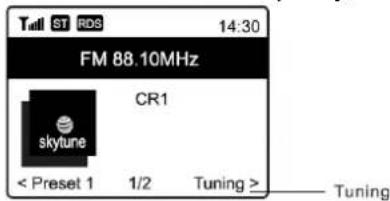
Manual Tune
To manual tune to the frequency, rotate the [Scroll/Select] knob and press [OK] to confirm.
text_image
FM 88.10MHz CR1 skytune < Preset 1 1/2 Tuning > TuningBT PLAYBACK
Before transmission between your BT device and the radio is possible, both devices must be coupled. This process is called "pairing". The radio is served as a receiver, to receive music stream to play on the radio.
If you have already coupled to a BT device before, this connection will be restored automatically when both devices are in range and BT operation has been selected on the radio. "Pairing" does not have to be repeated. This function may need to be activated in your BT device, however.
- Push the Menu button to display the selection menu for the different operating modes.
• Use the up/down button to select the operating mode BT and push the dial switch. - Switch your BT device to which you want to connect the radio on and activate the pairing mode here. The device scans for BT devices in the reception range.
- When the radio is found, your BT device shows its name Audizio Lucca-XXXX (the XXXX is an identification code for your radio unit).
- Select the radio at your BT device.
- Start playback on your BT device.
- Playback now takes place using the radio.
AUX IN
You can listen to the music stored in other audio device or smart phone on the radio, through the connection to the 3.5 mm aux-in jack on the rear side. Use the cable with both ends in 3.5 mm pin, one end to the aux-in jack on the radio, the other end to the earphone jack on the audio device or if it has line out socket.
CD PLAYER
The CD drive on the radio is a slot-in type. Gently insert the CD into the slot (with label side up) and it will be taken in automatically. It will take a moment to read the disc before it starts playing the first track.
Skip to the next or previous track by rotating the [Scroll/Select] knob. Press and hold the [◀] or [▶] buttons to fast forward / rewind. To pause/play the music, press in the [Scroll/Select] knob.
Press the [■/▲] to stop playing or long pressing the button to eject the CD.
The radio will switch to CD mode when a CD is inserted.
USB PLAYBACK
Another option to listen to your favorite music is via a USB disk drive. Insert the USB drive into the port at the back of the radio. Press the [▲] button and navigate to "USB", press [OK] to confirm. It will take a moment to read the USB drive before it starts playing the music.
Skip to the next or previous track by rotating the [Scroll/Select] knob. Press and hold the [◀] or [▶] buttons to fast forward / rewind. To pause/play the music, press the [Scroll/Select] knob.
Note:
If a USB drive is not recognized, the list of files on the drive is corrupted or a file in the list is not played, please connect the USB drive to a PC, format the drive and try again. The supported file systems are FAT12, FAT16 and FAT32.
A USB drive requiring high power (more than 500mA or 5V) is not supported. Compatible audio format: Mp3.
MICRO SD PLAYBACK
To play music from a Micro SD memory card, simply insert a Micro SD card into its port on the front of the radio (with label side up). Press the [▲] button and navigate to "Micro SD", press [OK] to confirm. It will take a moment to read the Micro SD card before it can start playing music.
Skip to the next or previous track by rotating the [Scroll/Select] knob. Press and hold the [◀] or [▶] buttons will invoke fast forwarding / rewinding. To pause/play the music, press the [Scroll/Select] knob.
Note: If a Micro SD is not recognized or does not play properly, the list of files on the device is corrupted or a file in the list is not played, please format the memory card (all the files will be deleted) and try again. The supported file systems are FAT12, FAT16 and FAT 32. Compatible audio format: Mp3.
ALARM SETTING
- Choose Alarm from the home screen or press the [icon] button on the remote control.
- Select either Alarm 1 or Alarm 2, choose Turn on to activate the Alarm.
- Follow the alarm wizard instructions to set the alarm.
- The wizard will guide you through the settings below:
Time - Set the time for the alarm.
Sound - You can choose Wake to Tone, My Favourite, Wake to FM Radio or Wake to DAB Radio as the alarm source. Note:
Wake to FM or Wake to DAB Radio - only the preset stations can be used for the radio alarm (if the preset scan has been completed).
Wake to My Favourite - Preset your favorite station before setting this as the alarm source.
Repeat - You can schedule the alarm as you desire: Everyday, Once or multiple days.
Alarm Volume - Adjust the volume of the alarm as you like by rotating the [Scroll/Select] knob or [▲/▼] button on remote.
Alarm duration - There are a number of duration choices available. You can set the preferred duration for the alarm to sound. When the time is due, it will turn off automatically.
- After the above settings are completed, press the [◀] button to exit and make sure the Alarm is turned on. You will see that the Alarm icon has appeared on the display when activated correctly.
Note: If the selected alarm source is not available, the Wake to Tone alarm will be triggered instead.
Stopping Alarm/Activate the Snooze function
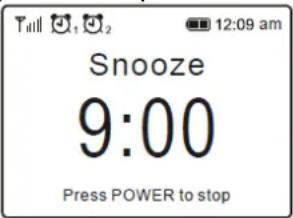
When the alarm goes off, press the [💡] to stop the alarm or press the [Scroll/Select] knob to activate the Snooze feature.
When Snooze is activated, the alarm is muted for 9 minutes and sounds again when the time is due. You can repeat the process multiple times. To stop the Snooze function, press the []
text_image
Tull 12:09 am Snooze 9:00 Press POWER to stopSLEEP TIMER
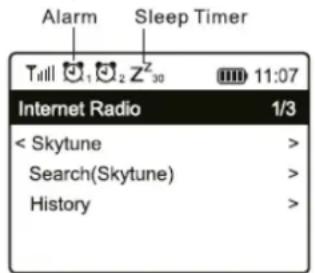
You can set the timer to let the radio go into standby mode after the selected time elapsed in the range of 15 minutes to 180 minutes. There are several timer options to choose from. Press [Z] button on the remote control to set the timer or navigate to Sleep Timer in the home screen. You will see the icon appear on the display when the timer is set.
text_image
Alarm Sleep Timer Till Z30 11:07 Internet Radio 1/3 < Skytune > Search(Skytune) > History >CONFIGURATION
Here you will find the complete settings / options available to configure your own radio. On the home screen, navigate to Configuration setting. Press [OK] and you will see a list of options available.
Network
• Network Options
Always on: The WLAN function remains switched on (faster access when switching from other modes of radio).
Auto off in 30s: The WLAN function shuts down after 30 seconds when not in use (to save energy).
• Wi-Fi Channels
Not all of the Wi-Fi channels are available in every country. There may be variation between different countries. Therefore it is necessary to choose the Wi-Fi channels to ensure the Wi-Fi performs satisfactory. We have already set the channels according to the requirement in different countries. Choose the country you are staying from the list to get the correct channel.
- Add / Remove AP
Add AP (Scan) - It will scan out a list of routers around.
Add AP (WPS button) - Choose this option to connect your Wi-Fi router via WPS if the router has a WPS button. Remove AP - If you have already added a router and want to remove it, choose this option.
Note: Always bring the radio within 2 meters of the Wi-Fi router for setup.
• AP
If you have added more than one routers on the radio and want to switch to another one, select this option to change.
- Signal
This is to show the strength of the Wi-Fi Signal of the Wi-Fi router as received by the radio. Usually signal levels lower than -70dBm is at weaker level and if it affects the reception of your radio, you may need to optimize the router location or check any problem of the router itself.
• IP
The IP is set Dynamic by default. Select to change Fixed IP according to your network condition.
• DNS
The DNS is set Dynamic by default. Select to change
Date and Time
The radio will set your local time automatically after the internet connection is completed.
If you want to do manual setting, change it by the following options:
- Time zone
Auto-set Time Zone: This option is set by default.
Manual-set Time Zone: Choose this option if you want to set the time in another region.
Choose and highlight the region/city you prefer and press [OK] to confirm.
Coupled with NTP (use network time) and DST (Daylight time saving) will be adjusted automatically if you choose to use network time (NTP).
- Set Time Format
Choose either 12-hour or 24-hour notation you prefer.
- Set Date Format
• DST (Day Light Saving)
Enable on/off.
• NTP (Use network time)
NTP is designed to synchronize a device's clock with a time server. Your radio will synchronize the time server by default every time it powers up and connects to Internet.
This ensures a very high degree of accuracy in the radio's clock. You can change to use other time server by inputting the URL address (see below NTP server). You can choose "Do not use network time" if you don't want it to.
If you choose not to use NTP for clock synchronization, highlight the NTP (Network time protocol) and press OK to make the change. You will see the Set Date & Time appeared on the menu. Select it and adjust the date and time as you desire.
- NTP Server
NTP is designed to synchronize a device's clock with a time server. Here it shows the server being used for the radio.
Language
The default language is English, you can choose other languages as preferred. Scroll with the [▲ /▼] buttons on remote or the [Scroll/Select] knob to the item with F and press [OK].
Scroll to highlight and press [OK] to select your language of choice. English, French, Spanish, Italian, German, Dutch, Polish, Russian are available.
DAB Setup
- DAB full scan
You can always carry out a new DAB scan by selecting this option. All current presets and channels will be erased.
- DAB station list
The scanned DAB stations will be listed here for management. You can move position or even delete any station. Scroll to the station and press [▶]. A pop-up window will be presented: Move up, Move down and Delete.
FM Setup
- FM Area
Choose the region according to your physical location to define the search range for the radio.
- Scan setting
Either "All stations" or "Strong stations" (with stronger signal) can be selected.
- Audio setting
You can choose to set "Auto Stereo" or "Forced mono" for the reception.
- FM full scan
You can always carry out a new scan of FM channels by selecting this option.
All current presets and channels will be erased.
The radio channel at the lowest frequency of the scanned values will be highlighted. The preset list will be saved unless a new preset scan is carried out.
- FM station list
You can adjust the preset ranking by Move down, Move up or Delete it. Highlight one of the presets, then press the [▶] button, it will enter the Edit menu. Press the [◀] button to return to the Preset list.
Local Radio
The radio is set by default to detect the radio stations in your local area automatically by internet connection and these stations can be accessed by pressing the [Local] button on the remote. You can also set "Local" in another region if desired. Highlight Local Radio and press [OK]. Choose Manual-set Local radio to change the region setting.
Playback Setup
This is to set the mode of playback under UPnP/DLNA compatible streaming: Repeat All, Repeat One, Shuffle and Normal.
Resume play options
This is to setup the device whether to return to the last operating mode when it is switched on or to display the home screen.
Power-On Options
This is to select the state of the radio after a power reset or power cut, whether to return to Standby or the state subject to the option selected from the "Resume play options".
Dimmer
You can set the backlight level for the display as you prefer. There are two settings: Mode and Level.
• Mode - Normal or Power Saving
Normal - the display will stay with the same level of brightness all the time without dimming down. Dim - the display will dim down after 20 seconds, if no input is made on the radio.
• Level - Bright and Dim
Bright - This is to adjust the level of brightness in Normal mode. Dim - This is to adjust the level of brightness in Dim mode.
- Dimmer in Standby
The display brightness in standby mode can be adjusted manually by turning the rotary knob [Scroll/Select] or pressing the [/] buttons on the remote. If no input is registered within 20 seconds, it will restore to the dim value as set in Configuration.
EQ (Equaliser)
Various music genres can be set.
Buffer Time
Sometimes you may experience uneven playback of the internet radio. This can happen if the internet connection is slow or network congestion occurs. To help improve the situation, you can choose longer buffer time to get a few seconds of radio stream before beginning to play. The default value is 2 seconds. You can choose 5 seconds if you prefer to have a longer buffer time.
AUX in Gain
If the volume level of the connected auxiliary device is too small even the volume on the device is set to maximum, you may want to adjust the gain to 6dB to achieve a higher volume level.
Reset CD Door
In case the CD cannot be ejected, select this option and choose Yes to confirm. It will take a few seconds to release the CD.
Information
View the Network and System Information of your radio. To access this information quickly, press the [Info] button on the remote control. When you use your PC to manage My favorite stations, you must use the IP address and you can view this info from here. Then, type in the IP address (Configuration > Information > Network-Information > IP) to your PC's browser input window.
Software Update
There may be software released to upgrade features of the radio from time to time.
Check the update regularly to keep your radio up to date with the latest software.
Reset to Default
You can do the reset to clear all the settings and return to default settings.
Note: all the station presets, settings and configurations will be erased after you have performed the reset.
Experience an easy way to control tuning internet radio channels and manage your favourite list via PC or Smart phone's web browser. The supported browsers are Internet Explorer and Chrome.
- Connect your PC or Smart phone to the same Wi-Fi network as your radio.
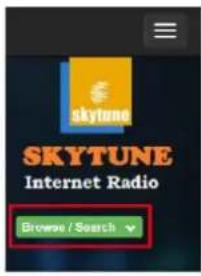
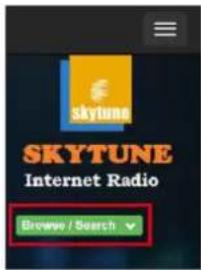
- Visit www.skytune.net
- On the home page, click "Browse/Search"
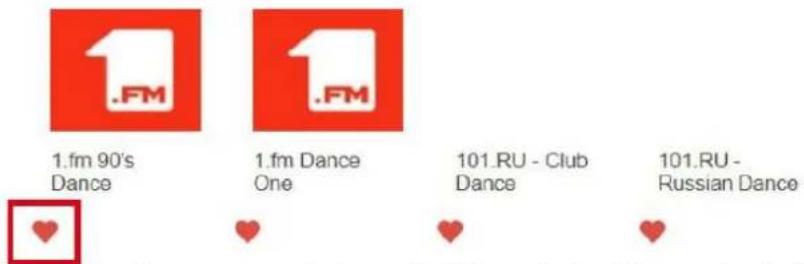
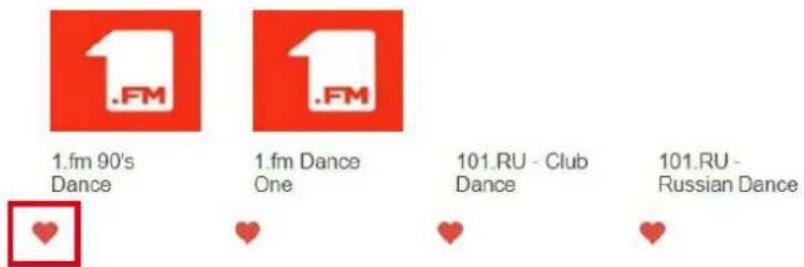
- Browse or enter the name to search the radio channel, a list of internet radio channels will be displayed.
- Click the " symbol
text_image
SKYTUNE Internet Radio Browse / SearchResult for Searching 'dance'
text_image
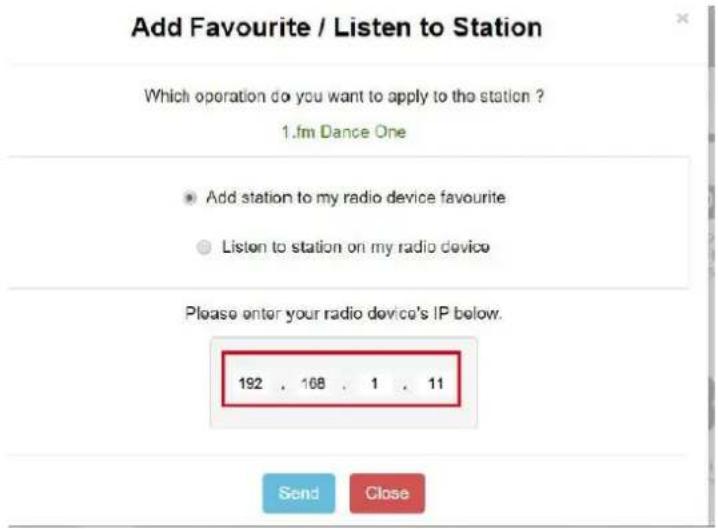
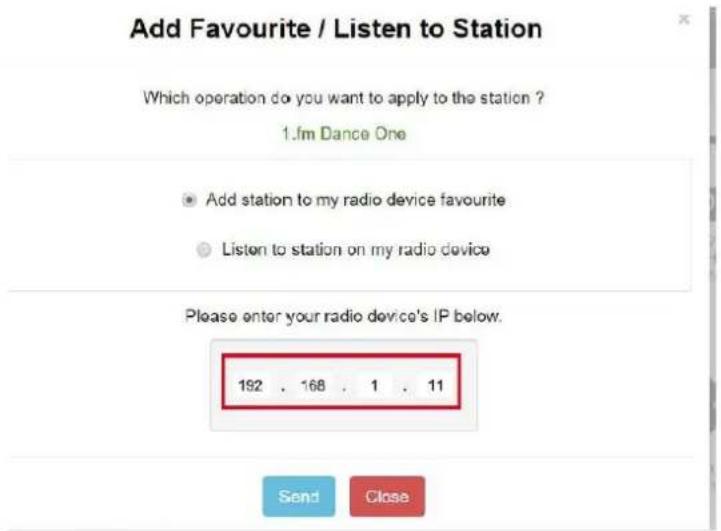
.FM 1.fm 90's Dance 1.fm Dance One 101.RU - Club Dance 101.RU - Russian Dance- It will prompt you whether to "Add Favourite" or "Listen to Station". Enter the IP address of your radio (e.g. 192.168.1.11):
text_image
Add Favourite / Listen to Station Which operation do you want to apply to the station ? 1.fm Dance One • Add station to my radio device favourite • Listen to station on my radio device Please enter your radio device's IP below. 192 . 168 . 1 . 11 Send CloseThe IP address can be located on the radio unit as follow:
* On the remote control, press the [Info] button, choose Network and scroll to IP to view the IP address
* On the radio, return to the home screen. Navigate to Configuration > Information > Network Information > IP
- Select "Listen to Station", click "Send" and the radio unit will switch playing the channel and the "My Favourite" page will pop up on the web browser.
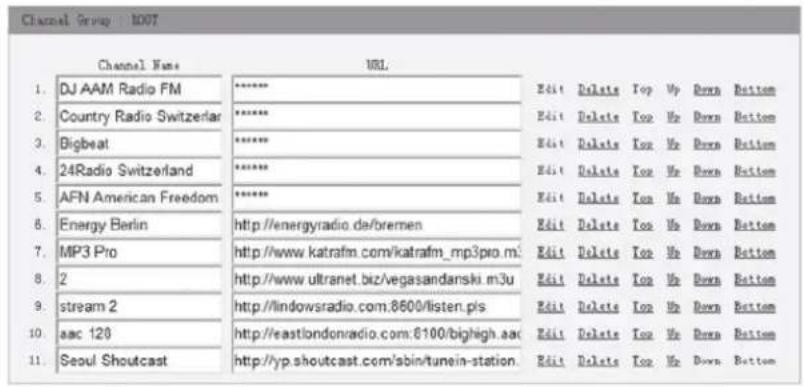
You can then choose to add the playing station to favourite or manage your list by other edit options. Any changes will synchronize to the radio unit immediately.
MY FAVOURITE
text_image
Channel Name URL 1. DJ AAM Radio FM **** Edit Delete Top Up Down Bottom 2. Country Radio Switzerland **** Edit Delete Top Up Down Bottom 3. Bigbeat **** Edit Delete Top Up Down Bottom 4. 24Radio Switzerland **** Edit Delete Top Up Down Bottom 5. AFN American Freedom **** Edit Delete Top Up Down Bottom 6. Energy Berlin http://energyradio.de/bremen Edit Delete Top Up Down Bottom 7. MP3 Pro http://www.katrafm.com/katrafm_mp3pro.m3 Edit Delete Top Up Down Bottom 8. 2 http://www.ultranet.biz/vegasandanski.m3u Edit Delete Top Up Down Bottom 9. stream 2 http://lndowsradio.com:8600/listen.pis Edit Delete Top Up Down Bottom 10. asac 128 http://eastlondonradio.com:6100/bighigh.aac Edit Delete Top Up Down Bottom 11. Seoul Shoutcast http://yp.shoutcast.com/sbin/tunein-station Edit Delete Top Up Down Bottom
text_image
Add Channel Channel Name URL Submit ResetYou can also add the radio channel if you know the published audio stream URL with the streaming format as follow:
- Audio formats: MP3, AAC, AAC+
- Stream formats: Shoutcast, Icecast (HTTP, HTTPS) and HLS
- Playlist formats: PLS, M3U
- Sampling frequency: 44.1 KHz and 48 KHz
HELPFUL TIPS
1. If the Internet Radio keeps re-buffering radio station:
The Internet Radio is streaming the data from the radio station via your broadband connection, if there is a high error rate on your broadband connection, or the connection is intermittent, then it will cause the Internet Radio to pause until the connection is re-established and it has received enough data to start playing again.
If your Internet Radio keeps stopping, please check the DSL modem to ensure that the Broadband line is not suffering a high error rate or disconnections. If you are experiencing these problems, you will need to contact your broadband supplier.
2. What is Buffering?
When playing a stream, the Internet Radio/Media player, downloads a small amount of the stream before it starts playing. This is used to fill in any gaps in the stream that may occur if the internet or the wireless network is busy. The Internet Radio streams music data from the PC while you are listening. If a stream gets blocked or experiences Internet congestion while transferring it may stop/interfere with the quality of play. If this happens, check your internet connection speed- it must be faster than the speed of the streams.
3. My radio is working but some stations cannot be played.
a) The problem may be due to one or more of the followings:
b) The radio station is no longer broadcasting.
c) The radio station has reached the maximum allowed number of simultaneous listeners.
d) The radio station has changed the stream arrangement and the link is no longer valid.
e) The radio station is not broadcasting at the time of the day (not all stations are broadcasting 24 hours throughout the day).
f) The Internet connection between your radio and the radio station server is too slow or unstable to support the data rate of the broadcast.
| Problem | Cause | Solutions |
| Cannot connect to Wi-Fi network | Network down | Confirm that a Wi-Fi or Ethernet Wired connected PC can access the internet (i.e. can browse the web) using the same network.• Check that a DHCP server is available, or that you have configured a static IP address on the radio.• Check that you firewall is not blocking any outgoing ports. As a minimum the radio needs access to UDP and TCP ports 80,443 and 8008, DNS port 53. |
| Router restricts access to listed MAC addresses | Obtain the MAC address from Configuration > Information > Network > Wi-Fi MAC and add to the allowed equipment list on your access point.Note: The radio has separate MAC addresses for wired and wireless networks. | |
| Insufficient Wi-Fi signal strength | Check distance to router; see if a computer can connect to the network in this location• Optimize the distance of the router's location | |
| Unknown encryption method | Change encryption method on router. The radio supports WEP, WPA, WPA2 | |
| Firewall preventing access | Windows Media Player: varies — non-Microsoft firewalls may require configuration for UPnP. | |
| If your radio can connect to the network successfully, but is unable to play particular stations | • The station is not broadcasting at this time of the day (remember it may be located in a different time zone).• The station has too many people trying to attach to the radio station server and the server capacity is not large enough.• The station has reached the maximum allowed number of simultaneous listeners.• The link on the radio is out of date. This is updated automatically every day, so the next time you turn on the link will be recognized. | |
| No sound | • Adjust the volume level of the external powered speaker.• Please check if the power of the external powered speaker is switched on. |
[Media player UPnP/USB/CD/Micro SD]
[Media player UPnP/BT/USB/CD/MicroSD]
text_image
Add/Remove AP AP:[ ]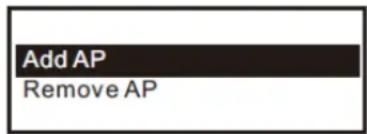
text_image
Add AP Remove APtext_image
Wi-Fi signal bar Tall ▶ 12:09 My Favourite < 28 Apr, 2018 >OVERZICHT VAN RENMERKEN EN FUNCTIES
| Local Radio |
| Globe All |
| Globe By Genre |
| Globe By Region |
text_image
Top 40 Dance 10:37 < 2 May,2018 Wed >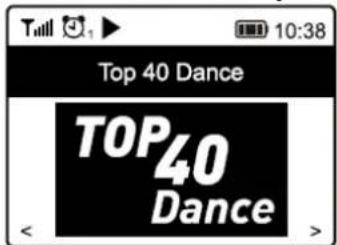
text_image
Top 40 Dance TOP40 DanceMijn favoriet
text_image
Tull 📋₁ 📋₂ 12:09 am Snooze 9:00 Press POWER to stopSLEEP TIMER
- DST (Day Light Saving)
In-/uitschakelen.
Result for Searching 'dance'
text_image
skytune SKYTUNE Internet Radio Browse / Search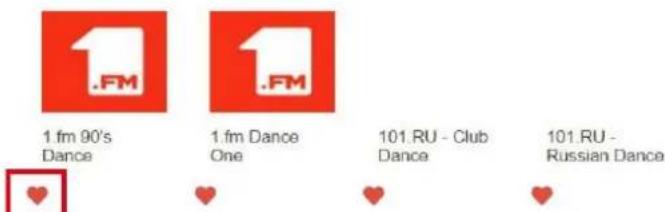
text_image
.FM 1.fm 90's Dance 1.fm Dance One 101.RU - Club Dance 101.RU - Russian Dancetext_image
Add Favourite / Listen to Station Which operation do you want to apply to the station ? 1.fm Dance One • Add station to my radio device favourite • Listen to station on my radio device Please enter your radio device's IP below. 192 . 168 . 1 . 11 Send Closetext_image
Channel Name URL 1. DJ AAM Radio FM **** Edit Delete Top Up Down Bottom 2. Country Radio Switzerlar **** Edit Delete Top Up Down Bottom 3. Bigbeat **** Edit Delete Top Up Down Bottom 4. 24Radio Switzerland **** Edit Delete Top Up Down Bottom 5. AFN American Freedom **** Edit Delete Top Up Down Bottom 6. Energy Berlin http://energyradio.de/bremen Edit Delete Top Up Down Bottom 7. MP3 Pro http://www.katrafm.com/katrafm_mp3pro.m² Edit Delete Top Up Down Bottom 8. 2 http://www.ultranet.biz/vegasandanski.m3u Edit Delete Top Up Down Bottom 9. stream 2 http://lndowsradio.com.8600/listen.pis Edit Delete Top Up Down Bottom 10. asc 128 http://eastlondonradio.com:6100/bighigh.aac Edit Delete Top Up Down Bottom 11. Seoul Shoutcast http://yp.shoutcast.com/sbin/tunein-station Edit Delete Top Up Down Bottom
text_image
Add Channel Channel Name URL Submit Reset2. Wat is buffering?
[Media-Player UPnP/USB/CD/Micro SD]
[Media player UPnP/BT/USB/CD/MicroSD]
text_image
Add/Remove AP AP:[ ]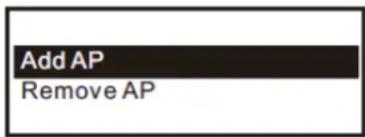
text_image
Add AP Remove APtext_image
Wi-Fi signal bar Tull ▶ 12:09 My Favourite < 28 Apr, 2018 >Start playing internet radio
text_image
Top 40 Dance 10:37 < 2 May,2018 Wed >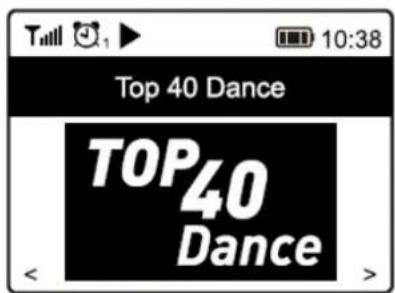
text_image
Top 40 Dance TOP40 DanceMein Favorit
• NTP (Use network time)
Result for Searching 'dance'

1. fm 90's Dance
1.fm Dance One
101.RU - Club Dance
101.RU - Russian Dance

text_image
Add Favourite / Listen to Station Which operation do you want to apply to the station ? 1.fm Dance One • Add station to my radio device favourite • Listen to station on my radio device Please enter your radio device's IP below. 192 , 168 , 1 , 11 Send Close[Reproductor multimedia: UPnP/USB/CD/Micro SD]
[Reproductor multimedia UPnP/USB/CD/Micro SD]
[Media player UPnP/BT/USB/CD/MicroSD]
text_image
Add/Remove AP AP:[ ]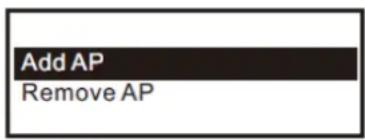
text_image
Add AP Remove APtext_image
Wi-Fi signal bar 12:09 My Favourite < 28 Apr, 2018 >| Local Radio |
| Globe All |
| Globe By Genre |
| Globe By Region |
text_image
Top 40 Dance 10:37 < 2 May,2018 Wed >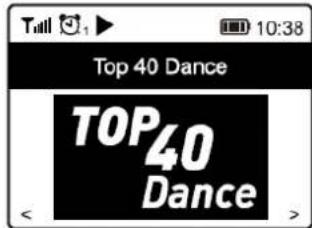
text_image
Tall 📋1 ▶ 10:38 Top 40 Dance TOP40 Dance < >My Favorite
text_image
Till 📋₁ 📋₂ 12:09 am Snooze 9:00 Press POWER to stop• DST (Day Light Saving)
Permitir on/off
• Level - Bright and Dim
Result for Searching 'dance'
1.fm 90's Dance
1. fm Dance One
101.RU - Club
Dance
101.RU - Russian Dance

text_image
Add Favourite / Listen to Station Which operation do you want to apply to the station ? 1.fm Dance One • Add station to my radio device favourite • Listen to station on my radio device Please enter your radio device's IP below. 192 . 168 . 1 . 11 Send Close| Channel Name | URL | |||||||
| 1. | DJ AAM Radio FM | ****** | Edit | Delete | Up | Up | Down | Button |
| 2. | Country Radio Switzerland | ****** | Edit | Delete | Up | Up | Down | Button |
| 3. | Bigbeat | ****** | Edit | Delete | Up | Up | Down | Button |
| 4. | 24Radio Switzerland | ****** | Edit | Delete | Up | Up | Down | Button |
| 5. | AFN American Freedom | ****** | Edit | Delete | Up | Up | Down | Button |
| 6. | Energy Berlin | http://energyradio.de/bremen | Edit | Delete | Up | Up | Down | Button |
| 7. | MP3 Pro | http://www.katrolm.com/katrolm_mp3pro.m2 | Edit | Delete | Up | Up | Down | Button |
| 8. | 2 | http://www.ultranet.biz/vegasandanski.m3u | Edit | Delete | Up | Up | Down | Button |
| 9. | stream 2 | http://lindowssradio.com:8500/listen.pls | Edit | Delete | Up | Up | Down | Button |
| 10. | aac 128 | http://eastlondonradio.com:8100/bighigh.asc | Edit | Delete | Up | Up | Down | Button |
| 11. | Seoul Shoutcast | http://yp.shoutcast.com/sbin/tune/n-station. | Edit | Delete | Up | Up | Down | Button |

text_image
Add Channel Channel Name URL Submit Reset[Radio Internet/DAB/FM]
[Radio Internet/DAB/FM]
[Media player UPnP/BT/USB/CD/MicroSD]
text_image
Add/Remove AP AP:[ ]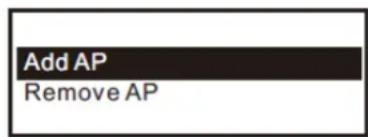
text_image
Add AP Remove APtext_image
Wi-Fi signal bar Tull ▶ 12:09 My Favourite < 28 Apr, 2018 >PRESENTATION DES CARACTERISTIQUES ET FONCTIONS
text_image
Top 40 Dance 10:37 < 2 May,2018 Wed >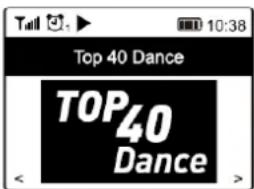
text_image
Top 40 Dance TOP40 DanceMy Favorite
• DST (Day Light Saving)
Activation on/off.
• NTP (Use network time)
Local Radio - radio locale
Result for Searching 'dance'
bar
| Category | Value | |---|---| | .FM | 1.fm 90's Dance | | .FM | 1.fm Dance One | | 101.RU - Club Dance | 101.RU - Club Dance | | 101.RU - Russian Dance | 101.RU - Russian Dance |- It will prompt you whether to "Add Favourite" or "Listen to Station". Enter the IP address of your radio (e.g. 192.168.1.11):
text_image
Add Favourite / Listen to Station Which operation do you want to apply to the station ? 1.fm Dance One • Add station to my radio device favourite • Listen to station on my radio device Please enter your radio device's IP below. 192 . 168 . 1 . 11 Send Close| Lucca Internet Radio with DAB+ | ||
| Item | 102.252 | 102.254 |
| Colour | Wood | Black |
| Playback options | BT 5.0 streaming, CD, DAB+ tuner, FM radio, Internet radio, Micro SD, USB | |
| Input connections | 3.5mm jack, USB | |
| Output connections | 3.5mm jack | |
| Output power | 60W | |
| Power supply | 100-240VAC 50/60Hz (12V Adapter) | |
| Dimensions | 310 x 225 x 200mm | |
| Weight | 3,60kg | |
The specifications are typical. The actual values can slightly change from one unit to the other. Specifications can be changed without prior notice.
The products referred to in this manual conform to the European Community Directives to which they are subject:
European Union
Tronios B.V.,
7602KR Almelo, The Netherlands
2014/35/EU
2014/30/EU
2011/65/EC
2014/53/EU

United Kingdom
Tronios Ltd.,
130 Harley Street,
London W1G 7JU, United Kingdom
S.I. 2016:1101
S.I. 2016:1091
S.I. 2012:3032
S.I. 2017:1206

Specifications and design are subject to change without prior notice.
www.audizio.com
Copyright © 2022 by Tronios The Netherlands