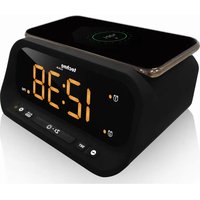
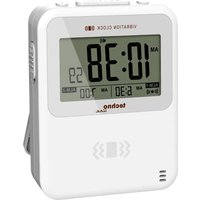
WT 477 - Alarm Clock Techno Line - Free user manual and instructions
Find the device manual for free WT 477 Techno Line in PDF.


| Product type | Radio alarm clock |
| Brand | Techno Line |
| Model | WT 477 |
| Main power supply | AC adapter 5 V DC / 2.0 A (included) |
| Backup battery | 1 x CR2032 (not included) |
| Wireless charging | Yes, Qi compatible, max 5 W power |
| USB port | 1 x USB-A 5 V / 1 A |
| Dual alarm | Yes, independent settings for alarm 1 and 2 |
| Time formats | 12h / 24h |
| Backlight | 3 levels: high, low, off |
| Snooze function | Yes, adjustable from 5 to 60 minutes |
| Alarm duration | 5 minutes |
| Wireless charging frequency | 110 - 205 kHz |
| Display | LED |
| Usage | Indoor only |
| Maintenance | Soft damp cloth, no harsh chemicals |
| Safety | Do not open the device, do not expose to water or fire |
| Spare parts | AC adapter supplied; standard CR2032 battery commercially available |
| General information | Complies with essential requirements of European directives |
Frequently Asked Questions - WT 477 Techno Line
User questions about WT 477 Techno Line
0 question about this device. Answer the ones you know or ask your own.
Ask a new question about this device
Download the instructions for your Alarm Clock in PDF format for free! Find your manual WT 477 - Techno Line and take your electronic device back in hand. On this page are published all the documents necessary for the use of your device. WT 477 by Techno Line.
USER MANUAL WT 477 Techno Line
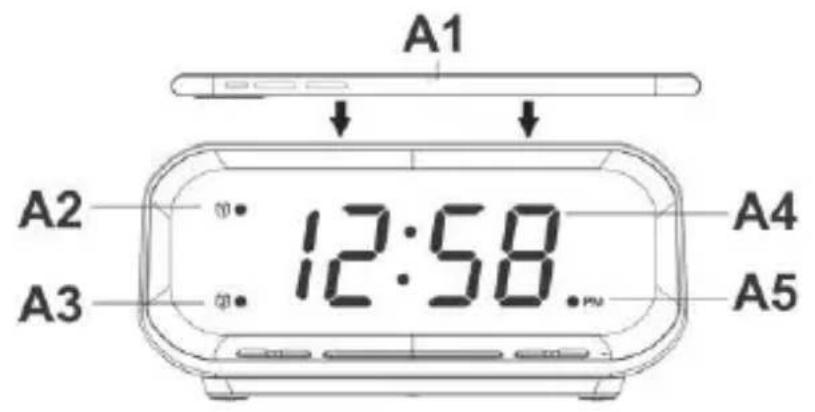
A2: / Alarm 1 Symbol
PFLEGE IHRES PRODUKTS
LED alarm clock with wireless charging and USB charging port
OVERVIEW
A - Front view
A1: Place mobile device (not included) on top for wireless charging
A2: / Alarm 1 icon A3: / Alarm 2 icon
A4: Time A5: PM indicator
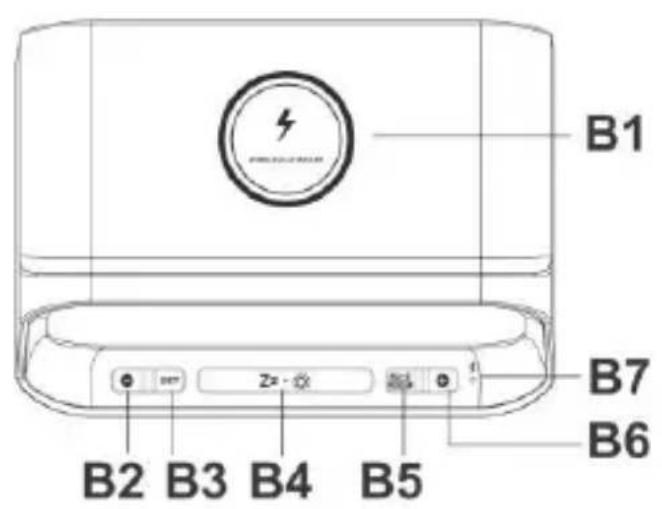
B - Top view
B1:Charging coil (charging target circle) B2: button
B3: button B4: button
ALI2 B5: button B6: button
B7: Wireless charging indicator (LED)
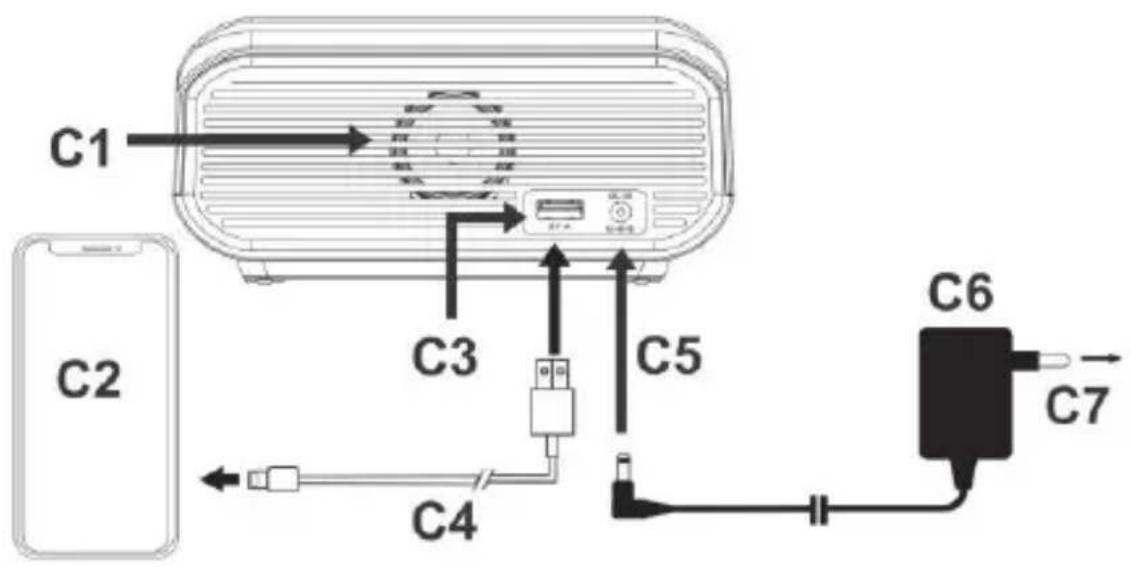
C - Back view
C1: Heat release vent C2: Mobile devices (not applicable for tablet(iPad)
C3: 5V 1-AMP USB port C4: USB charging cable (not included)
C5: Insert DC jack to power up your unit C6: AC/DC power adapter (included)
C7: AC wall socket
D - Bottom view
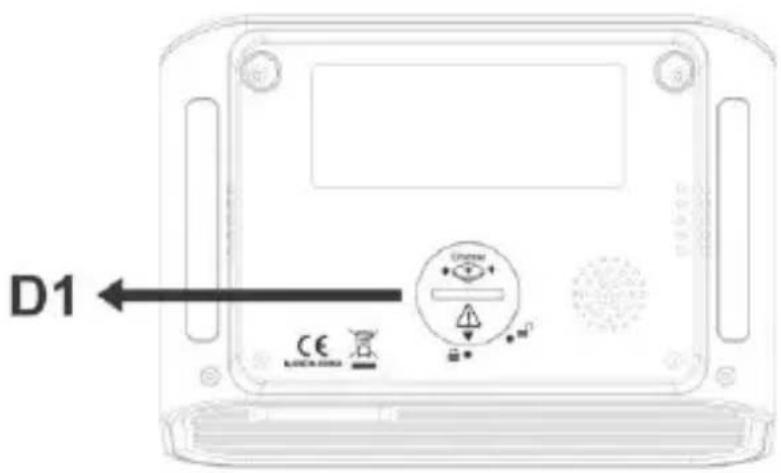
D1: Backup battery ( 1x CR2032, not included)
Please read these instructions carefully and keep the manual for future reference.
Plug in the AC/DC adaptor (DC 5V / 2.0A) to an AC household outlet, and then plug the DC jack to the back of the unit. The display shows the default time (at high-dim brightness).
Press the zz button once to turn the time display to low brightness if need.
Remark: Make sure the correct adaptor (DC 5V / 2.0A) is being connected. Incorrect chargers or adaptors may cause damage, the wireless charger may malfunction or may not charge your phone.
TO INSTALL BACKUP BATTERY ON YOUR CLOCK
Your clock requires one lithium cell "CR2032" battery (not included) to provide backup power to it in the event of a temporary power interruption.
- Place your clock face down on a flat and soft surface.
- Use a coin to turn the battery cover anti-clockwise at the back of your unit.
- Insert one new lithium cell "CR2032" battery into the battery compartment by observing the "+" polarity facing upward.
- Replace the battery cover and turn clockwise to lock it.
If AC power is interrupted and backup batteries are being used, the time and all settings of your unit will be kept. The alarm, wireless charging and USB charging do not function and the time display does not light up.
TO USE THE WIRELESS CHARGER
This function only works with mobile devices that support Qi - compatible wireless charging technology.
- Make sure your clock is connected with the adaptor (DC 5V / 2.0A) supplied with this clock. Unauthorized chargers or adaptors may cause damage or the wireless charger may malfunction.
- Center your mobile device with back side down on the marked charging target circle. The wireless charging indicator is on.
- If your mobile device is not charging, the charging indicator is off. Please verify that your mobile device is not shifted too far off center.
-
Using the external wireless charging receiver connected to non-Qi compatible mobile device may result in unstable charging.
-
Do not put any foreign object (metal) on the charging target circle any time or under the mobile device during charging. The wireless charging indicator flashes and charging will stop.
Note: the wireless charging indicator light alerts you to the wireless chargers status:
| Charging indicator | Status | Mobile device position | Top view |
| LED is on and static | Make sure your device is aligned to this units charging area. Center your device with back side down on the marked charging target circle. When the light is on, the mobile device is charging properly. | √ | Mobile devices |
| LED is off | Light is off, if: 1 – your mobile device is removed from the wireless charging surface 2 – your mobile device is not placed on the charging surface properly 3 – the clock is not connected to a power outlet. | Charging target circle ① | |
| Please verify that your mobile device is not shifted too far off centre. Lift up the mobile device from the charging surface and put it back on properly. | X X | ② ② | |
| LED is flashing | Light is flashing when not charging properly due to a general error. Do not place foreign materials, such as metal objects, magnets and magnetic stripe cards, on the wireless charging target or between the mobile device and the wireless charging target circle during charging. | X | Do not place any foreign object (metal) on the charging coil at any time or under the mobile device during charging |
CAUTION: -
-
Do not place a wireless charging receiver solely on the wireless charging surface. Doing so may overheat the wireless charger and cause a fire. It may also result in serious burn or device malfunction.
-
If you place a mobile device on the wireless charging surface for an extended period, the wireless charger may overheat and stop charging.
- Do not cover or block the heat release vent at the back of the clock.
- When the mobile device is fully charged, remove it from the wireless charging surface.
- Do not place foreign materials, such as metal objects, magnets, magnetic stripe cards, paper clips etc. between the mobile device and the wireless charging surface. The mobile device may not charge properly or may be damaged due to overheating.
- Wireless charging may not work properly if you attach a thick case to your mobile device. If your case is thick, remove it before placing your mobile device on the wireless charging surface.
- If you connect a charger to the mobile device during wireless charging, the wireless charging feature will be unavailable.
TO CHARGE MOBILE DEVICES WITH THE USB PORT
Connect the charging cable of your mobile phone (not included) to the A-type USB port at the back of the unit, then connect the other end to your mobile phone. The clock will charge the mobile phone automatically.
Notes:
- Make sure to use the original cable of your mobile phone for charging
- Make sure the original adaptor (DC 5V / 2.0A) enclosed with your clock is being used to power your clock. Using other adaptors may not charge your phone.
- iPad, tablet and notepad charging is not applicable.
- Charging one mobile device by the USB port and another mobile device by the wireless charger at the same time will reduce the charging efficiency and extend the charging time.
TO SET TIME AND SNOOZE DURATION (default time is at 0:00)
- Press and hold the set button, once during time display mode and, the hour digit "0" flashes. Press the or the button to set the hours.
-
Press the SET button once again, the minute digits "00" flash. Press the or the button to set the minutes.
-
Press the SET button once again, press the or the button to select "24Hr" "12Hr". The LED of the PM indicator will appear to indicate the afternoon time in the 12Hr time format. There is no AM indicator.
- Press the SET button once again, "n05" flashes, press the or the button to set the snooze duration (from 5 min to 60 min.).
- Press the set button again to confirm. The set time is displayed.
Notes:
- The clock exits the set mode when no key is pressed in approximate 10 seconds.
- Press and hold the or the button to accelerate setting at high speed.
TO SET ALARM 1 AND ALARM 2 (default alarm time at 6:00)
(1) Press and hold the ALI-2 button, the LED and hour digit “6” flash, press the or the button to set the desired hour.
(2) Press the ALI-2 button once again, the minute digits "00" flash. Press the or the button to set desired minutes.
- Press the ALI-2 button once again, the LED and hour digit “6” flash. Repeat Step 1 to 2 above to set Alarm 2.
- In the middle of setting the alarm, press the button once to store your alarm setting and exit the alarm set mode.
Notes:
- The clock exits the alarm set mode when no key is pressed in approximate 10 seconds.
- Press and hold the or the button to accelerate setting at high speed.
TO TURN ON OR OFF ALARM 1 AND 2
- Press the button once to activate Alarm 1, the LED appears.
- Press the button again to activate Alarm 2, LED appears.
-
Press the button again to activate both Alarm 1 and 2. Both LED and LED appear.
-
Press the button again to deactivate both alarms (both LED ① and LED disappear).
TO STOP AND RESET THE ALARM TO COME ON THE NEXT DAY
When alarm 1 or 2 is sounding, the related alarm icon flashes. Press the ALI-2 button once to stop the alarm and reset it to come on the following day. After that both LED and/or ED remain on the display.
TO ACTIVATE THE SNOOZE FUNCTION (default snooze duration is 5 minutes)
When alarm is sounding, press the button once, the alarm will be silenced momentarily and come on again after the set snooze duration.
Note: if your second alarm activates while the first alarm is sounding or it is in the snooze mode, the second alarm overrides the first alarm (the first alarm is reset to come on the next day).
TO USE THE DIMMER FUNCTION
At normal time display mode, press the Z button once to adjust the brightness (HI / LO / OFF) of the time display.
TROUBLE SHOOTING
If your clock displays irrelevant time or does not function properly, which maybe caused by electro-static discharge or other interference. Unplug the DC jack at the back of the unit, slide open the battery cover and take out the batteries. Then re-plug the DC jack and reinstall batteries by observing the correct +/- polarity. Your unit will be reset to default settings and you need to set it again.
CARE OF YOUR PRODUCT
- Place your clock on a stable surface, away from sources of direct sunlight or excessive heat or moisture.
- Protect your furniture when placing your clock on a natural wood, lacquered finish or natural stone material by using a cloth or protective material between it and the furniture.
- Clean your clock with a soft cloth moistened only with mild soap and water. Stronger agents such as Benzine, thinner or similar materials
can damage the surface of the unit. Make sure the unit is unplugged before cleaning.
- Do not mix old and new batteries. Do not mix alkaline, standard (carbon-zinc), or rechargeable (nickel-cadmium) batteries.
- If the clock is not to be used for a prolonged period, such as a month or longer, remove the batteries to prevent possible corrosion. Should the battery compartment become corroded or dirty, clean the compartment thoroughly and replace the batteries.
- Do not open the inner back case or tamper with any components of this clock.
- Do not plug in any other AC/AC or AC/DC adaptor with incorrect specifications or voltage.
Hereby, Technotrade declares that this product WT 477 is in compliance with the essential requirements and other relevant provisions of Directive 2014/53/EU and ROHS 2011/65/EC. The original EU declaration of conformity may be found at: www.technoline.de/doc/4029665004778
Notified Body: NB 2280 - MICOM Labs, 575 Boulder Court, Pleasanton, California 94566, USA Zertifikat LC-A2671-EU/4 Kan 2023/Rev A
SPECIFICATIONS
Alarm duration 5 minute (wake-to-buzzer)
Snoopze duration 5 to 60 minutes
AC/DC adapter HX12H-0502000-AG-001
Frequency range: 110K - 205KHz
Output power, wireless: 5 W (max.)
Default settings:-
Time 0:00, 24HR format
Alarm 1 and 2 6:00am (OFF)
Snoopeduration 05 (5 minutes)
Precautions
- This main unit is intended to be used only indoors.
- Do not subject the unit to excessive force or shock.
-
Do not expose the unit to extreme temperatures, direct sunlight, dust or humidity.
-
Do not immerse in water.
- Avoid contact with any corrosive materials.
- Do not dispose this unit in a fire as it may explode.
- Do not open the inner back case or tamper with any components of this unit.
Batteries safety warnings
- Install batteries correctly by matching the polarities (+/-) .
- Always replace a complete set of batteries.
- Never mix used and new batteries.
- Remove exhausted batteries immediately.
- Remove batteries when not in use.
- Do not recharge and do not dispose of batteries in fire as the batteries may explode.
- Ensure batteries are stored away from metal objects as contact may cause a short circuit.
- Avoid exposing batteries to extreme temperature or humidity or direct sunlight.
- Keep all batteries out of reach from children. They are a choking hazard.
Use the product only for its intended purpose!
Consideration of duty according to the battery law
Old batteries do not belong to domestic waste because they could cause damages of health and environment. You can return used batteries free of charge to your dealer and collection points. As end-user you are committed by law to
bring back needed batteries to distributors and other collecting points!
Consideration of duty according to the law of electrical devices
This symbol means that you must dispose of electrical devices separated from the General household waste when it reaches the end of its useful life. Take your unit to your local waste collection point or recycling centre. This applies to all countries of the European Union, and to other European
countries with a separate waste collection system.
- PFLEGE IHRES PRODUKTS
- OVERVIEW
- A - Front view
- B - Top view
- C - Back view
- D - Bottom view
- TO INSTALL BACKUP BATTERY ON YOUR CLOCK
- TO USE THE WIRELESS CHARGER
- CAUTION: -
- TO CHARGE MOBILE DEVICES WITH THE USB PORT
- Notes:
- TO SET TIME AND SNOOZE DURATION (default time is at 0:00)
- TO SET ALARM 1 AND ALARM 2 (default alarm time at 6:00)
- TO TURN ON OR OFF ALARM 1 AND 2
- TO STOP AND RESET THE ALARM TO COME ON THE NEXT DAY
- TO ACTIVATE THE SNOOZE FUNCTION (default snooze duration is 5 minutes)
- TO USE THE DIMMER FUNCTION
- TROUBLE SHOOTING
- CARE OF YOUR PRODUCT
- SPECIFICATIONS
- Precautions
- Batteries safety warnings
- Consideration of duty according to the battery law
- Consideration of duty according to the law of electrical devices
Brand : Techno Line
Model : WT 477
Category : Alarm Clock