303114 - Vacuum Cleaner Brandson - Free user manual and instructions
Find the device manual for free 303114 Brandson in PDF.


User questions about 303114 Brandson
0 question about this device. Answer the ones you know or ask your own.
Ask a new question about this device
Download the instructions for your Vacuum Cleaner in PDF format for free! Find your manual 303114 - Brandson and take your electronic device back in hand. On this page are published all the documents necessary for the use of your device. 303114 by Brandson.
USER MANUAL 303114 Brandson
Handheld Vacuum Cleaner
Mod.-Nr.: 303114
Table of contents
- Deutsch .... 3
- English 14
- Français 26
- Italiano .... 37
- Español....48

ENG: Latest information, drivers, user manuals and data sheets can be found at www.ganzeinfach.de in our download area.
natural_image
Two technical line drawings of a mechanical component, one with a flange and circular cutout, the other with a rounded top and side holes (no text or symbols)natural_image
Line drawing of two identical footshells with visible mechanical components and a small inset detail (no text or symbols)6. Benutzung
natural_image
Line drawing of a handbag with three small accessories and an arrow indicating flow (no text or symbols)text_image
Medical illustration showing two steps of a procedure: left to right, step 1 to step 2, and right to right, with arrows indicating direction.natural_image
Technical illustration of a mechanical component with an arrow indicating direction (no text or symbols present)natural_image
Technical illustration of a mechanical component with an arrow indicating direction (no text or symbols present)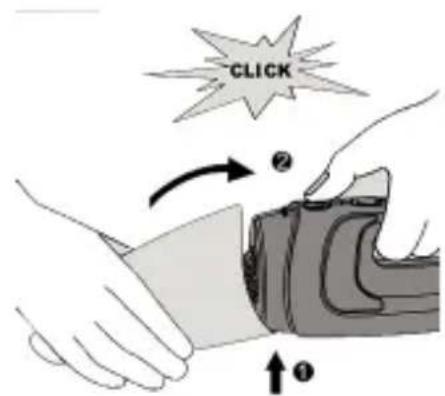
text_image
CLICK ↑①Lagerung
IMPORTANT SAFETY GUIDELINES FOR THIS APPLIANCE
Please read these instructions carefully before using the appliance!
- Never vacuum any flammable substances!
- Never immerse the appliance or the power adapter in water!
- This appliance is meant exclusively for personal use and for the intended purpose. This appliance is not intended for commercial use.
- Do not use the product with wet hands.
- Operate the appliance only with the voltage indicated on the appliance label.
- Children should use or clean the appliance only under supervision or guidance.
- If the power cable is damaged, then it should be replaced by the manufacturer, his specialist dealer or an equally qualified person, so as to prevent any risk.
- In the interest of child safety, please do not leave any packaging material (plastic bags, cardboard, polystyrene, etc.) lying around.
- Children should be supervised to ensure that they do not play with the appliance.
- Unplug the power plug when the appliance is not being used or during cleaning.
- Charge the handheld vacuum cleaner only with the charger provided. The adapter may become hot during the charging process!
- Please do not tilt the appliance to one side when vacuuming fluids!
- Always switch off the handheld vacuum cleaner after use.
- Never block the exhaust openings while the appliance is being operated!
- Switch off the appliance when you charge it!
- Do not use the handheld vacuum cleaner without the filter unit in place.
- If you have vacuumed fluids using the appliance, empty and dry the dust compartment before placing the appliance in the charging station.
Thank you for choosing a Brandon product. Please read the following user manual carefully so as to be able to get the most from the product you have purchased.
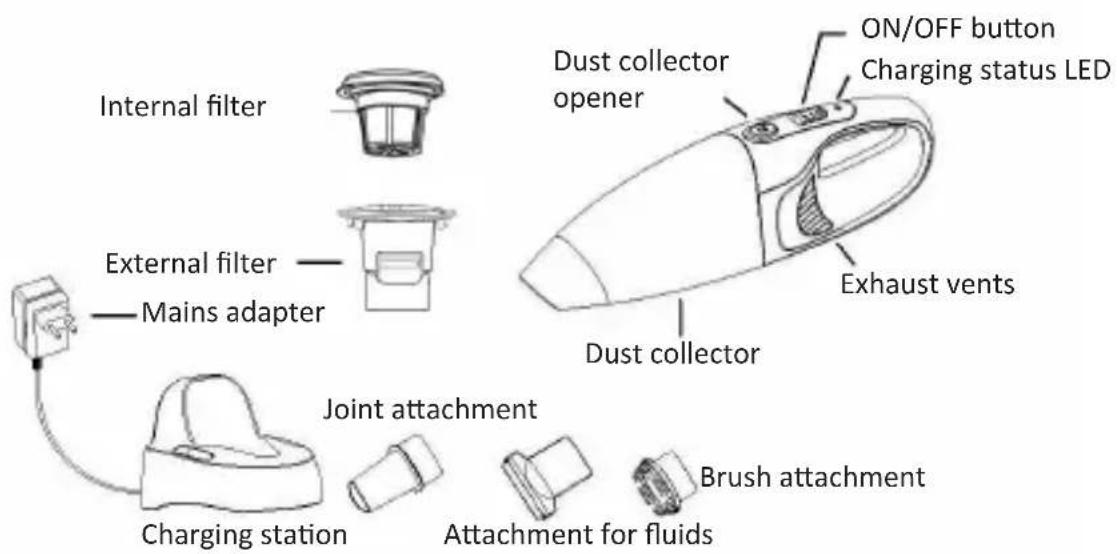
1. Scope of supply
• Handheld vacuum cleaner
- Brush attachment
- Joint attachment
- Attachment for fluids
- Charging station
2. Technical data
| Power supply • Power adapter: 100 - 240V AC• Vacuum cleaner: 14.4V DC |
| Battery type 1500mAh 14.4V Ni-MH battery |
| Charging time 5.5 - 6 hours |
| Battery life 15min |
| Power consumption 85W |
3. Product details
text_image
Internal filter External filter Mains adapter Joint attachment Charging station Brush attachment Attachment for fluids Dust collector opener Dust collector ON/OFF button Charging status LED Exhaust vents4. Installing the charging station
natural_image
Simple line drawing of a 3D object resembling a shoe or bracket (no text or symbols)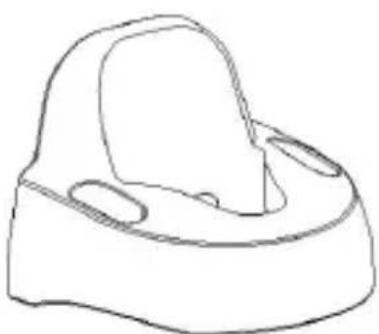
natural_image
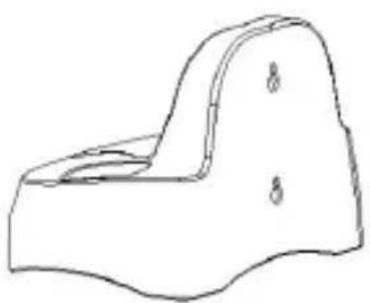
Line drawing of a rubber duck (no text or symbols)Place the charging station on a straight, level surface or mount it on the wall. Use the provided attachment holes for wall mounting.
5. Charging the appliance
Charge the appliance for at least 6.5 hours as soon as the battery is empty.
- Ensure that the appliance has been switched off.
- Connect the charging station to a properly installed socket.
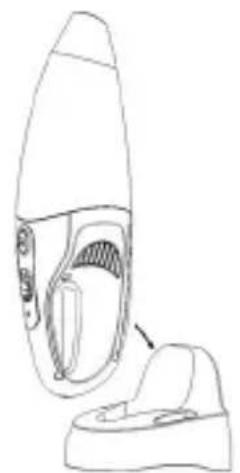
- Place the handheld vacuum cleaner on the charging station. The charging LED glows red during the charging process. The appliance is fully charged when the green LED comes on.
6. Usage
natural_image
Line drawing of a handbag with a side panel and base, no text or symbols present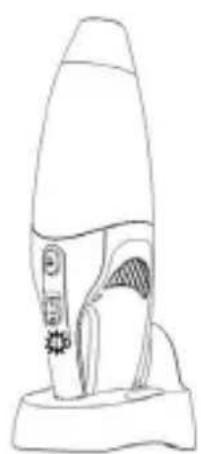
natural_image
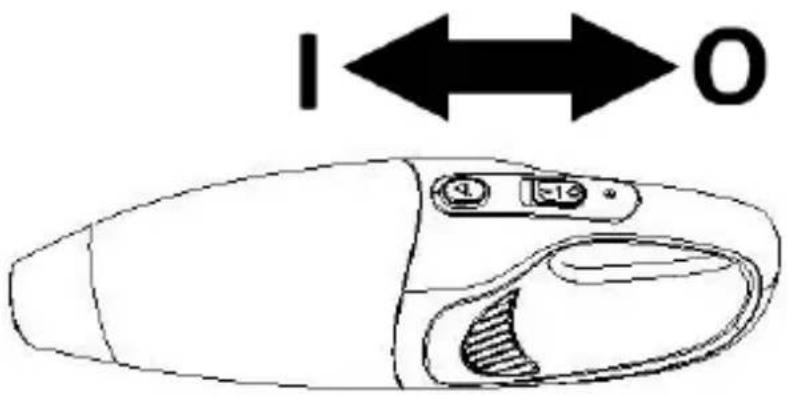
Line drawing of a stylized rocket or rocket with no visible text, numbers, or symbolsSlide the "On/Off" switch in the direction of "I" to switch it on. Slide the switch to the "0" position to switch it off.
7. Accessories
text_image
I ←→ O ① 1-14The appliance comes with the following accessories:
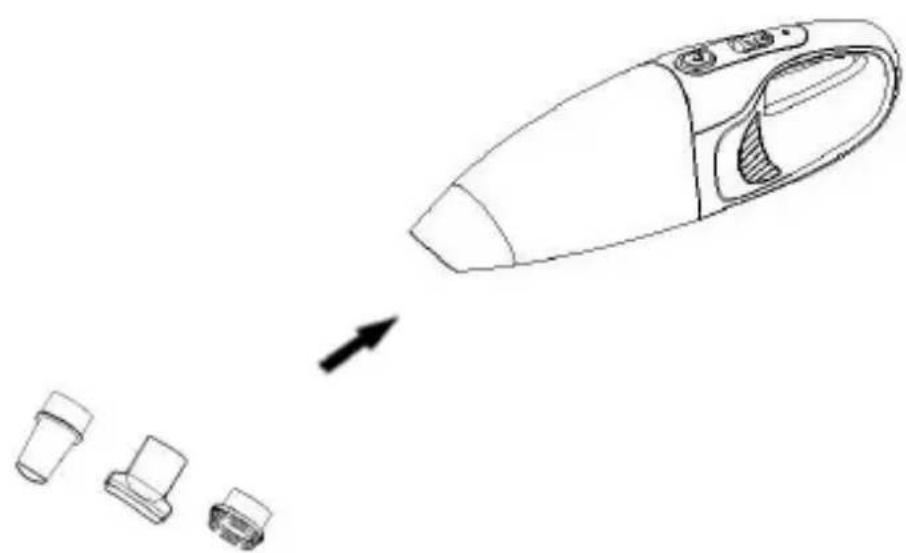
• A brush attachment to clean delicate surfaces
- A joint attachment for vacuuming corners or narrow gaps
• A fluid attachment for vacuuming liquids
Select the accessory that you want to use, and attach it to the nozzle of the handheld vacuum cleaner.
natural_image
Line drawing of a handbag with three small accessories and an arrow indicating flow (no text or symbols)8. Vacuuming fluids
Mount the fluid attachment to the nozzle of the handheld vacuum cleaner. Hold the handheld vacuum cleaner at an angle of about 30^ facing downwards.
Note: Hold the appliance with the nozzle facing upwards if there is fluid in the dust collector. Never tilt it to the side or shake the handheld vacuum cleaner!
Hold the appliance with the fluid attachment facing downwards on the surface to be cleaned, so that the rubber wiper remains in contact with the surface. Then turn it on to start vacuuming.
Ensure that you never exceed the maximum fluid quantity of about 100ml!
Empty the dust collector after vacuuming and allow it to dry completely before reusing the appliance.
9. Cleaning and maintenance
Disconnect the mains adapter from the socket before cleaning. If you have used the appliance for vacuuming fluids, you have to empty the dust collector after use and allow it to dry completely.
Clean the product using a slightly moist cloth.
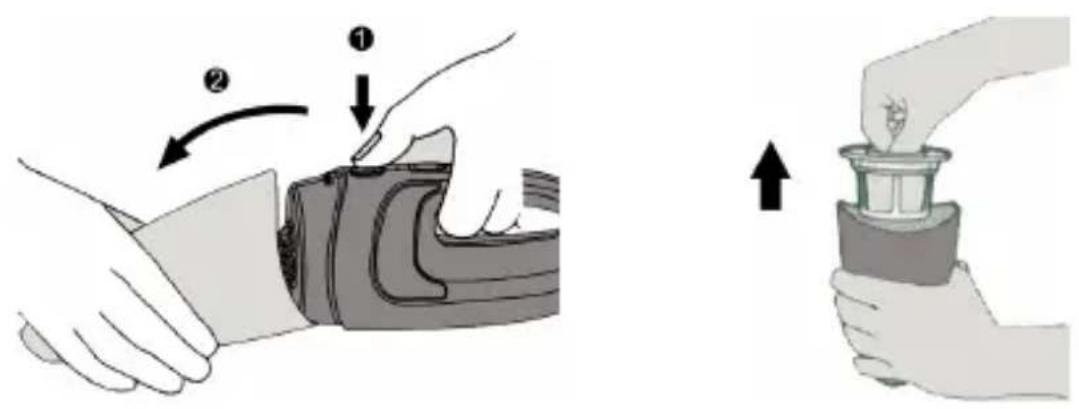
To do this, hold it over a trash bin and open the dust compartment.
Remove the filter from the appliance and empty the dust compartment.
text_image
Medical illustration showing a hand performing a valve manipulation technique with labeled steps ① and ②, alongside a close-up of the device's handle.Cleaning the filter unit
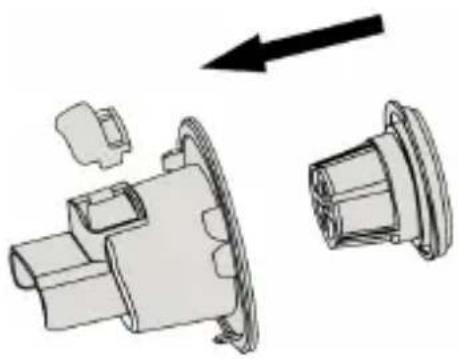
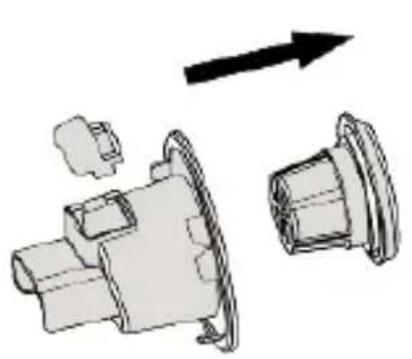
Remove the filter unit from the appliance. Remove the filter from the filter unit by unscrewing it from the holder. Then clean all the parts of the filter unit using a brush. If more dirt has accumulated, clean it using a vacuum cleaner.
Note: You can clean the filter using cold or lukewarm water if necessary. Dry the filter thoroughly before reusing it in the filter unit!
natural_image
Technical illustration of a mechanical component with two views, one showing a flanged part and the other a cylindrical housing (no text or symbols)Then place the filter back into the filter unit and secure it. Insert the entire filter unit back into the dust compartment properly.
Storage
natural_image
Technical line drawing of a mechanical component with an arrow indicating direction (no text or symbols)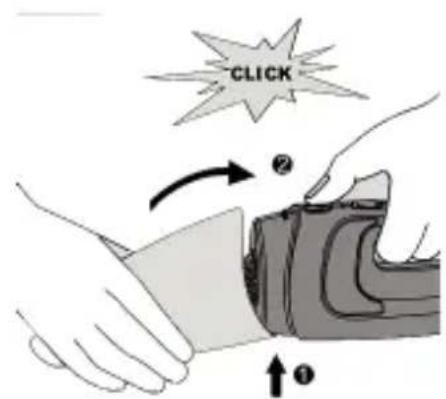
text_image
CLICK ↑①For storage, you can place the handheld vacuum cleaner and the accessories on the charging station. Ensure that you disconnect the plug from the socket if you are not using the appliance.
- Troubleshooting
| Problem Solution | |
| The appliance is no longer working properly | ·The batteries of the appliance may be empty. Please charge the batteries. ·Plug the charging station into the socket if you want to charge the appliance. ·Ensure that the vacuum cleaner is turned off during the charging process. Otherwise, it will not be charged properly. |
| The charging LED is not glowing | ·Plug the charging station into the socket if you want to charge the appliance. |
| The vacuum cleaner is not vacuuming properly | ·The dust collector has to be properly installed. Otherwise the vacuuming capacity is severely restricted. ·The dust collector is full. Empty the dust collector. ·The filter unit is clogged. Clean the filter of the vacuum cleaner. |
| Dust is coming out of the vacuum cleaner | ·The dust collector has to be properly installed. Otherwise the dust collector is not sealed properly and dust may come out. ·The dust collector is full. Empty the dust collector. ·Check whether the filter and the filter unit are properly installed. |
| The vacuum cleaner does not work properly when the accessories are attached | ·The dust collector is full. Empty the dust collector. ·The relevant accessory is clogged, clean it. ·Check whether the filter and the filter unit are properly installed. |
| The surface is still very wet after vacuuming the fluid. | ·Ensure that the fluid attachment is fixed to the vacuum cleaner.·Hold the vacuum cleaner at an angle of about 30° facing downwards properly onto the surface to be vacuumed. Never tilt the appliance to one side and ensure that the fluid attachment is touching the surface. |
| Fluid is coming out of the vacuum cleaner. | ·The filter unit is wet. Ensure that the filter unit is dry before inserting the filter into the dust collector.·Check whether the filter and the filter unit are properly installed.·Never exceed the maximum level marking for liquids in the dust collector. |
11. Safety instructions and liability disclaimer
Never try to open the device to carry out repairs or conversions. Avoid contact with mains voltages. Do not short-circuit the product. The device is not certified for use in the open air; only use it in dry conditions. Protect it from high humidity, water and snow. Keep it away from high temperatures. Do not subject the device to sudden changes in temperature or heavy vibration as this might damage electronic components. Examine the device for damage before using it. The unit should not be used if it has received an impact or has been damaged in any other way. Please observe national regulations and restrictions. Do not use the device for purposes other than those described in the instructions. This product is not a toy. Keep it out of the reach of children or mentally impaired persons. Any repair or alteration to the device not carried out by the original supplier, will invalidate the warranty or guarantee. The product may only be used by persons who have read and understood these instructions. The device specifications may change without any separate prior notice to this effect.
12. Disposal instructions
Electrical and electronic devices may only be disposed of in accordance with the European WEEE Directive and not with household rubbish. Components must be disposed of or recycled separately as dangerous, toxic elements can inflict sustained damage on the environment if they are disposed of incorrectly.
As a consumer, you are bound by the Electrical and Electronic Devices Act (ElektroG) to return electrical and electronic goods free of charge at the end of their useful life to the manufacturer, the place of purchase or to specially set up, public collection points.
The details in each case are governed by national law. The symbol on the product, the operating instructions and/or the packaging refers to these regulations. By separating materials in this way, recycling and disposing of old devices, you are making an important contribution towards protecting our environment.
13. Instructions on the disposal of batteries
With regard to the sale of batteries or the supply of devices containing batteries, the supplier is obliged to draw the customer's attention to the following:
As the end user, the customer has a statutory obligation to return used batteries. He can return old batteries stocked or previously stocked by the supplier in the form of new batteries to the supplier's despatch warehouse (despatch address) free of charge.
The symbols shown on the batteries have the following meanings: Pb = battery contains more than 0.004 percent by mass of lead, Cd = battery contains more than 0.002 percent by mass of cadmium, Hg = battery contains more than 0.0005 percent by mass of quicksilver.

The symbol of the rubbish bin with a cross through it indicates that the battery may not be put in household waste.

WEEE guideline: 2012/19/EU
WEEE register number: DE 67896761
WD Plus GmbH, herewith declares that this product 303114 conforms to the principle requirements and other relevant stipulations. The complete Declaration of Conformity can be obtained from: WD Plus GmbH, Wohlenbergstraße 16, 30179 Hanover
CONSIGNES DE SÉCURITÉ IMPORTANTES POUR CET APPAREIL
natural_image
Simple line drawing of a 3D object resembling a shoe or bracket (no text or symbols)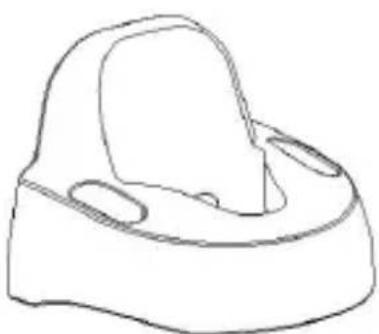
natural_image
Line drawing of a rubber duck (no text or symbols)natural_image
Line drawing of a handbag with a side panel and base, no text or symbols present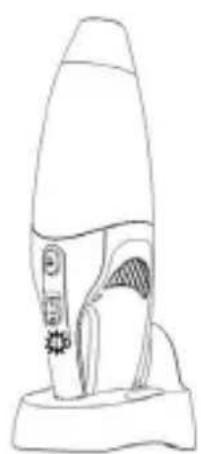
natural_image
Line drawing of a stylized rocket or rocket with no visible text, numbers, or symbols6. Mode d'emploi
natural_image
Line drawing of a handbag with three small accessories and an arrow indicating flow (no text or symbols)8. Aspirer des liquides
text_image
Medical illustration showing two steps of a procedure: left to right, step 1 to step 2, and right to right, with arrows indicating direction.natural_image
Technical line drawing of a mechanical component with an arrow indicating direction (no text or symbols present)natural_image
Technical illustration of a mechanical component with an arrow indicating direction (no text or symbols present)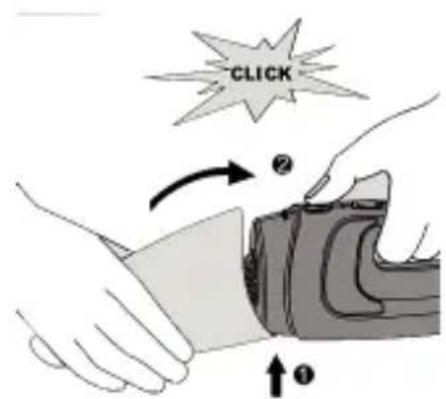
text_image
CLICK ↑①natural_image
Two technical line drawings of a mechanical component, one with a flange and circular cutout, the other with a rounded top and side holes (no text or symbols)natural_image
Line drawing of two identical footshells with visible mechanical components and a small inset detail (no text or symbols)6. Utilizzo
natural_image
Line drawing of a handbag with three small accessories and an arrow indicating flow (no text or symbols)text_image
Medical illustration showing two steps of a procedure: left to right, step 1 to step 2, and right to right, with arrows indicating direction of movement.natural_image
Technical line drawing of a mechanical component with two views (top and side), no text or symbols presentnatural_image
Technical illustration of a mechanical component with an arrow indicating direction (no text or symbols present)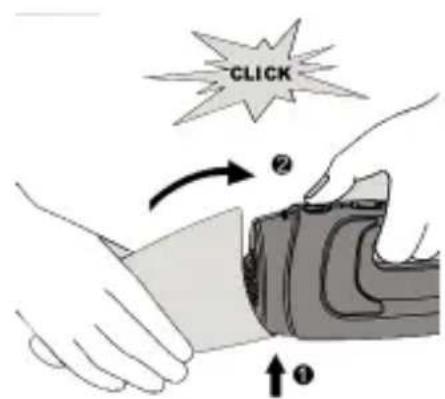
text_image
CLICK ↑①natural_image
Simple line drawing of a 3D object resembling a shoe or bracket (no text or symbols)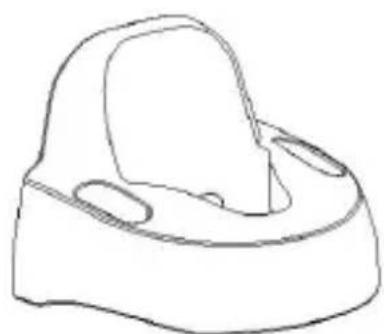
natural_image
Line drawing of a baby rubber duck (no text or symbols)natural_image
Line drawing of a handbag with a side-mounted seat and handle, no text or symbols present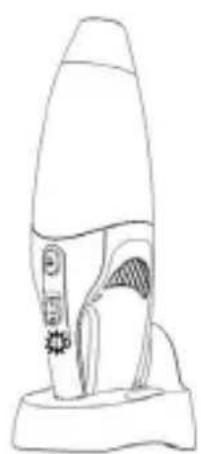
natural_image
Line drawing of a stylized rocket or rocket with no visible text, numbers, or symbols52 Español
text_image
I ←→ O 9 14natural_image
Line drawing of a handbag with three small accessories and an arrow indicating direction (no text or symbols)text_image
Medical illustration showing two steps of a procedure: left to right, labeled with arrows and numbered indicators (① and ②), right to right, labeled with an upward arrow.natural_image
Technical illustration of a mechanical component with two views and an arrow indicating direction (no text or symbols)Almacenamiento
natural_image
Technical illustration of a mechanical component with an arrow indicating direction (no text or symbols present)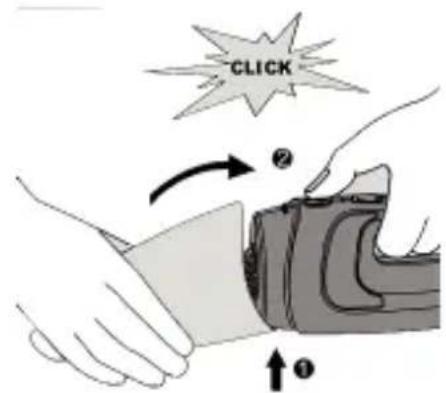
text_image
CLICK ↑①- Solución de errores