VG 7000 Devil’s Choice - Grill plate STEBA - Free user manual and instructions
Find the device manual for free VG 7000 Devil’s Choice STEBA in PDF.


User questions about VG 7000 Devil’s Choice STEBA
0 question about this device. Answer the ones you know or ask your own.
Ask a new question about this device
Download the instructions for your Grill plate in PDF format for free! Find your manual VG 7000 Devil’s Choice - STEBA and take your electronic device back in hand. On this page are published all the documents necessary for the use of your device. VG 7000 Devil’s Choice by STEBA.
USER MANUAL VG 7000 Devil’s Choice STEBA
natural_image
Stebo Steak Gasoline 100 grater with black cabinet and wheels, no visible text or symbols on the device itself.220-240 V\~; 50-60 Hz; 2.800 W
Deluxe Grillcenter VG 7000 Devil's Choice
Instructions for use 34
Mode d'emploi 42
text_image
Exploded view diagram of a portable gas stove with numbered parts and internal componentsPackliste
EN: Screw the two square tubes (13 in front & 14 at rear) onto the side panel (26) using 4 screws BB. The large holes at the end of the tube must point towards the top. Mount the tension lock (25) on the outside with 2 screws AA and 2 nuts EE.
EN: Screw the two square tubes (28 in front & 27 at rear) onto the side panel (26) using 4 screws BB. The large holes at the end of the tube must point towards the top. Mount the tension lock (25) on the outside with 2 screws AA and 2 nuts EE.
EN: Screw the two side panels onto the base plate (19) using 4 screws BB.
EN: Place the housing on its feet and screw the two rear panels (14) tight with 8 screws BB. Screw the lower rear panel onto the base plate using 1 screw AA. Screw the door magnet (20) onto the base plate with 2 screws AA. Make sure the magnet is facing forward.
EN: Screw the front traverse (11) onto the housing with 4 screws BB.
EN: Screw the two brake rollers (21) tight. Push the axle (17) through the tube ends. Place the wheels (18) on the axle and finally, audibly click the two wheel covers (16) into place.
EN: Insert the shelf (29) at the desired height.
EN: Screw the two handles (22) onto the two doors (15 & 24) using 4 handle pads (23) and 4 screws BB.
natural_image
Line drawing of a two-wheeled cart with doors and wheels, no text or symbols presentEN: Hang the doors with the fixed bolt facing down. Then press the spring-loaded bolt downwards and lock it into place.
text_image
DD-M4*4 ⑩*4EN: Screw the 4 device feet (10) onto the device with 4 screws DD.
EN: Screw the two carrying handles (3) onto the housing on the left and right.
EN: Screw the two hooks (31) for the tension lock onto the grill with 2 AA screws and 2 EE nuts each.
EN: Danger! The device is very heavy. Place the device securely in the holes and secure it with the locking hooks.
EN: Remove the 2 screws BB, with washers FF and nuts EE that were mounted on the grill for transport reasons. Screw the mounting bracket 1 (8) and the mounting bracket 2 (9) tight with 1 screw BB and 2 screws AA each, as well as the associated washers and nuts.
EN: Remove the 2 screws BB, with washers FF and nuts EE that were mounted on the grill for transport reasons. Screw the mounting bracket 1 (8) and the mounting bracket 2 (9) tight with 1 screw BB and 2 screws AA each, as well as the associated washers and nuts.
EN: Hang the left shelf (6), open it and screw it tight with 4 collar screws CC.
EN: Hang the left shelf (30), open it and screw it tight with 4 collar screws CC.
natural_image
Line drawing of a portable grill with control panel and handlebars (no text or symbols)EN: Hang the 6 hooks (7) through the holes in the shelf.
natural_image
Technical line drawing of a mechanical device with no visible text or symbolsEN: Slide in the fat collecting tray (32) at the back.
EN: Place the 4 reflector plates (33) next to each other under the radiators.
text_image
Technical diagram of a portable grill with numbered components and labeled partsEN: Insert the two grill plates (4 & 5) and attach the wire rack (2).
1) Lid handle
2) Lid with thermometer
3) Wire grill
4) Trays, can be folded
5) Innovative infinitely variable power control with display
6) Grill table
7) Wheels
8) On/Off Button
9) Wheels with brake
10) Fat collector bowl
11) Closed grill plate (power plate)
12) Open grill plate
Generally
This appliance is for private use only and must not be used commercially. Please read the instruction manual carefully and keep it at a safe place. When the appliance is given to another person the instruction manual should be passed to that person, too. Only use the appliance as described in the instruction manual and pay attention to the safety information. No liability for damages or accidents will be accepted, which are caused by not paying attention to the instruction manual. Remove all packaging and sticker (except the rating label). Wash up all parts carefully (see cleaning).
Safety information

Hot surface! There is danger of burning when touching the surface during operation.
- Connect and operate the appliance in accordance with the specifications shown on the rating label.
- Do not use if the plug cord is damaged. Verify before every use.
- Do not plug with wet hands.
- Connect the power plug to a properly installed and easily accessible socket only.
-
The device should be operated via a residual current device (RCD) that has a tripping current of no more than 30 mA.
-
To unplug the power plug, always pull the plug – not the cable.
- Plug off the appliance after each use or in case of failure.
- Do not pull at the cord. Don't pull it over edges and don't bend it too much.
- Keep the cord away from hot parts.
The appliance can be used by children aged 8 and above and persons with limited physical, sensory or mental capabilities or lack of experience/knowledge, provided that are supervised or have been provided with instruction in the safe use of the appliance and have understood the resulting dangers. Children must not use the packaging as a toy. Cleaning and user maintenance must not be carried out by children unless they are 8 years or older and are supervised.
- Children under the age of 8 must be kept away from the appliance and the connecting cable.
- Children should be supervised to ensure that they do not play with the appliance or packaging material (e.g. Plastic Bags).
- The appliance must not be operated using a timer or a separate remote system!
- Never leave the appliance unattended when in use.
This is an electrical device! Never operate in the rain or on wet surfaces.
The device must not be operated with charcoal or similar fuels.
- Do not leave the appliance outdoors or in a damp area.
- Never immerse the device in water or spray it with a hose!
- Never use the device after a malfunction, e.g. if it felt down or has been damaged in any other manner.
- The manufacturer is not liable for damage which is occurring due to the usage of the appliance in a different way as described or a mistake in the handling has been made.
- To prevent injury, repairs such as replacing a damaged cord, should only be carried out by a customer service. Only original spare parts have to be used.
- Only use the device when completely assembled.
- The device gets hot, only transport after it cooled down. Always close the lid before transport.
- Only use the device as described in this manual.
- You must not wrap the grill with tin foil (accumulation of heat).
- You must not put any materials such as paper, cardboard, plastic etc. into the appliance.
- This appliance is intended to be used in household and similar applications such as:
o staff kitchen areas in shops, offices and others working environments
o by clients in hotels, motels and other residential type environments
o bed and breakfast type environments.
- Before initial use: clean all parts – except the heating elements - carefully and leave to dry. Heat up the device for about 15 min. to eliminate the smell of newness. The device may smoke slightly in the first few minutes.
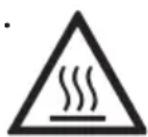
Attention! Housing gets hot. Danger of burns! Do
not place the appliance on a sensitive surface (e.g. painted furniture) and keep a distance of at least 70cm to burnable materials.
- Never operate the device without the fat collecting tray!
• If you grill indoors, there must be sufficient ventilation.
- Fat and grilled food can splash and drip. Therefore, do not place the device directly on sensitive surfaces such as polished table tops, parquet, carpet or patio tiles.
- If an extension cable is used, it has to have a cross-section of 1,5mm^2 . A cable drum must always be unwound.
- If a GS-tested 16 A multi-pin extension is used, it may not be charged with more than 3680 watts due to fire hazard.
- Make sure that children do not tease the cable or that a trip hazard occurs.
- The device must always be disconnected from the power supply if it is not supervised and before assembling, disassembling or cleaning.
- Hygiene: Please always clean the device to avoid bacteria and mold formation.
Cleaning
- Fat residue must be removed for hygienic reasons and because of the risk of fire.
- Pull out the fat collecting tray at the back of the device and clean it.
- After grilling, heat the device for approx. 15 minutes at the highest level with the lid closed. This causes oil residues and burnt items to burn off.
Danger! This can produce heavy smoke! That's why this should be done outdoors.
Attention! Pull the plug before cleaning and allow the device to cool down.
- Never immerse the unit into water.
- Rub the enamelled grill plates with kitchen paper. If necessary, soak in warm, soapy water and clean with a soft sponge.
- Clean and dry the housing and interior with a damp cloth with detergent.
- The stainless steel reflectors and the grease tray can be cleaned in hot, soapy water and then dried. The reflectors can become discoloured due to the high heat.
Workplace
Important:
Use as a table grill: Never place this device on or next to hot surfaces (e.g. hot stoves). Only use it on a even, stable and a heat resisting surface. It is important that no inflammable items are near to the device. Do not place the device on the edge of the table so that it cannot be touched by children or fall down when touched.
Use with grill table: place on a flat surface and secure against rolling away.
On/off switch
Connect the device to the power supply. Then press the on/off switch on the side, the display lights up.
When you have finished grilling, turn the switch off again.
Display & power control
When the device is switched on, the display shows the power per each side in percent. 100% = 1,400 watts.
By adjusting the power with the stepless power regulator, a continuous heat supply is ensured.
The power can be adjusted individually for each grill area (closed grill plate or grill grate).
The following settings correspond to the approximate temperatures with the lid closed:
| Setting in % Temperature closed grill plate in °C | Temperature open grill plate in °C | Interior temperature on wire grill in °C |
| 30 65 50 45 | ||
| 40 125 105 80 | ||
| 50 200 140 120 | ||
| 60 250 185 165 | ||
| 70 320 220 190 | ||
| 80 330 240 220 | ||
| 90 345 255 235 | ||
| 100 380 260 240 |
Maximum power consumption for 1 hour of operation corresponds to approx. 2.8 KW.
Thermometer
The thermometer shows the all-round heat, but not the temperature on the plates.
Preparation for grilling
When using the device for the first time, all parts must be wiped with a damp cloth. The device should then be heated up with the lid closed at maximum temperature for approx. 15 minutes in order to remove any production oils. It can smoke slightly. Depending on your needs, the right and left plates can be used separately.
The reflectors and the fat collecting plate must always be pushed in so that the installation surfaces are not damaged.
The grill plates must not be covered with aluminium foil, otherwise the device could overheat.
To avoid damage, do not cut on the grill plates!
For technical reasons, the radiators glow in different reds!
Grilling
Before grilling, the plates should be oiled lightly with heat-resistant oil to prevent sticking (e.g. sunflower oil - no native oils may be used!).
The best grilling results are achieved with the lid closed, as this creates all-round heat. The temperature increases by approx. 30^ C when the lid is closed. This reduces energy consumption!
The device can be operated left or right side individually or together. You can e.g. pre-grill on the open plate at a setting of 225^ C - 250^ C on each side and finish grilling on the power grate (closed plate) at a setting of 300^ C.
If foods contain a lot of fat, individual splashes of fat can catch fire. Please make sure that there is not too much fat on the plates or in the fat drip tray. Heavily soiled parts can catch fire!
Some tips on grilling
• In the interest of your health:
- Minced meat must be processed immediately
- Separate fried poultry from raw meat, do not eat raw and always cook completely.
• Cured meat or sausage should not be grilled too much
- Do not allow starchy foods (e.g. bread, potatoes) to become too dark
Accessories (not included)
- Rotisserie
- Cover
Correct Disposal of this product
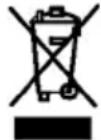
This marking indicates that this product should not be disposed with other household wastes throughout the EU. To prevent possible harm to the environment or human health from uncontrolled waste disposal, recycle it responsibly to promote the sustainable reuse of material resources. To return your used device, please use the return and collection systems or contact the retailer where the product was purchased. They can take this product for environmental safe recycling.
Packaging disposal: Do not throw away the package materials. Please put it in the recycling bin.



Gift box: Paper, should be put to the old paper collection point. Plastic packaging material and foils should be collected in the special collection containers.
Service and Repair:
If the appliance must be repaired, please get in touch with your trader or with the manufacturer: