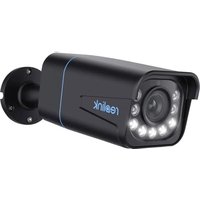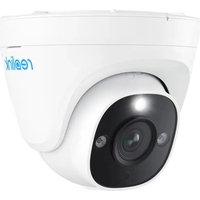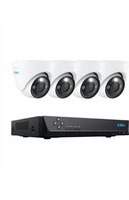
RLK8-1200D4-A - Surveillance Camera REOLINK - Free user manual and instructions
Find the device manual for free RLK8-1200D4-A REOLINK in PDF.


User questions about RLK8-1200D4-A REOLINK
0 question about this device. Answer the ones you know or ask your own.
Ask a new question about this device
Download the instructions for your Surveillance Camera in PDF format for free! Find your manual RLK8-1200D4-A - REOLINK and take your electronic device back in hand. On this page are published all the documents necessary for the use of your device. RLK8-1200D4-A by REOLINK.
USER MANUAL RLK8-1200D4-A REOLINK
If you need any technical help, please visit our official support site and contact our support team before returning the products, https://support.reolink.com.
EC REP CET PRODUCT SERVICE SP. Z O.O.
Ul. Dluga 33 102 Zgierz, Polen
UK REP CET PRODUCT SERVICE LTD.
Beacon House Stokenchurch Business Park, Ibstone Rd, Stokenchurch High Wycombe, HP14 3FE, United Kingdom
August 2023
QSG1_A
58.03.006.0023

Be Prepared, Be Reolink
EN/DE/FR/IT/ES
Operational Instruction
Apply to: 12MP PoE Security Camera Systems
@ReolinkTech https://reolink.com
EN
Contents
What's in the Box 2
Introduce the NVR 3
Introduce the Cameras 4
Connection Diagram 7
Set up PoE NVR System 9
Mount Tips for the Cameras 10
Troubleshooting 11
Specifications 12
Notification of Compliance 12
What's in the Box
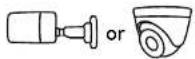
NVR Bullet or Dome Camera

Pack of Screws

Waterproof

Network Cable

Network Cable

Power Adapter

USB Mouse

HDMI CableNVR

Surveillance Card

Quick Start Guide Mounting
Hole Template
NOTE: Quantity of devices and accessories vary by different models that you purchase.
Introduce the NVR
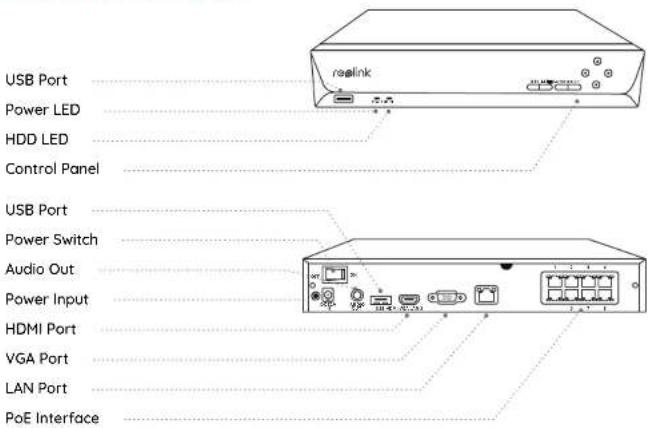
text_image
USB Port Power LED HDD LED Control Panel USB Port Power Switch Audio Out Power Input HDMI Port VGA Port LAN Port PoE InterfaceNOTE: The actual appearance and components may vary with different products.
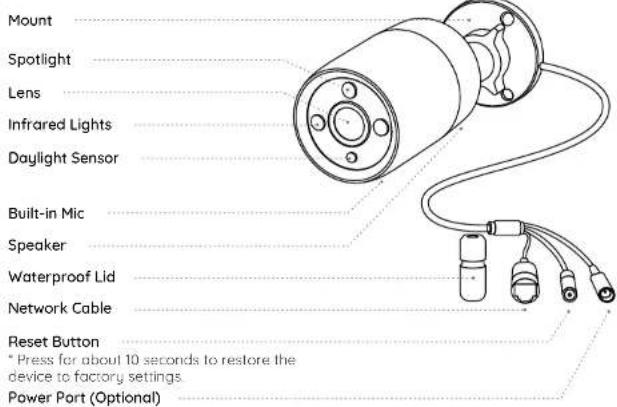
Introduce the Cameras
text_image
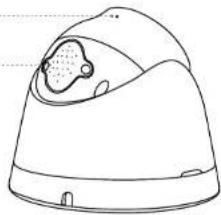
Mount Spotlight Lens Infrared Lights Daylight Sensor Built-in Mic Speaker Waterproof Lid Network Cable Reset Button * Press for about 10 seconds to restore the device to factory settings. Power Port (Optional)Mount
Metal Case
Spotlight
Infrared Lights
Lens
Daylight Sensor
Waterproof Lid
Network Cable
Reset Button
- Press and hold for 10 seconds to restore camera
to factory settings
Power Port (Optional)
natural_image
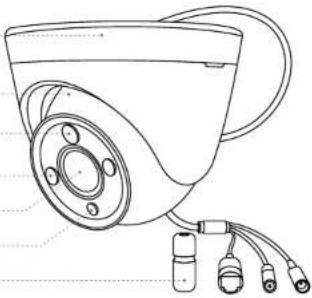
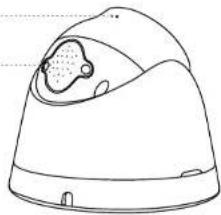
Line drawing of a surveillance camera with multiple cables and a head-mounted lens (no text or symbols)Built-in Mic
Speaker
natural_image
Line drawing of a helmet with a small inset showing internal components (no text or symbols)NOTE:
- Different types of cameras are introduced in this section. Please check out the camera included
in the package and check out the details from the corresponding introduction above. - The actual appearance and components may vary with different model of product.
Connection Diagram
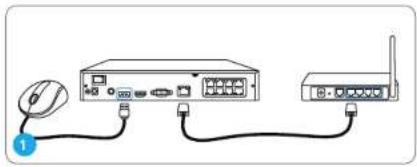
To ensure all components work properly, it is recommended that you connect every part and try to run the system before a final installation.
natural_image
Diagram showing connection between a computer and a wireless router via cable (no text or symbols present)Connect the NVR (LAN port) to your router with a network cable. Next, connect the mouse to the USB port of the NVR.
text_image
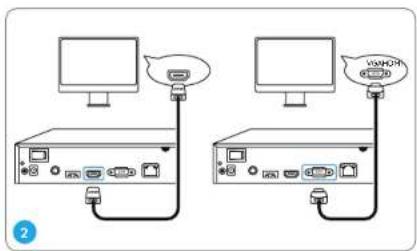
Diagram showing two computer setups connected via USB cable, with one setup emitting a 'VIMON' signal and the other emitting 'VIMON'.Connect the NVR to the monitor with a VGA or HDMI cable.
NOTE: There is no VGA cable included in the package.
text_image
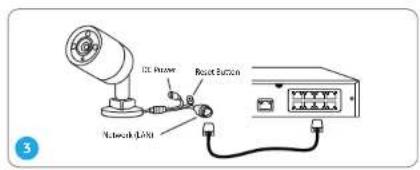
IC Receiver Reset Button Network LightConnect cameras to PoE ports on the NVR.
natural_image
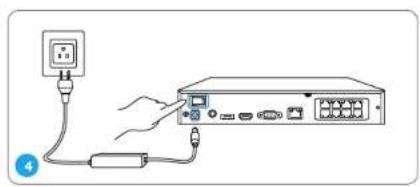
Diagram showing connection between a power outlet and a network switch (no text or symbols present)Connect the NVR to a power outlet and turn on power switch.
Set up the NVR System
A setup wizard will guide you through the NVR system configuration process. Please set a password for your NVR (for the initial access) and follow the wizard to configure the system.
NOTE: The password should be at least 6 characters. It is recommended that you note down the password and keep it in a secure place.
Access the System via Smartphone or PC
Download and launch the Reolink App or Client software and follow the instructions to access the NVR.
- On Smartphone
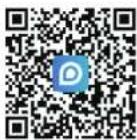
Scan to download the Reolink App.
- On PC
Download path: Go to https://reolink.com > Support > App & Client.
Mount Tips for the Cameras
- Do not face the camera towards any light sources.
- Do not point the camera towards a glass window. Or, it may result in poor image quality because of the window glare by infrared LEDs, ambient lights or status lights.
- Do not place the camera in a shaded area and point it towards a well-lit area. Or, it may result in poor image quality. To ensure best image quality, the lighting condition for both the camera and the capture object shall be the same.
- To ensure better image quality, it's recommended to clean the lens with a soft cloth from time to time.
- Make sure the power ports are not directly exposed to water or moisture and not blocked by dirt or other elements.
- With IP waterproof ratings, the camera can work properly under conditions like rain and snow. However, it doesn't mean the camera can work underwater.
- Do not install the camera at places where rain and snow can hit the lens directly.
- The camera may work in extreme cold conditions as low as -25^ because it will produce heat when powered on. You may power the camera indoors for a few minutes before installing it outdoors.
Troubleshooting
No Video Output on the Monitor/TV
If there's no video output on the monitor from Reolink NVR, please try the following solutions:
• TV/monitor resolution should be at least 720p or above.
- Make sure your NVR is powered on. - Double check the HDMI/VGA connection, or swap another cable or monitor to test.
If it still doesn't work, please contact Reolink Support https://support.reolink.com
Failed to Access the PoE NVR Locally
If you failed to access the PoE NVR locally via mobile phone or PC, please try the following solutions:
- Connect the NVR (LAN port) to your router with a network cable. - Swap another Ethernet cable or plug the NVR to other ports on the router.
- Go to Menu -> System -> Maintenance and restore all settings.
If it still doesn't work, please contact Reolink Support https://support.reolink.com
Failed to Access the PoE NVR Remotely
If you failed to access the PoE NVR remotely via mobile phone or PC, please try the following resolutions:
• Make sure you can locally access this NVR system.
- Go to NVR Menu -> Network -> Network > Advanced and make sure that UID Enable is selected.
- Please connect your phone or PC under the same network (LAN) of your NVR and see if you can visit any website to verify whether there is Internet access available.
- Please reboot your NVR and router and try again.
If it still doesn't work, please contact Reolink Support https://support.reolink.com
Specifications
NVR
Decoding Resolution: 12MP/8MP/5MP/4MP/3MP/1080p/720p Operating Temperature: -10°C to 45°C Size: 260 x 41 x 230mm
Weight: 2.0kg
Camera
Night Vision: 30 Meters (100ft) Day/Night Mode: Auto Switchover Operating Temperature: -10°C to 55°C (14°F to 131°F) Operating Humidity: 10%-90% Weather Resistance: IP66
For more Specifications, visit https://realink.com/.
Notification of Compliance
FCC Compliance Statement
This device complies with Part 15 of FCC Rules. Operation is subject to the following two conditions: (1) this device may not cause harmful interference, and (2) this device must accept any interference received, including interference that may cause undesired operation. For more information, visit https://reolink.com/fcc-compliance-notice/

Simplified EU Declaration of Conformity
Realink declares that this device is in compliance with the essential requirements and other relevant provisions of Directive 2014/30/EU.

Correct Disposal of this product
This marking indicates that this product cannot be disposed with other household wastes throughout the EU. To prevent possible harm to the environment or human health from uncontrolled waste disposal and promote the sustainable reuse of material resources, please recycle it responsibly. To return your used device, please visit the Return and Collection System or contact the
retailer from whom the product was purchased. They can take this product away for environmentally safe recycling, promote the sustainable reuse of material resources, please recycle it responsibly. To return your used device, please visit the Return and Collection System or contact the retailer from whom the product was purchased. They can take this product away for environmentally safe recycling.
Limited warranty
This product comes with a 2-year limited warranty that is valid only if purchased from Reolink Official Store or a Reolink authorized reseller. Learn more:
https://reolink.com/warranty-and-return/.
NOTE: We hope that you enjoy your new purchase. But if you are not satisfied with the product and plan to return it, we strongly suggest that you format the inserted HDD first.
Terms and Privacy
Use of the product is subject to your agreement to the Terms of Service and Privacy Policy at reolink.com. Keep it out of reach of children.
End User License Agreement
By using the Product Software that is embedded on the Reolink product, you agree to the terms of this End User License Agreement ("EULA") between you and Reolink. Learn more; https://reolink.com/eula/
DE
Überblick
Lieferumfang 15
NVR-Einführung 16
natural_image
Technical line drawing of a mechanical device with cylindrical body and connected cables (no text or symbols)Montageplatte
Metallgehäuse
Spotlight
natural_image
Line drawing of a surveillance camera with multiple cables and a head-mounted lens (no text or symbols)18Del
natural_image
Line drawing of a helmet with a small inset showing internal components (no text or symbols)HINWEIS:
natural_image
Diagram of a network device showing connections between a mouse, switch, router, and antenna (no text or labels)text_image
Diagram showing two computer setups connected via USB cable, with one setup emitting a speech bubble and the other emitting a logo.text_image
DC Power Rack Button Network LANnatural_image
Diagram showing connection between a power outlet and a network switch (no text or symbols present)https://support.reolink.com
Spezifikationen
NVR
https://reolink.com/
natural_image
Line drawing of a realink device with ports and indicator lights (no text or symbols)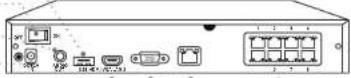
natural_image
Technical line drawing of a mechanical device with cylindrical body and connected cables (no text or symbols)Sommier
Boîtier métallique
Projecteur
natural_image
Line drawing of a surveillance camera with multiple cables and a head-mounted lens (no text or symbols)Micro intégré
Haut-parleur
natural_image
Line drawing of a helmet with a small inset showing internal components (no text or symbols)REMARQUE:
natural_image
Line drawing of a network device with mouse, switch, and WiFi (no text or symbols)text_image
Diagram showing two computer setups connected via USB cable, with one setup emitting a 'VIMON' signal.natural_image
Illustration of a hand connecting an electrical outlet to a network switch (no text or symbols visible)contacter le support Reolink https://support.reolink.com
Spécifications
NVR
-10°C to 55°C (14°F to 131°F)
Pour plus de specifications, visitez https://reolink.com/.
Avis de Conformité
https://reolink.com/warranty-and-return/.
natural_image
Technical line drawing of a mechanical device with cylindrical body and connected cables (no text or symbols)natural_image
Line drawing of a surveillance camera with multiple cables and a head-mounted lens (no text or symbols)natural_image
Line drawing of a helmet with a decorative handle and spout (no text or symbols)AVVISO:
natural_image
Line drawing of a network device with mouse, switch, and router (no text or symbols)text_image
Diagram showing two computer setups connected via USB port, with one setup emitting a device and the other emitting an USB port.text_image
DC Power Rack Button Network LANsnatural_image
Diagram showing connection between a power outlet and a network device (no text or symbols present)https://reolink.com/foc-compliance-notice/

https://reolink.com/warranty-and-return/
AVVISO:
https://reolink.com/eulo/

Índices
natural_image
Line drawing of a realink device with ports and indicator lights (no text or symbols)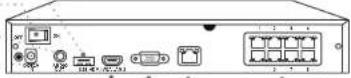
natural_image
Technical line drawing of a mechanical device with cylindrical body, flanged ends, and coiled cable (no text or symbols)Placa de montaje
Caja metálica
Foco
Luces Infrarrojas
Objetivo
Sensor de Luz Solar
Tapa impermeable
Cable de red