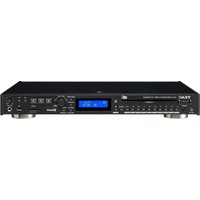
CD-P750DAB - Cd player/recorder TEAC - Free user manual and instructions
Find the device manual for free CD-P750DAB TEAC in PDF.


| Product type | CD player/recorder with DAB/FM tuner and Bluetooth |
| Brand and model | TEAC CD-P750DAB |
| Power supply | AC 100-240 V, 50/60 Hz |
| Power consumption | 20 W |
| Playback media | CD (CD-DA, CD-ROM, CD-R, CD-RW), SD/SDHC cards, USB flash drives |
| Playable audio formats | CD-DA, MP3, WMA, AAC, WAV |
| Built-in tuner | DAB (Band III) and FM (87.5 - 108 MHz) |
| Bluetooth | Version 5.1, Class 1, A2DP and AVRCP profiles, SBC, AAC, aptX, aptX HD codecs |
| Audio outputs | Headphone jack (6.35 mm), LINE OUT (RCA), TUNER OUT (RCA), coaxial and optical digital outputs |
| Auxiliary input | AUX IN jack (3.5 mm stereo mini-jack) |
| Recording function | Copy audio CDs and DAB/FM radio to SD card or USB flash drive in MP3 format |
| Display | Backlit display with brightness adjustment |
| Remote control | Wireless (RC-1336) included, AAA batteries supplied |
| Laser safety | Class 1 laser product, do not open the casing |
| Operating temperature | 5 °C to 35 °C |
| Permissible installation angle | 30° or less |
| Supplied accessories | Power cord, RC-1336 remote control, batteries (AAA x2), FM antenna, RCA cable, instruction manual |
Frequently Asked Questions - CD-P750DAB TEAC
User questions about CD-P750DAB TEAC
0 question about this device. Answer the ones you know or ask your own.
Ask a new question about this device
Download the instructions for your Cd player/recorder in PDF format for free! Find your manual CD-P750DAB - TEAC and take your electronic device back in hand. On this page are published all the documents necessary for the use of your device. CD-P750DAB by TEAC.
USER MANUAL CD-P750DAB TEAC
The lightning flash with arrowhead symbol, within an equilateral triangle, is intended to alert the user to the presence of uninsulated "dangerous voltage" within the product's enclosure that may be of sufficient magnitude to constitute a risk of electric shock to persons.

The exclamation point within an equilateral triangle is intended to alert the user to the presence of important operating and maintenance (servicing) instructions in the literature accompanying the appliance.
WARNING: TO PREVENT FIRE OR SHOCK HAZARD, DO NOT EXPOSE THIS APPLIANCE TO RAIN OR MOISTURE.
CAUTION
- DO NOT REMOVE THE EXTERNAL CASES OR CABINETS TO EXPOSE THE ELECTRONICS. NO USER SERVICEABLE PARTS ARE INSIDE.
- IF YOU ARE EXPERIENCING PROBLEMS WITH THIS PRODUCT, CONTACT THE STORE WHERE YOU PURCHASED THE UNIT FOR A SERVICE REFERRAL. DO NOT USE THE PRODUCT UNTIL IT HAS BEEN REPAIRED.
- USE OF CONTROLS OR ADJUSTMENTS OR PERFORMANCE OF PROCEDURES OTHER THAN THOSE SPECIFIED HEREIN MAY RESULT IN HAZARDOUS RADIATION EXPOSURE.
1) Read these instructions.
2) Keep these instructions.
3) Heed all warnings.
4) Follow all instructions.
5) Do not use this apparatus near water.
6) Clean only with dry cloth.
7) Do not block any ventilation openings. Install in accordance with the manufacturer's instructions.
8) Do not install near any heat sources such as radiators, heat registers, stoves, or other apparatus (including amplifiers) that produce heat.
9) Do not defeat the safety purpose of the polarized or grounding-type plug. A polarized plug has two blades with one wider than the other. A grounding type plug has two blades and a third grounding prong. The wide blade or the third prong are provided for your safety. If the provided plug does not fit into your outlet, consult an electrician for replacement of the obsolete outlet.
10) Protect the power cord from being walked on or pinched particularly at plugs, convenience receptacles, and the point where they exit from the apparatus.
11) Only use attachments/accessories specified by the manufacturer.
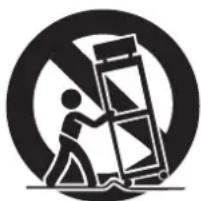
12) Use only with the cart, stand, tripod, bracket, or table specified by the manufacturer, or sold with the apparatus. When a cart is used, use caution when moving the cart/apparatus combination to avoid injury from tip-over.
natural_image
Symbolic icon of a person pushing a large object through a circular frame, with no text or symbols present.13) Unplug this apparatus during lightning storms or when unused for long periods of time.
14) Refer all servicing to qualified service personnel. Servicing is required when the apparatus has been damaged in any way, such as power-supply cord or plug is damaged, liquid has been spilled or objects have fallen into the apparatus, the apparatus has been exposed to rain or moisture, does not operate normally, or has been dropped.
- The apparatus draws nominal non-operating power from the AC outlet with its POWER or STANDBY/ON switch not in the ON position.
- The mains plug is used as the disconnect device; the disconnect device shall remain readily operable.
- Caution should be taken when using earphones or headphones with the product because excessive sound pressure (volume) from earphones or headphones can cause hearing loss.
CAUTION
- Do not expose this apparatus to drips or splashes.
- Do not place any objects filled with liquids, such as vases, on the apparatus.
- Do not install this apparatus in a confined space such as a book case or similar unit.
- The apparatus should be located close enough to the AC outlet so that you can easily reach the power cord plug at any time.
- If the product uses batteries (including a battery pack or installed batteries), they should not be exposed to sunshine, fire or excessive heat.
- CAUTION for products that use replaceable lithium batteries there is danger of explosion if a battery is replaced with an incorrect type of battery. Replace only with the same or equivalent type.
WARNING
Products with Class I construction are equipped with a power supply cord that has a grounding plug. The cord of such a product must be plugged into an AC outlet that has a protective grounding connection.
Precautions concerning batteries
Misuse of batteries could cause them to rupture or leak leading to fire, injury or the staining of nearby things. Please read and observe the following precautions carefully.
- Be sure to insert the batteries with correct positive (⊕) and negative (⊖) orientations.
- Use batteries of the same type. Never use different types of batteries together.
- If the remote control is not used for a long time (more than a month), remove the batteries to prevent them from leaking.
- If the batteries leak, wipe away the leakage inside the battery compartment and replace the batteries with new ones.
- Do not use batteries of types other than those specified. Do not mix new batteries with old ones or use different types of batteries together.
- Do not heat or disassemble batteries. Never throw batteries into fire or water.
- Do not carry or store batteries with other metallic objects. The batteries could short circuit, leak or explode.
- Never recharge a battery unless it is confirmed to be a rechargeable type.
- Do not expose batteries to extremely low air pressure as it could result in an explosion or leakage of flammable liquids or gases.
For European Customers
Disposal of electrical and electronic equipment and batteries and/or accumulators
a) All electrical/electronic equipment and waste batteries/accumulators should be disposed of separately from the municipal waste stream via collection facilities designated by the government or local authorities.
b) By disposing of electrical/electronic equipment and waste batteries/accumulators correctly, you will help save valuable resources and prevent any potential negative effects on human health and the environment.
c) Improper disposal of waste electrical/electronic equipment and batteries/accumulators can have serious effects on the environment and human health because of the presence of hazardous substances in the equipment.
d) The Waste Electrical and Electronic Equipment (WEEE) symbols, which show wheeled bins that have been crossed out, indicate that electrical/electronic equipment and batteries/accumulators must be collected and disposed of separately from household waste.
If a battery or accumulator contains more than the specified values of lead (Pb), mercury (Hg), and/or cadmium (Cd) as defined in the Battery Directive (2006/66/EC, 2013/56/EU), then the chemical symbols for those elements will be indicated beneficial. WEEE symbol.
e) Return and collection systems are available to end users. For more detailed information about the disposal of old electrical/electronic equipment and waste batteries/accumulators, please contact your city office, waste disposal service or the shop where you purchased the equipment.
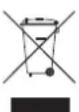

Pb, Hg, Cd
Compliance of radio transmitter and interference
This product has the function of broadband transmitter using 2.4GHz Band.
Use frequency range: 2402 MHz – 2480 MHz
Maximum output power: Bluetooth® Class 1 (less than 10 mW)
Please use only in the country where you purchased the product.
Depending on the country, restrictions on the use of Bluetooth wireless technology might exist.
Model for EEA (European Economic Area)

Hereby, TEAC Corporation declares that the radio equipment type is in compliance with Directive 2014/53/EU., and the other Directives, and Commission Regulations.
Model for UK
Hereby, TEAC CORPORATION declares that the radio equipment type is in compliance with UK Radio Equipment Regulations.

The full text of the EU or UK declaration of conformity is available at the following internet address. Please contact us by e-mail.
https://teacsupport.aqipa.com/
Radiation Exposure requirements
This equipment meets the regulation, which is recognized internationally, for the case of human exposure to radio waves generated by the transmitter.
Statement of compliance
Model for EEA and UK
This equipment complies with EN.62479; Assessment of electronic and electrical equipment related to human exposure restrictions for electromagnetic fields.
Laser information
This product contains a semiconductor laser system inside the cabinet and is classified as a "CLASS 1 LASER PRODUCT".
To prevent being exposed to the laser beam, do not try to open the enclosure.
Optical pickup
Type: EP-C250L
Manufacturer: GUANGDONG EVER BRIGHT GROUP CO.,LTD
Laser output: Less than 0.30 mW on the objective lens
Wavelength: 792 +8 nm/-12 nm
The SDHC logo is a trademark of SD-3C, LLC.

The Bluetooth ^* word mark and logo are the property of Bluetooth SIG, Inc. and are used by TEAC Corporation with permission.
Qualcomm aptX is a product of Qualcomm Technologies, Inc. and/or its subsidiaries.
Qualcomm is a trademark of Qualcomm Incorporated, registered in the United States and other countries. aptX is a trademark of Qualcomm Technologies International, Ltd., registered in the United States and other countries.

Qualcomm® aptX™ HD
MPEG Layer-3 audio coding technology licensed from Fraunhofer IIS and Thomson Licensing.
Supply of this product does not convey a license nor imply any right to distribute MPEG Layer-3 compliant content created with this product in revenue-generating broadcast systems (terrestrial, satellite, cable and/or other distribution channels), streaming applications (via Internet, intranets and/or other networks), other content distribution systems (pay-audio or audio-on-demand applications and the like) or on physical media (compact discs, digital versatile discs, semiconductor chips, hard drives, memory cards and the like). An independent license for such use is required. For details, please visit http://mp3licensing.com.
Other company names, product names and logos in this document are the trademarks or registered trademarks of their respective owners.
Information is given about products in this manual only for the purpose of example and does not indicate any guarantees against infringements of third-party intellectual property rights and other rights related to them. TEAC Corporation will bear no responsibility for infringements on third-party intellectual property rights or their occurrence because of the use of these products.
With the exception of personal enjoyment and similar uses, copyrighted materials belonging to third parties cannot be used without permission from the rights holders in accordance with copyright law. Please use the equipment appropriately.
TEAC Corporation will bear no responsibility for rights infringements committed by users of this product.
IMPORTANT SAFETY INSTRUCTIONS 2
1 - Introduction ...... 6
Features....6
Included accessories 6
Conventions used in this manual 6
Using the TEAC International Site 6
Precautions for placement and use 7
Notes about power supplies....7
Beware of condensation....7
Cleaning the unit....7
About compact discs....7
Precautions for use....7
Slot loading of discs 8
SD cards and USB flash drives....8
Precautions for use....8
SD card write protection 8
Bluetooth® notes 8
Profiles....8
Codecs....8
Content protection....8
Transmission security....8
2 – Names and Functions of Parts....9
Front panel....9
Rear panel....12
Wireless remote control (RC-1336)....13
Home Screen....14
Menu structure....15
Basic Menu screen operations....15
Menu operation procedures....15
3-Preparation 16
Making connections....16
Preparing the remote control....17
Installing batteries....17
When to replace batteries....17
Battery precautions 17
Using the wireless remote control 17
Turning the unit on and off....17
Adjusting the display brightness....17
Inserting and removing discs....18
Inserting discs....18
Ejecting discs 18
Forcing disc ejection 18
Inserting and removing SD cards 18
Inserting SD cards....18
Removing SD cards 18
SD card write protection switches 18
Connecting and disconnecting USB flash drives 19
Connecting USB flash drives....19
Disconnecting USB flash drives....19
Selecting the playback source....19
4 - CD/SD/USB playback .....20
Files that can be played back....20
Tracks and folders on SD cards and USB flash drives.....20
Playback area....21
Setting the playback area....21
Basic playback operations 21
Playing tracks 21
Selecting tracks for playback....21
Skipping to earlier and later tracks....21
Selecting tracks directly 22
Folder playback (SD cards and USB flash drives only) .....22
Playback modes....24
Setting the playback mode....24
Searching backward and forward....24
Using the repeat playback function....25
Ordinary repeat playback settings 25
A-B repeat playback settings (audio CDs only) 25
Program playback (audio CDs only)....26
Preparing the program 26
Checking and editing the program....26
Removing steps from the program 27
Adding steps to the program....27
Clearing the program 27
Using the power-on-play function....28
Using the resume function 28
Time and text information display 29
5 - Bluetooth device playback 30
Pairing 30
Usable controls....30
Playback from a Bluetooth device....30
Unpairing 30
6 - Using DAB tuner....31
Setting up your DAB tuner....31
Listening to DAB Radio 31
Setting the DAB display....31
Using the DAB menu 31
Broadcast station presets....32
Setting radio station presets manually....32
Selecting presets....32
Clearing preset assignments....32
7 - Listening to FM radio....33
Tuning in radio stations....33
Changing the received frequency 33
Setting the FM mode....33
Setting radio station presets 33
Setting radio station presets automatically....33
Setting radio station presets manually....33
Selecting preset stations 34
Clearing preset assignments....34
Setting the tuner broadcast outputs....34
RDS (Radio Data System) 34
PTY search 34
RDS Program type....35
8 - Dubbing (copying) functions....36
Dubbing overview 36
Dubbing procedures 36
Muting analog outputs while dubbing 37
Make dubbing format settings....37
Recording times when dubbing 37
9 – Other functions....38
Setting the automatic power saving function....38
Adjusting the analog output....38
Using the AUX IN jack 38
Checking the firmware version 38
Restoring factory default settings....38
10-Troubleshooting....39
11 – Specifications....40
Ratings....40
Inputs and outputs....40
Analog audio input and output ratings 40
DIGITAL OUT connectors 40
Audio performance 40
Bluetooth function 40
Tuner....41
Other 41
Dimensional drawings....41
Thank you very much for choosing TEAC.
Read this manual carefully to get the best performance from this unit. After reading it, keep it in a safe place for future reference.
Features
- Playback of CDs, SD cards and USB flash drives possible
- CD player supports CD-DA, CD-ROM, CD-R, CD-RW (CD-DA format only), MP3-CD and WMA-CD formats
- MP3, AAC, WAV and WMA files can be played from SD cards and USB flash drives
- Bluetooth® receiver built-in, enabling playback from smart phones and other devices
• DAB/FM tuner built-in - AUX IN jack can be used for playback from mobile audio players and other devices
● Analog outputs include a pair of RCA unbalanced jacks - Recording from audio CDs and the tuner to SD cards and USB flash drives is possible
● Unbalanced RCA connectors dedicated for tuner output - CD/SD/USB direct track searching using number keys or the dedicated remote control
● Power-on-play function can automatically start track playback when the unit is turned on
● Headphone output jack enables audio monitoring - Up to 32 tracks can be added to the program memory
Included accessories
Check to be sure the box contains all the included items shown below. Please contact the store where you purchased this unit if any of these items are missing or have been damaged during transportation.
Power cord × 1
Wireless remote control (RC-1336) × 1
Batteries for remote control (AAA) × 2
FM antenna × 1
RCA cable × 1
Owner's Manual (this document) × 1
- See page 282 for warranty information.
Conventions used in this manual
In this manual, we use the following conventions:
- When we refer to buttons, connectors and other parts of this unit and other equipment, we use a bold font like this: HOME/MENU button.
- When we show characters that appear on the display, the type-face looks like this: Menu.
- SD/SDHC memory cards are called "SD cards".
- The CD-DA format is sometimes called the "audio CD" format. In addition, CDs with tracks recorded in the audio CD format are sometimes called "audio CDs".
- CDs with MP3 and WMA files are called "data CDs".
- The input source that is currently selected is called the "current source".
- The folder that is currently selected is called the "current folder".
- Computers, portable audio devices and other equipment connected to this unit using Bluetooth wireless transmission are called "Bluetooth devices".
- As necessary, additional information is provided under TIP, NOTE and ATTENTION headings.
TIP
These are tips about how to use the unit.
NOTE
These provide additional explanations and describe special cases.
ATTENTION
Failure to follow these instructions could result in injury, damage to equipment or lost recording data, for example.
Using the TEAC International Site
You can download updates for this unit from the TEAC International Site:
Click Language at the top right of the page and select the desired country or region to access a page in the corresponding language.
Precautions for placement and use
- The operating temperature range of this unit is 5–35°C.
- Do not install this unit in the following types of locations. Doing so could make the sound quality worse or cause malfunction.
- Locations with frequent vibrations
● Near windows or other places exposed to direct sunlight
● Near heaters or other extremely hot places - Extremely cold places
● Very humid or poorly ventilated places - Very dusty places
- Install the unit so that it is level.
- To enable good heat dissipation, do not place anything on top of the unit.
- Do not place the unit on top of a power amplifier or other device that generates heat.
- In order to enable good heat dissipation, leave at least 20 cm (8") between this unit and walls and other equipment when installing it. If you put it in a rack, for example, leave at least 5 cm (2") open above and 10 cm (4") open behind it.
Failure to provide these gaps could cause heat to build up inside and result in fire.
Notes about power supplies
- Insert the included power cord all the way into the AC IN connector.
- Do not connect a power supply other than one that is AC 100 V – 240 V (50/60 Hz).
- Hold the power cord by its plug when connecting or disconnecting it.
Beware of condensation
Condensation could occur if the unit is moved from a cold place to a warm place, it is used immediately after a cold room has been heated or it is otherwise exposed to a sudden temperature change. To prevent this, or if this occurs, let the unit sit for one or two hours at the new room temperature before using it.
Cleaning the unit
Use a dry soft cloth to wipe the unit clean. Do not wipe with chemical cleaning cloths, thinner, alcohol or other chemical agents. Doing so could damage the surface or cause discoloration.
About compact discs
In addition to commercially-available music CDs, this unit can play CD-R and CD-RW discs recorded in the audio CD (CD-DA) format as well as CD-R and CD-RW discs that contain MP3 audio files.
ATTENTION
8cm CDs cannot be used. If an 8cm CD is inserted, it will automatically be ejected. During ejection, if it stops at a place where it cannot be removed, press and hold the EJECT (▲) button.
Precautions for use
● Always insert discs with the label facing upward.
- To remove a disc from its case, press down on the center of the disc holder, then lift the disc out, holding it carefully by the edges.
- Do not touch the signal side (the unlabeled side). Fingerprints, oils and other substances can cause errors during playback.
- If fingerprints or dust adhere to the signal recording side of a disc, wipe gently with a soft dry cloth from the center towards the outside edge.
- Dirt on discs can lower the sound quality, so clean them and always store them in a clean state.
- Do not use any record spray, anti-static solutions, benzene, paint thinner or other chemical agents to clean CDs as they could damage the delicate playing surface. It may cause CDs to become unplayable.
- Do not apply labels or other materials to discs. Do not use discs that have had tape, stickers or other materials applied to their surface. Do not use discs that have sticky residue from stickers, etc. Such discs could become stuck in the unit or cause it to malfunction.
- Never use a commercially available CD stabilizer.
- Using stabilizers with this player will damage the mechanism and cause it to malfunction.
- Do not use cracked discs.
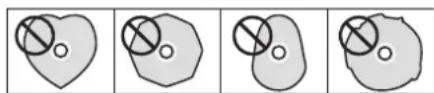
- Only use circular compact discs. Avoid using non-circular promotional, etc. discs.
natural_image
Four abstract diagrams showing heart-shaped and irregular shapes with crossed-out circles, no text or symbols present.- Copy Control CDs have been sold by several record companies in an attempt to protect their copyrights. Since some of these discs do not comply with the CD specifications, they may not be playable on the unit.
Slot loading of discs
natural_image
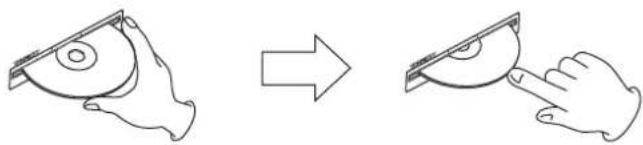
Illustration of a hand holding a CD or DVD disc, before and after viewing the disc (no text or symbols)- As shown in the illustration, hold the disc with the labeled side up and insert it part way into the slot.
- Push the disc in further until just before it disappears. It will automatically be drawn in to the slot.
If a disc will not load properly
If a disc becomes stuck during insertion, for example, and is difficult to push, do not try to force the disc in. Pull the disc out once, press the EJECT (▲) button, and then try inserting it again. (Trying to force the disc in could damage the unit.)
SD cards and USB flash drives
This unit uses SD cards and USB flash drives for recording and playback.
Precautions for use
SD cards and USB flash drives are delicate media.
In order to avoid damaging SD cards and USB flash drives, please take the following precautions when handling them.
- Do not leave them in extremely hot or cold places.
- Do not leave them in extremely humid places.
- Do not let them get wet.
- Do not put things on top of them or twist them.
- Do not hit them.
- Do not remove or insert them during recording, playback, data transmission or other access.
- When transporting them, put them into cases, for example.
SD card write protection
This unit writes track information to the media in order to improve operation performance. Since track information cannot be written to SD cards that are write-protected, the amount of time needed to read media will become longer, for example.
Bluetooth® notes
This unit has a built-in Bluetooth audio receiver, and can output sound played on a computer or portable audio device that supports Bluetooth wireless transmission (Bluetooth device).
ATTENTION
The Bluetooth function of this unit is not guaranteed to enable connection or operation with all Bluetooth devices.
Profiles
This unit supports the following Bluetooth profiles.
● A2DP (Advanced Audio Distribution Profile)
● AVRCP (Audio/Video Remote Control Profile)
In order to transfer audio by Bluetooth wireless technology, the Bluetooth device must support A2DP.
In order to control playback on the Bluetooth device, it must support AVRCP.
Even if a Bluetooth device supports the same profiles, though, its functions might differ according to its specifications.
Codecs
This unit supports the following codecs. It will automatically select one of them during audio transfer.
SBC
• AAC
- Qualcomm® aptX™ audio
- Qualcomm® aptX™ HD audio
The unit will select the appropriate codec to use according to the codec compatibility of the other Bluetooth device and communication conditions.
NOTE
- You cannot select the codec to be used by pressing a button, for example.
- Due to characteristics of Bluetooth wireless technology, playback from a Bluetooth device will be slightly delayed compared to playback from this unit.
Content protection
This unit supports SCMS-T as a form of content protection when transmitting audio, so it can play protected audio.
Transmission security
This unit supports security functions during Bluetooth transmission in accordance with the Bluetooth standard specifications, but it does not guarantee the privacy of such transmissions.
TEAC CORPORATION will bear no responsibility should an information leak occur during Bluetooth wireless transmission.
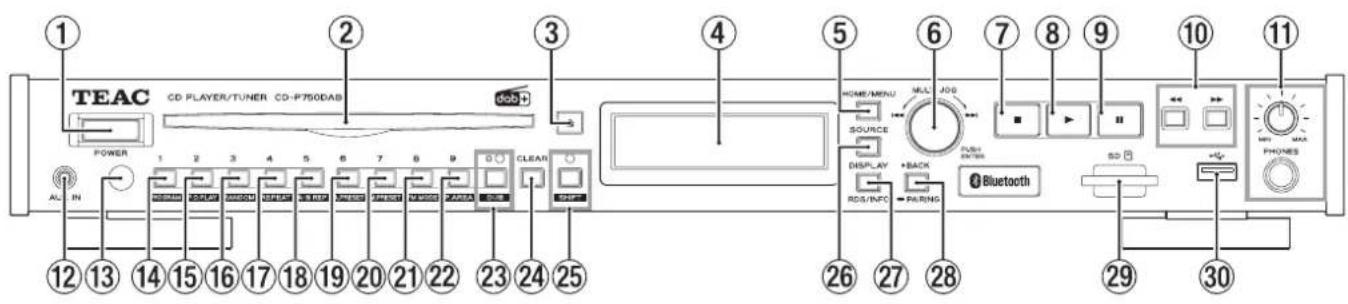
Front panel
EN
① POWER switch
This turns the unit on and off
CAUTION
Before turning the unit on, lower the volumes of connected equipment to their minimum levels.
Failure to do so could result in a sudden loud noise that could harm hearing, for example.
NOTE
Do not turn off the power when the unit is operating (including dubbing, playing back, or writing data to an SD card or USB flash drive). Doing so could cause dubbing to fail or dubbed data to be lost, for example.
② Disc slot
Insert a disc here.
After a disc is inserted partway, the unit will automatically draw it in.
③ EJECT (▲) button
Press to eject a disc. (see "Inserting and removing discs" on page 18)
Press and hold for at least 10 seconds to force-eject a disc. (see "Forcing disc ejection" on page 18)
④ Display
This shows various types of information.
⑤ HOME/MENU button
- When the Home Screen is open, press to open the Menu screen. (see "Menu structure" on page 15) (see "Basic Menu screen operations" on page 15)
- When the Menu screen is open, press this button to return to the Home Screen.
⑥ MULTI JOG dial
This dial functions as a dial when turned and as a button when pressed.
Dial functions
- When the current source is CD, USB or SD and the playback area is set to "All", turn the MULTI JOG dial to skip tracks. (see "Skipping to earlier and later tracks" on page 21)
- When the current source is USB or SD and the playback area is folder (icon shown), turn the MULTI JOG dial to move among tracks and folders. (see "Folder playback (SD cards and USB flash drives only)" on page 22)
- When the current source is FH, turn the MULTI JOG dial to change the received frequency. (see "Tuning in radio stations" on page 33)
- When the input source is DAB, turn the MULTI JOG dial to start automatic station selection. (see "Listening to DAB Radio" on page 31)
- When the current source is DAB/FH and preset mode is enabled, turn the MULTI JOG dial to move to the previous or next preset number. (see "Setting radio station presets" on page 33 and "Broadcast station presets" on page 32)
- When a menu screen is open, turn to select items and change setting values. (see "Basic Menu screen operations" on page 15)
- When pressing and holding SHIFT button, turn the MULTI JOG dial to adjust the display brightness. (see "Adjusting the display brightness" on page 17)
Button function
- When a Menu Screen is open, press to confirm selections and settings (ENTER button function).
⑦ STOP (■) button
- Press to stop playback.
- When the current source is DAB or FN, press to switch between frequency and preset modes. (see "Changing the received frequency" on page 33)
- Press when dubbing to stop. (see "Dubbing procedures" on page 36)
⑧ PLAY (▶) button
Press when stopped or in playback standby to start playback.
⑨ PAUSE (II) button
Press when stopped or playing back to start playback standby.
⑩ ◀◀/▶▶ [FAST] buttons
- Press and hold these buttons to search backward/forward. (see "Searching backward and forward" on page 24)
- If the current source is CD, USB or SD and you are searching backward/forward, press and hold the button for the opposite direction (◀◀ or ▶▶) to search at high-speed. (see "Searching backward and forward" on page 24)
- When the current source is FH, press to automatically search received frequencies for that frequency mode. (see "Changing the received frequency" on page 33)
- When the input source is DAB, press to start automatic station selection.
⑪ PHONES jack/knob
Use this standard stereo jack to connect stereo headphones. Use an adapter to connect headphones with a mini plug. Use the PHONES knob to adjust the headphone output level.
PHONES jack output can be lowered up to -18 dB in 1dB intervals using the A.Out Att. setting screen. (see "Adjusting the analog output" on page 38)
CAUTION
Before connecting headphones, minimize the volume with the PHONES knob. Failure to do so could result in a sudden loud noise that could harm hearing, for example.
⑫ AUX IN jack
This stereo mini jack is an audio line input jack. Connect a portable digital player or other external audio device here. (see "Using the AUX IN jack" on page 38)
CAUTION
- Before connecting another device to the AUX IN jack, minimize the volume of that device. Failure to do so could result in a sudden loud noise that could harm hearing, for example.
- Before connecting or disconnecting with the AUX IN jack, set the current source to something other than AUX (CD or Bluetooth) or turn the unit off.
⑬ Remote control signal receiver
Signals from the wireless remote control (RC-1336) are received here. When operating the remote control, point it toward this receiver.
⑭ 1 [PROGRAM] button
- Press to input track number 1 when the current source is CD, USB or SD and the playback area is set to "All". (see "Selecting tracks directly" on page 22)
- When the current source is DAB or FN, press to tune in a pre-set station.
- When the current source is CD and shift mode is active (SHIFT indicator lit), press this to start program setting mode. Press this to check and edit the program after it has been prepared. (see "Preparing the program" on page 26)
NOTE
- The number buttons on the unit (1 [PROGRAM] - 0 [DUB]) can be used to specify numbers for track selection. For track numbers, a maximum of two digits can be input for audio CDs and three digits for data CDs. (see "Selecting tracks directly" on page 22)
- When in shift mode (SHIFT indicator lit), pressing a number button will change the setting of the function shown in white lettering below the button.
⑮ 2 [P.O.PLAY] button
- Press to input track number 2 when the current source is CD, USB or SD and the playback area is set to "All". (see "Selecting tracks directly" on page 22)
- When the current source is DAB or FN, press to tune in a pre-set station.
- When in shift mode (SHIFT indicator lit), press to turn the power-on-play function on/off. (see "Using the power-on-play function" on page 28)
⑯ 3 [RANDOM] button
- Press to input track number 3 when the current source is CD, USB or SD and the playback area is set to "All" (see "Selecting tracks directly" on page 22)
- When the current source is DAB or FH, press to tune in a pre-set station.
- When the current source is CD, USB or SD, and shift mode is active (SHIFT indicator lit), press to switch between ordinary and random playback modes. (see "Playback modes" on page 24)
⑰4 [REPEAT] button
- Press to input track number 4 when the current source is CD, USB or SD and the playback area is set to "All". (see "Selecting tracks directly" on page 22)
- When the current source is DAB or FN, press to tune in a pre-set station.
- When the current source is CD, USB or SD, and shift mode is active (SHIFT indicator lit), press to cycle through repeat playback modes (ordinary playback, single repeat and all repeat playback modes). (see "Ordinary repeat playback settings" on page 25)
⑱ 5 [A-B REP] button
- Press to input track number 5 when the current source is CD, USB or SD and the playback area is set to "All". (see "Selecting tracks directly" on page 22)
- When the current source is DAB or FH, press to tune in a pre-set station.
- When the current source is CD and shift mode is active (SHIFT indicator lit), press to set the A-B repeat function starting (A) and ending (B) points. (see "A-B repeat playback settings (audio CDs only)" on page 25)
⑲6 [A. PRESET] button
- Press to input track number 6 when the current source is CD, USB or SD and the playback area is set to "All". (see "Selecting tracks directly" on page 22)
- When the current source is DAB or FH, press to tune in a pre-set station.
- When the current source is DAB or FH and shift mode is active (SHIFT indicator lit), press to automatically program the preset stations. (see "Setting radio station presets automatically" on page 33)
⑳7 [M.PRESET] button
- Press to input track number 7 when the current source is CD, USB or SD and the playback area is set to "All". (see "Selecting tracks directly" on page 22)
- When the current source is DAB or FN, press to tune in a pre-set station.
- When the current source is DAB or FH and shift mode is active (SHIFT indicator lit), press to manually program the preset stations. (see "Setting radio station presets manually" on page 33)
⑳ 8 [FM MODE] button
- Press to input track number 8 when the current source is CD, USB or SD and the playback area is set to "All". (see "Selecting tracks directly" on page 22)
- When the current source is DAB or FH, press to tune in a pre-set station.
- When the current source is FM and shift mode is active (SHIFT indicator lit), press to switch between stereo and mono for FM broadcast reception. (see "Setting the FM mode" on page 33)
②2 9 [P.AREA] button
- Press to input track number 9 when the current source is CD, USB or SD and the playback area is set to "All". (see "Selecting tracks directly" on page 22)
- When the current source is DAB or FH, press to tune in a pre-set station.
- When the current source is USB or SD and shift mode is active (SHIFT indicator lit), press to set the playback area. (see "Setting the playback area" on page 21)
②3 0 [DUB] button and indicator
- Press to input track number when the current source is CD, USB or SD and the playback area is set to "All". (see "Selecting tracks directly" on page 22)
- When the current source is DAB or FH, press to tune in a pre-set station.
- When the current source is CD and playback is stopped or the current source is DAB/FH, press with shift mode active (SHIFT indicator lit) to start dubbing (copying) preparation. The indicator lights when the dubbing (copying) function is active. (see "Dubbing procedures" on page 36)
⑳ CLEAR button
- When the current source is CD, USB or SD, press this to clear values input with number buttons.
- Press to close a warning message that has appeared on the Home Screen.
- When the current source is FH, press and hold to clear all preset stations for that source. (see "Clearing preset assignments" on page 34)
⑲ SHIFT button and indicator
Press this button to light the indicator and enable shift mode, which activates the shift functions of other buttons. (These functions are shown below the buttons with white letters on dark blue backgrounds.)
To deactivate the shift mode (SHIFT indicator unlit), press the SHIFT button again.
Using a shift function will deactivate shift mode.
26 SOURCE button
Press to switch the current source. (see "Selecting the playback source" on page 19)
⑳ DISPLAY/RDS/INFO button
- Press during playback to show a variety of information. (see "Time and text information display" on page 29)
- Press when the current source is FN to switch the RDS mode. (see "RDS (Radio Data System)" on page 34)
- When the input source is DAB, press to start automatic station selection.
⑳ BACK [PAIRING] button
- When the Henu screen is open, press to return to the Home Screen.
- When a Menu setting screen is open, press to go up one menu level.
- When the current source is USB or SD and the playback area is folder (Icon shown), press to move up one folder level. (see "Playback area" on page 21)
- When the current source is BLUETOOTH, press and hold to activate Bluetooth pairing mode. When a Bluetooth connection is active (Connected shown), press to disconnect forcefully. (see "Pairing" on page 30)
29 SD card slot
Insert SD cards in these slots. (see "Inserting and removing SD cards" on page 18)
③0 USB port
Connect (and disconnect) USB flash drives here. (see "Connecting and disconnecting USB flash drives" on page 19)
Rear panel

③1 ANTENNA DAB connector
Connect the included FM antenna here.
Extend the antenna and attach it to a window frame, wall or other surface where it provides the best reception.
③2 TUNER OUT jacks
These analog RCA pin output jacks always output the sound from the tuner.
The nominal output level is -10 dBV.
33 DIGITAL OUT connectors
These are digital audio output connectors.
Signals can be output in IEC60958-3 (S/PDIF) format.
COAXIAL: Coaxial digital output (RCA)
OPTICAL: Optical digital output (TOS)
NOTE
When playing back MP3 or WAV files, the sampling frequency of this unit's digital outputs is 44.1 kHz.
③4 LINE OUT jacks
These are analog RCA pin output jacks.
The default nominal output level is -10 dBV (OFF analog output level setting), but it can also be lowered in 1dB increments to -28 dBV (-18dB analog output level setting). (see "Adjusting the analog output" on page 38)
③5 AC IN connector
Connect the included power cord here.
Wireless remote control (RC-1336)
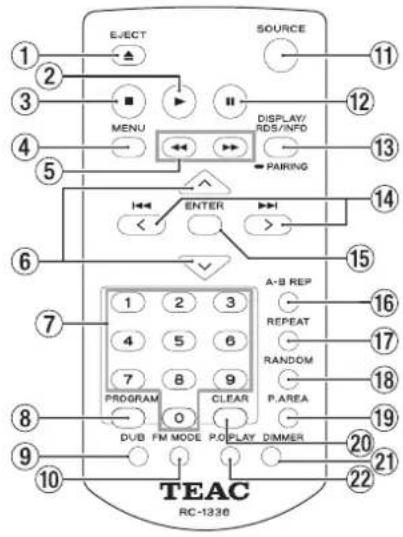
① EJECT (▲) button
This has the same function as the EJECT (▲) button on the main unit. (see "Inserting and removing discs" on page 18)
② ▶ button
This has the same function as the PLAY (▶) button on the main unit.
③ ■ button
This has the same function as the STOP (■) button on the main unit.
④ MENU button
This has the same function as the HOME/MENU button on the main unit.
⑤ ◀◀/▶▶ buttons
- Press and hold these buttons to search backward/forward. (see "Searching backward and forward" on page 24)
- When the current source is DAB or FM, press to automatically search received frequencies for that frequency mode. (see "Changing the received frequency" on page 33)
⑥ ∧/∨ buttons
- When the current source is USB or SD and the playback area is folder (Icon shown), press the ^ button to move up one folder level. (see "Playback area" on page 21)
- When the current source is DAB or FM, press the ∧/∨ button to select a preset station.
- When a Menu setting screen is open, press the ^ button to move up one menu level.
- The √ button has the same function as the remote control ENTER button.
⑦ Number (0–9) buttons
- When the current source is CD, USB or SD and the playback area is set to "All", use the number buttons to select tracks by their track numbers. For track numbers, a maximum of two digits can be input for audio CDs and three digits for data CDs. (see "Selecting tracks directly" on page 22)
- When the current source is DAB or FH, press to tune in a pre-set station.
⑧ PROGRAM button
- When the current source is CD, press this to start program setting mode. Press this to check and edit the program after it has been prepared. (see "Preparing the program" on page 26)
- When the current source is DAB or FM, press to program preset stations manually. (see "Setting radio station presets manually" on page 33)
- When the current source is DAB or FM, press and hold to program preset stations automatically. (see "Setting radio station presets automatically" on page 33)
⑨ DUB button
Press when stopped to start dubbing (copying) preparation. (see "Dubbing procedures" on page 36)
⑩ FM MODE button
When the current source is FH, press to switch between stereo and mono for FM broadcast reception. (see "Setting the FM mode" on page 33)
⑪ SOURCE button
This has the same function as the SOURCE button on the main unit. (see "Selecting the playback source" on page 19)
⑫ II button
This has the same function as the PAUSE (II) button on the main unit.
⑬ DISPLAY/RDS/INFO [PAIRING] button
- Press during playback to show a variety of information. (see "Time and text information display" on page 29)
- When the current source is BLUETOOTH, press and hold to activate Bluetooth pairing mode. Press when pairing to end pairing mode. (see "Pairing" on page 30)
- Press when the current source is FH to switch the RDS mode. (see "RDS (Radio Data System)" on page 34)
- When the input source is DAB, press to start automatic station selection.
⑭ |◀◀/▶▶| [〈/〉] buttons
- When the current source is CD, USB or SD and the playback area is set to "All", press to skip tracks. (see "Skipping to earlier and later tracks" on page 21)
- When the current source is USB or SD and the playback area is folder (Icon shown), press to move between tracks and folders. (see "Playback area" on page 21)
- If the current source is DAB or FN, press to change the frequency received. (see "Tuning in radio stations" on page 33)
- When a menu screen is open, turn to select items and change setting values. (see "Basic Menu screen operations" on page 15)
⑮ ENTER button
When a Menu screen is open, press to confirm selections and settings.
⑯ A-B REP button
When the current source is CD, press to set the A-B repeat function starting (A) and ending (B) points. (see "A-B repeat playback settings (audio CDs only)" on page 25)
⑰ REPEAT button
Press to cycle through repeat playback modes (ordinary playback, single repeat and all repeat playback modes). (see "Ordinary repeat playback settings" on page 25)
18 RANDOM button
Press to switch between ordinary and random playback modes. (see "Playback modes" on page 24)
⑲ P.AREA button
When the current source is USB or SD, press to set the playback area. (see "Setting the playback area" on page 21)
⑳ CLEAR button
This has the same function as the CLEAR button on the main unit.
② DIMMER button
Use to adjust the display brightness. (see "Adjusting the display brightness" on page 17)
⑳ P.O.PLAY button
Press to turn power-on-play on/off. (see "Using the power-on-play function" on page 28)
Home Screen
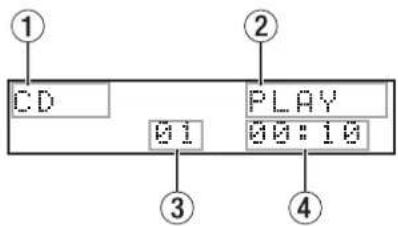
Home Screen when CD/USB/SD selected
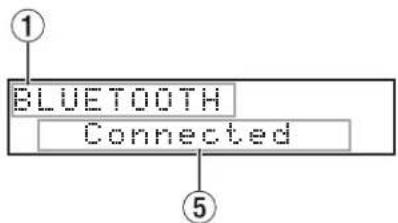
Home Screen when Bluetooth selected
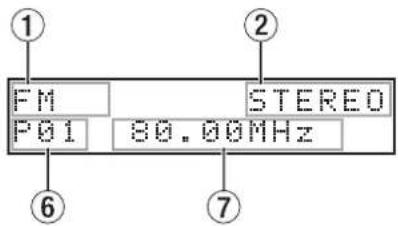
Home Screen when DAB/FM selected
① Current source
This shows the name of the currently selected input source, (see "Selecting the playback source" on page 19)
② Transport status/playback file format
- When the current source is CD, this shows the transport status.
- When the current source is CD, but a data CD is loaded or when the current source is USB/SD, this shows the playback file format.
③ Track number
This shows the number of the currently playing track.
④ Elapsed time from track beginning
This shows the elapsed time from the beginning of the current track (hours: minutes: seconds).
⑤ Connection status
This shows the connection status with other Bluetooth devices and messages.
⑥ Preset number
When the current source is DAB or FM and preset mode is enabled, this shows the preset number.
⑦ Frequency received
If the current source is DAB or FN, this shows the frequency received.
Menu structure
Press the main unit HOME/MENU button or remote control MENU button to open the Menu screen.
The various menu items are as follows.
| Menu item Function Page | ||
| APS Setting | Automatic power saving function setting | see page 38 |
| DUB AutoMute | Dubbing automatic mut-ing function setting | see page 37 |
| A.Out Att. | Analog output attenua-tion function setting | see page 38 |
| Resume Setting | Resume playback function setting | see page 28 |
| Tuner Out Sel. | Tuner broadcast sound output setting | see page 34 |
| Information | Show information | see page 38 |
| Dubbing Format | Dubbing format settings | see page 37 |
| Factory Reset | Restore factory default settings | see page 38 |
NOTE
The settings for all menu items are retained even when the unit is turned off.
Basic Menu screen operations
Operations are conducted on the Menu screen as follows.
Selecting items (moving vertically on a page):
Turn the MULTI JOG dial on the main unit.
Use the ◀◀◀/▶▶▶I [〈/〉] buttons on the remote control.
Confirming a selected item:
Press the MULTI JOG dial on the main unit.
Press the remote control ENTER button.
Opening a submenu from a page:
Press the MULTI JOG dial on the main unit.
Press the remote control ENTER button.
Selecting an item in a submenu:
Turn the MULTI JOG dial on the main unit.
Use the ◀◀/▶▶[〈/〉] buttons on the remote control.
Going back one step in a menu:
Press the main unit BACK [PAIRING] button.
Press the remote control ∧ button.
Returning directly to the Home Screen from a Menu screen:
Press the main unit HOME/MENU button.
Menu operation procedures
This example explains how to set the analog output attenuation function.
- Press the main unit HOME/MENU button or remote control MENU button to open the menu screen.
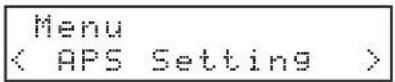
APS Setting menu item shown
- Turn the main unit MULTI JOG dial or use the remote control ◄◀/▶▶I [〈〉] buttons to select the setting item.
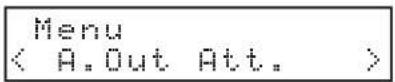
A. Out Att. selected
- Press the main unit MULTI JOG dial or remote control ENTER button to open the various setting screens.
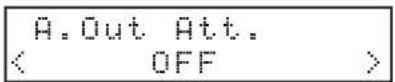
A. Out Att. screen open
-
Turn the main unit MULTI JOG dial or use the remote control ◀◀/▶▶I [〈〉] buttons to change the setting.
-
Press the main unit MULTI JOG dial or remote control ENTER button to confirm the setting and return to the Menu screen.
-
Repeat steps 2 to 5 as necessary to set each item.
-
Press the main unit BACK [PAIRING] button or remote control ∧ button to return to the Home Screen.
Making connections
This is an example of CD-P750DAB connections.
Precautions before making connections
- Carefully read the operation manuals of the devices to be connected and then connect them correctly.
- Before making connections, turn this unit and all equipment to be connected off (standby).
- Install all connected devices, including this unit, so that they are powered from the same line. When using a power strip or similar device, be sure to use one that has high current capacity (thick cable) in order to minimize fluctuations in power voltage.
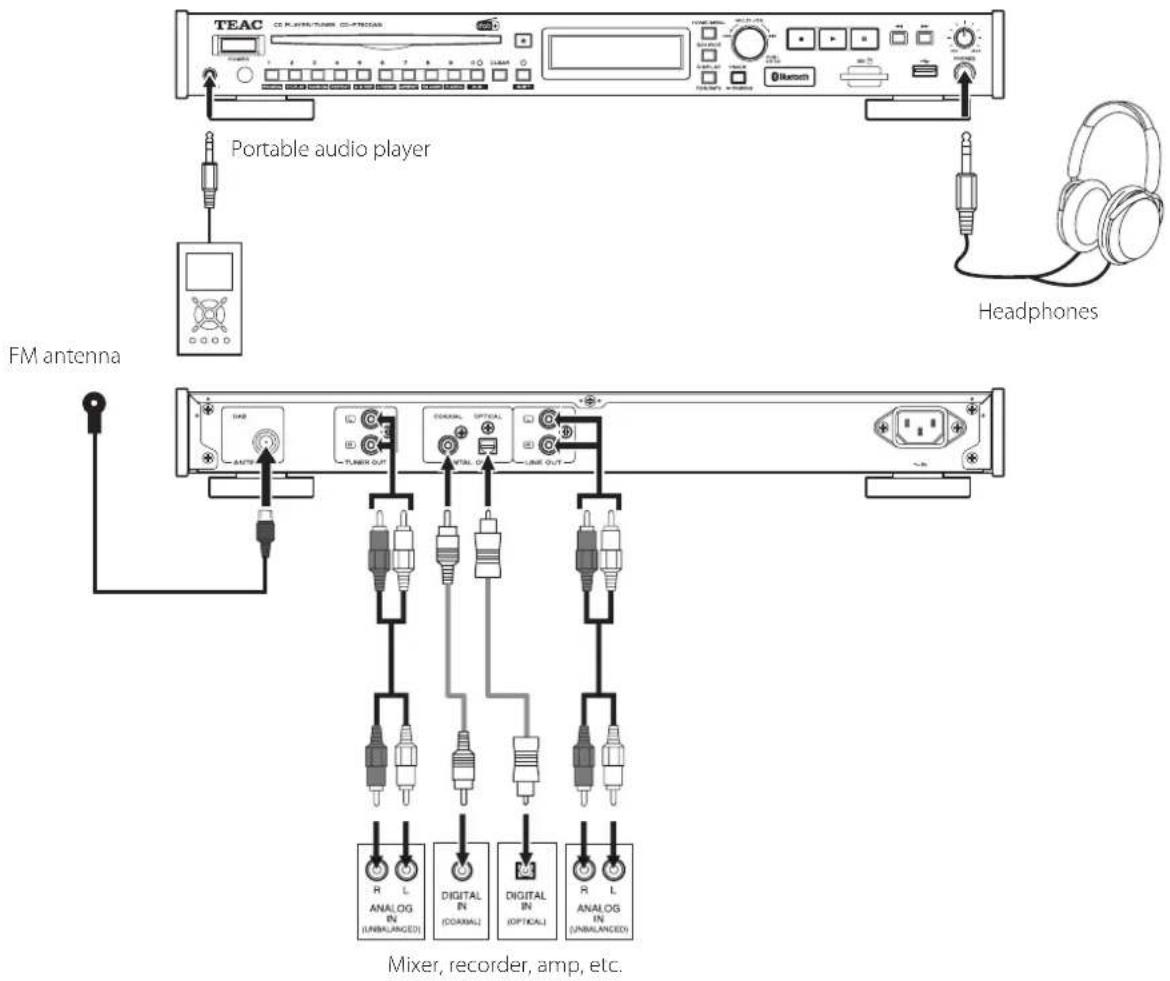
Preparing the remote control
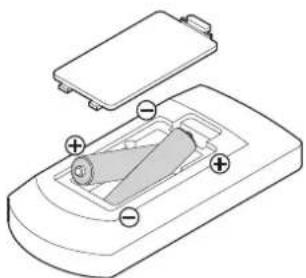
Installing batteries
- Open the cover on the back.
- Insert two AAA batteries, being certain to use the correct and orientations.
- Close the cover.
natural_image
Diagram of a battery pack with an open rear panel and internal components (no text or symbols)When to replace batteries
Replace both batteries with new ones if the distance from the main unit that the remote can be used decreases or if the unit stops responding to the remote buttons.
Battery precautions
Misuse of batteries could cause them to leak or rupture, for example. Carefully read and follow the battery caution labels. (see "Precautions concerning batteries" on page 3)
Using the wireless remote control
See "Wireless remote control (RC-1336)" on page 13 for the button functions.
When using the remote control, point it toward the receiver on the unit and use it within the range shown below.
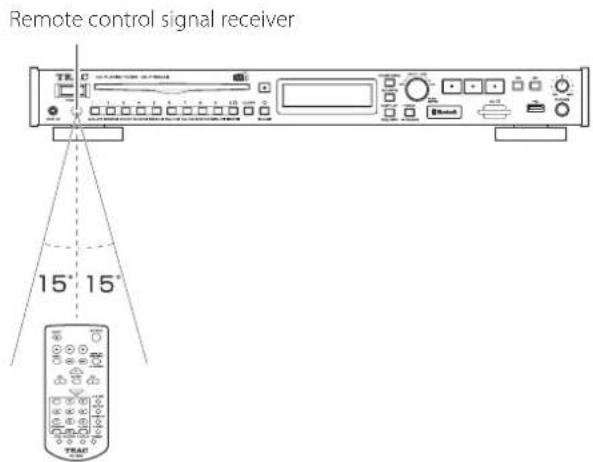
Remote control operation range
From any angle within 15^ of front: 5 m
ATTENTION
• Operation might not be possible if there are obstacles.
- Remove the batteries if not using the remote control for a long time (a month or more).
- If battery fluid should leak, wipe away any fluid inside the case thoroughly and install new batteries.
- When using other devices that can be controlled by infrared rays, operation of this remote control could cause those devices to function improperly.
Turning the unit on and off
Press the POWER switch on the front of the unit.

Home Screen
After the unit starts and the startup screen is shown, the Home Screen will open.
Turning the unit off
No special operations are necessary.
Press the POWER switch to turn the unit off.
CAUTION
Do not turn the power off or disconnect the power cord when the unit is operating (including playing back or writing data to an SD card or USB flash drive). Doing so could cause proper dubbing (copying) to fail, dubbed (copied) data to be lost, and sudden loud noises from monitoring equipment, which might damage the equipment, harm hearing or cause other trouble.
Adjusting the display brightness
Turn the MULTI JOG dial while pressing the SHIFT button or press the remote control DIMMER button to adjust the display brightness.
Main unit operation:
dim ←→ somewhat dim ←→ normal Remote-control operation: normal → somewhat dim → dim → normal, etc.
Inserting and removing discs
Inserting discs
Insert the disc part way with its labeled side up.
Push the disc in further until just before it disappears. It will automatically be drawn in to the slot.
ATTENTION
• Discs cannot be inserted when the power is off.
- If the disc becomes stuck during insertion, for example, and is difficult to push, do not try to force it in. Pull the disc out once and press the EJECT (▲) button. Then, try inserting it again. (Trying to force the disc in could scratch it or damage the unit.)
- If a disc other than a playable CD is inserted or a disc is inserted upside down, the unit will automatically eject it.
- 8cm CDs cannot be used. If an 8cm CD is inserted, it will automatically be ejected.
Ejecting discs
- Press the main unit or remote control EJECT (▲) button.
- When the disc is partially ejected, hold the edge and pull it out.
ATTENTION
When the power is off, the main unit and remote control EJECT (▲) buttons will not function.
Forcing disc ejection
Press and hold the EJECT (▲) button for at least 10 seconds to force the disc to eject. (This will eject discs even when No Disc appears on the Home Screen)
Inserting and removing SD cards
Inserting SD cards
Insert an SD card into the SD card slot on the front of the unit to enable playback and dubbing by this unit.
NOTE
SD cards can be inserted whether or not the unit is on or off.
- Inserted SD cards with the correct orientation.
- The label should be up and the connector should be inserted toward the back.
Removing SD cards
Turn the unit off or stop operation before removing an SD card.
CAUTION
Do not remove an SD card when the unit is operating (including playing back or writing data to the SD card). Doing so could cause proper dubbing to fail, data to be lost, and sudden loud noises from monitoring equipment, which might damage the equipment, harm hearing or cause other trouble.
- Press the SD card in gently to make it to come forward.
- Pull the SD card out by hand.
SD card write protection switches
SD cards have write-protection switches that prevent writing new data to them.
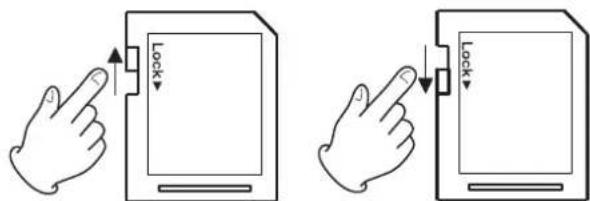
If you slide the write-protection switch to the LOCK position, dubbing will not be possible.
Remove write-protection to use the dubbing (copying) function.
Connecting and disconnecting USB flash drives
Connecting USB flash drives
Connect a USB flash drive to the USB port on the front of the unit to enable playback and dubbing with this unit.
NOTE
You can connect a USB flash drive when the unit is on or off.
Disconnecting USB flash drives
Turn the unit off or stop operation before disconnecting a USB flash drive.
CAUTION
Never disconnect a USB flash drive when the unit is operating (including playing back or writing data to the USB flash drive). Doing so could cause proper dubbing to fail, data to be lost, and sudden loud noises from monitoring equipment, which might damage the equipment, harm hearing or cause other trouble.
Selecting the playback source
Press the main unit or remote control SOURCE button to select the source played back by the main unit.
This changes the current source in the following order.
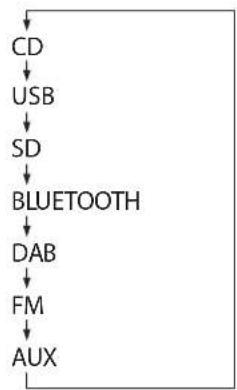
flowchart
graph TD
    A["CD"] --> B["USB"]
    B --> C["SD"]
    C --> D["BLUETOOTH"]
    D --> E["DAB"]
    E --> F["FM"]
    F --> G["AUX"]
Current source switching order
The name of the current source (CD, USB, SD, BLUETOOTH, DAB, FM or AUX) appears in the current source display area on the Home Screen.
NOTE
- When the current source is switched from CD to any other input source, the CD will stop if it is playing back or paused.
In the same way, when switching from an SD card to another medium or from a USB flash drive to another input source, the previous source will stop if playing back or pause. (Bluetooth and AUX will not stop.) - The playback mode setting is not cleared when the current source changes.
This chapter explains playback functions for audio files stored on CDs, SD cards and USB flash drives.
This explanation assumes that you have already loaded a CD, SD card or USB flash drive that contains audio files into the unit, that the unit is on, and that the current source is set appropriately. (see "Selecting the playback source" on page 19)
Files that can be played back
This unit can play back files in the following formats.
Audio CDs
Commercially-available music CDs as well as CD-R and CD-RW discs that have been created in the audio CD format
Data CDs
CD-ROM/R/RW discs with MP3 or WMA files using ISO 9660 (Level 1, Level 2 or Joliet) recording formats can be played back.
SD card/USB flash drive
In addition to files (MP3) dubbed by this unit, this unit can play audio files that have been recorded by other units or written by a computer or other audio device if they use the following formats.
| Files that can be played back F | File extensions |
| AAC .m4a, .M4A | |
| MP3 .mp3, .MP3 | |
| WAV .wav, .WAV | |
| WMA .wma, .WMA |
NOTE
- This unit cannot play CD-R/CD-RW discs that have not been finalized.
- For information about sampling frequencies and bit rates that can be played back, see "Playback file formats" at the end of this manual. (see "Ratings" on page 40)
- This display of this unit can only show half-width (normal) alphabet letters and numbers (single-byte). If a file name uses Japanese, Chinese or other full-width (double-byte) characters, playback is possible but those characters will be replaced with
* on the display.
- MP3 files are recognized by the ".mp3" extension. Always add the ".mp3" extension to file names. This unit cannot play MP3 files without the ".mp3" extension. Furthermore, this unit cannot play files that have the ".mp3" extension if they are not in the MP3 data format.
- WAV files are recognized by the ".wav" extension. Always add the ".wav" extension to file names. This unit cannot play WAV files without the ".wav" extension. Furthermore, this unit cannot play files that have the ".wav" extension if they are not in the WAV data format.
• Media with more than 300 files or 50 folders might not play properly.
- Depending on the condition of the disc, playback might skip or not be possible.
Tracks and folders on SD cards and USB flash drives
This unit handles audio files on SD cards and USB flash drives as "tracks".
Some data CDs, SD cards and USB flash drives store files in folders in the same way that ordinary computer files are handled. Some also store multiple folders within a single folder, creating a multi-level structure.
This unit assigns track numbers to audio files for management. Track numbers are assigned in the following order.
- Playable files in each folder are sorted in Unicode order. Folders, including empty folders and folders that do not contain playable files, are sorted in Unicode order.
- If the root folder contains playable files, those files are assigned numbers first.
- After all playable files in the root folder are assigned numbers, if there are lower-level folders with playable files in them, those files are assigned numbers
- If there are more folders at an even lower level with playable files in them, those files are assigned numbers if there are no folders in the lower level, the unit searches for folders on the same level, and then assigns numbers to the files in those folders.
During ordinary playback of SD cards and USB flash drives, tracks are played in numerical order in the same way as audio CDs.
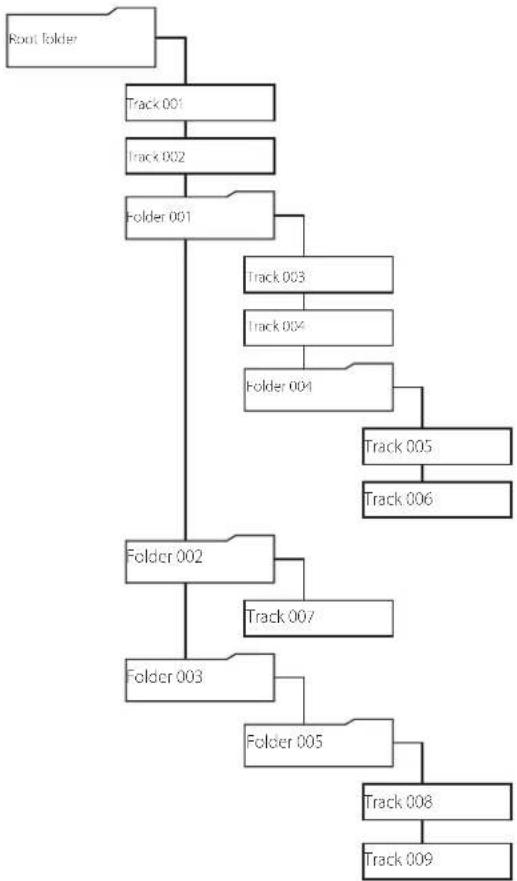
flowchart
graph TD
    A["Root folder"] --> B["Track 001"]
    B --> C["Track 002"]
    C --> D["Folder 001"]
    D --> E["Track 003"]
    E --> F["Track 004"]
    F --> G["Folder 004"]
    G --> H["Track 005"]
    H --> I["Track 006"]
    D --> J["Folder 002"]
    J --> K["Track 007"]
    K --> L["Folder 003"]
    L --> M["Folder 005"]
    M --> N["Track 008"]
    N --> O["Track 009"]
Track and folder structure example
Playback area
The range of tracks that can be selected for playback on the Home Screen is called the "playback area".
When using audio CDs and CD-R/CD-RW discs with MP3 and WMA files, the entire disc is always set as the playback area.
When using SD cards and USB flash drives, you can set folders as the playback area.
Limiting the playback area makes selection of playback tracks easier when you have numerous recorded files on an SD card or USB flash drive.
Setting the playback area
When the current source is USB or SD, press the SHIFT button on the main unit to activate shift mode (SHIFT indicator lit). Then, press the 9 [P. AREA] button to set the playback area. The remote control P. AREA button can also be pressed to set the playback area.
| Playback area | Folder icon Meaning |
| All Not shown Play all the files on the medium. | |
| Folder Shown | |
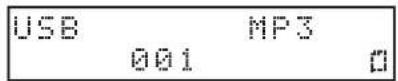
The Licon appears at the right side of the Home Screen when the playback area is folder.
| USB | MP3 | |
| 001 | 0 | |
Basic playback operations
This section explains basic playback operations, including starting, stopping and pausing.
This explanation assumes that you have already made necessary connections, turned the unit on, loaded a medium that contains audio files, selected the current source, and opened the Home Screen on the display.
Playing tracks
Press the main unit PLAY (▶) button or the remote control ▶ button to start playback.
Stopping playback:
Press the main unit STOP (■) button or remote control ■ button.
Pausing playback:
Press the main unit PAUSE (II) button or remote control II button.
Selecting tracks for playback
This is an explanation of how to select tracks if there are multiple tracks when the current source is CD and an audio CD is loaded, as well as when the current source is USB or SD and the playback area is "All".
The two ways to select tracks are moving (skipping) backward/forward by track number and specifying track numbers directly.
NOTE
When the current source is USB or SD and the playback area is folder (Icon shown), the number buttons on the main unit and remote cannot be used to designate tracks.
Skipping to earlier and later tracks
Turn the main unit MULTI JOG dial or use the remote control ◀◀/▶▶I [〈〉] buttons to skip to the previous or next track.
- During track playback, turn the main unit MULTI JOG dial counterclockwise or press the remote control ◀◀◀ [◀] button to return to the track beginning. When already at the beginning of a track, turn the MULTI JOG dial counterclockwise or press the remote control ◀◀◀ [◀] button to skip to the beginning of the previous track.
- When at the beginning or middle of a track, turn the main unit MULTI JOG dial clockwise or press the remote control ▶▶▶ [>] button to skip to the next track.
After selecting a track, press the PLAY (▶) button or remote control ▶ button to start playing it back. Instead of pressing the main unit PLAY (▶) button or remote control ▶ button, press the PAUSE (II) button or remote control II button to pause at the beginning of the selected track.
NOTE
- Only tracks in the current playback area can be played back.
- The track number, file name and other file information for the currently playing file appear on the display.
- Turn the main unit MULTI JOG dial or use the remote control ◄◀/▶▶[</>] buttons as necessary to move between tracks.
Selecting tracks directly
The number buttons on the main unit and the remote control can be used to directly enter track numbers.
For track numbers, a maximum of two digits can be input for audio CDs and three digits for data CDs.
Enter the track number digits in order, starting with the largest.
Playback starts after the track number is input.
Audio CD track number entry
Set with two digits.
Example: for track 9, input 0→9
Data CD/USB/SD track number entry
Set with three digits.
Example 1: for track 105, input 1 → 0 → 5
Example 2: for track 4, input 0 → 0 → 4
- After five seconds pass during track number input, playback of that track number will start.
- Playback can also be started by pressing the main unit PLAY (▶) button or MULTI JOG dial or the remote control ▶ or ENTER buttons.
For example, track 7 can be played in the following ways.
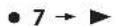


NOTE
- If you input the wrong number, you can press the CLEAR or STOP (■) button to delete the input value.
- The largest number that can be shown for the currently playing track is 999. If the track number exceeds 1000, only the last three digits will be shown.
- In random mode, the number buttons cannot be used to set tracks.
- Track numbers that do not exist cannot be input.
Folder playback (SD cards and USB flash drives only)
When the current source is USB or SD and the playback area is folder (☐icon shown), the selected folder (the current folder) can be set as the playback area.
In the procedure explained below, you can select a track and set the folder that contains that track as the current folder.
- Select USB or SD as the current source. (see "Selecting the play-back source" on page 19)
- Set the playback area to folder (don shown). (see "Setting the playback area" on page 21)
- Turn the main unit MULTI JOG dial or use the remote control ◀◀◀/▶▶▶ [〈〉] buttons to select a track/folder. The top line of the Home Screen shows the file or folder name, and the 📁con starts to blink.
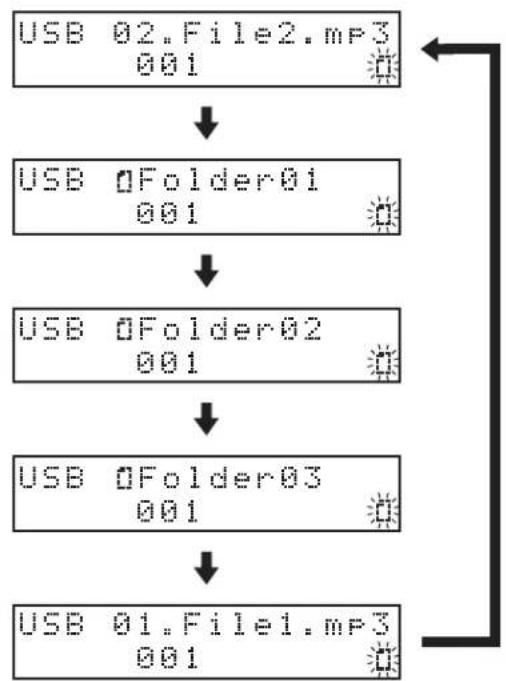
flowchart
graph TD
    A["USB 02.File2.mp3\n001"] --> B["USB 0Folder01\n001"]
    B --> C["USB 0Folder02\n001"]
    C --> D["USB 0Folder03\n001"]
    D --> E["USB 01.File1.mp3\n001"]
NOTE
- To cancel track/folder selection, press the CLEAR button on the main unit or remote control.
- If you select a folder that does not contain any audio files, NO FILE will be shown. At this time, if you turn the main unit MULTI JOG dial or press the ◀◀/▶▶I [</>] buttons, the name of the currently selected file will be shown and movement might become impossible. If this happens, press the CLEAR button on the main unit or remote control to cancel selection. Then, try again.
-
The current folder will change along with movement between folders.
-
When the ☐on is blinking, press the main unit MULTI JOG dial or remote control ENTER button to start playback if a track is selected or to move down one level if a folder is selected.
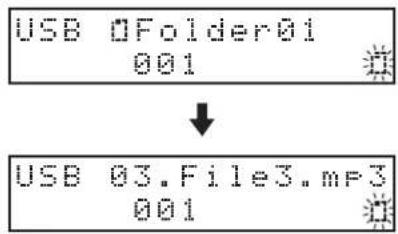
To move up one level, press the main unit BACK [PAIRING] button or remote control ∧ button.
- Turn the main unit MULTI JOG dial or use the remote control ◄◀/▶▶I [〈〉] buttons to select a track/folder.
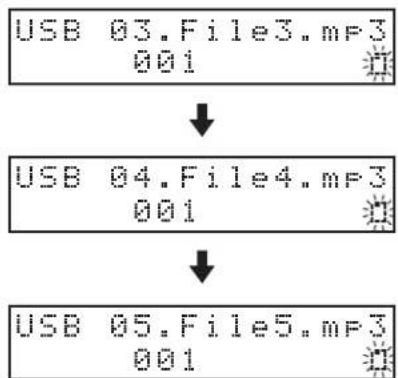
flowchart
graph TD
    A["USB 03.File3.mP3\n001"] --> B["↓"]
    B --> C["USB 04.File4.mP3\n001"]
    C --> D["↓"]
    D --> E["USB 05.File5.mP3\n001"]
- When the icon is blinking, press the main unit MULTI JOG dial or remote control ENTER button to select that track and start playback. The folder that contains the selected track becomes the current folder.
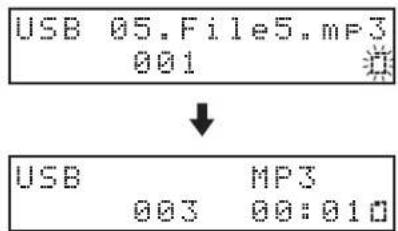
NOTE
- If repeat playback is activated during folder playback, the tracks in the current folder will be played repeatedly.
- If random playback is activated during folder playback, the tracks in the current folder will be played randomly.
Activating skip mode
When the playback area is folder (Icon shown), press and hold the main unit MULTI JOG dial or remote control ENTER button to activate skip mode. An S will appear on the Home Screen.
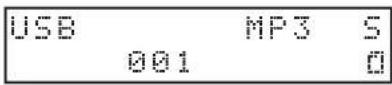
In this mode, turn the main unit MULTI JOG dial or use the remote control ◀◀/▶▶[〈/〉] buttons to skip to earlier and later tracks that are on the same level. Tracks on the same level can also be designated directly. (see "Selecting tracks directly" on page 22)
NOTE
When in skip mode, press and hold the main unit MULTI JOG dial or remote control ENTER button to make S disappear and return to ordinary folder mode.
Playback modes
This unit has two playback modes.
The current playback mode is shown on the Home Screen.
Continuous playback mode (default setting)
Tracks in the playback area will be played in track number order.
NOTE
When using an SD card or USB flash drive and the playback area is folder (icon shown), tracks in the currently playing folder will be played in numerical order.
Random playback mode
All tracks in the playback area will be played in random order regardless of track number.
NOTE
When using an SD card or USB flash drive and the playback area is folder (icon shown), tracks in the current folder will be played in random order. (see "Folder playback (SD cards and USB flash drives only)" on page 22)
Setting the playback mode
Press the main unit SHIFT button to activate shift mode (SHIFT indicator lit), and press the 3 [RANDOM] button to change the playback mode.
The remote control RANDOM button can also be pressed repeatedly to cycle through playback modes.
| Indicator Play back mode | |
| Not shown | Continuous playback mode(Ordinary playback mode) |
| RND | Random playback mode |
| CD | RND | PLAY |
| 01 00:01 |
Random playback mode active
NOTE
- Unless otherwise specified, explanations in this manual assume that the playback mode is set to continuous playback mode.
• The current playback mode appears on the Home Screen.
Searching backward and forward
You can search backward and forward within a track while listening to it.
- Play or pause the desired track.
- Press and hold the main unit ◀◀/▶▶ [FAST] buttons or the remote control ◀◀/▶▶ buttons to start searching backward/forward.
- To stop searching, release the button you are pressing. The state (playing or paused) before searching started will resume.
NOTE
- If the end of a track is reached when searching forward, the unit skips to the next track and starts searching it from the beginning.
- If the end of the last track is reached when searching forward, the unit stops.
- If the beginning of a track is reached when searching backward, the unit skips to the track before it and starts searching it from the end.
- If the beginning of the first track is reached when searching backward, playback pauses, but will resume when the button is released.
- When searching backward/forward by pressing the ◀◀/▶▶ button, press and hold the other ◀◀/▶▶ button for the opposite direction to search at high speed. (This function only works with the main unit buttons.)
Using the repeat playback function
All tracks in the playback area can be played back repeatedly. Specified intervals within a track can also be played back (A-B repeat playback).
Ordinary repeat playback settings
A selected track or all tracks can be played back repeatedly.
Press the main unit SHIFT button to activate shift mode (SHIFT indicator lit), and press the 4 [REPEAT] button to select one of the following repeat modes.
The remote control REPEAT button can also be pressed to cycle through the modes.
Single track repeat ("1REP" shown on the Home Screen)
The selected track will play back repeatedly.
All track repeat ("REP" shown on the Home Screen)
All tracks* will play back repeatedly.
*When playing a folder on a data CD, all tracks in the folder will be repeated. During program playback, all tracks in the program will be repeated.
Off (no indicator)
Playback will not repeat.
Turning off repeat playback
Press the REPEAT button on the main unit or remote control repeatedly until "1REP" and "REP" do not appear on the display.
NOTE
- If repeat playback is enabled during playback, playback will continue as is until everything has been played. Then, playback will continue from the beginning. If it is enabled when playback is stopped, pressing the PLAY (▶) button will start repeat playback.
- The repeat function setting is retained even when the unit is turned off.
A-B repeat playback settings (audio CDs only)
Specified intervals within a track can be played back (A-B repeat playback). Follow the procedures below to use A-B repeat playback.
- Select CD as the current source. (see "Selecting the playback source" on page 19)
- When playing back or when playback is paused at the point where you want the repeat playback interval to start (A), press the main unit SHIFT button to activate shift mode (SHIFT indicator lit) and press the 5 [A-B REP] button. The remote control A-B REP button can also be pressed.
A- appears on the Home Screen.
| CD | A- | PLAY |
| 01 00:10 |
- At the point where you want the repeat playback interval to stop (B), press the main unit SHIFT button to activate shift mode (SHIFT indicator lit) and press the 5 [A-B REP] button. The remote control A-B REP button can also be pressed.
A-B appears on the Home Screen.
This confirms the set interval (A-B) and starts A-B repeat playback.
| CD | A-B | PLAY |
| 01 | 00:22 |
ATTENTION
A-B repeat is not possible with data CDs, SD cards or USB flash drives.
NOTE
- Press the main unit STOP (■) button or remote control ■ button to stop the unit and clear the set A-B repeat interval. Changing the track or the current source will also clear the repeat interval.
- The A-B repeat playback interval cannot include more than one track.
- The A-B repeat setting is not retained when the unit is off or in standby.
Program playback (audio CDs only)
By creating a program in advance, you can play the tracks you want in the order you desire. The program can have a maximum of 32 tracks.
Preparing the program
Prepare the program using the following procedures.
- Program editing and playback functions cannot be turned on when random playback mode is active (RHD shown on display).
- The same track can be added to the program repeatedly.
-
Opening the disc tray will clear the program.
-
When stopped, press the main unit SHIFT button to activate shift mode (SHIFT indicator lit), and press the 1 [PROGRAM] button. The remote control PROGRAM button can also be pressed.
This activates program setting mode. If the program has not been set yet, a track can be assigned to program step "01" ("HEH" and the track number blink).
| CD | STOP | |
| MEM | -- | P-01 |
NOTE
If the program has already been set, the number and playback time of the track assigned to program step "01" will be shown. (see "Checking and editing the program" on page 26)
- Use the numeric keypad or turn the MULTI JOG dial on the main unit or use the remote control ◀◀/▶▶I [〈〉] buttons to select the track to add to program step "01" ("1EH" and the track number blink).
| CD | STOP | |
| MEM | 05 | P-01 |
NOTE
- The Home Screen will reopen if nothing is done for 5 seconds.
- When a track is selected, press the STOP (■) button to cancel track selection and return to the Home Screen.
- Press the main unit MULTI JOG dial or remote control ENTER button.
The selected track will be assigned to program step "81", and the next program step will become ready for assignment.
| CD | STOP | |
| MEM | -- | P-02 |
- Repeat steps 2 and 3 above to add other tracks to the program in order.
- Press the main unit PLAY (▶) button or remote control ▶ to start program playback.
NOTE
- The same track can be added to the program repeatedly.
- A "HEH FULL" error message will appear if you try to add more than 32 tracks. The maximum number of tracks that can be added is 32.
Checking and editing the program
The content of the program can be checked and edited.
Checking the program
- Press the main unit SHIFT button to activate shift mode (SHIFT indicator lit), and press the 1 [PROGRAM] button to activate program setting mode ("HEI" and the track number blink).
The remote control PROGRAM button can also be pressed.
| CD | STOP | |
| MEM | -- | P-04 |
- Repeat the previous step to activate program checking mode ("HEH" and the program step number blink).
| DD | STOP | |
| MEM | -- | P-04 |
Turn the main unit MULTI JOG dial or use the remote control ◄◄◄/►►► [〈〉] buttons to change program step numbers, and check track numbers.
- When finished checking the program, press the main unit PLAY(▶) button or remote control ▶ button to start program playback.
Editing the program
- Press the main unit SHIFT button to activate shift mode (SHIFT indicator lit), and press the 1 [PROGRAM] button to activate program setting mode ("HE1" and the track number blink). The remote control PROGRAM button can also be pressed.
- Repeat the previous step to activate program checking mode ("MEN" and the program step number blink).
- Show the program step number that you want to edit.
- Press the main unit SHIFT button to activate shift mode (SHIFT indicator lit), and press the 1 [PROGRAM] button. The remote control PROGRAM button can also be pressed.
- Turn the main unit MULTI JOG dial or use the remote control ◀◀◀/▶▶▶I [〈〉] buttons to select a track, and press the main unit MULTI JOG dial or remote control ENTER button to assign it.
- To edit multiple program steps, repeat steps 3–5 above.
- When finished editing the program, press the main unit PLAY (▶) button or remote control ▶ button to start program playback.
Removing steps from the program
- Press the main unit SHIFT button to activate shift mode (SHIFT indicator lit), and press the 1 [PROGRAM] button to activate program setting mode ("HEI") and the track number blink). The remote control PROGRAM button can also be pressed.
- Repeat the previous step to activate program checking mode ("HEM" and the program step number blink).
- Turn the main unit MULTI JOG dial or use the remote control I◀◀/▶▶I [</>] buttons to show the program step number to be removed.
- Press the CLEAR button. This removes the content of the selected program step number and shifts the following program step numbers forward.
- To remove multiple program steps, repeats steps 2–4 above.
- When finished removing steps from the program, press the main unit PLAY (▶) button or remote control ▶ button to start program playback.
Adding steps to the program
- Press the main unit SHIFT button to activate shift mode (SHIFT indicator lit), and press the 1 [PROGRAM] button. ("HEI" and the track number blink.) The remote control PROGRAM button can also be pressed.
- Turn the main unit MULTI JOG dial or use the remote control I◀◀/▶▶I [〈〉] buttons to select a track, and press the main unit MULTI JOG dial or remote control ENTER button to assign it.
- Repeat these procedures to add multiple tracks.
- When finished adding tracks to the program, press the main unit PLAY (▶) button or remote control ▶ button to start program playback.
Clearing the program
- Press the main unit SHIFT button to activate shift mode (SHIFT indicator lit), and press the 1 [PROGRAM] button. ("MEN" and the track number blink.) The remote control PROGRAM button can also be pressed.
- Press and hold the main unit or remote control CLEAR button. A "Program clear?" message will appear.
| CD | STOP |
| Program | clear? |
- Press the main unit MULTI JOG dial or remote control ENTER button to clear the program. To cancel program clearing, press the following buttons. Main unit or remote control CLEAR button Main unit STOP (■) or remote control ■ button.
NOTE
Any of the following operations will also clear all the tracks from the program.
- Ejecting the disc
- Turning off or putting the unit into standby
- Switching the source from CD
Using the power-on-play function
By using a commercially-available timer, for example, to turn this unit on, you can make it start playing at a desired time.
- Connect the unit to the timer so that it receives power from the timer power output in advance.
- Select the current source for playback. (see "Selecting the play-back source" on page 19)
- Press the main unit SHIFT button to activate shift mode (SHIFT indicator lit), and press the 2 [P.O.PLAY] to turn on the power-on-play function. (This is off by default.) The remote control P.O.PLAY button can also be pressed.
| PWR On Play On01 00:01 |
- With this unit's POWER switch set to on, turn the power off from the timer, and set the timer to turn on at the desired time. The power will turn on at the desired time, and the unit will automatically start playback.
NOTE
- The P icon appears on the Home Screen when the power-on-play function is on.
| CD | PLAY P | |
| 01 | 00:10 | |
- The power-on-play function on/off setting is retained even when the unit is turned off.
Using the resume function
When the resume playback function is on, playback can restart from the point where it was last stopped (resume point). The following actions will clear the resume point.
• The medium is ejected
• The playback area is changed
- The unit is turned off or put into standby when the playback area is set to folder (icon shown)
- The playback mode is set to random
- The content of the current source is changed (dubbing function used)
Use the menu to turn the resume playback function on/off.
- Select the Resume Setting item on the Menu screen to open the Resume Setting screen. (see "Menu operation procedures" on page 15)
| Resume Setting | |
| < | ON > |
-
Turn the resume playback function on or off. Options: OFF, ON (default)
-
Confirm the setting and return to the menu screen.
NOTE
- If there is no resume point (no time has been set as the resume point), the beginning of the playback track will become the resume point.
- The resume playback function on/off setting is retained even when the unit is turned off.
Time and text information display
When the current source is CD, USB or SD, press the main unit DISPLAY/RDS/INFO button or remote control DISPLAY/RDS/INFO [PAIRING] button to select the time or text information shown on the Home Screen.
Press the main unit DISPLAY/RDS/INFO button or remote control DISPLAY/RDS/INFO [PAIRING] button to cycle through the types of information shown.
The types of information shown change according to the type and status of the media set as the current source as well as the unit operation status.
Audio CDs
When playing back or paused, you can cycle through what is displayed: track elapsed time → track remaining time → total track elapsed time → total track remaining time.
| Indicator Meaning | |
| Not shown Track elapsed time | |
| TRK-R | Track remaining time |
| TOTAL | Total track elapsed time |
| TTL-R | Total track remaining time |
Data CDs, SD cards and USB flash drives
When playing back, paused or stopped, you can cycle through what is displayed: track elapsed time → file name of current track → title of current track → name of current track artist → name of current track album → folder name.
| Indicator Meaning | |
| Not shown Track elapsed time | |
| FILE | File name of current track |
| TITLE | Title of current track |
| ARTIST | Name of current track artist |
| ALBUM | Name of current track album |
| FOLDER | Folder name |
NOTE
- The text information shown on the display is from the ID3/WMA tags for data CDs and from the ID3/WMA/AAC tags for SD cards and USB flash drives.
If this is information is not stored with the disc or file, nothing will appear after TITLE: and ARTIST:.
If characters that cannot be displayed are included in the data, they will be replaced with *.
- The displayed content setting is not retained when the unit is turned off (no indicator will be shown when restarted).
- On SD cards and USB flash drives written by Mac computers, the numbers of tracks in folders and the track numbers might not match. This is an existing problem in Mac system files, but it does not affect playback by this unit.
- "999:59" will continue to be shown if the elapsed track time exceeds this time.
This unit can output sound from a computer, portable audio device or other equipment that supports Bluetooth wireless transmission (A2DP). Moreover, if the Bluetooth device supports AVRCP, the PLAY (▶) button and other controls on this unit can be used to control playback on the Bluetooth device.
Pairing
Follow the procedures below to enable communication with a Bluetooth device.
NOTE
Pairing also requires operation of the Bluetooth device. Refer to the operation manual of the Bluetooth device for procedures.
- Select BLUE TOOTH as the current source, (see "Selecting the playback source" on page 19)
- Press and hold the main unit BACK [PAIRING] button or remote control DISPLAY/RDS/INFO [PAIRING] button. A PAIRING message will blink on the display.
BLUETOOTH PAIRING
- Enable Bluetooth transmission on the other Bluetooth device.
- On the other Bluetooth device, select this device "CDP750_XXXX" ("XXXX" is a unique 4-digit hexadecimal identifier for the unit). When pairing succeeds, this unit and that device will be connected and Connected will appear on the Home Screen.
BLUETOOTH Connected
NOTE
- Some older Bluetooth devices require the input of a passkey. Enter 0000 in such cases.
- Pairing will automatically end if connection is not confirmed within two minutes.
- When this unit is turned on, it will automatically try to connect with the Bluetooth device to which it was previously connected. At this time, pairing will automatically end after five minutes if connection is not possible because that Bluetooth device is not turned on or its Bluetooth function is turned off.
Usable controls
Controls on the main unit and included wireless remote control (RC-1336) can be used to control the connected Bluetooth device if it supports AVRCP.
| Main unit Remote control Function | ||
| PLAY (▶) button ▶ | button | Play |
| PAUSE (■) button ■ | button | Pause |
| STOP (■) button ■ | button | Stop |
| MULTI JOG dial turning | |◀◀/▶▶| [</>] buttons | Selects tracks |
| ◀◀/▶▶ [FAST] buttons | ◀◀/▶▶ buttons | Search backward and forward |
ATTENTION
Operation might not occur properly depending on the connected Bluetooth device.
Playback from a Bluetooth device.
After pairing with the other Bluetooth device in advance, follow the procedures below for playback from it.
- Select BLUETOOTH as the current source. (see "Selecting the playback source" on page 19)
- On the other Bluetooth device, select this device "CDP750_XXXX" ("XXXX" is a unique 4-digit hexadecimal identifier for the unit) to connect them.
Connected appears on the Home Screen when connection completes.
Controls on the main unit and included wireless remote control (RC-1336) can be used to control the connected Bluetooth device, and this unit can output the playback sound from the Bluetooth device.
Unpairing
The Bluetooth device that is currently connected can be unpaired from the unit.
- Select BLUETOOTH as the current source. (see "Selecting the playback source" on page 19)
- Press the main unit BACK [PAIRING] button or remote control DISPLAY/RDS/INFO [PAIRING] button.
A Disconnect? message will appear on the display.
BLUETOOTH Disconnect?
- Press the main unit MULTI JOG dial or remote control ENTER button to unpair the device.
Press the main unit BACK [PAIRING] button or remote control CLEAR button to cancel unpairing.
- After unpairing, the pairing operation will start.
Setting up your DAB tuner
The first time you listen to the DAB radio, it will scan for DAB stations and build a station list.
The unit will scan for broadcast services in the local area and add them to the station list as they are found.
Listening to DAB Radio
- Press the main unit or remote control SOURCE button to select DAB.
When the scanning process has finished, the DLS (Dynamic Label Segment) will appear on the second line of the display.
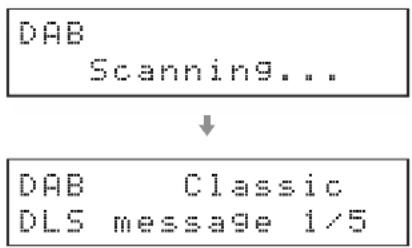
flowchart
graph TD
    A["DAB Scanning..."] --> B["DAB Classic DLS message 1/5"]
- Select the station you want to listen to turning the main unit MULTI JOG dial or using the remote control ◀◀/▶▶I [</>] buttons.
Setting the DAB display
You can change what is shown on the second line of the display while listening to DAB.
Press the main unit DISPLAY/RDS/INFO button or remote control DISPLAY/RDS/INFO [PAIRING] button to cycle through the types of information shown.
DLS message
The Dynamic Label Segment (DLS) is a scrolling text label supplied by the radio station. It may be information about music titles or details regarding the program or station.
Program type
This is a description of the type of music broadcast by the radio station such as Pop, Rock or Classical music.
Ensemble name
This is the name of the ensemble that is broadcasting the program.
Channel and frequency
This is the station and frequency of the currently playing broadcast.
Bit rate
The is the bit rate and sound mode of the broadcast currently being received.
Date and time
This is the current date and time.
Signal strength
Use this to check the signal strength of the current station.
Using the DAB menu
In DAB mode, use the DAB menu to access various functions.
- In DAB mode, press the main unit HOME/MENU button or remote control MENU button.
- Turn the main unit MULTI JOG dial or use the remote control ◄◀/▶▶I [</>] buttons to select the menu item you want, and press the main unit MULTI JOG dial or remote control ENTER button
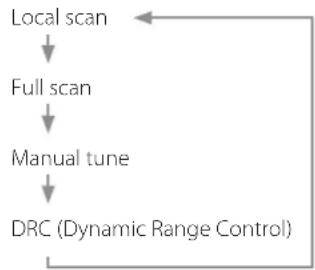
flowchart
graph TD
    A["Local scan"] --> B["Full scan"]
    B --> C["Manual tune"]
    C --> D["DRC (Dynamic Range Control)"]
    D --> A
Local scan
The unit will scan the DAB bands between 10A and 13F and add the stations found to the station list.
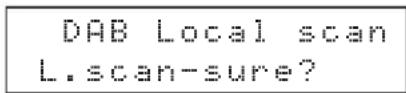
Press the main unit HOME/MENU button or remote control MENU button to start scanning.
DAB Local scan Scanning...
Full scan (auto scan)
The unit will scan the DAB bands between 5A and 13F and add the stations found to the station list.
DAB Full scan Full scan-sure?
Press the main unit HOME/MENU button or remote control MENU button to start scanning.
DAB Full scan Scanning...
Manual tune
This option allows you to manually tune in a station and view the strength of the signal as it changes. This could be useful when adjusting or positioning an antenna for better reception.
DAB Manual Tune 7A 188.928MHz
Turn the main unit MULTI JOG dial or use the remote control ◀◀◀/▶▶▶I [〈〉] buttons to select the desired station, and press the main unit HOME/MENU button or remote control MENU button to show the signal strength of that station.
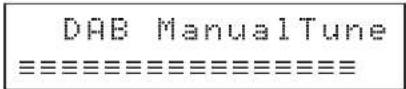
Press the main unit HOME/MENU button or remote control MENU button again to return to the ordinary display.
DRC
Use this option to adjust the amount of Dynamic Range Control (DRC) applied to received broadcasts. DRC is used to reduce the range between high and low volumes of audio and is sometimes applied at the broadcast source. Pop music might have a high value of DRC applied, appropriate for constantly high listening levels, while classical music broadcasts might have no DRC applied to allow the listener to hear the full dynamic range of the source volume.
- You can select one of the three DRC settings: OFF, LOW, HIGH.
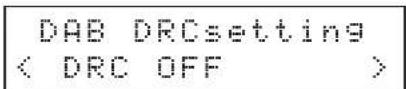
When set to HIGH, the broadcast DRC is applied. Set to LOW, only half the broadcast DRC value is applied. Set to OFF, no DRC is applied.
Broadcast station presets
This unit can have up to 20 DAB station presets.
Setting radio station presets manually
- Select DAB as the current source. (see "Selecting the playback source" on page 19)
- Tune in the station that you want to add as a preset. (see "Changing the received frequency" on page 33)
- Press the main unit SHIFT button to activate shift mode (SHIFT indicator lit), and press the 7 [M.PRESET] button. The remote control PROGRAM button can also be pressed. P01 will blink at the top of the Home Screen.
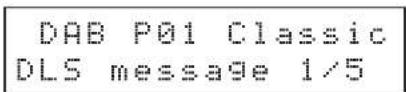
NOTE
• The blinking P01 will disappear after some time passes.
- If appears, the preset already has an assigned frequency.
- Turn the main unit MULTI JOG dial or use the remote control ◄◀◀/▶▶▶I [</>] buttons to select the preset number to assign.
- Press the main unit MULTI JOG dial or remote control ENTER button to confirm the preset.
Selecting presets
- When in preset mode, turn the main unit MULTI JOG dial or use the remote control ∧ and ∨ buttons to select a preset station.
- You can also use the main unit or remote control number buttons to directly enter a preset number, and press the ENTER button to select that station.
NOTE
• There is no automatic preset function.
- Using Local scan or Full scan will erase presets that have already been added.
The first station found using Local scan or Full scan will automatically be added to P01.
- Presets that have not had a station assigned to them will be skipped and cannot be selected.
In the following example, P01, P05, P06 and P08 have stations assigned, while P02-04 and P07 do not.
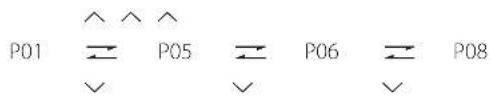
Clearing preset assignments
- Select the current source for the presets to be cleared (DAB). (see "Selecting the playback source" on page 19)
- Press and hold the main unit or remote control CLEAR button. The following message will appear on the Home Screen.
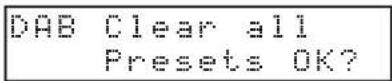
Before clearing DAB station presets
- Press the main unit MULTI JOG dial or remote control ENTER button.
After all preset assignments for the current source have been cleared, the Home Screen reopens.
NOTE
Press the main unit or remote control CLEAR button to cancel the operation and return to the Home Screen.
This unit can be used to listen to FM radio.
The following instructions assume that the current source has been set to FN. (see "Selecting the playback source" on page 19)
Tuning in radio stations
Changing the received frequency
Changing the frequency
Press the main unit STOP (■) or remote control ■ button to switch between frequency selection mode (preset numbers not shown) and preset mode (preset numbers shown).
When in preset mode, PXX appears on the Home Screen.
Raising the received frequency
When in frequency selection mode, turn the main unit MULTI JOG dial clockwise or use the remote control ▶▶▶1 [>] button to raise the received frequency by one step.
When in frequency selection mode, press the main unit ▶▶ [FAST] button or remote control ▶▶ button to automatically search for received frequencies in the higher direction.
Lowering the received frequency
When in frequency selection mode, turn the main unit MULTI JOG dial counterclockwise or use the remote control ◀◀◀ [<] button to lower the received frequency by one step.
When in frequency selection mode, press the main unit ◀◀ [FAST] button or remote control ◀◀ button to automatically search for received frequencies in the lower direction.
Setting the FM mode
Press the main unit SHIFT button to activate shift mode (SHIFT indicator lit) and press the main unit 8 [FM MODE] button, or press the remote control FM MODE button to switch between stereo and mono reception.
| FM | STEREO |
| 80.00MHz |
STEREO (stereo, default)
The unit will receive stereo FM broadcasts in stereo.
- If reception is poor, switch to MONO (mono) reception.
MONO (mono)
The unit will receive FM broadcasts in mono. When the reception of an FM stereo broadcast is poor, select this mode. The sound becomes mono, but noise is also reduced, making it sound better.
NOTE
Mono reception mode will automatically be disabled when the received frequency is changed.
Setting radio station presets
This unit can have up to 20 FM presets.
NOTE
Unless the preset memory is cleared, preset radio stations will be retained even when the unit is turned off. (see "Clearing preset assignments" on page 34)
Setting radio station presets automatically
- Select the current source for the presets (FH). (see "Selecting the playback source" on page 19)
- Press the main unit SHIFT button to activate shift mode (SHIFT indicator lit), and press the 6 [A.PRESET] button. The remote control PROGRAM button can also be pressed and held. The following message will appear on the Home Screen.
| FM |
| A.Preset OK? |
- Press the main unit MULTI JOG dial or remote control ENTER button to start automatically setting presets.
| FMAuto Preset |
The unit will automatically search for radio stations and set them in order, starting with preset 01 (P01). The unit will stop automatically adding presets when 20 have been added or the reception frequency range has been searched completely.
Setting radio station presets manually
- Select the current source for the presets (FH). (see "Selecting the playback source" on page 19)
- Tune in the station that you want to add as a preset. (see "Changing the received frequency" on page 33)
- Press the main unit SHIFT button to activate shift mode (SHIFT indicator lit), and press the 7 [M.PRESET] button. The remote control PROGRAM button can also be pressed. P81 will blink at the top of the Home Screen.
- The blinking P01 will disappear after some time passes.
-
If appears, the preset already has an assigned frequency.
-
Turn the main unit MULTI JOG dial or use the remote control I◄◄/►►I [] buttons to select the preset number to assign.
-
Press the main unit MULTI JOG dial or remote control ENTER button to confirm the preset.
Selecting preset stations
- When in preset mode, turn the main unit MULTI JOG dial or use the remote control ∧ and ∨ buttons to select a preset station.
- You can also use the main unit or remote control number buttons to directly enter a preset number, and press the ENTER button to select that station.
Clearing preset assignments
- Select the current source for the presets to be cleared (FH). (see "Selecting the playback source" on page 19)
- Press and hold the main unit or remote control CLEAR button. The following message will appear on the Home Screen.
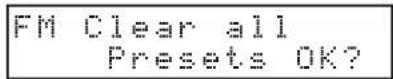
Before clearing FM station presets
- Press the main unit MULTI JOG dial or remote control ENTER button.
After all preset assignments for the current source have been cleared, the Home Screen reopens.
NOTE
Press the main unit or remote control CLEAR button to cancel the operation and return to the Home Screen.
Setting the tuner broadcast outputs
You can set whether tuner broadcast signals are output from the TUNER OUT jacks only or from all the main unit jacks (TUNER OUT, LINE OUT, DIGITAL OUT (COAXIAL, OPTICAL) and PHONES jacks).
- Select the Tuner Out Sel. item on the Menu screen to open the Tuner Out Sel. screen. (see "Menu operation procedures" on page 15)
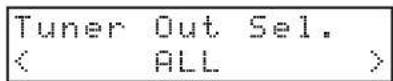
- Set the outputs for sounds from the tuner.
| Option Meaning | |
| Tuner Out | Tuner broadcasts sounds are output only from the TUNER OUT jacks. |
| ALL (default) | Tuner broadcast signals are output from all the main unit jacks (TUNER OUT, LINE OUT, DIGITAL OUT (COAXIAL, OPTICAL) and PHONES jacks). |
- Confirm the setting and return to the Henu screen.
NOTE
The tuner audio output setting is retained even when the unit is turned off.
RDS (Radio Data System)
The Radio Data System (RDS) is a broadcasting service that allows stations to send additional information along with the regular radio program signal.
● RDS works on the FM frequency band in Europe only.
- Tune in to an FM RDS station. (see "Tuning in radio stations" on page 33)
- Press the main unit DISPLAY/RDS/INFO button or remote control DISPLAY/RDS/INFO [PAIRING] button to cycle through the following RDS modes.
Program service (PS)
When you select Program service, PS will appear to the right of FN and then the program service name or station's name will be displayed. If there is no program service data, the frequency will be displayed.
RDS Program type (PTY)
When you select RDS Program type, PTV will appear to the right of FN and then the program type will be displayed.
RDS Radio text (RT)
When you select RDS Radio text, RT will appear to the right of FH and then information from the station consisting of up to 64 characters will be displayed.
PTY search
You can search for stations by program type. This function is available only through the RDS services of FM frequency stations in Europe.
- Press the main unit SHIFT button to activate shift mode (SHIFT indicator lit), and press the 5 [A-B REP] button. The remote control A-B REP button can also be pressed. PTV SEARCH appears on the display.
- Turn the main unit MULTI JOG dial or use the remote control ◄◀/▶▶I [</>] buttons to select the desired program. You can select from 31 program types (PTY).
-
Press the main unit MULTI JOG dial or remote control ENTER button to confirm the selection. The unit starts searching.
-
When the program type that you have selected is found, searching stops and the program type will be displayed.
- If a matching program type is not found during PTY Search, it will stop at the frequency set before searching started.
- To stop searching, press the main unit SHIFT button to activate shift mode (SHIFT indicator lit), and press the 5 [A-B REP] button.
The remote control A-B REP button can also be pressed.
RDS Program type
NEWS:
Brief announcements, events, public opinion, reports and real situations.
AFFAIRS:
Suggestions, including practical announcements other than news, documents, discussion and analysis.
INFO:
Useful and reference information, such as weather forecasts, consumer guides and medical advice.
SPORT:
Sports-related programs.
EDUCATE:
Educational and cultural information.
DRAMA:
All kinds of radio concerts and serial dramas.
CULTURE:
All aspects of national or local culture, including religious events, philosophy, social science, language and theatre.
SCIENCE:
Programs on natural science and technology.
VARIED:
Popular programs such as quizzes, entertainment news, interviews, comedy and satire.
POP M:
Programs of commercial and popular songs, including music sales volumes, etc.
ROCK M:
Modern music generally composed and played by young musicians.
EASY M:
Popular music usually lasting for less than 5 minutes.
LIGHT M:
Classical music, instrumental music, chorus, and light music favored by general audiences.
CLASSICS:
Orchestral music including great operas and symphonies, chamber music and so on.
OTHER M:
Other music styles, including rhythm & blues and reggae.
WEATHER:
Weather reports and forecasts.
FINANCE:
Financial reports, commerce and trading.
CHILDREN:
Children's programs.
SOCIAL:
Social affairs.
RELIGION:
Religious programs.
PHONE IN:
Programs in which the public expresses its views by phone.
TRAVEL:
Travel reports.
LEISURE:
Programs concerning recreational activities.
JAZZ:
Jazz music.
COUNTRY:
Country music.
NATION M:
National music.
OLDIES:
Music from the so-called golden age of popular music.
FOLK M:
Folk music.
DOCUMENT:
Documentaries.
TEST:
Broadcast when testing emergency broadcast equipment or receivers. Not intended for searching or dynamic switching for consumer receivers.
ALARM!:
A program with notifications about emergencies and natural disasters.
Using the dubbing (copying) functions of this unit, the content of audio CDs and DAB/FM broadcasts can be copied to SD cards and USB flash drives. The format used for the files on the dubbing destination can also be changed.
Dubbing overview
Regardless of the playback mode setting, audio CDs are played continuously while being dubbed to SD cards and USB flash drives. This unit can record DAB/FM broadcasts to SD cards and USB flash drives.
Some dubbing operations might delete existing files.
Dubbing never deletes existing files.
NOTE
This unit cannot simultaneously dub to both an SD card and a USB flash drive.
Dubbing file formats
This unit can write the following file formats to the dubbing destination.
- Dubbing from audio CDs MP3 files (96/128/192/320 kbps)
- Dubbing from DAB/FM radio MP3 files (96/128/192 kbps)
For details about setting the MP3 file bit rate, see "Make dubbing format settings" on page 37.
NOTE
When dubbing, a folder named "DUBBING" is created and files named "RECXXX.mp3" are created for each CD track on the destination. ("XXX" are three-digit numbers such as "001".)
Operation when dubbing
Operation is as follows when the unit is dubbing.
- Actions other than dubbing are not possible.
- While dubbing, the audio of the CD being dubbed is output. The DUB AutoMute item can be set to ON to stop output. (see "Muting analog outputs while dubbing" on page 37)
- Playback of SD cards and USB flash drives is not possible while dubbing.
- Regardless of the playback mode setting, audio CDs are played continuously while dubbing.
NOTE
- Depending on the SD card or USB flash drive used while dubbing, errors could occur if writing cannot keep up with audio input.
- When copying from an audio CD, silent gaps will occur even between tracks that sounded continuous on the CD.
- The maximum file size when recording is 2 GB. Dubbing will end when the file size reaches 2 GB.
Dubbing from content on SD cards and USB flash drives
This unit can only dub from CD and DAB/FM radio sources. This unit cannot dub from data CDs, SD cards, USB flash drives, Bluetooth devices or the AUX input.
Dubbing to write-protected media
Can not DUB will appear on the Home Screen and dubbing will not start. Press the CLEAR or STOP (■) button to return to the previous screen.
Dubbing to media that does not have enough open space
Media Full will appear on the Home Screen and dubbing will not start. Press the CLEAR or STOP (■) button to return to the previous screen. Moreover, if the dubbing destination runs out of space during dubbing, Media Full will appear on the Home Screen and dubbing will stop. Press the CLEAR or STOP (■) button to return to the previous screen.
Dubbing procedures
- Load the audio CD or tune in the radio frequency that you want to dub.
- Select the media to copy as the current source (CD, DAB or FM). (see "Selecting the playback source" on page 19)
- When stopped, press the main unit SHIFT button to activate shift mode (SHIFT indicator lit), and press the 0 [DUB] button to activate dubbing mode. The remote control DUB button can also be pressed.
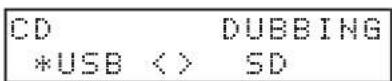
- Turn the main unit MULTI JOG dial or use the remote control ◄◀/▶▶I [</>] buttons to select the dubbing destination (USB or SD).
NOTE
• The Home Screen will reopen if nothing is done for five seconds.
- This unit cannot simultaneously dub to both an SD card and a USB flash drive.
- Press the main unit SHIFT button to activate shift mode (SHIFT indicator lit), and press the main unit 0 [DUB] button to start dubbing. The remote control DUB button can also be pressed.
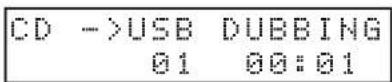
NOTE
- If the dubbing destination medium is write-protected, a Can not DUB message will appear. Press the main unit or remote control CLEAR button to close the message and return to the Home Screen.
- If the dubbing destination medium does not have enough open space, a Media Full message will appear. Press the main unit or remote control CLEAR button to close the message and return to the Home Screen. Moreover, if the dubbing destination runs out of space while dubbing, a Media Full message will appear and dubbing will stop. Press the main unit or remote control CLEAR button to close the message and return to the Home Screen.
- To stop dubbing, press the main unit STOP (■) button or remote control ■ button.
A Complete message will appear, and the Home Screen will reopen.
When the current source is CD, dubbing will automatically stop after the last track on the CD has been copied.
NOTE
- The date and time information for the folders and files created are fixed and might be different from the current date and time depending on the dubbing.
- "999:59" will continue to be shown if the elapsed track time exceeds this time.
Muting analog outputs while dubbing
Output from the LINE OUT jacks can be muted to prevent the dubbed sound from being output to connected equipment while recording (dubbing).
- Select the DUB AutoMute item on the Menu screen to open the DUB AutoMute screen. (see "Menu operation procedures" on page 15)

- Turn the dubbing mute function on/off.
Options: OFF (default), ON
- Confirm the setting and return to the Menu screen.
NOTE
The dubbing mute function on/off setting is retained even when the unit is turned off.
Make dubbing format settings
Set the dubbing format.
- Select the Dubbing Format item on the Menu screen to open the MP3 Bit rate screen. (see "Menu operation procedures" on page 15)
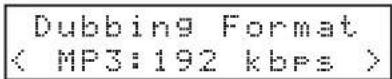
- Set the dubbing format.
Options: 96 kbps, 128 kbps, 192 kbps (default), 320 kbps
- Confirm the setting and return to the Menu screen.
NOTE
- The dubbing format setting is retained even when the unit is turned off.
- When the current source is DAB/FM, the bit rate will automatically be reduced to 192 kbps if the dubbing format setting is 320 kbps.
Recording times when dubbing
The table below shows maximum recording times when dubbing on SD/SDHC cards and USB flash drives of different capacities by file format.
| File format (set when dubbing) | SD/SDHC card or USB flash drive capacity | ||||||
| 4 GB 8 GB 16 | GB 32 GB 64 GB | ||||||
| MP3 (STEREO) | 96kbps | 44.1kHz | 92 hours35 minutes | About 185 hours | About 370 hours | About 740 hours | About 1481 hours |
| 128kbps | 44.1kHz | 69 hours26 minutes | About 138 hours | About 277 hours | About 555 hours | About 1111 hours | |
| 192kbps | 44.1kHz | 46 hours17 minutes | 92 hours35 minutes | About 185 hours | About 370 hours | About 740 hours | |
| 320kbps | 44.1kHz | 27 hours46 minutes | 55 hours33 minutes | About 111 hours | About 222 hours | About 444 hours | |
- The recording times shown above are estimates. They might differ depending on the SD/SDHC card or USB flash drive in use.
- The recording times shown above are not continuous recording times, but rather they are the total possible recording times for the SD/SDHC card or USB flash drive.
Setting the automatic power saving function
When the automatic power saving function is on, the unit will enter standby mode under the following conditions.
- If 30 minutes pass while stopped or paused when the current source is CD, USB or SD.
- If 30 minutes pass without pairing when the current source is BLUETOOTH.
- If 8 hours pass when the current source is AUX, regardless of whether or not there is an input signal.
NOTE
- When the current source is DAB or FM, the unit will not enter standby even if the automatic power saving function is on.
-
In standby mode, the display will become unlit and the DUB and SHIFT indicators will light.
-
Select the APS Setting item on the Menu screen to open the APS Setting screen. (see "Menu operation procedures" on page 15)
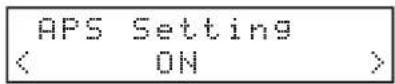
- Turn the automatic power saving function on/off. Options: OFF, ON (default)
- Confirm the setting and return to the menu screen. Press any button other than the POWER switch to end standby mode.
NOTE
Pressing the POWER switch when the unit is in standby mode will turn the unit off.
Adjusting the analog output
If sound distorts from an output destination device at maximum output level, you can use this unit's analog output level function, which lowers the output level, to stop distortion.
- Select the A.Out Att. item on the Menu screen to open the A.Out Att. screen. (see "Menu operation procedures" on page 15)
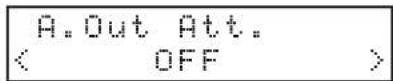
- Set the analog output level. Options: 0FF (default), -1dB to -18dB (in 1dB intervals)
- Confirm the setting and return to the Menu screen.
NOTE
- This adjusts the output level from the LINE OUT and PHONES jacks. They cannot be set independently.
- The analog output level of the input signal from the AUX IN jack cannot be adjusted.
Using the AUX IN jack
The AUX IN jack can be used for playback from portable audio players and other devices.
- Connect the AUX IN jack to a portable audio player or other device.
- Select AUX as the current source. (see "Selecting the playback source" on page 19)
- Press the play button on the connected device to start playback.
Checking the firmware version
You can check the version of the system firmware used by this unit.
- Select the Information item on the Menu screen to open a screen where you can check the firmware version. (see "Menu operation procedures" on page 15)

The firmware version confirmation screen shows information about the system firmware version.
- Press the main unit MULTI JOG dial or remote control ENTER button to return to the menu screen.
Restoring factory default settings
You can restore the various settings stored in the backup memory of the unit to their factory default values. Use the following menu procedures to do so.
- Select the Factory Reset item on the Menu screen. (see "Menu operation procedures" on page 15)
- Press the main unit MULTI JOG dial or remote control ENTER button. A confirmation message will appear.
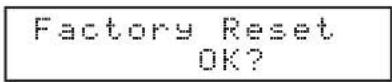
NOTE
To cancel, press the main unit CLEAR button.
- Press the main unit MULTI JOG dial or remote control ENTER button to reset the unit to its factory settings. After it completes, the menu screen will reopen.
If you experience a problem with this unit, please take a moment to review the following information before requesting service. If it still does not operate correctly, contact the retailer where you purchased the unit.
The unit will not turn on.
- Confirm that the power plug and other connectors are inserted completely.
Media are not recognized.
- Confirm that the SD card or USB flash drive is inserted securely.
- Stop playback or recording once.
Playback is not possible.
- If you are trying to play a WAV file, confirm that it uses a sampling frequency (44.1/48 kHz) and a bit depth (16-bit) that are supported by this unit.
- If you are trying to play an MP3 file, confirm that it uses a sampling frequency (44.1/48 kHz) and a bit rate (32–320 kbps or VBR) that are supported by this unit.
CD cannot be played.
- If you are trying to play a data CD that contains MP3 files, confirm that their bit rates are supported by this unit.
- Confirm that the disc is not scratched or dirty.
All the tracks on an SD card or USB flash drive cannot be played back.
- Confirm that it is not in folder playback mode.
No sound is output.
- Check connections with the monitoring system again. Check the volume of the amplifier as well.
There is noise.
- Confirm that the connection cables do not have contact issues.
The remote control (RC-1336) does not function.
- Confirm that a battery is installed and has not died.
Nothing appears on the display or it is dim.
- Confirm that the display brightness setting is not set to dim. (see "Adjusting the display brightness" on page 17)
Sound breaks up or is noisy.
- Are there any wireless LAN devices, other Bluetooth devices, microwave ovens or similar equipment nearby?
Keep such devices as far away as possible during use. - Try reducing the distance between this unit and the other Bluetooth device. Try changing the positions of this unit and the other Bluetooth device.
- The operation of apps other than for music playback on the smartphone could cause the sound to break up. In this case, stop operation of apps other than the one used for music playback.
Cannot connect or communication is interrupted.
- Confirm that the other Bluetooth device power is on and that its Bluetooth function is on.
-
Confirm that the other Bluetooth device is not too far away. Are there walls or other obstacles, for example, between this unit and the other Bluetooth device?
The body of this unit itself could interrupt transmission if the other Bluetooth device is behind it.
Try changing the positions of this unit and the other Bluetooth device. -
Try turning this unit's power off and on again.
- Remove the "CDP750_XXXX" pairing record from the other Bluetooth device, and follow the procedures in "Pairing" on page 30. ("XXXX" is a unique 4-digit hexadecimal identifier number for the unit.)
Cannot pair with another device.
- Confirm that the other Bluetooth device supports A2DP and AVRCP.
- Confirm that the other Bluetooth device is in a state that allows transmission. For details, check the operation manual of that Bluetooth device.
- Turn the power off for both this unit and the other Bluetooth device once, turn them both on again and try pairing them.
- Turn off Bluetooth devices other than the one that you are trying to pair with.
- Remove the "CDP750_XXXX" pairing record from the other Bluetooth device once, and try pairing with that device again. ("XXXX" is a unique 4-digit hexadecimal identifier number for the unit.)
Cannot receive radio or reception is poor.
- Select a broadcast station.
- If reception is poor, try repositioning the antenna.
- If a TV is near the unit, turn the TV off.
- Reception conditions are poor in reinforced concrete buildings, basements and similar locations. Place this unit and its antenna near a window facing outside the building, for example.
Stereo FM broadcasts become mono.
- Confirm that the FM mode is not set to mono reception.
Ratings
Supported media
CD, CD-R* (only CD-DA format), CD-RW (12cm, ISO 9660 LEVEL
1/2/JOLIET (multi-session and CD text not supported)
SD cards* (512 MB - 2 GB)
SDHC cards* (4 GB - 32 GB)
USB flash drives* (512 MB - 64 GB)
* Media must be formatted FAT16/32.
Playback file formats
CD-DA: 44.1 kHz, 16-bit stereo
WAV*: 44.1/48 kHz, 16-bit
(LPCM SD card/USB flash drive)
MP3*: 44.1/48kHz, 32–320 kbps, VBR
(MPEG1/2 Audio Layer-3, data CD/SD card/USB flash drive)
AAC*: 44.1/48 kHz, 8–320 kbps, VBR
(MPEG4 AAC-LC (Audio stream), DRM not supported, SD card/USB flash drive)
WMA*: 44.1/48 kHz, 32–320 kbps, VBR (WMA ver.9 standard, DRM not supported, data CD/SD card/USB flash drive)
* File/folder specifications are as follows.
Maximum file size: 2 GB
Maximum number of files: 300 (including folders)
Maximum number of files in a single folder: 100
Maximum number of folders: 50
Maximum number of folder levels: 16
(The full path, including the file name, must not exceed 260 characters.)
Number of channels
2 channels (stereo)
1 channel (mono)
Dubbing file formats
MP3: 44.1 kHz, 96/128/192/320 kbps
(96/128/192 kbps with tuner)
Maximum file size: 2 GB
Inputs and outputs
Analog audio input and output ratings
AUX IN jack (front panel)
Connector: 3.5mm stereo mini jack
Nominal input level: -20 dBV (0.1 Vrms)
Maximum input level: -4 dBV (0.63 Vrms)
Input impedance: 10 kΩ or higher
LINE OUT jacks
Connectors: RCA pin jacks
Rated output level
-10 dBV (0.316 Vrms, when analog output level setting OFF)
Maximum output level (switchable):
+6 dBV (2.0 Vrms, when analog output level setting OFF)
Output impedance: 200 Ω
TUNER OUTPUT jacks
Connectors: RCA pin jacks
Rated output level: -10 dBV (0.316 Vrms)
Maximum output level: +6 dBV (2.0 Vrms)
Output impedance: 200 Ω
Phones jack
Connector: 6.3mm (1/4") standard stereo jack
Maximum output: 20 mW + 20 mW or higher (THD+N 0.1% or less, into 32 Ω load)
DIGITAL OUT connectors
OPTICAL connector
Connector: optical
Supported signal format: IEC-60958-3 standard for consumers (S/PDIF)
COAXIAL connector
Connector: RCA-pin jack
Supported signal format: IEC-60958-3 standard for consumers (S/PDIF)
Output impedance: 75 Ω
Output level: 0.5 Vpp
Audio performance
Frequency response
20 Hz - 20 kHz: ±1.0 dB
(when 44.1/48kHz sampling frequency, CD/SD/USB playback to Analog outputs, JEITA)
Distortion
0.005% or less
(when CD/SD/USB playback to Analog outputs, JEITA)
S/N ratio
95 dB or higher
(when CD/SD/USB playback to Analog outputs, JEITA)
Dynamic range
90 dB or higher
(when CD/SD/USB playback to Analog outputs, JEITA)
Channel separation
90 dB or higher
(when CD/SD/USB playback to Analog outputs, JEITA)
Bluetooth function
Bluetooth version: 5.1
Output class: 1 (about 10m* unobstructed transmission distance)
Supported profiles: A2DP, AVRCP 1.0
Supported A2DP codecs: SBC, AAC, Qualcomm®aptX™ audio, Qualcomm®aptX™ HD audio
Supported A2DP content protection: SCMS-T
* The transmission distance is only an estimate and might vary depending on the surrounding environment and radio wave conditions.
Tuner
Frequency range
DAB: Band III, 174 MHz - 240 MHz
FM: 87.5 MHz - 108.0 MHz
Antenna connector
Type: F-type (female)
Input: 50 Ω, unbalanced
Other
Power
AC100-240 V, 50/60 Hz
Power consumption
20 W
Dimensions (W × H × D, including protrusions)
446.2×58.8×297.1 mm (17 5/8"×2 3/8"×11 3/4")
Weight
3.6 kg (8 lb)
Operating temperature range
5-35°C (41-95°F)
Permitted installation tilt
30^ or less
Dimensional drawings
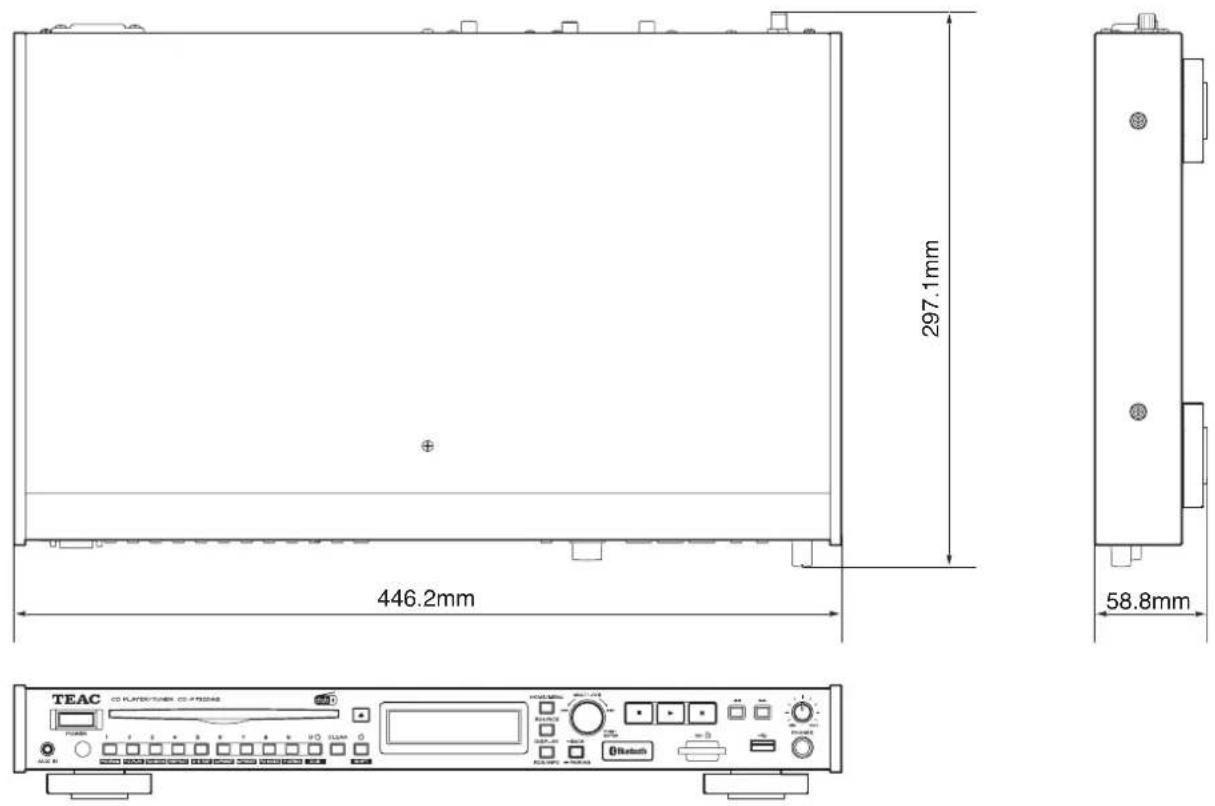
● Illustrations in this manual might differ in part from the actual product.
● Weight and dimensions are approximate.
- Specifications and external appearance might be changed without notification to improve the product.
CAUTION
RISK OF ELECTRIC SHOCK DO NOT OPEN

ATTENTION : POUR RÉDUIRE LE RISQUE D'ÉLECTROCUTION, NE RETIREZ PAS LE CAPOT (OU L'ARRIÈRE). AUCUNE PIÈCE INTERNE N'EST RÉPARABLE PAR L'UTILISATEUR. CONFIEZ TOUTE RÉPARATION À UN SERVICE APRÈS-VENTE QUALIFIÉ.

natural_image
Symbolic icon of a person pushing a ladder under a circular background (no text or symbols)https://teacsupport.aqipa.com/
The SDHC logo is a trademark of SD-3C, LLC.

The Bluetooth® word mark and logo are the property of Bluetooth SIG, Inc. and are used by TEAC Corporation with permission.
Qualcomm aptX is a product of Qualcomm Technologies, Inc. and/or its subsidiaries.
Qualcomm is a trademark of Qualcomm Incorporated, registered in the United States and other countries. aptX is a trademark of Qualcomm Technologies International, Ltd., registered in the United States and other countries.

Qualcomm aptX™ HD
MPEG Layer-3 audio coding technology licensed from Fraunhofer IIS and Thomson Licensing.
Supply of this product does not convey a license nor imply any right to distribute MPEG Layer-3 compliant content created with this product in revenue-generating broadcast systems (terrestrial, satellite, cable and/or other distribution channels), streaming applications (via Internet, intranets and/or other networks), other content distribution systems (pay-audio or audio-on-demand applications and the like) or on physical media (compact discs, digital versatile discs, semiconductor chips, hard drives, memory cards and the like). An independent license for such use is required. For details, please visit http://mp3licensing.com.
Prises DIGITAL OUT 80
Performances audio....80
Fonction Bluetooth....80
Tuner (syntoniseur)....81
Autres....81
natural_image
Four-panel diagram showing a heart-shaped object with two crossed-out circles, each divided into four quadrants (no text or symbols)natural_image
Illustration showing a hand holding a CD to press a disc, with an arrow indicating the process (no text or symbols present)⑱ Touche 5 [A-B REP]
⑳ Touche DISPLAY/RDS/INFO
③3 Prises DIGITAL OUT
① Touche EJECT (▲)
natural_image
Diagram of a battery pack with an open rear panel and internal components (no text or symbols)flowchart
graph TD
    A["USB 02.File2.mp3\n001"] --> B["USB 0Folder01\n001"]
    B --> C["USB 0Folder02\n001"]
    C --> D["USB 0Folder03\n001"]
    D --> E["USB 01.File1.mp3\n001"]
NOTE
flowchart
graph TD
    A["USB 0Folder01\n001"] --> B["USB 03.File3.mF3\n001"]
BLUETOOTH Disconnect?
Channel and frequency
flowchart
graph TD
    A["Local scan"] --> B["Full scan"]
    B --> C["Manual tune"]
    C --> D["DRC (Dynamic Range Control)"]
    D --> A
Local scan
$$ \begin{array}{l} \text {DAB Local scan} \ \text {L.scan - sure?} \end{array} $$
$$ \begin{array}{c} \text {DAB Local scan} \ \text {Scanning...} \end{array} $$
Full scan (auto scan)
$$ \begin{array}{l} \text {DAB Full scan} \ \text {Full scan - sure?} \end{array} $$
$$ \begin{array}{c} \text {DAB Full scan} \ \text {Scanning...} \end{array} $$
Manual tune
| FM Clear allPresets OK? |
Type de programme RDS
NEWS (nouvelles) :
Dimensions (L × H × P) (saillies incluses)
446,2 × 58,8 × 297,1 mm
Poids
3,6 kg
natural_image
Symbolic icon of a person climbing a ladder inside a circle (no text or symbols)https://teacsupport.aqipa.com/
The SDHC logo is a trademark of SD-3C, LLC.

The Bluetooth ^® word mark and logo are the property of Bluetooth SIG, Inc. and are used by TEAC Corporation with permission.
Qualcomm aptX is a product of Qualcomm Technologies, Inc. and/or its subsidiaries.
Qualcomm is a trademark of Qualcomm Incorporated, registered in the United States and other countries. aptX is a trademark of Qualcomm Technologies International, Ltd., registered in the United States and other countries.

Qualcomm® aptX™ HD
MPEG Layer-3 audio coding technology licensed from Fraunhofer IIS and Thomson Licensing.
Supply of this product does not convey a license nor imply any right to distribute MPEG Layer-3 compliant content created with this product in revenue-generating broadcast systems (terrestrial, satellite, cable and/or other distribution channels), streaming applications (via Internet, intranets and/or other networks), other content distribution systems (pay-audio or audio-on-demand applications and the like) or on physical media (compact discs, digital versatile discs, semiconductor chips, hard drives, memory cards and the like). An independent license for such use is required. For details, please visit http://mp3licensing.com.
natural_image
Illustration showing a hand holding a CD to press a disc, with an arrow indicating the process (no text or symbols present)COAXIAL: Salida digital coaxial (RCA)
OPTICAL: Salida digital óptica (TOS)
NOTA
① Botón EJECT (▲)
natural_image
Diagram of a battery pack with an open rear panel and internal components (no text or symbols)Rango operativo del control remoto
flowchart
graph TD
    A["USB 02.File2.mp3\n001"] --> B["USB 0Folder01\n001"]
    B --> C["USB 0Folder02\n001"]
    C --> D["USB 0Folder03\n001"]
    D --> E["USB 01.File1.mp3\n001"]
NOTA
flowchart
graph TD
    A["USB 0Folder01\n001"] --> B["USB 03.File3.mF3\n001"]
BLUETOOTH Disconnect?
flowchart
graph TD
    A["Local scan"] --> B["Full scan"]
    B --> C["Manual tune"]
    C --> D["DRC (Dynamic Range Control)"]
    D --> A
Local scan
$$ \begin{array}{l} \text {DAB Local scan} \ \text {L.scan - sure?} \end{array} $$
$$ \begin{array}{c} \text {DAB Local scan} \ \text {Scanning...} \end{array} $$
Full scan (auto scan)
$$ \begin{array}{l} \text {DAB Full scan} \ \text {Full scan - sure?} \end{array} $$
$$ \begin{array}{l} \text {DAB Full scan} \ \text {Scanning...} \end{array} $$
Manual tune
Conectores DIGITAL OUT
Conector OPTICAL
Conector: óptico
FM: 87,5 MHz a 108,0 MHz
Conector de antena
Tipo: F (hembra)
Entrada: 50 Ω, no balanceada
Otros
Alimentación
CA 100-240 V, 50/60 Hz
Consumo
20 W
Dimensiones (an. × al. × pro. salientes incluidos)
446,2×58,8×297,1 mm
Peso
3,6 kg
natural_image
Symbolic icon of a person lifting a ladder inside a circle (no text or symbols)https://teacsupport.aqipa.com/
The SDHC logo is a trademark of SD-3C, LLC.

The Bluetooth® word mark and logo are the property of Bluetooth SIG, Inc. and are used by TEAC Corporation with permission.
Qualcomm aptX is a product of Qualcomm Technologies, Inc. and/or its subsidiaries.
Qualcomm is a trademark of Qualcomm Incorporated, registered in the United States and other countries. aptX is a trademark of Qualcomm Technologies International, Ltd., registered in the United States and other countries.

Qualcomm aptX™ HD
MPEG Layer-3 audio coding technology licensed from Fraunhofer IIS and Thomson Licensing.
Supply of this product does not convey a license nor imply any right to distribute MPEG Layer-3 compliant content created with this product in revenue-generating broadcast systems (terrestrial, satellite, cable and/or other distribution channels), streaming applications (via Internet, intranets and/or other networks), other content distribution systems (pay-audio or audio-on-demand applications and the like) or on physical media (compact discs, digital versatile discs, semiconductor chips, hard drives, memory cards and the like). An independent license for such use is required. For details, please visit http://mp3licensing.com.
natural_image
Four abstract heart-shaped diagrams with circular symbols, no text or labels presentnatural_image
Illustration showing a hand holding a CD to press a disc, then to press another hand (no text or symbols present)● A2DP (Advanced Audio Distribution Profile)
● AVRCP (Audio/Video Remote Control Profile)
⑳Taste DISPLAY/RDS/INFO
③3 Anschlüsse DIGITAL OUT
③4 Anschlüsse LINE OUT
① Taste EJECT (▲)
natural_image
Diagram of a battery pack with an open rear panel and internal components (no text or symbols)schreibgeschützt
flowchart
graph TD
    A["USB 02.File2.mp3\n001"] --> B["USB 0Folder01\n001"]
    B --> C["USB 0Folder02\n001"]
    C --> D["USB 0Folder03\n001"]
    D --> E["USB 01.File1.mp3\n001"]
Anmerkung
flowchart
graph TD
    A["USB 0Folder01\n001"] --> B["USB 03.File3.mp3\n001"]
| CD | STOP |
| Program | clear? |
| Resume Setting | |
| < | ON > |
BLUETOOTH Disconnect?
flowchart
graph TD
    A["Local scan"] --> B["Full scan"]
    B --> C["Manual tune"]
    C --> D["DRC (Dynamic Range Control)"]
    D --> A
DAB Local scan Scanning...
DAB Full scan Full scan-sure?
DAB Full scan Scanning...
DAB Clear all Presets OK?
MP3*: 44,1 kHz, 48 kHz, 32–320 kbit/s, VBR
AAC*: 44,1 kHz, 48 kHz, 8–320 kbit/s, VBR
natural_image
Symbolic icon of a person climbing a ladder inside a circle (no text or symbols)The SDHC logo is a trademark of SD-3C, LLC.

The Bluetooth® word mark and logo are the property of Bluetooth SIG, Inc. and are used by TEAC Corporation with permission.
Qualcomm aptX is a product of Qualcomm Technologies, Inc. and/or its subsidiaries.
Qualcomm is a trademark of Qualcomm Incorporated, registered in the United States and other countries. aptX is a trademark of Qualcomm Technologies International, Ltd., registered in the United States and other countries.

Qualcomm aptX™ HD
MPEG Layer-3 audio coding technology licensed from Fraunhofer IIS and Thomson Licensing.
Supply of this product does not convey a license nor imply any right to distribute MPEG Layer-3 compliant content created with this product in revenue-generating broadcast systems (terrestrial, satellite, cable and/or other distribution channels), streaming applications (via Internet, intranets and/or other networks), other content distribution systems (pay-audio or audio-on-demand applications and the like) or on physical media (compact discs, digital versatile discs, semiconductor chips, hard drives, memory cards and the like). An independent license for such use is required. For details, please visit http://mp3licensing.com.
natural_image
Four abstract diagrams showing overlapping circles within heart-shaped shapes, no text or symbols presentnatural_image
Illustration showing a hand holding a CD or DVD disc being placed on a screen, with an arrow indicating transformation (no text or symbols present)⑳ Pulsante DISPLAY/RDS/INFO
① Pulsante EJECT (▲)
natural_image
Diagram of a battery pack with an open rear panel and internal components (no text or symbols)Intervallo operativo del telecomando
flowchart
graph TD
    A["USB 02.File2.mp3\n001"] --> B["USB 0Folder01\n001"]
    B --> C["USB 0Folder02\n001"]
    C --> D["USB 0Folder03\n001"]
    D --> E["USB 01.File1.mp3\n001"]
NOTA
flowchart
graph TD
    A["USB 0Folder01\n001"] --> B["USB 03.File3.mp3\n001"]
flowchart
graph TD
    A["USB 03.File3.mF3\n001"] --> B["USB 04.File4.mF3\n001"]
    B --> C["USB 05.File5.mF3\n001"]
| CD | STOP |
| Program | clear? |
BLUETOOTH Disconnect?
DAB Local scan L.scan-sure?
DAB Local scan Scanning...
DAB Full scan Full scan-sure?
DAB Full scan Scanning...
RDS Program type (PTY).
WAV*: 44.1/48kHz, 16 bit
(card LPCM SD/chiavetta USB).
MP3*: 44.1/48kHz, 32–320kbps, VBR
(MPEG1/2 Audio Layer-3, data CD/card SD/chiavetta USB).
AAC*: 44.1/48kHz, 8–320kbps, VBR
(MPEG4 AAC-LC (Audio stream), DRM non supportato, card SD/chiavetta USB).
WMA*: 44.1/48kHz, 32–320kbps, VBR (WMA ver.9 standard, DRM non supportato, data CD/card SD/chiavetta USB).
FM: 87.5 MHz to 108.0 MHz
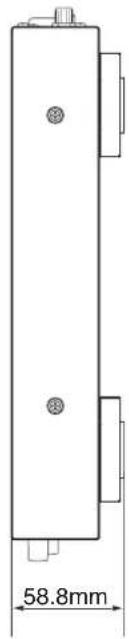

natural_image
Symbolic icon of a person pushing a large object through a circular frame, with no text or symbols present.https://teacsupport.aqipa.com/
The SDHC logo is a trademark of SD-3C, LLC.

The Bluetooth ^® word mark and logo are the property of Bluetooth SIG, Inc. and are used by TEAC Corporation with permission.
Qualcomm aptX is a product of Qualcomm Technologies, Inc. and/or its subsidiaries.
Qualcomm is a trademark of Qualcomm Incorporated, registered in the United States and other countries. aptX is a trademark of Qualcomm Technologies International, Ltd., registered in the United States and other countries.

Qualcomm® aptX™ HD
MPEG Layer-3 audio coding technology licensed from Fraunhofer IIS and Thomson Licensing.
Supply of this product does not convey a license nor imply any right to distribute MPEG Layer-3 compliant content created with this product in revenue-generating broadcast systems (terrestrial, satellite, cable and/or other distribution channels), streaming applications (via Internet, intranets and/or other networks), other content distribution systems (pay-audio or audio-on-demand applications and the like) or on physical media (compact discs, digital versatile discs, semiconductor chips, hard drives, memory cards and the like). An independent license for such use is required. For details, please visit http://mp3licensing.com.
Transmissiebeveiliging 208
natural_image
Four heart-shaped diagrams with cross symbols inside, no text or labels presentnatural_image
Illustration of a hand holding a CD or DVD disc, transforming into a second-hand corner (no text or symbols)Transmissiebeveiliging
⑳ DISPLAY/RDS/INFO-toets
① Toets EJECT (▲)
⑬ DISPLAY/RDS/INFO [PAIRING]-toets
natural_image
Diagram of a battery pack with an open lid and internal components, showing no text or symbolsflowchart
graph TD
    A["USB 02.File2.mp3\n001"] --> B["USB 0Folder01\n001"]
    B --> C["USB 0Folder02\n001"]
    C --> D["USB 0Folder03\n001"]
    D --> E["USB 01.File1.mp3\n001"]
OPMERKING
flowchart
graph TD
    A["USB 0Folder01\n001"] --> B["USB 03.File3.mF3\n001"]
| CD | STOP | |
| MEM | --- | P-04 |
| CD | STOP |
| Program | clear? |
BLUETOOTH Disconnect?
flowchart
graph TD
    A["Local scan"] --> B["Full scan"]
    B --> C["Manual tune"]
    C --> D["DRC (Dynamic Range Control)"]
    D --> A
Local scan
DAB Local scan
L.scan-sure?
DAB Local scan Scanning...
DAB Full scan
Full scan-sure?
DAB Full scan Scanning...
Handmatige afstemming
RDS programmatype (PTY)
WAV*: 44,1/48 kHz, 16-bits
MP3*: 44,1/48 kHz, 32–320 kbit/s, VBR
AAC*: 44,1/48 kHz, 8–320 kbit/s, VBR
20 Hz - 20 kHz ± 1,0 dB
Type: F-type (female)
natural_image
Symbolic icon of a person pushing a large object under a diagonal line (no text or symbols)https://teacsupport.aqipa.com/
The SDHC logo is a trademark of SD-3C, LLC.

The Bluetooth® word mark and logo are the property of Bluetooth SIG, Inc. and are used by TEAC Corporation with permission.
Qualcomm aptX is a product of Qualcomm Technologies, Inc. and/or its subsidiaries.
Qualcomm is a trademark of Qualcomm Incorporated, registered in the United States and other countries. aptX is a trademark of Qualcomm Technologies International, Ltd., registered in the United States and other countries.

Qualcomm aptX™ HD
MPEG Layer-3 audio coding technology licensed from Fraunhofer IIS and Thomson Licensing.
Supply of this product does not convey a license nor imply any right to distribute MPEG Layer-3 compliant content created with this product in revenue-generating broadcast systems (terrestrial, satellite, cable and/or other distribution channels), streaming applications (via Internet, intranets and/or other networks), other content distribution systems (pay-audio or audio-on-demand applications and the like) or on physical media (compact discs, digital versatile discs, semiconductor chips, hard drives, memory cards and the like). An independent license for such use is required. For details, please visit http://mp3licensing.com.
natural_image
Four-panel diagram showing a heart-shaped object with two circles and three cross symbols, arranged horizontally (no text or labels)natural_image
Illustration of a hand holding a CD or DVD disc, before and after viewing the disc (no text or symbols)⑳ DISPLAY/RDS/INFO-knapp
① EJECT-knapp (△)
natural_image
Diagram of a battery pack with an open rear panel and internal components (no text or symbols)flowchart
graph TD
    A["USB 02.File2.mp3\n001"] --> B["USB 0Folder01\n001"]
    B --> C["USB 0Folder02\n001"]
    C --> D["USB 0Folder03\n001"]
    D --> E["USB 01.File1.mp3\n001"]
ANMÄRKNING
flowchart
graph TD
    A["USB 0Folder01\n001"] --> B["USB 03.File3.mp3\n001"]
| CD | STOP |
| Program | clear? |
BLUETOOTH Disconnect?
flowchart
graph TD
    A["Local scan"] --> B["Full scan"]
    B --> C["Manual tune"]
    C --> D["DRC (Dynamic Range Control)"]
    D --> A
Local scan
DAB Local scan
L.scan-sure?
DAB Local scan Scanning...
Full scan (automatisk skanning)
DAB Full scan
Full scan-sure?
DAB Full scan Scanning...
Manual tune
STEREO (Stereo, standard)
USB-flashminnen* (512 MB - 64 GB)
WAV*: 44,1/48 kHz, 16-bit
(LPCM SD-kort/USB-minne)
MP3*: 44,1/48 kHz, 32–320 kbps, VBR
(MPEG1/2 Audio Layer-3, data CD/SD-kort/USB-minne)
AAC*: 44,1/48 kHz, 8–320 kbit/s, VBR
(MPEG4 AAC-LC (Ljudström), DRM stöds inte, SD-kort/USB-minne)
WMA*: 44,1/48 kHz, 32–320 kbit/s, VBR (WMA v9 standard, DRM stöds inte, data CD/SD-kort/USB-minne)
AUX IN-uttag (frontpanel)
Kontakt: 3,5 mm stereo minijack
Maximal utnivå: +6 dBV (2,0 Vrms)
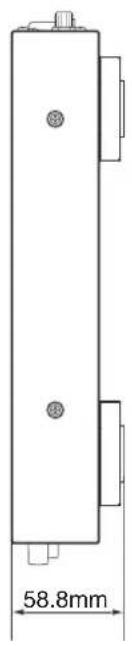

This product is subject to the legal warranty regulations of the country of purchase. In case of a defect or a problem, please contact the dealer where you bought the product.
In countries/regions other than the USA, Canada and Europe
This warranty gives you specific legal rights, and you may also have other rights that vary by country, state or province. If you have a warranty claim or request, please contact the dealer where you bought the product.
This product has a serial number located on the rear panel. Please write it here and retain this for your records.
Model name: CD-P750 DAB Serial number:

- CAUTION
- WARNING
- Precautions concerning batteries
- For European Customers
- Disposal of electrical and electronic equipment and batteries and/or accumulators
- Compliance of radio transmitter and interference
- Model for EEA (European Economic Area)
- Model for UK
- Radiation Exposure requirements
- Statement of compliance
- Model for EEA and UK
- Laser information
- Optical pickup
- Qualcomm® aptX™ HD
- IMPORTANT SAFETY INSTRUCTIONS 2
- - Introduction ...... 6
- – Names and Functions of Parts....9
- 3-Preparation 16
- - CD/SD/USB playback .....20
- - Bluetooth device playback 30
- - Using DAB tuner....31
- - Listening to FM radio....33
- - Dubbing (copying) functions....36
- – Other functions....38
- 10-Troubleshooting....39
- – Specifications....40
- Features
- Included accessories
- Conventions used in this manual
- TIP
- NOTE
- ATTENTION
- Using the TEAC International Site
- Precautions for placement and use
- Notes about power supplies
- Beware of condensation
- Cleaning the unit
- About compact discs
- Precautions for use
- Slot loading of discs
- If a disc will not load properly
- SD cards and USB flash drives
- SD card write protection
- Bluetooth® notes
- Profiles
- Codecs
- Content protection
- Transmission security
- Front panel
- ① POWER switch
- ② Disc slot
- ③ EJECT (▲) button
- ④ Display
- ⑤ HOME/MENU button
- ⑥ MULTI JOG dial
- Dial functions
- Button function
- ⑦ STOP (■) button
- ⑧ PLAY (▶) button
- ⑨ PAUSE (II) button
- ⑩ ◀◀/▶▶ [FAST] buttons
- ⑪ PHONES jack/knob
- ⑫ AUX IN jack
- ⑬ Remote control signal receiver
- ⑭ 1 [PROGRAM] button
- ⑮ 2 [P.O.PLAY] button
- ⑯ 3 [RANDOM] button
- ⑰4 [REPEAT] button
- ⑱ 5 [A-B REP] button
- ⑲6 [A. PRESET] button
- ⑳7 [M.PRESET] button
- ⑳ 8 [FM MODE] button
- ②2 9 [P.AREA] button
- ②3 0 [DUB] button and indicator
- ⑳ CLEAR button
- ⑲ SHIFT button and indicator
- SOURCE button
- ⑳ DISPLAY/RDS/INFO button
- ⑳ BACK [PAIRING] button
- SD card slot
- ③0 USB port
- Rear panel
- ③1 ANTENNA DAB connector
- ③2 TUNER OUT jacks
- DIGITAL OUT connectors
- ③4 LINE OUT jacks
- ③5 AC IN connector
- Wireless remote control (RC-1336)
- ① EJECT (▲) button
- ② ▶ button
- ③ ■ button
- ④ MENU button
- ⑤ ◀◀/▶▶ buttons
- ⑥ ∧/∨ buttons
- ⑦ Number (0–9) buttons
- ⑧ PROGRAM button
- ⑨ DUB button
- ⑩ FM MODE button
- ⑪ SOURCE button
- ⑫ II button
- ⑬ DISPLAY/RDS/INFO [PAIRING] button
- ⑭ |◀◀/▶▶| [〈/〉] buttons
- ⑮ ENTER button
- ⑯ A-B REP button
- ⑰ REPEAT button
- RANDOM button
- ⑲ P.AREA button
- ② DIMMER button
- ⑳ P.O.PLAY button
- ① Current source
- ② Transport status/playback file format
- ③ Track number
- ④ Elapsed time from track beginning
- ⑤ Connection status
- ⑥ Preset number
- ⑦ Frequency received
- Menu structure
- Basic Menu screen operations
- Selecting items (moving vertically on a page):
- Confirming a selected item:
- Opening a submenu from a page:
- Selecting an item in a submenu:
- Going back one step in a menu:
- Returning directly to the Home Screen from a Menu screen:
- Menu operation procedures
- Making connections
- Precautions before making connections
- Preparing the remote control
- Installing batteries
- When to replace batteries
- Battery precautions
- Using the wireless remote control
- Remote control operation range
- Turning the unit on and off
- Turning the unit off
- Adjusting the display brightness
- Inserting and removing discs
- Inserting discs
- Ejecting discs
- Forcing disc ejection
- Inserting and removing SD cards
- Inserting SD cards
- Removing SD cards
- SD card write protection switches
- Connecting and disconnecting USB flash drives
- Connecting USB flash drives
- Disconnecting USB flash drives
- Selecting the playback source
- Files that can be played back
- Audio CDs
- Data CDs
- SD card/USB flash drive
- Tracks and folders on SD cards and USB flash drives
- Playback area
- Setting the playback area
- Basic playback operations
- Playing tracks
- Stopping playback:
- Pausing playback:
- Selecting tracks for playback
- Skipping to earlier and later tracks
- Selecting tracks directly
- Audio CD track number entry
- Data CD/USB/SD track number entry
- Folder playback (SD cards and USB flash drives only)
- Activating skip mode
- Playback modes
- Continuous playback mode (default setting)
- Random playback mode
- Setting the playback mode
- Searching backward and forward
- Using the repeat playback function
- Ordinary repeat playback settings
- Single track repeat ("1REP" shown on the Home Screen)
- All track repeat ("REP" shown on the Home Screen)
- Off (no indicator)
- Turning off repeat playback
- A-B repeat playback settings (audio CDs only)
- Program playback (audio CDs only)
- Preparing the program
- Checking and editing the program
- Checking the program
- Editing the program
- Removing steps from the program
- Adding steps to the program
- Clearing the program
- Using the power-on-play function
- Using the resume function
- Time and text information display
- Data CDs, SD cards and USB flash drives
- Pairing
- Usable controls
- Playback from a Bluetooth device.
- Unpairing
- Setting up your DAB tuner
- Listening to DAB Radio
- Setting the DAB display
- DLS message
- Program type
- Ensemble name
- Channel and frequency
- Bit rate
- Date and time
- Signal strength
- Using the DAB menu
- Local scan
- Full scan (auto scan)
- Manual tune
- DRC
- Broadcast station presets
- Setting radio station presets manually
- Selecting presets
- Clearing preset assignments
- Tuning in radio stations
- Changing the received frequency
- Changing the frequency
- Raising the received frequency
- Lowering the received frequency
- Setting the FM mode
- STEREO (stereo, default)
- MONO (mono)
- Setting radio station presets
- Setting radio station presets automatically
- Selecting preset stations
- Setting the tuner broadcast outputs
- RDS (Radio Data System)
- Program service (PS)
- RDS Program type (PTY)
- RDS Radio text (RT)
- PTY search
- RDS Program type
- NEWS:
- AFFAIRS:
- INFO:
- SPORT:
- EDUCATE:
- DRAMA:
- CULTURE:
- SCIENCE:
- VARIED:
- POP M:
- ROCK M:
- EASY M:
- LIGHT M:
- CLASSICS:
- OTHER M:
- WEATHER:
- FINANCE:
- CHILDREN:
- SOCIAL:
- RELIGION:
- PHONE IN:
- TRAVEL:
- LEISURE:
- JAZZ:
- COUNTRY:
- NATION M:
- OLDIES:
- FOLK M:
- DOCUMENT:
- TEST:
- ALARM!:
- Dubbing overview
- Dubbing file formats
- Operation when dubbing
- Dubbing from content on SD cards and USB flash drives
- Dubbing to write-protected media
- Dubbing to media that does not have enough open space
- Dubbing procedures
- Muting analog outputs while dubbing
- Make dubbing format settings
- Recording times when dubbing
- Setting the automatic power saving function
- Adjusting the analog output
- Using the AUX IN jack
- Checking the firmware version
- Restoring factory default settings
- The unit will not turn on.
- Media are not recognized.
- Playback is not possible.
- CD cannot be played.
- All the tracks on an SD card or USB flash drive cannot be played back.
- No sound is output.
- There is noise.
- The remote control (RC-1336) does not function.
- Nothing appears on the display or it is dim.
- Sound breaks up or is noisy.
- Cannot connect or communication is interrupted.
- Cannot pair with another device.
- Cannot receive radio or reception is poor.
- Stereo FM broadcasts become mono.
- Ratings
- Supported media
- Playback file formats
- Number of channels
- Inputs and outputs
- Analog audio input and output ratings
- AUX IN jack (front panel)
- LINE OUT jacks
- TUNER OUTPUT jacks
- Phones jack
- DIGITAL OUT connectors
- OPTICAL connector
- COAXIAL connector
- Audio performance
- Frequency response
- Distortion
- S/N ratio
- Dynamic range
- Channel separation
- Bluetooth function
- Tuner
- Frequency range
- Antenna connector
- Other
- Power
- Power consumption
- Dimensions (W × H × D, including protrusions)
- Weight
- Operating temperature range
- Permitted installation tilt
- Qualcomm aptX™ HD
- ⑱ Touche 5 [A-B REP]
- ⑳ Touche DISPLAY/RDS/INFO
- ③3 Prises DIGITAL OUT
- ① Touche EJECT (▲)
- Type de programme RDS
- NEWS (nouvelles) :
- Dimensions (L × H × P) (saillies incluses)
- Poids
- NOTA
- ① Botón EJECT (▲)
- Rango operativo del control remoto
- BLUETOOTH Disconnect?
- Conectores DIGITAL OUT
- Conector OPTICAL
- Conector de antena
- Otros
- Alimentación
- Consumo
- Peso
- ⑳Taste DISPLAY/RDS/INFO
- ③3 Anschlüsse DIGITAL OUT
- ③4 Anschlüsse LINE OUT
- ① Taste EJECT (▲)
- Anmerkung
- ⑳ Pulsante DISPLAY/RDS/INFO
- ① Pulsante EJECT (▲)
- RDS Program type (PTY).
- Transmissiebeveiliging
- ⑳ DISPLAY/RDS/INFO-toets
- OPMERKING
- Handmatige afstemming
- RDS programmatype (PTY)
- ⑳ DISPLAY/RDS/INFO-knapp
- ① EJECT-knapp (△)
- ANMÄRKNING
- Full scan (automatisk skanning)
- STEREO (Stereo, standard)
- AUX IN-uttag (frontpanel)
- In countries/regions other than the USA, Canada and Europe
Brand : TEAC
Model : CD-P750DAB
Category : Cd player/recorder