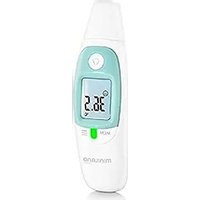
Thermosense - Thermometer Miniland - Free user manual and instructions
Find the device manual for free Thermosense Miniland in PDF.


| Product Type | Infrared thermometer for ear and forehead |
| Brand | Miniland |
| Model | Thermosense |
| Category | Thermometer |
| Dimensions | 131.8 x 37.7 x 37.3 mm |
| Weight | 53.5 g (without batteries) |
| Power Supply | 3 V DC, 2 AAA 1.5 V batteries |
| Measurement Type | Forehead, ear, object, ambient |
| Body Measurement Range | 32.0 °C to 42.9 °C (89.6 °F to 109.3 °F) |
| Accuracy (body) | ±0.2 °C (35.0-42.0 °C), otherwise ±0.3 °C |
| Object Measurement Range | -22 °C to 80.0 °C (-7.6 °F to 176.0 °F) |
| Object Accuracy | ±2.0 °C (±4.0 °F) |
| Ambient Temperature Range | 5.0 °C to 59.9 °C (41.0 °F to 139.8 °F) |
| Memory | Up to 9 measurements (forehead and ear) |
| Display | LCD screen with backlight (green/red) |
| Units | °C / °F (switchable) |
| Special Functions | Standby mode, object measurement, cleaning indicator |
| Maintenance | Clean the sensor with an alcohol-moistened cotton swab, dry for 20 min |
| Safety | Does not replace medical advice; avoid use on infected ear; keep out of reach of children |
| Spare Parts / Reparability | No user-serviceable parts; unauthorized modifications void warranty |
| General Information | Conforms to EC directives (CE0197 marking), EMC standards |
Frequently Asked Questions - Thermosense Miniland
User questions about Thermosense Miniland
0 question about this device. Answer the ones you know or ask your own.
Ask a new question about this device
Download the instructions for your Thermometer in PDF format for free! Find your manual Thermosense - Miniland and take your electronic device back in hand. On this page are published all the documents necessary for the use of your device. Thermosense by Miniland.
USER MANUAL Thermosense Miniland
miniland thermosense
Español 6
English 20
Português 33
Français 47
Deutsch 61
Italiano 76
Polski 90
Русский 103
Figuras · Figures · Abbildungen · Rysunki · Образность

ESPAÑOL
ÍNDICE
- Introduction
- Contents
- Safety instructions
- Product features
- Instructions for use
- Product care
-
Technical specifications
-
Information on the disposal of the batteries and the product
1. INTRODUCTION
Congratulations on the purchase of this ear and forehead thermometer with object temperature reading function.
The device is intended for the intermittent monitoring of human body temperature on people of all ages. The patient may be an operator and can change the batteries under normal circumstance and maintain the device and its accessories according to the user manual.
Before using this device, carefully read all the instructions given in this manual. For safe and correct use of this product, be sure to read and fully understand the safety precautions explained in this user manual.
Before using this device, please read all the instructions in this manual carefully. Please keep in a safe place as it contains important information.
The features described in this user's guide are subject to modifications without prior notice.
2. CONTENTS
1 Ear and forehead thermometer
2 AAA Batteries
1 Instruction manual and guarantee
1 Quick guide
If any of the above is missing, please contact your retailer.
3. SAFETY INSTRUCTIONS
- Use of this thermometer is not intended as a substitution for consultation with your physician. Measurement results are for reference only. Contact your physician if you have or suspect any health concerns.
- The infrared sensor (J) must be kept clean, dry, and undamaged at all times to ensure accurate measurements.
-
Earwax in the ear canal or lipid on the forehead may cause an inaccurate measurement, so make sure the ear canal or forehead is clean.
-
If you clean the ear or forehead, please keep waiting for 5-10 minutes before measuring.
- Don't touch or blow the infrared sensor (J). A polluted infrared sensor may cause inaccuracy.
- Avoid measuring the ear temperature if the ear is inflamed or infected.
- If the temperature of the storage area differs greatly from that of the measuring area, please wait the thermometer temperature to equalize to the room temperature about 30 minutes before use.
- Keep the thermometer out of the reach of children and pets to avoid inhalation or swallowing of small parts. Do not allow children to take their temperatures unattended. Children may not be able to use the device according to the instructions in this user manual. It is not a toy.
- Don't throw battery into fire. Battery is likely to explode in fire.
- Don't store the thermometer to temperature extremes (below -20°C/-4°F or over 55°C/131°F) or humidity extremes (below 15%RH or over 90%RH). Failing to do so may cause inaccuracy.
- Don't use the product in a wet ear hole after swimming or bathing. It is possible to damage the ear hole.
- Don't use the thermometer if the main body is damaged (for example, the infrared sensor is broken). The continuous use of a damaged unit may cause injury, improper results, or serious danger.
- Don't take apart, repair or change any parts of the unit at any time.
- Don't use a mobile phone nearby when the thermometer is working.
- If your thermometer will not be used for a longtime. It is advised to remove battery to prevent possible damage due to chemical leakage. If battery does leak, remove carefully. Do not allow bare skin to touch leaking fluid.
- This product needs special precautions regarding EMC and needs to be installed and put into service according to the EMC information provided, and this unit can be affected by portable and mobile RF communications equipment.
- The materials (e.g. ABS) of expect contact with patient had passed the ISO 10993-5 and ISO 10993-10 standards test, no toxicity, allergy and irritation reaction. However, based on the current science and technology, other potential allergic reactions are unknown. If you have allergic reaction to materials, please stop treatment immediately and consult your physician.
- Store the thermometer in a dry, clean place. It is forbidden to leave the product exposed to any chemical solvent, lint, dust, direct sunshine or high temperature.
- When using, shall not touch battery and the patient simultaneously.
- If you have any problems with this device, such as setting up, maintaining or using, please contact with MINILAND's technical service.
- This device should not be used adjacent to or stacked with other
ENGLISH
equipment and if adjacent or stacked use is necessary, it should be observed to verify normal operation in the configuration in which it will be used.
IMPORTANT
- Changes and modifications carried out by anyone other than the MINILAND technical service will not be covered by the product guarantee.
- The warranty does not include the user-caused faults listed below:
- Unauthorized disassembly and modification of the product.
- If the product is dropped during application or transportation.
- An incorrect use of the product.
4. PRODUCT FEATURES
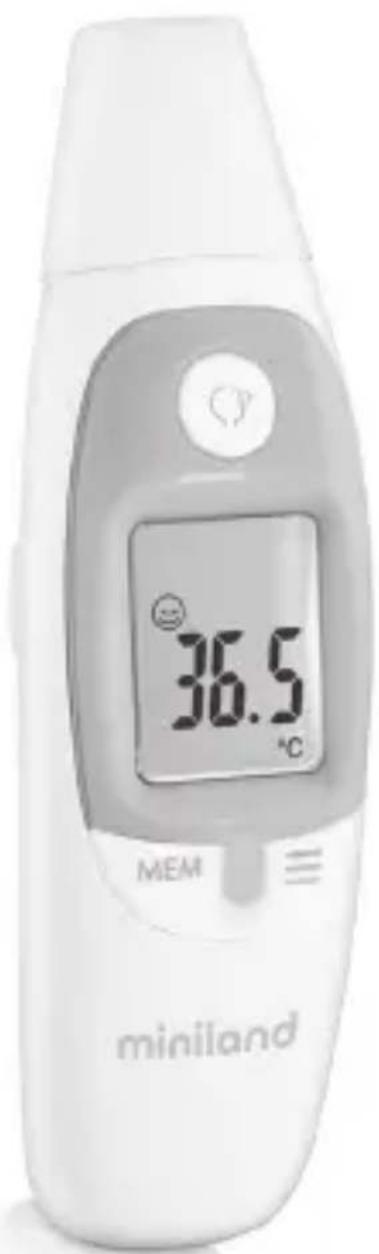
4.1. PARTS (FIGURE 1)
A. Prove
B. Battery cover
C. Forehead measuring button
D. Forehead probe cover
E. Ear measuring button
F. LCD display
G. Memory button
H. LED display
I. Set button
J. Infrared sensor
4.2. LCD DISPLAY (FIGURE 2)
- Memory mode symbol
- Forehead temperature symbol
- Ear temperature symbol
- Temperature display
- Cleaning symbol
- Low battery symbol
- Ambient temperature symbol
- Object temperature symbol
- Sleep mode symbol
- Fahrenheit degree symbol
- Centigrade degree symbol
- Display date and time in standby mode
- PM (Post Meridiem) display
- Setup mode symbol
5. INSTRUCTIONS FOR USE
5.1. BEFORE USE
5.1.1. RECOMMENDATIONS
- To achieve accurate measurement, it is very important to check the infrared sensor (J) and sure it is clean before using.
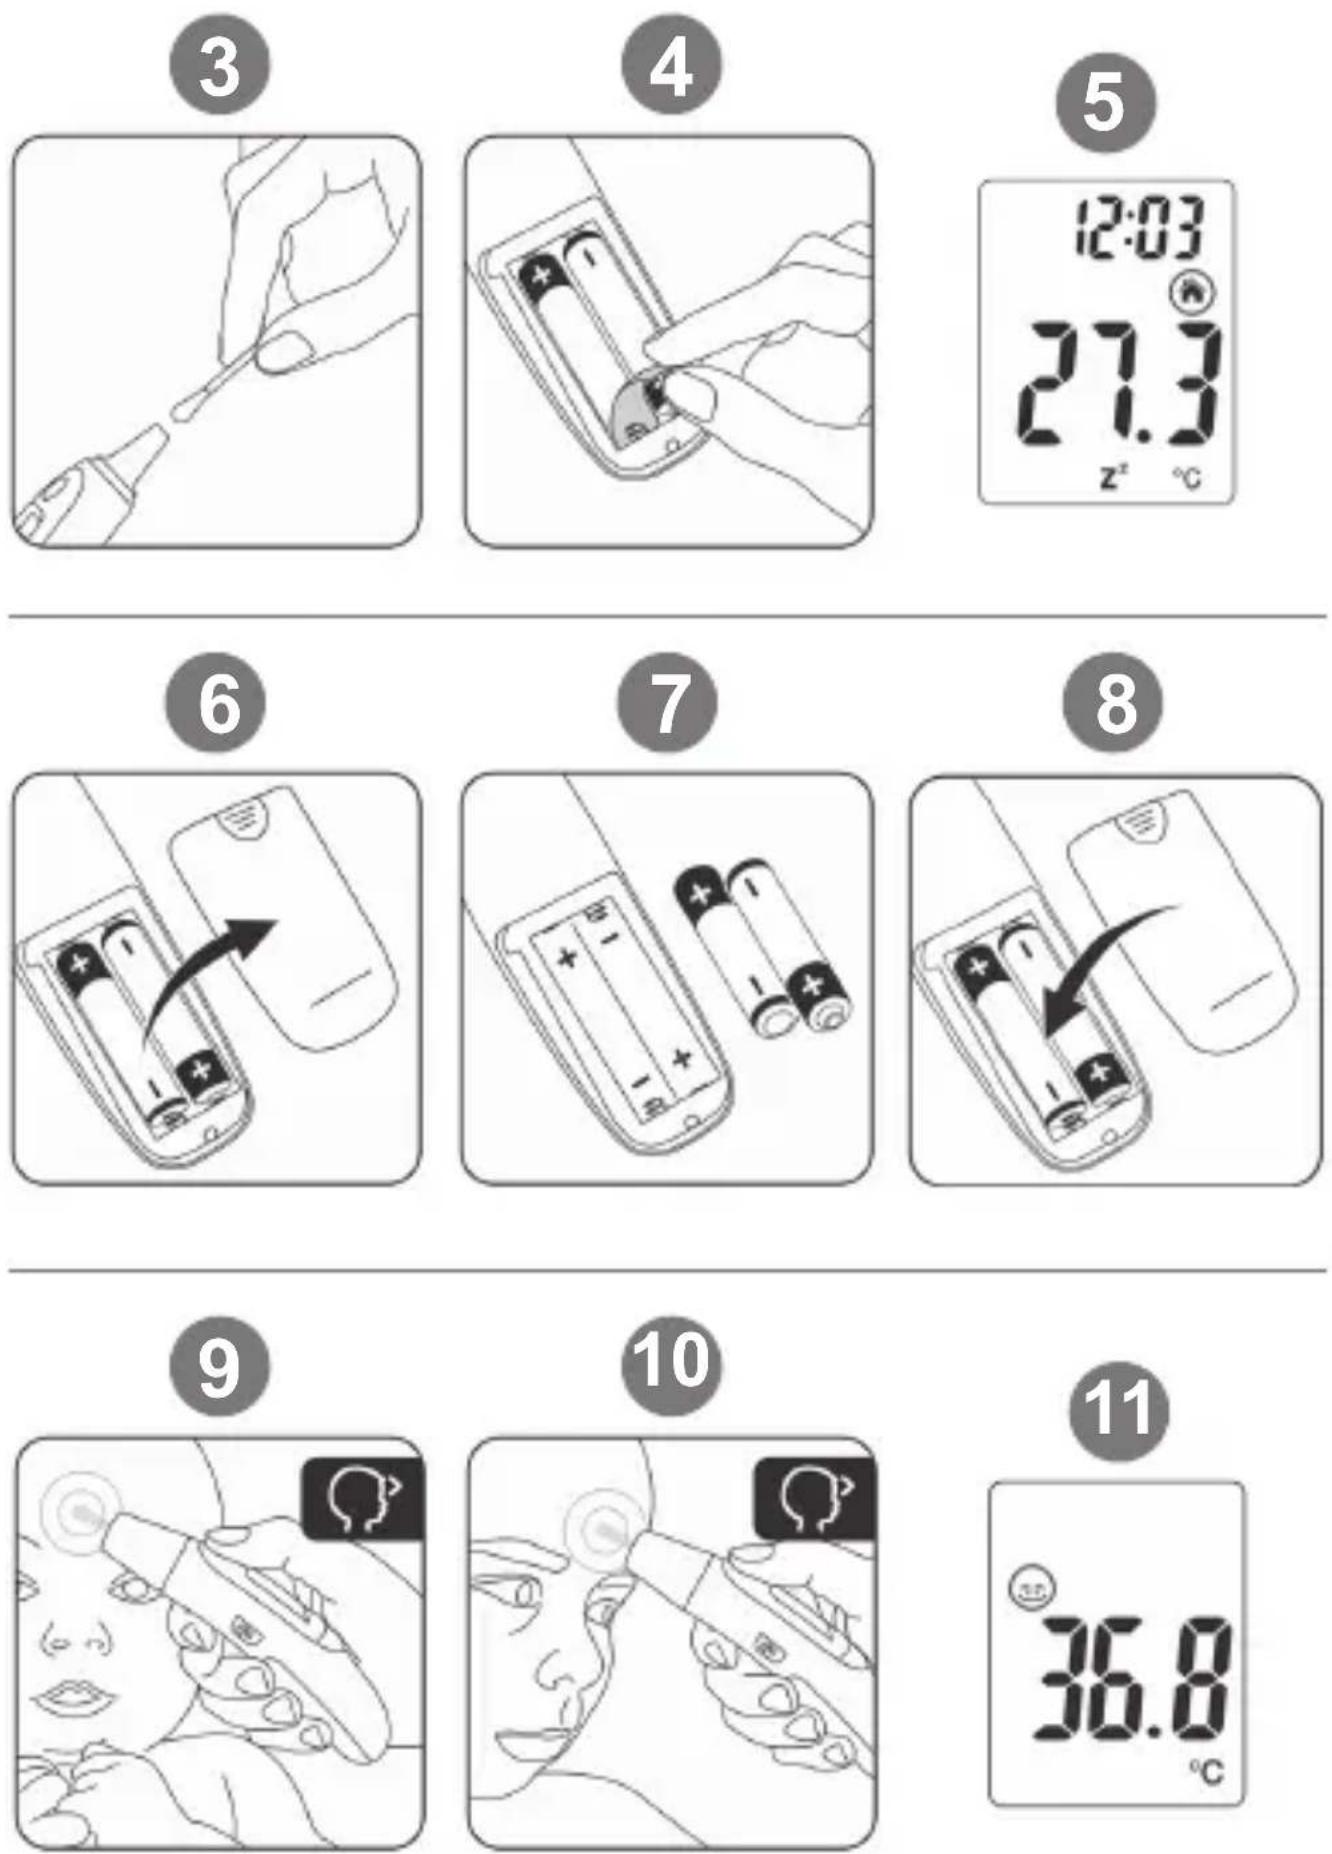
To clean the sensor, gently wipe its surface with a cotton swab slightly moistened with alcohol and immediately wipe dry with a clean cotton swab. Figure 3.
After cleaning, allow at least 20 minutes drying time before taking temperatures.
- Earwax in the ear canal or lipid on the forehead may cause an inaccurate measurement, so make sure the ear canal or forehead is clean.
If you clean the ear or forehead, please keep waiting for 5-10 minutes before measuring.
-
If the temperature of the storage area differs greatly from that of the measuring area, please wait the thermometer temperature to equalize to the room temperature about 30 minutes before measuring.
-
Please open the battery cover and move the insulating piece away when you use the thermometer first time, and then the thermometer turns on automatically. Press any button to turn on when it was turn off. Figure 4.
-
Remember than in standby mode, the LCD display environment temperature and circularly display time and date. Figure 5.
5.1.2. INSTALLATION/REMOVAL OF BATTERIES
When the low battery indicator (6) appears on the LCD, or the thermometer does not function at all, you should replace the old batteries with new ones as soon as possible.
This product uses two AAA 1.5V batteries, use the following procedure to replace or insert batteries:
- Open the battery cover. Figure 6.
-
Remove the old batteries and then insert the new batteries into the battery compartment. Make sure you install the new batteries properly; be sure to match the positive and negative ends of the battery to the marking in the batteries compartment of the thermometer. Figure 7.
-
Replace the battery compartment cover and press to close. Figure 8.
5.2. FOREHEAD TEMPERATURE MEASUREMENT
-
Put on the forehead probe cover (D) before use. Place the thermometer in your hand as shown with your thumb on the forehead temperature button (C). Figure 9.
-
Do not press the button yet.
- Make sure the probe is clean before measuring.
ENGLISH
- Hold the thermometer so that the probe flush on center of the forehead, midway between eyebrow and hairline. The forehead probe cover should touch the forehead.
Press the forehead temperature button (C) to start the measurement.
Figure 10.
- Keep the probe flat until you hear two beeps. The measurement is complete and the thermometer may be removed from the head.
- Read the temperature display on LCD. Figure 11.
Press the Memory Button (G) or the SET button (I) to turn back to standby mode. The thermometer will automatically return back to standby mode after 1 minute if no button is pressed.
5.3. EAR TEMPERATURE MEASUREMENT
· A temperature measurement taken from right ear may differ from a measurement taken from left ear. Therefore, always take the temperature in the same ear.
· External factors may influence ear and forehead temperatures, particularly when an individual has:
• been lying on one ear or the other
• had their ears covered
• been exposed to very hot or very cold temperatures
• been recently swimming or bathing.
In these cases, the person should remain at rest and in an appropriate environment, for at least 30 minutes before taking the temperature.
- For people wearing hearing aid device or ear plugs, remove the device and wait 30 minutes prior to taking a temperature.
-
Use the untreated ear if ear drops or other ear medications have been placed in the ear canal.
-
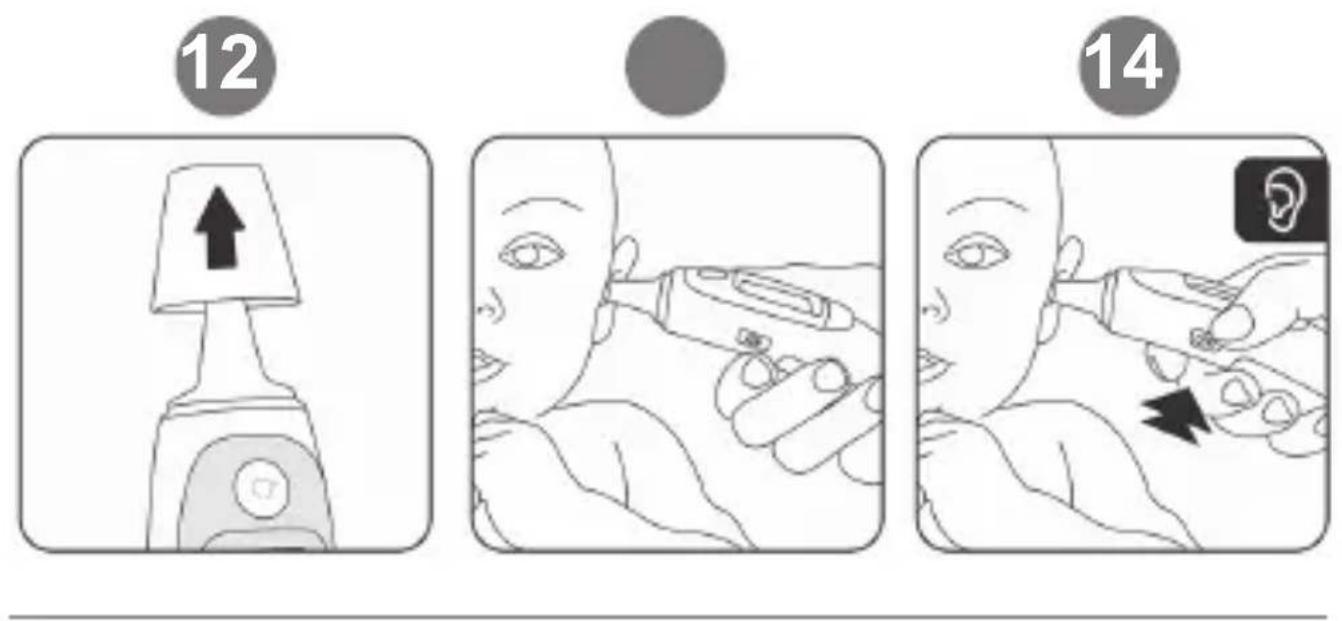
Remove the forehead probe cap (D) before using. Figure 12. Place the thermometer in your hand as shown with your thumb or forefinger on the EAR button.
-
Do not press the button yet.
-
Make sure the probe is clean before measuring.
-
Insert the probe very gently and slowly into the ear canal. Figure 13.
- Hold the thermometer so that the probe faces straight in the direction of the eardrum.
It is important to point the thermometer probe towards the eardrum and its periphery inside the ear.
- Hold the outer ear and gently pull it toward the rear of the head to straighten the ear canal.
-
Always insert the thermometer into the same ear with the same direction and depth.
-
Press the ear measuring button (E) to start the measurement until
you hear two beeps. Then, the measurement would be complete. Figure 14.
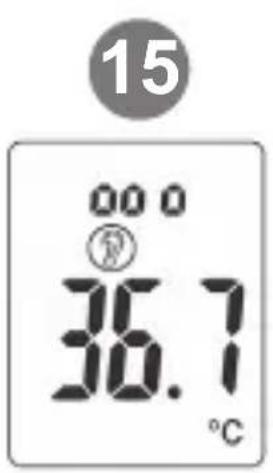
- Remove the thermometer from the ear canal. The LCD displays the measured temperature. A new measurement can be taken when the displayed “ooo” disappear. Figure 15.
5.4. DISPLAYING THE RESULTS OF THE MEASUREMENT
Normal body temperature is a range. A person's normal temperature range tends to decrease with age. The following table shows normal temperature ranges by age:
| 0 - 2 years 38.4 - 38.0 | °C 97.5 - 100.4 °F | |
| 3 - 10 years 36.1 - 37.8 | °C 97.0 - 100.0 °F | |
| 11 - 65 years 35.9 - 37.6 | °C 96.6 - 99.7 °F | |
| >65 years 35.8 - 37.5 | °C 96.4 - 99.5 °F |
The range of normal temperature varies from person to person and can be influenced by many factors such as time of day, measure from different sites, level of activity, medications... So we recommend that you practice with the thermometer on yourself and family members when you are healthy. This way you will know how the thermometer works and will feel more confident of the measurements you take when a family member is ill.
The LED indicator on this unit can be illuminated in two colors:
- In green if the measurement is between 34.0^ (93.2°F) and 37.9^ (100.3°F).
- In red if the measurement is between 38.0^ (100.4°F) and 42.9^ (109.3°F).
5.5. OBJECT TEMPERATURE READING
- Don't use this mode to take someone's body temperature.
-
When reading the temperature of an object, the surface temperature is displayed. It can be different from the internal temperature, especially if the surface is exposed to direct sunlight.
-
Remove forehead probe (D) before using place the thermometer in your hand with your thumb on the ear measuring (E) and forehead measuring (C) buttons.
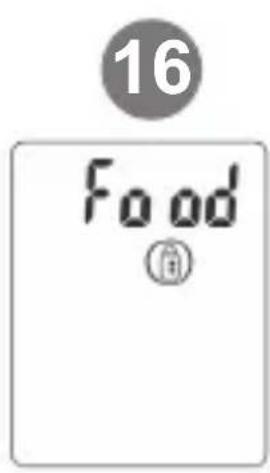
Press both buttons at the same time. The word "food" will be shown on the LCD. Figure 16.
- Hold the thermometer and ensure the probe is around 1 cm from the
ENGLISH
liquid or surface whose temperature you want to measure.
Press the ear measuring button (E) to start the measurement.
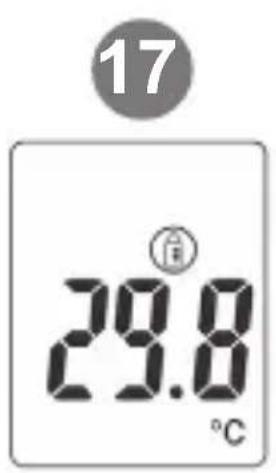
- Remove the thermometer from the object. The LCD displays the measured temperature. Figure 17. You can press the Memory (G) or Set (I) buttons return back to standby mode. If no button is pressed the thermometer will automatically return back to this mode after 1 minute.
5.6. MEMORY CHECKING
There are a total of 9 memory data for recording ear and forehead temperature measurements.
The current measurement is always stored in the last storage space. When all storage spaces have been occupied, the oldest measurement is always deleted from the memory.
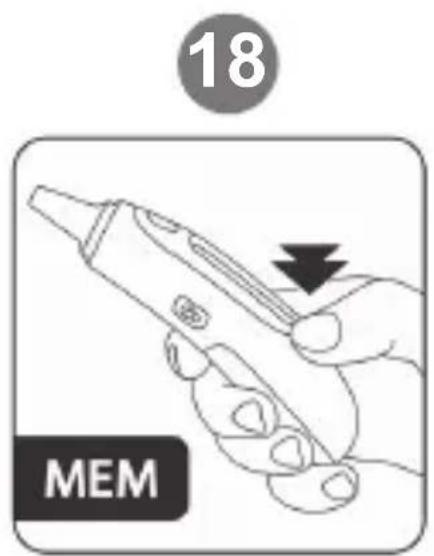
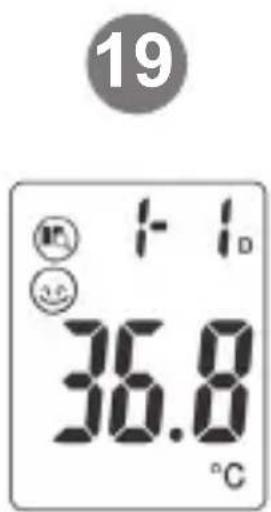
Press the Memory button (G) to check the memory data. Figure 18. The LCD displays memory number, where the measure has been taken (ear or forehad), measured temperature, time and date figures. Figure 19.
Press the Memory button (G) repeatedly to go to the memory number you need. Press and hold the Memory button (G) to check the memory number you need in a rapid way.
Press the Set button (I) to go back to standby mode.
5.7. DATE AND TIME SETUP
-
Press the Set button (I) to enter setting mode from the standby mode.
-
Press the Memory button (G) to switch the settings between hour mode (12hr or 24hr, in afternoon, "PM" will display on LCD when you select 12hr mode) → hour → minute → year (2001-2099) → month → day and sleep mode (ON or OFF).
-
Press the Set button (I) to modify the displayed setting and confirm it pressing the Memory button (G).
5.8. SLEEP MODE SETUP
It is recommended that you use sleep mode as this will prolong the battery life. If the sleep mode is ON the display will automatically turn off after 3 minutes to save battery power.
-
Press the Set button (I) to enter setting mode.
-
Press the Memory button (G) to switch the settings until you reach the SLEEP function (SLP).
-
Press the Set button (I) to modify the function.
-
Press the Memory button (G) again to confirm exit the setup.
5.9. FAHRENHEIT/CELSIUS SETUP
In standby mode or measuring mode, you can switch between Celsius (°C) and Fahrenheit (°F) by pressing and holding the ear (E) and
forehead (C) measuring buttons at the same time until you hear one or two "beep" sounds.
5.10. TROUBLESHOOTING
| PROBLEMS CHECKLIST SOLUTIONS | ||
| No response / Automatic reset when pull out insulator | Batteries used up Change | the batteries for new ones |
| Batteries in wrong polarity | Take out the batteries and reinsert them correctly | |
| Poor battery contact | ||
| “Lo” on screen The | measured temperature is lower than 32.0°C/89.6°F. Please check the operation method | Follow user's manual for proper measurement |
| “Hi” on screen The | measured temperature is higher than 42.9°C/109.3°F. Please check the operation method | Follow user's manual for proper measurement |
| “ErrP” or “ErrH” on screen. | Hardware problem Contact | the manufacturer or distributor. |
| “ErrE” on screen. | Operating temperature is out of the range | Use the thermometer in the range of operating conditions |
| The sensor temperature has not been stabilised | Wait about 10 seconds and take a measurement again | |
| The measurement is not accurate or if there is any doubt om the measured result | Please check if the the infrared sensor (J) is clean or not | Clean the infrared sensor (J) with cotton swab according to user manual |
| Please check the measuring way is corrector not | Ensure you have read the manual and know how to use the thermometer properly | |
| The measurement is not accurate or if there is any doubt om the measured result | Please check if you have let the thermometer and patient get stabilized in the room for 30 minutes at least | Please keep the thermometer and patient in the measuring room at least 30 minutes before using |
| Are you using the thermometer outdoors? | Please, take the measurement indoor | |
| Please, check if you held the thermometer in your hand too long and affect the accuracy | Put the thermometer on the table in the room where the measurement is taking place and let it cool down first | |
| Battery symbol on LCD | Batteries used up Change new battery | |
| Other malfunctions | Contact the MINILAND technical service. | |
6. PRODUCT CARE
6.1. WARNING OF DIRT ON THE SENSOR
In order to remind the user to clean the infrared sensor (J), this thermometer has a special alarm. If the thermometer hasn't been used for a long time or if several measures have been taken, the backlight will flash for 1 minute and the LCD will display the cleaning symbol (5) to remind the user to clean the infrared sensor.
The thermometer will return back to standby mode after pressing any button. At this point, the backlight will stop flashing.
6.2. CARE AND MAINTENANCE
· To ensure accurate measurements, keep the sensor (J) clean and free of scratches is very important. Finger prints, ear wax or dirt will affect the accuracy of the thermometer.
· In order to get an accurate measurement, please clean the probe tip. Gently wipe its surface with a cotton swab slightly moistened with alcohol and immediately wipe dry with a clean cotton swab.
- Use a soft dry cloth to clean the body of the thermometer. Never clean the thermometer with an abrasive cleanser, thinner, benzene or submerge the thermometer into water or other liquids.
· After cleaning, allow at least 20 minutes drying time before taking temperatures. Store it in a clean, dry place at room temperature.
- Never expose the thermometer to extreme temperatures, humidity, direct sunlight or shock.
6.3. CALIBRATION
The thermometer is initially calibrated during manufacturing, before ex-factory. If the thermometer is used according to the instruction, periodic recalibration is not required. If at any time you question the accuracy of the measurement, please contact the retailer immediately.
Don't attempt to modify or reassemble the thermometer.
- TECHNICAL SPECIFICATIONS
| Power supply DC 3V (2 x AAA battery) | ||
| Mode of operation Adjusted mode | ||
| Reference body site Core | ||
| Body measuring range 32.0°C - 42.9°C (89.6°F - 109.3°F) | ||
| Ear and forehead laboratory accuracy; | In range of for 35.0°C - 42.0°C (95.0°F-107.6°F) | ±0.2°C ±0.4°F |
| For other range ±0.3°C | ±0.5°F | |
| Object measuring range -22°C - 80.0°C (-7.6°F - 176.0°F) | ||
| Object measuring accuracy | ±2.0°C(±4.0°F) | |
| Displayed room temperature range | 5.0°C - 59.9°C (41.0°F - 139.8°F) | |
| Room temperature accuracy | ±1°C (±2°F) | |
| Dimension 131.8(L) x 37.7(W) x 37.3(D)mm (±2mm) | ||
| Weight About 53.5g (without battery) | ||
| Forehead operating condition | With a relative humidity of 15%-85% Atmosphere pressure: 700hPa - 1060hPa | 15.0°C - 40.0°C 59.0°F - 104.0°F |
| Ear and object operating condition | With a relative humidity of 15%-85% Atmosphere pressure: 700hPa - 1060hPa | 10.0°C - 40.0°C 50.0°F - 104.0°F |
ENGLISH
| Storage and transport condition: | With a relative humidity of 15%-90% Atmosphere pressure: 700hPa - 1060hPa | -20°C - 55°C -4°F – 131°F |
| Service life 2 years | ||
| Service life of the battery W | With a new battery (Carbon) approx. 6 months based on the use frequency at 5 times/day | |
NORMALIZED SYMBOLS
The following is a list of symbols that can be found on the product, packaging and instructions.






- Type BF Applied Part.
· Disposal in accordance with Directive 2012/19/EU (WEEE)
- Complies with the European Medical Device Directive (93/42/EEC) and amended by directive 2007/47/EC requirements. Notified body TÜV Rheinland (CE0197)
· The name and the address of the manufacturer.
- Name and adress of the Authorized Representative in the European Community.
· Attention: Read the operating Instructions for use!
- First number 2: Protected against solid foreign objects of 12.5 ~mm and greater Second number 2: Protected against vertically falling water drops when enclosure tilted up to 15^ . Vertically falling drops shall have no harmful effects when the enclosure is tilted at any angle up to 15^ , on either side of the vertical.

- Batch code

- Represents the manufacture date and serial number.
IMPORTANT INFORMATION REGARDING ELECTRO MAGNETIC COMPATIBILITY (EMC)
With the increased number of electronic devices such as PC's and mobile (cellular) telephones, medical devices in use may be susceptible to electromagnetic interference from other devices. Electromagnetic interference may result in incorrect operation of the medical device and create a potentially unsafe situation.
Medical devices should also not interfere with other devices. In order to regulate the requirements for EMC (Electro Magnetic Compatibility) with the aim to prevent unsafe product situations, the EN60601-1-2 standard has been implemented. This standard defines the levels of immunity to electromagnetic interferences as well as maximum levels of electromagnetic emissions for medical devices.
This medical device conforms to this EN60601-1-2 standard for both immunity and emissions. Nevertheless, special precautions need to be observed:
· The medical devices should not be used adjacent to or stacked with other equipment. In case adjacent or stacked use is necessary, the medical device should be observed to verify normal operation in the configuration in which it will be used.
- Refer to further guidance below regarding the EMC environment in which the device should be used.
| Recommended separation distance between portable and mobile RF communications equipment and the thermometer | |||
| The thermometer is intended for use in an electromagnetic environment in which radiated RF disturbances are controlled. The customers or the users of these thermometer can help prevent electromagnetic interference by maintaining a minimum distancebetween portable and mobile RF communications equipment (transmitters) and the thermometer as recommended below, according to the maximum ouptut power of the communications equipment. | |||
| Output Power of Transmitter in Watt | Separation distance according to frequency of transmitter in meter | ||
| 150 kHz to 80 MHz d = 1,2 √P | 80 MHz to 800 MHz d = 1,2 √P | 800 MHz to 2,5 GHz d = 2,3 √P | |
| 0.01 0.12 0 | 12 0.23 | ||
ENGLISH
| 0.1 0.38 0.38 0.78 | ||
| 1 1.2 1.2 2.3 | ||
| 10 3.8 3.8 7.3 | ||
| 100 12 12 23 | ||
| For transmitters rated at a maximum output power not listed above, the recommended separation distance d in meters (m) can be estimated using the equation applicable to the frequency of the transmitter, where P is the maximum output power rating of the transmitter in watts (W) according to the transmitter manufacturer.Note: At 80MHz and 800MHz, the separation distance for the higher frequency range appliesNote: These guidelines may not apply in all situations.Electromagnetic propagation is affected by absorption and reflection from structures, objects, and people. | ||
■ 8. INFORMATION ON THE DISPOSAL OF THE BATTERIES AND THE PRODUCT
- Remember to remove the batteries and dispose of them in a responsible manner when disposing of the baby monitor.
- You should not mix products bearing the crossed-out rubbish bin symbol with your domestic rubbish.
- These products should be taken to the collection points allocated by the local authorities for appropriate treatment.
· Alternatively you may contact the point of sale where you purchased the product.

ÍNDICE
4.2. ECRÃ LCD (FIGURA 2)
4.2. ÉCRAN LCD (FIGURE 2)
© Miniland, S.A. 2017
Fabricado en China. Conservar los datos. Made in China. Keep this information. Fabricado em China. Conservar dados. Fabbricato in China. Conservare i dati.
Fabriqué en China. Conserver ces informations. Hergestellt in China. Bewahren Sie diese Angaben auf Wyprodukowano w Chinach. Zachowaj instrukcję. Сделано в Китае. Сохраните эту информацию.
Shenzhen Dongdixin Technology Co., Ltd No. 3 Building XiliBaimang Xusheng Industrial Estate 518108, Nanshan Shenzhen China

Shanghai International Holding Corp. GmbH (Europe) Eiffestraße 80, 20537 Hamburg Germany
89212 thermosense
CE 0197
- miniland thermosense
- ESPAÑOL
- ÍNDICE
- INTRODUCTION
- CONTENTS
- SAFETY INSTRUCTIONS
- ENGLISH
- IMPORTANT
- PRODUCT FEATURES
- PARTS (FIGURE 1)
- LCD DISPLAY (FIGURE 2)
- INSTRUCTIONS FOR USE
- BEFORE USE
- RECOMMENDATIONS
- INSTALLATION/REMOVAL OF BATTERIES
- FOREHEAD TEMPERATURE MEASUREMENT
- Figure 10.
- EAR TEMPERATURE MEASUREMENT
- DISPLAYING THE RESULTS OF THE MEASUREMENT
- OBJECT TEMPERATURE READING
- MEMORY CHECKING
- DATE AND TIME SETUP
- SLEEP MODE SETUP
- FAHRENHEIT/CELSIUS SETUP
- PRODUCT CARE
- WARNING OF DIRT ON THE SENSOR
- CARE AND MAINTENANCE
- CALIBRATION
- NORMALIZED SYMBOLS
- IMPORTANT INFORMATION REGARDING ELECTRO MAGNETIC COMPATIBILITY (EMC)
- ■ 8. INFORMATION ON THE DISPOSAL OF THE BATTERIES AND THE PRODUCT
- ECRÃ LCD (FIGURA 2)
- ÉCRAN LCD (FIGURE 2)
Brand : Miniland
Model : Thermosense
Category : Thermometer