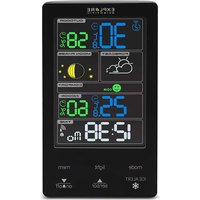
WSC4009 - Weather Station Explore Scientific - Free user manual and instructions
Find the device manual for free WSC4009 Explore Scientific in PDF.


User questions about WSC4009 Explore Scientific
0 question about this device. Answer the ones you know or ask your own.
Ask a new question about this device
Download the instructions for your Weather Station in PDF format for free! Find your manual WSC4009 - Explore Scientific and take your electronic device back in hand. On this page are published all the documents necessary for the use of your device. WSC4009 by Explore Scientific.
USER MANUAL WSC4009 Explore Scientific
ABOUT THIS INSTRUCTION MANUAL

These operating instructions are to be considered a component of the device.
Please read the safety instructions and the operating instructions carefully before use.
Keep these instructions for renewed use at a later date. When the device is sold or given to someone else, the instruction manual must be provided to the new owner/user of the product. The device is intended only for indoor use.

GENERAL WARNINGS
- Risk of electric shock – This device contains electronic components. Only use the device as described in the manual; otherwise, you run the risk of an electric shock.
-
Choking hazard – Children should only use the device under adult supervision. Keep packaging material, like plastic bags and rubber bands, out of the reach of children, as these materials pose a choking hazard.
-
Risk of chemical burn – Keep batteries out of the reach of children! Make sure you insert the batteries correctly. Leaking battery acid can lead to chemical burns. Avoid contact of battery acid with skin, eyes and mucous membranes. In the event of contact, rinse the affected region immediately with a plenty of water and seek medical attention.
- Risk of fire/explosion – Do not expose the device to high temperatures. Use only the recommended batteries. Do not short-circuit the device or batteries, or throw them into a ♦e. Excessive heat or improper handling could trigger a short-circuit, a ♦e, or an explosion.
- Do not disassemble the device. In the event of a defect, please contact your dealer. The dealer will contact the Service Centre and can send the device in to be repaired, if necessary.
- Use only the recommended batteries. Always replace weak or empty batteries with a new, complete set of batteries at full capacity. Do not use batteries from different brands or with different capacities. The batteries should be removed from the unit if it has not been used for a long time.
SCOPE OF DELIVERY
WSC4009
Weather station, Outdoor sensor, Operating instructions, AC/DC adapter(3.6V)
WSH4009
Weather station, Outdoor sensor, Operating instructions.
BEFORE YOU BEGIN
- We recommend using alkaline batteries. If temperatures regularly fall below 0°C (32°F), we recommend using lithium batteries.
- Avoid using rechargeable batteries. (Rechargeable batteries cannot maintain correct power requirements.)
- Insert batteries before first use, matching the polarity in the battery compartment. 2x AA Batteries are required for the Weather station and 2x AAA Batteries are required for the Outdoor sensor.



PRODUCT OVERVIEW
- When connect with batteries, press [light] to activate the backlight for 5 seconds or to activate the snooze function to delay the alarm by 8 minutes. When connect with adaptor, press the [light] button to adjust the brightness. The setting order: High light --> Low-->light-->off.
- Press [mode] to switch between time, date, alarm 1 and alarm 2 display.
- While in setting mode, press [] ▲o increase one unit, press and hold to increase rapidly.
- While in setting mode, press [] to decrease one unit, press and hold to decrease rapidly.
- Press [mem] to toggle the display among current, maximum and minimum recording of temperature/humidity. Press and hold to clear the max/min memory records.
- ICE ALERT Alarm Led.
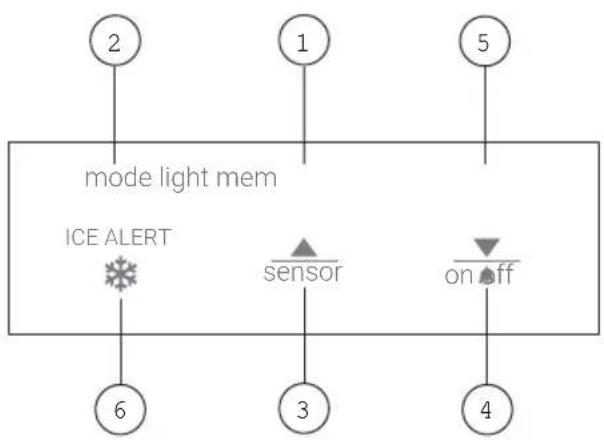
flowchart
graph TD
    A["2"] --> B["mode light mem"]
    C["1"] --> B
    D["5"] --> B
    E["6"] --> F["ICE ALERT"]
    G["3"] --> H["sensor"]
    I["4"] --> J["on off"]
*Radio-controlled clock function not available in every territory
- Air vent
- Battery compartment
- Power jack(For WSC4009 only) (Input 3.6V DC ⊖-⊕+)
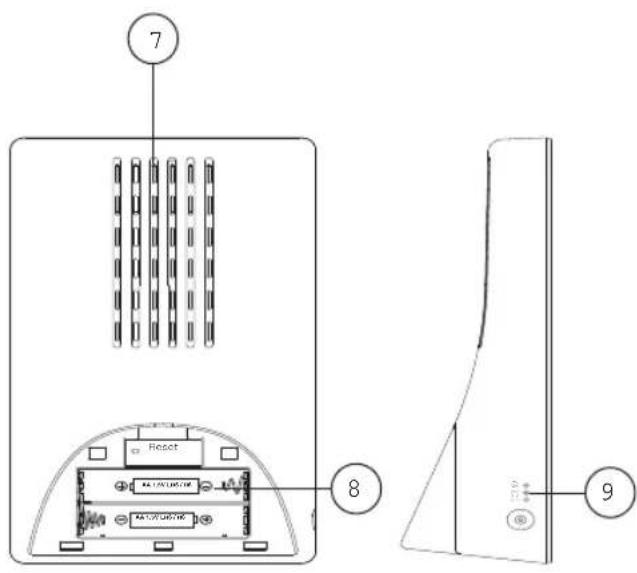
text_image
7 8 9OUTDOOR SENSOR
- Outdoor temperature & humidity LCD display
- Battery compartment
- TX (Initiate main unit search)
- Channel switch
- C/F switch
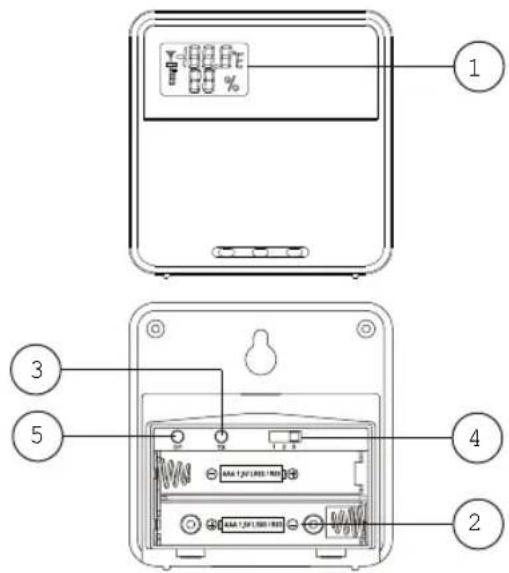
text_image
1 2 3 4 5
| MODE\BUTTON | light | mode | ▲ | ▼ | men | |
| Standard mode | PRESS | Adjust brightness when connect with adapter | Switch time, alarm display | Toggle between outdoor sensor chammel 1-3 | Turn Alarm on/off | Toggle the display among current, maximum and minimum recording of temperature/humidity |
| HOLD | Turn RCC on/off | Enter into time and date setting | Initiate RCC receiving | —— | Clear the max/min memory records | |
| Alarm mode | PRESS | Adjust brightness when connect with adapter | Switch time, alarm display | Toggle between outdoor sensor chammel 1-3 | Turn Alarm on/off | Toggle the display among current, maximum and minimum recording of temperature/humidity |
| HOLD | Turn RCC on/off | Enter into time and date setting | Initiate RCC receiving | —— | Clear the max/min memory records | |
| Time/alarm setting mode | PRESS Confirm setting increase for 8 seconds | Decrease | —— | |||
| HOLD | Turn on backlight for 8 seconds | —— | Quick Increase | Quick Decrease | —— | |
LCD DISPLAY
- Weather Forecast symbols
- Indoor Temperature and Indoor humidity display
- Outdoor Temperature and Outdoor humidity display
- Time/Alarm display
- Phase of the moon
- Comfort level
[ ] Max/Min temperature humidity indicator 6
[ ] Low battery indicator [ ] RF & Outdoor channel indicator 2
[ ] Time zone indicator tor[ ] RCC signal indica
[] Alarm indicator (A1:1-5 Weekday, A2: 6-7 weekend)
[] Daylight saving time [] trend of temperature and humidity [] Time zone(For US only)
GETTING STARTED
INSERT BATTERIES
- Remove the battery door from the back.
- Insert 2x AA (LR6)/1.5V batteries. Please ensure the polarities (+/-) of the batteries match upon installation.
- Reattach the battery door.
NOTE: Replace batteries when [ ] displays, or when the display is dim.
OUTDOOR SENSOR
The main unit can receive data from up to 3 outdoor sensors. 1 Sensor is included with delivery.
- Remove the battery door from the back.
- Insert 2x AAA (LR03)/1.5V batteries. Please ensure the polarities (+/-) of the batteries match upon installation.
- Select a channel, then press TX.
- Reattach the battery door.
- Place the sensor within 30 m (98 ft) of the main unit using the table stand or wall mount.
TO SEARCH FOR A SENSOR:
The main unit will automatically search for a new sensor after the batteries are installed. To manually initiate a outdoor sensor search, press and hold [ ]▲
NOTE: The transmission range may vary depending on many factors. You may need to experiment with various locations to get the best results.
CLOCK
CLOCK RECEPTION
- When you insert or replace the batteries, RCC reception is initiated. To manually start RCC reception press the [l] button.
- The receiving process duration is 3 minutes.
- During receiving process, the RCC signal symbol shows:[]
- If the RCC receiving process is successful, a completed RCC symbol [W] will be shown in the display and the date and time will be set automatically. If it fails within 7 minutes, RCC setting will quit automatically. If that happens, press and hold the light button to re-initiate RCC receiving.
SET THE CLOCK MANUALLY
- Press and hold hodton to enter into time and date setting.
- The setting parameter will flash.
- Press [ ] button once, the figure will increase 1 unit. Press and hold the [ ] button, the figures will increase rapidly.
- Press [button once, the figure will decrease 1 unit. Press and hold the [] button, the figures will decrease rapidly.
- Press [mode] button to confirm setting and enter to next parameter.
- Sequence of setting: Time zone --> 12/24h format --> Hour--Minute Year Calendar format (day-month/month-day)--Month Day Temperature unit (°C/°F)--BST ON/OFF(only for US) --Exit
- If there is no action in 20 seconds, the setting will be saved and you will exit the setting mode.


ALARM
SETTING/ADJUSTING ALARM TIME
- Press [ ] to display the alarm.
- Press and hold [ ] button to enter alarm setting mode.
- The setting parameter will flash.
- Press [▲] or [ ] button to set the desired data.
- Press [mode] on to confirm setting and exit.
- Alarm will turn on automatically when alarm setting is finished.
TURN ON/OFF ALARM
In normal mode:
Press the [] button to turn on/off the alarm.
OPERATION
- At the set time, alarm signal rings.
- During the alarm, press the [ ] ignition to delay the alarm by 8 minutes.
- If you do not press any button to stop the alarm, it will automatically turn off after 2 minutes.
- To stop the alarm, press any other button, except for []light
- The alarm will start again at the next alarm time, unless you switch off the alarm function by press-
ing the []▼button until the alarm is set to off.
WEATHER FORECAST
This device forecasts the next 12-24 hours of weather within a 30-50 km (19-31 mile) radius with a 75% accuracy.
| SYMBOL DESCRIPTION | |
| Sunny | |
| Sunny to cloudy | |
| Cloudy | |
| Cloudy to rain | |
| Cloudy to snow | |
ICE ALERT
If the channel 1 sensor falls between 3^ to -2^ (37°F to 28°F), the ice alert indicator [ ] all display, and will disappear once the temperature is out of this range.
TEMPERATURE AND HUMIDITY
The indoor temperature is always displayed in the right corner of the screen. To receive outdoor temperature you can connect up to 3 outdoor sensors to the main unit.
Press the [▲] button to toggle between Channel 1-3.
MAX/MIN MEMORY
To toggle between current, minimum and maximum records for the selected sensor press [mepeatedly. To clear records, press and hold [mem
NOTE: When the indoor temperature is lower than -5 °C (23.0 °F), the screen displays LL.L. When the temperature is higher than 50 °C (122.0 °F), the screen displays HH.H.
BACKLIGHT
When connect with batteries, press [light] to activate backlight for 5 seconds. When connect with adaptor, press the [light] button to adjust the brightness. The setting order: High light --> Low light --> off.
SPECIFICATIONS MAIN UNIT:
Dimensions
100 x 49.3 x 185 mm (L x W x H)
Weight
280 g (Exclude batteries)
Power:
2x AA (LR6) 1.5V batteries
TEMPERATURE:
Indoor temperature display range:
-5°C to +50°C (23°F to 122°F)
Outdoor temperature display range:
-20°C to +60°C (-4°F to 140°F)
HUMIDITY:
Indoor/outdoor humidity range:
20% - 95% RH
Accuracy:
+/- 5% (40%-80%), other +/-7%
AC/DC POWER ADAPTER:

Only use a compatible AC/DC Power adapter (3.6V = 100mA). Plug the power cable to the power jack and the power adapter to a suitable power outlet.

OUTDOOR SENSOR:
Dimensions:
60 x 20 x 60 mm (L x W x H)
Weight:
45 g (Exclude batteries)
Transmission range:
30 m (98 ft)
Temperature range:
-20°C to 60°C (-4°F to 140°F)
Signal frequency:
433 MHz
Power:
2x AAA (LR03) 1.5V batteries
EC DECLARATION OF CONFORMITY
CE Hereby, Explore Scientific GmbH declares that the equipment type with part number: WSC4009, WSH4009 are in compliance with
Directive: 2014/53/EU. The full text of the EU declaration of conformity is available at the following internet address: www.bresser.de/download/WSC4009/CE/WSC4009_CE.pdf www.bresser.de/download/WSH4009/CE/WSH4009_CE.pdf
RCM DECLARATION OF CONFORMITY

The product complies with electrical safety, EMC and radio spectrum regulatory requirements for products supplied to the
Australia or New Zealand market.
NOTES ON CLEANING
- Remove the batteries before cleaning.
- Only use a dry cloth to clean the exterior of the device. To avoid damaging the electronics, do not use any cleaning fluid.
- Protect the device from dust and moisture.
CAUTION
– Risk of explosion if the battery is replaced by an incorrect type
- disposal of a battery into fire or a hot oven, or mechanically crushing or cutting of a battery, that can result in an explosion;
– leaving a battery in an extremely high temperature surrounding environment that can result in an explosion or the leakage of flammable liquid or gas;
- a battery subjected to extremely low air pressure that may result in an explosion or the leakage of flammable liquid or gas.
DISPOSAL
Dispose of the packaging materials properly, according to their type, such as paper or cardboard. Contact your local waste-disposal service or environmental authority for information on the proper disposal.

Do not dispose of electronic devices in the household garbage!
As per the Directive 2002/96/EC of the European Parliament on waste electrical and electronic equipment and its adaptation into German law, used electronic devices must be collected separately and recycled in an environmentally friendly manner.
In accordance with the regulations concerning batteries and rechargeable batteries, disposing of them in the normal household waste is explicitly forbidden. Please make sure to dispose of your used batteries as required by law — at a local collection point or in the retail market. Disposal in domestic waste violates the Battery Directive. Batteries that contain toxins are marked with a sign and a chemical symbol.
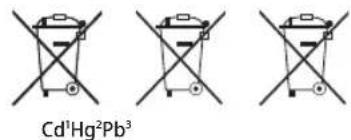
chemical
Chemical structure diagram of Cd¹Hg²Pb³ catalyst with three identical configurations shown^1 battery contains cadmium
^2 battery contains mercury
^3 battery contains lead
WARRANTY & SERVICE
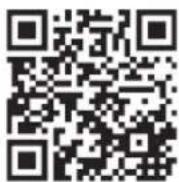
The regular guarantee period is 2 years and begins on the day of purchase. To benefit from an extended voluntary guarantee period as stated on the gift box, registration on our website is required.
You can consult the full guarantee terms as well as information on extending the guarantee period and details of our services at www.bresser.de/warranty_terms.
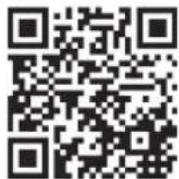
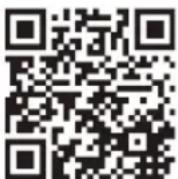
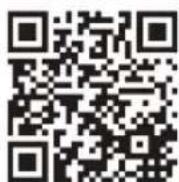
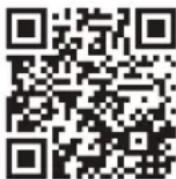
Would you like detailed instructions for this product in a particular language? Then visit our website via the link below (QR code) for available versions.
Alternatively you can also send an email to manuals@bresser.de or leave a message on +49 (0) 28 72 - 80 74-220*. Please always state your name, precise address, a valid phone number and email address, as well as the article number and name.
*Number charged at local rates in Germany (the amount you will be charged per phone call will depend on the tariff of your phone provider); calls from abroad will involve higher costs.
MANUAL DOWNLOAD:
SERVICE AND WARRANTY:
www.bresser.de/warranty_terms
100x49.3x185 mm (LxPxA)
Peso
SERVICE AND WARRANTY:
www.bresser.de/warranty_terms
ZU DIESER ANLEITUNG

SERVICE AND WARRANTY:
www.bresser.de/warranty_terms
A PROPOS DE CE MODE D'EMPLOI

DÉCLARATION DE CONFORMITÉ CE

chemical
Chemical structure diagram of Cd¹Hg²Pb³ catalyst with three identical configurations shownSERVICE AND WARRANTY:
www.bresser.de/warranty_terms
PARA BUSCAR UN SENSOR:
SERVICE AND WARRANTY:
www.bresser.de/warranty_terms


natural_image
Empty white background with faint horizontal lines and corner markers (no text or symbols)
text_image
EN IT DE FR ES 71
MANUAL DOWNLOAD:
SERVICE AND WARRANTY:
www.bresser.de/warranty_terms
EXPLORE®
SCIENTIFIC
EU Explore Scientific GmbH
Gutenbergstr. 2 · DE-46414 Rhode Germany
1010 S. 48th Street, Springdale, AR 72762
www.explorescientific.com