
Match Pro - Binoculars BUSHNELL - Free user manual and instructions
Find the device manual for free Match Pro BUSHNELL in PDF.

| Brand | Bushnell |
| Model | Match Pro |
| Category | Binoculars |
| Product Type | Low dispersion observation binoculars |
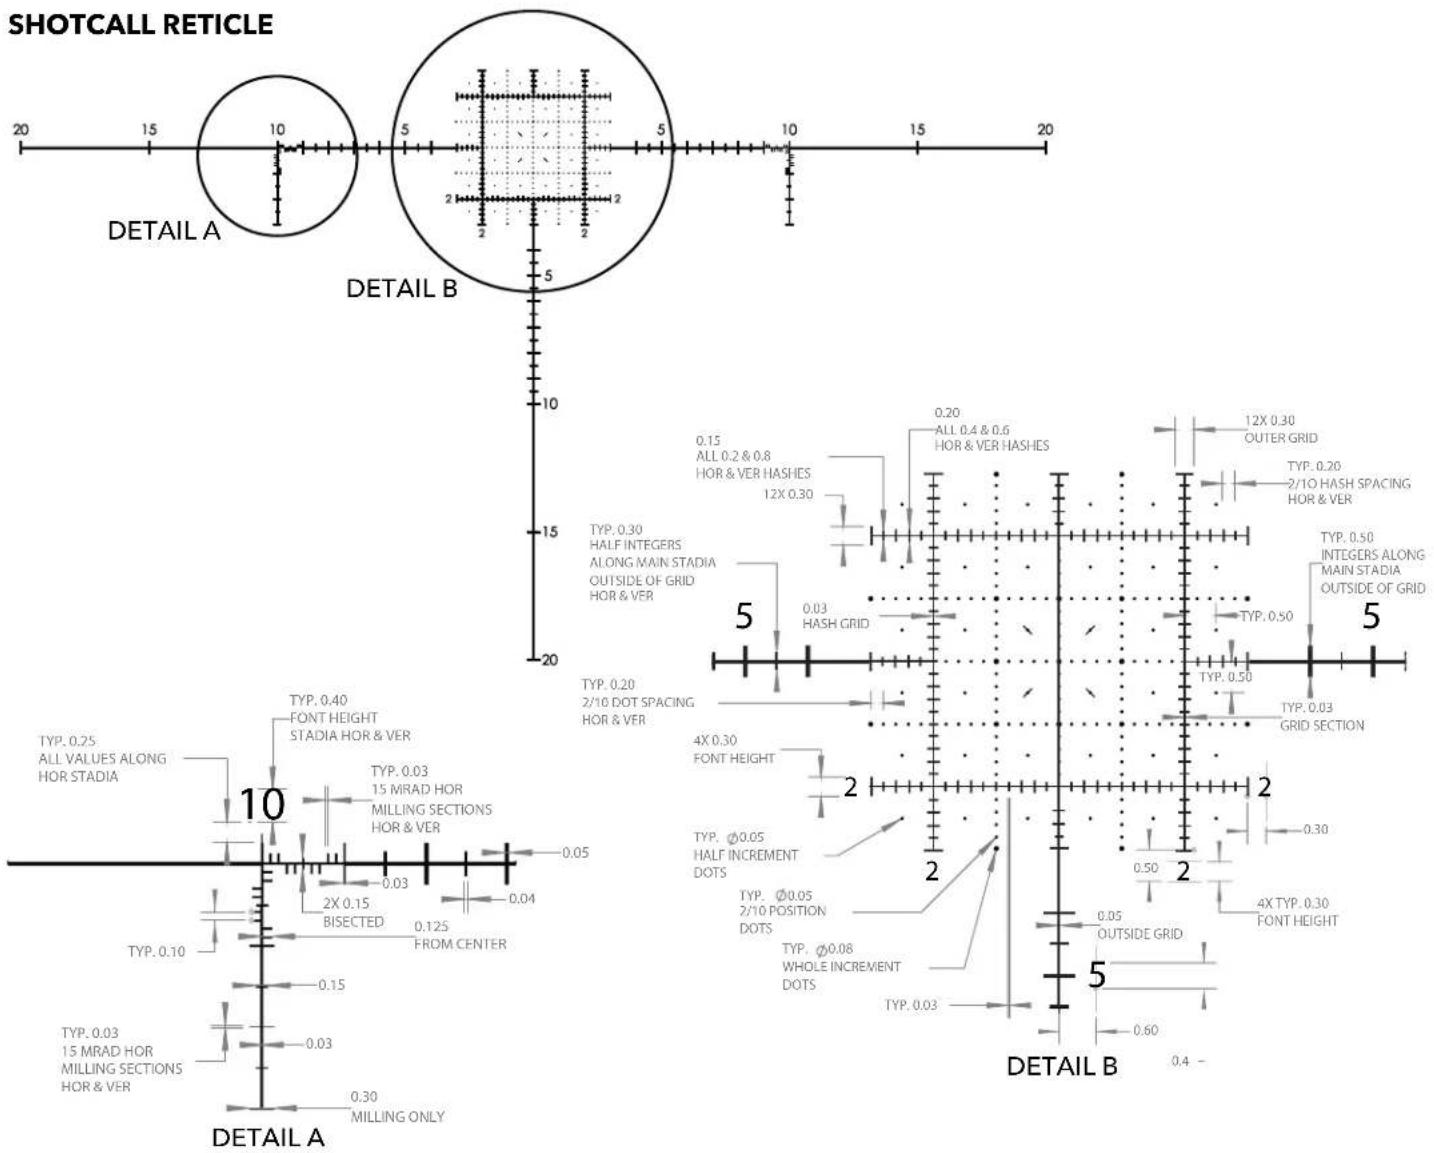
| Reticle | SHOTCALL (MRAD) |
| Magnification | 15x |
| Objective Diameter | 56 mm |
| Prism Type | Abbe-Koenig (roof) |
| Field of View | 236 ft/1000 yd (78.7 m/1000 m) |
| Exit Pupil | 3.8 mm |
| Eye Relief | 18.5 mm |
| Minimum Focus Distance | 13 m |
| Length | 8.6 in (218 mm) |
| Weight | 52 oz (1474 g) |
| Waterproof Construction | IPX5 |
| Fogproof | Nitrogen gas purging |
| Lens Coating | Fully multi-coated + EXO Barrier |
| Eyecups | Twist-up three-position |
| Diopter Adjustment | Yes, with lock |
| Reticle Rotation | Yes, leveling wheel |
| Tripod Mount | Two threaded posts (front and rear) |
| Included Accessory | BridgeSet IPD stabilizer |
| Cleaning | Microfiber cloth, avoid harsh chemicals |
| Maintenance | Store in a cool, dry place |
Frequently Asked Questions - Match Pro BUSHNELL
User questions about Match Pro BUSHNELL
0 question about this device. Answer the ones you know or ask your own.
Ask a new question about this device
Download the instructions for your Binoculars in PDF format for free! Find your manual Match Pro - BUSHNELL and take your electronic device back in hand. On this page are published all the documents necessary for the use of your device. Match Pro by BUSHNELL.
USER MANUAL Match Pro BUSHNELL
- EYECUP ADJUSTMENT 4
- IPD (INTERPUPILLARY DISTANCE) ADJUSTMENT 4
- MAIN AND RETICLE FOCUS DIOPTER 4
- IMAGE CALIBRATION DIOPTER ADJUSTMENT 5
- ROTATING/LEVELING RETICLE 5
TRIPOD & BRIDGESET IPD STABILIZER MOUNTING 5
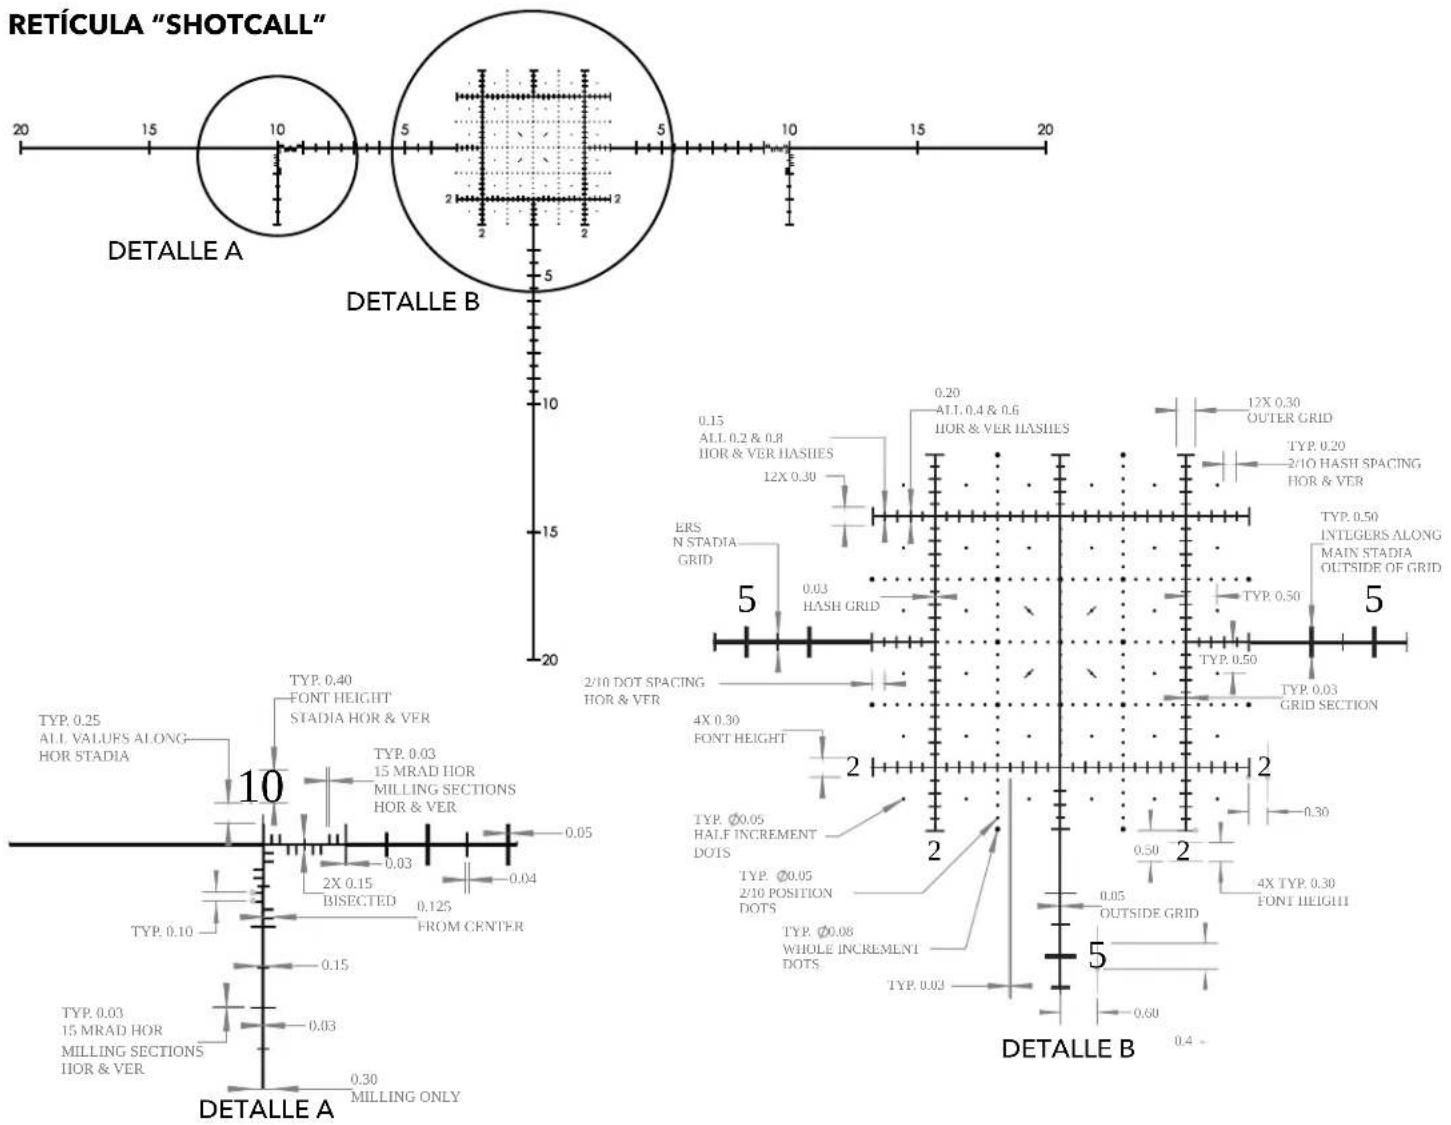
SHOTCALL RETICLE 6
WATERPROOF / FOGPROOF 6
NECKSTRAP ATTACHMENT (NOT INCLUDED) 6
CARE OF THE OPTICS
CLEANING 7
TECHNICAL SPECIFICATIONS 7
WARRANTY 7
LANGUAGES
FRANÇAIS 8
ESPAÑOL 13
DEUTSCH 18
ITALIANO 23
7
You've made the right decision by choosing the Bushnell Match Pro® ED Spotting Binocular!
Bushnell® is always at the forefront of high quality, multi-use optics. The Match Pro® ED Spotting Binocular is no exception. Fully multi-coated lenses, ED Prime objective lens, and dry nitrogen purged IPX5 construction offer crisp, bright images in any environment.
The Match Pro ^® ED utilizes Abbe-Koenig Prisms for superior resolution and light transmission for the clearest image. In addition, the SHOTCALL reticle is designed to condense and lighten the long-range shooter's gear bag by combining features of a high magnification binocular and an MRAD based reticle for ranging, target sizing, and shot correction.
PARTS GUIDE
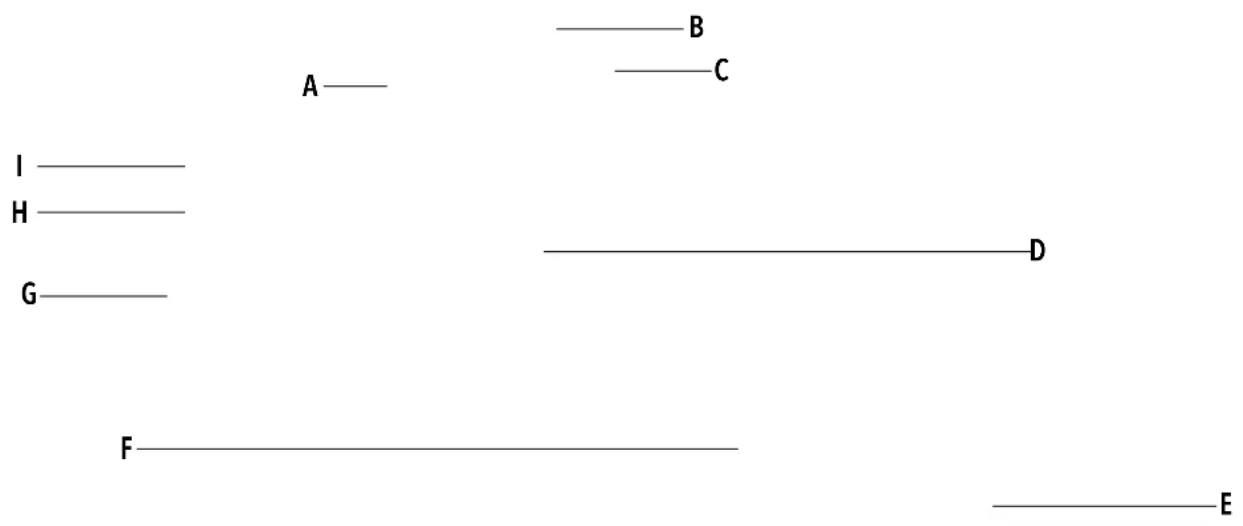
A. Main Focus Knob
B. Three Position Twist-Up Eyecups
C. Image Calibration Diopter
D. Rearward Bridge Accessory Lug
E. Objective Lens
F. Forward Bridge Accessory Lug
G. Strap Slug
H. Reticle Rotating/Leveling
I. Reticle Focus Diopter
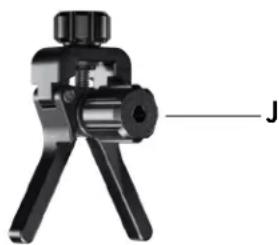
J. BridgeSet IPD Stabilizer
natural_image
Close-up of a black mechanical clamp or crimping tool with a labeled component 'J' (no text or symbols on the device itself)
WARNING: NEVER LOOK AT THE SUN THROUGH THE BINOCULAR (OR ANY OTHER OPTICAL INSTRUMENT). IT MAY PERMANENTLY DAMAGE YOUR EYES.
MATCH PRO® ED SPOTTING BINOCULAR SETUP STEPS:
Note: Due to the high magnification, a tripod and mounting adapter, or other suitable support, is useful for steadying target images during the setup process.
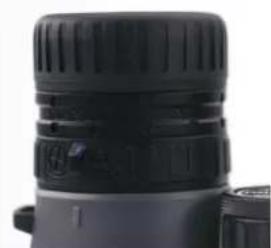
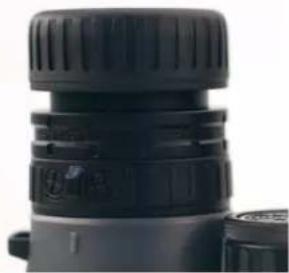
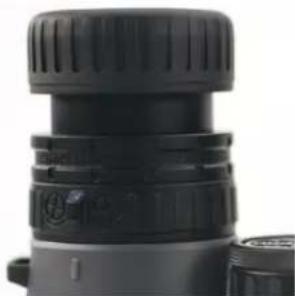
1. EYECUP ADJUSTMENT
Your Bushnell Match Pro binocular is fitted with three position eyecups (Fig. 1) that provide a comfortable view of the full image and help to exclude extraneous light. For use without eyeglasses or sunglasses, twist up the eyecups (Fig. 2 & 3). This action will place your eyes farther from the binocular's ocular lenses at the correct eye relief distance, allowing you to see the full field of view.
natural_image
Close-up of a black and white camera lens (no visible text or symbols)Fig. 1 Eyecup in "Down" Position (for use with glasses)
natural_image
Close-up of a black cylindrical device with textured top and side connectors (no visible text or symbols)Fig. 2 Eyecup in First "Up" Position (for use without glasses)
natural_image
Close-up of a black cylindrical object with textured surface and small protrusions (no visible text or symbols)Fig. 3 Eyecup in Second "Up" Position (for use without glasses)
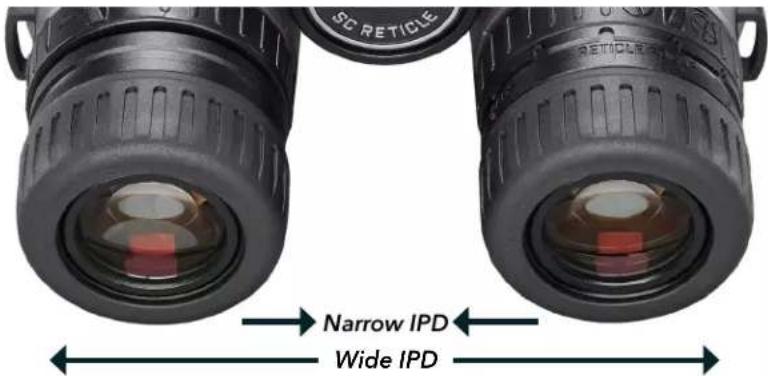
2. IPD (INTERPUPILLARY DISTANCE) ADJUSTMENT
The spacing between the pupils of your eyes, called "interpupillary distance," varies from person to person. To match your binoculars to your IPD or eye-to-eye width:
a. Point the binocular at a white wall or blank area of the sky. Hold the binoculars and view them as you normally would. Don't worry about focus yet.
b. Grasp each side of the binocular firmly. Next, move the left and right sides closer or farther apart (Fig. 4) until you see a single image with no shaded areas.
Fig. 4 Interpupillary Distance (IPD) Adjustment
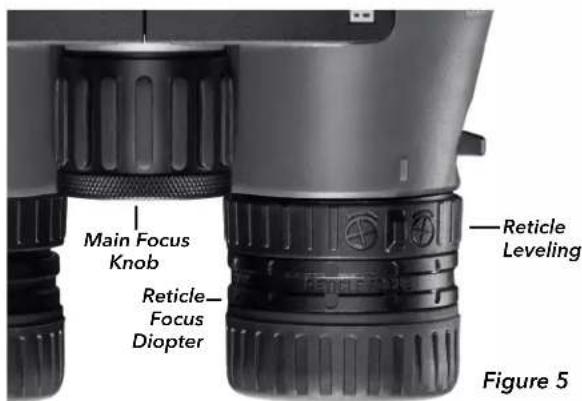
3. MAIN FOCUS KNOB AND RETICLE FOCUS DIOPTER
While looking at a light-colored blank wall or similar plain background, use the Main Focus Knob (Fig. 5) to make the background or target image out-of-focus. Next, concentrate on the right-barrel reticle and rotate the Reticle Focus Diopter (Fig. 5) in either direction until it is sharp. Leave both eyes open during this step.
Look away from the binocular for a few seconds, then look at the reticle again to ensure it is in focus. Minor adjustments may be needed to ensure your eye isn't working harder than it needs to. The reticle should be in focus as soon as you look through the right barrel with your right eye.
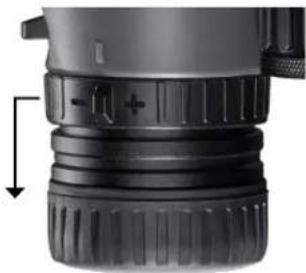
- IMAGE CALIBRATION DIOPTER ADJUSTMENT
a. Cover the left objective lens with the attached lens cap and observe a target image with fine details, such as a distant sign or label with printed words. Next, use the Main Focus Knob to focus the image until the target image is sharp. Leave both eyes open during this step.
b. Do not adjust the Main Focus Knob during this step. Next, cover the right barrel and uncover the left. Unlock the Image Calibration Diopter by pulling the ring towards the eyecup. Next, observe the same target image as in step 4a, with both eyes open, and calibrate the left-barrel focus by rotating the Image Calibration Diopter in either direction. Confirm the diopter is calibrated by looking away from the binocular and then back at the target image to ensure the image is immediately in focus. Minor adjustments may be needed. Lock the ring back into place when finished by pushing it toward the objective lens.
natural_image
Close-up of a black camera lens component with a directional arrow indicating compression (no text or symbols visible)Fig. 6 Image Calibration Diopter. Pull the ring towards eyecup to unlock for adjustment.
- ROTATING/LEVELING RETICLE
Focus on a target image and level the reticle with the horizon using the Reticle Leveling control (Fig. 5). This control is relatively stiff to turn to reduce accidental adjustments. If unsure about the horizon level, aids such as a bubble level, plumb bob, or laser level may be used. If the reticle focus needs fine tuning, repeat steps #2 through 4. Any Image Calibration or Reticle Focus Diopters adjustments should be minor compared to the first pass.
The binocular is now calibrated to your vision, and the Main Focus Knob is typically all you'll need to adjust moving forward.
TRIPOD & BRIDGESET IPD STABILIZER MOUNTING
The Match Pro ED offers two ways to attach a tripod mount, or the included BridgeSet IPD Stabilizer. This allows two accessories to be used at the same time.
To attach the binocular to a tripod, unscrew or pull off the cap which covers the threaded socket (lug) and set it aside in a safe place. Use a compatible binocular tripod adapter accessory to attach the binocular to any standard tripod horizontally to provide stability during prolonged viewing.
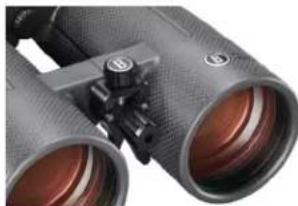
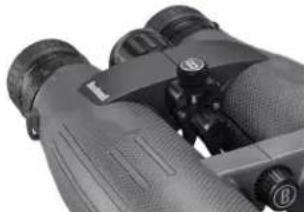
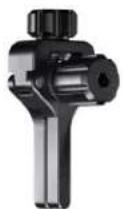
The BridgeSet IPD Stabilizer allows you to secure your customized IPD or eye-to-eye width. The accessory can be put in the forward (Fig. 7) or rearward (Fig. 8) lug positions.
To attach the accessory:
-
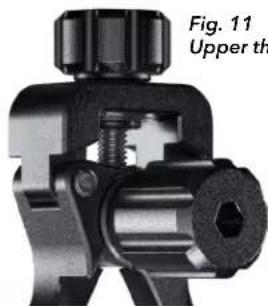
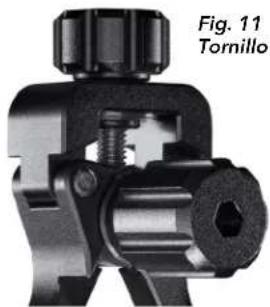
Open the binocular to the widest point, and ensure the stabilizer is collapsed. Use the stabilizer's upper thumb screw (Fig. 11) to adjust the leg position if necessary. This will allow easier access to the chosen lug position.
-
Unscrew the cap that covers the threaded socket (lug) (Fig. 9) and set it aside in a safe place.
-
Rotate the forward thumb screw (Fig. 10) into the lug. Use the included hex key to tighten further, be sure not to overtighten.
-
Readjust the binocular IPD to your setting (see IPD adjustment on Page 4).
-
Expand the stabilizer legs by rotating the upper thumb screw (Fig. 11) until they contact the bottoms of both binocular barrels.
natural_image
Close-up of a pair of binoculars with visible lens and adjustment knobs (no text or symbols)Fig. 7 Forward Lug position
natural_image
Close-up of binoculars with visible lens and adjustment knobs (no text or symbols)Fig. 8 Rearward Lug position

natural_image
Close-up of a car's wheel knob with a 'B' marking, no visible text or symbols beyond the labelFig. 9 Threaded socket cap cover
natural_image
Mechanical component diagram showing a valve assembly with no visible text or symbolsFig. 11 Upper thumb screw
BridgeSet IPD
Stabilizer collapsed
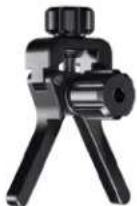
BridgeSet IPD
Stabilizer expanded
WATERPROOF / FOGPROOF
Getting caught in a heavy downpour won't be a problem. The binocular is manufactured and tested to withstand water exposure to IPX5 standards. Fogproof protection is achieved from dry nitrogen purging that removes suspended moisture.
All exterior lens surfaces have our new EXO Barrier™ coating (in addition to full multi-coating). EXO Barrier, quite simply, is the best protective lens coating technology Bushnell has ever developed. The EXO Barrier is added at the end of the coating process to molecularly bond to the lens and fills the microscopic pores in the glass. The result is an ultra-slick coating that repels water, oil, fog, dust, and debris - rain, snow, fingerprints, and dirt will not stick. In addition, EXO Barrier is built to last: the bonded coating will not fade with time or normal wear and tear.
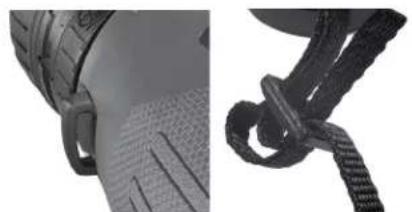
NECKSTRAP ATTACHMENT (not included)
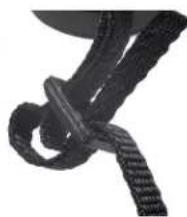
To attach a neckstrap, thread the ends of the neckstrap through the strap lug (Fig. 12) on each side of the binocular, then back through the plastic buckle on the strap (Fig. 13). Adjust the position of the binoculars on your chest as they hang around your neck to your preference, by changing the length of the strap section which passes through the strap channel and buckle by an equal amount on each side. If you prefer to use an aftermarket strap with metal split key rings, attach them to a plastic zip tie placed on the strap lugs rather than installing them directly on the lug to avoid damaging the finish on the binocular via contact with the rings.
natural_image
Close-up of two mechanical components: a textured surface and a knotted rope (no text or symbols visible)Fig. 12 Strap Lug Fig. 13 Strap & Buckle
CARE OF THE OPTICS
- Your Bushnell Match Pro binocular will provide years of trouble-free service if it receives the normal care you would give any fine optical instrument.
- Avoid sharp impacts. Set the binocular down gently on hard surfaces.
- Tug on the strap after attaching it, ensuring it is securely fastened to the binocular before placing it around your neck.
- Store your binocular in a cool, dry place whenever possible.
CLEANING
- First, blow or brush away any dust or debris on the lens (using "canned air" or a soft lens brush). Excessive contamination, such as muddy water spots, should first be flushed with low-flow water from a cup or bottle.
- To remove dust or fingerprints, use a clean microfiber cloth. First, breathe onto the lens to be cleaned to apply a light coating of moisture. Then, starting at the middle of the lens, apply the cloth and gently rub with a circular motion moving outwards. Use of a coarse cloth (including paper towels) or unnecessary rubbing may scratch the lens surface and eventually cause permanent damage.
- For a more thorough cleaning, photographic lens tissue and photographic lens cleaning fluid may be used. Always apply the fluid to the cleaning cloth - never directly on the lens.
- Never use household window cleaning liquids to prevent potential damage to the optical coatings on the binocular's lens surfaces. Likewise, avoid using facial tissue or clothing that may have fibers that can be abrasive and hold oils or dirt.
Note: If using in the rain, resist the urge to wipe the lens, as keeping microfiber cloths clean while hands are dirty is difficult. A blow-out bulb or simply focusing through the droplets is often a better strategy. Also, it is unnecessary to keep the lenses spotless at all times. Thin films of dust or other small amounts of contaminants will not significantly degrade optical performance.
TECHNICAL SPECIFICATIONS
| SKU | Reticle | Magnification | Objective Diameter | Prism System | Field of view ft@100yds / m@100m | Exit Pupil (mm) | Eye Relief (mm) | Close Focus (ft/m) | Length (in/mm) | Weight (oz/g) |
| BMP1556G SHOT-CALL 15x 56 mm Abbe-Koenig | Roof | 236 / 78.7 | 3.8 18 | 5 13 / 4 8 | 8.6/218 52 oz / 1 | ,474 g | ||||
Click to read the Bushnell Ironclad Warranty.

Bushnell®
©2023 Bushnell Outdoor Products
Bushnell, ^™ , ^® , denote trademarks of Bushnell Outdoor Products
www.bushnell.com
9200 Cody, Overland Park, KS 66214
natural_image
Close-up of a black wire crimping tool with a labeled component 'J' (no text or symbols on the device itself)
AVERTISSEMENT : NE JAMAIS REGARDER LE SOLEIL À TRAVERS LES JUMELLES (OU TOUT AUTRE INSTRUMENT OPTIQUE). CELA POURRAIT ENTRAÎNER DES LÉSIONS OCULAIRES IRRÉVERSIBLES.
ÉTAPES DE RÉGLAGE DES JUMELLES D'OBSERVATION À FAIBLE DISPERSION MATCH PRO® :
natural_image
Close-up of a black camera lens with visible lens and adjustment knobs (no text or symbols)natural_image
Close-up of a black cylindrical optical device with textured grip and mounting bracket (no visible text or symbols)natural_image
Close-up of a black cylindrical optical device with textured surfaces and no visible text or symbolsnatural_image
Close-up of a black camera lens component with a directional arrow indicating compression (no text or symbols visible)natural_image
Close-up of a car's wheel knob with a circular logo (no readable text or symbols)natural_image
Close-up of a pair of binoculars with visible lenses and adjustment knobs (no text or symbols)natural_image
Close-up of binoculars with no visible text or symbolsFig. 8 Position ergot arrière
natural_image
Close-up of a car's side profile showing front wheel, side profile, and textured surface (no text or symbols)natural_image
Close-up of a black rope tied with a string, no visible text or symbols©2023 Bushnell Outdoor Products
Bushnell, ^TM , ②, denote trademarks of Bushnell Outdoor Products
www.bushnell.com
9200 Cody, Overland Park, KS 66214
natural_image
Close-up of a black mechanical clamp or crimping tool with a labeled component 'J' (no text or symbols on the device itself)
natural_image
Close-up of a black camera lens with visible focal points and adjustment knobs (no text or symbols)natural_image
Close-up of a black cylindrical device with textured top and side connectors (no visible text or symbols)natural_image
Close-up of a black cylindrical optical device with textured top and side connectors (no visible text or symbols)natural_image
Close-up of a black camera lens component with a directional arrow indicating compression (no text or symbols visible)natural_image
Close-up of black binoculars with visible lens and adjustment knobs (no text or symbols)natural_image
Close-up of binoculars with no visible text or symbolsnatural_image
Close-up of a car's wheel knob with a circular logo (no readable text or symbols)Fig. 9 Tapa de la zapata roscada
natural_image
Close-up of a mechanical clamp or connector component (no visible text or symbols)Fig. 10 Tornillo delantero
natural_image
Close-up of a car's side profile showing front wheel, side profile, and textured surface (no text or symbols visible)Fig. 12 Lengüeta para correa
natural_image
Close-up of a black rope tied with a string, no visible text or symbolsFig. 13 Correa y hebilla
natural_image
Close-up of a black mechanical clamp or crimping tool with a labeled component 'J' (no text or symbols on the device itself)
WARNUNG: SCHAUEN SIE MIT DIESEM FERNGLAS (ODER EINEM ANDEREN OPTISCHEN INSTRUMENT) NIEMALS IN DIE SONNE, DA DIES ZU DAUERHAFTEN AUGENSCHÄDEN FÜHREN KANN.
natural_image
Close-up of a black camera lens component with a directional arrow indicating compression (no text or symbols visible)natural_image
Close-up of black binoculars with visible lenses and adjustment knobs (no text or symbols)natural_image
Close-up of binoculars with visible lens and adjustment knobs (no text or symbols)natural_image
Close-up of a mechanical knob with a circular label (B) on a textured surface, no visible text or symbols beyond the letter.natural_image
Mechanical component diagram showing a valve assembly with no visible text or symbolsnatural_image
Close-up of a car's side profile showing front wheel, side profile, and textured surface (no text or symbols)Abb. 12 Tragegurt

natural_image
Close-up of a black rope tied with a string, no visible text or symbols©2023 Bushnell Outdoor Products
Bushnell, ^TM , ^® , denote trademarks of Bushnell Outdoor Products
www.bushnell.com
9200 Cody, Overland Park, KS 66214
natural_image
Close-up of a black mechanical clamp or crimping tool with a labeled component 'J' (no text or symbols on the device itself)
ATTENZIONE: NON OSSERVARE IL SOLE ATTRAVERSO IL BINOCOLO (O ALTRI STRUMENTI OTTICI). POTREBBE CAUSARE DANNI PERMANENTI AGLI OCCHI.
natural_image
Close-up of a black cylindrical object with textured surface and small protrusions (no visible text or symbols)natural_image
Close-up of a black mechanical device with threaded top and side connectors (no visible text or symbols)natural_image
Close-up of a black cylindrical optical device with textured top and side ports (no visible text or symbols)©2023 Bushnell Outdoor Products
Bushnell, ^™ , Ⓡ , denote trademarks of Bushnell Outdoor Products
www.bushnell.com
9200 Cody, Overland Park, KS 66214