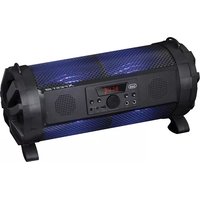
XF 550 APP - Docking station Trevi - Free user manual and instructions
Find the device manual for free XF 550 APP Trevi in PDF.


| Product Type | Docking Station |
| Brand | Trevi |
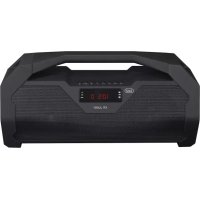
| Model | XF 550 APP |
| Music Power | 40 W |
| Frequency Response | 38 Hz - 20 kHz |
| FM Range | 87.5 - 108 MHz |
| Bluetooth Version | 2.1 |
| Rechargeable Battery | 2000 mAh, approximately 100/110 min autonomy |
| Power Supply | 9 V, 1 A (AC/DC adapter included) |
| Dimensions | 520 x 215 x 235 mm |
| Microphone Inputs | 2 MIC inputs (6.35 mm) |
| USB Port | USB playback and 5 V 1 A output (power bank) |
| Line-in Input | 3.5 mm jack |
| Main Functions | Bluetooth, FM radio, USB, Line-in, microphone, LED light effects, equalizer |
| App Control | Speaker Pro app (iOS/Android) |
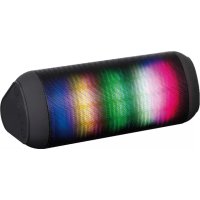
| LED Light Effects | 12 preset modes, brightness and color adjustment |
| Equalizer | Presets Dance, Classical, Jazz, Rock and custom equalizer |
| Package Contents | Player/radio unit, microphone, AC/DC adapter, audio cable, carrying strap, user manual |
| Maintenance and Cleaning | Soft slightly damp cloth, avoid solvents and abrasive substances |
| Safety | Do not use above 9 V, do not expose to water or heat sources, moderate volume |
| Warranty | 24 months from date of manufacture |
Frequently Asked Questions - XF 550 APP Trevi
User questions about XF 550 APP Trevi
0 question about this device. Answer the ones you know or ask your own.
Ask a new question about this device
Download the instructions for your Docking station in PDF format for free! Find your manual XF 550 APP - Trevi and take your electronic device back in hand. On this page are published all the documents necessary for the use of your device. XF 550 APP by Trevi.
USER MANUAL XF 550 APP Trevi
al dispositivo.
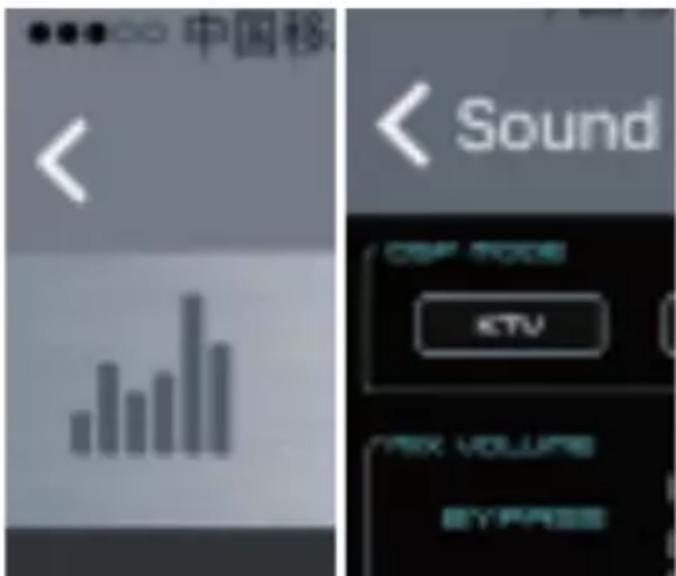
MIX VOLUME: BYPASS, EFFECT;
HOWLING CONTROL: FREQUEN. SHIFTER, HOWLING, PRECISE, MASSIVE.
FUNZIONAMENTO USB
- Do not use power supply with a voltage higher than 9V, 1A; cause damage unit.
- Listen at high volume for long periods of time, may damage your hearing.
- Avoid placing the player:
- Near magnetic fields.
- Near any heat sources such as heaters and stoves.
- In very damp places like bathrooms, swimming pools, etc...
- In very dusty places.
- In places subject to strong vibrations.
- Place the appliance so that its sides there is always enough room for free air circulation (at least 5 cm).
- If liquids penetrate into the appliance immediately disconnect the plug from the wall socket and set the appliance to your nearest authorised TREVI Service Centre.
• Always check before charging, power cables and connection are installed properly. - No naked sources, such as lighted candles, should be placed on this.
- The apparatus shall not be exposed to dripping or splashing water and no object filled with water, such as vases, should be placed on the unit.
- Keep this manual for future reference.
CARE AND MAINTENANCE
For cleaning it is recommended to use a soft, slightly damp cloth. Avoid solvents or abrasive substances.
IMPORTANT
The construction of this device guarantees long flawless operation. However, if come some problem, you should consult your nearest authorized service center.
TREVI pursues a policy of continuous research and development. Therefore, the products may show different characteristics from those described.
WARNING FOR A CORRECT USE OF RECHARGEABLE BATTERY
- Recharge the battery in an ambient temperature between 5°C and 35°C.
- Don't recharge more than the suitable period to prevent the risk of overheating and burst.
- Don't recharge the battery for more than 8 hours.
- Recharging the battery over the suitable period or an extended period of inactivity may reduce battery duration.
- Rechargeable battery is liable to wear and tear and its performance will reduce gradually.
- To extend the duration of the battery use it when is completely charged up to the complete discharging, then recharge it fully before use it again. Recharge a battery not completely consumed, will result a reduced duration. In this case, repeat the full charging/discharging cycle many times.
- Avoid recharge the battery for the whole night.
PACKAGE CONTENTS
- Unit
- Microphone
-
AC/DC adaptor
-
Audio cable (Line-in)
- Strap
- User manual
DESCRIPTION LINKS AND CONTROLS
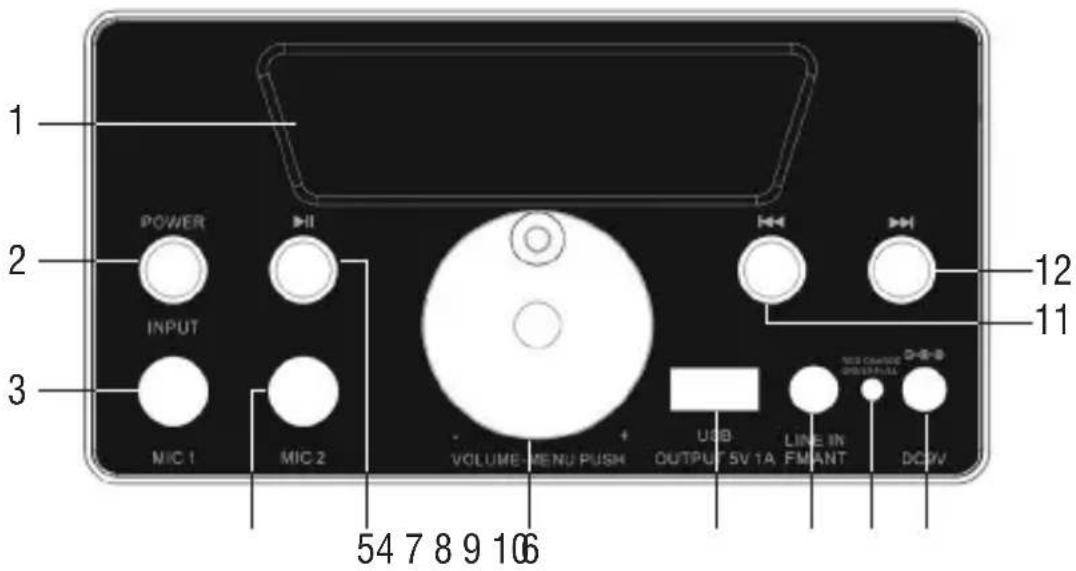
- Led Display
- POWER/INPUT button
- Microphone 1 In
- Microphone 2 In
-
▶ II button, Play/Pausa; (In FM mode, hold for 3 seconds the device will enter into automatic scan)
-
VOLUME-/+ & MENU PUSH: Master volume adjustment&Men selection button&PUSH knob enter menu.
-
USB Player/Power Bank 5V --- 1A output
-
LINE input/FM ANT.
-
LED CHARGE STATUS:
RED= Charging GREEN= Fully charged
-
Power Socket 9V---1A
-
◀ button, previous song
-
▶ button, next song
CHARGING THE BATTERY
At the first use of the device, charge it for 4 hours.
-
With device in OFF, connect the supplied power cord to device's socket (10). Connect the power adapter to a power outlet;
-
The LED indicator (9) lights Red;
-
After charging the LED indicator (9) will be Green.
Note:
- For a good battery life it is recommended to keep the unit off during charging.
- The device's autonomy with the fully charged battery is about 100/110min depending on the volume.
BASIC OPERATION
- POWER/INPUT: long press (for above 2 seconds) to turn on the machine; during working status, short press to select mode: BT/LINE/FM (circulating); during working status, long press (for above 2 seconds) to turn off the machine.
- PLAY/PAUSE: during playing status, short press to pause/mute; during FM mode, long press to automatically scan radio station.
- VOLUME-MENU PUSH: adjust volume; PUSH knob enter menu: bass volume adjustment -9\~+9Vo treble volume adjustment -9\~+9 IU MIC input volume adjustment EC MIC reverb depth adjustment dL MIC reverb delay adjustment LED light mode switch br light brightness adjustment volume adjustment (circulating).
- PREVIOUS/NEXT: during playing status, press to get back to a previous or next song.
- USB: USB Player/Power Bank 5V 1A output.
RADIO FUNCTION
AUTOMATIC STORING
- Place the device in a non-interfering location and insert the Line-in cable into the socket (8) as an antenna;
- Select the Radio function by pressing the key (2) a few times;
- Press and hold down the key ▶ II (5) for a few seconds to search and store radio stations automatically; the search/storage will stop when the entire radio bandwidth is completed. At the end, the first stored radio station will be played.
RECALL STORED STATION
To call the number of a preset station to use ▶▶ (12) for next station and ◀◀ (11) for previous station.
Note: The quality of FM reception depends on the place where the device is placed. The proximity of TV sets, fluorescent lamps, or other appliances may cause interference in the reception of radio programs, in this case removed the radio player.
BLUETOOTH FUNCTION
PAIR TO YOUR BLUETOOTH DEVICE
- Place the speaker near the Bluetooth device to be connected and turn on the unit;
- Press button (2) repeatedly until "Blue" appears in the display (1);
- Follow the instructions of your external device to search for the speaker;
- Search the speaker named "XF 550 APP" and enter the PIN "0000" if required;
-5. Will hear a notification sound to confirm you the connection.
Notes:
- The speaker can only works with a Bluetooth connection, free it can not be interrupted during normal operation.
The proximity of TV sets, fluorescent lamps or other appliances may cause interference in the reception, in this case, to move the unit.
CONTROLS AVAILABLE IN BLUETOOTH MODE
- Press ▶▶ (11) button once to skip to next song, press ◀◀ (12) button once to skip to previous song.
- Press ▶ II (5) button to pause, press it again to resume play.
DIRECT APPLICATION OF THE APPARATUS:
To check the device via your smartphone, tablet, or other device, download the "Speaker
Pro” application; this will allow you to control the following modes: Music, Light, USB Input, Equalizer, Microphone. To cancel the app, press the exit button.
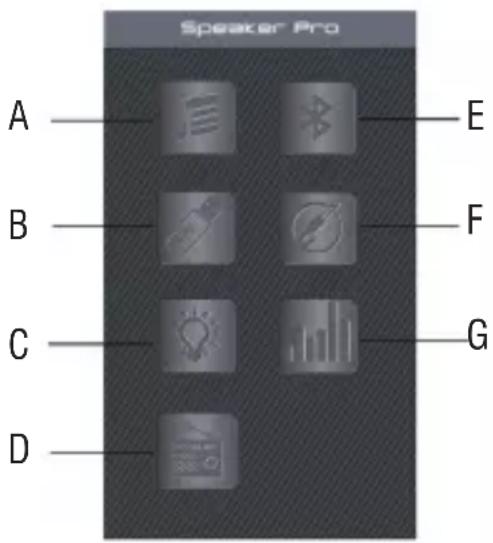
Once the device is connected to the external device via a Bluetooth connection (see “Connecting to Devices”), open the “Speaker-Pro” app on the external device. On the main page there are 7 icons:
A. Bluetooth Music play.
B. USB card play.
C. Light control colour, brightness and light flash mode.
D. FM Radio.
E. Control Bluetooth connect.
F. Line-in input-mute.
G. Equalizer, volume adjustment for music, Microphone.
A. Bluetooth Music play:
Press 📄 to enter into Bluetooth Music play page, Press “Pick songs to play” to Pick Song page to choose the song you want to play, press “Done” to return to Bluetooth Music play page, also you can operate pause, play, backward, forward & volume adjustment, repeat, random play. Press “<” to return to the main page.
B. USB card play:
When inserting a USB into the speaker, press 📄 to enter the USB Card play page. To choose a song and play music on the USB card, press “Play” to enter into the play control page, where you can operate pause, play, backward, forward & volume adjustment. Press “List” to return to USB list page, press “Back” to return to the main page.
C. Light control colours, brightness and colour change mode:
Press 📷 to enter into Light Control page, you can select any colour to show the light colour on the speaker, as well as adjust the brightness of the light. To go back to main page,
press “<” in the left corner.
Press “Profiles” to enter into Light Effect mode page, you can choose from a total of 12 pre-set light effect modes. To return to Light Control page, press “Light” in the left corner.
D. FM Radio:
Press to enter into FM radio mode, press SCAN to enter into radio program automatic scan. Press ◀◀▶ for radio program manual scan; ▲Top and bottom trimming, Turn the TUNER button radio station can be adjusted. Slide around to adjust radio frequency between 87.5MHz\~108.0MHz.
E. Bluetooth connection:
Press 📋 to enter into Bluetooth Control connection page, then click “Speaker Pro BLE” to connect to the speaker.
F. Line In input - mute:
Press 📋 to enter into Line IN input page, press to mute music, press insert a line continue play. Press “<” to main page.
G. Equalizer, volume adjustment for Microphone and Music:
Press and to enter into Sound Set page to adjust the volume for Music and Microphone. Press Music button, and then turn Volume or Bass or Treble button to adjust the volume; press Microphone button, and then turn EHCO or Microphone Volume or Delay to adjust the volume. There are 4 pre-set EQ modes: Pop, Classical, Jazz and Rock. You can also press G-Eq to access the graphic equalier to set up your preferred equalize specification.
MIC DSP selection:
During “MIC DSP” Sound Field Mode: DSP MODE has 5 choices: KTV, HALL, CAVE, CONCERT, STAOIUM; MIX VOLUME has 2 choices: BYPASS, EFFECT, swipe left and right to adjust the
volume; press ECHO to adjust the volume of ATTENUATION or DELAY mode; press REVBER to adjust the volume of 5 choices: DRY WET WIDTH ROOM DAMPING; press VOICEC HANGE to adjust the volume of PITCH or FORMANT mode; press PITCH SHIFTER to ajust the volume of KEY mode; HOWLING CONTROL has 4 choices: FREQUENCY SHIFTER HOWLING PRECISE MASSIVE.
USB FUNCTION
- Insert a USB memory in socket (7) and turn on the unit;
- Playback will start automatically;
- Press ◀◀(11) button to skip to previous song, press once ▶◀(12) button to skip to next song;
- Press ▶ II (5) button to pause, press it again to resume play.
LINE IN FUNCTION
- Connect any unit equipped with audio output through a 3.5mm jack cable to the LINE IN input (8);
- To press (2) key repeatedly until "LINE" appears on the display (1);
- Adjust the external device from their commands.
TECHNICAL CHARACTERISTICS
Music power: 40W
Frequency response: 38Hz - 20KHz
FM Range: 87.5 - 108MHz
Bluetooth version: 2.1
Bluetooth max power transmission:....0,8mW
Bluetooth transmission: 2,4GHz
Power Supply: ....Rechargeable battery 2000mAh by adapter 9V ---
Dimensions: 520 x 215 x 235mm
INFORMATION ON REMOVAL AND DISPOSAL OF THE BATTERY
Warning: the operation of removal and disposal is reserved exclusively to the specialized technical personnel!
- Remove the screws that secure the frontal control panel.
- Pull out the panel.
- Pull out the connector and remove the battery from its housing.
Whatever type of battery, it must not be thrown into household waste, fire or water. Each type of battery must be recycled or disposed of at appropriate collection dedicated centres.
Precautions for correct disposal of the product.
The symbol shown on the equipment indicates that waste must be disposed of in “separate collection” and so the product must not be disposed of together with urban waste.
The user must take the product to special “separate waste collection centres” provided by local government, or deliver it to the retailer against the purchase of a new product.
Separate collection of waste and subsequent treatment, recycling and disposal operations promotes the production of equipment with recycled materials and limits negative effects on the environment and on health caused by improper handling of waste.
Illegal disposal of the product leads to the enforcement of administrative penalties.
WARRANTY
- This unit is guaranteed for a period of 24 months from the date of production printed on the product itself or on label on product.
- The warranty is valid only if the unit has not been tampered with. The warranty is valid only at authorized TREVI assistance centres, that will repair manufacturing defects, excluded replacement of labels and removable parts.
- TREVI is not liable for damage to people or things caused by the use of this unit or by the interruption in the use of this unit.
NOTES D'EMPLOI
MIX VOLUME: BYPASS, EFFECT;
HOWLING CONTROL: FREQUEN. SHIFTER, HOWLING, PRECISE, MASSIVE.
FONCTIONNEMENT MICRO CARTE SD/USB
CONDITIONS DE GARANTIE
MIX VOLUME: BYPASS, EFFECT;
HOWLING CONTROL: FREQUEN. SHIFTER, HOWLING, PRECISE, MASSIVE.
USB-BETRIEB
MIX VOLUME: BYPASS, EFFECT;
HOWLING CONTROL: FREQUEN. SHIFTER, HOWLING, PRECISE, MASSIVE.
FUNCIONAMIENTO USB
SIMPLIFIED EU DECLARATION OF CONFORMITY
Hereby TREVI Spa declares that the radio equipment type XF 550 APP is in compliance with directive 2014/53/EU.
The full text of the EU declaration of conformity is available at the following internet address: https://www.trevi.it/dms/zidi/TREVI/DOCXF550APP.pdf
- FUNZIONAMENTO USB
- CARE AND MAINTENANCE
- IMPORTANT
- WARNING FOR A CORRECT USE OF RECHARGEABLE BATTERY
- PACKAGE CONTENTS
- DESCRIPTION LINKS AND CONTROLS
- CHARGING THE BATTERY
- Note:
- BASIC OPERATION
- RADIO FUNCTION
- AUTOMATIC STORING
- RECALL STORED STATION
- BLUETOOTH FUNCTION
- PAIR TO YOUR BLUETOOTH DEVICE
- Notes:
- CONTROLS AVAILABLE IN BLUETOOTH MODE
- DIRECT APPLICATION OF THE APPARATUS:
- Bluetooth Music play:
- USB card play:
- Light control colours, brightness and colour change mode:
- FM Radio:
- Bluetooth connection:
- Line In input - mute:
- Equalizer, volume adjustment for Microphone and Music:
- MIC DSP selection:
- USB FUNCTION
- LINE IN FUNCTION
- TECHNICAL CHARACTERISTICS
- INFORMATION ON REMOVAL AND DISPOSAL OF THE BATTERY
- Warning: the operation of removal and disposal is reserved exclusively to the specialized technical personnel!
- Precautions for correct disposal of the product.
- WARRANTY
- NOTES D'EMPLOI
- FONCTIONNEMENT MICRO CARTE SD/USB
- CONDITIONS DE GARANTIE
- USB-BETRIEB
- FUNCIONAMIENTO USB
- SIMPLIFIED EU DECLARATION OF CONFORMITY
Brand : Trevi
Model : XF 550 APP
Category : Docking station