Air Fry Digital 5S - Deep fryer TAURUS - Free user manual and instructions
Find the device manual for free Air Fry Digital 5S TAURUS in PDF.

| Product type | Air Fryer |
| Brand | Taurus |
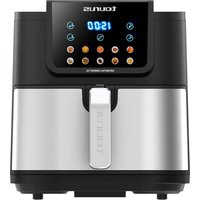
| Model | Air Fry Digital 5S (AF1450XD) |
| Power supply | Electric, power cord with plug |
| Power | 1500 W (estimated) |
| Basket capacity | 5 liters (estimated, up to 1200 g of food) |
| Maximum temperature | 200 °C |
| Timer | 1 to 60 minutes (adjustable) |
| Preset programs | 8 programs: pizza, potatoes, meats, prawns, fish, chicken wings, vegetables, desserts |
| Display | Digital screen with touch control panel |
| Dimensions (W x D x H) | 30 x 30 x 35 cm (estimated) |
| Weight | 4.5 kg (estimated) |
| Material | Plastic and metal, non-stick grid |
| Maintenance and cleaning | Clean with a damp cloth and a little detergent. Do not immerse in water, do not wash in the dishwasher. |
| Safety | Auto shut-off, thermal overheat protection, handle to remove basket |
| Spare parts and repairability | Basket and grid available as spare parts through the technical service |
| Included accessories | Basket, non-stick grid |
| General information | Oil-free air fryer with 8 automatic programs and touch controls |
Frequently Asked Questions - Air Fry Digital 5S TAURUS
User questions about Air Fry Digital 5S TAURUS
0 question about this device. Answer the ones you know or ask your own.
Ask a new question about this device
Download the instructions for your Deep fryer in PDF format for free! Find your manual Air Fry Digital 5S - TAURUS and take your electronic device back in hand. On this page are published all the documents necessary for the use of your device. Air Fry Digital 5S by TAURUS.
USER MANUAL Air Fry Digital 5S TAURUS
natural_image
Line drawing of a flat-screen air fryer with handle and side legs (no text or symbols)EN. Instructions for use
FR. Mode d'emploi
English (Original instructions)
AIR FRYER AF1450XD
DESCRIPTION
A. Digital control panel
- Power ON/OFF icon
- Temperature adjustment icons
- Digital display
- Time adjustment icons
- Preset programs
5.1 Pizza program
5.2 Fries program
5.3 Meat program
5.4 Shrimp program
5.5 Fish program
5.6 Chicken drumsticks program
5.7 Vegetables program
5.8 Dessert program
B. Air inlet
C. Pot
D. Handle
E. Non-stick tray
F. Air outlet
G. Power cable and plug
If the model of your appliance does not have the accessories described above, they can also be bought separately from the Technical Assistance Service.
USE AND CARE
- Fully extend the appliance's supply cord before each use.
- Only use the device if the parts or accessories are properly fitted.
- Do not use the appliance if the accessories attached to it are defective. Replace them immediately.
- Do not use the machine when empty.
- Do not use the appliance if the timer switch does not work properly.
- Do not move the appliance while in use.
- To keep the non-stick treatment in good condition, do not use metal or pointed utensils on it.
- Do not force the appliance's work capacity.
-
Disconnect the appliance from the mains when not in use and before undertaking any cleaning task.
-
Store this appliance out of reach of children and/or persons with physical, sensory or reduced mental or lack of experience and knowledge.
- Do not store or transport the appliance if it is still hot.
- Never leave the appliance connected and unattended if it is not in use. This saves energy and prolongs the life of the appliance.
- Use only utensils appropriate to support high temperatures.
- As a reference, in the annexed table, you will find a recommendation on the cooking temperature and time for several meals.
- The product contains electronic elements and heating elements. Do not put it in water or wash it with water.
- Do not cover the air inlet and outlet during the operating process. Do not touch the inside of the product. Avoid scald.
- Do not damage, strongly pull or twist the power cord, use it to carry heavy loads, or transform it, to avoid electric shock, fire and other accidents. If the supply cord is damaged, it must be replaced by the manufacturer, its service agent or similarly qualified persons in order to avoid a hazard.
- Place the product about 30 cm away from the wall or furniture to avoid damaging it.
INSTRUCTIONS FOR USE
BEFORE USE
- Please read the "Safety advice and warnings" booklet carefully before first use.
- Make sure that the entire product's packaging has been removed.
- Before using the product for the first time, clean the parts that will come into contact with food in the manner described in the «Cleaning» section.
- High-temperature air will flow out through the outlet during the product working process.
USE
- Unroll the cable completely before plugging it in.
- Connect the appliance to the mains.
- Note: manipulate the pot using its handle. Don't touch the pot when it's hot.
- Put the ingredients you want to fry inside the pot (C).
- Introduce the pot inside the fryer.
- Press the on/off button (1) to switch on the appliance.
-
Adjust the temperature and time using the according buttons, or select one of the 8 preset modes, as the initial temperature and time will be 200^ and 18 minutes.
-
Press the on/off button again to start the cooking (1). If you leave it while any preset mode is selected, it will turn off into standby mode after 1 minute. This also applies to pausing in the middle of the cooking process.
- Note: If the product is switched on and you pull off the pot, it will be off until you put it back in.
- Note: Keep in mind that if the appliance is cool, you should add 3 minutes to the cooking time.
- Note: if you want to shake the ingredients, pull the pot out of the appliance by the handle and shake it after 2/3 of the cooking time has been reached.
- Once the cooking time reaches its end, pull out the pot outside the appliance. The appliance will switch off automatically.
- If the food is not cooked as desired, switch it on again for a couple of minutes.
- CAUTION: Pot and food will be very HOT.
- Place the pot over a plain surface able to support high temperatures.
TIME AND TEMPERATURE
- You can adjust the duration and temperature by using the symbols ▲ /▼ (2, 4).
PRESET PROGRAMS
• This appliance has 8 preset programs.
- To select a program, press any of the program buttons (5.1-5.8).
- If you wish, you can also change the temperature and time settings for the preset programs (2,4).
- Once the program has been selected, press the on/off icon (1) to start heating. You will see that the Timer will start running.
- To change any settings while cooking, first pause by pressing the on/off icon (1), modify the desired setting (2,4) and then resume by pressing on/off again (1).
- NOTE: During the cooking phase, you can press the on/off icon (1) to stop the appliance. The Timer will also stop and display whatever time remains. Press this button again to resume the cooking phase.
- The fryer will beep when the cooking time has finished.
- Check to see that the food is cooked.
- If it is not, you only have to put the container back in the fryer and program the Timer to cook for a few more minutes.
- When cooking is complete, remove the pot from the appliance. The appliance will switch off automatically.
ONCE YOU HAVE FINISHED USING THE APPLIANCE
- Unplug the appliance from the mains.
- Let it cool down.
- Clean the appliance as it is explained in the «Cleaning» section.
SAFETY THERMAL PROTECTOR
- The appliance has a safety device which protects the appliance from overheating.
- If the appliance turns itself off and does not switch itself on again, disconnect it from the mains supply and wait for approximately 15 minutes before reconnecting. If the machine does not start again, seek authorised technical assistance.
CLEANING
- Disconnect the appliance from the mains and allow it to cool before undertaking any cleaning task.
- Clean the equipment with a damp cloth with a few drops of washing-up liquid and then dry it.
- Do not use solvents or products with an acid or base pH, such as bleach, or abrasive products, for cleaning the appliance.
- Never submerge the appliance in water or any other liquid or place it under running water.
- It is advisable to clean the appliance regularly and remove any food that remains.
- If the appliance is not in good condition of cleanliness, its surface may degrade and inexorably affect the duration of the appliance's useful life and could become unsafe to use.
- None of the parts is suitable for cleaning in the dishwasher.
- The draining/drying position of the articles washable in the sink must allow the water to drain away easily.
- Then dry all parts before their assembly and storage.
RECOMMENDATION TABLE
• Here you can find our recommendation on the time and temperature for frying different meals.
- NOTE: These settings are indicative only.
- Foods may vary in origin, size, shape and brand, so we cannot guarantee the best settings for any specific food.
| COOKING GUIDE Food Amount (g) (min-max) | Time (min) | Temp. (°C) | Shake Extra information | ||
| Potatoes & fries | |||||
| Thin frozen fries 300-1200 9-16 200 Yes | |||||
| Thick frozen fries 300-1200 11-20 200 Yes | |||||
| Home-made fries (5×8mm) 300-1200 16-10 200 Yes | Add 1/2 tbsp oil | ||||
| Home-made potato wedges | 300-1200 18-22 180 Yes | Add 1/2 tbsp oil | |||
| Home-made potato cubes 300-1200 12-18 180 Yes | Add 1/2 tbsp oil | ||||
| Rosti 250 15-18 180 Yes | |||||
| Potato gratin | 500 15-18 200 Yes | ||||
| Meat & Poultry | |||||
| Steak | 100-500 | 8-12 180 | |||
| Pork chops | 100-500 | 10-14 180 | |||
| Hamburger | 100-500 | 7-14 180 | |||
| Sausage roll | 100-500 | 13-15 180 | |||
| Drumsticks | 100-500 | 18-22 180 | |||
| Chicken breast | 100-500 | 10-15 180 | |||
| Snacks | |||||
| Spring rolls | 100-400 | 8-10 200 Yes | |||
| Frozen chicken nuggets 100-500 6-10 200 Yes | |||||
| Frozen fish fingers 100-400 6-10 200 | |||||
| Frozen breadcrumbed cheese snacks | 100-400 | 8-10 180 | |||
| Stuffed vegetables | 100-400 | 10 | 160 | ||
| Baking | |||||
| Cake | 300 20-25 160 | Use baking tin/ oven dish | |||
| Quiche | 400 20-22 180 | Use baking tin | |||
| Muffins | 300 | 15-18 | 200 | Use baking tin/ oven dish | |
| Sweet snacks | 400 20 160 | ||||
TROUBLESHOOTING
| Problem Possible cause Solution | ||
| The AIR FRYER does not work. | The appliance is not plugged in. | Put the mains plug in an earthed wall socket. |
| You have not set the Timer. Press | the according button to the required cooking time to switch on the appliance. | |
| The foods fried with the AIR FRYER are not done. | The quantity of food in the pot is too much. | Put smaller batches of food in the pot. Smaller batches are fried more evenly. |
| The set temperature is too low. | Press the temperature buttons until you reach the desired temperature.Temperature setting - refer to the cooking guide for reference. | |
| The food is fried unevenly in the AIR FRYER. | Certain food types need to be shaken halfway through the cooking time. | Food that lies on top of or across each other (e.g. fries) needs to be shaken halfway through the cooking time. |
| Fried snacks are not crispy when they come out of the AIR FRYER. | Incorrect food type used. Refer to | food manufacturers cooking instructions. |
| White smoke comes out from the appliance. | Food with high oil content has been used.Oil has been added to the food. | Do not use food groups with high oil content or add extra oil that is not required.An air fryer uses technology where low or no oil is required. |
| The pot still contains grease residues from previous use. | White smoke is caused by grease heating up in the pot.Make sure you clean the pot correctly after each use. | |
| Cannot slide the tray into the appliance. | Pot overloaded. Do not fill the pot | above the indication mentioned in the cooking guide. |
FR
5.4 Shrimp programma
5.5 Visprogramma
WSTĘPNIE USTAWIONE PROGRAMY
LUFTFRYSARE AF1450XD
BESKRIVNING
HAVA FRITÖZÜ AF1450XD
TANIM
A. Dijital kontrol paneli
(הכלההוּרָהוּרָהוּרָהוּרָהוּרָהוּרָהוּרָהוּרָהוּרָהוּרָהוּרָהוּרָהוּרָהוּרָהוּרָה
HE
תַרְשָׁה בְּרִיָה
AF1450XD
תָאַת
•
,הכלההוּרָה,הכלההוּרָה,הכלההוּרָה,הכלההוּרָה,