Air Fry Digital 360 XL - Deep fryer TAURUS - Free user manual and instructions
Find the device manual for free Air Fry Digital 360 XL TAURUS in PDF.

| Brand | Taurus |
| Model | Air Fry Digital 360 XL |
| Type | Oil-free air fryer |
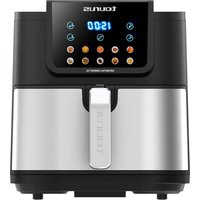
| Number of programs | 10 preset programs |
| Temperature range | 40°C to 200°C (in 5°C increments) |
| Time range | 1 to 60 minutes (in 1 minute increments) |
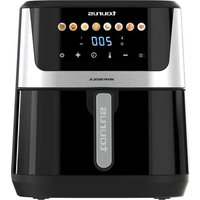
| Special functions | Dual (synchronous cooking), Sync (synchronized finish), preheat, interior light |
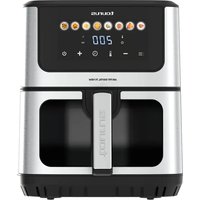
| Compartments | 2 independent cooking compartments |
| Included accessories | 2 frying pots with cast iron grills, wall separation accessory |
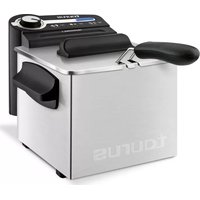
| Cleaning | Dishwasher-safe grills; exterior body cleaned with a damp cloth |
| Safety | Anti-overheating thermal protection, automatic shut-off at end of cooking |
| Power supply | Mains (220-240 V, 50-60 Hz) |
Frequently Asked Questions - Air Fry Digital 360 XL TAURUS
User questions about Air Fry Digital 360 XL TAURUS
0 question about this device. Answer the ones you know or ask your own.
Ask a new question about this device
Download the instructions for your Deep fryer in PDF format for free! Find your manual Air Fry Digital 360 XL - TAURUS and take your electronic device back in hand. On this page are published all the documents necessary for the use of your device. Air Fry Digital 360 XL by TAURUS.
USER MANUAL Air Fry Digital 360 XL TAURUS
AIR FRY GRILL 360 XL (AFA2800D)
natural_image
Line drawing of a closed box with handles and a lid (no text or symbols)EN. Instructions for use
FR. Mode d'emploi
natural_image
Line drawing of a portable electric stove with a power plug and labeled connection point G (no text or symbols beyond basic lines)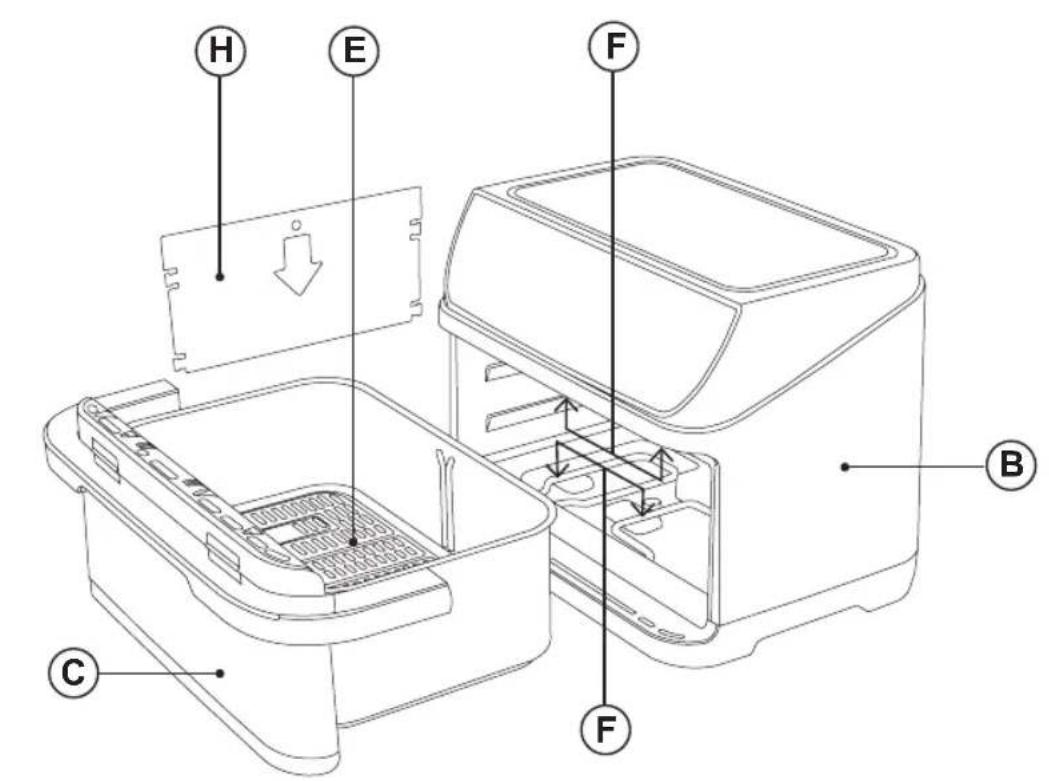
flowchart
graph TD
    A["10"] --> B["8:8:8"]
    C["4"] --> D["664"]
    E["5"] --> F["△"]
    G["2"] --> H["LAMP LEFT"]
    I["9"] --> J["DUAL SYNC"]
    K["8111"] --> L["7"]
    M["7"] --> N["□"]
    O["7"] --> P["□"]
    Q["7"] --> R["□"]
    S["7"] --> T["□"]
    U["7"] --> V["□"]
    W["7"] --> X["□"]
    Y["7"] --> Z["□"]
    AA["7"] --> AB["□"]
    AC["7"] --> AD["□"]
    AE["7"] --> AF["□"]
    AG["7"] --> AH["□"]
    AI["7"] --> AJ["□"]
    AK["7"] --> AL["□"]
    AM["7"] --> AN["□"]
    AO["7"] --> AP["□"]
    AQ["7"] --> AR["□"]
    AS["7"] --> AT["□"]
    AU["7"] --> AV["□"]
    AW["7"] --> AX["□"]
    AY["10"] --> AZ["8:8:8"]
    BA["4"] --> BB["664"]
    BC["5"] --> BD["△"]
    BE["2"] --> BF["LAMP LEFT"]
    BG["9"] --> BH["DUAL SYNC"]
    BI["8111"] --> BJ["LAMP RIGHT"]
    BK["7"] --> BL["□"]
    BM["7"] --> BN["LAMP RIGHT"]
    BO["3"] --> BP["LAMP RIGHT"]
    BQ["1"] --> BR["LAMP RIGHT"]
ES
English (Original instructions)
AIR FRYER
AFA2800D
DESCRIPTION
A Digital control panel
B Main body
C Frying pot
D Handle
E Die-cast Grill
F 4 heating elements
G Supply cord
H Wall accessory
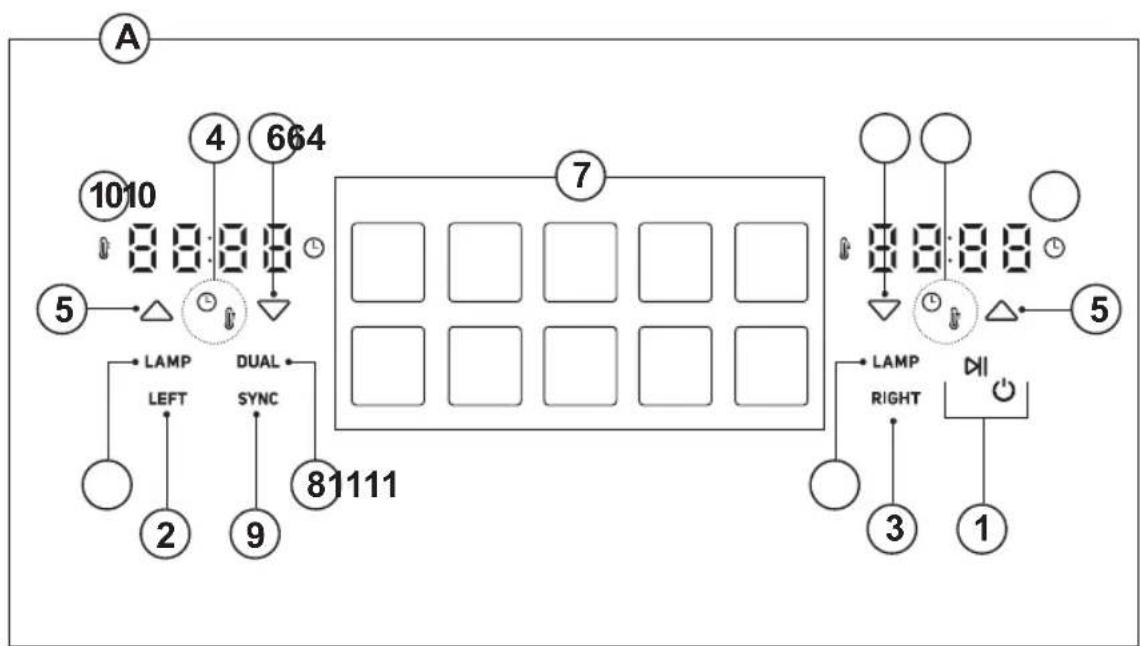
CONTROL PANEL
- On/off button
- Left button
- Right button
- Temperature/time button
- Increase temperature/time buttons
- Decrease temperature/time buttons
- Programs buttons
- Dual function button 'Dual'
- Synchronise function button 'SYNC'
- Time and Temperature Display
- Lamp function buttons 'LAMP'
USE AND CARE
- Fully extend the appliance's supply cord before each use.
- Do not use the appliance if the parts or accessories are not properly fitted.
- Do not use the appliance if the accessories attached to it are defective. Replace them immediately.
- Do not use the appliance when empty.
- Do not use the appliance if the on/off button does not work properly.
- Do not move the appliance while in use.
- To keep the non-stick treatment in good condition, do not use metal or pointed utensils on it.
- Do not force the appliance's work capacity.
- Respect the MAX level.
- Disconnect the appliance from the mains when not in use and before undertaking any cleaning task.
- Do not store or transport the appliance if it is still hot.
-
Never leave the appliance connected and unattended if is not in use. This saves energy and prolongs the life of the appliance.
-
Use only utensils appropriate to support high temperatures.
- Turning the temperature regulator to the minimum setting does not mean that the appliance is switched off.
- As a reference, in the annexed table you will find a recommendation on the cooking temperature and time for several meals.
INSTRUCTIONS FOR USE
BEFORE USE
- Make sure that the entire product's packaging has been removed.
- Please read carefully the "Safety advice and warnings" booklet before first use
- Before using the product for the first time, clean the parts that will come into contact with food in the manner described in the cleaning section.
USE
- Extend the supply cord completely before plugging it in.
- Connect the appliance to the mains.
• Take the frying pot out of the fryer carefully.
NOTE: Do not use the frying pot without the die-cast grill in it.
NOTE: manipulate the frying pot using the handle. Don't touch the frying pot when it's hot.
- Select the compartment you want to work with.
- Select the desired program
- Use the preheat button* to make sure that the appliance is ready when you put the food in.
(*) Please refer to the preset programs table and use the preheat button only if the program does not include automatic preheating. You can also tell, because when the preheat is activated, the program flashes.
- Introduce the frying pot inside the fryer.
- Select the desired temperature or time by pressing the temperature/time selector button and adjusting it using the increase and decrease buttons.
- Press the on/off button to start the cooking process.
NOTE: Remember that there are two panels. If you want to set a different time or temperature on each side, first select 'Left' or 'Right' and then proceed with the configuration.
NOTE: if you want to shake the ingredients, pull the frying pot out of the appliance by the handle and shake it. (But, please review the table of preset programs to verify that this function is not already included in an existing program.)
- Once the cooking time reaches its end, pull out the frying pot outside the appliance. The appliance will switch off automatically.
- Check to see that the food is cooked.
- If it is not, you only have to put the frying pot back in the fryer and program the timer to cook for a few more minutes.
CAUTION: frying pot, die-cast grill and food will be very HOT.
- Place the frying pot over a plain surface able to work with high temperatures.
TIME AND TEMPERATURE
- If you wish you can also change the temperature and time settings.
- The cooking time can be adjusted from 1 to 60 minutes* by pressing temperature/time selector button and adjusting it using the increase and decrease buttons. Time increases or decreases 1 minute every press.
- The cooking temperature can be adjusted from 40^ to 200^^* by pressing temperature/time selector button and adjusting it using the increase and decrease buttons. Temperature increases or decreases 5^ every press.
- Press and hold the selector buttons to quickly increase or decrease the time and temperature
(*) Depending on the selected program
PRESET PROGRAMS
• This appliance has 10 preset programs.
- To select a program, press the program button.
- Selecting the on/off button, it will start the cooking process
- If you wish you can also change the temperature and time settings for the pre-set programs as explained in the "TIME AND TEMPERATURE" section
DUAL FUNCTION
- The 'Dual' function allows you to copy the time and temperature to both sides. Select the 'Left' or 'Right' button, set the desired program or adjust the time and temperature to your preference. Once everything is configured, press the 'Dual' button, and both displays will show the same time and temperature.
- Selecting the on/off button, it will start the cooking process.
SYNC FUNCTION
- The Synchronise function allows both frying pots to finish cooking simultaneously.
- For optimal performance, it is recommended to use the wall accessory.
- Select 'Left' to set the desired program or manually adjust the time and temperature for this frying pot.
- Select 'Right' to set the desired program or manually adjust the time and temperature for this frying pot.
- Once both sides are set, press the 'SYNC' button to activate the function.
- Selecting the on/off button, it will start the cooking process
WALL ACCESSORY
- This fryer is supplied with a divider accessory.
- The divider accessory allows you to cook two different types of food at the same time without mixing flavours.
LAMP FUNCTION
- To activate the light, the fryer must be properly closed. once this is the case, press the 'LAMP' function.
- To deactivate it, press the 'LAMP' function again.
PRE-HEAT FUNCTION
- To activate the preheating, select the preheat button, and it will start: 5 minutes at 200^ . Once it's finished, you can add the food and begin using the device.
- Please refer to the preset programs table and use the preheat button only if the program does not include automatic preheating.
ONCE YOU HAVE FINISHED USING THE APPLIANCE
- When the cooking time finishes, the fryer will stop automatically.
- Unplug the appliance from the mains.
- Allow to cool down.
- Clean the appliance as it is explained on the cleaning section.
SAFETY THERMAL PROTECTOR
- The appliance has a safety device, which protects the appliance from overheating.
- If the appliance turns itself off and does not switch itself on again, disconnect it from the mains supply, and wait for approximately 15 minutes before reconnecting. If the machine does not start again seek authorised technical assistance.
CLEANING
- Disconnect the appliance from the mains and allow it to cool before undertaking any cleaning task.
-
Clean the equipment with a damp cloth with a few drops of washing-up liquid and then dry.
-
Do not use solvents, or products with an acid or base pH such as bleach, or abrasive products, for cleaning the appliance.
- Never immerse the appliance in water or any other liquid or place it under running water.
- It is advisable to clean the appliance regularly and remove any food remains.
- If the appliance is not kept in a good state of cleanliness, its surface may deteriorate and this will inevitably affect the life of the appliance and make it unsafe to use.
- The die-cast grill is suitable for cleaning in the dishwasher.
PRESET PROGRAMS TABLE
Here you can find the settings for each program, including the cooking time and temperature. You will also see whether it has an automatic preheat function and an acoustic alert to turn the food halfway through the cooking process.
| PROGRAM | AUTOMATIC PRE-HEAT | TIME | TEMPERTAURE (°C) | ACOUSTIC WARNING | |
| ADD FOOD (1) | SHAKE (2) | ||||
| Pre-heating NO 5 min | 200 YES NO | ||||
| Meat | YES5 min | 8 min 200 | YES NO | ||
| French chips NO 20 min | 200 NO YES | ||||
| Pizza(bake function) | YES5 min | 10 min 180 | YES NO | ||
| Chicken wings | YES5 min | 25 min 200 | YES YES | ||
| Vegetables | YES5 min | 15 min 180 | YES NO | ||
| Fish | YES5 min | 12 min 160 | YES YES | ||
| Dehydrating NO 6 h | 55 NO NO | ||||
| Fermenting | NO 1 h 40 | NO NO | |||
| Defrost | YES | 10 min 160 | YES NO | ||
| (1) Acoustic warning to add food when preheat is finished(2) Acoustic warning to turn food in half the preset time. | |||||