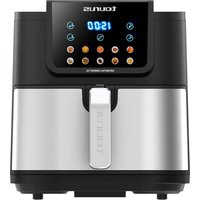
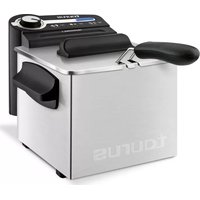
Air Fry Digital XL - Deep fryer TAURUS - Free user manual and instructions
Find the device manual for free Air Fry Digital XL TAURUS in PDF.

| Product Type | Air Fryer |
| Brand | Taurus |
| Model | Air Fry Digital XL |
| Capacity | 5.5 L (estimated) |
| Power | 1500 W (estimated) |
| Temperature Range | 80 °C to 200 °C |
| Timer | 1 to 60 minutes |
| Preset Programs | 8 programs |
| Display | Digital control panel |
| Main Material | Plastic and metal |
| Included Accessories | Frying pan, non-stick tray |
| Tray Cleaning | Dishwasher safe |
| Safety | Overheat protection |
| Power Supply | Mains (power cord) |
| Control Type | Touch buttons |
Frequently Asked Questions - Air Fry Digital XL TAURUS
User questions about Air Fry Digital XL TAURUS
0 question about this device. Answer the ones you know or ask your own.
Ask a new question about this device
Download the instructions for your Deep fryer in PDF format for free! Find your manual Air Fry Digital XL - TAURUS and take your electronic device back in hand. On this page are published all the documents necessary for the use of your device. Air Fry Digital XL by TAURUS.
USER MANUAL Air Fry Digital XL TAURUS
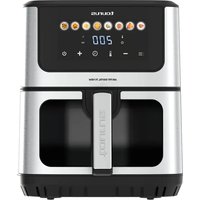
AIR FRY DIGITAL XL AIR FRY DIGITAL 7S VIEW
natural_image
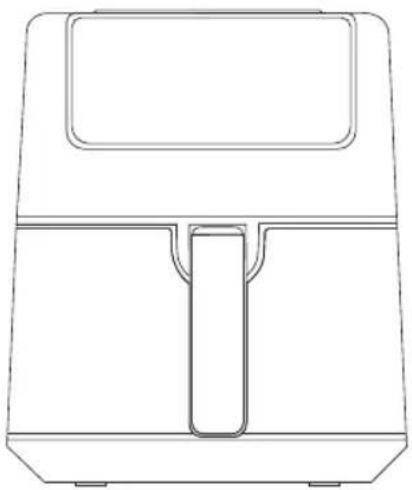
Line drawing of a rectangular air fryer with a handle and side panel (no text or symbols)EN. Instructions for use
FR. Mode d'emploi
natural_image
Simple line drawing of a fan or blade-like structure with a labeled point E (no text or symbols beyond the label)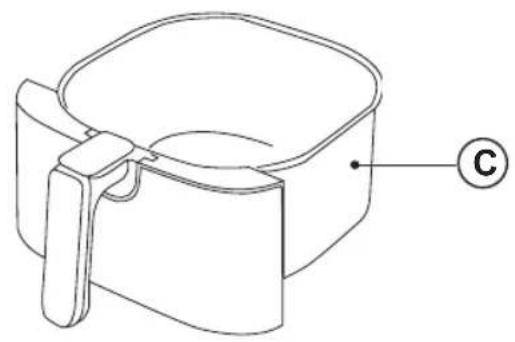
natural_image
Line drawing of a mechanical component with a handle and labeled point C (no text or symbols beyond label)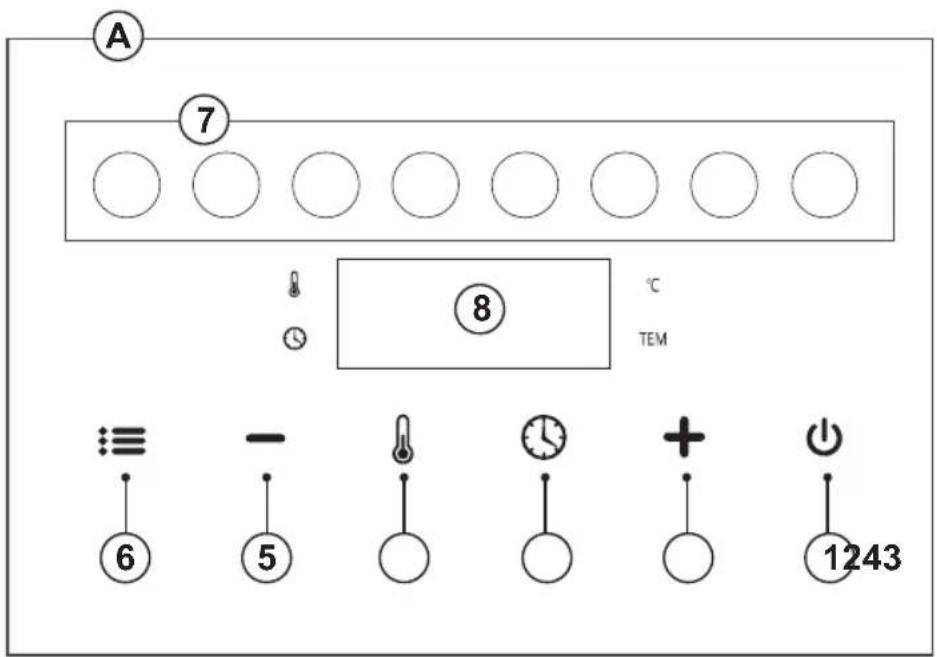
AIR FRY DIGITAL 7S VIEW
DESCRIPCIÓN
A Panel de control digital
B Cuerpo principal
C Cubeta
D Asa
E Bandeja antiadherente
English (Original instructions)
AIR FRYER
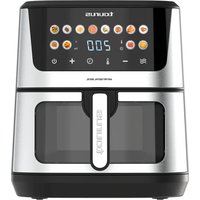
AIR FRY DIGITAL XL
AIR FRY DIGITAL 7S VIEW
DESCRIPTION
A Digital control panel
B Main body
C Frying pot
D Handle
E Non-stick tray
F Supply cord
CONTROL PANEL
- On/off button
- Time selector button
- Temperature selector button
- Increase temperature/time button
- Decrease temperature/time button
- Program selector button
- Program indicators
- Time and Temperature Display
USE AND CARE
- Fully extend the appliance's supply cord before each use.
- Do not use the appliance if the parts or accessories are not properly fitted.
- Do not use the appliance if the accessories attached to it are defective. Replace them immediately.
- Do not use the appliance when empty.
- Do not use the appliance if the on/off button does not work properly.
- Do not move the appliance while in use.
- To keep the non-stick treatment in good condition, do not use metal or pointed utensils on it.
- Do not force the appliance's work capacity.
- Disconnect the appliance from the mains when not in use and before undertaking any cleaning task.
- Do not store or transport the appliance if it is still hot.
- Never leave the appliance connected and unattended if is not in use. This saves energy and prolongs the life of the appliance.
- Use only utensils appropriate to support high temperatures.
- Turning the temperature regulator to the minimum setting does not mean that the appliance is switched off.
- As a reference, in the annexed table you will find a recommendation on the cooking temperature and time for several meals.
INSTRUCTIONS FOR USE
BEFORE USE
- Make sure that the entire product's packaging has been removed.
- Please read carefully the "Safety advice and warnings" booklet before first use
- Before using the product for the first time, clean the parts that will come into contact with food in the manner described in the cleaning section.
USE
- Extend the supply cord completely before plugging it in.
- Connect the appliance to the mains.
• Take the frying pot out of the fryer carefully.
Note: Do not use the frying pot without the non-stick tray in it.
Note: manipulate the frying pot using the handle. Don't touch the frying pot when it's hot.
- Put the ingredients you want to fry inside the frying pot.
- Introduce the frying pot inside the fryer.
- Select the desired temperature by pressing the temperature selector knob and adjust it using the increase and decrease buttons.
- Select the desired time by pressing the time selector knob and adjust it using the increase and decrease buttons.
- Press the on/off button to start the cooking process.
Note: have in mind that if the appliance is cold, you should add 3 minutes and 200°C to the cooking time.
Note: if you want to shake the ingredients, pull the frying pot out of the appliance and shake it.
- At the end of the cooking time, the deep-fryer beeps several times and switches off automatically.
CAUTION: frying pot and food will be very HOT.
- Check to see that the food is cooked.
- If it is not, simply place the frying pot back in the fryer and set the timer to cook for a few more minutes.
- Place the frying pot over a plain surface able to work with high temperatures.
TIME AND TEMPERATURE
- If you wish, you can also change the temperature and time settings.
- The cooking time can be set from 1 to 60 minutes by pressing the time selector and using the increase and decrease buttons. Each press increases or decreases the time by 1 minute.
- The cooking temperature can be set from 80^ to 200^ by pressing the temperature selector and using the increase and decrease buttons. Each press increases or decreases the temperature by 5^ .
- Press and hold the selector buttons to quickly increase or decrease the time and temperature.
PRESET PROGRAMS
• This appliance has 8 preset programs.
- To select a program, press the program selector button repeatedly.
- Press the on/off button to start the cooking process.
- If you wish you can also change the temperature and time settings for the preset programs as explained in the "TIME AND TEMPERATURE" section.
ONCE YOU HAVE FINISHED USING THE APPLIANCE
- At the end of the cooking time, the fryer stops automatically.
- Unplug the appliance.
- Allow to cool down.
- Clean the appliance as described in the Cleaning section.
SAFETY THERMAL PROTECTOR
- The appliance has a safety device, which protects the appliance from overheating.
- If the appliance turns itself off and does not switch itself on again, disconnect it from the mains supply, and wait for approximately 15 minutes before reconnecting. If the machine does not start again seek authorised technical assistance.
CLEANING
- Disconnect the appliance from the mains and allow it to cool before undertaking any cleaning task.
- Clean the equipment with a damp cloth with a few drops of washing-up liquid and then dry.
- Do not use solvents, or products with an acid or base pH such as bleach, or abrasive products, for cleaning the appliance.
-
Never immerse the appliance in water or any other liquid or place it under running water.
-
It is advisable to clean the appliance regularly and remove any food remains.
- If the appliance is not kept in a good state of cleanliness, its surface may deteriorate and this will inevitably affect the life of the appliance and make it unsafe to use.
- The non-stick tray is suitable for cleaning in the dishwasher.
RECOMMENDATION TABLE
Here you can find our recommendation on the time and temperature for frying different meals.
| Ingredients Time | (minutes) Temperature (°C) |
| Meat 8-10 180 | |
| Chicken 25-30 200 | |
| Shrimp 10 200 | |
| Fish 20 180 | |
| Cake 30 160 | |
| French fries 15-30 200 | |
| Nuggets 7-14 180 | |
| Vegetables 8-10 160 |
TROUBLESHOOTING
| Problem Possible cause Solution | ||
| The screen does not turn on.. Power failure. Check the condition and maintenance of the power supply equipment | ||
| Circuit board failure Contact our Technical Support Service | ||
| The food is undercooked/ overcooked. | Incorrect selected time or temperature. | Adjust the temperature and cooking time according to the amount of food and cooking preferences. |
| Too much food in the frying pot. If you have too much food, fry them in batches. Less food in the frying pot allows for more even heating. | ||
| Smoke is coming out of the appliance during the first use. | There are traces of antioxidant oil in the air fryer. | Preheat the fryer for 10 to 15 minutes at the maximum temperature. |
| The appliance emits a smell. There are food residues inside the fryer. | Clean the fryer and its accessories as described in the “Cleaning” section. | |
| The control panel is unresponsive. | There are oil or water residues on the control panel | Clean and dry the control panel with a cloth. |
| There are oil or water residues on your hands. | Wash and dry your hands. | |
NOTE: If after referring to this table you still cannot resolve the problem, please contact our Customer Support team.
FR
AIR FRY DIGITAL 7S VIEW
DESCRIPTION
FRIGGITRICE AD ARIA AIR FRY DIGITAL XL AIR FRY DIGITAL 7S VIEW
DESCRIZIONE
AIR FRY DIGITAL 7S VIEW
DESCRIPCIÓ
A Panell de control digital
B Cos principal
C Cubeta
D Nansa
E Safata antiadherent
AIR FRY DIGITAL 7S VIEW
BESCHREIBUNG
A Digitales Bedienfeld
B Hauptteil
C Bratentopf
D Henkel
E Antihaft-Schale
F Netzkabel
BEDIENFELD
AIR FRY DIGITAL 7S VIEW
DESCRIERE
A Panou de control digital
B Corpul principal
C Oală de prăjit
D Mâner
E Tavă antiaderentă
F Cablu de alimentare
PANOUL DE CONTROL
WSTĘPNIE USTAWIONE PROGRAMY
AIR FRY DIGITAL 7S VIEW
ПЕРИГРАФН
AIR FRY DIGITAL 7S VIEW
ОПИСАНИЕ
AIR FRY DIGITAL 7S VIEW
BESKRIVELSE
AIR FRY DIGITAL 7S VIEW
BESKRIVELSE
A Digitalt kontrollpanel
B Hoveddelen
C Stekegryte
D Håndtak
E Non-stick brett
F Tilførselsledning
KONTROLLPANEL
FORHÅNDSINNSTILTE PROGRAMMER
AIR FRY DIGITAL 7S VIEW
BESKRIVNING
A Digital kontrollpanel
AIR FRY DIGITAL 7S VIEW
KUVAUS
AIR FRY DIGITAL 7S VIEW
AÇIKLAMA
A Dijital kontrol paneli
B Ana gövde
C Kızartma tenceresi
D Tutamak
E Yapışmaz tepsi
F Besleme kablosu
KONTROL PANELİ
AIR FRY DIGITAL XL AIR FRY DIGITAL 7S VIEW