
PC-GKH 3119 - Heating ProfiCare - Free user manual and instructions
Find the device manual for free PC-GKH 3119 ProfiCare in PDF.
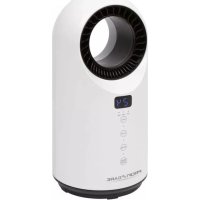
| Product type | Glass convector |
| Brand | ProfiCare |
| Model | PC-GKH 3119 |
| Net weight | Approximately 6.2 kg |
| Power supply | 230 V ~, 50/60 Hz |
| Power consumption | 1000 / 2000 W |
| Protection class | I |
| Operating modes | Comfort (2000 W), Eco (1000 W), Anti-freeze (2000 W, fixed at 6 °C), Weekly timer |
| Temperature range (Comfort mode) | 10 °C to 50 °C |
| Temperature range (Eco mode) | 5 °C to 45 °C |
| Special functions | 24-hour timer, weekly timer, open window detection, child safety, remote control, dimmable backlight |
| Installation type | On stands (free-standing) or wall-mounted |
| Overheat protection | Yes, automatic shutdown at 51 °C |
| Cleaning | Dry cloth, vacuum cleaner for protective grille |
| Delivery contents | Unit, remote control (CR2025 battery included), 2 stands, 4 wall brackets, 6 wall plugs, 6 long screws, 8 short screws |
| Warranty | Refer to the manual for details |
Frequently Asked Questions - PC-GKH 3119 ProfiCare
User questions about PC-GKH 3119 ProfiCare
0 question about this device. Answer the ones you know or ask your own.
Ask a new question about this device
Download the instructions for your Heating in PDF format for free! Find your manual PC-GKH 3119 - ProfiCare and take your electronic device back in hand. On this page are published all the documents necessary for the use of your device. PC-GKH 3119 by ProfiCare.
USER MANUAL PC-GKH 3119 ProfiCare
natural_image
Black rectangular electronic device with digital display and control buttons, no visible text or symbols on the device itself.natural_image
Technical line drawing of a heat exchanger or cooling unit with cooling fins and cooling elements (no text or symbols)natural_image
Front view of a rectangular electronic device with internal components and mounting holes, shown in two orthogonal views (no text or symbols)Fernbedienung
$$ P P = \text { Montag } $$
$$ P S = \text { Freitag } $$
$$ P \mathbb {R} = \text { Dienstag } $$
$$ P F = \text { Samstag } $$
$$ P P = \text { Donnerstag } $$
Be sure to read the separately enclosed safety instructions first.
Instruction Manual
Thank you for choosing our product. We hope you will enjoy using the appliance.
Read the instruction manual and the separately enclosed safety instructions very carefully before using this appliance.
Keep these documents, including the warranty certificate, receipt and, if possible, the box with the inner packaging in a safe place. If you pass the appliance on to a third party, always include all the relevant documents.
Symbols in this Instruction Manual
Important information for your safety is specially marked. It is essential to comply with these instructions in order to avoid accidents and prevent damage to the appliance:

WARNING:
This warns you of dangers to your health and indicates possible injury risks.

CAUTION:
This refers to possible hazards to the appliance or other objects.
Content
Overview of the Components....3
Unpacking the Appliance....13
Overview of the Components / Scope of Delivery......13
Warnings for the Use of the Appliance ....14
Connected Load....14
Handling Batteries....14
Putting the Appliance into Operation....14
Mounting the Stands....14
Wall Mounting....15
Remote Control 16
Electric Connection 16
Notes for Use....16
Operation 17
Switching On/Off 17
Selecting the Operating Mode 17
Set Temperature....17
Child Lock....17
Switching the Display Illumination Off and On....17
24 Hour Timer 17
Weekly Timer 18
Program the Weekly Timer 18
Deleting a Weekly Timer Programming....18
Open Window Detection 18
Ending Operation 18
Restore Factory Settings 18
Overheat Protection 19
Cleaning....19
Dust on the Protective Grille from the Air Outlet......19
Storage....19
Technical Data....19
Product Data Sheet....19
Disposal 20
Battery Disposal 20
Meaning of the "Dustbin" Symbol ....20
Unpacking the Appliance
- Remove the appliance from its packaging.
- Remove all packaging material, such as foils, filling material, cable ties and cardboard packaging.
- Check the scope of delivery for completeness.
- If the contents of the packaging are incomplete or if damage can be detected, do not operate the appliance. Return it to the dealer immediately.
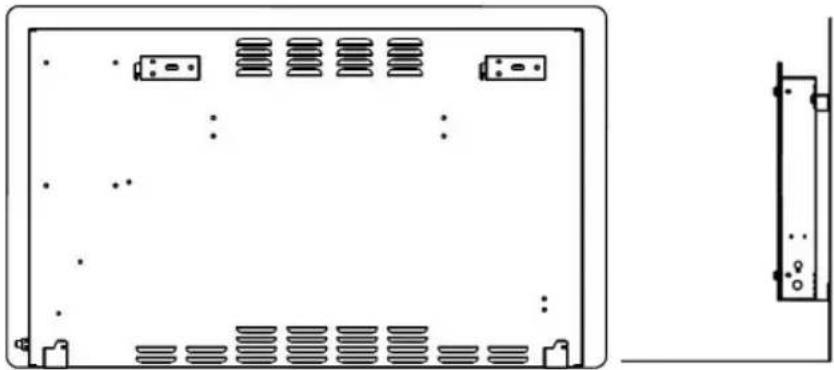
Overview of the Components / Scope of Delivery
Appliance
1 Air outlet
2 Suspension openings
4 Time display
5 Heating active ( ◆ )
6 Anti-frost function (※)
7 ECO mode (
8 Hour bar for weekly timer ( 5 4 5 1016 20)
9 Time programme (P)
3 Temperature display in degrees Celsius (°C)
10 Comfort mode (
11 Open window detection active (☐)
12 Child lock activated (
13 Button √(reduce temperature)
14 Button ⚙ (set time programmes)
15 Button ⏻ (switch appliance on or off)
16 Button ⚙(set time)
17 Button ≡(select operating mode)
18 Button ∧ (increase temperature)
19 Air inlet
20 Stand
Remote Control
1 Select operating mode
2 Set time
3 ✅ Decrease temperature
4 Ⓞ Switching the illumination of the display off and on
5 Battery compartment
6 Activate / deactivate detection for open window
7 ⓐ Switching the child lock on and off
8 ⬇ Increase temperature
9 ◎ Set time programmes
10 ⏻ Switching the appliance on or off
Without Illustration
1 × Button cell (CR 2025), already inserted in the battery compartment of the remote control
2×Stand
4×Mountingbracket
6×Wall plug
6× Screw (long)
8×Screw(short)
Warnings for the Use of the Appliance
- Do not hang the heater directly below a wall socket.
- Ensure that a safety distance is maintained between the power cord and the housing.
- To prevent the heater from overheating, the air outlet should not be covered. Curtains, textiles and all combustible materials must be kept at least 1 m away from the air outlet.
- Under no circumstances may the fan heater be used in rooms with explosive gas (e. g. petrol) or while work is being carried out with inflammable adhesives or solvents (e. g. when gluing or painting parquet, PVC etc.).
- Do not use this heater in small rooms when they are occupied by persons not capable of leaving the room on their own, unless constant supervision is provided.
- When the appliance is no longer in use, always disconnect the mains plug from the socket.
Connected Load
The appliance supports a power input of 2000 W.
CAUTION: Overload!
- When using an extension cord, it must have a cable cross-section of at least 1.5 ~mm^2 .
- Do not use a multiple socket as this appliance is too powerful.
- Do not connect any other powerful devices to the same electric circuit.
Handling Batteries
- Do not charge batteries!
- Do not open batteries by force!
- Do not short-circuit batteries! A short circuit can cause batteries to become very hot or even ignite. This can result in burns.
- Keep batteries away from children. They are not toys.
- Observe the polarity (+ / -)!
- Danger of explosion! Do not expose batteries to intense heat, such as sunshine, fire or similar.
- Batteries can leak battery acid. If the remote control will not be used for a longer period of time, remove the batteries.
- If a battery leaks, do not rub the liquid into the eyes or mucous membranes. In case of contact, wash hands, rinse eyes with clean water. Seek medical attention if any discomfort persists.
- Batteries are not to be disposed of together with domestic wastes. Return used batteries to the responsible collection points or to the dealer.
Putting the Appliance into Operation
The appliance can be used as a stand-alone unit or for wall mounting. Observe the corresponding installation instructions below.
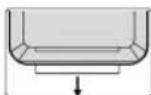
Mounting the Stands
- Place the appliance with its back on a table. Place a soft blanket under the appliance for protection.
- Place the appliance so that the bottom of the appliance protrudes over the edge of the table.
- Attach the stands to the underside of the appliance with the eight screws supplied. Hand-tighten the screws with a suitable screwdriver.
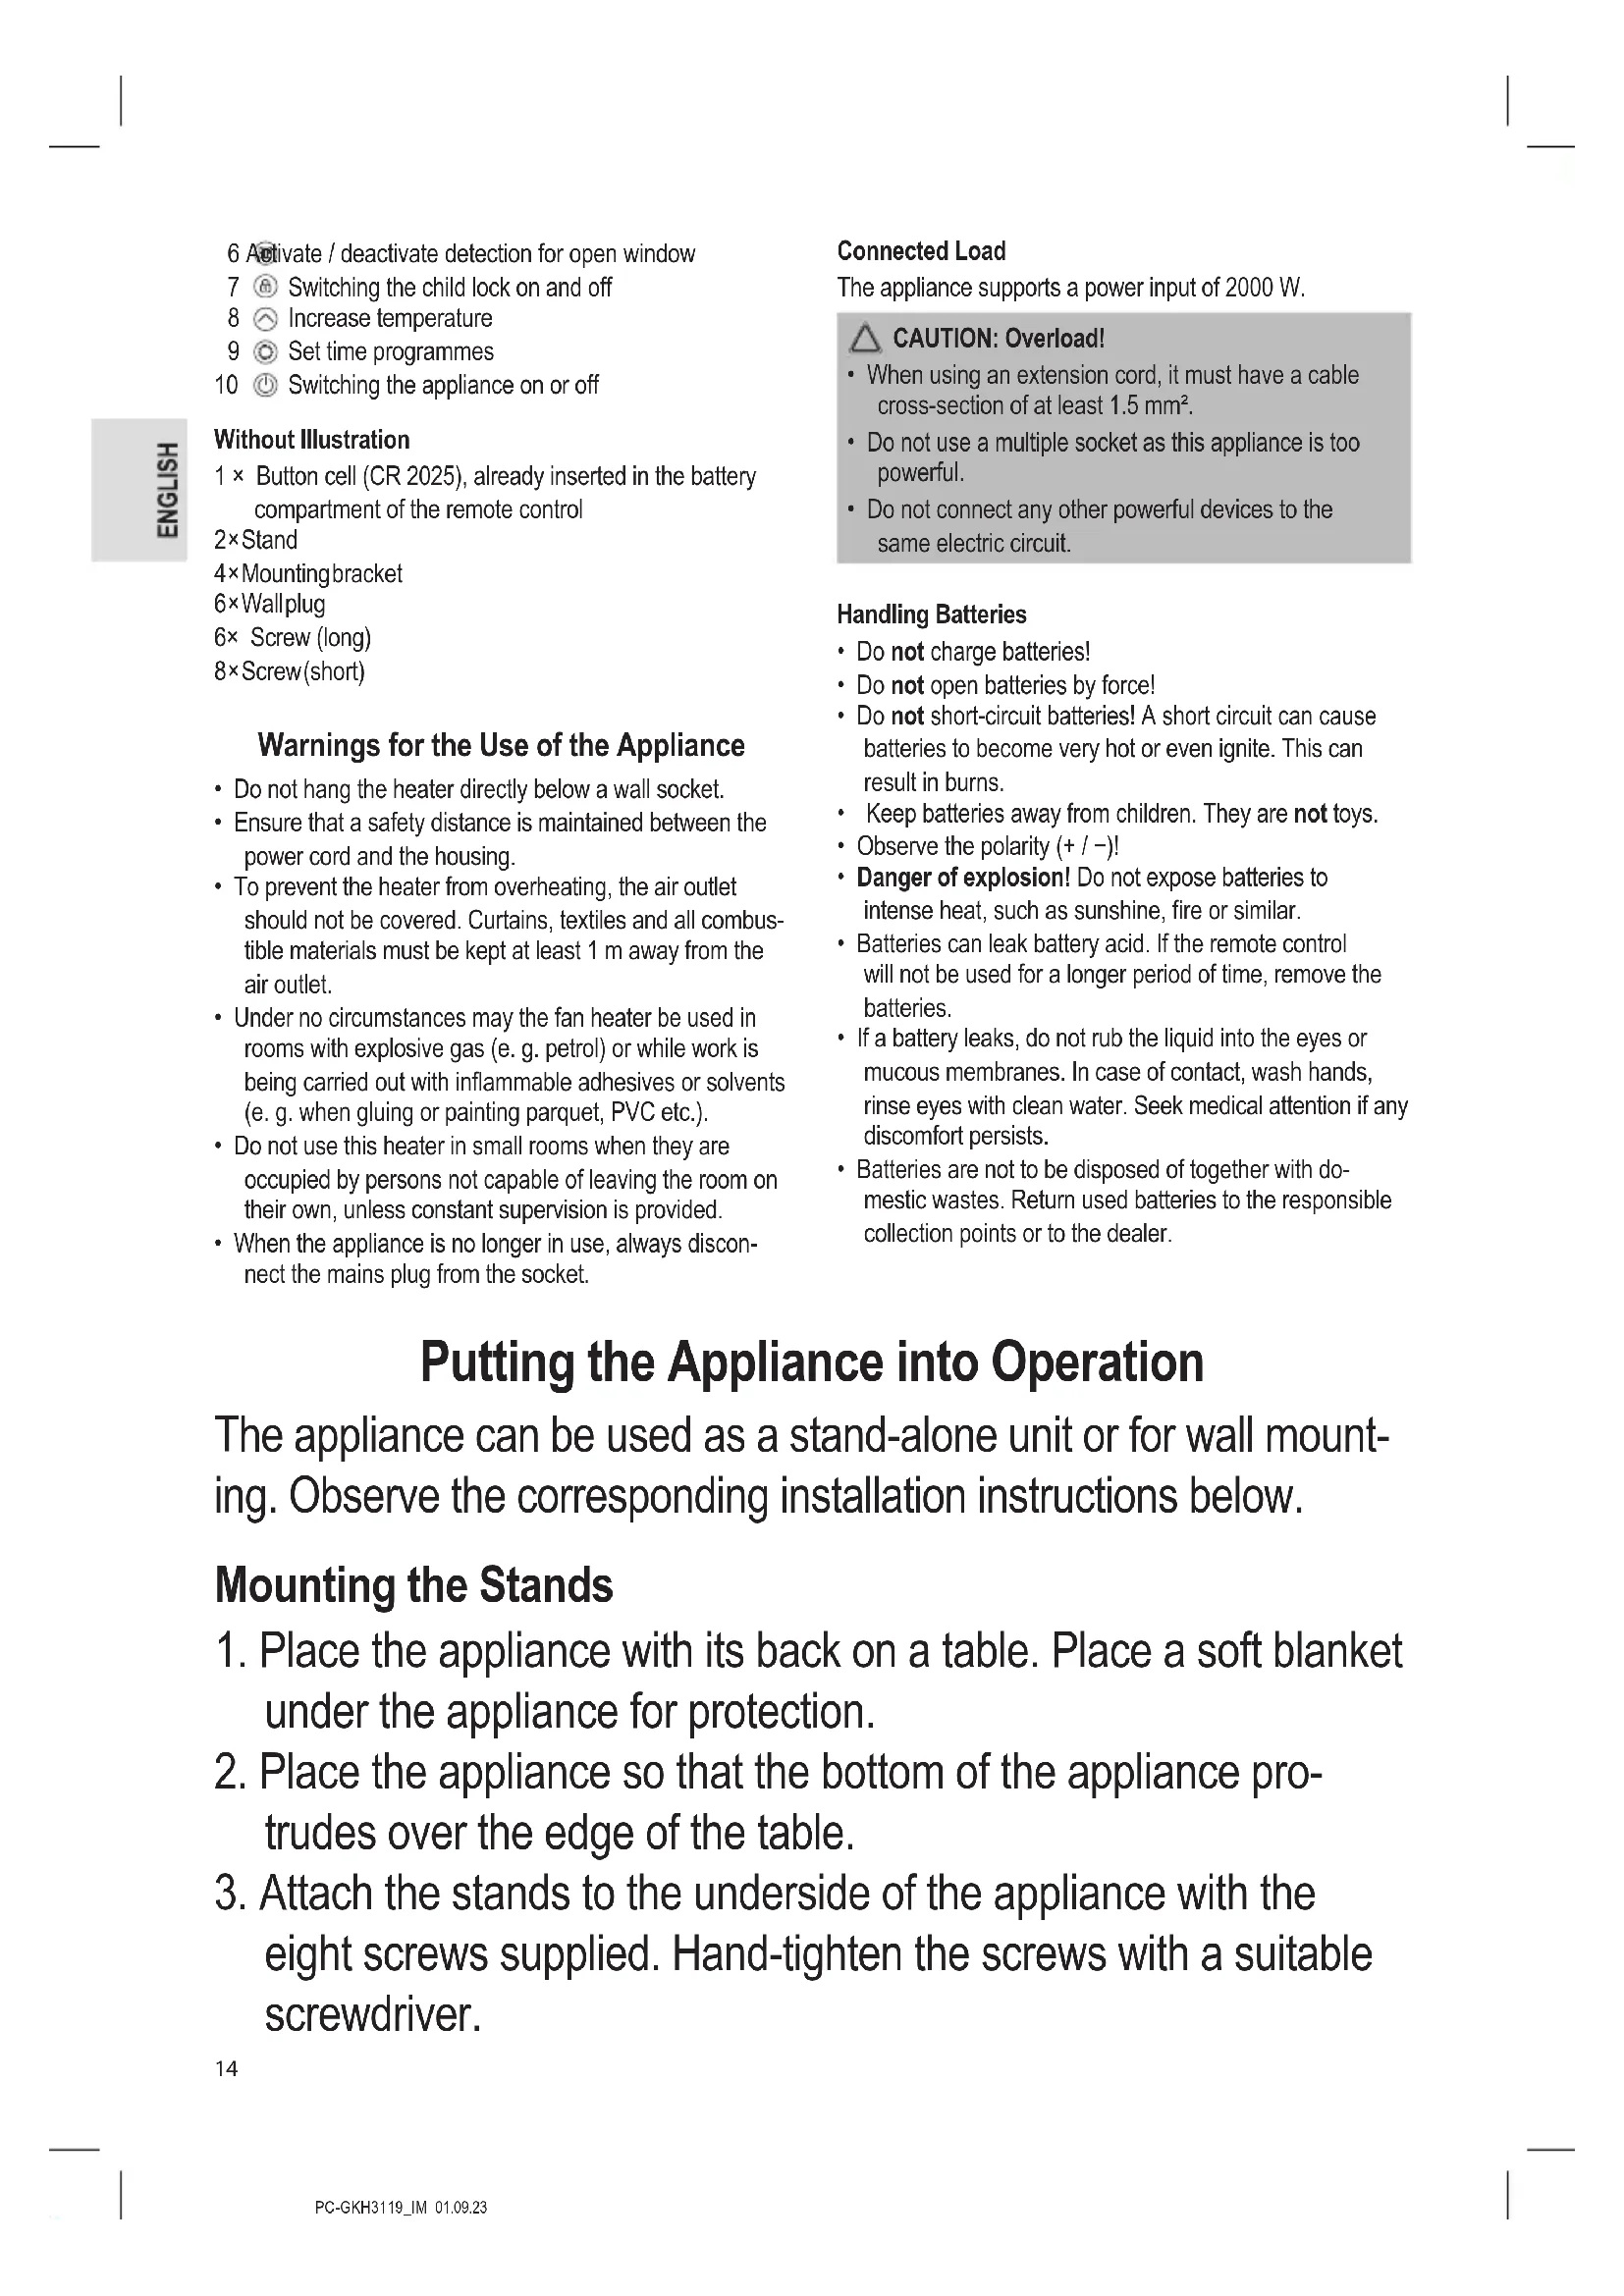
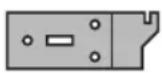
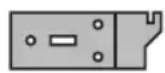
Wall Mounting
Use the mounting material supplied. Observe the following installation drawings.
- Make sure that there is a power socket nearby. The socket must be freely accessible.
- Make sure beforehand that there are no cables or pipes in the wall that you could damage during installation.
- The mounting brackets must be firmly fixed to the wall with the screws to ensure the safe installation of the appliance on the wall.
- Make sure that the wall has the required load-bearing capacity for the appliance.
-
The distance to the floor should be at least 15 cm and to the ceiling not less than 50 cm.
-
For wall mounting, you need the four mounting brackets, the six long screws and the wall plugs. For the two mounting brackets that are mounted on the underside of the appliance, you need four of the short screws.
-
Drill the six holes for the mounting brackets as illustrated. The distance between the holes for the two individual holes in the mounting brackets must be 450 mm.
Both mounting brackets must be mounted as illustrated.
-
Provide the holes with the wall plugs. Secure the mounting brackets to the wall with the six screws.
-
Place the appliance with its front on a table. Place a soft blanket under the appliance for protection.
-
Now mount the other two mounting brackets on the underside of the appliance as illustrated.

natural_image
Technical line drawing of a heat exchanger or cooling unit with cooling fins and cooling elements (no text or symbols)These mounting brackets serve as spacers.
- Hold the appliance by the sides and hang it on the mounting brackets. Note the suspension openings on the back of the appliance. Slide the appliance into the slots of the mounting brackets.
natural_image
Front view of a rectangular electronic device with internal components and mounting holes, shown in two orthogonal views (no text or symbols)Remote Control
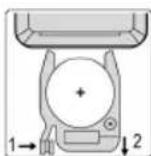
The lithium cell in the battery compartment of the remote control has been secured with a plastic film for transport. This prolongs the life of the battery. Before using the remote
control for the first time, the plastic film must be removed so that it is ready for use.
When operating, make sure that there is a clear view between the remote control and the sensor under the display of the appliance. When the range of the remote control decreases, the battery must be changed. To change the battery, proceed as follows:
-
Press the lock in the direction of the arrow (1).
-
Pull the holder for the button cell out of the remote control (2).
-
Replace the cell with a battery of the same type (CR 2025). Make sure that the polarity is correct.
-
Push the holder back into the battery compartment until it clicks into place.
Electric Connection
-
Make sure the voltage of the appliance (see rating label) matches the mains voltage to be used.
-
Connect the mains plug with a properly installed earthed socket. A signal tone sounds. The current ambient temperature is then displayed.
Notes for Use
- The appliance is equipped with overheating protection. When the ambient temperature reaches 51 °C, the appliance switches off.
- Avoid opening doors and windows during heating operation, as this will impair the heating effect.
• The current ambient temperature is displayed.
- Settings can only be made during operation.
- Some buttons are located both on the appliance and on the remote control. The same buttons have the same function.
- The buttons on the appliance are sensor buttons. Touch the buttons lightly with a finger to perform the function.
• Each key press is confirmed by an acknowledgement tone.
- The display dims after 30 seconds if no button is pressed.
- The settings are automatically adopted after approx. 5 seconds.
- The appliance remembers in which operating mode it was last operated. When the appliance is switched on again with the button or when the mains plug is plugged back into the socket, the appliance starts in the last selected operating mode.
- The appliance starts with full heating power ( ) when it is switched on for the first time or after the factory settings have been restored.
- The temperatures for the two heating powers are set at the factory as follows:
$$ \text { Comfort mode } (\bullet) = 2 5 ^ {\circ} \mathrm{C} $$
$$ \text { ECO mode } (\mathbb {C}) = 2 0 ^ {\circ} \mathrm{C} $$
- The temperature setting in comfort mode is always 5 °C higher than in ECO mode. If you change the temperature in one of the two modes, the other mode is automatically adjusted.
Operation
The operation of the appliance is described using the buttons on the remote control.
Switching On/Off
- Press the ⏻ button to switch on the appliance.
- The temperature pointer displays the current ambient temperature.
- Only when switching on for the first time or after restoring the factory settings:
If the ambient temperature is below 25 ^ , the appliance starts heating. The active heating is displayed by the symbol ↗. - Press the ⏻ button again to switch off the appliance.
Selecting the Operating Mode
Press the button ☺ repeatedly to select between the following operating modes:
- Comfort Mode ( ⚙ )
The appliance operates with full power of 2000 watts. The symbol appears in the display. In this mode, the temperature can be set between 10 °C and 50 °C.
• ECO Mode ( G )
The appliance operates with half the power of 1000 watts. The symbol appears in the display. In this mode, the temperature can be set between 5 °C and 45 °C.
- Anti-frost Function (※
The appliance operates with full power of 2000 watts. The symbol appears in the display. In this mode, the temperature is fixed at 6 °C and cannot be changed.
- If the ambient temperature drops below 5 °C, the appliance automatically starts heating.
- If the ambient temperature rises above 7 °C, the appliance switches off the heating operation.
• Weekly Timer (PPI-PP)
With the weekly timer, a period of time can be set for each day of the week during which the appliance is to be active. In addition, you can set when the appliance should operate in comfort mode, ECO mode or anti-frost function. See the chapter “Weekly Timer” and “Program the Weekly Timer” for more details.
Set Temperature
The set temperature flashes in the display. After approx. 5 seconds, the setting is automatically accepted. The current ambient temperature is displayed again.
- Select comfort mode or ECO mode with the button ☑.
- Press the button to increase the temperature. Or press the button to decrease the temperature.
- The temperature setting in comfort mode is always 5 °C higher than in ECO mode. If you change the temperature in one of the two modes, the other mode is automatically adjusted.
Child Lock
- Press the button Ⓜ to activate the child lock. The activated function is displayed by the symbol ⚫ in the display. The buttons on the appliance and on the remote control have no function.
- To deactivate the child lock, press the button @again.
- You can also activate and deactivate the function on the appliance. To do this, press and hold the button for approx. 3 seconds.
Switching the Display Illumination Off and On
You can switch the backlight off and on both with the remote control and on the appliance.
- Press the button ⏻ on the remote control.
- Press and hold the button on the appliance for approx. 3 seconds.
24 Hour Timer
You can set the appliance to operate for a specific time. Only full hours can be set.
- Press the button ⚙️. The time display Ostarts flashing.
- Use the ⬤ or ⬙ button to set the desired time. The setting(☐☐☐) deactivates the function.
- After the set time has elapsed, the appliance switches to standby mode.
- The remaining hours are displayed in the time display. For technical reasons, it is not possible to display the remaining minutes.
- If the operating mode "Weekly Timer" is selected, this function cannot be used.
Weekly Timer
- To use the weekly timer, you must first set the current time. The current time must be set when the appliance is first put into operation and every time the appliance is disconnected from the mains.
- The days of the week are indicated by the following digits in the display:
$$ P P = \text { Monday } $$
$$ P \text { IS } = \text { Friday } $$
$$ P 2 = \text { Tuesday } $$
$$ P B = \text { S a t u r d a y } $$
$$ P B = \text { Wednesday } $$
$$ P P = \text { Sunday } $$
$$ P \text { = Thursday } $$
Set the Current Time:
- Select the weekly mode with the button ⓊThedisplay shows PPl.
- Press the button ⚙. The 1 starts flashing.
- Select the current day of the week with the 🔗 or ⏻ button. Confirm your entry with the button ⚙ When the time is displayed, the hours (○) start flashing.
- Set the current hour with the 📄 or button. Confirm your entry with the button ⚙ When the time is displayed, the minutes (☐) start flashing.
- Set the current minutes with the button or . √
- Wait until the minutes stop flashing. The settings are accepted. In the hour bar, the upper and lower bars of the current hour flash.
Program the Weekly Timer
- The operating modes determine when the appliance is to operate in which operating mode.
• Each line of the hour bar ( ± 12500) represents one hour. The appliance is activated for the selected full hour. - The upper bar represents the full power of the appliance, the lower bar represents half the power. If the bars of the hour bar are not lit, the appliance is working in the anti-frost function.
- The appliance must remain switched on in the "Weekly Timer" operating mode for the function to work. To avoid being disturbed by the display illumination, it can be switched off as described above.
- If the appliance is in the activated hour, the set temperature can be displayed or changed with the ☐ or √ button.
-
Make sure that you do not maintain too long between programming steps. The programming mode is automatically terminated after 5 seconds!
-
If not already done, set the time and temperature as described on page 17.
- Individual temperatures cannot be set during programming. The temperature from the default settings (page 17) are adopted.
-
Select the weekly timer mode with the button ⏻. In the hour bar, the upper and lower bars of the current hour flash.
-
Press the button Ⓞ The current day P of the week starts flashing in the display.
- Select the day of the week to be programmed (PPI-PPI) with the button Ⓤ
- Select the anti-frost function (*) with the button ≡
- Go to the desired start time with the button or .
- Use the button to select whether the appliance should operate with full power (☐) or half power (☐)
- Move to the desired stop time with the or button. The bars become visible accordingly.
- Wait until the P stops flashing. The settings are accepted. In the hour bar, the upper and lower bars of the current hour flash.
- Do you want to set more than one heating period per day, e. g. heating period 1 from 10 – 12 hrs, heating period 2 from 16 – 18 hrs. Program heating period 1 (points 1 – 8) as described above. Immediately after point 8, start again with point 5 to set heating period 2.
Deleting a Weekly Timer Programming
- Select the weekly timer mode with the button ☑. In the hour bar, the upper and lower bars of the current hour flash.
- Press the button ⓄThe current day P of the week starts flashing in the display.
- With the button ⚙ select the day of the week on which previously programmed times are to be changed.
- Select the anti-frost function (※) with the button ≈
- Go forward or backward in time with the button or . √ As soon as you reach the programmed time, it is deleted
Open Window Detection
The appliance causes a temperature check at regular intervals and switches off if the temperature drops by 5 °C within 20 minutes.
- Press the ⏻ button to switch on the function. The symbol 📄 appears in the display.
- Press the button again to switch the function off. The symbol ☐ goes out.
- You can also activate and deactivate the function on the appliance. To do this, press and hold the button for approx. 3 seconds.
Ending Operation
-
Press the ⏻ button to switch off the appliance.
-
Then pull the mains plug out of the socket.
Press and hold the ∧ and ∨ buttons on the appliance for approx. 3 seconds. An acknowledgement tone sounds and the appliance switches off. The factory settings are restored.
Overheat Protection
The appliance features an overheat protection mechanism causing the appliance to switch off automatically in case of overheating.
- Then pull the mains plug out of the socket.
- Let the appliance cool down for approx. 10 minutes before using it again.
- If the overheat protection mechanism causes the appliance to switch off again after a short period, this might indicate a defect. Switch off the appliance and disconnect it from the mains. Have the appliance checked by your dealer or our customer service.
Cleaning

WARNING:
• Always unplug the appliance from the mains before cleaning and wait until the appliance has cooled down.
- Never immerse the appliance in water to clean it. This may lead to electrical shock or fire.

CAUTION:
- Do not use wire brushes or other abrasive materials.
-
Do not use caustic or scouring agents.
-
Wipe away dust with a dry cloth.
- Flecks can be removed with a suitably damp cloth.
Dust on the Protective Grille from the Air Outlet
If dust has collected on the protective grille, this can cause overheating.
- Remove the dust by careful brushing.
or
- Use the upholstery nozzle of your vacuum cleaner to remove the dust.
Storage
- When used as a stand-alone appliance, we recommend storing the appliance in its original packaging if it is not going to be used for a long period of time.
- Let the appliance cool down before putting it away!
• Always store the appliance out of the reach of children in a well-ventilated and dry place.
Technical Data
Model: PC-GKH 3119
Power supply: 230 V\~, 50/60 Hz
Power consumption: 1000/2000 W
Protection class:....I
Net weight: .... approx. 5.2 kg
The right to make technical and design modifications in the course of continuous product development remains reserved.
This appliance has been tested according to all applicable, current CE directives and built according to the latest safety regulations.
Product Data Sheet
| Model identifier PC-GKH 3119 | ||||||
| Item Symbol Value Unit Item Unit | ||||||
| Heat output | Type of heat input, for electric storage local space heaters only | |||||
| Nominal heat output P_nom | 2.00 | kW | manual heat charge control, with integrated thermostat | no | ||
| Minimum heat output (indicative) | P_min | 1.00 kW | manual heat charge control with room and / or outdoor temperature feedback | no | ||
| Maximum continuous heat output | P_max,c | 2.00 kW | electronic heat charge control with room and / or outdoor temperature feedback | no | ||
| Auxiliary electricity consumption | fan assisted heat output | no | ||||
| At nominal heat output | eI_max | 0,000 | kW | Type of heat output/room temperature control | ||
| At minimum heat output | eI_min | 0,000 | kW | single stage heat output and no room temperature control | no | |
| In standby mode | eI_SB | 0,00141 | kW | Two or more manual stages, no room temperature control | no | |
| with mechanic thermostat room temperature control | no | |||||
| with electronic room temperature control | no | |||||
| electronic room temperature control plus day timer no | |||
| electronic room temperature control plus week timer yes | |||
| Other control options | |||
| room temperature control, with presence detection no | |||
| room temperature control, with open window detection yes | |||
| with distance control option yes | |||
| with adaptive start control no | |||
| with working time limitation yes | |||
| with black bulb sensor no | |||
| Contact details Clatronic International GmbH, Industriering Ost 40, 47906 Kempen, Germany | |||
Disposal
Battery Disposal
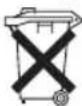
As a consumer you are obliged by law to return old batteries / accumulators.
Your appliance contains batteries. If these batteries are spent, follow the instructions below:

CAUTION:
Batteries / rechargeable batteries must not be disposed of with household waste!
- Remove the battery (batteries) from the remote control before disposing of the appliance.
• Take spent batteries to the appropriate collection point or to a dealer. - Your town or local authority can provide information about public collection points.
Meaning of the "Dustbin" Symbol
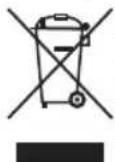
Protect our environment: do not dispose of electrical equipment in the domestic waste.
Please return any electrical equipment that you will no longer use to the collection points provided for their disposal.
This helps avoid the potential effects of incorrect disposal on the environment and human health.
This will contribute to the recycling and other forms of re-utilisation of electrical and electronic equipment.
Information concerning where the equipment can be disposed of can be obtained from your local authority. Your dealer and contractual partner is also obliged to take back the old appliance free of charge.
BELANGRIJK:
De stands monteren....22
Wandmontage 23
Afstandsbediening ....25
natural_image
Technical line drawing of a heat exchanger or cooling unit with cooling fins and cooling elements (no text or symbols)natural_image
Front view of a rectangular electronic device with internal components and mounting points, shown in two orthogonal views (no text or symbols)Afstandsbediening
$$ P F S = V r i j d a g $$
$$ P P = \text { Dinsdag } $$
$$ P _ {F} = Z a t e r d a g $$
$$ P B = \text { Woensdag } $$
$$ P P = Z o n d a g $$
$$ P \mathbb {H} = \text { Donderdag } $$
natural_image
Technical line drawing of a heat exchanger or radiator unit with cooling fins and mounting brackets (no text or symbols)natural_image
Front view of a rectangular electronic device with internal components and a side-view inset showing a separate component (no text or symbols)Télécommande
natural_image
Technical line drawing of a heat exchanger or cooling unit with cooling fins and cooling elements (no text or symbols)natural_image
Front view of a rectangular electronic device with internal components and a side-view inset showing a separate component (no text or symbols)Mando a distancia
natural_image
Technical line drawing of a heat exchanger or cooling unit with cooling fins and cooling elements (no text or symbols)natural_image
Front view of a rectangular electronic device with internal circuitry and mounting points (no text or symbols)Telecomando
natural_image
Technical line drawing of a heat exchanger or cooling unit with cooling fins and cooling elements (no text or symbols)natural_image
Front view of a rectangular electronic device with internal components and a side-view inset showing a vertical panel (no text or symbols)$$ P S = P i a t e k $$
$$ P P = W t o r e k $$
$$ P B = S o b o t a $$
$$ P B = \text { Środa } $$
$$ P P = \text { Niedziela } $$
$$ P \text { PH } = C z w a r t e k $$
CTC Clatronic Sp. z o.o
Ul. Brzeska 1
45-960 Opole
Usuwanie
Usuwanie baterii
natural_image
Technical line drawing of a heat exchanger or cooling unit with cooling fins and cooling elements (no text or symbols)natural_image
Front view of a rectangular electronic device with internal components and a side-view inset showing a cylindrical component (no text or symbols)Távirányító
$$ P P = H e t f o $$
$$ P \text { is } = P \text { éntek } $$
$$ P \mathbb {R} = K e d d $$
$$ P B = S z o m b a t $$
$$ P B = S z e r d a $$
$$ P P = \text { Vasárnap } $$
$$ P \text { Φ } = C s u t o r t o k $$
natural_image
Technical line drawing of a heat exchanger or cooling unit with cooling fins and cooling elements (no text or symbols)natural_image
Front view of a rectangular electronic device with internal circuitry and mounting points (no text or symbols)( ) ECO ∪ ∪ ∪ ∪ ∪ ∪ ∪ ∪ ∪ ∪ ∪ ∪ ∪ ∪ ∪ ∪ ∪ ∪ ∪ ∪ ∪ ∪ ∪ ∪ ∪ ∪ ∪ ∪ ∪ ∪ ∪ ∪ ∪ ∪ ∪ ∪ ∪ ∪ ∪ ∪ ∪ ∪ ∪ ∪ ∪ ∪ ∪ ∪ ∪ ∪ ∸ ∪ ∸ ∸ ∸ ∸ ∸ ∸ ∸ ∸ ∸ ∸ ∸ ∸ ∸ ∸ ∸ ∸ ∸ ∸ ∸ ∸ ∸ ∸ ∸ ∸ ∸ ∸ ∸ ∸ ∸ ∸ ∸ ∸ ∸ ∸ ∸ ∸ ∸
natural_image
Pure electrical circuit lines without any symbolsnatural_image
Front view of a rectangular electronic device with multiple ports and connectors, shown in two orthogonal views (no text or symbols)جهاز التحكم عن بعد
- Fernbedienung
- Be sure to read the separately enclosed safety instructions first.
- Instruction Manual
- Symbols in this Instruction Manual
- WARNING:
- CAUTION:
- Content
- Unpacking the Appliance
- Overview of the Components / Scope of Delivery
- Appliance
- Remote Control
- Without Illustration
- Warnings for the Use of the Appliance
- Connected Load
- CAUTION: Overload!
- Handling Batteries
- Putting the Appliance into Operation
- Mounting the Stands
- Wall Mounting
- Electric Connection
- Notes for Use
- Operation
- Switching On/Off
- Selecting the Operating Mode
- Set Temperature
- Child Lock
- Switching the Display Illumination Off and On
- Hour Timer
- Weekly Timer
- Set the Current Time:
- Program the Weekly Timer
- Deleting a Weekly Timer Programming
- Open Window Detection
- Ending Operation
- Overheat Protection
- Cleaning
- Dust on the Protective Grille from the Air Outlet
- Storage
- Technical Data
- Disposal
- Battery Disposal
- Meaning of the "Dustbin" Symbol
- BELANGRIJK:
- Afstandsbediening
- Télécommande
- Mando a distancia
- Telecomando
- Usuwanie
- Usuwanie baterii
- Távirányító
Brand : ProfiCare
Model : PC-GKH 3119
Category : Heating