
PCHL 3086 - Heating ProfiCare - Free user manual and instructions
Find the device manual for free PCHL 3086 ProfiCare in PDF.
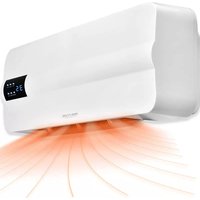
| Product type | Fan heater |
| Brand | ProfiCare |
| Model | PCHL 3086 |
| Power supply | 220-240 V~, 50-60 Hz |
| Rated power | 1500 W |
| Min. power | 1000 W (Low) |
| Net weight | Approx. 2.2 kg |
| Protection class | II |
| Operating modes | Fan, Low heat (1000W), High heat (1500W) |
| Thermostat | Yes, adjustable from 15°C to 35°C |
| Timer | 01 to 12 hours |
| Oscillation | Yes, approx. 45° |
| Overheating protection | Yes, automatic shut-off |
| Safety switch | Yes, tilt switch |
| Control panel | Touch with LED display |
| Remote control | Yes, CR2025 battery included |
| Filter | Washable, accessible via front grille |
| Cleaning | Dry or slightly damp cloth, brush air outlets |
| Safety distances | Minimum distance of 90 cm from furniture |
| Outdoor use | No, indoor use only |
| Warranty | See provided warranty certificate |
| Manufacturer | Clatronic International GmbH, Germany |
Frequently Asked Questions - PCHL 3086 ProfiCare
User questions about PCHL 3086 ProfiCare
0 question about this device. Answer the ones you know or ask your own.
Ask a new question about this device
Download the instructions for your Heating in PDF format for free! Find your manual PCHL 3086 - ProfiCare and take your electronic device back in hand. On this page are published all the documents necessary for the use of your device. PCHL 3086 by ProfiCare.
USER MANUAL PCHL 3086 ProfiCare
Notification de accomplishment de directiva 31
Eliminación 31
Thank you for choosing our product. We hope you will enjoy using the appliance.
Symbols in this Instruction Manual
Important information for your safety is specially marked. It is essential to comply with these instructions in order to avoid accidents and prevent damage to the appliance:

WARNING:
This warns you of dangers to your health and indicates possible injury risks.

CAUTION:
This refers to possible hazards to the appliance or other objects.

NOTE:
This highlights tips and information.
Contents
Overview of the Components. 3
General Notes 40
Special Safety Precautions for this Appliance. 40
Handling Batteries 42
Unpacking the Appliance 42
Overview of the Components 42
Remote Control 43
Changing the Battery of the Remote Control 43
Notes for Use 43
Connected Load 43
Safety Switch 43
Electric Connection 43
Operating Buttons 43
Operation 43
Switching the Appliance On / Off 43
Power Level Selection 44
Time-delayed Switch-off 44
Switch Oscillation On/Off 44
Overheat Protection 44
Cleaning 44
Dust on the air outlet openings 44
Filter 44
Technical Data 44
Notice of Directive Conformity. 45
Disposal 45
Battery Disposal 45
Meaning of the "Dustbin" Symbol 45
Product Data Sheet. 46
General Notes
Read the operating instructions carefully before putting the appliance into operation and keep the instructions including the warranty, the receipt and, if possible, the box with the internal packing. If you give this appliance to other people, please also pass on the operating instructions.
- The appliance is designed exclusively for private use and for the envisaged purpose. This appliance is not fit for commercial use.
- Do not use it outdoors. Keep it away from sources of heat, direct sunlight, humidity (never dip it into any liquid) and sharp edges. Do not use the appliance with wet hands. If the appliance is humid or wet, unplug it immediately.
- When cleaning or putting it away, switch off the appliance and always pull out the plug from the socket (pull the plug itself, not the lead) if the appliance is not being used and remove the attached accessories.
- Do not operate the appliance without supervision. If you leave the room you should always turn the appliance off. Remove the plug from the socket.
- The appliance and the mains lead have to be checked regularly for signs of damage. If damage is found the appliance must not be used.
- Use only original spare parts.
- In order to ensure your children's safety, please keep all packaging (plastic bags, boxes, polystyrene etc.) out of their reach.

WARNING:
Do not allow small children to play with the plastic foil.
There is a danger of suffocation!
Special Safety Precautions for this Appliance
You will find the following symbol with warning character on the appliance:

WARNING:
In order to prevent overheating, the fan heater must not be covered.

WARNING:
- Some parts of the product can become very hot and cause burns. Avoid contact with the skin.
-
You must be particularly careful when children and vulnerable persons are present.
-
This appliance can be used by children aged from 8 years and above and persons with reduced physical, sensory or mental capabilities or lack of experience and knowledge if they have been given supervision or instruction concerning use of the appliance in a safe way and understand the hazards involved.
Children shall not play with the appliance. - Cleaning and user maintenance shall not be made by children without supervision.
- Children younger than 3 years of age should be kept away from the appliance, unless they are supervised at all times.
- Children from the age of 3 and younger than 8 years of age may only turn the appliance on and off if they are supervised, or have been instructed with regard to the safe use of the appliance, and if they have understood the risks resulting from it, provided that the appliance has been placed and installed in its normal position of use.
- Children from the age of 3 and younger than 8 years of age may not insert the plug into the socket, may not regulate the appliance, may not clean the appliance and / or may not perform the maintenance by the user.
- Please keep a safety distance of at least 90~cm between all sides of the appliance and furniture and other objects.
- Under no circumstances may the fan heater be used in rooms with explosive gas (e.g. petrol) or while work is being carried out
with inflammable adhesives or solvents (e.g. when gluing or painting parquet, PVC etc.).
- Do not insert any objects into the fan heater.
- Ensure that a safety distance is maintained between the power cord and the housing.
- Do not use the fan heater in the open air.
- Do not use the fan heater in close proximity to bathtubs, showers or swimming pools.
- The fan heater should not be placed directly below a mains power socket.
- Do not repair the appliance by yourself. Always contact an authorized technician. If the supply cord is damaged, it must be replaced by the manufacturer, its service agent or similarly qualified persons in order to avoid a hazard.
Handling Batteries

WARNING:
- Do not expose batteries to excessive heat such as sunlight, fire or similar. There is a risk of explosion!
- Batteries are not toys. Keep away from children.
- Do not open batteries by force.
- Avoid contact with metal objects (rings, nails, screws, etc.). There is a risk of short circuit!
- A short circuit could cause the battery to heat up excessively or even to catch fire, resulting in injuries.
- For your own safety, cover the battery terminals with adhesive tape during transport.
- In case of battery leakage, make sure not to rub the liquid into your eyes or mucous membranes. In case of contact, wash your hands and rinse your eyes with clear water. Seek medical attention if any discomfort persists.

CAUTION:
Batteries can leak and lose battery acid. If the remote control is not used for a long period of time, remove the battery.
Unpacking the Appliance
- Remove the appliance from its packaging.
- Remove all packaging material such as foils, padding, cable holders and cardboard.
- Fully unwind the cable.

NOTE:
There might be dust and production residue present on the appliance. We recommend cleaning the appliance as described under "Cleaning".
Overview of the Components
1 Air outlet openings
2 Ventilation grille
3 On/off switch (I/O)
4 Safety switch
5 MODE ON/OFF button + indicator lamp
6 SWING button + indicator lamp
7 TIMER button + indicator lamp
8 TEM. button + indicator lamps Fan/Low/High
9 Display
10 ON/OFF button
11 UP button
12 SWING button
13 DOWN button
14 TIMER button
15 MODE button
Remote Control

NOTE:
The button cell in the battery compartment of the remote control has been secured with a foil for transport. This will extend the durability of the battery. Before initial use please remove this foil so that the remote control is ready for operation.
The range of the remote control is limited. When using the remote control, please ensure that there are no obstacles placed between it and the sensor on the appliance.
Changing the Battery of the Remote Control
If the range of the remote control is reduced during use, please proceed as follows:
- Open the battery compartment on the bottom of the remote control by holding the lever inwards and pulling out the battery compartment.
- Replace the button cell with a battery of the same type (CR2025). Ensure correct polarity.
- Then close the battery lid.
Notes for Use
Connected Load
The appliance supports a power input of 1500 W.

CAUTION: Overload
- When using an extension cord, it must have a cable cross-section of at least 1.5mm^2
- Do not use multi-outlet power strips, since this appliance is too powerful.
- Do not connect any other powerful appliances to the same electric circuit.
Safety Switch
Your fan heater features a safety switch that disconnects the power supply in case the appliance falls over. The safety switch prevents hazards caused by overheating.

CAUTION:
Place the appliance on a smooth, horizontal surface. Avoid carpets in order to prevent failure of the safety switch.

NOTE:
As soon as the safety switch has been activated, the appliance must be set and switched on again.
Electric Connection
- Make sure the voltage of the appliance (see rating label) matches the mains voltage to be used.
- Connect the mains plug to a properly installed isolated ground socket.
Operating Buttons
The buttons on the appliance are sensor touch buttons. In order to perform the corresponding function gently touch the buttons. Whenever a button is pressed, it will be confirmed by a beep sound.
| Control Panel | Remote Control | Function |
| TEM. | + UP | Increase temperature |
| - DOWN | Decrease temperature | |
| TIMER | TIMER | Time-delayed switch-off: 0 to 12 hours |
| SWING | SWING | Switch oscillation on / off |
| MODE ON/OFF | MODE | Power level selection (Fan, Low and High) |
| ON/OFF | Switching the appliance on / off |

NOTE:
In order to switch off the appliance using the button MODE ON/OFF on the front, repeatedly press the button until the Fan indicator lamp starts flashing. The display shows and indicates the activated 30 second timer.
Operation

NOTE:
- The operation is explained using the buttons on the remote control.
- The buttons can only be pressed once the appliance has been switched on by using the ON/OFF button.
Switching the Appliance On/Off
- Use the on / off switch on the back to switch on the appliance. To do this, set it to position I. You will hear a signal tone.
- Start the appliance using the ON/OFF button. The appliance activates the fan mode and starts operating in setting 1. Both the indicator lamp above the MODE ON/OFF button and the Fan indicator lamp start to light up.
- Press the ON/OFF button again to switch off the appliance.

NOTE:
A 30 second timer will start in the display. During this period the fan remains in operation to cool down the appliance. The Fan indicator lamp is flashing. When the timer period has lapsed, the appliance will automatically switch into standby mode.

CAUTION:
When not using the appliance, disconnect the mains plug.
Power Level Selection
Press the MODE button repeatedly to choose between the available power levels. The indicator lamps for Fan, Low and High indicate the selected power setting.
Fan operation - Setting 1 (without heating) The display shows 0 1
Fan operation - Setting 2 (without heating) The display shows 02
Low Power level / Heating level 1 (1000 Watt)
High Power level / Heating level 2 (1500 Watt)
Use the + UP and DOWN buttons to select a temperature between 15 and 40 .
- The selected temperature flashes briefly on the display. Afterwards, the current room temperature is shown on the display again.
- The appliance will automatically switch to the respective power setting if the selected temperature falls into a higher or lower power setting.

NOTE:
- Once the current ambient temperature has been reached, the appliance switches off and automatically maintains the set temperature level.
- There may be a slight difference between the displayed and the actual room temperature. This is due to the design and does not mean that the appliance is defective.
Time-delayed Switch-off
You can set a time-controlled switch-off for the appliance.
- Use the TIMER button to select a time setting between 0 and 1 hours. The indicator lamp above the TIMER button lights up.
- Upon expiry of the timer, the appliance will switch off automatically.
Switch Oscillation On/Off
Press the SWING button to switch on oscillation. The appliance automatically rotates in the range of about 45 degrees. The indicator lamp above the SWING button lights up.
Overheat Protection
The appliance features an overheat protection mechanism causing the appliance to switch off automatically in case of overheating.
- Use the ON/OFF button to switch the appliance off.
-
Set the on / off switch, located at the back of the appliance, to the O position.
-
Disconnect the mains plug from the socket.
- Let the appliance cool down for approx. 10 minutes before using it again.

NOTE:
If the overheat protection mechanism causes the appliance to switch off again after a short period, this might indicate a defect.
- Switch off the appliance and disconnect it from the mains.
- Have the appliance checked by your dealer or our customer service.
Cleaning

WARNING:
Always disconnect from the mains before cleaning and wait until the appliance has cooled down.
- Never immerse the appliance in water to clean it. This may lead to electrical shock or fire.

CAUTION:
- Do not use wire brushes or other abrasive materials.
-
Do not use caustic or scouring agents.
-
Wipe away dust with a dry cloth.
- Flecks can be removed with a suitably damp cloth.
Dust on the air outlet openings
Dust accumulating on the air outlet openings may lead to overheating.
- Remove the dust by careful brushing.
or
- Use the upholstery nozzle of your vacuum cleaner to remove the dust.
Filter
- Open the ventilation grille and remove it.
- Remove and clean the filter. You may use a brush to clean the filter.
- Reinsert the filter.
- Reattach the ventilation grille to the appliance. Observe the guide lugs. The ventilation grille must audiably engage.
Technical Data
Model: PC-HL 3086
Power supply: 220 - 240 V~, 50 - 60 Hz
Power consumption: 1500 W
Protection class: II
Net weight: approx. 2.2 kg
The right to make technical and design modifications in the course of continuous product development remains reserved.
Notice of Directive Conformity
The appliance meets the European standards and directives in the current version at delivery:
Low Voltage Directive (LVD) 2014 / 35 / EC
- Electromagnetic Compatibility (EMC) Legislation Directive 2014 / 30 / EC
RoHS-directive 2011/65/EU & (EU) 2015/863
Ecodesign-directive (ErP) 2009/125/EC
Commission Regulation (EU) 2015 / 1188 (Product Data Sheet see page 46)
Disposal
Battery Disposal

As a consumer you are obliged by law to return old batteries / accumulators.
Remove the battery from the remote control before disposing of the appliance.
Return the battery to a collection facility for the collection of old batteries or hazardous waste. Contact your local authority for more information.
Meaning of the "Dustbin" Symbol
Protect our environment: do not dispose of electrical equipment in the domestic waste.
Please return any electrical equipment that you will no longer use to the collection points provided for their disposal.
This helps avoid the potential effects of incorrect disposal on the environment and human health.
This will contribute to the recycling and other forms of re-utilisation of electrical and electronic equipment.
Information concerning where the equipment can be disposed of can be obtained from your local authority.
Product Data Sheet
| Model identifier PC-HL | 3086 | |||||
| Item Symbol Value Unit Item Unit | ||||||
| Heat output Type of heat input, for electric storage | local space heaters only | |||||
| Nominal heat output P nom | 1.5 kW manual | heat charge control, with integrated thermostat N. A. | ||||
| Minimum heat output (indicative) | Pmin | 1.0 kW | manual heat charge control with room and / or outdoor temperature feedback | N. A. | ||
| Maximum continuous heat output | Pmax,c | 1.5 kW | electronic heat charge control with room and / or outdoor temperature feedback | N. A. | ||
| Auxiliary electricity consumption | fan assisted heat output | N.A. | ||||
| At nominal heat output | eI max | 0,000 | kW | Type of heat output/room temperature control | ||
| At minimum heat output | eI min | 0,000 | kW | single stage heat output and no room temperature control | no | |
| In standby mode | eISB | 0,000 | kW Two | or more manual stages, no room temperature control no | ||
| with mechanic thermostat room temperature control | no | |||||
| with electronic room temperature control | yes | |||||
| electronic room temperature control plus day timer | no | |||||
| electronic room temperature control plus week timer | no | |||||
| Other control options | ||||||
| room temperature control, with presence detection | no | |||||
| room temperature control, with open window detection | no | |||||
| with distance control option | no | |||||
| with adaptive start control | no | |||||
| with working time limitation | yes | |||||
| with black bulb sensor | no | |||||
| Contact details | Clatronic International GmbH, Industriering Ost 40, 47906 Kempen, Germany | |||||
| N. A. = not applicable | ||||||
Instrukcja obslugi
CTC Clatronic Sp. z o.o
Ul. Brzeska 1
45-960 Opole
Usuwanie
Usuwanie baterii

Yka3bIbaeHa BO3MOxHyO ONaCHOCTb IIN3JeINN INpynx OKpyKaIOxN INpeDMETOB.

ПИМЕЧАнЯ:
Jaet COBtI INHOpMaIIO.
CoapedkaHne
O63op detae np6opa. 3
O67a HΦopMaun 62
Oc6bIe yka3aHnI NO texHnke
6e3oNaCHOCTn Dn DaHoro ycTpoCTBa... 63
Kakobpaatabca6baatepaKaMa. 65
PacnaKOBka ycTpoiCTBa. 65
O63op detae np6opa. 65
DuctauHooHoe ynpabBHeHne 65
3aMeHa 6aTapeKn B nCTaHcNoHHom ynpabJeHHn ...65
PpmeuHnno nncnoB3OBAHn.. 65
PoiKIOHHeHHa Harpy3ka 65
AbapnHbBbIKIOaTeIb 65
PoiKIOHHeHne 3JIeKToPiTaHnI 66
KhoNk ynpaBneHn 66
Pa6ota. 66
Bknquhen / Bbiknquhen aannapaTa 66
Bb6op ypoBHa MOUHocTn 66
BbIkuoyHeHc3aepKoIOBpeMeHn 66
BkIIOUeHHe / BbIKIOUeHHe KOJIe6aHnI NToKa 67
3aunra ot neperpeBa 67
Ynctka 67
BbIBB Bo3DyXOBblYcKbHbIX OTBepCTnax 67
ΦnIbTp 67
TexHHueckne daHbIe 67
Ytunnaa.. 67
Yttnn3aunncnojIb3oBaHnO 6tapeyn 67
3haueheine cunmbola «Kop3nHa» 67
OmbaHOpMaun
Ipeed Haayanom 3KcNpyataunn np6opba BHNMaTeIbHO npouTaNte npuIaraeMyo HNCTpykTuNO no 3KcNpyataunn COxpaHNTe ee BHaTeXHOM MeCTe, BMeCTe C rapaHTnHBIM TaIOHOM, KaccOBbIM YekOM N, NO BO3MOxHOCtN, KAPTOHHO Ko06KO C yNAKOBOUHbIM MaTePnaIaON. Ecn daTe KOMyJIn6o nononb3OBAtBcra np6bOpom, o83aTeNbHO daNe T B npndauy DaHHUo INCHtpkyuio nO 3KcNpyataunn.
-Повьтугсь пибором только чатным образим и по наз nauseю. Пибор не пedingондя КOMМерчесКOrO ИСпОльваня.
He nIb3yIeTcB np6OpOM IOJ OTKpbITbIM He6OM. PpeDoxpaHnTe np6Op OT kApbl, pRmblx CoNHeuHbIX LyUey, BnaXHOCTN (HN B KOem clyuae He nOprpykaTe ero B BoY) n yapob 06 ocTpble yrbl. He npKacaiTeCk K np6OpBy bAnKbIMn pykam. Ecn np6Op ByaNaXHHncn IIN HAMOK, TyT Xe BbIbTe BuIKy n3 po3eKn.
- Pocne 3KcNpyatauM, MoTAtke npHaadLeKHOCTe, YnCTKe IINI POJOMKe pnp60pa Bcerda BbHMaIte BnIKy n3 po3ETKn (TaNHTe 3a BnIKy, a He 3a KaBeJIb).
He octabnIte BkIOUeHHbIe 3NEKtpOnpnp6Opbl 6e3 npICMOTpa.BbIXoIa nI NOMEuEHNBaCERda BbIKIOuayTe npN6Op.BbIHbTe wTekePn3po3ETKn.
- Pn6b np KabeB cTeBO rntaHn Heo6xOIMOppeyIrpHo 06cneIOBaTb Ha Hauuue CNeIOB NOBpeKdHn. Pn 6hApXeHN NOBpeXDeHn NoJIb3OBAtbcrnp6bopom 3anpeaaetc.
Vicnoj3yTeToIbKOOpnHaHbHbe3aHactN.
- IV3 coo6paXeHn 6e3oNaChOCTn IJr DeTeH He ocTaBJIaIte JExKaTb ynaKOBky (PiNactNKOBbIe MeWKIn, KapTOH, neHONlact n T.D.) 6e3 npICMOTpa.

IPEDYUNPEXDEHNE:
He no3B0JnTe DeTm nIpaTb c noIIN3TNHeHOBOI nIeHko. OnachocTb yduyba!
Oco6bIe yka3aHnI NO TexHnke 6e3OpacHOCTNДЯ ДaHHoro yCTpoiCTBa
Ha n3deIin ImeOTcA cIeDyUoI npEynpeXdaUOuI CNMBOJ:

ПЕДУПЕЖДЕНЕ:
ДяТOrO,чTo6bl npi6op He nepepeBaIcra,HeIb3a NaKpbIbAtb erO CBepxU.

ПЕДУПЕЖДЕНЕ:
-
HekotopbIe DeTaII np6opa MOryT cnIbHO HaPeBaTbcr I MoXHo 06KeYbCra. N36eRaTb CoPnKoCHOBeHnR C KoxEi.
Heo6xoJIMO 6bITb IpeJeIbHO OCTOpOxHbIM B IprcCyTCTBn DeTei JIOeI n3 rpynnbl pncka. -
3TINM npnbopom moryt noIb3OBaTbcra detn cTapwe 8 let n Iuca C orpaHnueHHbIMN oIN3nueCKIMN, Ocra3aTeJIbHbIMN IN NCNXUeCKIMN cNoC06HOCTaMn INn He IMeIOUne ONbITA INn 3HaHn, ECIN OHn HaxOJaTcR IOd HAID3OpOM INn INPOINHCTpyKTHIpOBaHbIB B OTHOseHmB e3ONaCHOrO NOIb3OBaHnRA pnbopom IN 3HaOT O CBraHHbIX C 3TINM ONaCHOCTaX.
He n03B0JrTe DeTm irpaTb c np6Opom.
-ЧИстka и ухов за прибором не должны проворпся DeТьМи 6e3 надзopa.
Heo6xOdmo nCnoJb3OBaTb np6Op BdJIH OT deTeM OMOKe 3-xIeT,ecnTOJbKO OHn He HaxOJaTcN PoD NOCTOAHbIM pN-CMOTpOM.
-Детистарше 3-xи младше 8 leT moryr TOnbKO BKJIIOUaTb IN BblKJIIOUaTb пибор под писмOTpOM B3PocIbIX,ИЛN,ecnIN IX obuchIN 6e3ONaCHO nCNoIb3OBaTb DaHHbIпибOP,иОHnnoHIMaIOT pIckN,CBЯ3aHHbIe c пибopOM,a TaKKe,ecnIпибOp yCTaHOBJIeH B HopMaJIbHOM MeCTOpacNoJoxeHIn. -
Детистарше 3-x И младше 8 Лет He должны BCTаВЯТь ВИКУВ розETКу, He должны очирать ппбори / пппрОИЗВОДИТь ТхнUCHЕСКоE obслuyЖИВаHne.
- CnéДиTe 3a Tem,ЧтобьI 6e3OpaHoe paCCToHne Do Me6eIN IПИpyrIX ПpeДMeTobCoCTabJIЯNo He MeHee 90 cm c JIo6oI CTOpOHbl.
- Hn B Koem cnyuae n Hn npi KaKix o6cTojTeJbCTBax He noJIb3yIteCb HaRpeBaTeJem B NOMEeHnX, B KOTOpbIX XpaHrTcB 3PbIBOONaChbIe BeIeCTBa (HaRpIMep 6eH3nH) IIN IPOUN3BOdYrTa pa60tbi C JERKOBOcPJIaMeHЯUoMmCra pAcTBOPHTeJAMn IIN KJIeA MIn (HaRpIMep: yKJaKa napKeTa IIN JInHOJNMyMa PBX n T.d.).
3anpeaetcyaBaTbBHarpeBaTeIbKaKne-Jn6o npedMeTbl. - ObecneuTe TaKke 6e3oNaChoe paccToHnE MeKdy ceTeBbIM ShHypOM N HaPeBaTeJIem.
3anpeaetcnoB3OBaTbCnHaPBeBaTeJemHaOTKpbITOM BO3- dyxe.
He nCnoJIb3yIte o6OrpeBaTeIb B HeNOCpeIcTBeHHOJ 6JIIN3OCTU OT BaHHbl, DyuHa IINI PIIaBaTeIbHoro 6accEiHa.
He cTaNtB HeNocpeDCTBeHNO pO3eTKoJ.
He pemontnyte yctpoCTBO camocToTbHo. O6aTeIbHO CBJNTecb C aBTOpN3OBaHHbIM MaCTepOM. Pn IOBpeXdEHN cTeBOrO shHpa, BO n36eXaHne ONaCHOCTn NOPaXeHnA 3JeKTPn-ueCKm TOKOM, uHyp cIeDyET 3aMeHtB y n3ROTOBHTeJI, cepBnCHOro npedCTaBHTeJI INI dpyHX KBaINΦnCIPoBAHHbIX IIN.
Kak o6paatabcra 6aTaapeiKaMn

PENEYIPPEXDEHNE:
He noBBepraTe 6aTapeKn BO3deIcTBIO CINbHOro TeIIa, KaK HApIMep, COJIHeUHbIe JIyH, OROH N T.D. Puck B3pbIbA!
-БатAPEKHeIgpyuSha.ДеркTe IX BdAnOT DeTei
- He pa36bpaite 6aTaapeiKn.
- Ⅲ6eraIte KOHTaKTA C MTeaJIINueckMn IpeJMeTaMn (KoJIbUa, rBO3dN, 6OJIbI N.T.D.). Puck KopoTkoR 3aMbIkaHnI!
KopoTkoe 3ambikaHne MOXET npNBecTN K npepeBy n daKe BocnnaMeHeHHIO 6aTaapeek, YTO MOXET npNBecTN K TpaBMam.
-ДяBaшewe63oNaChOCTn3aKpoTteKOHTaKTbI6atapeNJIINKoJIeHToI npI TpaHCnOpTpIOBKe.
B cnyuae BbITEkAHn 3NEKtPOInTa,OCTepeaITeCb nonadHn KcNToB B rnaHa Ha cIn3NCTbIe.B cnyuae nnonadHn, npomte YnCToB Bodoi. ObaTINTeCb K Brpae B cnyuae CoxpaHeHn DnCKOMΦopTa.

BHIMAHNE:
BatapeMn Morynt Noty, H3 Hx Bblbctc KNCNOTa. EcnPiY He nCnoB3yeTc DnIteNbHoe Bpem, BbitackBaTe aKKymyTopbl.
PacnaKOBka yctpoNCTBa
1.ИЗБЛЕКТЕ yСТРОДСТВО ИЗУПАКOBКИ.
2. YdaInTe BCE ynaKOBOChbIe MaTePnAbI, TaKHe KaK fonIba, nOKnadKn, KcKCaTOpbI KaBeJeN KApToH.
3.Полнocью pa3moTaиTe шур.

ПРИМЕЧАНО:
Ha yctpoiCTBe MOyT 6bIb nbIb n OTXoDbI npOn3BOJCTBeHHoro npOcecca. PekOMeHdyEer TOnHCTnTb yctpoiCTBO, KaK OINcAHO B pa3dJe «UIncTa).
O63op dTeaJe np6opa
1 Bo3dyxOboBInyckHbIe OTBepCTnIa
2 BeHTnIaHnHaPeWTeKa
3 BbiklouateIb nIaHn (I/O)
4 AByaHbIy BbIKIOUaTeIb
5 KhoIka MODE ON/OFF + INDIIKAtOp
6 KhoNka SWING+ INHdNkaTOp
7 KhoNka TIMER + INDnKaTOp
8 KhoNka TEM. +HnDnKaToPb Fan/Low/High
9 DnCnJIeI
10 Khonka CON/OFF
11 Khonka+UP
12 KhoNka SWING
13 KhonKa DOWN
14 Khonka TIMER
15 Khonka MODE
DnCTaHcHNOHHoe ynpabJIeHne

ПРИМЕЧАЙ:
IITnEBBm 3nemH B 6bataeHOM OTCEKe IyNbTa DnCTAHUHOHO ynpabHeHn DnI CEne TpaHcnpTIpOBKn 6bl 3aunuH e foJIbTo. 3To npOdNt cPok CnyKb6b6bataeKn. PpeD nepBbIM BKNIOueHEm ydaNte 3Ty foJbry, YTO6bI pINBecTn IyNbT B paOoee COCTOHRHe.
Obactb deiCTBnIaHIOHO ynpabJIeHnOrpahnueHa.
Iotppe6bma MouHocbYcTpoCTBa-1500BT.

BHIMAHNE:Ipeperpy3ka
-Пи Исплььзовани Кбеля-удннгеля,эр ce�нne должно 6ыт b He Mehee 1,5 MM2.
He nCnoB3yIne MyIbTu-ynHnHTeIN NITAHN, TAK KAc yCTpOcTB0 CnUkOM MOuHOE.
He noKIOUOaIte Dpyrne MoUHbIe ycTPOcTBA K ToJ Xe cENI 3JeKTPoNtAHn.
AbarinHbI BbIKNoaTeNb
Baw o6orpeBaTeIb Oshaueh AbapnHbIM BbIKIOUaTeIeM, KOTopbI OTKIOUaET 3JIeKTpONITaHne B clyuae OTKa3a yCTpoIcTBa. AbapnHbIM BbIKIOUaTeIb IpeDoTbpaIaet pNCK neperpeBa.

BHIMAHNE:
IocTaBbTe yctpoiCTBO Ha pOBHyO rOpN3oHTaJIbHyIO NO-BepxHOCtB. CtapaiTecb He CTaBNTb yCTpoiCTBO Ha KOBe, YTO6bl IpeD0TbPAiTb c60a ABapuHOrO BbIKNoUOteJIa.

ПРМЕЧАнЯ:
Iocne akTnBaun npedeoxpAHntBHoro BbIKHouaTeN np6Op Heo6xOIMMO BHOBb yCTaHOBTb NKIOHTb.
IoiKJIIOUeHne 3JIeKTPoINrTaHHN
- Y6eHITecb, YTO HAIIpXKeHHe, Heo6xoJHMoe JIA yCTPOI CTBa (CM. Ta6JIHcKy CO CIEUINΦHKaIeH) COOTBeTCTByET HAIIpXKeHHO B HcIOJIb3YeMOI CETH ⅢeKTPoIHtAHH.
- BCTaBBTe IITeIcEJIb HNCIIpaBHyIO, 3a3eMJIeHHyIO pO3eTKy.
KhoIIKNyIpaBJIeHHN
Ha yctpojctBe HcIOJIb3yIOTcCeHCOPHbE KHOIIKN.CJIerKa KOCHHTecb KHONK, YTO6bl BbIIOJHHTb COOTBeTCTBYIOUHO yHKUHO.IpH KaJDOM HaKaTHN KHOINB bIdaeTc3ByKOBOI CNrHaJI IIOITBepKdEHn.
- HaKMHTe KHOPIKy ON/OFF, YTO6bI BBIKIOHOTbY 1- npH6Op.
ПРIMECHИ:
HaHNCIIIEe 3aIyCTHTcTaIMeP Ha 30 cekyHd. BToBpeMBeHTNIAITOP IpoIOJkaeT pa6oTaTB, OCTyKaI np6Op. HndNKATOP Fan Mnaet. IIO HCTeueHHBpeMeHH, OTCuHTaHHORO TaIMepOM, Pp6Op aBTOMaTHueCKN NepExoNTB DeKypHbI peKM.
BHIMAHNE:
EcIn yctpoCTBO He HcnoJb3yeTc,OTcoeHnHTe HHyp 3JIeKTPoTTaHH.
YtJIn3aIy IcNoIb3OBaHHO6aTaepKn

Kakokynatelb, BblOpndnueckn 683aHbI BO3BpaataB nCNoIb3ObaHHbe 6taapeeKn/ aKKyMyJrTOpbI.
I3BnKeKNe 6aTapeKy n3 nylbTa dNCTaH- CIOHOHorO ynpabJeHnpePeD yTNIN3aCne np6opa.
BepHnte 6atapeKy Ha nyHKT c6opa cTapbIX 6atapeek nnn onaChbIX OTXODOB. ObaaaiTeCb K MeCTbIM BnactrM dIpyonnyeHna 6oee noPp6Ho HOpMaun.
3haueHne CNMBOJa KOp3Ha
3aunTa OkpykaHoueI cpebl: He donyckaetcnytnn3aun 3JneKtponpnpobOB Bmecte C bblTOBbIMN OTXoDanM.
Ytunnaqya yctapeBwe TeXnKu Hnncnpabhix 3neKtpo np6opob npOn3BOHTc B ropondcx npEeMHbIX nyHkTax.
He donyckaIte He npabnblHo yTunl3auin OTxOOB.3To HAHOCIT Bpek OkpykaIOUe CpeE IN OKa3bBaet HeratNBHOE BO3DeICTBne Ha 3DopOBBe IIOJe.
Oka3bIaBte coaeCTBne nporpamme yTuIN3aunn npyTm fopmam nepepa60TKn 3NeKtpoHHoN n3NeKtpuueckoTexHKn.
HOpMaunO npHKtax yTNn3aun 6bITOBoTexnKMOXHO NOJyUHTB MECTHBIX OPraHax Bnactn.
julil no jolil
a 1000
Joo aoussu la oolgljg jlo cglgmo 1aay .nll oolgy alg lal /yIb Jn Jn Jn Jn Jn Jn Jn Jn
Jolg. 0rbll Cylalgl g aal l yabll gssy Jd aball .loglebl no jdaal alabbl alal gl
与 OO = E 且 SH OO
:
.5j1 abz51go
0g2g 2g1g5g1g
a10
.
algljz
.0j0a11 0000000000000000000000000000000
.0Lj, all p12xowly j
g
.
J
1.
jaii jaii jaii jaii jaii jaii jaii jaii jaii jaii jaii jaii jaii jaii jaii jaii jaii jaii jaii jaii jaii jaii jaii jaii jaii jaii jaii jaii jaii jaii jaii jaii jaii jaii jali jali jali jali jali jali jali jali jali jali jali jali jali jali jali jali jali jali jali jali jali jali jali jali jali jali jali jali jali
S OBC = S COD + S BOC - S BOC
4
a 1
A
PC-HL 3086
60-50 240-220
1500
II
2.2
jaiubjgbllllaua aagaaag aieiia jol jgalb
L
aall jao all CE oLjg jolol
ydsgdoaiaoLs jzabibul gddl ydg aabblzogjSly
. doLwJlglj
| a#lll g### |
a#lll ## ### ## ## ## ## ## ## ## ## ## ## ## ## ## ## ## ## ## ## ## ## ## ## ## ## ## ## ## ## ## ## ## ## ## ## ## ## ## ## ## ## ## ## ## ## ## ## ## ## ## ## ## ## ## ## ## ## ## ## ## ## ## ## ## ## ## ## ## ## ## ## ## ## ## ## ## ## ## ## ## ## ## ## ## ## ## ## ## ## ## ## ## ## ## ## ## ## ## ## ## ## # ## # # # # # # # # # # # # # # # # # # # # # # # # # # # # # # # # # # # # # # # # # # # # # # # # # # # # # # # # # # # # # # # # # # # # # # # # # # # # # # # # # # # # # # # # # # # # # # # # # # # # #
## ## ## ## ## ## ## ## ## ## ## ## ## ## ## ## ## ## ## ## ## ## ## ## ## ## ## ## ## ## ## ## ## ## ## ## ## ## ## ## ## ## ## ## ## ## ## ## ## ## ## ## ## ## ## ## ## ## ## ## ## ## ## ## ## ## ## ## ## ## ## ## ## ## ## ## ## ## ## ## ## ## # # # # # # # # # # # # # # # # # # # # # # # # # # # # # # # # # # # # # # # # # # # # # # # # # # # # # # # # # # # # # # # # # # # # # # # # # # # # # # # # # # # # # # # # # # # # # # # # # # ## # # # # # # # # # # # # # # # # # # # # # # # # # # # # # # # # # # # # # # # # # # # # # # # # # # # # # # # # # # # # # # # # # # # # # # # # # # # # # # # # # # # # # # # # # # # # # # # # # # 10000000000000000000000000000000000000000000000000000000000000000000000000000000000000000000000000000a#lll l##g a#lll l##g a#lll l##g a#lll l##g a#lll l##g a#lll l##g a#lll l##g a#lll l##g a#lll l##g a#lll l##g a#lll l##g a#lll l##g a#lll l##g a#illl l##g a#illl l##g a#illl l##g a#illl l##g a#illl l##g a#illl l##g a#illl l##g a#illl l##g a#illl l##g a#illl l##g a#illl l##g a#illl l##g a#illl l## g a#illl l##g a#illl l##g a#illl l##g a#illl l##g a#illl l##g a#illl l##g a#illl l##g a#illl l##g a#illl l##g a#illl l##g a#illl l##g a#illl l##g a#elll l##g a#illl l##g a#illl l##g a#illl l##g a#illl l##g a#illl l##g a#illl l##g a#illl l##g a#illl l##g a#illl l##g a#illl l##g a#illl l##g a#illl l###g a#illl l##g a#illl l##g a#illl l##g a#illl l##g a#illl l##g a#illl l##g a#illl l##g a#illl l##g a#illl l##g a#illl l##g a#illl l##g a#illl l##g a#lll l##g a#illl l##g a#illl l##g a#illl l##g a#illl l##g a#illl l##g a#illl l##g a#illl l##g a#illl l##g a#illl l##g a#illl l##g a#illl l## g a#illl l## g a#illl l##g a#illl l##g a#illl l##g a#illl l##g a#illl l##g a#illl l##g a#illl l##g a#illl l##g a#illl l##g a#illl l##g a#illl l##g a#elll l##g a#elll l##g a#illl l##g a#illl l##g a#illl l##g a#illl l##g a#illl l##g a#illl l##g a#illl l##g a#illl l##g a#illl l##g a#illl l##g a#illl l## g a#illl l###g a#illl l##g a#illl l##g a#illl l##g a#illl l##g a#illl l##g a#illl l##g a#illl l##g a#illl l##g a#illl l##g a#illl l##g a#illl l##g a#elll l##g a#lll l##g a#illl l##g a#illl l##g a#illl l##g a#illl l##g a#illl l##g a#illl l##g a#illl l##g a#illl l##g a#illl l##g a#illl l##g a#illl l###g a#illl l###g a#illl l##g a#illl l##g a#illl l##g a#illl l##g a#illl l##g a#illl l##g a#illl l##g a#illl l##g a#illl l##g a#illl l##g a#illl l##g a#lll l##g a#elll l##g a#illl l##g a#illl l##g a#illl l##g a#illl l##g a#illl l##g a#illl l##g a#illl l##g a#illl l##g a#illl l##g a#illl l##g a#illl l###g a#illl l## g a#illl l##g a#illl l##g a#illl l##g a#illl l##g a#illl l##g a#illl l##g a#illl l##g a#illl l##g a#illl l##g a#illl l##g a#illl l##g a#lll l##g a#lll l##g a#illl l##g a#illl l##g a#illl l##g a#illl l##g a#illl l##g a#illl l##g a#illl l##g a#illl l##g a#illl l##g a#illl l## g a#illl l##g a#illl l## g a#illl l##g a#illl l##g a#illl l##g a#illl l##g a#illl l##g a#illl l##g a#illl l##g a#illl l##g a#illl l##g a#illl l##g a#elll l##g a#illl l##g a#elll l##g a#illl l##g a#illl l##g a#illl l##g a#illl l##g a#illl l##g a#illl l##g a#illl l##g a#illl l##g a#illl l##g a#illl l## g a#illl l##g a#illl l###g a#illl l##g a#illl l##g a#illl l##g a#illl l##g a#illl l##g a#illl l##g a#illl l##g a#illl l##g a#illl l##g a#illl l##g a#elll l##g a#illl l##g a#lll l##g a#illl l##g a#illl l##g a#illl l##g a#illl l##g a#illl l##g a#illl l##g a#illl l##g a#illl l##g a#illl l##g a#illl l## g a#illl l## g a#illl l## g a#illl l##g a#illl l##g a#illl l##g a#illl l##g a#illl l##g a#illl l##g a#illl l##g a#illl l##g a#illl l##g a#illl l##g a#elll l##g a#elll l##g a#elll l##g a#elll l##g a#elll l##g a#elll l##g a#elll l##g a#elll l##g a#elll l##g a#elll l##g a#elll l##g a#elll l##g a#elll l## g a#elll l##g a#elll l##g a#elll l##g a#elll l##g a#elll l##g a#elll l##g a#elll l##g a#elll l##g a#elll l##g a#elll l##g a#elll l##g a#elll l##g a#illl l##g a#elll l##g a#elll l##g a#elll l##g a#elll l##g a#elll l##g a#elll l##g a#elll l##g a#elll l##g a#elll l##g a#elll l##g a#elll l## g a#elll l## g a#elll l## g a#elll l## g a#elll l## g a#elll l## g a#elll l## g a#elll l## g a#elll l## g a#elll l## g a#elll l## g a#elll l## g a#elll l## g a#illl l## g a#elll l## g a#elll l## g a#elll l## g a#elll l## g a#elll l## g a#elll l## g a#elll l## g a#elll l## g a#elll l## g a#elll l## g a#elll l## g a#elll l##g a#elll l## g a#elll l## g a#elll l## g a#elll l## g a#elll l## g a#elll l## g a#elll l## g a#elll l## g a#elll l## g a#elll l## g a#elll l## g a#illl l## g a#illl l## g a#elll l## g a#elll l## g a#elll l## g a#elll l## g a#elll l## g a#elll l## g a#elll l## g a#elll l## g a#elll l## g a#elll l## g a#elll l##g a#elll l##g a#elll l## g a#elll l## g a#elll l## g a#elll l## g a#elll l## g a#elll l## g a#elll l## g a#elll l## g a#elll l## g a#elll l## g a#Elll l## g a#elll l## g a#elll l## g a#elll l## g a#elll l## g a#elll l## g a#elll l## g a#elll l## g a#elll l## g a#elll l## g a#elll l## g a#elll l## g a#elll l## G a#elll l## g a#elll l## g a#elll l## g a#elll l## g a#elll l## g a#elll l## g a#elll l## g a#elll l## g a#elll l## g a#elll l## g a#elll l## g a#elll l## g a# ell l l## g a#elll l## g a#elll l## g a#elll l## g a#elll l## g a#elll l## g a#elll l## g a#elll l## g a#elll l## g a#elll l## g a#elll l## g a#elll l## g a#elll l## g |
| (1) 1500) 2 y###/d###/g###/High |
| 15 ###/###/DOWN - jllg UP + jllp ### |
| ###/40 |
| ###/40 |
| ###/40 |
| ###/40 |
| ###/40 |
| ###/40 |
| ###/40 |
| ###/40 |
| ###/40 |
| ###/40 |
| ###/40 |
| ###/40 |
| ###/40 |
| ###/40 |
| ###/40 |
| :ab>la |
| aläbljlgallpaj.abb#l alllol ojrlal al jlg#gllor#e |
| o#r#ll a##n#l s#a#l lglal j#l#l#l#l#l#l#l#l#l#l#l#l#l#l#l#l#l#l#l#l#l#l#l#l#l#l#l#l#l#l#l#l#l#l#l#l#l#l#l#l#l#l#l#l#l#l#l#l#l#l#ll |
| a,b,c,d,e,f,g,h,i,j,k,l,m,n |
| l,s,t,u,v,w,r,s,t,u,v,w,SWING √r|j|d|b|e|f|g|h|i |
| a,b,c,d,e,f,g,h,i,j,k,l,m,n |
| .SWING √r|j|d|b|c|d|u|v|w |
JUSSO 1500000000000000000000000000000000000000000000000000000000000
jolil
aIjIJI JIJIJI JIJIJI JIJIJI JIJIJI JIJIJI JIJIJI JIJIJI JIJIJI JIJIJI JIJIJI JIJIJI JIJIJI JIJIJI JIJIJI JIJIJI JIJIJI JIJIJI JIJIJI JIJIJI JIJIJI JIJIJI JIJIJI JIJIJI JIJIJI JIJIJI JIJIL
:4
120 + 45NA
w
如 y10 或 y = 1 ,5, y = 2 ,
.
a 1000000000000000000000000000000000000000000
:

a1j y2y 3 jog a g0g61 jaooll cylll y w j S
.aygb oial o851 plauow puee cyllbll
a#
1 1
Jolgo g Clllgl auiu 1 2
. gai j 3
= -

jglalabgogjgl .
Uigslde aole ojbi
alglc
a 2
(O/I)JyJyJyJyJyJyJyJy
Jalizao4
+MODE ON/OFF 5
g+SWING 6
Fan/Low/High 8
ON/OFF 10
UP+11
SWING 12
DOWN 13
TIMER 14
MODE 15

$$ \begin{array}{c} \vdots \ \ddot {\mathcal {S}} _ {\mathrm {g r y p h y s i c a l}} \quad \dot {\mathcal {S}} _ {\mathrm {g r y p h y s i c a l}} \quad \dot {\mathcal {S}} _ {\mathrm {g r y p h y s i c a l}} \quad \dot {\mathcal {S}} _ {\mathrm {g r y p h y s i c a l}} \quad \dot {\mathcal {S}} _ {\mathrm {g r y p h y s i c a l}}, \quad \dot {\mathcal {S}} _ {\mathrm {g r y p h y s i c a l}} \quad \dot {\mathcal {S}} _ {\mathrm {g r y p h y s i c a l}} \quad \dot {\mathcal {S}} _ {\mathrm {g r y p h y s i c a l}} \quad \dot {\mathcal {S}} _ {\mathrm {g r y p h y s t e m}} \quad \dot {\mathcal {S}} _ {\mathrm {g r y p h y s i c a l}} \quad \dot {\mathcal {S}} _ {\mathrm {g r y p h y s i c a l}} \quad \dot {\mathcal {S}} _ {\mathrm {g r y p h y s i c a l}} \quad \dot {\mathcal {S}} _ {\mathrm {g r y p h y}} \ \ddot {\mathcal {S}} _ {\mathrm {g r y p h y s i c a l}} \quad \dot {\mathcal {S}} _ {\mathrm {g r y p h y s i c a l}} \quad \dot {\mathcal {S}} _ {\mathrm {g r y p h y s i c a l}} \quad \dot {\mathcal {S}} _ {\mathrm {g r y p h y s 1 5 0 0 0 0 0 0 0 0 0 0 0 0 0 0 0 0 0 0 0 0 0 0 0 0 0 0 0 0 0 0 0 0 0 0 0 0 0 0 0 0 0 0 0 0 0 0 0 0 0 0 2} \ \ddot {\mathcal {S}} _ {\mathrm {g r y p h y s i c a l}} \quad \dot {\mathcal {S}} _ {\mathrm {g r y p h y s i c a l}} \quad \dot {\mathcal {S}} _ {\mathrm {g r y p h y s i c a l}} \quad \dot {\mathcal {S}} _ {\mathrm {g r y p h y s i n g u o} ^ {-} \mathrm {i n} ^ {-} \mathrm {i n} ^ {-} \mathrm {i n} ^ {-} \mathrm {i n} ^ {-} \mathrm {i n} ^ {-} \mathrm {i n} ^ {-} \mathrm {i n} ^ {-} \mathrm {i n} ^ {-} \mathrm {i n} ^ {-} \mathrm {i n} ^ {-} \mathrm {i n} ^ {-} \mathrm {i n}}} \ \ddot {\mathcal {S}} _ {\mathrm {g r y p h y s i c a l}} \quad \dot {\mathcal {S}} _ {\mathrm {g r y p h y s i c a l}} \quad \dot {\mathcal {S}} _ {\mathrm {g r y p h y s i c a l}} \quad \dot {\mathcal {S}} _ {\mathrm {g r y p h y}} \ \end{array} $$
$$ \bar {o} g \dot {a} \dot {s} j \dot {a} \dot {a} \dot {a} \dot {a} \dot {a} \dot {a} \dot {a} \dot {a} \dot {a} \dot {a} \dot {a} \dot {a} \dot {a} \dot {a} $$
$$ \begin{array}{l} \dot {j} \omega \dot {g} \dot {a} \dot {b} \dot {c} \dot {d} \dot {e} \dot {f} \dot {g} \dot {h} \dot {i} \dot {j} \dot {k} \dot {l} \dot {m} \dot {n} \dot {o} \dot {p} \dot {q} \dot {r} \dot {s} \dot {t} \dot {u} \dot {v} \dot {w} 8 j n s m d y l a b u j k \ \dot {a} \dot {b} \dot {c} \dot {d} \dot {e} \dot {f} \dot {g} \dot {h} \dot {i} \dot {j} \dot {k} \dot {l} \dot {m} \dot {n} \dot {o} \dot {p} \dot {q} \dot {r} \dot {s} \dot {t} \dot {u} \dot {v} \dot {w} \dot {\mathrm {的}} \dot {\mathrm {的}} \dot {\mathrm {的}} \dot {\mathrm {的}} \dot {\mathrm {的}} \dot {\mathrm {的}} \dot {\mathrm {的}} \dot {\mathrm {的}} \dot {\mathrm {的}} \dot {\mathrm {的}} \dot {\mathrm {的}} \dot {\mathrm {的}} \dot {\mathrm {的}} \dot {\mathrm {的}} \dot {\mathrm {的}} \ddot {\mathrm {的}} \ddot {\mathrm {的}} \ddot {\mathrm {的}} \ddot {\mathrm {的}} \ddot {\mathrm {的}} \ddot {\mathrm {的}} \ . \ddot {a} i a \dot {a} b l j b l \dot {b} b l 1 g 5 j d g \ddot {a} i \dot {a} \bar {l} \ddot {a} \bar {b} r b j b j \dot {g} \dot {g} \dot {g} \dot {g} \dot {g} \dot {g} \dot {g} \dot {g} \dot {g} \ \bullet j _ {A} = j _ {1} \dot {i} _ {B}, \ \bullet \dot {\vec {a}} \vec {w} \cdot \dot {j} g \ \end{array} $$
$$ \begin{array}{l} \text {j g e a d i s t r i b u t i o n} \ \text {j g e a d i s t r i b u t i o n} \end{array} \text {j g e a d i s t r i b u t i o n} \text {j g e a d i s t r i b u t i o n} \text {j g e a d i s t r i b u t i o n} \text {j g e a d i s t r i b u t i o n} \text {j g e a d i s t r i b u t i o n} \text {j g e a d i s t r i b u t i o N} 3 \text {j g e a d i s t r i b u t i o N} \text {j g e a d i s t r i b u t i o N} \text {j g e a d i s t r i b u t i o N} \text {j g e a d i s t r i b u t i o N} \text {j g e a d i s t r i b u t i o N} \text {j g e a d i s t r i b u t i o N}. $$
$$ \therefore \ddot {a} _ {g l} J _ {l g b} \dot {a} _ {l r} \dot {w} _ {i} $$
$$ \left. \right.\left. \right.\left. \right.\left. \right.\left. \right.\left. \right.\left. \right.\left.\left.\left.\left.\left.\left.\left.\left.\left.\left.\left.\left.\left.\left.\left.\left.\left.\left.\left.\left.\left.\left.\left.\left.\left.\left.\left.\right.\right.\right.\right.\right.\right.\right.\right.\right.\right.\right.\right.\right.\right.\right.\right.\right.\right.\right.\right.\right.\right.\right.\right.\right.\right.\right\rangle_ {0} ^ {1} = 0, 0, 0, 0, 0, 0, 0, 0, 0, 0, 0, 0, 0, 0, 0, 0, 0, 0, 0, 0, 0, 0, 0, 0, 0, 0, 0, 0, 0, 0, 0, 0, 0, 0, $$
$$ \left. \left| g _ {j} \right| \right| _ {0} ^ {1} \left| \frac {1}{2} \right| _ {0} ^ {1} \left| \frac {1}{2} \right| _ {0} ^ {1} \left| \frac {1}{2} \right| _ {0} ^ {1} \left| \frac {1}{2} \right| _ {0} ^ {1} $$
$$ \dot {g} \dot {g} \dot {g} \dot {g} \dot {g} \dot {g} \dot {g} \dot {g} \dot {g} \dot {g} \dot {g} \dot {g} \dot {g} \dot {g} \dot {g} \dot {g} \dot {g} \dot {g} \dot {g} \dot {g} \dot {g} $$
$$ . 4 0 1. \dot {2} \dot {2} \dot {2} \dot {2} \dot {2} \dot {2} \dot {2} $$
$$ j g j \cdot \text {l} \cdot \text {s} \cdot \text {s} \cdot \text {s} \cdot \text {s} \cdot \text {s} \cdot \text {s} \cdot \text {s} \cdot \text {s} \cdot \text {s} \cdot \text {s} \cdot \text {s} \cdot \text {s} \cdot \text {s} \cdot \text {s} \cdot \text {s} 8 \cdot \text {n} \cdot \text {n} \cdot \text {n} \cdot \text {n} \cdot \text {n} \cdot \text {n} \cdot \text {n} 3 \cdot \text {n} \cdot \text {n} \cdot \text {n} \cdot \text {n} \cdot \text {n} 1 5 b u j g j y. $$
$$ \rho_ {i} \dot {s} _ {i} \dot {s} _ {i} \dot {s} _ {i} \dot {s} _ {i} \dot {s} _ {i} \dot {s} _ {i} \dot {s} _ {i} \dot {s} _ {i} \dot {s} _ {i} $$
$$ \left. \right.\left. \right.\left. \right.\left. \right.\left. \right.\left. \right.\left. \right.\left.\left.\left.\left.\left.\left.\left.\left.\left.\left.\left.\left.\left.\left.\left.\left.\left.\left.\left.\left.\left.\left.\left.\left.\left.\left.\left.\right.\right.\right.\right.\right.\right.\right.\right.\right.\right.\right.\right.\right.\right.\right.\right.\right.\right.\right.\right.\right.\right.\right.\right.\right.\right.\right\rangle_ {0} ^ {\prime} = 0, 0, 0, 0, 0, 0, 0, 0, 0, 0, 0, 0, 0, 0, 0, 0, 0, 0, 0, 0, 0, 0, 0, 0, 0, 0, 0, 0, 0, 0, 0, 0, 0, 0, $$
$$ S \dot {y} $$
$$ g ^ {i} (j) j _ {i} j _ {i} j _ {i} j _ {i} j _ {i} j _ {i} j _ {i} j _ {i} j _ {i} j _ {i} j _ {i} j _ {i} j _ {i} j _ {i} j _ {i} j _ {i} j _ {i} j _ {i} j _ {i} j _ {i} j _ {i}. $$
$$ \left. \right.\left. \right.\left. \right.\left.\left.\left.\left.\left.\left.\left.\left.\left.\left.\left.\left.\left.\left.\left.\left.\left.\left.\left.\left.\left.\left.\left.\left.\left.\left.\left.\left.\left.\left.\left.\right.\right.\right.\right.\right.\right.\right.\right.\right.\right.\right.\right.\right.\right.\right.\right.\right.\right.\right.\right.\right.\right.\right.\right.\right.\right.\right.\right.\right.\right.\right. $$
$$ . (\omega \mathrm {d} \mathrm {j} \log \mathrm {P V C} \mathrm {g} \mathrm {j}, \mathrm {l} \mathrm {a} \mathrm {j} \mathrm {x} \mathrm {b} \mathrm {g} \mathrm {j} \text {a} _ {\mathrm {i}} \text {a} _ {\mathrm {i}} \text {a} _ {\mathrm {i}} \text {a} _ {\mathrm {i}} \text {a} _ {\mathrm {i}} \text {a} _ {\mathrm {i}} \text {a} _ {\mathrm {i}} \text {a} _ {\mathrm {i}} \text {a} _ {\mathrm {i}} $$
$$ \therefore \frac {1}{2} \frac {1}{2} \frac {1}{2} \frac {1}{2} \frac {1}{2} \frac {1}{2} \frac {1}{2} \frac {1}{2} \frac {1}{2} $$
$$ . \ddot {c} _ {\text {i i i}} \text {i} \text {i} \text {i} \text {i} \text {i} \text {i} \text {i} \text {i} \text {i} \text {i} \text {i} \text {i} \text {i} \text {i} \text {i} \text {i} \text {i} \text {i} \text {i} \text {i} \text {i}. $$
$$ \dots \mathrm {d} \left[ \begin{array}{l l l l l l l l l} \frac {1}{2} & 1 & 0 & 0 & 0 & 0 & 0 & 0 & 0 \ 0 & 1 & 0 & 0 & 0 & 0 & 0 & 0 & 0 \ 0 & 0 & 1 & 0 & 0 & 0 & 0 & 0 & 0 \ 0 & 0 & 0 & 1 & 0 & 0 & 0 & 0 & 0 \end{array} \right] $$
$$ . \dot {a} l _ {i j k l} \dot {l} o l o g i p l a o i i w y l \dot {o} l g o l j n o b r e l l b d p d \dot {d} i i w $$
$$ \cdot \omega \omega \omega \omega \omega \omega \omega \omega \omega \omega \omega \omega \omega \omega \omega \omega \omega \omega \omega \omega \omega \omega \omega \omega \omega \omega \omega \omega \omega \omega \omega \omega \omega \omega \omega \omega \omega \omega \omega \omega \omega \omega \omega \omega \omega \omega \omega \omega \omega \omega \cdot $$

- Symbols in this Instruction Manual
- WARNING:
- CAUTION:
- NOTE:
- Contents
- General Notes
- Special Safety Precautions for this Appliance
- Handling Batteries
- Unpacking the Appliance
- Overview of the Components
- Remote Control
- Changing the Battery of the Remote Control
- Notes for Use
- Connected Load
- CAUTION: Overload
- Safety Switch
- Electric Connection
- Operating Buttons
- Operation
- Switching the Appliance On/Off
- Power Level Selection
- Time-delayed Switch-off
- Switch Oscillation On/Off
- Overheat Protection
- Cleaning
- Dust on the air outlet openings
- Filter
- Technical Data
- Notice of Directive Conformity
- Disposal
- Battery Disposal
- Meaning of the "Dustbin" Symbol
- Product Data Sheet
- Instrukcja obslugi
- Usuwanie
- Usuwanie baterii
- ПИМЕЧАнЯ:
- CoapedkaHne
- OmbaHOpMaun
- IPEDYUNPEXDEHNE:
- Oco6bIe yka3aHnI NO TexHnke 6e3OpacHOCTNДЯ ДaHHoro yCTpoiCTBa
- ПЕДУПЕЖДЕНЕ:
- Kak o6paatabcra 6aTaapeiKaMn
- PENEYIPPEXDEHNE:
- BHIMAHNE:
- PacnaKOBka yctpoNCTBa
- ПРИМЕЧАНО:
- O63op dTeaJe np6opa
- DnCTaHcHNOHHoe ynpabJIeHne
- ПРИМЕЧАЙ:
- BHIMAHNE:Ipeperpy3ka
- AbarinHbI BbIKNoaTeNb
- ПРМЕЧАнЯ:
- KhoIIKNyIpaBJIeHHN
- ПРIMECHИ:
- YtJIn3aIy IcNoIb3OBaHHO6aTaepKn
- 3haueHne CNMBOJa KOp3Ha
- julil no jolil
- A
- ## ## ## ## ## ## ## ## ## ## ## ## ## ## ## ## ## ## ## ## ## ## ## ## ## ## ## ## ## ## ## ## ## ## ## ## ## ## ## ## ## ## ## ## ## ## ## ## ## ## ## ## ## ## ## ## ## ## ## ## ## ## ## ## ## ## ## ## ## ## ## ## ## ## ## ## ## ## ## ## ## ## # # # # # # # # # # # # # # # # # # # # # # # # # # # # # # # # # # # # # # # # # # # # # # # # # # # # # # # # # # # # # # # # # # # # # # # # # # # # # # # # # # # # # # # # # # # # # # # # # # #
- # # # # # # # # # # # # # # # # # # # # # # # # # # # # # # # # # # # # # # # # # # # # # # # # # # # # # # # # # # # # # # # # # # # # # # # # # # # # # # # # # # # # # # # # # # # # # # # # # # # 10000000000000000000000000000000000000000000000000000000000000000000000000000000000000000000000000000
- a#
- Uigslde aole ojbi
Brand : ProfiCare
Model : PCHL 3086
Category : Heating