imageRUNNER ADVANCE C3520i III - Printer CANON - Free user manual and instructions
Find the device manual for free imageRUNNER ADVANCE C3520i III CANON in PDF.

User questions about imageRUNNER ADVANCE C3520i III CANON
0 question about this device. Answer the ones you know or ask your own.
Ask a new question about this device
Download the instructions for your Printer in PDF format for free! Find your manual imageRUNNER ADVANCE C3520i III - CANON and take your electronic device back in hand. On this page are published all the documents necessary for the use of your device. imageRUNNER ADVANCE C3520i III by CANON.
USER MANUAL imageRUNNER ADVANCE C3520i III CANON
Learning How to Use Your Machine 4
Tips for Copying 6
Tips for Printing 7
Tips for Faxing 8
Tips for Scanning 9
Tips for Registering Destinations 10


You can access canon.com/oip-manual to read the User's Guide that describes all functions of this machine.
Store this guide in a safe place for future reference.
Some functions may not be available, depending on the model of the machine you are using.
The information in this document is subject to change without notice.
If your machine is of the model dedicated to printing only
The machine dedicated to printing only cannot be used for any other functions than printing. Although this Guide contains the descriptions of the functions and operations for copying, faxing, and scanning as well as printing, please read only the necessary descriptions to use your machine.
Learning How to Use Your Machin
This section contains a brief overview of the basic operations of your machine.
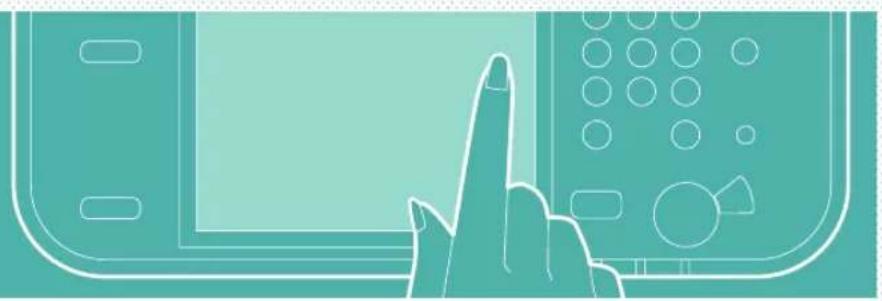
Turning On the Display
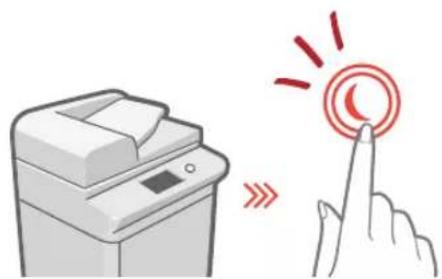
When the display is turned off, press the
button on the control panel to exit the Sleep mode and turn it back on.
The Main Buttons for Operations

Press to execute functions, to cancel operations, and to clear the current settings.
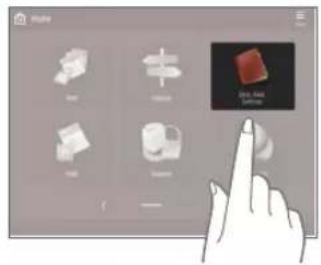
□ Accessing the Home

Perform a wide variety of operations from the Home, displayed from any screen by pressing
- Quickly Checking the Status of Machine
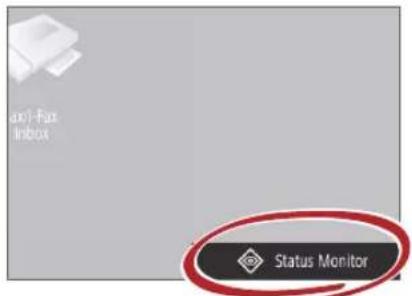
All you need to do to check the machine's status is press

See "Control Panel" in the User's Guide.

Two Methods for Setting Original Documents
Placing Original Documents Correctly
Placing Original Documents on the Platen Glass
- Place the side to scan face down.
- Place the original documents so that it fits in the back left corner.

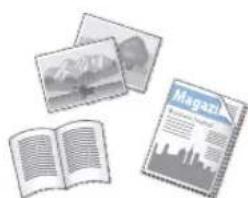
Compatible Types of Original Documents

Books, magazines

Business cards

Newspaper clippings
Placing Original Documents in the Feeder
- Place the side to scan face up.
- Adjust the slide guide.

Compatible Types of Original Documents
Documents with many pages, quotations, etc.

Tips for Copying
Use helpful functions, such as two-sided printing and N on 1 feature, to make your copies look better while using paper efficiently.
Basic Copy Flow
1 Set the document.
2 Press [Copy].
3 Enter the number of copies.
4 Set your preferred setting.
5 Press (Start).
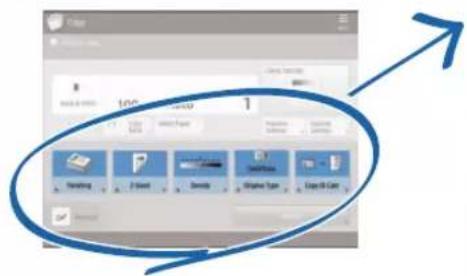
Non1
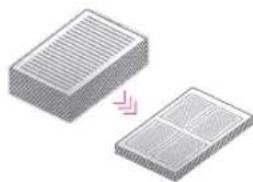
The N on 1 feature helps you save paper by combining multiple pages onto one single sheet of paper.

Density
Adjust the text density to make hard to read documents (such as something written in pencil) easier to read.
Recommended Settings
2-Sided
Halve the amount of paper you use by printing on both sides of copied paper.
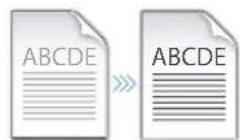
Copy Ratio
Use "Copy Ratio" when copying to magnify small text for easy reading.


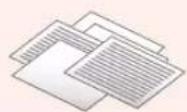
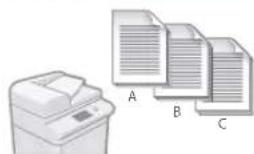
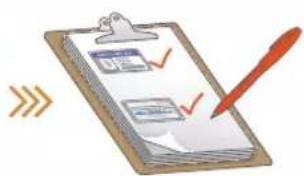
Finishing (Collate)
Output original documents in sets with the Collate mode, convenient for organizing big copy jobs.

Original Type
Pick one of a variety of different original types when copying to optimize the settings for that original document.

For further information about the functions,
see "A Variety of Features," on p.12.
Tips for Printing
Don't bother getting up! Specify print settings directly from your computer.

To print from a computer, first install the printer driver. For instructions on installing printer drivers, see the Printer Driver Installation Guide.

Basic Print Flow
1 Select the print function from the application menu.
2 Select the machine from [Select Printer].
3 Select the paper source.
4 Set your preferred setting.
5 Enter the number of copies, and press [Print].
Recommended Settings
2-Sided
Two-sided printing can save paper, especially for those big copy jobs!
Page Layout
Significantly decrease the amount of paper you use by printing a total of four pages on a single sheet of paper.
Finishing (Collate)
Use [Collate] when printing a large number of copies to sort them for easy distribution.
For further information about the functions, see "A Variety of Features," on p.12.
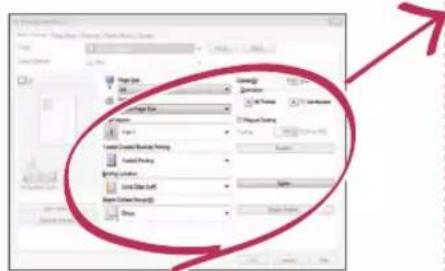
Change Print Settings with Just One Easy Click!
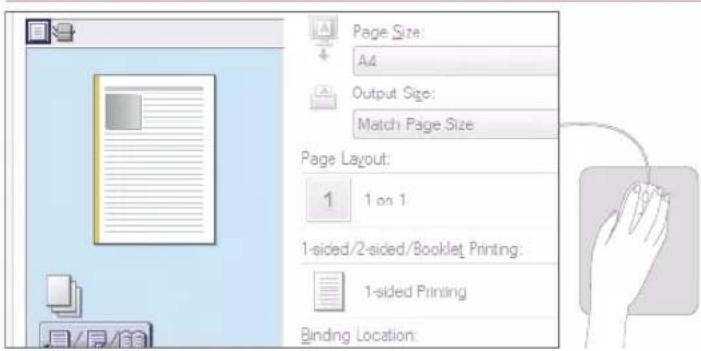
Change print settings, such as the page layout, by simply clicking the icon on the printer driver screen. The icon changes as you adjust the settings, so you can easily see your changes taking effect.

Tips for Faxing
Faxing is easy with these simple steps! Improve the clarity of your faxes by adjusting settings, such as density or resolution.
Basic Fax Flow
1 Set the document.
2 Press [Fax].
3 Enter the fax number and press [OK].
To send a fax to a registered address, press Address Book
4 Set your preferred setting.
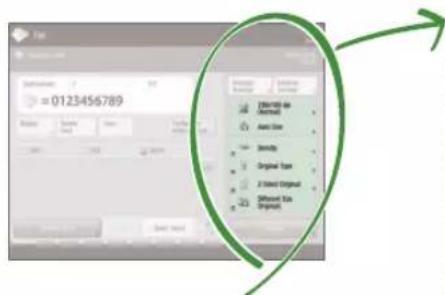
5 Press (Start) and once scanning is complete, press [Start Sending].
Recommended Settings
Resolution

m = 311

Improve text clarity by increasing the resolution of a document, when sending documents with small text.
Density

…

Increase the density of thin text when sending (such as text written in pencil) to make it easier to read.
Original Type

Pick one of a variety of different original types when faxing to optimize the settings for that original document.

For further information about the functions, see "A Variety of Features," on p.12.
Press the Button to Adjust the Fax Volume
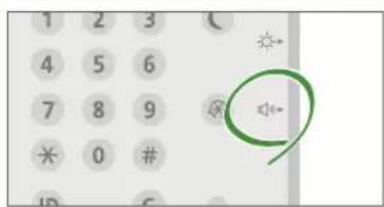
Adjust the volume when sending and receiving faxes by pressing on the control panel.
Previewing Received Faxes Before Printing
Check received faxes before printing, letting you select which to print while saving paper.

See "Saving Received Documents in the Machine (Memory Reception)" in the User's Guide.
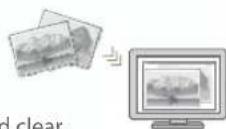
Tips for Scanning
Not enough space for storing mountains of paperwork? You can scan and store them as data on your computer.

Basic Scan Flow
1 Set the document.
2 | Press [Scan and Send].
3 | Press [New Destination] and enter the destination address.
To scan and send to a registered destination, press
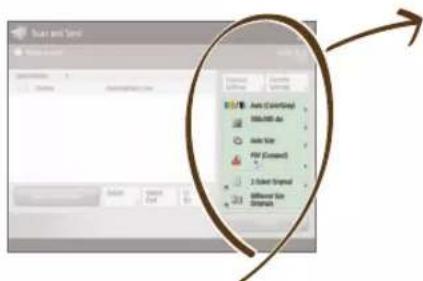
4 Set your preferred setting.
5 | Press (Start).
Recommended Settings
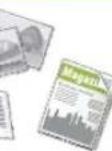
Resolution
You can adjust the resolution when scanning a magazine or picture to make the image more vivi
Different Size Originals
Scan a variety of different document sizes in one simple operation.


File Format
Save a scanned original document in the format that best suits your needs, such as contracts as PDFs or presentation materials as PowerPoint documents.

For further information about the functions, see "A Variety of Features," on p.12.
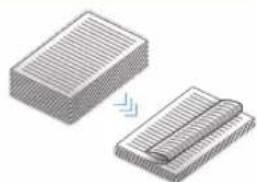
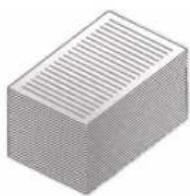
Digitize Stacks of Paper Documents to Save Office Space
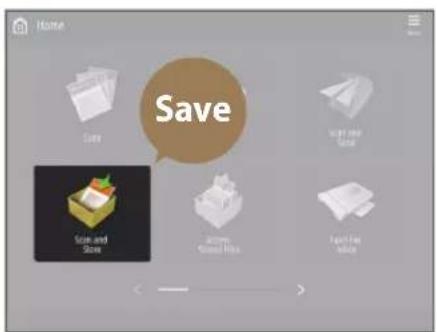
Digitize your paper documents by selecting [Scan and Store] when scanning an original document. You can even choose a variety of different destinations to save the data, such as the machine or a file server.
See "Basic Operations for"
Scanning Originals" in the User's Guide.

Tips for Registering Destinations
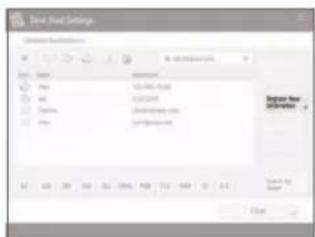
Register destinations in the address book to make sending operation simple. Increase efficiency by using One-Touch Buttons for frequently used destinations!
Basic Flow for Registering Destinations
1 | Press [Dest./Fwd. Settings].
2 Press [Register Destinations].
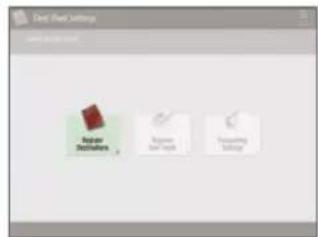
3 Press [Register New Dest].
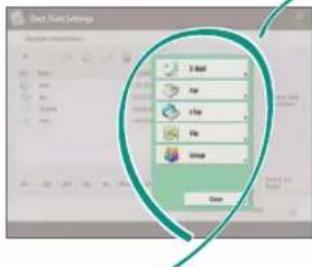
4 Select the type of destination.
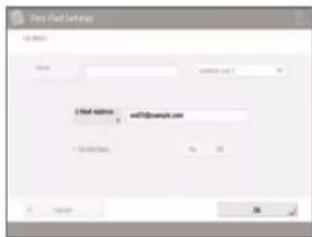
5 Enter the address and press [OK].
Select the Destination Type
Register e-mail addresses, fax numbers, even servers as destinations! Pick the destination type that is right for you.

Email

Fax I-Fax


LDAP Server GroupFile

See "Registering Destinations" in the User's Guide.
Using [Group]
You can register multiple destinations to a single group.
Send documents to everyone in a meeting at once!
Send Documents Easily With One-touch Buttons
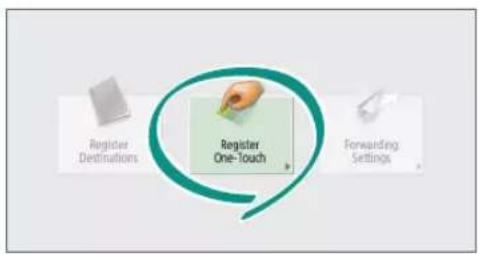
Register an often used destination to a one-touch button with [Register One-Touch], and save time!
Easy Address Editing from Your Computer
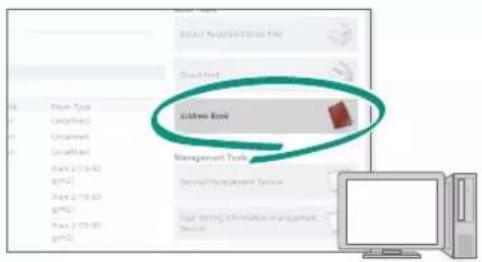
You can access the machine from your computer with the Remote UI, enabling you to edit addresses easily with the keyboard.

See "Registering Destinations" in the User's Guide.

See "Managing the Machine from a Computer (Remote UI)" in the User's Guide.

And More! A Variety of Features
There are many more helpful features that are not mentioned in this guide. For details, see the User's Guide.
Change Machine Settings Remotely from Your Computer
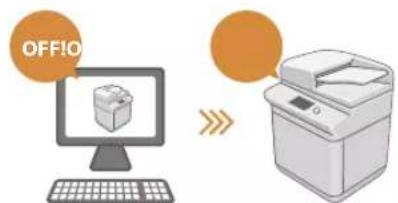
Use the "Remote UI" function to edit the address book, check consumable status, and more from your computer.

See "Managing the Machine from a Computer (Remote UI)" in the User's Guide.
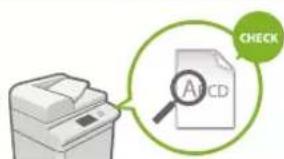
Prevent Security Leaks with Document Security
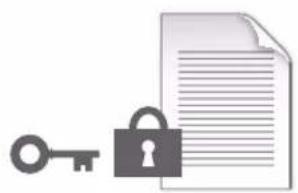
Password your documents with the Encrypted Secure Print mode. This feature is perfect for protecting important documents.

See "Advanced Functions for Printing" in the User's Guide.
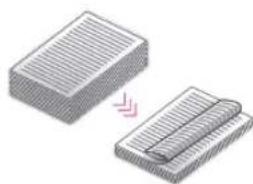
Professional Documents with Booklet Printing

Making booklets is easy with the [Booklet] option. Use staple finishing to give it an even more professional feel.
Print Two-Sided ID Cards on One Side of Paper
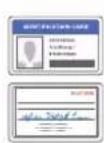
Check IDs easily by copying both sides of an ID and printing them to a single piece of paper with [Copy ID Card].

See "Making Booklets" in the User's Guide.

See "Making ID Card Copies" in the User's Guide.

Advanced Paper Saving Options


Print up to an incredible 16 pages of original documents on a single sheet of paper with [2-Sided] and [N on 1].

See "Copying" in the User's Guide.
Go Green with Staple-Free Binding


Bind paper without using metal staples with the Eco (Staple-Free) mode. Help the environment, and shred documents without a fuss.

See "Optional Equipment" in the User's Guide.
Reorganizing Documents with Staples


Just set "Manual Staple" and pass unstapled original documents through the feeder to staple them. Great for re-stapling!

See "Finishing with the Stapler" in the User's Guide.
One-touch Settings

Register often used combinations of settings to "Home" to efficiently use them with a single button.

See "Customizing the Touch Panel Display" in the User's Guide.

Guide
30-2, Shimomaruko 3-chome, Ohta-ku, Tokyo 146-8501, Japan
CANON U.S.A., INC.
One Canon Park, Melville, NY 11747, U.S.A.
CANON CANADA INC.
8000 Mississauga Road Brampton ON L6Y 5Z7, Canada
CANONE EUROPA N.V.
Bovenkerkerweg 59, 1185 XB Amstelveen, The Netherlands
(See http://www.canon-europe.com/ for details on your regional dealer)
CANON AUSTRALIA PTY. LTD
Building A, The Park Estate, 5 Talavera Road, Macquarie Park, NSW 2113, Australia
CANON CHINA CO., LTD
2F Jinbao Building No.89 Jinbao Street, Dongcheng District, Beijing 100005, China
CANON SINGAPORE PTE. LTD.
1 Fusionopolis Place, #15-10, Galaxis, Singapore 138522