FG950 - Vacuum Cleaner FAGOR - Free user manual and instructions
Find the device manual for free FG950 FAGOR in PDF.
| Product type | Robot vacuum |
| Brand | Fagor |
| Model | FG950 |
| Dimensions (diameter x height) | 300 mm x 78 mm |
| Weight | 2.8 kg |
| Battery type | Ni-MH 14.4 V, 1500 mAh |
| Runtime | 90 minutes |
| Charging time | Approximately 5 hours (first charge 12 hours) |
| Dustbin capacity | 180 ml |
| Cleaning modes | Auto, Spiral, Spot, Edge, Zigzag (via remote control) |
| Mopping function | Yes, with water tank and washable mop pad |
| Filter | Washable HEPA filter |
| Side brushes | 2 pieces, replaceable (lifespan 12 months) |
| Sensors | Shock, obstacle, and cliff sensors |
| Auto-return to base | Yes, when battery low or cycle ends |
| Remote control | Yes, with AAA batteries (not included) |
| Charging station | Included |
| Operating temperature | 0 to 40 °C |
| Maintenance | Dustbin, filters and brushes washable; clean sensors and wheels |
| Warranty | 2 years (excluding wear and misuse) |
Frequently Asked Questions - FG950 FAGOR
User questions about FG950 FAGOR
0 question about this device. Answer the ones you know or ask your own.
Ask a new question about this device
Download the instructions for your Vacuum Cleaner in PDF format for free! Find your manual FG950 - FAGOR and take your electronic device back in hand. On this page are published all the documents necessary for the use of your device. FG950 by FAGOR.
USER MANUAL FG950 FAGOR
natural_image
Red circular logo with stylized horizontal lines and a curved shape (no text or symbols)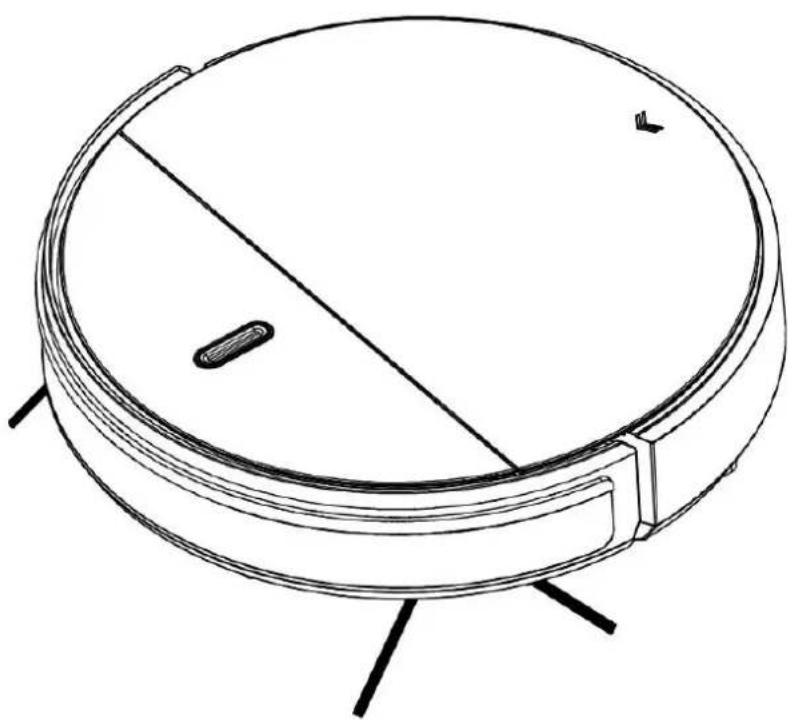
natural_image
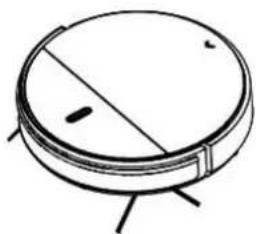
Line drawing of a circular device with a central slot and three legs, no text or symbols presentASPIRATEUR ROBOT
Model: FG950
MANUEL D'INSTRUCTIONS
natural_image
Simple line drawing of a circular vacuum cleaner with a diagonal slot and two mounting points (no text or symbols)natural_image
Illustration of a faucet and a cleaning tool (no text or symbols)Modes de nettoyage
natural_image
Pure technical drawing of a square with concentric circles and a circular ring, no text or symbols presentnatural_image
Pure spiral diagram with arrows indicating direction, no text or symbols presentnatural_image
Pure spiral diagram with directional arrows inside a square frame (no text or symbols)natural_image
Diagram of a robotic vacuum cleaner inside a brick wall corner, with airflow arrows indicating movement (no text or symbols)5. Mode Zigzag
natural_image
Simple line drawing of a circular object with horizontal lines and a small mark, no text or symbols present.Description
natural_image
Line drawing of a robotic vacuum cleaner with attached circuit board (no text or symbols)b
Remarque:
natural_image
Simple line drawing of a pulley system with a spiral and circular component (no text or symbols)Remarque:
natural_image
Abstract spiral diagram with three curved arrows forming a loop (no text or symbols)natural_image
Pure diagram of a spiral arrow pattern inside a square frame with dimension lines (no text or symbols)natural_image
Diagram of a robotic vacuum cleaner inside a brick wall, with airflow arrows indicating movement (no text or symbols)5. Mode Zigzag
natural_image
Simple line drawing of a circular object with horizontal lines above it, no text or symbols present.natural_image
Technical diagram of a mechanical assembly with layered components and dashed alignment lines, labeled Fig 3 (no text or symbols on the diagram itself)Remarque:
natural_image
Technical line drawing of a device with internal components and a close-up view (no text or symbols)DEPANNAGE
natural_image
Red circular logo with stylized horizontal lines, no text or symbols present
natural_image
Line drawing of a circular robotic vacuum cleaner with a central slot and three legs (no text or symbols)Robotic Vacuum Cleaner
Model: FG950
INSTRUCTION MENU
Please keep this user manual in your sight, read it thoroughly and carefully before using this product.
Table of Contents
Safety Instructions....1
Product Features....4
Product Components....6
Main Body and Accessories....7
Remote Control 8
Charging Station/display panel....10
Product Operation....11
Battery Charging....11
Battery Removal....12
Starting up/Standby/Sleep mode/Power off....13
Cleaning Modes....14
Water tank & mopping cloth 15
Product Maintenance....17
Cleaning Side Brushes....17
Cleaning Dust Bin and Filters....17
Cleaning Sensors and Wheels 18
Cleaning Charging Poles....18
Troubleshooting....19
Product Specification....20
Safety Instructions
Before using this product, please read the safety instructions and follow all those regular safety precautions.
- Only authorized technicians can disassemble the product. Users are not allowed to disassemble or repair the product.
- The appliance is only to be used with the power supply unit provided with the appliance. Using an unmatched adapter may cause electric shock, fire or product damage.
- Do not touch the power cord, plug or adapter with wet hands.
- Do not use this product in wet or moist environment (any environment with liquid), e.g. bathroom or laundry.
- Do not have curtain, any kind of wrapping material or part of user's body stuck in the wheels.
-
Before use, clean floor environment (remove all fragile objects and cords, clothing, paper, loose cables, as well as make sure to lift curtains and drapes off the floor to avoid any possible accidents. In case a loose cable is tangled with the product, the cable might move around with the product as it works and topple down table, chairs or cabinet and might cause harm or property damage.)
-
Make sure this product is not close to cigarette ends, lighters, matches or any flammables.
- Never use the product to clean combustible or highly volatile liquids, such as gasoline.
- Only use the product indoors; do not use it outdoors.
- If the product needs cleaning, clean it after it is fully charged.
- Do not over-bend or press the flexible cord with heavy or sharp objects.
- Do not sit on top of this product or attach an item on the top of it. Beware of children or pets while the product is in operation.
- Do not place this product where it is easy to drop off (tables, chairs, etc.).
- Turn off the power switch during product transportation or when you don't need to use this product for a long time.
- Before charging, check whether the adapter and outlet are properly connected.
- To avoid tripping, inform all the people in the house when this product is working.
- When dust bin is full, empty it before use.
- Use this product in temperature from 0^ C to 40^ C.
-
Do not use this product in high-temperature environment or under intense sunlight for a long time.
-
The battery must be removed from the product before it is disposed of.
- The battery should be disposed of properly for safety sake.
- The plug must be removed from the socket-outlet before cleaning or maintaining the appliance.
- This device is intended for household use only. Do not use it for professional purposes.
Warning:
This appliance can be used by children aged from 8 years and above and persons with reduced physical, sensory or mental capabilities or lack of experience and knowledge if they have been given supervision or instruction concerning use of the appliance in a safe way and understand the hazards involved. Children shall not play with the appliance. Cleaning and user maintenance shall not be made by children without supervision.
Product Features
Powerful Suction & Intelligent Suction Adjustment
Powerful Suction
Suction power of this product is strong enough to ensure that even tiny dust on the floor cleaned thoroughly!
Intelligent Suction Adjustment
This product can adjust its suction power automatically when it detects different environment. It is more efficient and power saving.
User Friendly Design
Operation is simple, press the " " button to start the robot!
natural_image
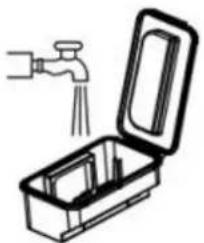
Technical line drawing of a circular vacuum cleaner with internal components (no text or symbols)Washable dust bin
Wash dust bin and filters with water. Wash dust bin after every empty.
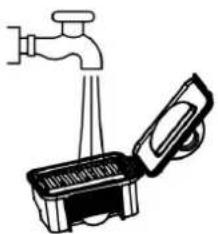
natural_image
Simple line drawing of a faucet and a bucket with a handle, no text or symbols present.Cleaning Modes
Four cleaning modes are provided to meet your needs.
1. Auto cleaning mode
The robot will clean a room automatically and adjust its cleaning according to situation.
natural_image
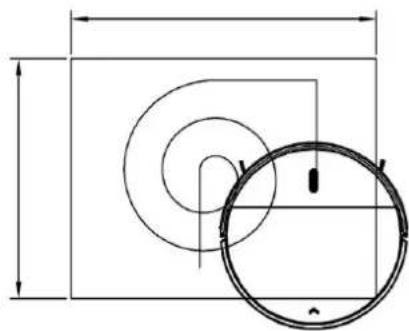
Technical drawing of a mechanical part with concentric circles and a circular hole, shown with dimension lines (no text or symbols)Product Features
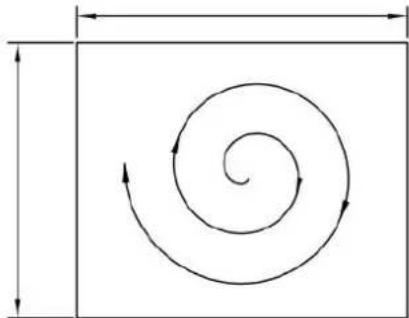
2. Spiral cleaning mode
In this mode the robot will clean in a spiral way.
natural_image
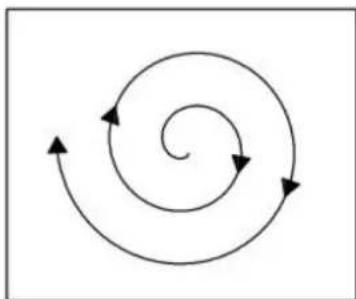
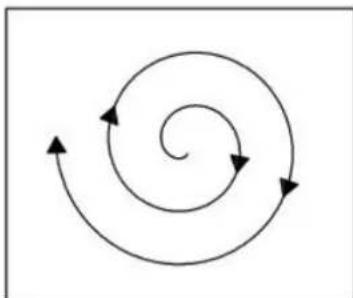
Abstract spiral diagram with three curved arrows indicating rotational direction (no text or symbols)3. Spot cleaning mode
The robot can clean intensively in a spot way when in dirty area.
natural_image
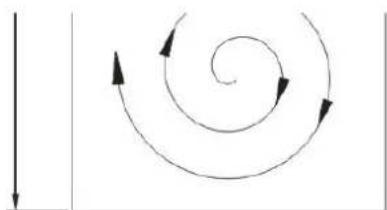
Pure spiral diagram with directional arrows inside a square frame (no text or symbols)In this mode the robot will clean along the wall or obstacles.
natural_image
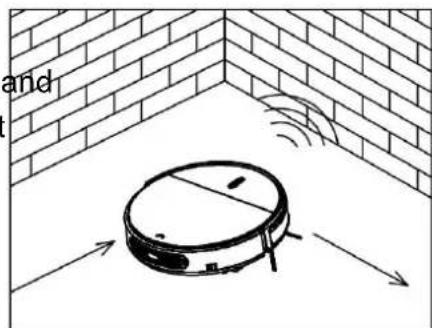
Diagram of a robotic vacuum cleaner inside a brick wall, with airflow arrows indicating motion (no text or symbols)5. Zig-zag mode
Robot will automatically goes into Zig-Zag cleaning wher detected it's in an open area or the environment with obstacles.
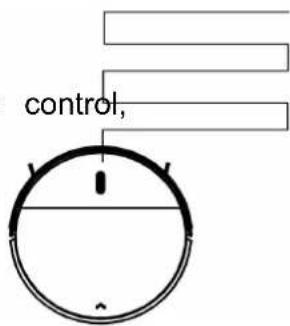
Note:
After switch on the robot, by press MODE on the remote Controller, user can select different cleaning mode:
Mode1 for spiral cleaning, Mode 2 for auto cleaning, M edge cleaning, Mode 4 for Zig-Zag cleaning.
natural_image
Simple line drawing of a circular object with horizontal lines and a small mark, no text or symbols present.Only press "SPOT" button on remote controller, the robot will in spot cleaning mode.
Product Components
Main body and accessories
1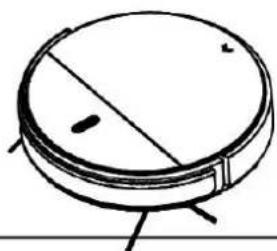 | 2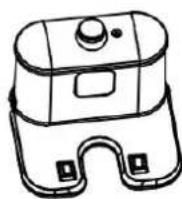 | 3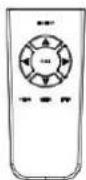 |
4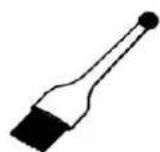 | 5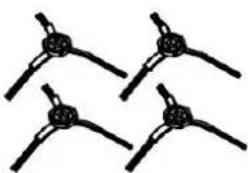 | 6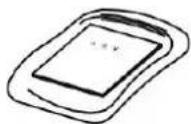 |
7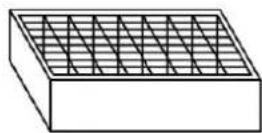 | 8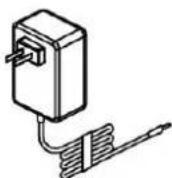 | 9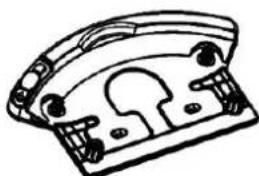 |
10 | ||
| No. | Description | Quantity |
| 1 | Main Body | 1 |
| 2 | Charging Station | 1 |
| 3 | Remote Control (battery not included) | 1 |
| 4 | Cleaning Brush | 1 |
| 5 | Side Brushes *2 | 2 |
| 6 | User Manual | 1 |
| 7 | HEPA Filter | 1 |
| 8 | Power Adapter | 1 |
| 9 | Mopping Plate&Water tank | 1 |
| 10 | Mopping Cloth | 2 |
Product Components
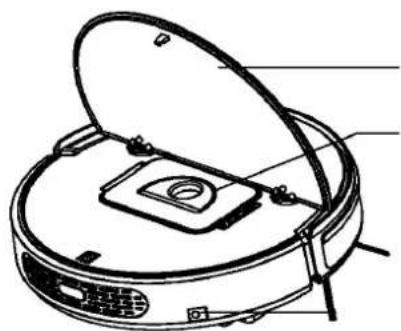
Main Body Diagram
natural_image
Line drawing of a robotic vacuum cleaner with open lid and circular vent (no text or symbols)Upper cover
Dust bin
Charging socket
Product Components
Remote control
- ON/OFF
- Direction buttons
- Scheduling button
- Auto charging
- Spot cleaning
- Cleaning mode
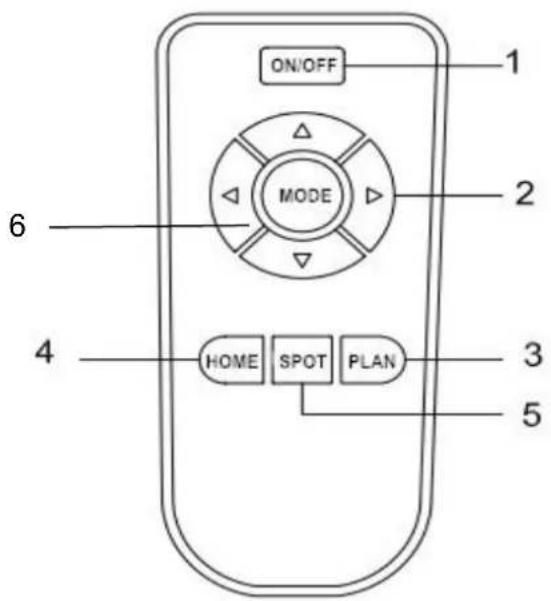
Switch on robot, then point it towards the robot to operate it.
1. ON/OFF button
The robot in standby status, press ON/OFF button the robot start cleaning. The direction button can control its working direction.
2. Scheduling function
The robot in standby status, press PLAN button can schedule working. Press PLAN button for 3 seconds for scheduling. When scheduling succeed, the indicator will flash pink for three seconds with a beep, and 24 hours later, the robot will work automatically. Press PLAN button for 3 seconds again, the indicator will flash pink for three seconds with two beeps, the scheduling cancel.
3. Auto charging
Press HOME button, robot will go to charge automatically, press HOME button again or press ON/OFF button, it will stop there.
4. Spot cleaning
Press SPOT button, the robot will go to spot cleaning mode and increase suction.
5. Mode Function
Press MODE button and robot will change its working mode.
(Mode 1: spiral cleaning. Mode 2: auto cleaning. Mode 3: edge cleaning. Mode 4: Zig-zac
Note:
A. Install two AAA type batteries into the remote control before use.
B. Remove the batteries if the remote control will be left unused for a long period.
C. If you use the remote control near the charging station, the robot may not recognize command and may not work.
Product Components
Charging station
Signal receive
Infrared signal transmitting widow
Power supply socket
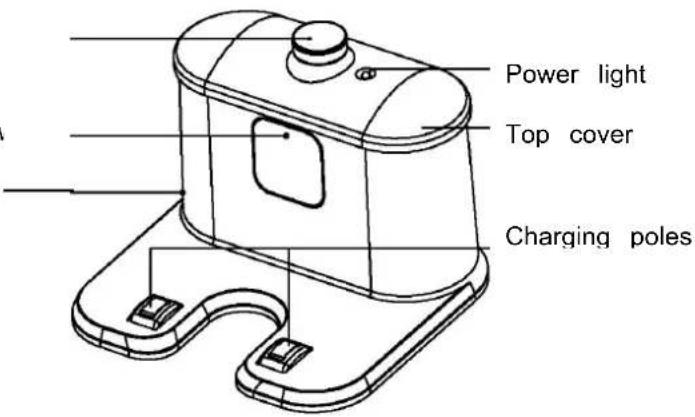
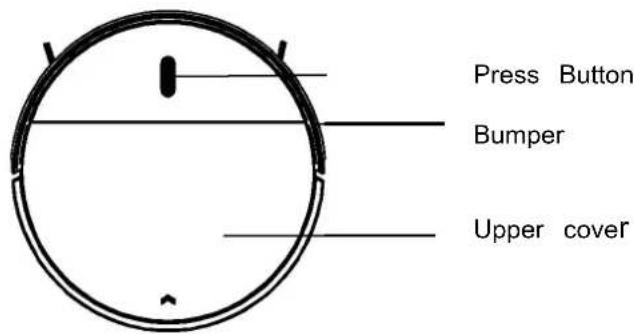
Display Panel
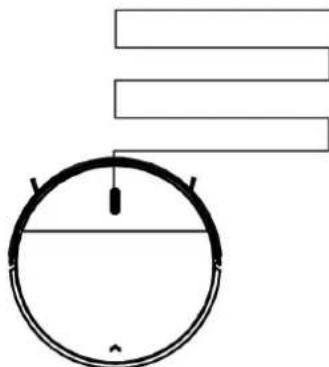
natural_image
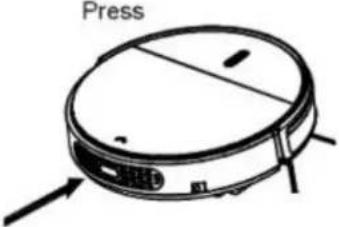
Simple line drawing of a circular object with a horizontal line and two vertical lines above it, no text or symbols present.Press Button
A. Switch on the robot, robot will have 2 beeps, and in standby status the LED indicat in gradual blue.
B. Press 1 "button again, robot will have 3 beeps and the indicator will flash in blue, t start cleaning. And the indicator will keep in blue during cleaning.
C. If the robot is malfunctioned, its indicator will be in different status (details please take reference in troubleshooting).
D. The indicator will flash in red when the robot has low power.
E. During charging (robot on charging home base or connected by charging adaptor), “” indicator will get red gradually. After fully charged, the robot will have 5 beeps and “ indicator will turn blue.
Product Operation
Battery Charging
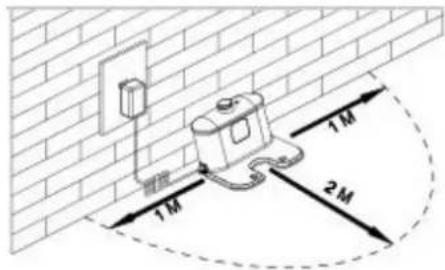
A. Place charging home base against the wall, plug in adapter, and signal light on charging home base will turn on.
Note: Put charging home base against the wall and remove obstacles about 1 meter distance at two sides and 2 meters ahead.
B. Turn on the power switch at the bottom side of the robot, and then display indicator will be in gradual blue, the robot is in standby. (If no command received, the robot will turn to sleeping mode after 30 seconds)
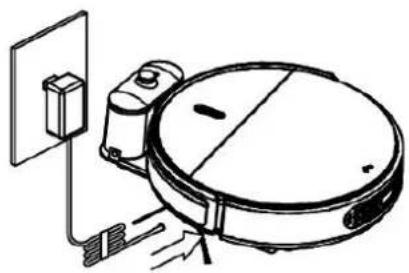
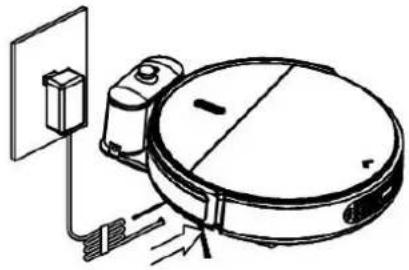
C. Charge the robot in either way as shown below:
a. Plug the adapter into the robot and the other end to the power socket as below on the left;
b. Plug the adapter into the charging station, and robot in standby status, press HOME button on remote controller to direct the robot to charging station for charging.

natural_image
Line drawing of a vacuum cleaner with attached electrical outlet and wiring (no text or symbols)b
Note:
a. Before charging, please always keep the power switch turning on, or else the robot cannot be charged and the “ ” button indicator will have red flash and the robot beeps.
b. When in charging, the "☐" button indicator will gradual in red.
c. If power switch is turned off, all the scheduled operation will be lost.
d. After fully charged, the robot will have 5 beeps. (Every charge will take no more than 5 hours).
e. When first using, please run out of the power, and charge the robot asap.
f. In the working status, the robot will return to charging station automatically when battery power is low.
Note: Please keep the charge station in charging, or else the robot can not find the charge station to charge automatically.
For extending battery life:
a. Before first use, charge the robot for 12 hours.
b. Charge the robot as soon as battery power is low.
c. The robot will return to charging station automatically when it finishes cleaning or b power is low.
d. If the robot is not to be used for a long time, fully charge the battery, turn the remove and store it in a cool, dry place.
e. If the robot is not to be used for more than 3 months, charge the robot for 12 working.
Battery Removal
- Remove the screws on battery cover with a screw driver.
- Remove the battery cover.
- Grasp the insulating tape at two sides of the battery and lift the battery.
- Unplug the wire connector that links the battery and robot.
Correct disposal of batteries in this product
(Applicable in countries with separate battery return systems.)
The marking on the battery, manual or packaging indicates that the battery in this product should not disposed of with other household waste. Where marked, the chemical symbols Hg, Cd or Pb indicate the battery contains mercury, cadmium or lead above the reference levels in EC Directive 2006/66.
The battery incorporated in this product is not user replaceable. For information on its replacement, please contact your service provider. Do not attempt to remove the battery or dispose it in a fire. D disassemble, crush, or puncture the battery. If you intend to discard the product, the waste collection will take the appropriate measures for the recycling and treatment of the product, including the battery
Warnings about battery

WARNING
You must not remove (or attempt to remove) the battery incorporated in this product on your To replace the battery, you must contact your service provider or an independent qualified professional. These instructions have been prepared for the exclusive use of your service provider or independent qualified professional.
FOR YOUR OWN SAFETY, DO NOT ATTEMPT TO REMOVE THE BATTERY ON YOUR OWN OR DISPOSE OF IT IN FIRE. DO NOT DISASSEMBLE, CRUSH OR PUNCTURE THE BATTERY.
Product Operation
Starting Up/ Pause/ Sleep mode/Power off
1. Starting up
Switch on the robot, robot will have 2 beeps and in standby status, LED indicator will be in gradual blue, press “ ” button or ON/OFF button on remote controller, the robot will have 3 beeps and start working.
Note: a. if robot is in sleep mode, press “” button to wake the robot up from sleep mode. Then press “” for a second time, the robot starts cleaning automatically.
b. If robot in standby for more than 15 minutes, it can only be wake up by “ 🍴 button on robot.
2. Pause
To stop the robot temporarily from cleaning:
A. Press “” button on main body;
B. Or press ON/OFF button on remote controller.
Note: when robot is paused, user can perform new operation.
3. Sleep mode
Turn robot into sleep mode, and its display indicator will be off (robot in standby, not powered off);
A. The robot will automatically turn to sleep mode if no command received in 60 seconds.
B. Press “☐” button on the main body for three seconds, robot will turn to sleep mode.
C. In sleep mode, long press “☐” button on the main body can wake up the robot. Press ON/OFF on remote controller can wake up the robot wihtin15 mins before robot in sleep mode.
Note: if the robot is not in use for a long time, please turn the power switch off.
- Power off : To switch off the robot.
Product Operation
Cleaning modes
1. Auto cleaning
In this mode, the robot will clean a room automatically and cleaning mode according to the environment.
Note:
In standby mode, press ON/OFF button on remote controller button on robot to start auto cleaning.
natural_image
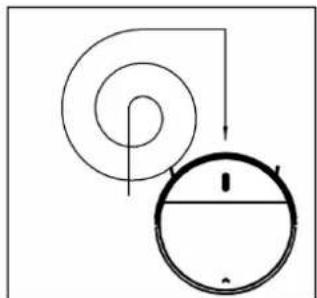
Simple line drawing of a pulley system with a spiral and circular component (no text or symbols)2.Spiral Cleaning
In mode 1, the robot will clean in a spiral way.
In standby mode, press ON/OFF button on remote controller or “●” button on robot to start auto cleaning and after few seconds, it will start spiral cleaning mode automatically.
natural_image
Abstract spiral diagram with three curved arrows forming a loop (no text or symbols)3.Spot cleaning
Press SPOT on the remote controller to start spot clean Note:

A. It is suggested that users could select spot cleaning when robot cleans around the areas with much dust
B. When robot is in standby, press SPOT, robot will clear around 30s and stop.
C. During robot cleaning, press SPOT, around 30S spot cleaning, robot will turn to other cleaning mode.
natural_image
Abstract spiral diagram with curved arrows, no text or symbols presentSwitch on the robot, press MODE on the remote control a select edge cleaning.Under edge cleaning mode, the robot will do cleaning along the obstacle by its side brushes.
natural_image
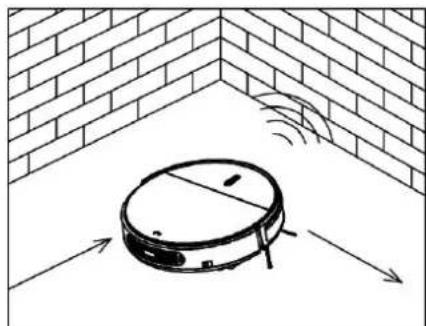
Diagram of a robotic vacuum cleaner inside a brick wall corner, with directional arrows indicating motion (no text or symbols)5. Zig -Zag cleaning mode
Robot will automatically goes into zig-zag cleaning when it detected it's in an open area environment with less obstacles. Or you can press MODE on remote control and Select z cleaning.
Note:
A. After switch on the robot, by press MODE on the remote user can select different cleaning modes. And user can press ON/OFF button to stop it.
B. Mode1 for spot cleaning, mode 2 for auto cleaning mode 3 for edge cleaning, mode 4 for zig-zag cleaning
Product Operation
The principle of overflow water tank
Water flow out from the water tank automatically because of gravity, so please take out the tank after finishing cleaning.
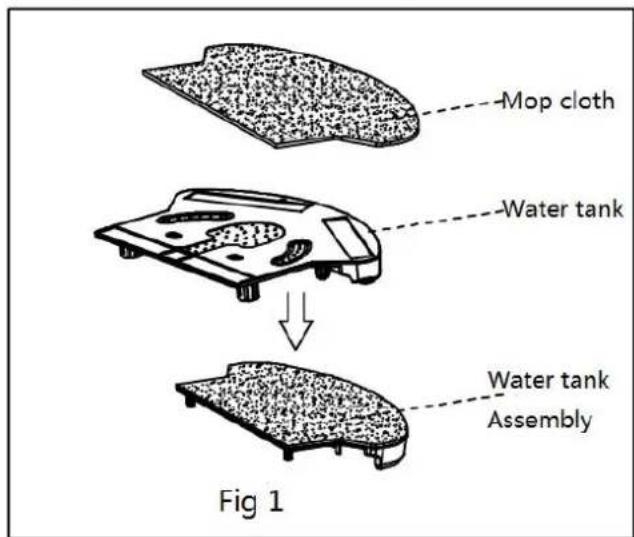
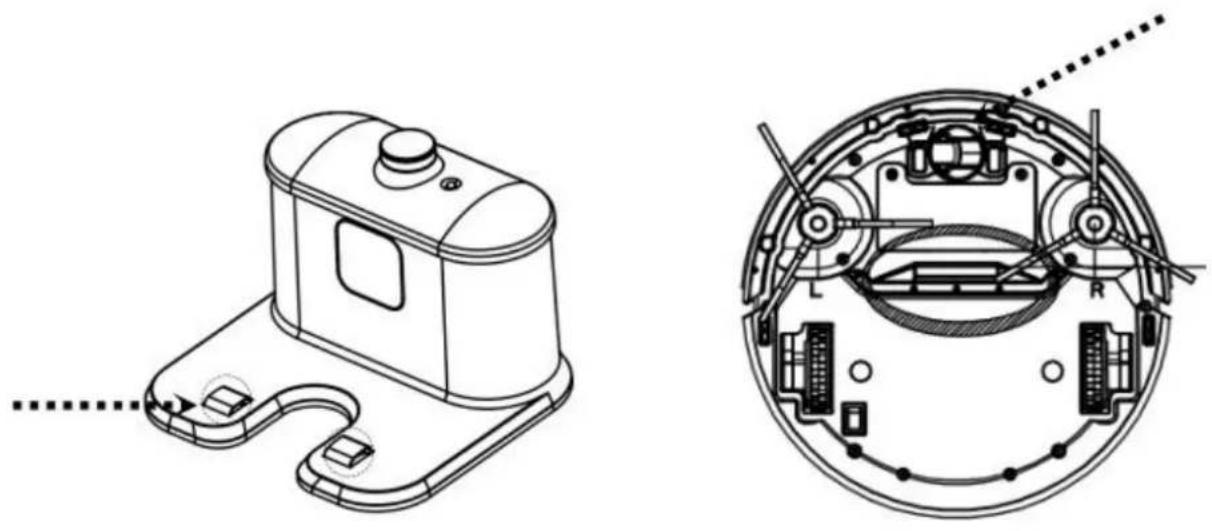
Water Tank and Mopping Cloth Installation
1. Install mopping cloth
Stick mopping cloth on the bottom of water tank as shown in fig 1. Make sure the side and mopping cloth face the appropriate sides, and then stick the mopping cloth sticking side.
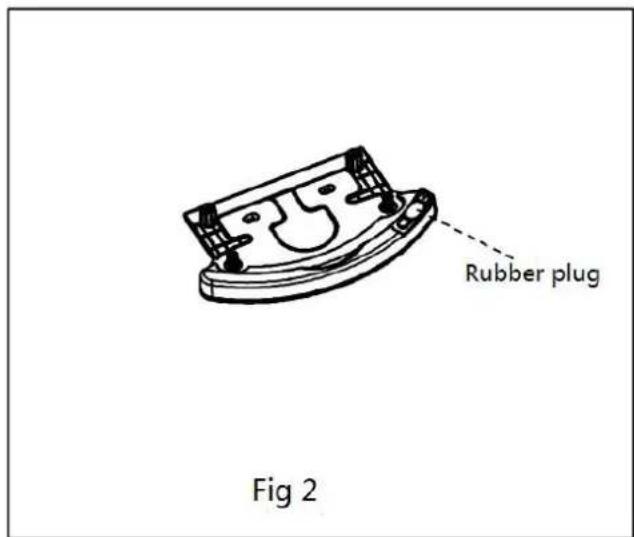
2. Fill water tank with water
Take out rubber plug of water tank, fill it with water, and then put back the rubber p position to prevent water leakage.
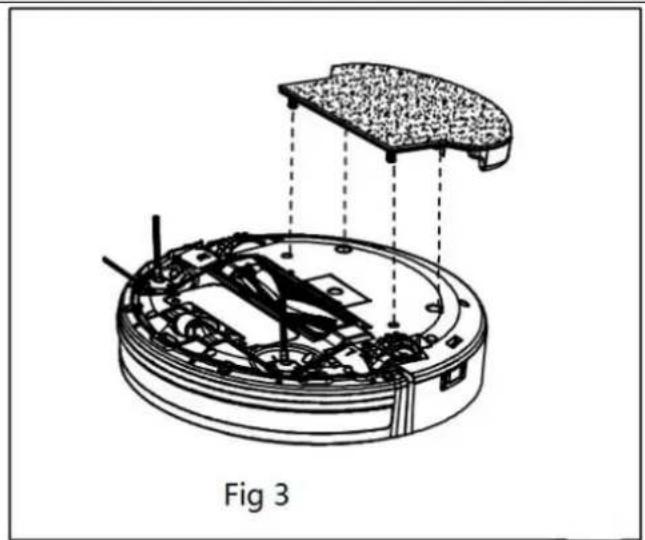
3. Fix water tank on the robot
Turnover the robot, fix the water tank on the robot bottom. Make sure the bolts are f pressed into the fixing slots.
natural_image
Technical diagram of a mechanical assembly with labeled Fig 3, showing internal components and structural connections (no text or symbols beyond label)Note:
A. Please don't clean carpet by the cleaner with water tank.
B. Mopping cloth must be well located on the water tank, pay attention to avoid friction robot wheel.
Warning:
Avoid allowing the robot to clean with water tank on wooden floor or dry area only.
Product Maintenance
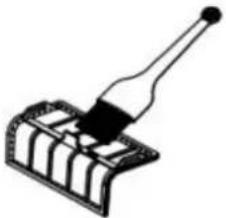
1. Cleaning Side Brushes
Clean the side brush when it gets dirty and replace it if it's damaged. Max life span brush is 12 months.
Note: Before replacing side brushes, check and make sure the 'L' / 'R' mark on side match with the 'L' / 'R' mark on the bottom base of the robot.
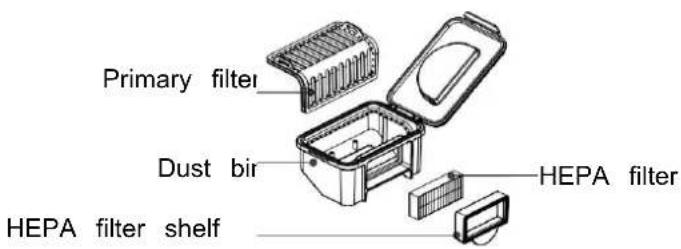
2. Cleaning Dust Bin and Filters
Empty and clean dust bin after each use following the steps as shown in the figures
 A. Press “^” to open the cover A. Press “^” to open the cover | 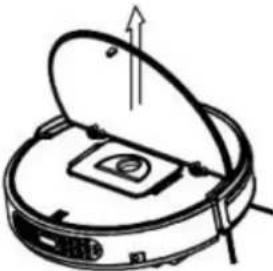 B. Take out dust bin B. Take out dust bin | ||
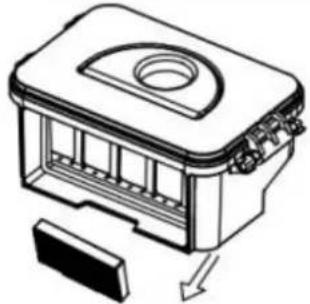 C. Take out HEPA C. Take out HEPA | 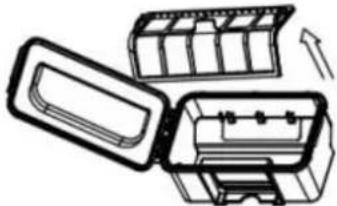 D. Open dust bin cover, take out primary filter. D. Open dust bin cover, take out primary filter. | 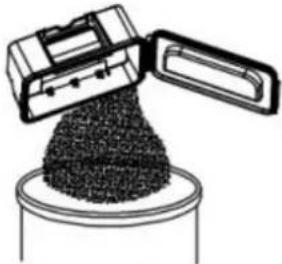 E. Empty dust bin. E. Empty dust bin. | |
  F. Clean dust bin and primary filter under water tap F. Clean dust bin and primary filter under water tap | 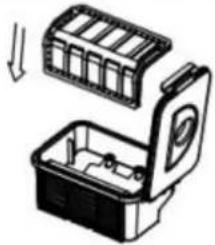 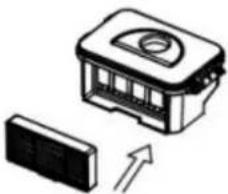 G. Install primary filter and HEPA filter G. Install primary filter and HEPA filter | ||
Note:
a. Wash HEPA filter after 15\~30 days of use. Max life span for HEPA and filter is 24
b. Reinstall the HEPA and primary filter after they are fully dry.
c. HEPA and primary filter could be replaced if needed.
d. Do not dry the filters under direct sunlight.
Product Maintenance
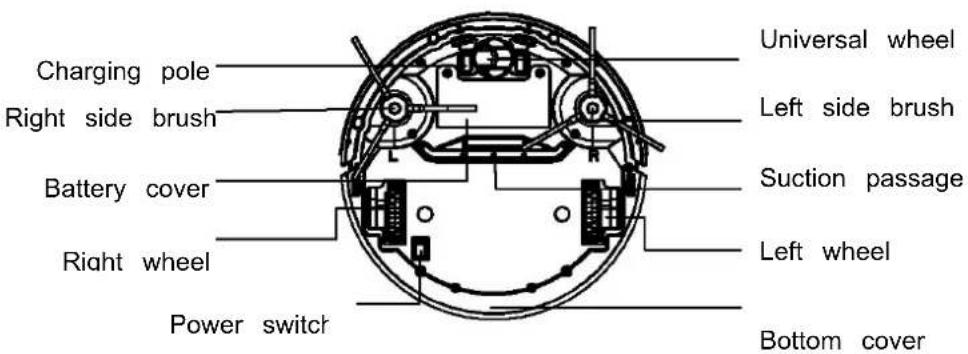
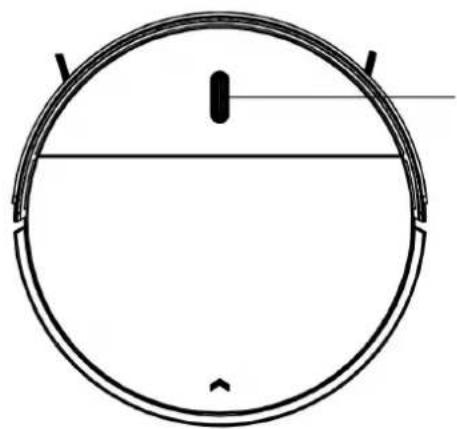
3. Cleaning Sensors and Wheels
Slightly wipe all the sensors and wheels, as marked in figure below, with soft cleaning cl tool.
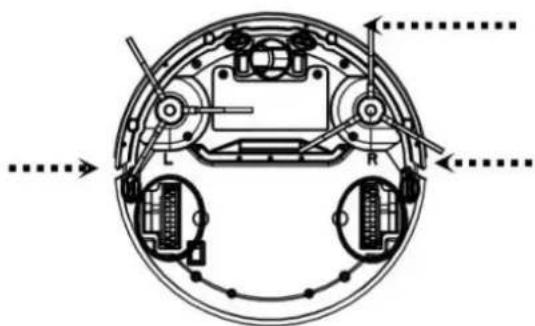
natural_image
Cross-sectional diagram of a mechanical device showing internal components and directional arrows (no text or labels)4. Cleaning Charging Poles
Cleaning the charging poles, as marked in the figure below, with soft cleaning cloth or to
natural_image
Technical line drawing of a mechanical device and its internal components (no text or symbols)Trobleshooting
| Problem | Possible Cause | Solution | |
| 1 | Robot suddenly stops cleaning and indicator | 1. Robot was pick up | 1. Re-place the robot onflobe and re-start the robot |
| 2 | Power on robot, its indicator is in blue | 1. Cliff sensor fault | 1. Clean cliff sensor2. If solutions given above doesn't work, to the seller for repairing |
| 3 | Robot does not change direction when it comes up against | 1. Bumper sensor fault | 1. Check the sensor to see if it is covered object |
| 4 | During charging, LED indicator flashes in red and robot beeps | 1. Robot switch min not powered on | 1. Switch on the robot |
| 5 | LED indicator flashes in red | 1. Batterylow | 1. Fully charge the battery |
| 6 | Blue LED flashes once, Red LED flash once. | 1. Side brush get stuck | 1. Put robot on flat surface and clean s brush |
| 7 | Blue LED flashes once, Red LED flash twice. | 1. Robot bumper is not flexible enough | 1. Loosen half circle of bumper bottom s |
| 8 | Blue LED flashes once, Red LED flash triple. | 1. Robot wheel get stuck | 1. Check wheels and take out the foreign |
Note: if all solutions given above don't work for you, please take actions below:
1) Re-set the robot by switching on the power button on the control panel.
2) If re-set action doesn't work, please send the robot to seller for repairing.
Product Specification
| Classification | Item | Detail |
| Construction specifications | Diameter | 300mm |
| Height | 78mm | |
| Weight | 2.8kg | |
| Electronic specifications | Battery Voltage | 14.4V |
| Battery specifications | Ni-MH 1500mAh | |
| Functional specifications | Dust bin capacity | 180ML |
| Charging type | Auto & Manual Charging | |
| Cleaning mode | One key to clean & remote control selection | |
| Cleaning time | 90 minutes | |
| Main body button type | Press button | |
Note: Particular specifications are subjected to change without prior notice.
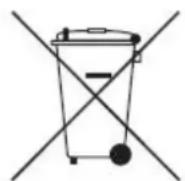
REMOVAL OF APPLIANCES USED
Directive 2012/19/EU on waste electrical and electronic Equipment (WEEE)
requires that the appliance uses are not disposed of using the normal municipal waste. Old appliances must be collected separately in order to optimize the red and recycling of materials they contain and reduce the impact on human health the environment.
The symbol of the dustbin is used on all products to remind the obligations for separate collection. Consumers should contact their local authorities or dealer regarding the steps to follow for the removal of their old appliance. If you proceed with the scrapping of old e be sure to render useless what could be dangerous: disconnect the power cable flush w device.
Danger:
Never attempt to use your appliance, if it shows signs of damage or the power cord or damaged. If the power cord is defective it is important to have it replaced with the after service to eliminate any danger.
Only qualified and authorized persons are authorized to carry out repairs to your appliance repairs not in accordance with standards could significantly increase the level of risk for user!
Defect resulting from improper handling, degradation or attempted repairs by third parties with the warranty on the product. This also applies in case of normal wear and accessories to appliance.
Important!
We recommend that you keep the packaging of your device at least for the duration of warranty. The guarantee does not apply without the original packaging.
Warranty:
Your device has two years warranty. The warranty does not cover wear and breakage for a wrong use of the product. The customer is responsible for all returns. You remain responsible for the costs and risks associated with the product shipment; it is therefore recommended to ship the product with an acknowledgement of receipt and transport insurance in case of significant value of the product.
KEEP OUT OF REACH OF CHILDREN
Children should be supervised to ensure that they do not play with the appliance.
FAGOR

EUROMENAGE