MS282993 - Rowing Machine Merax - Free user manual and instructions
Find the device manual for free MS282993 Merax in PDF.
| Product Type | Folding Rower |
| Brand | Merax |
| Model | MS282993 |
| Use | Indoor Only |
| Resistance | Adjustable Magnetic (from light to heavy) |
| Maximum User Weight | 120 kg (estimated) |
| Dimensions Unfolded (L x W x H) | Approx. 200 x 50 x 50 cm (estimated) |
| Folded Dimensions | Approx. 120 x 50 x 150 cm (estimated) |
| Net Weight | Approx. 30 kg (estimated) |
| Power Supply | Batteries (2x AAA, not included) for monitor |
| Display | LCD Monitor: time, distance, calories, etc. |
| Frame | Steel |
| Seat | Padded cushion on sliding rail |
| Handles | Foam handlebars |
| Pedals | With adjustable straps |
| Folding Mechanism | Yes, with ball lock and locking button |
| Maintenance | Clean with a damp cloth; wipe off sweat after each use; no solvents |
| Safety | Check screws and nuts before use; keep 2 meters clearance; do not use by more than one person; stop if pain occurs |
| Spare Parts | Full list in manual (over 100 referenced parts) |
| Repairability | Possibility to replace parts according to exploded diagram |
Frequently Asked Questions - MS282993 Merax
User questions about MS282993 Merax
0 question about this device. Answer the ones you know or ask your own.
Ask a new question about this device
Download the instructions for your Rowing Machine in PDF format for free! Find your manual MS282993 - Merax and take your electronic device back in hand. On this page are published all the documents necessary for the use of your device. MS282993 by Merax.
USER MANUAL MS282993 Merax
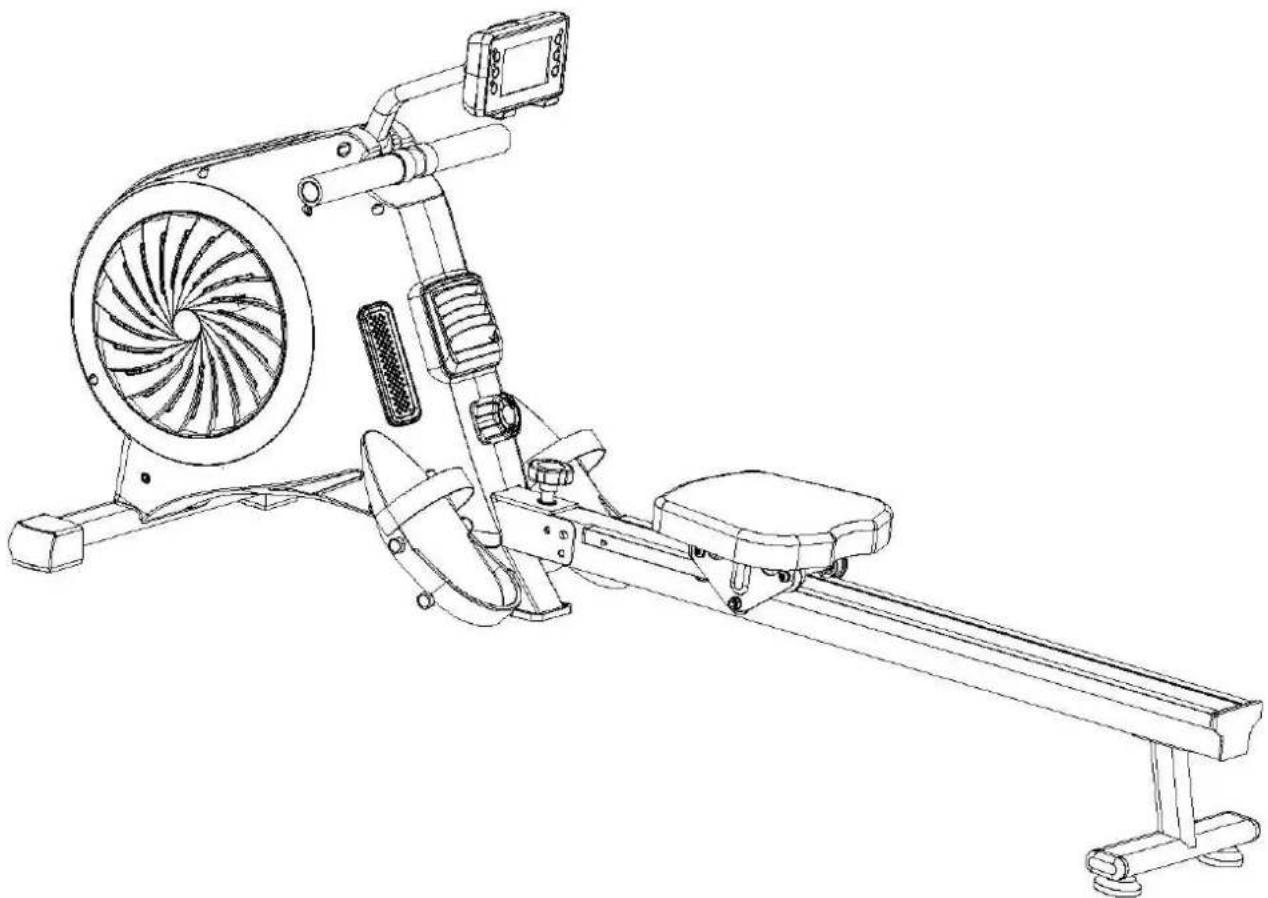
natural_image
Line drawing of a stationary exercise machine with rotating wheel and leg mechanism (no text or symbols)
VORSICHT
text_image
Technical diagram of a mechanical assembly with numbered components and exploded views, likely from an engineering or manufacturing document.Step 4

natural_image
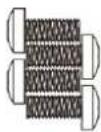
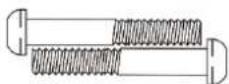
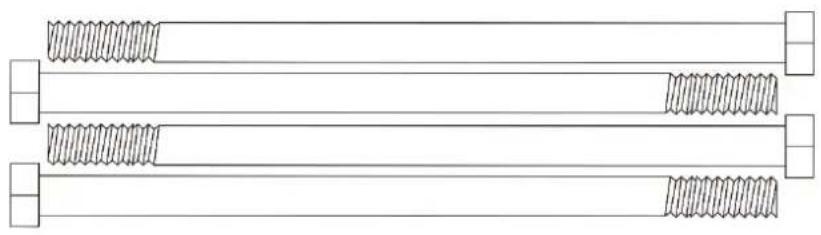
Pure diagram of three parallel cylindrical objects with coiled elements, no text or symbols presentHexagon Bolt M12*160*23*S19 (32)-4
Step 3

6*13*1.2(25)-4 Flat Washer

Bolt M6*15(26)-4
Step 2

text_image
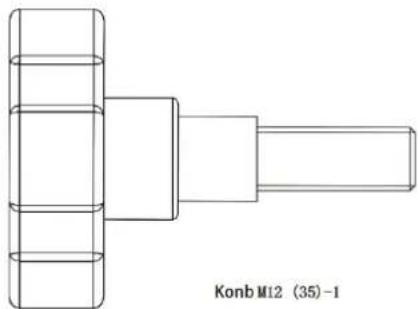
Konb M12 (35)-1
Nylon Nut M10*S17(51)-
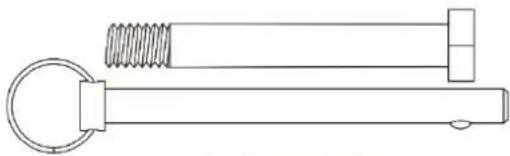
Bolt M10*80*15*S17 (53)-1

natural_image
Technical line drawing of a mechanical component with threaded shaft and circular end (no text or symbols)Pin Ball Latch M8(50)-1

Flat Washer 12 252.0(36)-1
natural_image
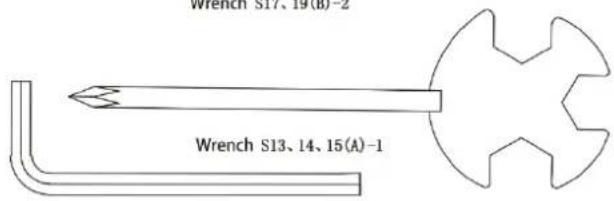
Pure line drawing of a double-ended wrench with hexagonal end (no text or symbols)Wrench S17、19(B)-2

text_image
Wrench S17, 19(b)-2 Wrench S13, 14, 15(A)-1Wrench S5(C)-1
Flat Washer
∅10*∅20*1.5(52)-2
Step 1


Spring Washer
∅8*∅13*2. 0(23)-2
Bolt M8*40*20 (85)-2


Flat Washer 08*φ16*1.5(8)-4
Bolt M8*20 (7)-2
Stücklisten:
line
| AGE | HEART RATE | | --- | --- | | 20 | 200 | | 40 | 160 | | 75 | 100 |Erholungsphase
text_image
CE GRS Batterian in.Kundenservice:
natural_image
Line drawing of a stationary exercise machine with rotating wheel and leg mechanism (no text or symbols)
ATTENTION
text_image
Technical diagram of a mechanical assembly with numbered components and exploded view, likely for assembly or manufacturing purposes.Step 4

natural_image
Pure diagram of three parallel cylindrical objects with coiled elements, no text or symbols presentHexagon Bolt M12*160*23*S19 (32)-4
Step 3

6*13*1.2(25)-4 Flat Washer
Bolt M6*15(26)-4
Step 2
text_image
Konb M12 (35)-1
Nylon Nut M10*S17(51)-
Bolt M10*80*15*S17 (53)-1
natural_image
Technical line drawing of a mechanical component with threaded shaft and circular end (no text or symbols)Pin Ball Latch M8(50)-1


Flat Washer
∅12*∅25*2.0(36)-1

natural_image
Pure line drawing of a double-ended wrench with hexagonal end (no text or symbols)Wrench S17、19(B)-2

text_image
Wrench S17, 19(b)-2 Wrench S13, 14, 15(A)-1Wrench S5(C)-1
Flat Washer
∅10*∅20*1.5(52)-2
Step 1

Spring Washer
∅8*∅13*2. 0(23)-2
Bolt M8*40*20 (85)-2


Flat Washer 08*φ16*1.5(8)-4
Bolt M8*20 (7)-2
Liste des pièces
text_image
Illustration showing five sequential steps of a stretching exercise, labeled 1 to 5.Phase d'exercice
line
| AGE | HEART RATE | | --- | --- | | 20 | 160 | | 40 | 120 | | 75 | 90 |Congratulations for choosing this product.
Before using this product for the first time, please read the manual carefully and use the equipment only as described in the manual to avoid hazards and personal injury.
Please retain this manual for future reference.
natural_image
Line drawing of a stationary exercise machine with rotating wheel and leg mechanism (no text or symbols)
CAUTION
Read all precautions and instructions in this manual before using this equipment. If you have any questions about this product, please consult your supplier in time.
IMPORTANT PRECAUTIONS
Please note the following safety precautions before exercising:
- Read all instructions before assembly & operation;
- Check all screws, nuts & other connections before using the machine;
- Do not expose the equipment to a humid place, otherwise it will cause malfunctions;
- When assembling, it is best to place parts on a mat (rubber or wood) to avoid soiling;
- Before exercising, make sure that no other items are placed within 2 meters of the equipment;
- Only use a damp cloth to clean, do not use solvent-based cleaners, but also pay attention to wipe off the sweat on the equipment after each exercise;
- Incorrect or excessive exercise can damage your health. It is recommended to consult a doctor before exercising. The doctor will give you a maximum amount of training (including pulse, watts, duration, etc.) so that you can exercise and get accurate information.
Note: This equipment is not suitable for therapeutic purposes;
-
Exercise can only be carried out under normal conditions of the machine, and only original accessories provided by the manufacturer can be used for maintenance;
-
This machine can only be used by one person at a time;
-
Be sure to wear sportswear and sports shoes when exercising, especially sports shoes must fit your feet;
-
If at any time during exercise you feel faint, dizzy or experience pain, stop and consult your physician;
-
Children and the disabled must use the machine under supervision;
-
This machine is designed to adjust the level of resistance to adjust the intensity of exercise, and it can be adjusted back and forth between light and heavy to select the appropriate resistance;
-
This equipment is for indoor use only!
Attention: Make sure all screws and nuts have been tightened before exercise.
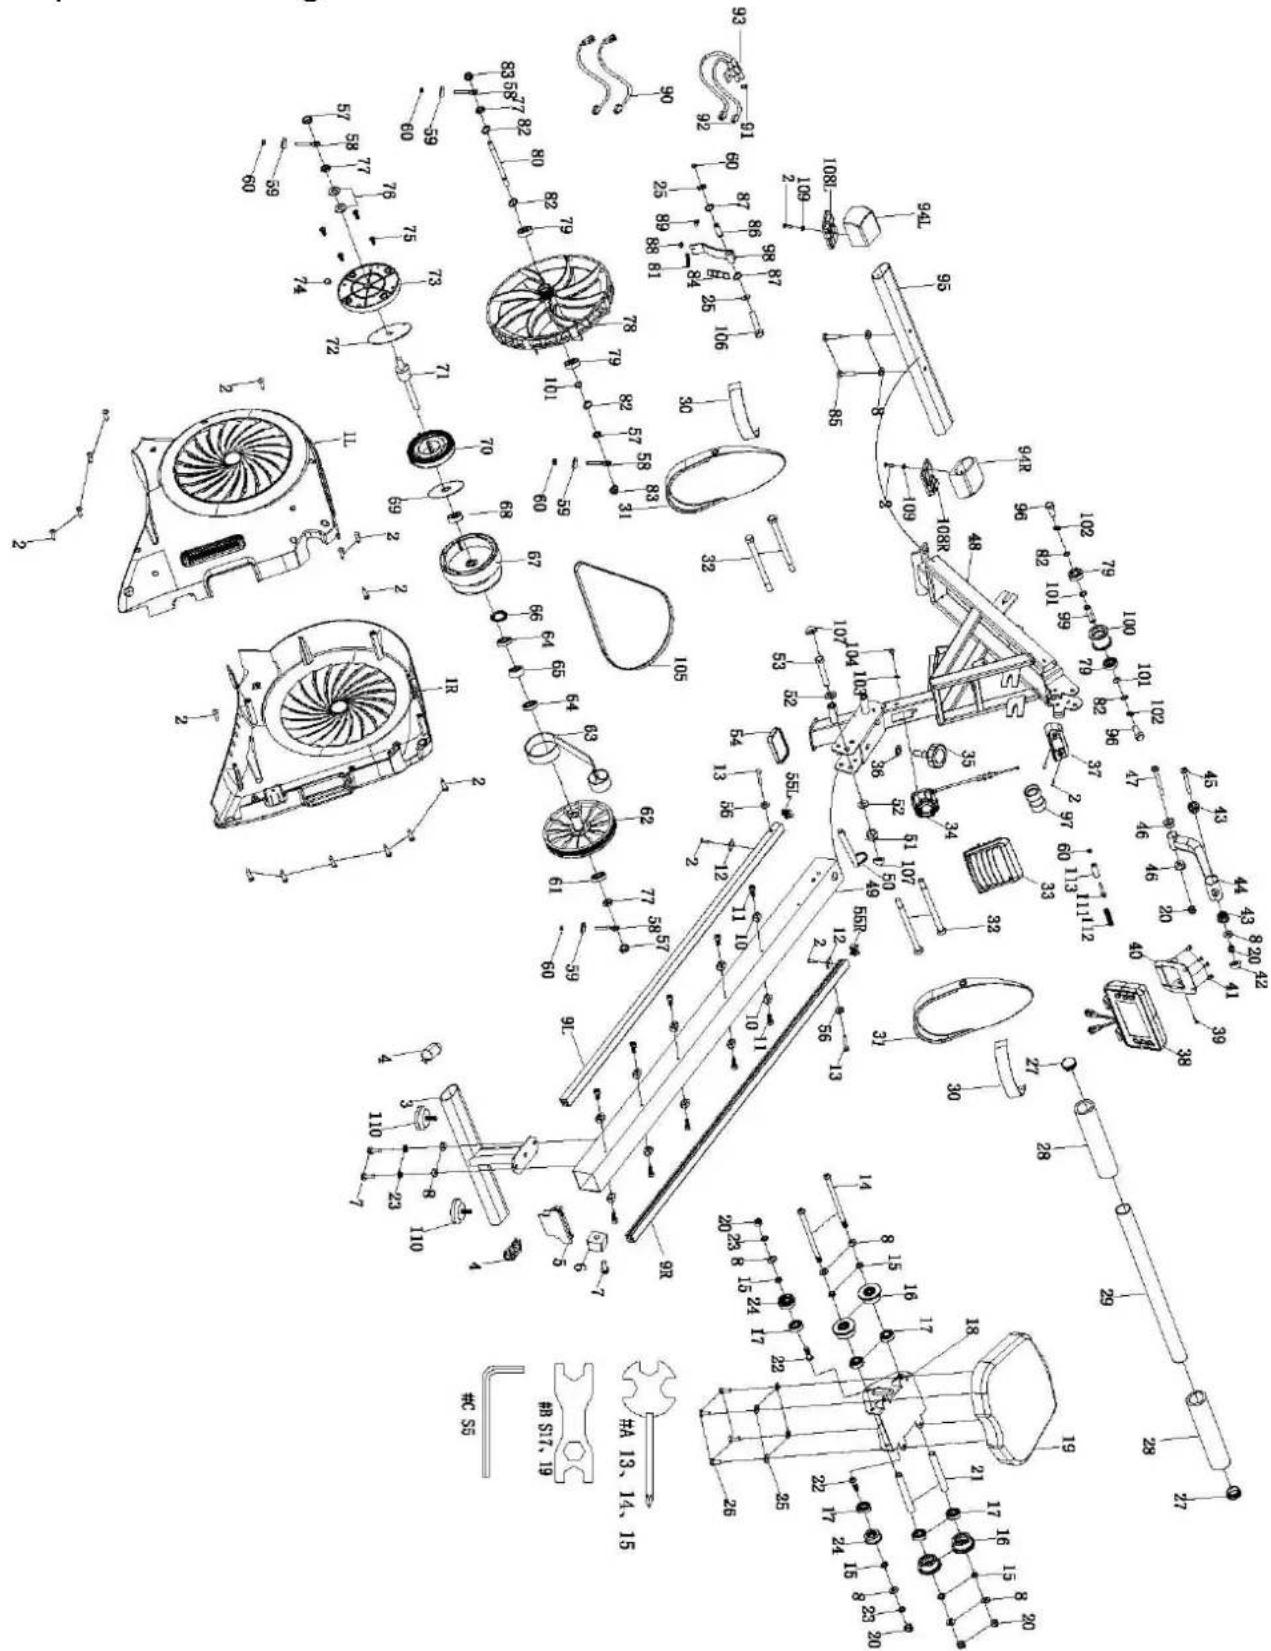
Exploded drawing and parts lists
Exploded drawing
text_image
Technical diagram of a mechanical assembly with exploded view and labeled parts, likely from an engineering or manufacturing document.Step 4
natural_image
Pure diagram of three parallel cylindrical objects with coiled elements, no text or symbols presentHexagon Bolt M12*160*23*S19 (32)-4
Step 3

6*13*1.2(25)-4 Flat Washer

Bolt M6*15(26)-4
Step 2

text_image
Konb M12 (35)-1
Nylon Nut M10*S17(51)-
Bolt M10*80*15*S17 (53)-1

natural_image
Technical line drawing of a mechanical component with threaded shaft and circular end (no text or symbols)Pin Ball Latch M8(50)-1


Flat Washer
∅12*∅25*2.0(36)-1

natural_image
Pure line drawing of a double-ended wrench with hexagonal end (no text or symbols)Wrench S17、19(B)-2
text_image
Wrench S17, 19(b)-2 Wrench S13, 14, 15(A)-1Wrench S5(C)-1
Flat Washer
∅10*∅20*1.5(52)-2
Step 1


Spring Washer
∅8*∅13*2. 0(23)-2
Bolt M8*40*20 (85)-2
Flat Washer 08*φ16*1.5(8)-4
Bolt M8*20 (7)-2
Part lists:
| No. | Description | Qty | No. | Description | Qty |
| 1L/R | Chain Cover (L/R) | 2 | 41 | Cross Pan Screw M5*12 | 4 |
| 2 | Cross Pan Self-Tapping Screw ST4.2*20 | 22 | 42 | Ball Cap | 1 |
| 3 | Rear Stabilizer | 1 | 43 | 32-8 Spacer of Axle | 2 |
| 4 | Elliptical End Cap | 2 | 44 | Display Tube Weld | 1 |
| 5 | Slide rail rear cover | 1 | 45 | Inner Hexagon Pan Screw M8*80 | 1 |
| 6 | Square Located Washer | 1 | 46 | Nylon Spacer | 2 |
| 7 | Inner Hexagon Pan Bolt M8*20 | 3 | 47 | Inner Hexagon Pan Screw M8*65 | 1 |
| 8 | Flat Washer Φ8.5*Φ16*1.5 | 11 | 48 | Main Frame Weld | 1 |
| 9L/R | Left and Right Aluminum rail | 2 | 49 | Rail | 1 |
| 10 | Slide Rail Step Pad | 10 | 50 | Pin Ball Latch | 1 |
| 11 | Inner Hexagon Socket Head Bolt M5*15 | 10 | 51 | Nylon Nut M10 | 1 |
| 12 | Slide rail located Washer | 2 | 52 | Flat Washer φ10.5*φ20*1.5 | 2 |
| 13 | Hexagon Screw M5*30 | 2 | 53 | Hexagon Bolt M12*160*23*S19 | 1 |
| 14 | Inner Hexagon Pan Bolt M8*130 | 2 | 54 | Rubber mat | 1 |
| 15 | Short Spacer | 6 | 55L/R | Tube Plug | 2 |
| 16 | Big Pulley | 4 | 56 | Flat Washer D5 | 2 |
| 17 | Bearing 608Z | 6 | 57 | Hexagon Nut M10*1*H5 | 3 |
| 18 | Sliding Seat | 1 | 58 | Adjustable Chain Bolt | 4 |
| 19 | Seat Cushion | 1 | 59 | Adjustable Chain U Support | 4 |
| 20 | Nylon Nut M8 | 6 | 60 | Nylon Nut M6 | 6 |
| 21 | Long Spacer | 2 | 61 | Bearing 6000RS | 1 |
| 22 | Inner Hexagon Pan Bolt M8*25 | 2 | 62 | Belt Disk + Axle spacer | 1 |
| 23 | Spring Washer D8 | 4 | 63 | Pulley Belt | 1 |
| 24 | Located wheel | 2 | 64 | Bearing 16003 | 2 |
| 25 | Flat Washer Φ6.2*Φ12*1.5 | 4 | 65 | One way bearing + cover | 1 |
| 26 | Inner Hexagon Pan Bolt M6*15 | 4 | 66 | D35 Ring for Axle | 1 |
| 27 | Round Inner Plug | 2 | 67 | Pulley disk | 1 |
| 28 | Handlebar Foam | 2 | 68 | Bearing 6300Z | 1 |
| 29 | Handlebar | 1 | 69 | PC Board 1 | 1 |
| 30 | Bandage | 2 | 70 | Spring | 1 |
| 31 | Pedal | 2 | 71 | Pulley Belt Axle | 1 |
| 32 | Hexagon Bolt M12*160*23*S19 | 4 | 72 | PC Board 2 | 1 |
| 33 | Combination of air outlets | 1 | 73 | Outer cover of webbing reel | 1 |
| 34 | Resistance Controller | 1 | 74 | Round Magnetic | 1 |
| 35 | Knob M12 | 1 | 75 | Cross Pan Screw M4*15 | 4 |
| 36 | Flat Washer Φ12 *Φ24*2.0 | 1 | 76 | Flat Washer Φ10.2*Φ14*1 | 2 |
| 37 | Handlebar Seat | 1 | 77 | Hexagon Thin Nut M10*1*H5 | 3 |
| 38 | Monitor | 1 | 78 | Flywheel | 1 |
| 39 | Cross Pan Screw M5*5 | 1 | 79 | Bearing 6000Z | 4 |
| 40 | Monitor Bracket | 1 | 80 | Flywheel Axle | 1 |
| 81 | Press Spring | 1 | 100 | Webbing Roller | 1 |
| 82 | Circlip for shaft D10 | 3 | 101 | Waved Washer D10 | 2 |
| 83 | Hexagon Flange Nut M10*1*H8 | 2 | 102 | Spring Washer D6 | 2 |
| 84 | Square Magnetic | 5 | 103 | Flat Washer Φ18*Φ5*1.5 | 1 |
| 85 | Inner Hexagon Pan Bolt M8*40*20 | 2 | 104 | Cross Pan Screw M5*20 | 1 |
| 86 | Magnetic Board Axle | 1 | 105 | Belt | 1 |
| 87 | Circlip for shaft D12 | 2 | 106 | Hexagon Bolt M6*50 | 1 |
| 88 | Anti-dropping pipe plug | 1 | 107 | Ball Cap S16 | 2 |
| 89 | Inner Hexagon Socket Head Bolt M6*15 | 1 | 108L/R | Rubber Anti-proof Pad(L/R) | 2 |
| 90 | Middle wire | 2 | 109 | Flat WasherΦ4.5*Φ9*1.0 | 2 |
| 91 | Cross Pan Screw M4*8 | 1 | 110 | Foot Pad | 2 |
| 92 | Sensor Wire | 2 | 111 | Located Axle 1 | 1 |
| 93 | Sensor Seat | 1 | 112 | Pressed Spring | 1 |
| 94L/R | Front Stabilizer End Cap | 2 | 113 | Located Axle 2 | 1 |
| 95 | Front Stabilizer | 1 | 114 | Tube | 1 |
| 96 | Hexagon BoltM6*15 | 2 | A | Wrench S13、14、15 | 1 |
| 97 | Webbing Positioning Cover | 1 | B | Wrench S17、19 | 2 |
| 98 | Magnetic Board Weld | 1 | C | Wrench S5 | 1 |
| 99 | Webbing Roller Shaft | 1 |
Assembly Instructions
1.Preparatory work:
A. Please make sure there is enough space before installation:
B. Use the tools provided or the special tools provided for installation;
C. Confirm that all components are ready before installation. (Please refer to the previous product exploded drawing, which indicates the name and location of the components).
2. Assembly instructions:
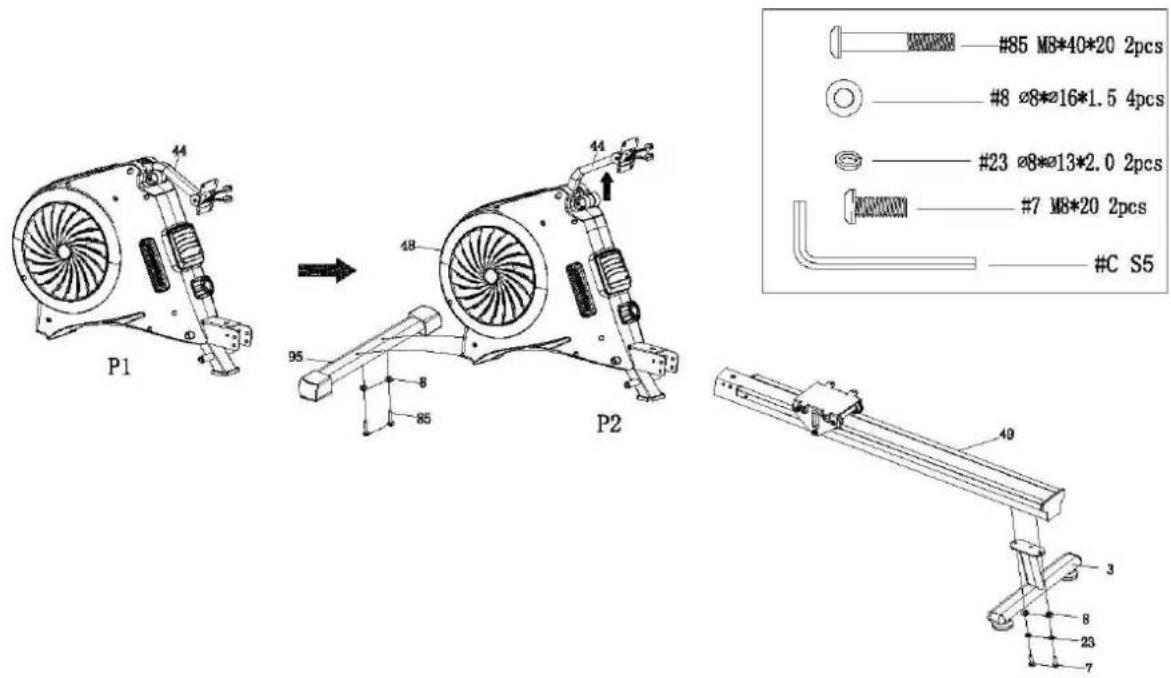
Step 1:
A. Make Display Tube Weld (44) upward as P2. It is OK when you hear "Click".
B. Lock Front Stabilizer (95) into Main Frame (48) by using Inner Hexagon Head Bolt (85) and Flat Washer (8).
C. Lock Rear Stabilizer (3) into Rail (49) by using Flat Washer (8), Spring Washer (23) and Inner Hexagon Head Bolt (7).
text_image
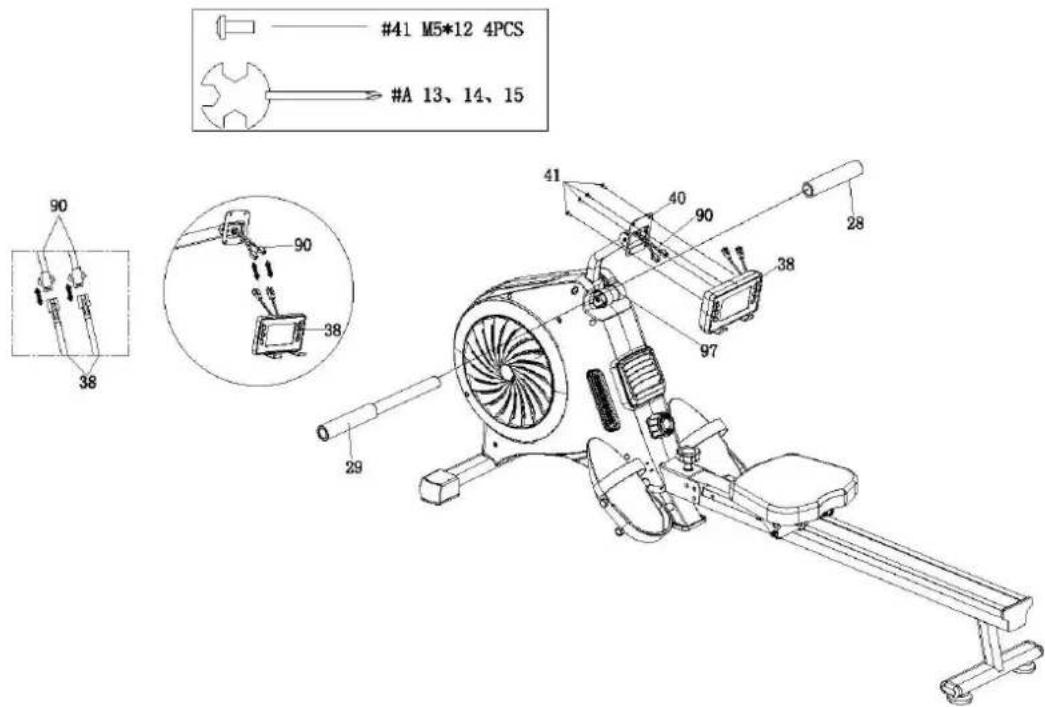
P1 44 95 48 8 85 P2 44 #85 M8*40*20 2pcs #8 28*16*1.5 4pcs #23 28*13*2.0 2pcs #7 M8*20 2pcs #C S5 49 3 8 23 7Step 2:
A. Insert Rail (49) into Main Frame (48), then insert Marbles Bolt (50).
B. Lock Rail (49) and Main Frame (48) together by using Hexagon Bolt (53), Flat Washer (52) and Nylon Nut (51), then screw Hexagon Bolt (53) well by using two Wrench (#B). Finally, lock fix Ball Cap (107).
C. Keep the hole of Rail (49) and Main Frame (48) in line, then make Knob (35) through Flat Washer (36) and the hole to lock Rail (49) and Main Frame (48) in order. Finally, screw Knob (35) well.
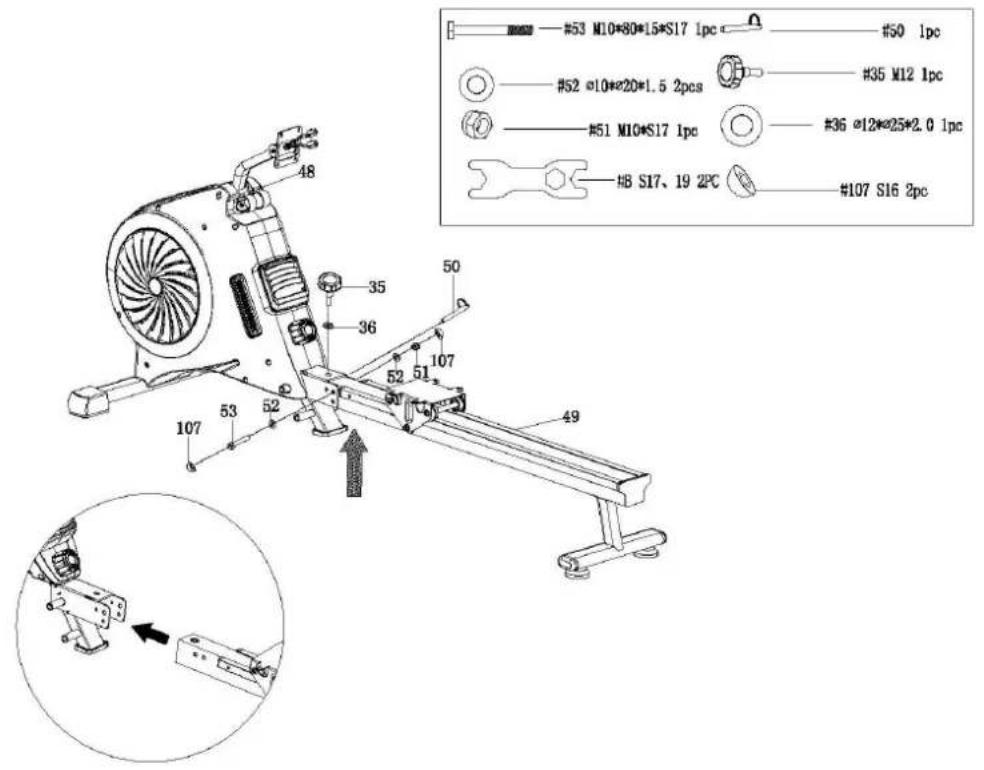
text_image
#53 M10*80*15*S17 1pc #50 1pc #52 @10*20*1.5 2pcs #35 M12 1pc #51 M10*S17 1pc #36 @12*25*2.0 1pc HB S17、19 2PC #107 S16 2pcStep 3:
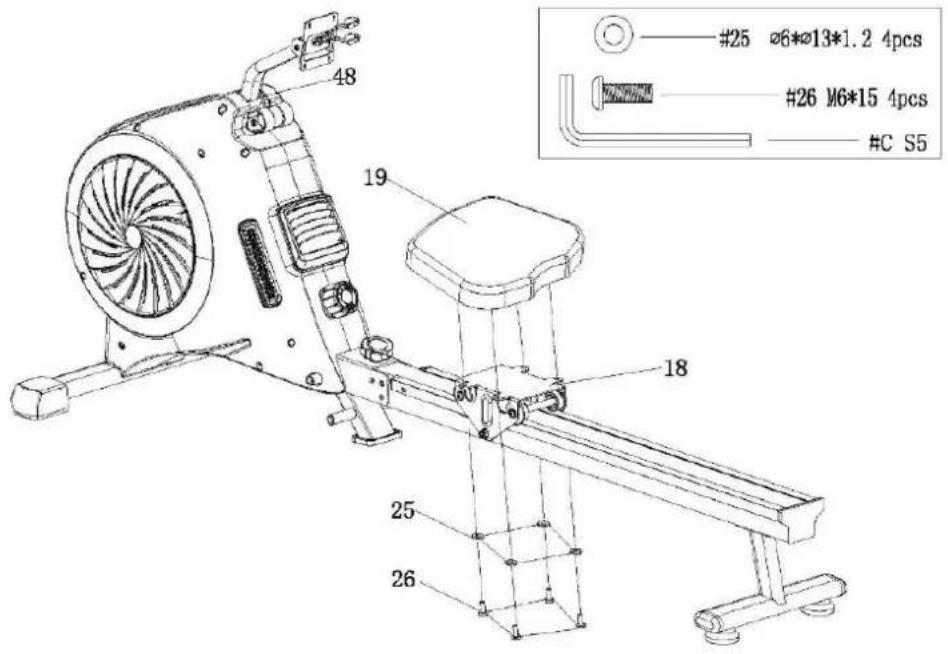
Lock Seat Cushion (19) into Sliding Seat (18) by using Flat Washer (25) and Inner Hexagon Head Bolt (26).
text_image
#25 6*13*1.2 4pcs #26 M6*15 4pcs #C S5 19 18 25 26Step 4:
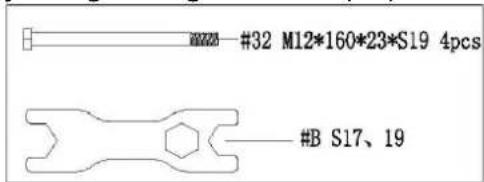
Lock Pedal (31 L/R) into Main Frame (48) by using Hexagon Screw (32).
text_image
#32 M12*160*23*S19 4pcs #B S17、19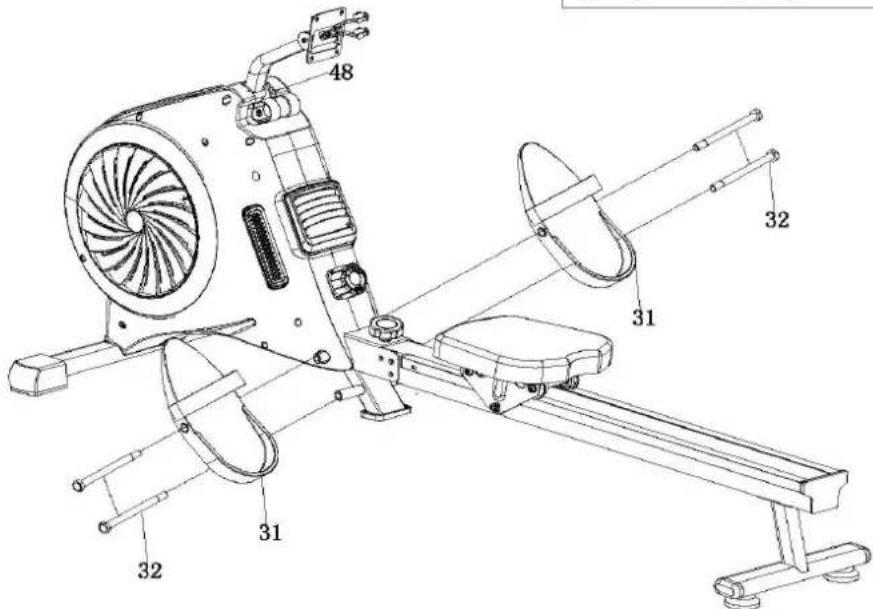
text_image
Technical diagram of a stationary exercise machine with labeled parts including 31, 32, and 48.Step 5:
A. Insert Handlebar (29) into Webbing Positioning Cover (97), then warp Handlebar (29) with Handlebar Foam (28).
B. Pull out Cross Head Bolt (41) from Monitor (38), then connect the wire of Monitor (38) with Mid wire (90).
C. Lock Monitor (38) into Monitor Bracket (40) by using Cross Head Bolt (41).
text_image
#41 M5*12 4PCS #A 13、14、15 90 38 90 38 41 40 90 38 97 28 29Folding Instruction
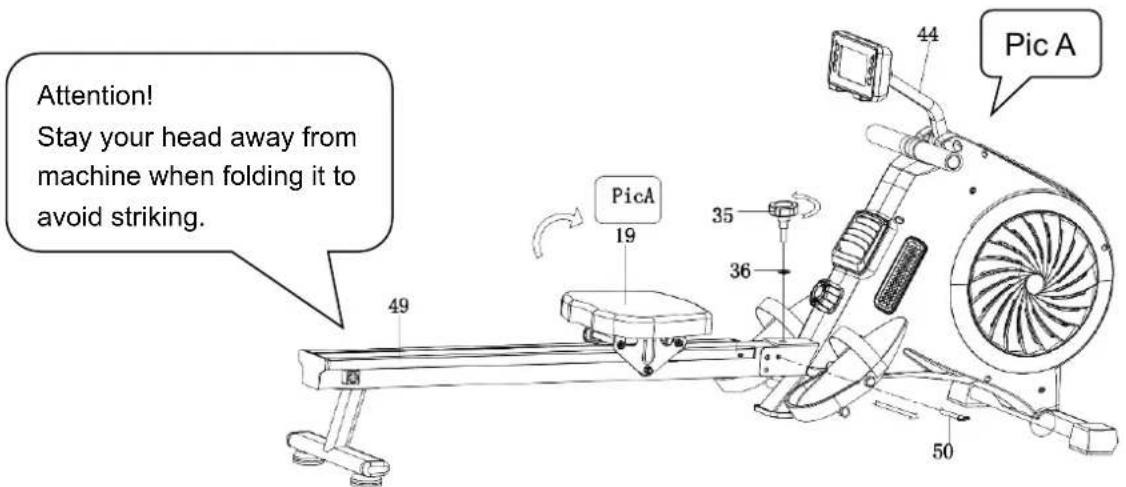
Fold the machine when it is not in use to avoid taking up space.
text_image
Attention! Stay your head away from machine when folding it to avoid striking. 49 PicA 19 35 36 50 44 Pic A
text_image
49 19 35 36 50 Pic B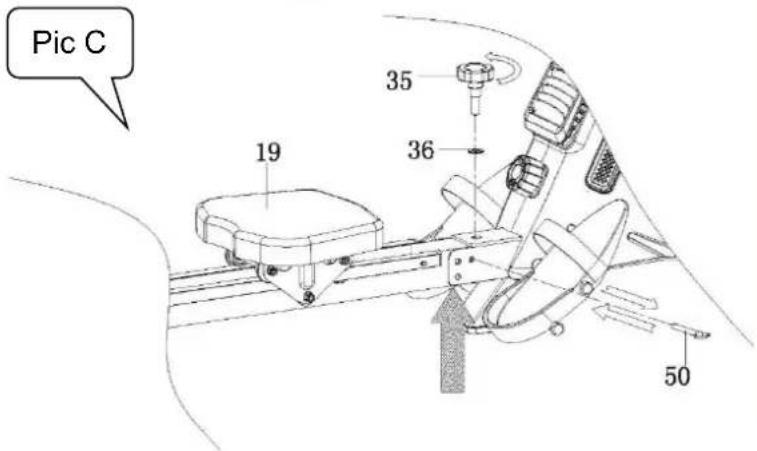
text_image
Pic C 19 35 36 50- Pull out Knob (35), Flat Washer (36) and Pin Ball Latch (50), then fold Rail (49) 90^ to make it stay upright. (Pic A)
Attention! It is better to hold the Seat Cushion (19) when folding the Rail (49), as the Seat Cushion (19) will slide down quickly.
-
Insert Pin Ball Latch (50) to fix Rail (49) and make it stay upright. Then lock Rail (49) well by using Knob (35), Flat Washer (36). (Pic B)
-
Pull out Pin Ball Latch (50) first when using machine.
- Second, put Rail (49) in flat and keep it in line with ground.
● Third, insert Pin Ball Latch (50).
● Finally, keep the hole of rail and main frame in line, then insert Knob (35) and Flat Washer (36) well in order.
Attention! It should hold Rail (49) up to keep the hole of rail and main frame when insert Knob (35) and Flat Washer (36).
Exercise Instruction
The Warm Up Phase
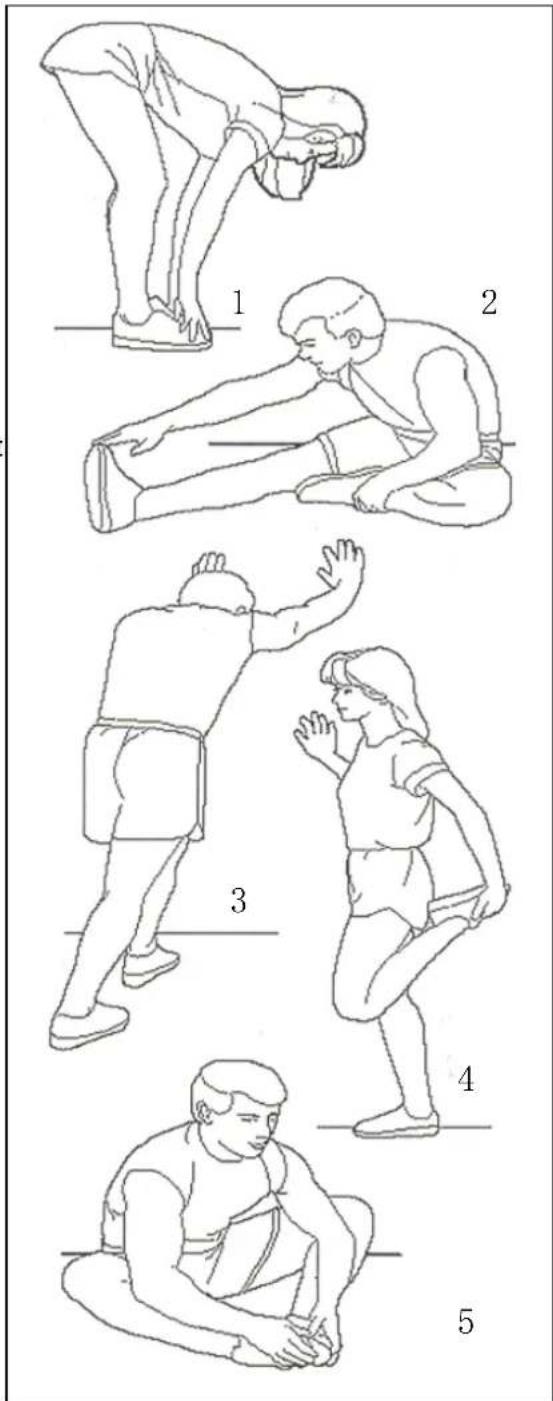
This stage helps get the blood flowing around the body and the muscles working properly. It will also reduce the risk of cramp and muscle injury. It is advisable to do a few stretching exercises as shown below. Each stretch should be held for approximately 30 seconds, do not force or jerk your muscles into a stretch - if it hurts, STOP.
1. Down Stretch
Bend your knees slightly and body slowly, let your back and shoulders relax, and try to touch your toes. Keep it for 10\~15 seconds, repeat 3 times.
2. Hamstring Stretch
Sitting on a clean cushion, then bend your right foot. Place your left foot against the inner thigh of your right foot. Try to touch your toes Keep it for 10 \~15 seconds, repeat each foot 3 times.
3. Calf and Foot Stretching
Stand and place both hands on a wall or a tree, one foot behind. Keep the behind foot stand and its heel on the floor, then tilt to the wall or tree. Keep it for 10 \~15 seconds, repeat each foot 3 times
4. Quadriceps Stretch
Place your left hands against a wall or a desk to aid your balance. Then grasp your ankle with your left hand and pull your foot toward your buttocks. Keep it for 10 \~15 seconds, repeat each foot 3 times.
5. Groin Stretch
Sit with your knees flexed and soles of feet together. Hold your ankles and bend at your hips. Keep it for 10 \~15 seconds, repeat 3 times.
text_image
Illustration showing five sequential steps of a stretching exercise, labeled 1 to 5.Exercise Stage
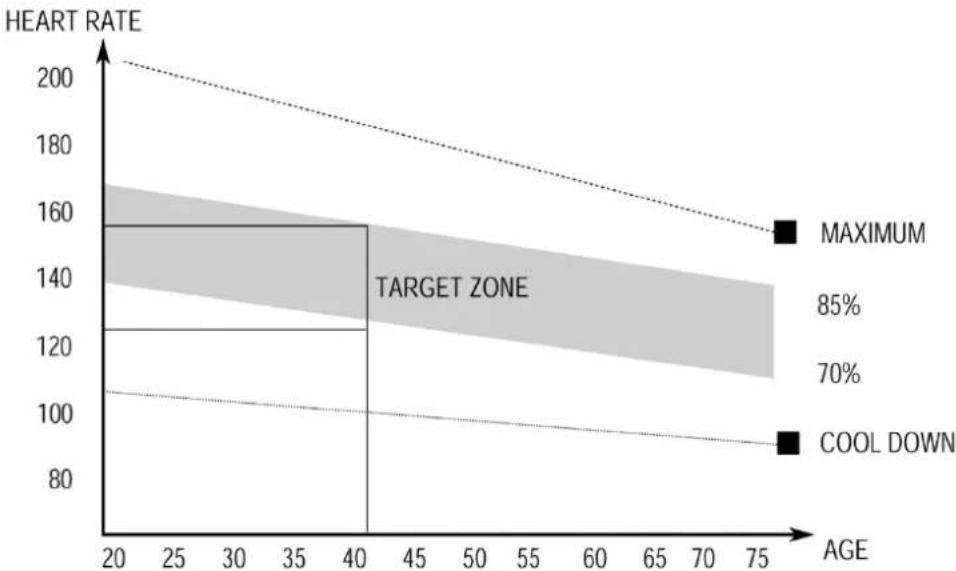
This stage should last for a minimum of 12 minutes though most people start at about 15\~20 minutes. After repeat it easily for several times, you can increase training strength. After exercising for a period of time, your heart beat will be close to the best position in the graph as below (Shaded part). Note: This exercising is for your whole life, it cannot complete in one night, so you should keep it.
line
| AGE | HEART RATE | | --- | --- | | 75 | 160 | | 70 | 90 |Recovery Phase
This stage is to let your Cardio-vascular System and muscles wind down. This is a repeat of the warm up exercise e.g., reduce your tempo, continue for approximately 5 minutes. Then repeat the exercise phase, please be careful not to force or jerk your muscles.
When using elliptical fitness exercises, please don't increase training intensity arbitrarily. It may make your leg muscles sprain, which means you can't continue exercising for a long time.
Equipment Tip
Adjusting the Tension Control can change the resistance of the equipment, the high resistance the harder to step. Users can use this device to find a suit