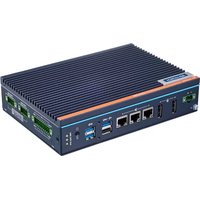
QHA300 - Computer hardware IFM - Free user manual and instructions
Find the device manual for free QHA300 IFM in PDF.


User questions about QHA300 IFM
0 question about this device. Answer the ones you know or ask your own.
Ask a new question about this device
Download the instructions for your Computer hardware in PDF format for free! Find your manual QHA300 - IFM and take your electronic device back in hand. On this page are published all the documents necessary for the use of your device. QHA300 by IFM.
USER MANUAL QHA300 IFM
Instructions for set-up
moneo|appliance
QHA300
V1.17 or higher
Contents
1 Preliminary note 3
1.1 Symbols used 3
1.2 Further documents 3
2 Safety instructions.... 4
3 Intended use.... 5
4 Function 6
5 Installation.... 7
6 Electrical connection.... 8
6.1 Grounding of the housing 8
6.2 Connecting operating voltage 8
6.3 Wiring 9
7 Operating and display elements 10
7.1 LED states 10
8 Set-up.... 11
8.1 Requirements 11
8.2 Preparations 11
8.3 Set-up of moneo|appliance 12
8.3.1 Adapting the hostname 12
8.3.2 Adapting the IP address - Ethernet interface 2 13
8.3.3 Set-up completed 13
8.4 Opening the appliance management system (AMS) 13
8.4.1 Requirements 13
8.4.2 Initial login via the browser 14
8.5 Opening moneo 14
1 Preliminary note
You will find instructions, technical data, approvals and further information using the QR code on the unit / packaging or at documentation.ifm.com.
1.1 Symbols used
√ Requirement
Instructions
Reaction, result
[...] Designation of keys, buttons or indications
→ Cross-reference

Important note
Non-compliance may result in malfunction or interference.

Information
Supplementary note
1.2 Further documents
- Software manual moneo|appliance

The documents can be downloaded at: www.ifm.com
2 Safety instructions
- The unit described is a subcomponent for integration into a system.
- The system architect is responsible for the safety of the system.
-
The system architect undertakes to perform a risk assessment and to create documentation in accordance with legal and normative requirements to be provided to the operator and user of the system. This documentation must contain all necessary information and safety instructions for the operator, the user and, if applicable, for any service personnel authorised by the architect of the system.
-
Read this document before setting up the product and keep it during the entire service life.
- The product must be suitable for the corresponding applications and environmental conditions without any restrictions.
- Only use the product for its intended purpose (→ Intended use).
- If the operating instructions or the technical data are not adhered to, personal injury and/or damage to property may occur.
- The manufacturer assumes no liability or warranty for any consequences caused by tampering with the product or incorrect use by the operator.
- Installation, electrical connection, set-up, operation and maintenance of the product must be carried out by qualified personnel authorised by the machine operator.
- Protect units and cables against damage.
• Store the product in its original packaging.
3 Intended use
IT hardware to operate moneo; incl. management system for appliance maintenance.
4 Function
▷ The appliance management system (AMS) allows the user to carry out basic maintenance tasks for the moneo|appliance, e.g.:
- Setting the network configuration and hostnames
- Setting of date and time
- Rebooting or shutting down the moneo|appliance
• Monitoring and restarting services - Importing software updates
• Displaying contact details for technical support - Setting the access for remote support
- Reading log files
- Data backup
The moneo|appliance is used to run the following software:
- moneo|configure for setting the parameters of connected devices
- moneo|RTM for monitoring the process data

The required licences to operate the moneo products must be ordered separately.
5 Installation

▶ Disconnect the power of the plant before installation.
▶ Attach the device to a DIN rail using the bracket on the back.
▶ To remove, pull down the retaining latch with a screwdriver.

The device is rated for convection cooling.
▶ Do not impede the air circulation.
Observe the operating conditions for the device specified in the data sheet. Further information at: www.ifm.com
6 Electrical connection

The device must be connected by a qualified electrician.
The national and international regulations for the installation of electrical equipment must be adhered to.
6.1 Grounding of the housing
The device is supplied with a COMBICON connector for an external voltage input of 10 - 36 V DC .
The device offers good EMI shielding and a stable grounding point on the housing.
▶ Use a grounding cable to connect the housing ground to earth.
6.2 Connecting operating voltage
The device is designed to be powered by an approved power supply or DC power source. The adapter is designed for 10 - 36 V DC and 7.7 - 1.31 A, as well as a maximum temperature of 70 °C (158 °F).
Before connecting the device, make sure of the following:
- The terminal block is suitable for 12 - 24 AWG (12A) and 7 lb-in torque. Only copper wires must be used.
- The nominal temperature of the input cables should be higher than 95 °C (203 °F).
Connect the cables as follows:
▶ Insert the positive and negative wires into the L+ and L- contacts on the terminal block.
▶ Tighten the screws of the cable clamps to prevent the wires from coming loose.
| Pin | Signal | Description | Pin layout |
| 1 | L+ | 10 - 36 VDC |  |
| 2 | L- |
6.3 Wiring
Connect the device as follows:

1: Status LEDs
2: On/off switch
3: 3x USB 3.0
4: 1x USB 2.0
5: Ethernet interface A
6: Ethernet interface B
7: Ethernet interface C
8: 2x display port
9: Voltage supply
10: Grounding

For special configurations observe the device's operating instructions.

The device has DI / DO and COM ports which are inoperative and must not be used.
7 Operating and display elements
7.1 LED states
| LED behaviour | Description | Action | ||
| PWR | BTR | RUN* | ||
| (0.5dB) | (17520) | (0964) | Power LED lights up green | Device is connected to the voltage supply and ready for operation |
| (0.6dB) | (08477) | (0710) | Power lights up orange | Device is connected to the voltage supply and is in standby mode |
| (0.7dB) | (04732) | (0243) | Power LED lights up green, buffer battery LED lights up red | Device is connected to the voltage supply and ready for operation▶ Check buffer battery. |
| (0.8dB) | (04283) | (0428) | Power LED lights up orange, buffer battery LED lights up red | Device is connected to the voltage supply and is in standby mode▶ Check buffer battery. |
*) The RUN LED lights up green as standard and has no function.
8 Set-up
When the operating voltage has been applied, the moneo|appliance functions according to the factory settings. The LEDs show the status of the devices and of the interfaces.
8.1 Requirements
For the moneo|appliance set-up, the following components are required.
• Monitor with display port
• Keyboard with USB connection
8.2 Preparations
▶ Connect the monitor to the display port.
▶ Connect the keyboard to the USB port.
▶ Connect the mains plug.
▶ Connect the network cable.
- Ethernet interface A (designation on the device) / ETH 1 (designation AMS) - sensor network
- Ethernet interface B (designation on the device) / ETH 2 (designation AMS) - IT network

moneo|appliance
| Ethernet interface | Labelling on the device | Description | Standard IP address | Subnet mask |
| ETH1 | A | Sensor network | 192.168.0.100 | 255.255.255.0 |
| ETH2 | B | IT network | DHCP | DHCP |
| ETH3 | C | Service interface | 192.168.82.247 | 255.255.255.0 |
Once the operating voltage has been applied, the moneo|appliance can be switched on via the on/off switch on the front of the device. Make sure that all cables have been connected according to the description.

If it is not possible to use a monitor and/or a keyboard, the initial setup can be performed directly via the AMS web interface.
IT network with active DHCP server:
▶ Connect the monitor (if available) to the appliance or check the DHCP server.
▶ Read the assigned IP address of the IT network in the login screen (initial setup with monitor) or retrieve the corresponding entry from the DHCP server (based on the MAC address).
▶ Access to the AMS web interface is via the following URL: https://
▶ Carry out the initial setup of the appliance.
IT network without active DHCP server:
▶ Connect the PC or laptop to the IT network (ETH2) of the appliance.
▶ Configure a static IP address for the PC/laptop.
Address range: 192.168.0.1...254 (except 192.168.0.100)
Subnet mask: 255.255.255.0
▶ Access the AMS web interface via the URL https://192.168.0.100/ams.
▶ Carry out the initial setup of the appliance.
8.3 Set-up of moneo|appliance
The initial set-up of the moneo|appliance is made via the connected keyboard and the monitor.
The different menu items in the appliance management system can be selected using the keyboard. Example: The keyboard shortcut [C] opens [C] Configure the system].
▶ Start the moneo|appliance.
▷ The text "welcome to moneo appliance" is displayed on the monitor.
▶ Enter the login details and confirm with [Enter].
There is no visible feedback on the monitor for the input. For example, no ***** is displayed in the input field. The field on the monitor remains empty despite input.
User name: administrator Password: < serial number of moneo|appliance >
The serial number is provided on the product label on the bottom of the moneo|appliance.
▷ If the login details are correct, the [Simple keyboard configuration menu] appears.
▶ Select the corresponding keyboard layout and confirm by clicking on [Ok].
▶ Confirm the successful change by clicking on [Ok].
▷ Prompt to change the password appears.
▶ Change the password when signing in for the first time.
Password requirements:
- At least 8 characters
- Must contain:
– at least one upper case letter
– at least one lower case letter
- at least one number
– at least one special character
There is no visible feedback on the monitor for the input. For example, no ***** is displayed in the input field. The field on the monitor remains empty despite input.
▶ Repeat the password and confirm by clicking on [Ok].
▶ After assigning the new password, log in again with new login data.
▷ The [Main menu] of the moneo|appliance is displayed.
8.3.1 Adapting the hostname
The default host name of the moneo|appliance is: moneo-appliance- XXXXXXX
The last 7 digits of the host name are randomly generated.
The host name can be adapted when signing in for the first time or later by following the below steps.
▶ Open the [Main menu].
▶ Select [C) Configure the system].
▷ [Configuration menu] opens.
▶ Select [H) Change the hostname].
▷ [Host name change] opens.
▷ The current host name is displayed in the field [Specify the new hostname].
▶ Change the host name using the keyboard and select [Ok].
▷ The host name is saved and the interface [Host name change] is closed.
▶ Select [R] Return to the previous menu] to go back to the previous menu environment.
8.3.2 Adapting the IP address - Ethernet interface 2
▶ Open the [Main menu].
▶ Select [C) Configure the system].
▷ [Configuration menu] opens.
▶ Select [N) Configure the network].
▷ [Network configuration] opens.
▶ Select [I) IT network (ETH 2)].
▶ Select [U) Use DHCP].
▶ Click on [Enter] to change the entry from [yes] to [no].
▶ Select [I) Set the IP address].
▷ [Network (ip)] opens.
▶ Enter the new IP address using the keyboard and select [Ok].
▷ [Network configuration] opens.
Now the settings must also be made for the network mask, gateway and the DNS servers. Once all settings have been made, they must be permanently saved.
▶ Select [S) Save the configuration].
▷ The message [The network configuration was successfully changed] is displayed.
▶ Confirm the message with [Ok].
▶ Select [R] Return to the previous menu] several times to return to the [Main menu].
▷ The system is configured and available via web interface.
8.3.3 Set-up completed
▶ Select [X) Exit].
▷ The [Main menu] is closed.
The following systems are available via the web browser:
- appliance management system: Opening the appliance management system (AMS) (→ 13)
• moneo: Opening moneo (→ 14)
8.4 Opening the appliance management system (AMS)
8.4.1 Requirements
Device (e.g. PC) for connection to the moneo|appliance. This device must be connected to the same network as the Ethernet interface (ETH 2) of the moneo|appliance.
For access to the appliance management system, a suitable web browser must be installed on the user's own PC.
Documentation of the serial number (product label) on the bottom of the housing Requirements It is recommended to use one of the following browsers:
- Google Chrome
- Mozilla Firefox
8.4.2 Initial login via the browser
▶ Open the URL of the appliance management system in your browser.
https://
▷ General status information is displayed.
▷ A certificate warning appears in the browser (cause: self-signed certificate). This message is risk-free.
▶ Confirm certificate warning.

An own certificate can be installed via the AMS.
▶ Click on the ≈ icon.
- ▶ Log in as administrator with the login details assigned in the AMS console.

If the user has not previously logged in to the AMS console, use the following login details:
User name: administrator
Password: < Serial number of the moneo|appliance >
▶ Enter the login details and confirm with [Login].
▷ Prompt to change the password appears.
▶ Change password according to the requirements below.
The appliance management system with its entire functional scope is displayed.
Password requirements:
• At least 8 characters
- Must contain:
– at least one upper case letter
– at least one lower case letter
- at least one number
– at least one special character
8.5 Opening moneo
▶ Open moneo in your browser. https://
▷ The licencing wizard is displayed.

You can find further information on licensing in the moneo installation instructions.
- 1 PRELIMINARY NOTE
- 1.1 SYMBOLS USED
- 1.2 FURTHER DOCUMENTS
- 2 SAFETY INSTRUCTIONS
- 3 INTENDED USE
- 4 FUNCTION
- 5 INSTALLATION
- 6 ELECTRICAL CONNECTION
- 6.1 GROUNDING OF THE HOUSING
- 6.2 CONNECTING OPERATING VOLTAGE
- 6.3 WIRING
- 7 OPERATING AND DISPLAY ELEMENTS
- 7.1 LED STATES
- 8 SET-UP
- 8.1 REQUIREMENTS
- 8.2 PREPARATIONS
- 8.3 SET-UP OF MONEO|APPLIANCE
- 8.3.1 ADAPTING THE HOSTNAME
- 8.3.2 ADAPTING THE IP ADDRESS - ETHERNET INTERFACE 2
- 8.3.3 SET-UP COMPLETED
- 8.4 OPENING THE APPLIANCE MANAGEMENT SYSTEM (AMS)
- 8.4.1 REQUIREMENTS
- 8.4.2 INITIAL LOGIN VIA THE BROWSER
- 8.5 OPENING MONEO
Brand : IFM
Model : QHA300
Category : Computer hardware