FRITZ!DECT 302 - Thermostat AVM - Free user manual and instructions
Find the device manual for free FRITZ!DECT 302 AVM in PDF.

| Product type | Connected radiator thermostat |
| Brand | AVM |
| Model | FRITZ!DECT 302 |
| Dimensions (W x H x D) | 51 x 51 x 90 mm |
| Weight | 220 g |
| Power supply | 3 AA batteries (included) |
| Valve thread | M30 x 1.5 mm |
| Wireless range | Up to 40 m |
| Radio standard | DECT (1880-1900 MHz) |
| Max. transmission power | 250 mW |
| Operating temperature | 0 °C to 50 °C |
| Main functions | Boost, anti-frost, weekly schedule, holiday mode, button lock |
| Configuration | Via FRITZ!Box interface (http://fritz.box) |
| Package contents | 1 thermostat, 3 AA batteries, Danfoss RA adapter, screw and nut |
| Compatible adapters | Available as optional (see online help) |
| Care and cleaning | Clean with a dry cloth; replace batteries if necessary |
| Safety | Indoor use only; do not open or modify; observe battery polarity |
| Recommended batteries | Varta Industrial Pro AA, GP Super Alkaline LR6, Varta Longlife Max Power AA, Duracell Industrial AA |
| Unsuitable batteries | Rechargeable batteries (limited use) and zinc-carbon batteries |
| Repairability | Spare parts (adapters) available; repair by a professional recommended |
| Environment | Do not dispose of with household waste |
Frequently Asked Questions - FRITZ!DECT 302 AVM
User questions about FRITZ!DECT 302 AVM
0 question about this device. Answer the ones you know or ask your own.
Ask a new question about this device
Download the instructions for your Thermostat in PDF format for free! Find your manual FRITZ!DECT 302 - AVM and take your electronic device back in hand. On this page are published all the documents necessary for the use of your device. FRITZ!DECT 302 by AVM.
USER MANUAL FRITZ!DECT 302 AVM
Installation and Operation


DEUTSCH 3
ENGLISH 15
ESPAÑOL 27
FRANÇAIS 39
ITALIANO 51
NEDERLANDS 63
FRITZ!DECT 302
natural_image
Two-step diagram showing a light bulb being inserted into a door panel, with red arrows indicating the process (no text or symbols present)natural_image
Three-step diagram showing a device being inserted into a door panel, with arrows indicating the process (no text or symbols present)
Ventilhub anpassen
natural_image
White cylindrical battery with three blue internal components and a red arrow pointing to its side (no text or symbols visible)natural_image
Cross-sectional view of a battery pack with three red indicator lights (no text or symbols visible)natural_image
White cylindrical device with internal components and a red arrow pointing to it (no text or symbols visible)Demontieren
FRITZ!DECT 302 is a radiator control that is connected with your FRITZ!Box via DECT. The functions of the FRITZ!DECT 302 are described in detail in the online help:
- Open a web browser and enter http://fritz.box.
- Click on Smart Home > Devices and Groups. in the menu.
- Click on ?
Requirements
- A FRITZ!Box that supports DECT to use the full range of functions.
- FRITZ!OS 6.83 or higher (exception: FRITZ!Box 7312/7412).
Package Contents
Illustration Number/Name
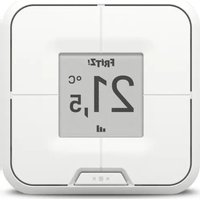
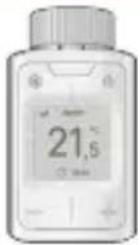 | 1 FRITZ!DECT 302 |
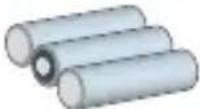 | 3 AA batteries (installed) |
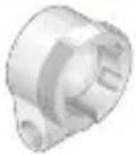 | 1 Adapter für Danfoss RA radiator valve |
 | 1 Adapter screw and nut |
Safety Instructions
- Only use FRITZ!DECT 302 indoors.
- Do not use FRITZ!DECT 302 if there is visible damage.
- Do not modify FRITZ!DECT 302. The device may not be opened, converted, modified or repaired except by a qualified technician.
- Operate FRITZ!DECT 302 in a dry place that is free of dust.
- Only use FRITZ!DECT 302 according to the instructions in this manual.
- Limited performance with rechargeable batteries!
Using rechargeable batteries can result in an incorrect estimation of battery life, reduced service life, and erroneous battery warnings.
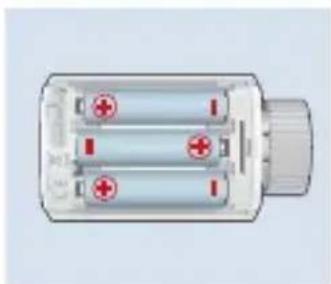
• Make sure that the batteries are inserted with the poles in the correct position!
- Use high-quality batteries!
Varta Industrial Pro AA, GP Super Alkaline LR6, Varta Longlife Max Power AA, or Duracell Industrial AA are suitable. Zinc carbon batteries are not suitable for operation!
- Immediately remove dead batteries from FRITZ!DECT 302. Do not use old and new batteries together.
- Keep batteries away from children and avoid contact with skin, eyes, and mucous membranes. Should you come in contact with battery acid, rinse immediately with clear water and consult a doctor.

Explosion hazard!
Injuries caused by explosion or burns through inappropriate handling of the batteries. Do not attempt to load, short-circuit, or disassemble the batteries!
Device Overview
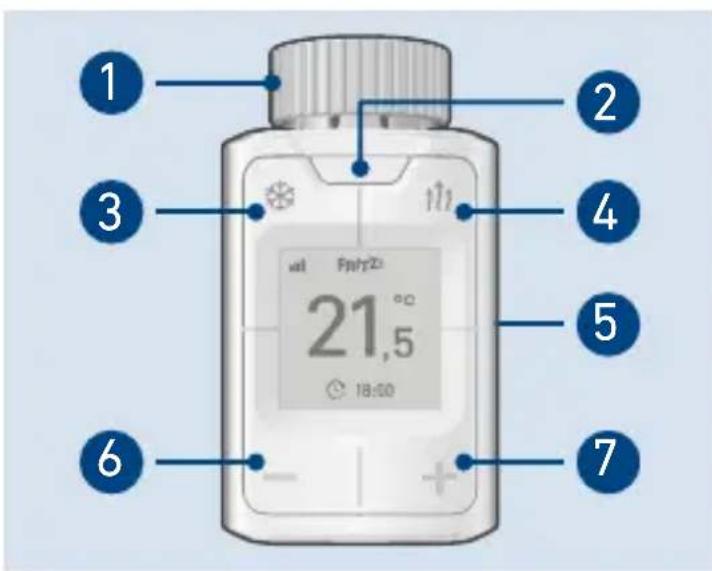
- Union nut
- Menu
- Antifreeze function
-
Boost function
-
Battery compartment lid
- Decrease temperature
- Increase temperature
Symbols in Display
| Radio connection | |
| Antifreeze function | |
| Boost function | |
| Keylock | |
| Switching time | |
| Vacation switching | |
| Batteries almost dead | |
| Start registration | |
| Start installation | |
| Load factory settings | |
| Rotate the display | |
| Information | |
| Next menu page | |
| Back |
Registering
-
Press the Menü button to start registration.
-
Press the Connect button on your FRITZ!Box
or
Press the DECT button on your FRITZ!Box and hold it down for 6 seconds.
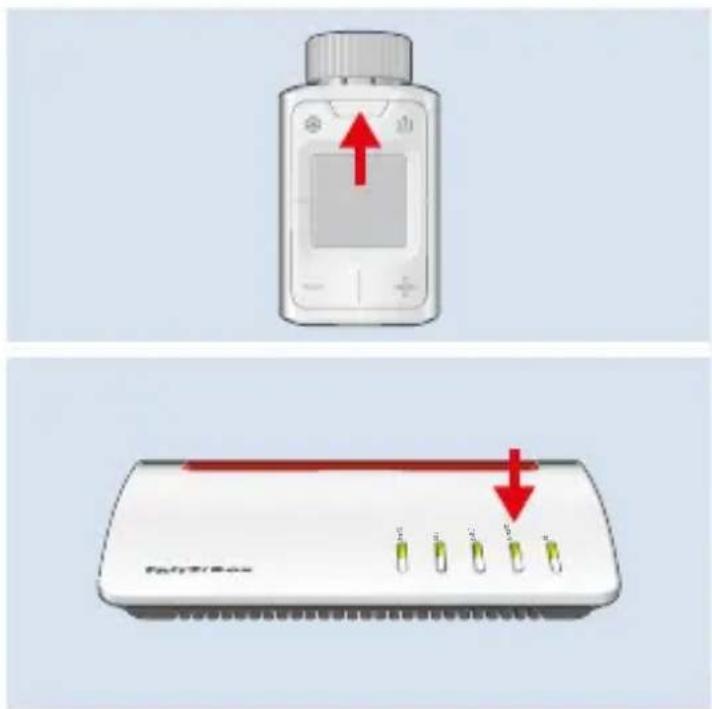
If registration was successful, the symbol is shown on the display and FRITZ!DECT 302 is ready to be installed on the radiator.
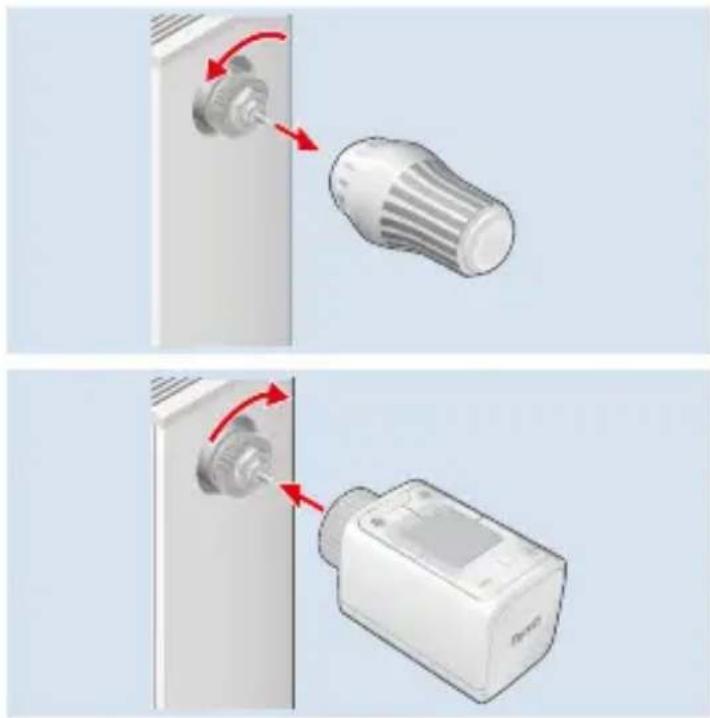
Installing
FRITZ!DECT 302 can be mounted on radiator valves with the dimensions M30 x 1.5 mm without an adapter.
- Remove the thermostat.

Water does not leak when the thermostat is removed.
- Install FRITZ!DECT 302. First screw the FRITZ!DECT 302 on by hand with the union nut.

Screwing the device on too tightly can damage the threads of the union nut and the radiator.
natural_image
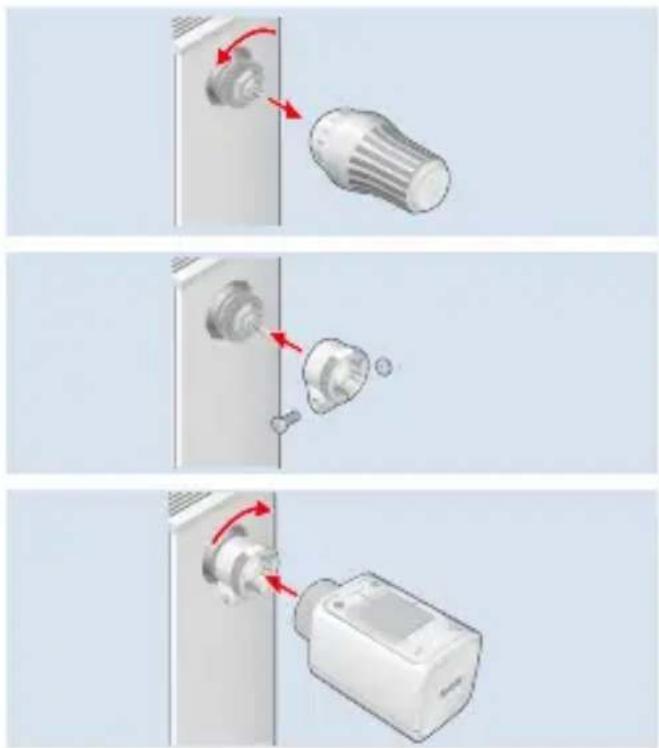
Two-step diagram showing a device being inserted into a lock, with red arrows indicating the process (no text or symbols present)Installing with an Adapter
If FRITZ!DECT 302 does not fit on your radiator valve, use an adapter. Compatible adapters are given in the online help; see page 15.
- Remove the thermostat.

Water does not leak when the thermostat is removed.
-
Install the adapter.
-
Install FRITZ!DECT 302.
natural_image
Three-step diagram showing a door lock mechanism with red arrows indicating rotation and assembly (no text or symbols)
Adjusting the Valve Lift
Once it is installed, follow the instructions in the display.
- Adjustment of the valve lift was successful if FRITZ!DECT 302 displays a temperature.
- Valve lift adjustment was unsuccessful if FRITZ!DECT 302 displays an error message. Check whether FRITZ!DECT 302 was installed correctly.
Once the valve lift is successfully adjusted, FRITZ!DECT 302 is ready for operation and can be configured; see "Configuring".
Configuring
- Open a web browser and enter http://fritz.box.
The FRITZ!Box user interface appears.
- Click on Smart Home > Devices and Groups in the menu.
- Click on √ behind your FRITZ!DECT 302.
The Smart Home profile appears. In the Smart Home Profile you can configure all settings for your FRITZ!DECT 302.
Menu
Open the menu
Press the Menu button and hold it down for 2 seconds.
Calling up the schedule
Press the Menu button.
Configure the following settings for FRITZ!DECT 302 in the menu:
- Start registration
- Start installation
- Load factory settings
- Rotate the display
Temperature Change
Changing the temperature
Press the - or + button.
Manual changes to the temperature remain intact until the next configured switching point is reached. This does not change any configured schedules.

If FRITZ!DECT 302 is in a group, the function is triggered on all devices in the group.
Boost function
With the boost function you can set your radiator on high for a specified period.
Switching on
- Press the key.
- Use the - and + buttons to specify how long the function should be active.
Switching off
Press the ↑↓ button again.

If FRITZ!DECT 302 is in a group, the function is triggered on all devices in the group.
Antifreeze function
With the antifreeze function, you can manually end heating for a specified period.
Switching on
- Press the key.
- Use the - and + buttons to specify how long the function should be active.
Switching off
Press the ✿ button again.

If FRITZ!DECT 302 is in a group, the function is triggered on all devices in the group.
Keylock
The button lock prevents settings on the FRITZ!DECT 302 from being changed.
Switching On and Off
- Press the Menu button.
- Press the ✿ button and hold it down for 2 seconds.
In the FRITZ!Box user interface you can disable access for FRITZ!Fon, App, and the FRITZ!Box user interface.
Factory Settings
Load factory settings
- Press the Menu button and hold it down for 2 seconds.
- Press the button with the >display.
- Press the button with the display.

When you load the factory settings of FRITZ!DECT 302, all of the settings and connections you configured are deleted.
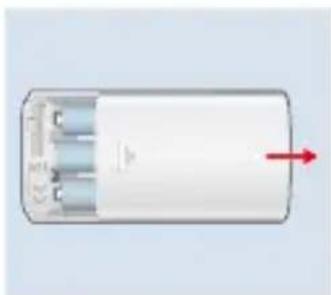
Changing Batteries
- Open the battery compartment.
natural_image
White cylindrical electronic component with three leads and a red arrow pointing to its side (no text or symbols visible)- Remove the dead batteries and insert new ones.
natural_image
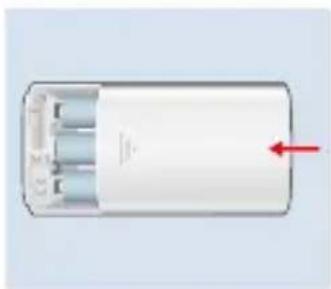
Illustration of a cylindrical battery with three red indicator lights and a gray connector (no text or symbols)- Close the battery compartment.
natural_image
White cylindrical device with internal components and a red arrow pointing to it (no text or symbols visible)Uninstalling
- Press the Menu button and hold it down for 2 seconds.
- Press the button with the 📋 display.
If Press and hold OK after mounting is shown in the display, FRITZ!DECT 302 is being prepared for uninstalling. - Remove FRITZ!DECT 302.
Technical Specifications
| Dimensions(W x H x D) | 51 x 51 x 90 mm |
| Thread M30 x 1.5 mm | |
| Weight 220 g | |
| Operating temperature | 0 °C to 50 °C(not in damp loca-tions) |
| Range up to 40 m | |
| Wi-Fi standard DECT | |
| Frequency Range 1880 | - 1900 MHz |
| Transmitter power (max.) | 250 mW |
Legal Notice
EU Declaration of Conformity
AVM declares herewith that the device is compliant with Directive 2014/53/EU. The full text of the declaration of EU conformity is available at
https://en.avm.de/service/declarations.

FRITZ!DECT 302
natural_image
Two-step diagram showing a light bulb being inserted into a door panel, with red arrows indicating the process (no text or symbols present)natural_image
Three-step diagram showing a door lock mechanism with red arrows indicating rotation and assembly (no text or symbols)
Ajuster la course de la vanne
natural_image
White cylindrical electronic component with three leads and a red arrow pointing to it (no text or symbols visible)natural_image
Illustration of a cylindrical battery with three red indicator lights and a gray connector (no text or symbols)natural_image
White cylindrical device with internal components and a red arrow pointing to it (no text or symbols visible)Démontage
natural_image
Two-step diagram showing a device being inserted into a lock, with red arrows indicating the process (no text or symbols present)natural_image
Three-step diagram showing a door lock mechanism with red arrows indicating rotation and assembly (no text or symbols)
natural_image
White cylindrical electronic component with three leads and a red arrow pointing to its side (no text or symbols visible)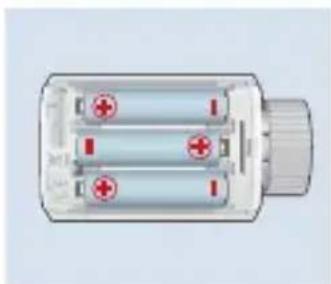
natural_image
Illustration of a cylindrical battery with three red indicator lights and a gray connector (no text or symbols)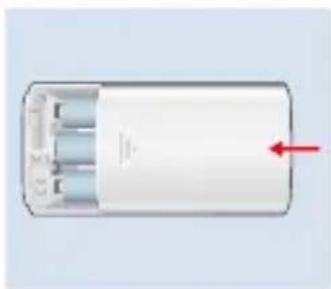
natural_image
Diagram of a cylindrical device with internal components and a red arrow indicating direction (no text or symbols)Desmontar
natural_image
Diagram showing a mechanical component with a rotating shaft and a flanged cylindrical part, both without any text or symbols.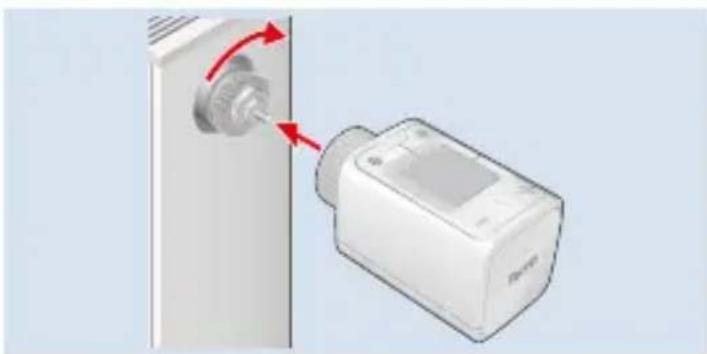
natural_image
Diagram showing a device with a knob inserted into a wall, connected to a device with red arrows indicating rotation (no text or symbols present)natural_image
Three-step diagram showing a device being inserted into a door panel, with arrows indicating the process (no text or symbols present)
natural_image
White cylindrical device with internal components and a red arrow pointing to it (no text or symbols visible)natural_image
Diagram of a cylindrical battery with three red indicator lights and a gray connector (no text or symbols)natural_image
White cylindrical device with internal components and a red arrow pointing to it (no text or symbols visible)Smontaggio
natural_image
Two-step diagram showing a device being inserted into a lock, with red arrows indicating the process (no text or symbols present)natural_image
Three-step diagram showing a light bulb being inserted into a door panel, with arrows indicating the process (no text or symbols present)natural_image
White cylindrical battery with three blue internal components and a red arrow pointing to its side (no text or symbols visible)natural_image
Illustration of a cylindrical battery with three red indicator lights and a gray connector (no text or symbols)natural_image
White cylindrical device with internal components and a red arrow pointing to it (no text or symbols visible)Demonteren
Support request en.avm.de/service/support-request
Social Media

en.avm.de
© AVM GmbH, 10547 Berlin