Luna WSM10L - Food Processor Waring Commercial - Free user manual and instructions
Find the device manual for free Luna WSM10L Waring Commercial in PDF.
| Product Type | Professional Stand Mixer |
| Brand | Waring Commercial |
| Model | Luna WSM10L |
| Bowl Capacity | 10 quarts (9.5 L) |
| Bowl Material | Stainless Steel |
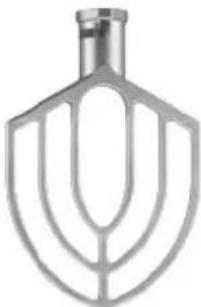
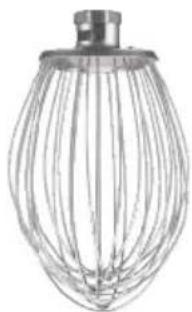
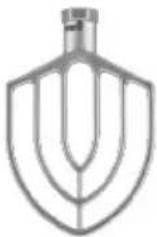
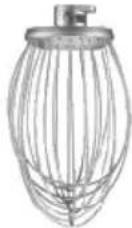
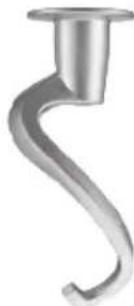
| Included Accessories | Flat beater, wire whip, dough hook |
| Number of Speeds | 3 (Low, Medium, High) |
| Overload Protection | Yes, with reset button |
| Splash Guard | Removable, with safety lock |
| Power Supply | Electric, 3-prong plug (grounded) |
| Usage | Commercial only |
| Bowl and Splash Guard Cleaning | Dishwasher safe |
| Warranty | 1 year limited (US and Canada) |
Frequently Asked Questions - Luna WSM10L Waring Commercial
User questions about Luna WSM10L Waring Commercial
0 question about this device. Answer the ones you know or ask your own.
Ask a new question about this device
Download the instructions for your Food Processor in PDF format for free! Find your manual Luna WSM10L - Waring Commercial and take your electronic device back in hand. On this page are published all the documents necessary for the use of your device. Luna WSM10L by Waring Commercial.
USER MANUAL Luna WSM10L Waring Commercial
natural_image
Two variants of a Varing Latino搬台 mixer with side fans and meshing (no visible text or symbols)WSM10L/WSM20L
For your safety and continued enjoyment of this product, always read the instruction book carefully before using.
When using an electrical appliance, especially when children are present, basic safety precautions should always be taken to reduce the risk of fire, electric shock and/or injury, including the following:
1. READ ALL INSTRUCTIONS.
- Switch off and unplug before fitting or removing tools and/or attachments, after use and before cleaning.
- Close supervision is necessary when any appliance is used by or near children or individuals with certain disabilities. Waring does not recommend the use of this appliance by children.
- Avoid contact with moving parts and fitted attachments. Keep hands, hair, clothing, as well as spatulas and other utensils away from beaters during operation to reduce the risk of injury to persons and/or damage to the mixer.
- The use of attachments not recommended or sold by Waring may cause fire, electric shock or injury.
- Do not use more than one attachment at a time.
- Do not exceed the maximum capacities listed in this use and care instruction book.
- Do not use the stand mixer if it is damaged or if the cord is damaged. Have the stand mixer checked and serviced before resuming use.
- When using an attachment, make sure that you have read the safety instructions that come with the particular attachment.
- Do not use outdoors.
- Keep stainless steel bowl away from heat sources, such as stovetops, ovens or microwaves.
- To protect against the risk of electric shock, do not put the power unit in water or other liquids.
- Remove all attachments and accessories from stand mixer before washing.
- Do not let cord hang over edge of table or counter.
- Do not put hands into the bowl during operation.
-
The mixer should be mounted on a stable and clean surface. Keep it away from overheated or very wet places, and away from equipment that has strong electromagnetism or can produce a strong electromagnetic field.
-
Keep machine clean.
- Disconnect power supply before performing maintenance.
SAVE THESE INSTRUCTIONS FOR COMMERCIAL USE ONLY
CONTENTS
Important Safeguards ....2
Grounding Instructions....4-5
Extension Cords....5
Parts & Accessories 6
Installation 7
Operating Instructions....8
Attaching Bowl to Mixer 9
Mixing Ingredients....10
Setting and Changing Speed.... 11
Cleaning Instructions....12–13
Recommended Maintenance....14
Mixer Capacity Chart 14–15
Warranty 16
Troubleshooting....17–18
NOTE: The maximum rating is based on the attachment that draws the greatest power. Other recommended attachments may draw significantly less power.
WARNING: RISK OF FIRE OR ELECTRIC SHOCK

The lightning flash with an arrowhead symbol within an equilateral triangle is intended to alert the user to the presence of uninsulated, dangerous voltage within the product's enclosure that may be of sufficient magnitude to constitute a risk of fire or electric shock to persons.

The exclamation point within an equilateral triangle is intended to alert the user to the presence of important operating and maintenance (servicing) instructions in the literature accompanying the appliance.

text_image
WARNING RISK OF FIRE OR ELECTRIC SHOCK DO NOT OPEN WARNING: TO REDUCE THE RISK OF FIRE OR ELECTRIC SHOCK, DO NOT REMOVE COVER (OR BACK) NO USER-SERVICEABLE PARTS INSIDE REPAIR SHOULD BE DONE BY AUTHORIZED SERVICE PERSONNEL ONLY
WARNING
GROUNDING INSTRUCTIONS
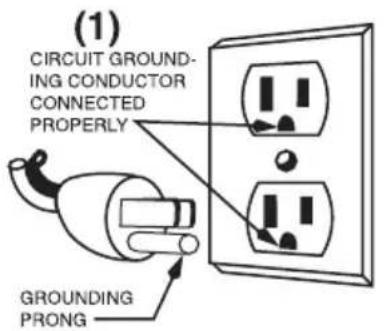
This appliance must be grounded while in use to protect the operator from electric shock. The appliance is equipped with a 3-conductor cord and a 3-prong, grounding-type plug to fit the proper grounding-type receptacle. The appliance has a plug that looks like the plug in drawing (1). An adapter, as in drawing (2), should be used for connecting the appliance plug to two-prong receptacles. The grounding lug, which extends from the adapter, must be connected to a permanent ground, such as a properly grounded outlet box as shown in drawing (3), using a metal screw. If the unit needs to be hardwired, have a licensed electrician connect the unit to a power supply.
GROUNDING METHOD
text_image
(1) CIRCUIT GROUND- ING CONDUCTOR CONNECTED PROPERLY GROUNDING PRONG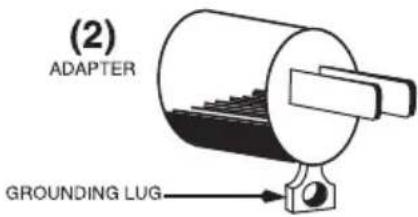
text_image
(2) ADAPTER GROUNDING LUG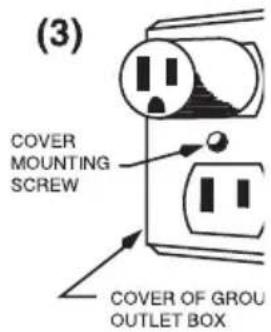
text_image
(3) COVER MOUNTING SCREW COVER OF GROU OUTLET BOXSPECIAL CORD SET INSTRUCTIONS
A short power-supply cord is provided to reduce the risks resulting from becoming entangled in or tripping over a longer cord.
Longer extension cords are available and may be used if care is exercised in their use.
If a long extension cord is used, the marked electrical rating of the extension cord must be at least as great as the electrical rating of the appliance, and the longer cord should be arranged so that it will not drape over the countertop or tabletop where it can be pulled on by children or tripped over.
EXTENSION CORDS
Use only 3-wire extension cords that have 3-prong, grounding-type plugs and 3-pole cord connectors that accept the plug from the appliance. Use only extension cords that are intended for indoor use. Use only extension cords having an electrical rating not less than the rating of the appliance. Do not use damaged extension cords. Examine extension cord before using and replace if damaged. Do not abuse extension cord and do not yank on any cord to disconnect. Keep cord away from heat and sharp edges.
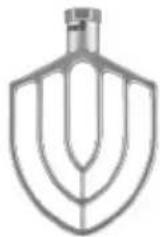
PARTS & ACCESSORIES

text_image
WARING COMMERCIAL Luna 1 2 3 4 10 START STOP 6 7 5 8 9 11 12 13-
START Button
-
STOP Button
-
Attachment Hub
-
AttachmentHub Screws
-
Bowl-Lift Lever
-
Bowl Guard Handle
-
Planetary Shaft
-
Bowl Handle
-
Bowl Clamp
-
Speed Control
-
Bowl Guard
-
Bowl
-
Rubber Feet
-
Bowl Cradle
15.PowerCord
(NOT SHOWN)
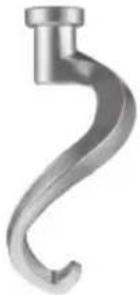
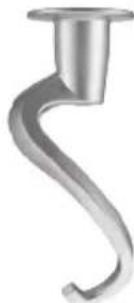
WSM10LDH
natural_image
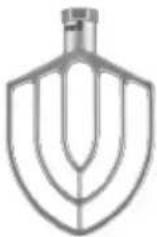
Metal hook-shaped object with a cylindrical port (no text or symbols visible)WSM10LMP
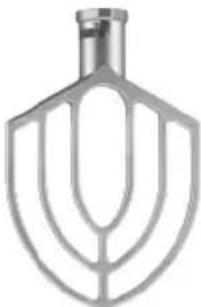
WSM10LW
WSM20LDH

natural_image
Close-up of a metallic hook-shaped tool or screw (no text or symbols visible)WSM20LMP
natural_image
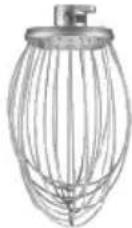
Metallic kitchen mixer blade with curved blades (no text or symbols)WSM20LW
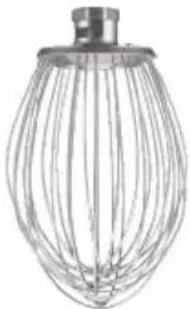
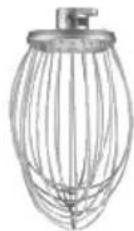
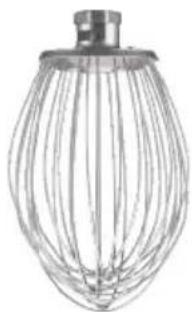
natural_image
Line drawing of a wire mesh kitchen mixer (no text or symbols)INSTALLATION
UNPACKING
Unpack the mixer immediately after receipt. If the machine is found to be damaged, save the packaging material and immediately contact your source of the equipment.

WARNING
TO AVOID SERIOUS PERSONAL INJURY:
- ALWAYS install equipment in work area with adequate light and space.
- ONLY operate mixer on a solid, LEVEL, nonskid surface that is nonflammable.
- NEVER bypass, alter, or modify this equipment in any way from its original condition. Doing so can create hazards and will void the warranty.
- NEVER operate mixer without all warnings attached.
• DO NOT attempt to lift mixer alone.
INSTALLATION
- Read this manual thoroughly before installation and operation. DO NOT proceed with installation and operation if you have questions or do not understand everything in this manual. Contact your local representative first.
- Remove the corrugated box from the skid by removing the bands on the box. NOTE: The WSM10L and WSM20L are shipped in a wooden crate; only the bolts at the bottom of the crate on all four sides need to be removed.
- Carefully unbolt the mixer from the skid using an 11/16" or 3/4" wrench.
- Select a location for the mixer, keeping these points in mind:
• Floor or counter must be level.
- Easy access for maintenance and service.
- Clearance for operating controls, installing and removing agitators, bowl or attachments.
- Sufficient space for adding ingredients during mixing periods.
- Make sure rear ventilation outlet of mixer is not blocked.
- Use at least two other people to tilt the unit and install rubber feet.
- Inspect mixer to make sure all parts have been provided (i.e., bowl, paddle, whisk, and dough hook).
- Read the electrical information found on the data plate located at the rear of the machine. The incoming power must match the rating on the data plate.

WARNING
OPERATING INSTRUCTIONS
TO AVOID SERIOUS PERSONAL INJURY:
- Before use clean the mixer. Refer to Cleaning Instructions section of this manual.
- NOTE: It is normal for the factory to apply a generous amount of grease in and on the machine. Excess grease (brown in color) will be on all metal surfaces (e.g., top portion of bowl guard, speed control, bowl clamps, bowl-lift lever, and attachment hub thumbscrew). Excess high-pressured grease (brownish-black) can also be found on the planetary shaft, and some drippings can be found in the bowl.
- DO NOT operate mixer before reading the instruction manual first.
- ALWAYS disconnect or unplug electric power before cleaning, servicing, or adjusting parts or attachments.
- ALWAYS keep hands, hair and clothing away from moving parts.
- Turn off mixer before changing speeds.
- Follow the Capacity Chart for mixing dough. Refer to Capacity Chart section.
- Use only first (1) speed for mixing dough. 2nd speed must never be used on 50% AR or lower.
- If the unit shuts off during mixing (overload protection trips), reduce the batch size.
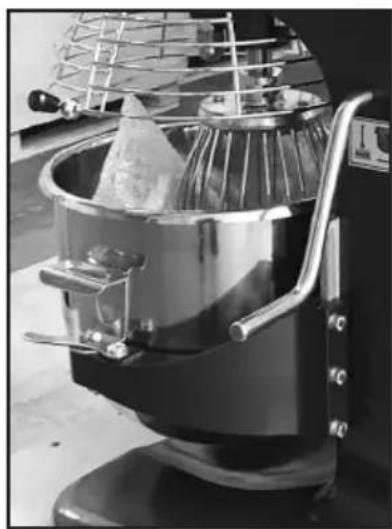
ABOUT THE REMOVABLE BOWL GUARD (Models WSM10L and WSM20L)
The interlocking bowl guard is easy to remove and reattach for easy cleaning in a sink or dishwasher.
NOTE: When bowl guard is open or not properly installed, mixer will not operate.
NOTE: Rotate bowl guard clockwise (open) and counterclockwise (closed) to attach agitators to mixer.
Opening/Rotating Bowl Guard:
Rotating bowl guard clockwise (open) and counterclockwise (closed), allows the operator to easily add ingredients to, and to properly remove the agitator and bowl from mixer.
Removing and Attaching the Bowl Guard:
NOTE: Before removing or attaching the bowl guard, make sure the bowl is in the down/ lowered position and the agitator tool is off the shaft.
- Lower cradle by pulling lift lever forward and down to its resting position.
- Lift bowl by bowl handles and:
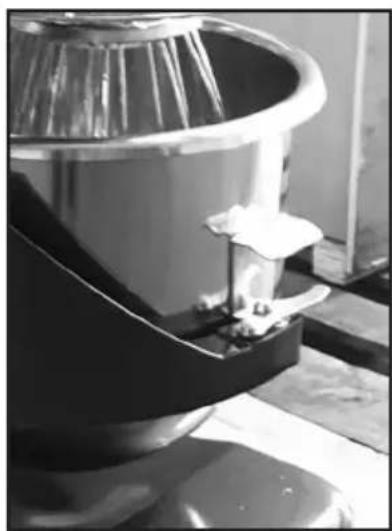
a) Slowly position locking pin (located on the rear of bowl) into the hole in middle rear of cradle (Fig. 1).
b) Lower bowl onto pins located on either side of bowl cradle.
- Once bowl is positioned on cradle, secure bowl by pulling each bowl clamp forward until bowl is locked tight (Fig. 2).
natural_image
Close-up of a kitchen mixer with mesh fan and cloth (no visible text or symbols)FIG. 1

natural_image
Close-up of a metallic mechanical component with a curved top and base, possibly a valve or pump (no visible text or symbols)FIG. 2
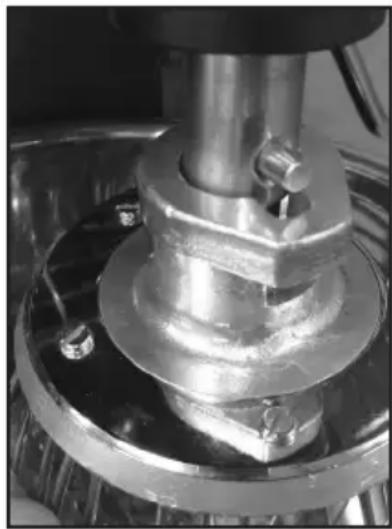
ATTACH AGITATOR TO MIXER
(i.e., Beater, Mixing Paddle, Dough Hook, Whisk)
Install bowl BEFORE attaching agitator.
NOTE: It is easier to install the agitator before adding the ingredients into the bowl.
- Rotate bowl guard to the left, so it rests in the open position.
Using excessive force to open and close bowl guard can damage the spring lock and bowl guard microswitch, and WILL VOID the warranty.
- Slide the agitator slowly upward onto the planetary shaft, fitting the shaft pin through the slot in the agitator (Fig 3).
- Rotate agitator clockwise to secure it onto the planetary shaft.

CAUTION
natural_image
Close-up of a mechanical assembly with metallic components and mounting holes (no visible text or symbols)FIG. 3
MIXING INGREDIENTS
Overloading or not following the capacity chart will damage the mixer and void the warranty. Refer to Capacity Chart section.
Before starting the mixer: Always change to the desired speed BEFORE starting the mixer. Failure to do so can damage the gears or other parts and WILL VOID the warranty.
Agitators must always rotate in a counterclockwise direction around the bowl. If the agitator moves clockwise, contact a licensed electrician immediately to remedy incorrect wiring.
IMPORTANT: It is recommend to always start with Speed 1 when starting the mixer. Failure to do so can damage the gears or other parts.
- Add the appropriate mixing ingredients to the bowl.
- Rotate bowl-lift lever up, until the bowl locks into position.
- Rotate bowl guard to the right, until it locks into the closed position. You will hear it click into place.
NOTE: Mixer will not start if bowl guard is open or bowl is in the lowered position.

CAUTION
SETTING AND CHANGING SPEED
Three fixed speeds are available for use: first (1), second (2) and third (3).
IMPORTANT: When mixing product, it is recommended to follow the Capacity Chart on page 15.
Select the appropriate speed setting by lifting or lowering the speed control lever.
IMPORTANT: When mixing product, always follow the recommended agitator and speed setting according to the Capacity Chart. Refer to Capacity Chart section.
Press the green START button to begin mixing.

CAUTION
Always STOP mixer BEFORE changing speeds. Failure to do so can damage the gears or other parts and WILL VOID the warranty!
To change the speed while mixing:
a. Press the red STOP button, then wait for the agitator to come to a complete stop.
b. Change the speed by raising or lowering the speed control lever.
c. Press the green START button to restart the mixer.
NOTE: Mixer is equipped with motor overload protection. If mixer shuts off during operation: Press the STOP button, unplug unit from wall, wait two minutes and plug unit back into the wall. Press the overload reset button located on the back of mixer.
NOTE: Reduce batch size by 10% if using chilled flour, water below 70^ F, ice, or high-gluten flour.
When the ingredients have been thoroughly mixed, press the red STOP button to stop the mixer.
Lower bowl by pulling bowl-lift lever forward and down to its resting position.
Rotate bowl guard to the left, so it is in the open position.
Remove the agitator from the planetary shaft by lifting it upward, then rotating it counterclockwise until it is unlocked. Lower the agitator and remove from the planetary shaft.
Push each bowl clamp backward to unlock the bowl from the bowl cradle.
Lift up slightly on bowl, so it clears pins on the bowl cradle.

CAUTION
Most batches are heavy. Always use two people to remove and transport the loaded bowl after mixing is complete.
CLEANING INSTRUCTIONS
- Dilute detergent per supplier's instructions.
• DO NOT hose down or pressure-wash mixer. - NEVER use a scrubber pad, steel wool, or abrasive material to clean mixer.
- NEVER use bleach (sodium hypochlorite) or bleach-based cleaner.
- ALWAYS remove the agitator after each batch, as the agitator can become stuck on the shaft and will be difficult to remove.
CAUTION

The entire mixer, including removable parts, must be thoroughly cleaned and sanitized using the procedures identified by your local health department and the ServSafe Essentials, published by the National Restaurant Association Educational Foundation (NRAEF). Visit www.servsafe.com for more details.

ALWAYS DISCONNECT OR UNPLUG ELECTRICAL POWER FROM THE MIXER BEFORE CLEANING.
CLEANING INSTRUCTIONS
| PART REQUIRED ACTION FREQUENCY | ||
| Agitators Hand-wash | using mild soap and water; rinse, dry and sanitize. | Clean after each use. |
| Removable Bowl Guard | Hand-wash using mild soap and water; rinse, dry and sanitize or place in dishwasher. | Clean after each use. |
| Bowl Using a sponge | or cloth, mild soap and water, apply pressure to make sure the bowl is clean; rinse, dry, and sanitize. The bowl can also be placed in a dishwasher. | Clean after each use. |
| Rear Splash Guard H | hand-wash using mild soap and water; rinse, dry and sanitize. | Clean after each use. |
| Bowl Cradle Hand-wash | with clean damp cloth; dry and sanitize. Apply a light quantity of Waring oil (mineral oil) to the planetary shaft after cleaning. | Daily |
| Planetary Shaft Wipe | Clean after each use. | |
| Exterior Hand-wash | using mild soap and water; rinse, dry, and sanitize. DO NOT use a water hose. | Daily |
IMPORTANT POINTS
Waring mixer will provide years of uninterrupted service if you do the following:
RECOMMENDED MAINTENANCE
| PART REQUIRED ACTION FREQUENCY | ||
| Bowl Slide Apply Waring | oil (mineral oil) on bowl slide. Raise and lower bowl to distribute the oil onto the rods. | If bowl becomes difficult to raise or lower. |
NOTE: Any other servicing should be performed by an authorized service representative.
MIXER CAPACITY CHART
The following maximum capacities are intended as a guideline only. Varying factors, such as the type of flour used, temperature of water used and other conditions may require the batch to be reduced.
When mixing dough (pizza, bread or bagels) check your "AR"-absorption ratio - water weight divided by flour weight.
Below capacities based on 12% flour moisture at 70^ F water temperature.
If high-gluten flour is used, reduce dough batch size by 10%.
2nd speed should never be used on mixtures with less than 50% AR.
Do not use attachments on hub while mixing.
When calculating the correct size mixer for your application, some helpful weights and measures to follow: 8.3 lb. = 1 gallon water & 2.0 lb. = 1 quart.
CAPACITY CHART & SUGGESTED SPEED CONTROL
| PRODUCT DESCRIPTION A | TACHMENT AGITATOR SPEED 10-QUART 20-QUART | ||||
| Final bread and roll dough weight | 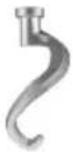 | Dough hook | 1st Speed only | 10 lb. 25 | lb. |
| Final pizza dough weight | 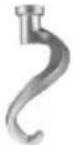 | Dough hook | 1st Speed only | 9 lb. 25 | lb. |
Pie crust Flat beater 1 9 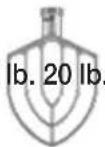 . . | |||||
Mashed potatoes* Flat beate 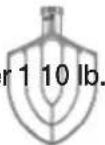 17 lb. 17 lb. | |||||
Cake batter Flat beater 1 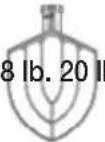 b. b. | |||||
| Waffle or hotcake batter |  | Flat beater 1 8 lb. 20 lb. | |||
| Pound cake batter |  | Flat beater | All speeds | 8 lb. | 20 lb. |
| Egg whites | 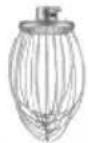 | Wire whisk | 3 | 2 doz. | 3 doz. |
| Meringue |  | Wire whisk | All speeds | 2 doz. | 3 doz. |
| Whipped cream | 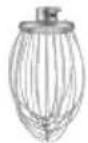 | Wire whisk | 2 | 3 qt. | 6 qt. |
* With butter and cream
NOTE: The mixer capacity depends on the moisture content of the dough.
When mixing doughs (pizza, bread, or bagel) check your AR%(% Absorption Ratio) = Water weight divided by flour weight.
The capacities listed on page 15 are based on flour at room temperature and 70^ F water temperature. (1 gallon of water weighs 8.33 lb.)
LIMITED ONE YEAR WARRANTY (U.S. & Canada Only)
Waring warrants every new Waring® Commercial Stand Mixer to be free from defects in materials and workmanship for a period of one year from the date of purchase when used with foodstuffs, nonabrasive liquids (other than detergents) and nonabrasive semi-liquids, providing it has not been subject to loads in excess of the indicated rating. Under this warranty, Waring will repair or replace any part which, upon our examination, is defective in materials or workmanship, provided the product is delivered prepaid to the Waring Service Center at 314 Ella T. Grasso Ave., Torrington, CT 06790, or any Factory Approved Service Center. This warranty does not: a) apply to any product that has become worn, defective, damaged or broken due to use or due to repairs or servicing by other than the Waring Service Center or a Factory Approved Service Center, or due to abuse, misuse, overloading or tampering; or b) cover incidental or consequential damages of any kind.
Warning: This warranty is void if appliance is used on Direct Current (DC).
WARING COMMERCIAL
314 Ella T. Grasso Ave.
Torrington, CT 06790
TROUBLESHOOTING
| PROBLEM POS | SIBLE CAUSES ACTION REQUIRED | |
| Mixer will not operate | Bowl guard not in closed position. | Rotate guard to the right until fully closed. |
| Bowl not raised. Raise bowl to highest position. | ||
| Power not connected properly. Check all power connections. Plug into a live socket. (Do not use extension cord!) Test socket with another item. | ||
| Building circuit breaker is off. Check breaker box. | ||
| Internal overload tripped. Press STOP button, then press reset button located on the back of mixer. Wait two minutes. Then press START to restart mixer. (If overload continues to trip, reduce batch size and/or adjust recipe!) | ||
| Gear not engaged. Switch gear fully into position. (Mixer will not operate if the speed control lever is positioned in between speeds.) | ||
| Mixer stops during mixing cycle | Internal overload tripped. Press STOP button, then press reset button located on the back of the mixer. Wait two minutes. Then press START to restart the mixer. (If overload continues to trip, reduce batch size and/or adjust recipe!) | |
| Mixer is noisy M | Mixer is not installed on level surface. | Adjust surface or relocate mixer. Make sure rubber feet are installed. |
| Bowl not seated correctly or clamps not in place. | Make sure bowl is seated into bowl cradle correctly, and bowl clamps are locked into place. | |
| Agitator not fitted properly. Remove and attach agitator into position properly. | ||
| Overloading bowl. Reduce batch size. Refer to Capacity Chart section. | ||
| Safety guard seized (will not move freely) | Clean & lubricate slide sheath. | |
| Agitators won't go onto the planetary shaft easily | Lack of lubrication and/or cleaning of the planetary shaft. | Wipe planetary shaft with a clean, damp cloth and lubricate the shaft with mineral oil or food-quality grease. |
| Bowl lift sticking or not operational | Lack of lubrication on bowl slides. Lubricate bowl slides with mineral oil or food-quality grease. If still sticking, technician must clean bowl-lift mechanism | |
| One or more gears not working | Damaged or broken gear. Technician to replace gear. Always stop mixer before shifting gears! | |
| Mixer will not mix medium or heavy loads | Incorrect or low voltage. Contact electrician. | |
| Residue leaking from hub | Contaminated hub due to buildup of meat and/or vegetable juices (especially tomatoes). | Technician to remove hub and clean interior. To avoid problem, wipe hub and dry after each use. *Note: Acid from tomato juices will corrode/contaminate interior parts! |
| Agitators touching bottom or sides of bowl | Defective or dented bowl. Remove dents or replace bowl. | |
| Defective agitator. Replace agitator. | ||
| Broken whip wires | Batch size too large for mixer. Adjust recipe. | Reduce batch size.Refer to Capacity Chart section. Mixture too firm, speed too high. Reduce speed. |
| Hand utensil dropped into bowl while mixing. | Stop mixer. | |
| Broken flat beater | Ingredients too cold or too large (e.g., frozen butter, cream cheese cut in chunks). | Wait for ingredients to reach room temperature before mixing.Reduce chunk size. |
| Broken dough hook | Batch size too large for mixer. Reduce batch size. Refer to Capacity Chart section. Adjust recipe. | |
| Ingredients too cold or too large. Wait for ingredients to reach room temperature before mixing. Reduce chunk size. | ||
| Discoloration of mixed product | Bowl has not been thoroughly cleaned. | Clean bowl again.Refer to Cleaning Instructions section. |
natural_image
Metal hook-shaped object with a metallic tip, no visible text or symbolsWSM10LMP
WSM10LW
WSM20LDH
natural_image
Close-up of a metallic curved mechanical component (no text or symbols visible)WSM20LMP

natural_image
Metallic kitchen mixer blade with curved blades (no text or symbols)WSM20LW
natural_image
Line drawing of a wire mesh kitchen mixer (no text or symbols)INSTALACIÓN
DESEMBALAJE
natural_image
Close-up of a metal mixing bowl with a mesh rack and a conical lid, mounted on a stand (no visible text or symbols)FIG. 1
natural_image
Close-up of a mechanical component with a metallic top and clamped parts, no visible text or symbols.FIG. 2
natural_image
Close-up of a mechanical assembly with metallic components and a central shaft (no visible text or symbols)FIG. 3

PRECAUCIÓN
MEZCLA
natural_image
Metal hook-shaped object with a metallic shaft and loop (no text or symbols visible)WSM10LMP
WSM10LW
WSM20LDH
natural_image
Close-up of a metallic curved mechanical component (no text or symbols visible)WSM20LMP
natural_image
Metallic kitchen mixer blade with curved blades (no text or symbols)WSM20LW
natural_image
Line drawing of a wire mesh kitchen mixer (no text or symbols)INSTALLATION
DÉBALLAGE
natural_image
Close-up of a kitchen mixer with a mesh fan and bag, no visible text or symbolsFIG. 1
natural_image
Close-up of a mechanical component with a metallic top and clamped parts, no visible text or symbols.FIG. 2
natural_image
Close-up of a mechanical assembly with metallic components and a central shaft (no visible text or symbols)FIG. 3
Trademarks or service marks of third parties used herein are the trademarks or service marks of their respective owners.
©2019 Waring Commercial
314 Ella T. Grasso Ave.
Torrington, CT 06790
www.waringcommercialproducts.com
Printed in China
Impreso en China
Imprimé en Chine
WSM10L/WSM20L IB
19WC060025
IB-16212