USER MANUAL GO 3 INSTA360
Instructions for Use
Instructions for Use .... 1
使用说明 9
Maximum Depth 60m (197ft)
Weight 100g (±3g)
What's Included
Dive Case x1, Thumb Screw Wrench x1, Protective Pouch x1, 1/4" Mount Adapter x1, 1/4" Thumb Screw x1, Anti-Fog Inserts x1 (6-Pack), Anti-slip Ring x4, Wrist Strapx1
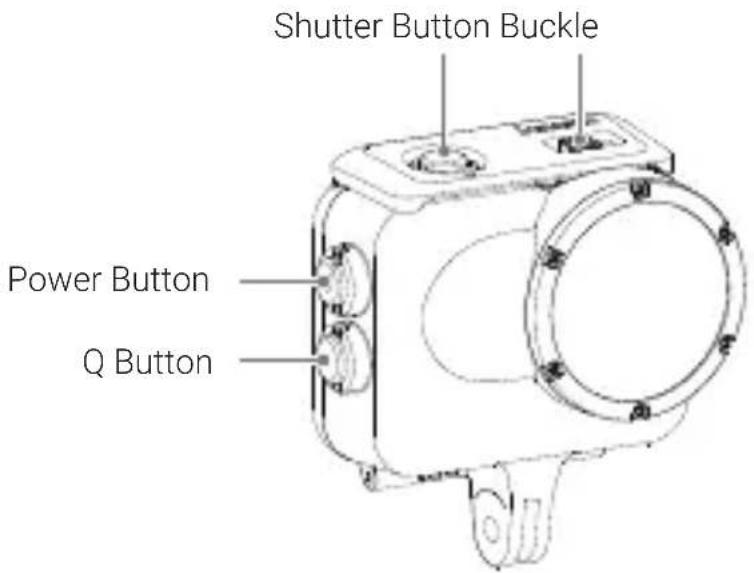
Names of Parts
Before Using
① Please read this document carefully and prepare the case properly before use.
Failure to observe these instructions may cause damage to the camera, battery or other parts, for which Insta360 won't assume responsibility. Please use this product responsibly to prevent accidental damage.
② Improper maintenance may affect product performance. Each time before use, it's suggested to securely close the Dive Case (no camera inserted) and immerse it in water to check for leaks as described below:
· Latch the Dive Case and then slowly immerse it in water, stopping if air is expelled from inside the Dive Case.
- Immerse the Dive Case and operate the buttons under water for 2–3 minutes checking for any air bubbles.
· Take the Dive Case out of the water and dry it thoroughly with a soft, dry cloth, then open and check for any water inside.
③ When sealing the Dive Case, be sure that the parts of the Dive Case in contact with its rubber seal are free of any foreign objects and the rubber seal has not moved off the rim of the Dive Case.
④ Never open or close the Dive Case in a location with a lot of sand, dirt, dust or other small particles. Otherwise, the performance of the Dive Case will be reduced and the camera may be damaged.
⑤ The Dive Case is not shock-resistant. Applying strong vibrations, shocks or pressure to the product may result in damage, failure or reduced waterproofing performance.
⑥ While using GO 3 in the Dive Case, the maximum height from which you can dive into the water is 2 meters (6.56ft). The Dive Case is protected against drops onto solid ground from a maximum height of 1 meter (3.28ft).
⑦ Glue may be visible inside the outer edge of the Dive Case lens. This is normal and will not affect waterproofing performance.
How to Use
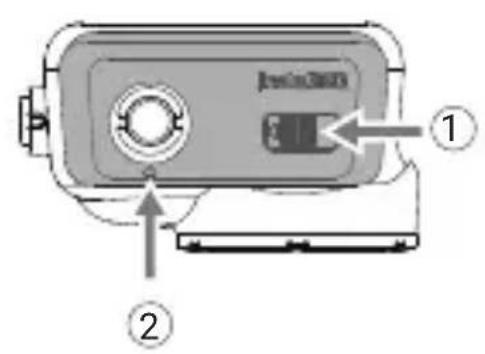
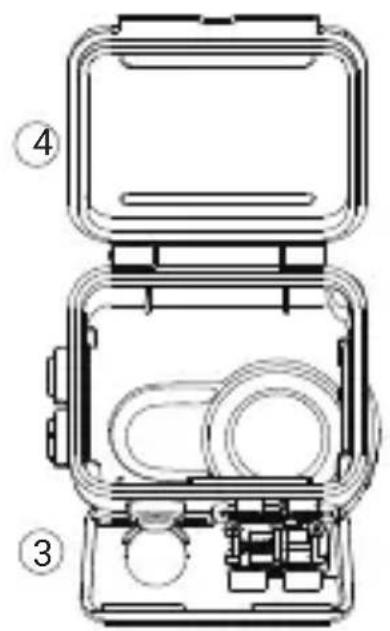
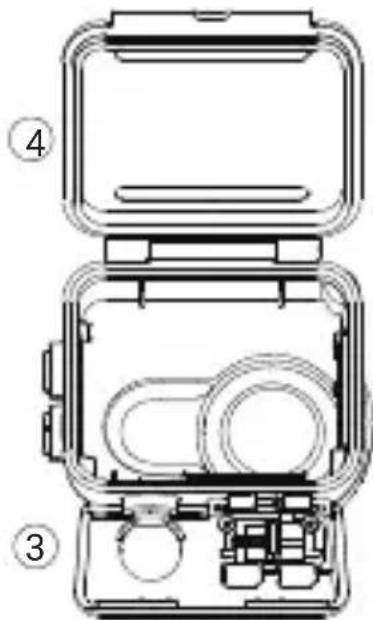
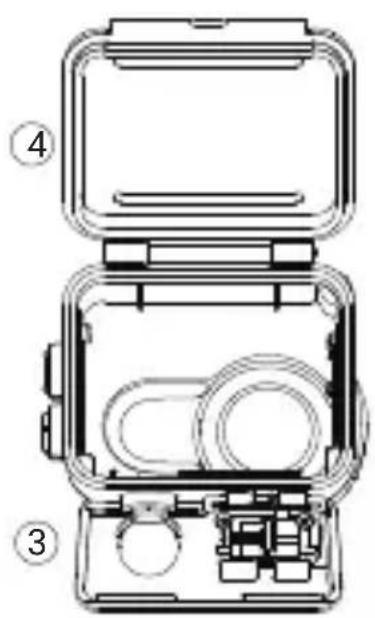
1 Open the Case
Hold the Dive Case with the buckle (①) arrow pointing to your left, as shown. Push the lock lever to the left and push the buckle up at arrow (②). Unhook buckle point (③) from the case's hook. When the buckle is unhooked, open the Dive Case (④).
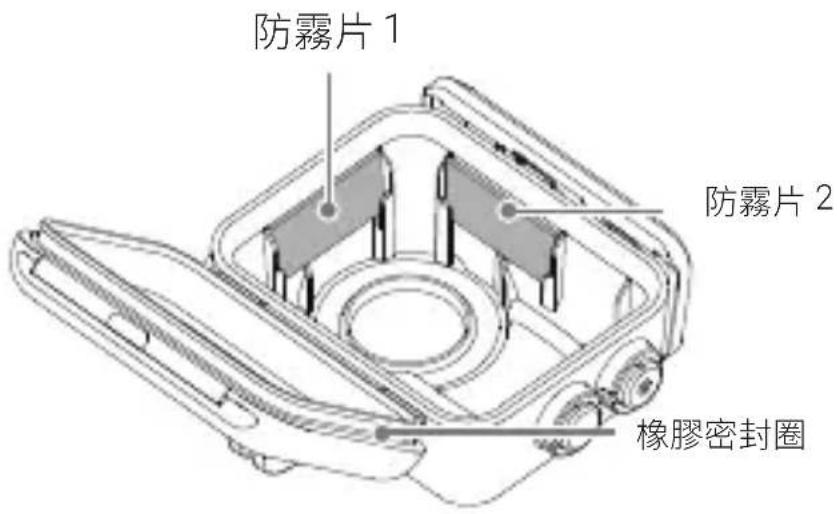
2 Attach the Anti-Fog Inserts
Attach the anti-fog inserts, ensuring they are inserted as shown below.

Note:
When using third-party anti-fog inserts, ensure that the size is within 28 × 15 × 1.2 mm. If the inserts are too large, they may cause water leakage and potentially damage the camera.
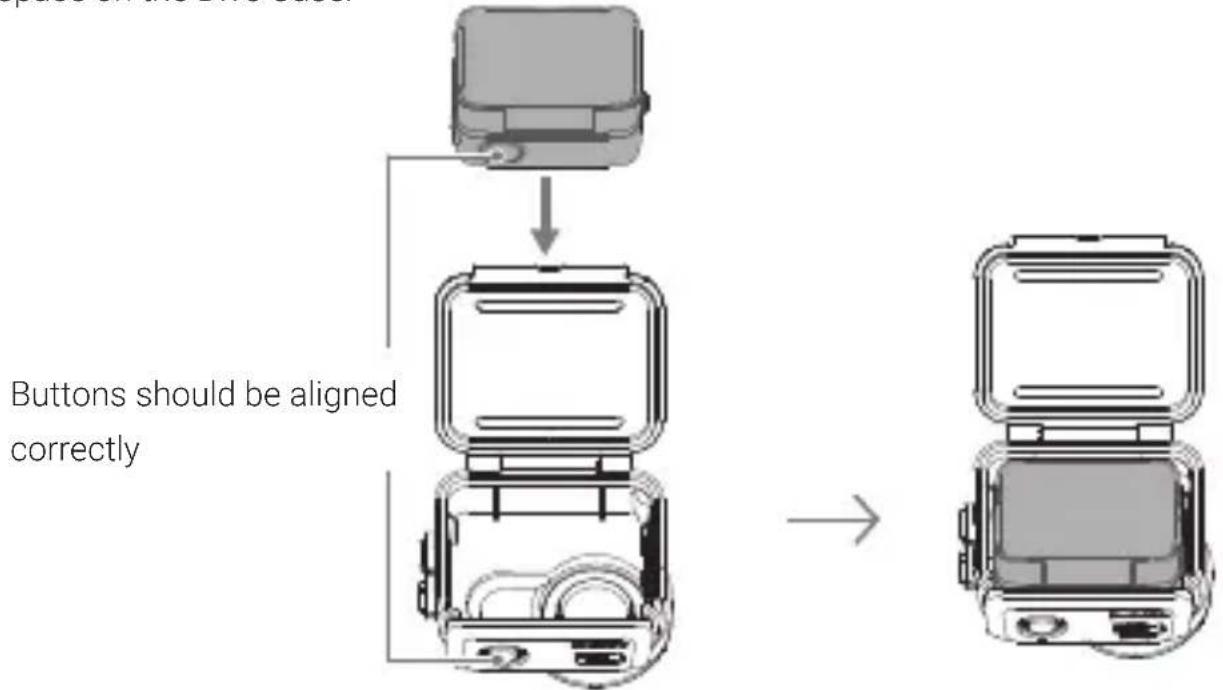
3 Insert the Action Pod and Camera
Be sure to insert in the correct direction so the camera lens is aligned with the lens space on the Dive Case.
Note:
- When using the camera in water, please lock the touchscreen ( ) to avoid accidental presses.
- When inserting the camera, take care not to scratch the lens.
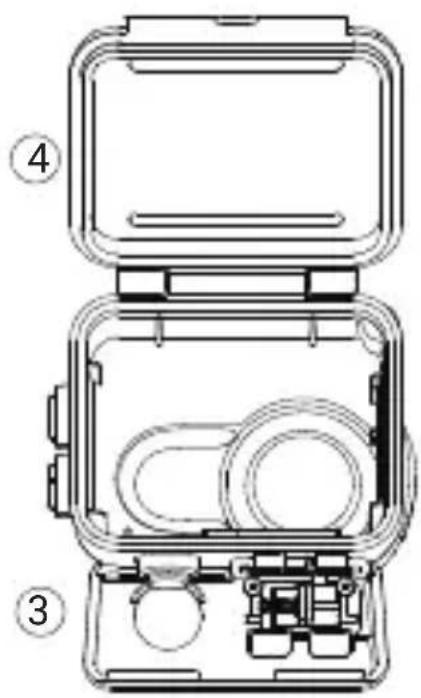
4 Close the Case
To close the Dive Case, latch the buckle onto the case's hook and firmly push down until it clicks.
natural_image
Illustration of a portable electronic device with control panel and buttons, no visible text or symbols
Note:
- Ensure the Dive Case is firmly closed. Be sure that the parts of the Dive Case in contact with its rubber seal are free of dirt or dust.
- For the best results, keep the Dive Case lens clean.
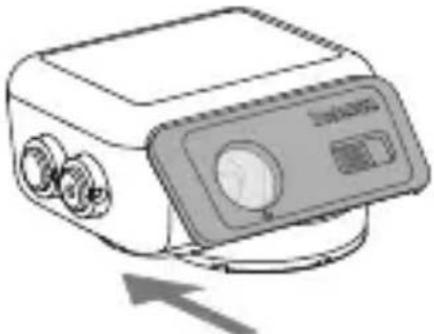
5 Attach the Anti-slip Ring
When connecting the Dive Case to other accessories, such as the Floating Hand Grip, stick an Anti-slip Ring to the screw points.
natural_image
Technical line drawing of a mechanical device with circular components and a magnified inset showing a separate view (no text or symbols)
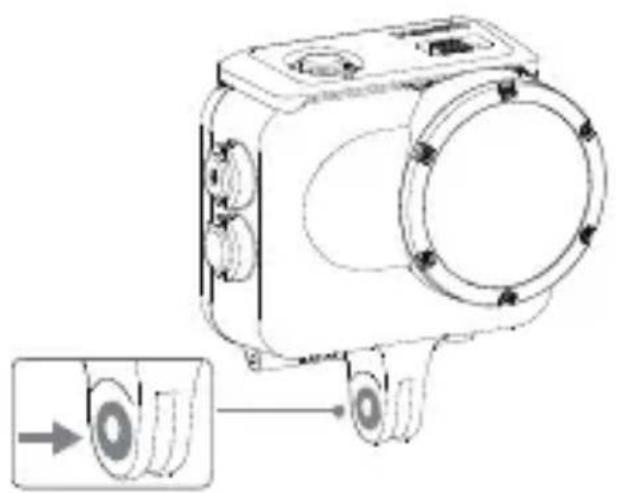
6 Connect with Floating Hand Grip or 1/4" Mount Adapter
Connect the Dive Case to the Floating Hand Grip or 1/4" Mount Adapter and fasten with a 1/4" Thumb Screw.
Maintenance
① Do not open the Dive Case while it is wet.
② After using the product in seawater, remove the camera and soak the Dive Case in freshwater for at least 60 minutes. If the Dive Case is not soaked after use in seawater, residual salt may cause water leakage. After soaking the Dive Case in freshwater, rinse it gently under the tap. Never apply a high-pressure water flow from a single direction, as it may cause leakage.
③ Ensure that the Dive Case is firmly closed before washing. After washing the Dive Case, wipe away any water droplets remaining on the surface with a soft, dry cloth. Do not dry it with a hair dryer, clothes dryer or stove.
④ Ensure there is no sand on the Dive Case before drying. Sand may scratch the product surface when wiped with a cloth.
⑤ Do not store the Dive Case in a hot and humid environment. In particular, do not leave it inside a hot car.
⑥ Do not wash the Dive Case with soap, neutral detergent or alcohol cleaning products. This may degrade the waterproofing performance.
⑦ Do not clean the Dive Case with organic solvents (such as diluents, alcohol or gasoline).
⑧ Store the product in a dry, well-ventilated location.
Disclaimer
Please read this Disclaimer carefully. Using this product means that you acknowledge and accept the terms of this disclaimer. By using this product, you hereby acknowledge and agree that you are solely responsible for your own conduct when using this product and any consequences thereof. You agree to use this product only for proper and lawful purposes. You understand and agree that Arashi Vision Inc. (hereinafter referred to as 'Insta360') accepts no liability for any and all misuse, consequences, damages, injuries, penalties, or any other legal responsibility directly or indirectly incurred by your using this product and associated accessories. Before every use, make sure that your accessories are functioning properly. If there's any damage or irregularity, stop using them immediately. Within the scope of state laws and regulations, Insta360 reserves the right of final explanation and revision for the commitment.
After-Sales Service
The warranty period of the attached product is 1 year from the original retail purchase. Warranty service may vary according to the applicable laws of your state or jurisdiction. For detailed warranty policies, please visit http://insta360.com/support
简体中文
产品规格
最大防水深度 60 米
重量 100g (±3g)
包含物品
2 放置防雾片
natural_image
Line drawing of a portable electronic device with control panel and buttons, no text or symbols present
注意:
natural_image
Technical line drawing of a mechanical device with circular components and a close-up inset showing a component detail (no text or symbols)
6 安装浮力手柄或 1/4" 转接头
natural_image
Illustration of a portable electronic device with buttons and a control panel (no text or symbols)
Hinweis:
natural_image
Technical line drawing of a mechanical device with circular components and a directional arrow indicating motion (no text or symbols)
②
natural_image
Line drawing of a portable electronic device with control panel and directional arrow (no text or symbols)
Nota:
natural_image
Technical line drawing of a mechanical device with circular components and a close-up inset showing a component detail (no text or symbols)
http://insta360.com/support
Français
Caractéristiques
natural_image
Technical line drawing of a mechanical device with open and closed compartments, no visible text or symbols
natural_image
Line drawing of a portable electronic device with control panel and buttons (no text or symbols)
Note :
natural_image
Technical line drawing of a mechanical device with circular components and a close-up inset showing a circular component (no text or symbols)
natural_image
Illustration of a portable electronic device with control panel and indicator lights (no text or symbols)
Nota:
natural_image
Technical line drawing of a mechanical device with circular components and a magnified inset showing a circular component (no text or symbols)
natural_image
Technical line drawing of a mechanical device with internal components (no text or symbols)
2 防曇シートの装着
防曇シートを下図のように装着します。

natural_image
Illustration of a portable electronic device with control panel and indicator lights (no text or symbols)
注意:
natural_image
Technical line drawing of a mechanical device with circular components and a close-up inset showing a button (no text or symbols)
natural_image
Line drawing of a portable electronic device with control panel and indicator lights (no text or symbols)
주의사항:
natural_image
Technical line drawing of a mechanical device with circular components and a close-up inset showing a circular component (no text or symbols)
2 插入防霧片
插入防霧片,確保他們如下並安裝。
natural_image
Illustration of a portable electronic device with control panel and indicator lights (no text or symbols)
注意:
natural_image
Technical line drawing of a mechanical device with circular components and a close-up inset showing a component detail (no text or symbols)
6 與手持浮力棒或 1/4" 接口連接
ADD: Foresea Life Center, Tower 2, 11F, 1100 Xingye Road, Haiwang Community, Xin'an Street, Bao'an District, Shenzhen, China
WEB: www.insta360.com
TEL: 400-833-4360 +1 800 6920 360
EMAIL: service@insta360.com
Insta360 GmbH


CARTA