LV-HD340 - Projector LA VAGUE - Free user manual and instructions
Find the device manual for free LV-HD340 LA VAGUE in PDF.
| Product type | LED Projector |
| Native resolution | 1280 x 720 (compatible 1920 x 1080) |
| Light source | LED |
| Brightness | 2500 lumens |
| Aspect ratio | 16:9 / 4:3 |
| Projection distance | 1.5 - 4 meters |
| Keystone correction | Manual ±15° |
| Power supply | 110-240 V ~ 50/60 Hz |
| Power consumption | 60 W |
| Dimensions (L x W x H) | 220 x 166 x 90 mm |
| Weight | 1200 g |
| Video inputs | 2x HDMI, 1x VGA, 1x AV |
| Multimedia inputs | 1x USB, 1x SD |
| Audio output | 3.5 mm jack |
| Wireless connectivity | Wi-Fi (Miracast, AirPlay) |
| Multimedia playback | Photo, music, video (USB/SD) |
| Focus | Manual (wheel) |
| Menu languages | English, French, German, etc. |
| Special functions | Multi-screen, noise reduction, mirroring |
| Maintenance and cleaning | Soft dry cloth, avoid liquids and moisture |
| Safety | Do not open, do not look at the lens |
| Spare parts and repairability | No user-serviceable parts. Contact customer service. |
Frequently Asked Questions - LV-HD340 LA VAGUE
User questions about LV-HD340 LA VAGUE
0 question about this device. Answer the ones you know or ask your own.
Ask a new question about this device
Download the instructions for your Projector in PDF format for free! Find your manual LV-HD340 - LA VAGUE and take your electronic device back in hand. On this page are published all the documents necessary for the use of your device. LV-HD340 by LA VAGUE.
USER MANUAL LV-HD340 LA VAGUE
text_image
1 2 3 4 5 6 M S OKANSCHLÜSSE
text_image
Function selection interface No operation for 15 seconds will return to previous state HDMI VGA AV USB TF CARDtext_image
08:52 Thursday, April 19 + Entertainment Clear Mobile games Sound Auto - movies Playlight Airplane Maps MUSE-screen Bluetooth Huawei mini- Gamehome Location Information Eye-com-Port Hotspot Fighting dock Little cinema Power Screen recorder Do not adducts 43 GPS Audio
text_image
Multi-screen Searching for devices... CANCEL
text_image
Multi-screen ID:10:A4:BE:A8:B6:BE CANCEL
text_image
Multi-screen Connecting to ID:10:A4:BE:AB:BE:BE--- CANCELtext_image
Wireless (1.4W) 62nm Polarity ChinaNet-gIoD STAR-WIFI ChinaNet-76ik TP-LINK_amtzus888 E23family TP-LINK_tecrewtext_image
AirPlay Minoring AirDrop Receiving Off Night Shift: Off Until 22:00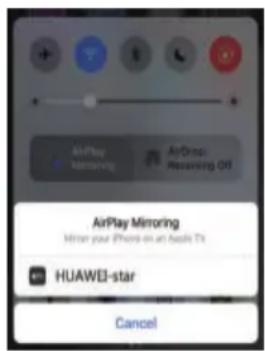
text_image
AirPlay Mirroring AirDrop Receiving Off AirPlay Mirroring Mirror your iPhone on an audio Tx HUAWEI-star Cancelnatural_image
Three white icons on a blue background: smartphone, wireless cable, and projector (no text or symbols)text_image
DEBUGGING USB debugging Debug mode when USB is connected Revoke USB debugging authorisations > Always prompt when connecting to USB Monitor apps installed by ADB Require user confirmation when apps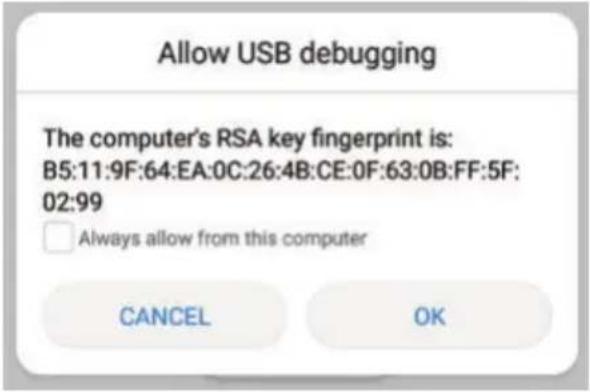
text_image
Allow USB debugging The computer's RSA key fingerprint is: B5:11:9F:64:EA:0C:26:4B:CE:0F:63:0B:FF:5F: 02:99 □ Always allow from this computer CANCEL OKnatural_image
Three white icons on a blue background: smartphone, audio jack, and monitor (no text or symbols)text_image
Trust This Computer? Your settings and data will be accessible from this computer when connected. Trust Don't Trust
text_image
Allow this device to access photos and videos? This device will be able to access photos and videos while it is connected to your iPhone. Allow Don't AllowTECHNISCHE DATEN
- Please read the entire user manual carefully before using the projector.
- To ensure the stability of the power supply, use standard grounded power sockets.
- Only use a power source as indicated on the projector.
- Please do not open projector. There are no user-serviceable parts in the projector. Opening the projector will void warranty. If there is a problem with your projector contact your supplier.
- Please do not directly look into the projector lens. The bright light could damage your eyes.
- Please do not place projector on a surface that may block air flow from the vents. A soft fabric could prevent air flow. Place the projector on stable hard surface.
- Please keep projector away from any liquids. The projector is not water proof or water resistant and is not for use outside.
- To prevent electrical shock please keep projector away from moisture.
- Please turn off and unplug projector when not in use.
- Please use original packaging material when storing your projector.
PRODUCT OVERVIEW
1 Status LED
2 On / Off button
3 Navigation
4 Select input
5 Back in the menu
6 Call up the menu
7 Objective Focus
8 Keystone correction

text_image
1 2 3 4 5 6 M S 7 8INTERFACES
1 3,5mm audio output
2 3.5mm audio/video input
3 HDMI input
4 VGA input
5 SD card input
6 Infrared input
7 HDMI input
8 USB input

text_image
1 2 3 5 PC-RGB AV HDMI 1 IR HDMI 2 6 8REMOTE CONTROL
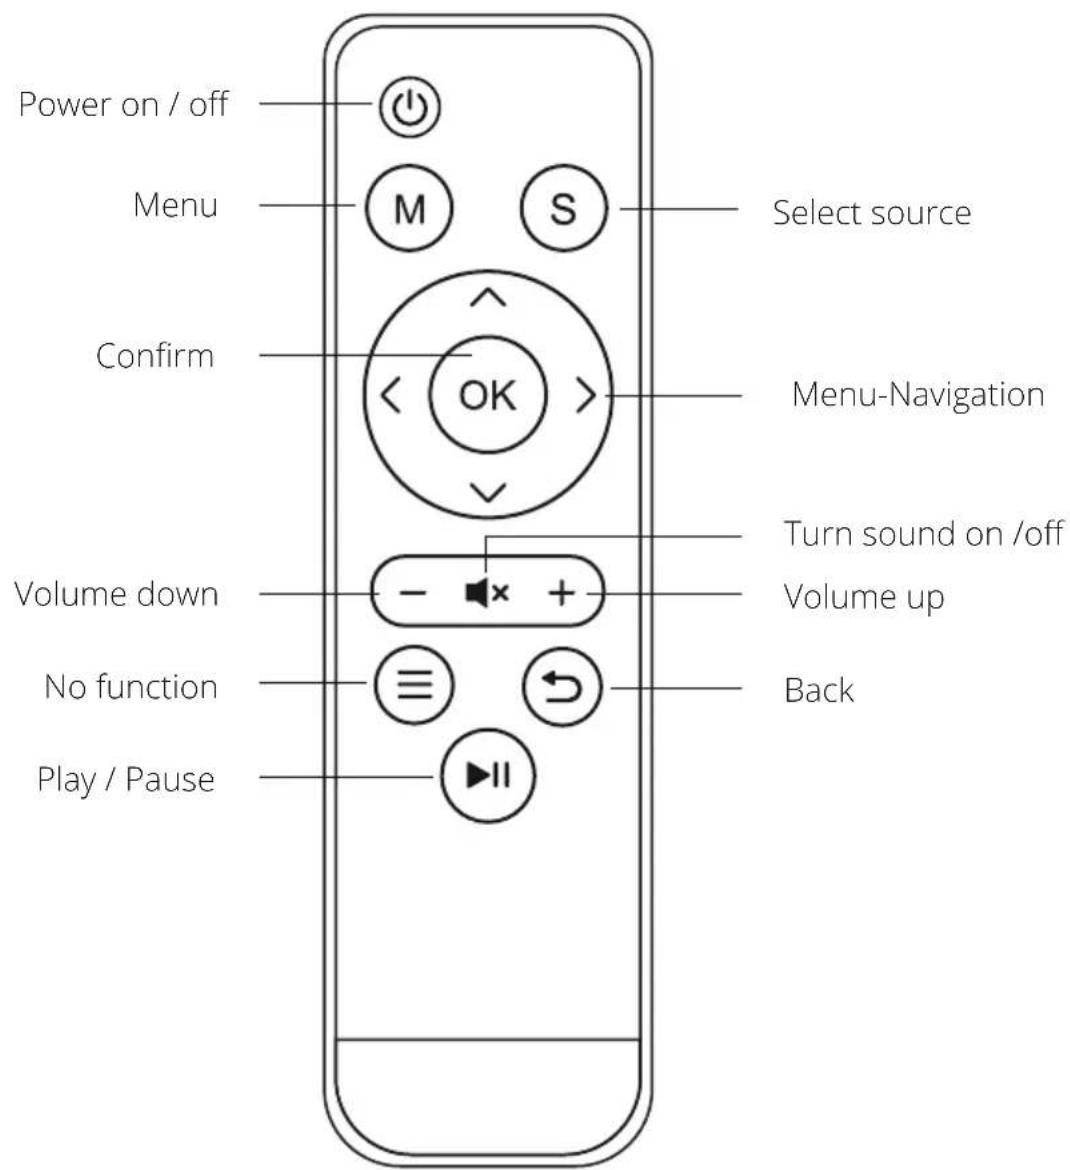
text_image
Power on / off Menu Select source M S Confirm OK Menu-Navigation Volume down Turn sound on /off Volume up No function Back Play / PauseINITIAL STEPS
Connecting the power cable
Connect the power cable to the side of the projector and to a power outlet. If the indicator light at the top of the projector turns red, the projector is in standby mode.
Power up
Remove the lens cap from the lens.
Press the „Power“ button on the top of the projector or the „Power“ button on the remote control. If the indicator light on the top of the projector is steady green, the projector is turned on.
Press the „Power“ button again either on the projector or on the remote control to turn off the projector.
Keystone correction/image focusing
Use the rear keystone adjustment dial (7) located at the top of the projector to adjust the angle of the projector. Use the front keystone adjustment dial (8), also located on the top of the projector, to adjust the image focus.
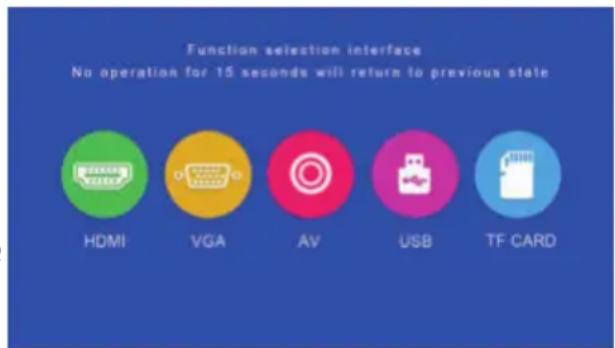
Selecting the signal source
Press the „S“ button on the projector or the „Source“ button on the remote control to open the menu for selecting the input signal.
Use the arrow buttons on the remote control or on the projector to select the appropriate signal source and confirm with „OK“.
text_image
Function selection interface No operation for 15 seconds will return to previous state HDMI VGA AV USB TF CARDMultimedia connection
Insert a SD card or a USB device into the appropriate input. Select the USB/SD media source, then select the desired media (Photo/Movie/Music/File). Select the file(s) you want to view, and then press the Play/Pause button on the remote control.
The following formats are supported for „USB“ and „TF Card“ sources:
| File Format File extension Codec | ||
| Picture | JPEG .jpg | |
| BMP .bmp | ||
| PNG .png | ||
| Music | WMA .wma | |
| MP3 .mp3 | ||
| AC3/WAV .ac3 / .wav | ||
| Movie | RM/RMVB .rm / .rmvb RV8 / 9 / 10 | |
| AVI .avi | ||
| ASF .wmv / .asf | ||
| MP4 .mp4 / .mov / .3gp | ||
| H264 .mov MPEG 1,2,4 | ||
| MKV .mkv | ||
| FLV .flv H.364 | ||
| PS .mpg/.mpeg/.vro/.vob vc1 | ||
| TS .ts | H.264 | |
HDMI Equipment Connection
Connect a computer and other HDMI devices to the corresponding input located at the side of the projector. Select the media source „HDMI“, and press „OK“.
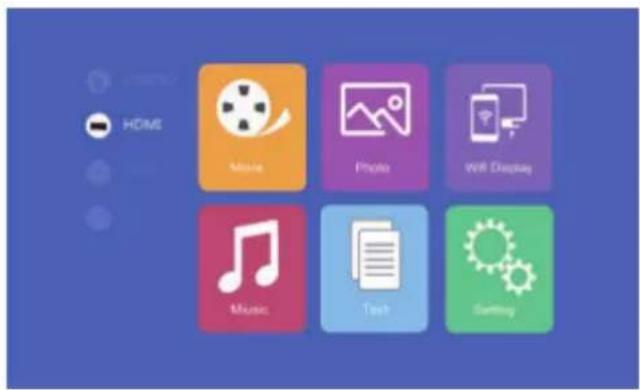
text_image
HOME Movie Photo Wi-Fi Display Music Text SettingVGA Equipment Connection
Connect a computer and other VGA devices to the corresponding input located at the side of the projector. Select the media source „VGA“, and press „OK“.

text_image
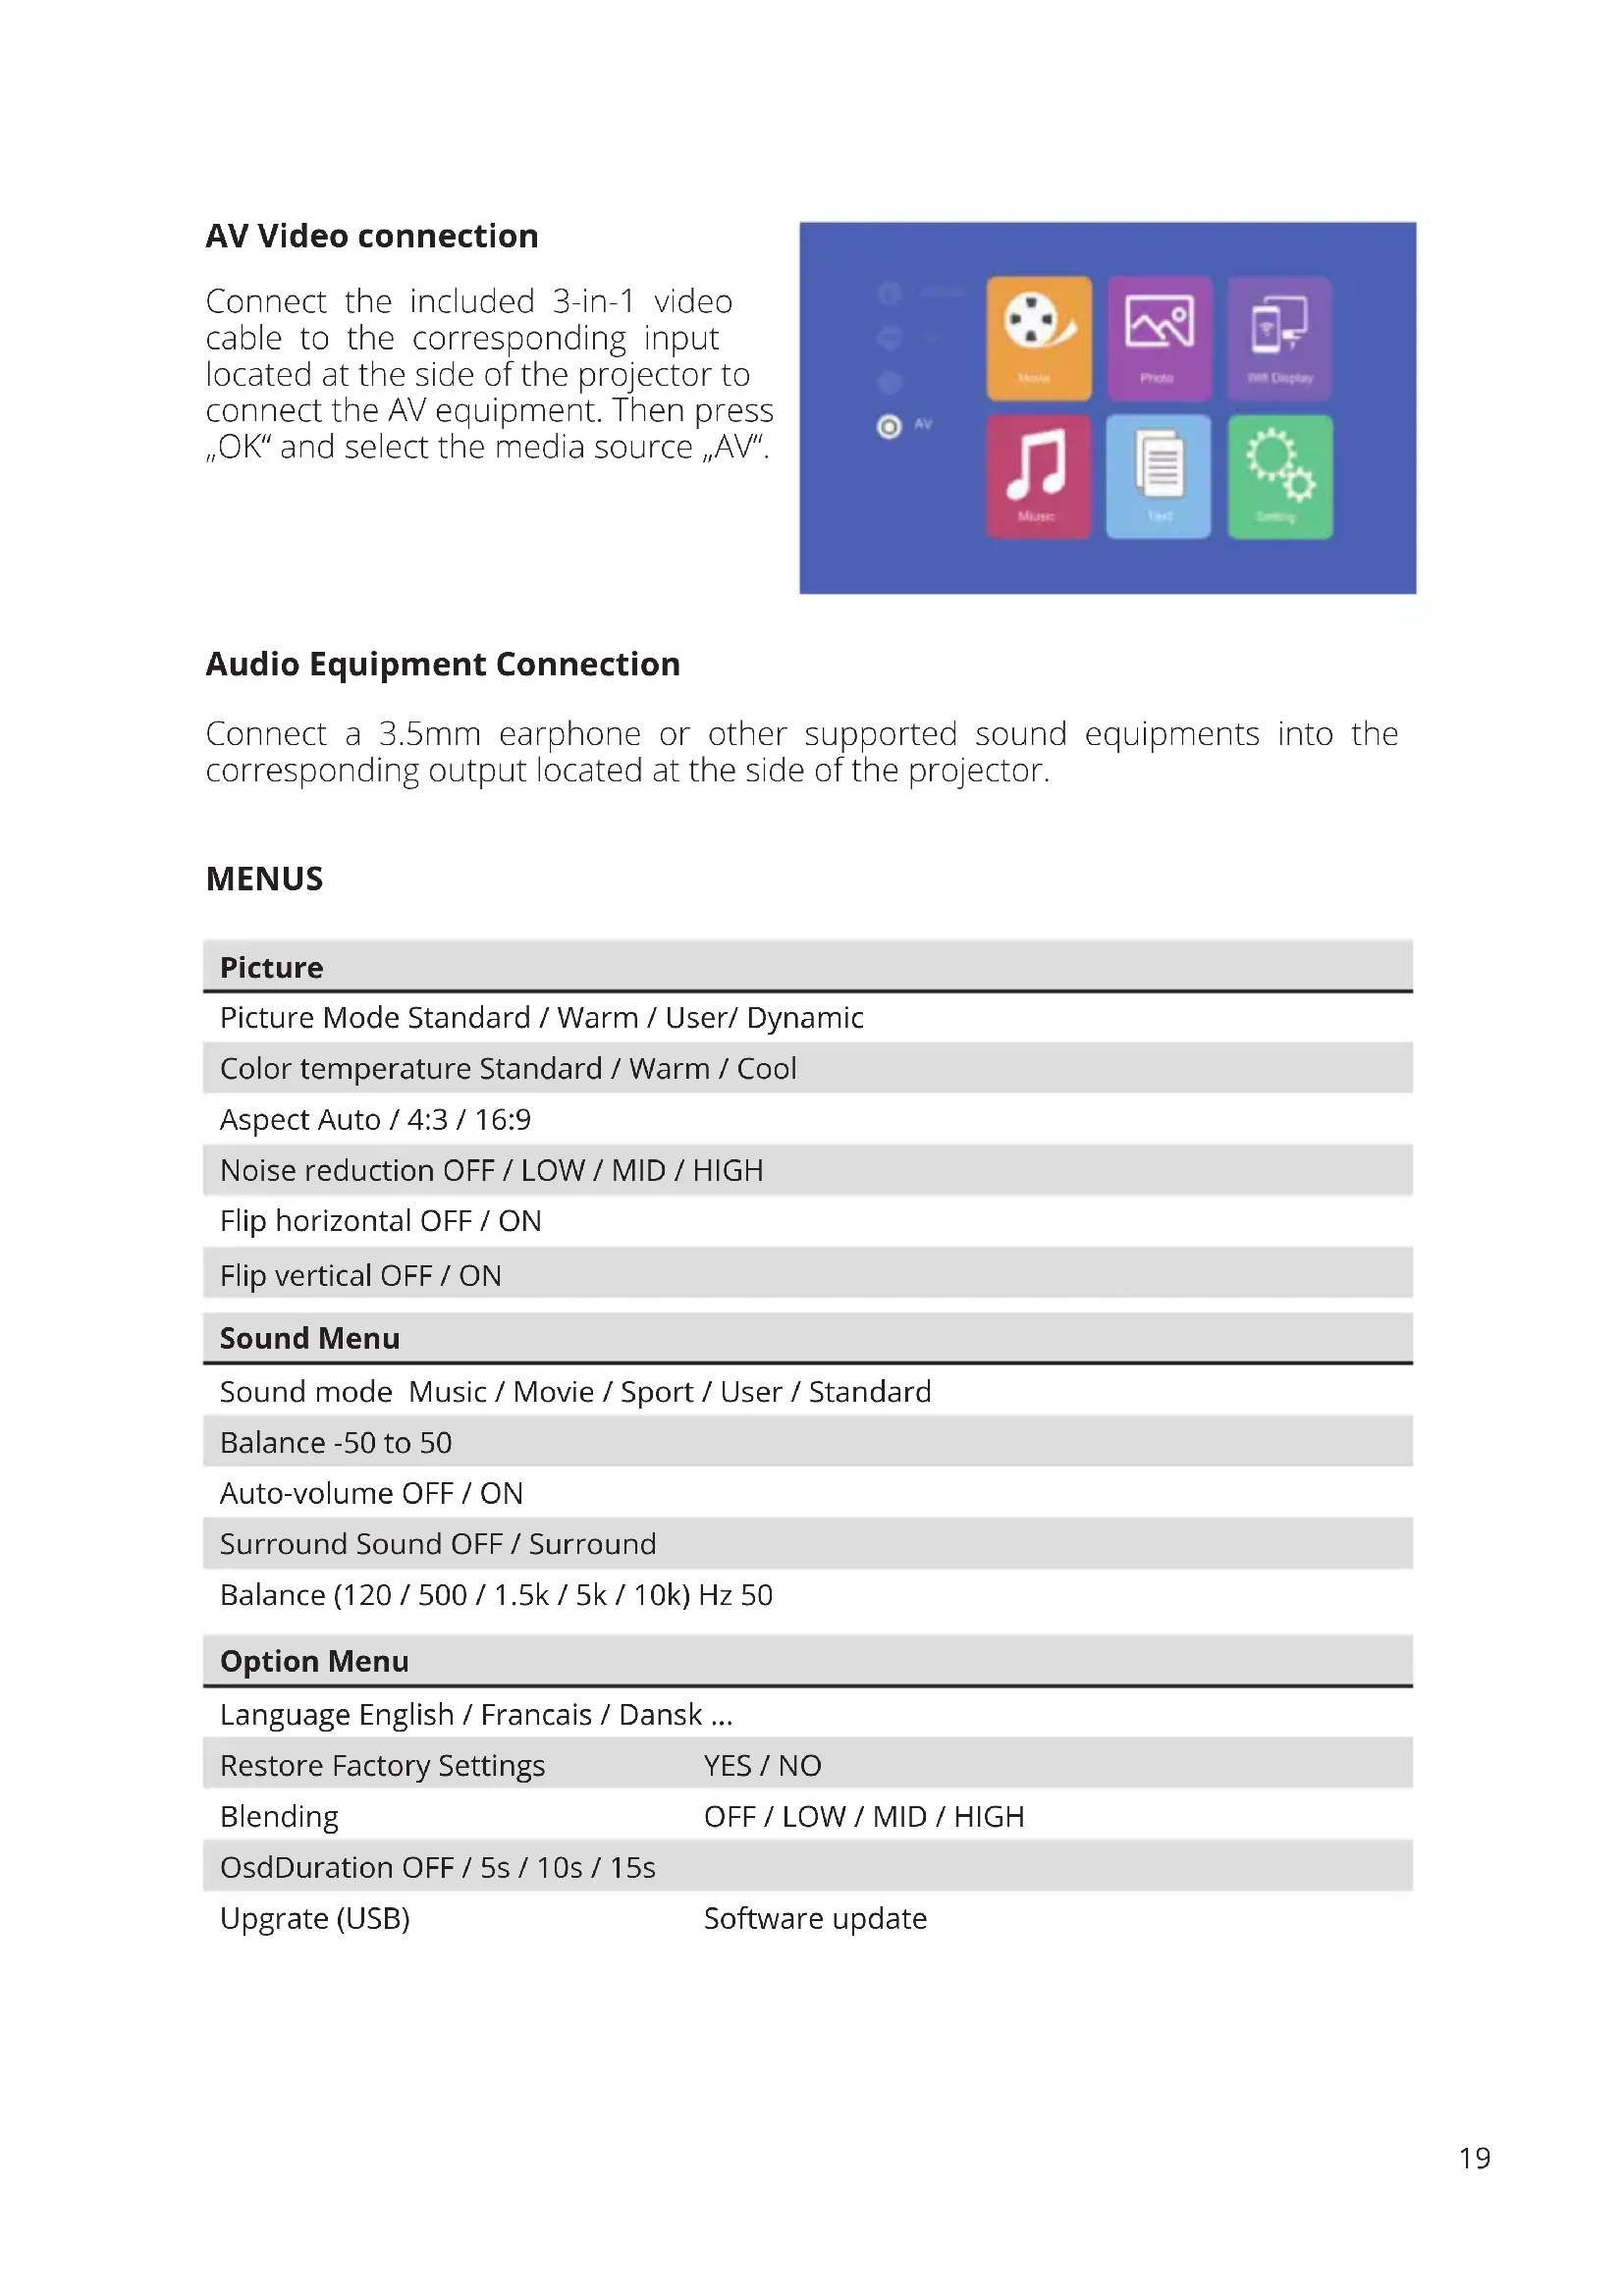
VGA Music Photo Wi-Fi Display Music Text SettingAV Video connection
Connect the included 3-in-1 video cable to the corresponding input located at the side of the projector to connect the AV equipment. Then press „OK“ and select the media source „AV“.
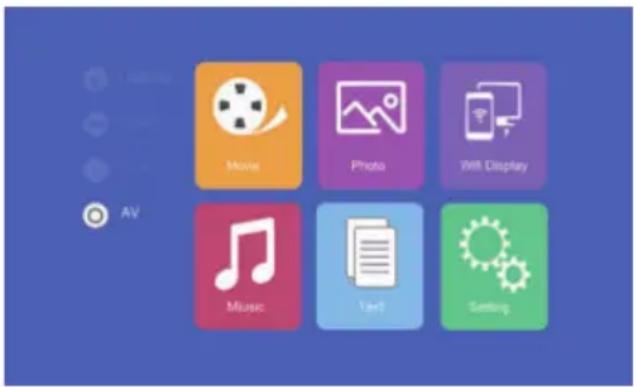
text_image
Movie Photo With Display AV Music Text SettingAudio Equipment Connection
Connect a 3.5mm earphone or other supported sound equipments into the corresponding output located at the side of the projector.
MENUS
Picture
| Picture Mode Standard / Warm / User/ Dynamic |
| Color temperature Standard / Warm / Cool |
| Aspect Auto / 4:3 / 16:9 |
| Noise reduction OFF / LOW / MID / HIGH |
| Flip horizontal OFF / ON |
| Flip vertical OFF / ON |
Sound Menu
| Sound mode Music / Movie / Sport / User / Standard |
| Balance -50 to 50 |
| Auto-volume OFF / ON |
| Surround Sound OFF / Surround |
| Balance (120 / 500 / 1.5k / 5k / 10k) Hz 50 |
Option Menu
| Language English / Francais / Dansk ... | |
| Restore Factory Settings | YES / NO |
| Blending | OFF / LOW / MID / HIGH |
| OsdDuration OFF / 5s / 10s / 15s | |
| Upgrade (USB) | Software update |
MULTI-SCREEN
This allows the screen content of a smartphone or tablet to be displayed wirelessly or via a USB cable on the projector.
Please note that not all content can be displayed due to copy protection requirements of the respective app provider (e.g. Netflix). By using the Amazon Firestick or Google Chromecast, you can also stream content from these providers.
Basic settings for multi-screen-sharing
To enter multi-screen-interface select "Wifi Display" on the main menu and press "OK".
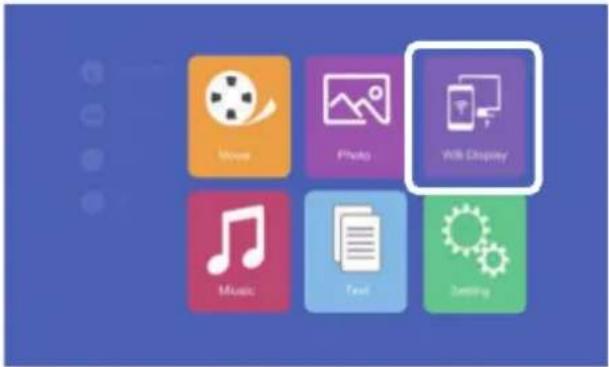
text_image
Movie Photos WB Display Music Text SettingsMulti-screen for Android phones
Requirements
Operating system Android 5.0 model with min. 1 GB RAM
Resolution WVGA 1080P
Storage At least 40MB free space needed
Step 1: From the WiFi Display menu, select Miracast.

text_image
IOS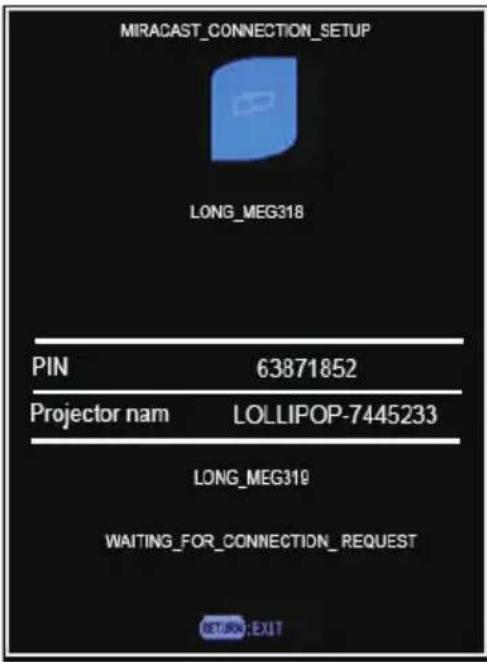
text_image
MIRACAST_CONNECTION_SETUP LONG_MEG318 PIN 63871852 Projector nam LOLLIPOP-7445233 LONG_MEG310 WAITING_FOR_CONNECTION_REQUEST RETURN: EXITStep 2: Go to the Miracast / Wireless Display / Multiscreen function on your smartphone and connect to the projector via the SSID.

text_image
09:52 Thursday, April 16 HKEYSTONE MUSIC-SURGER Bluetooth Huawei Drive DINAMARKS Location information Eye comfort Hotspot Playing stock Ultra brothers user Shower recorder Device buttons KD MPIG Auto
text_image
Multi-screen Searching for devices... CANCEL
text_image
Multi-screen ID:10:A4:BE:A8:B6:BE CANCEL
text_image
Multi-screen Connecting to ID:10:A4:BE:A8:BE:BE ... CANCELMulti-screen for iPhones
| Requirements |
| Operating system iOS 7 and above |
| iPhone 5 / iPod Generation 5 / iPad3 or higher |
| Supported resolutions iPhone: 480 x 320 / 1136 x 640iPad 1024 x 768 / 2048 x 1536 |
| Storage At least 40MB free space needed |
Step 1: Open the settings menu in your phone, turn on WiFi, and connect to your wireless network.
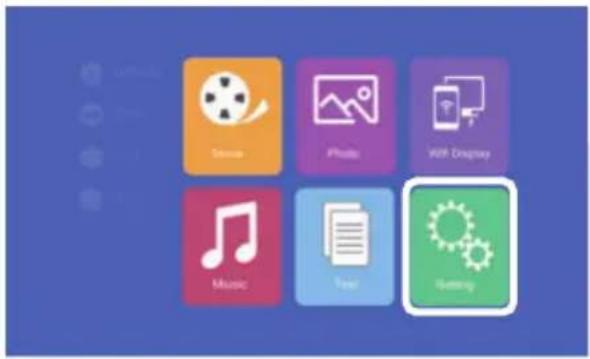
Step 2: Connect the projector to the same WLAN by selecting the symbol in the „Setting“ area and register the projector in the WLAN as follows:
text_image
Music Video Photo VR Display Music Text Sitting
text_image
Network Setup Net Interface Wireless Wireless Enter Net State Enter OTA Enter
text_image
Network Settings Net Interface Wireless Network Airline Net State Enter OTA Enter
text_image
Wireless Windows 1000 IP地址 Polaris ChinaNet.girD STAR-WIFI ChinaNet-Tok TP-LINK_amipus888 623Family TP-LINK_tscnew WPAKEY WPAKEY WPAKEY WPAKEY WPAKEY WPAKEYStep 3: Enter „Wifi Display“ from the main menu, select „iOS Airplay“ and press „OK“ to enter iOS wireless connection interface.

text_image
IOS
text_image
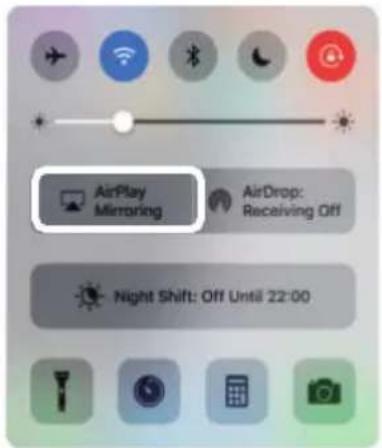
InMnurfs LQ63PDP-74525JStep 4: Confirm Air-Play Mirroring by selecting the SSID on the IOS device.
text_image
AirPlay Mimroring AirDrop: Receiving Off Night Shift: Off Until 22:00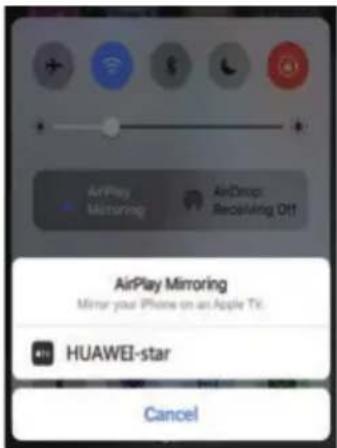
text_image
AirPlay Mimoring AirDrop Receiving Off AirPlay Mirroring Mirror your iPhone on an Apple TV. HUAWEI-star CancelConnection via cable connection (Android)
Please check if your Android device supports image transfer via USB cable.
Step 1: From the WiFi Display menu, select Cablecast.

text_image
IOS
natural_image
Three icons on a blue background: smartphone, audio jack, and monitor (no text or symbols)Step2: Connect your AndroidsmartphonetotherightUSBport(nottheOUT-5VUSBport) using the original USBcablesupplied by the phonemanufacturer. Then open the settings on your Android smartphone and enable „USB debugging“ in the developer options.
If you do not find the menu item „Developer options“ in your settings, it must be activated first. Please search the Internet for the necessary steps to do this.

text_image
DEBUGGING USB debugging Debug mode when USB is connected Revoke USB debugging authorisations Always prompt when connecting to USB Monitor apps installed by ADB Require user confirmation when apps
text_image
Allow USB debugging The computer's RSA key fingerprint is: B5:11:9F:64:EA:0C:26:4B:CE:0F:63:0B:FF:5F: 02:99 □ Always allow from this computer CANCEL OKConnection via a cable connection (iOS)
Step 1: From the WiFi Display menu, select Cablecast.

text_image
IOS
natural_image
Three icons on a blue background: smartphone, audio jack, and monitor (no text or symbols)Step 2: Confirm the connection with „Trust“. Use only original Apple USB cable.
Step 3: Click on "Allow" to start sharing multiple screens.

text_image
Trust This Computer? Your settings and data will be accessible from this computer when connected. Trust Don't Trust
text_image
Allow this device to access photos and videos? This device will be able to access photos and videos while it is connected to your iPhone. Allow Don't AllowSPECIFICATIONS
| Display method LCD |
| Contrast 1000:1 |
| Physical resolution 1280 x 720 (supports 1920 x 1080) |
| Light source LED |
| Projection distance 1,5 - 4m |
| Picture format 16:9 / 4:3 |
| Brightness 2500 lumens |
| Keystone correction ±15° manual |
| Network connection 110 - 240V ~ 50/60Hz |
| Power consumption 60W |
| Input interfaces USB / SD / HDMI / AV / VGA |
| Output interface 3,5mm audio jack |
| Dimensions 220 x 166 x 90mm |
Weight 1200g
DISPOSAL

This symbol indicates that this product is subject to the European Directive and must not be disposed of together with other household waste. Refer to and follow local regulations for separate collection of electrical and electronic equipment. Proper disposal of old products helps to avoid negative effects on the environment and health.
MANUFACTURER
VEHNSGROUP
VEHNSGROUP GmbH
Changes and errors excepted.
The manufacturer accepts no liability for damage resulting from incorrect, improper or incompatible use of the product.
© VEHNS GROUP GmbH
text_image
1 2 3 4 5 6 M S CKCONNEXIONS
text_image
Function selection interface No operation for 15 seconds will return to previous state HDMI VGA AV USB TF CARDtext_image
09:52 Thursday, April 16 HUAWEI power Analog mode Multi-screen Bluetooth Huawei Share Screen Location Information Sunset PACOR Biocommhens Hotspot Freezing Back Ultra battery cover Del NOS B24LUTS X3 NFG Auto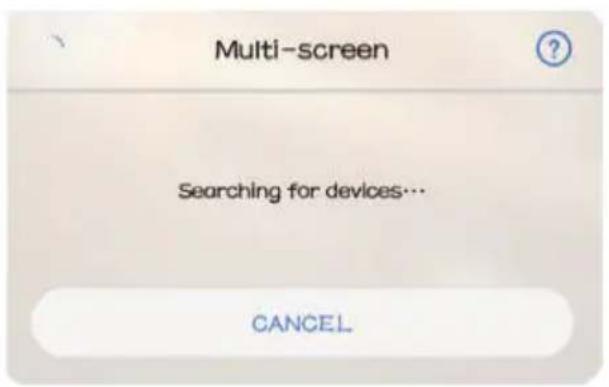
text_image
Multi-screen Searching for devices... CANCEL
text_image
Multi-screen ID:10:A4:BE:A8:B6:BE CANCEL
text_image
Multi-screen Connecting to ID:10:A4:BE:A8:BE:BE --- CANCELtext_image
Network Setup Net Interface Wireless Net State OTA Wireless Enter Enter Enter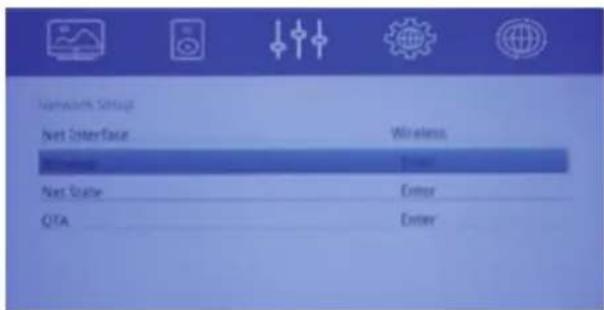
text_image
Network Settings Net Center Face Wireless Network Enter Net Scale Enter QTA Enter
text_image
Wireless IP-Link1-xx Polaris ChinaNet-gls2D STAR-WIFI ChinaNet-75k 1P-LINK_amrtus888 623family 1P-LINK_teacreetext_image
AirPlay Mirroring AirDrop: Receiving Off Night Shift: Off Until 22:00
text_image
AirPlay Morning AirDrop HyperViking Off AirPlay Mirroring Mirror your iPhone on an Apple TV. HUAWEI-star Cancelnatural_image
Three icons on a blue background: smartphone, audio jack, and monitor (no text or symbols)text_image
DEBUGGING USB debugging Debug mode when USB is connected Revoke USB debugging authorisations > Always prompt when connecting to USB Monitor apps installed by ADB Remine user confirmation when apps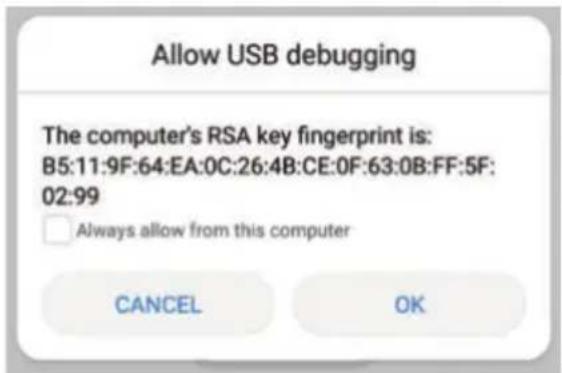
text_image
Allow USB debugging The computer's RSA key fingerprint is: B5:11:9F:64:EA:0C:26:4B:CE:0F:63:0B:FF:5F: 02:99 Always allow from this computer CANCEL OKnatural_image
Three white icons on a blue background: a smartphone, a wireless router, and a projector (no text or symbols)text_image
Trust This Computer? Your settings and data will be accessible from this computer when connected. Trust Don't Trust
text_image
Allow this device to access photos and videos? This device will be able to access photos and videos while it is connected to your iPhone. Allow Don't AllowCARACTÉRISTIQUES TECHNIQUES
Technologie LCD
Contraste 1000:1
text_image
1 2 O 6 M OK S 3 4 5 7 8COLLEGAMENTI
text_image
Function selection interface No operation for 15 seconds will return to previous state HDMI VGA AV USB TF CARDtext_image
00/52 Thursday, April 16 Multi-screen Searching for devices... CANCEL Multi-screen ID:10:A4:BE:A8:B6:BE CANCEL Multi-screen Connecting to ID:10:A4:BE:A8:BE:BE... CANCELtext_image
Network Setup Net Interface Wireless Wireless Enter Net State Enter OTA Enter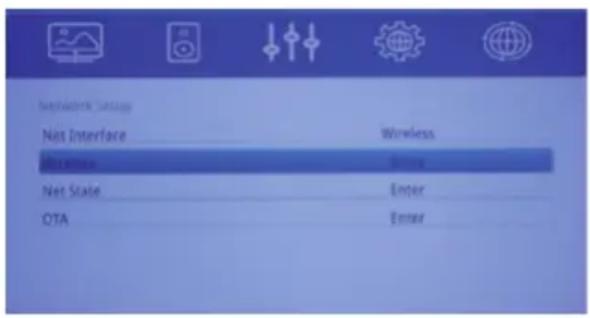
text_image
Networkwide Gateway Net Interface Wireless Macromedia Enter Net State Enter OTA Enter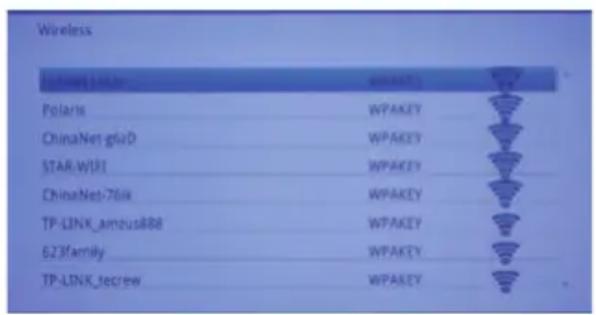
text_image
Wireless Polaris ChinaNet-gluD STAR-WISI ChinaNet-76ik TP-LINK_amzus888 623family TP-LINK_tecrewtext_image
AirPlay Mirroring AirDrop: Receiving Off Night Shift: Off Until 22:00
text_image
AirPlay Mirroring AirDrop Rearing On AirPlay Mirroring Mirror your iPhone on an Apple TV HUAWEI-star CancelConnessione via cavo (Android)
natural_image
Three white icons on a blue background: smartphone, audio jack, and monitor (no text or symbols)text_image
DEBUGGING USB debugging Debug mode when USB is connected Revoke USB debugging authorisations > Always prompt when connecting to USB Monitor apps installed by ADB Require user confirmation when app
text_image
Allow USB debugging The computer's RSA key fingerprint is: B5:11:9F:64:EA:0C:26:4B:CE:0F:63:0B:FF:5F: 02:99 Always allow from this computer CANCEL OKnatural_image
Three white icons on a blue background: smartphone, audio jack, and monitor (no text or symbols)text_image
Trust This Computer? Your settings and data will be accessible from this computer when connected. Trust Don't Trust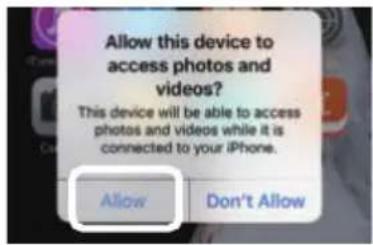
text_image
Allow this device to access photos and videos? This device will be able to access photos and videos while it is connected to your iPhone. Allow Don't AllowDATI TECNICI
Tecnologia LCD
Contrasto 1000:1
text_image
Function selection interface No operation for 15 seconds will return to previous state HOME VGA AV USB TF CARDConexión multimedia
text_image
09:52 Thursday, April 10 HUAWEI Mobile phone Sound Auto remote Playlight Amplify mode Multi-screen Bluebird Huawei Share Sendletown Location Information Eye comfort Hilltoped Flooring edge Ultra battery user Screen Reorder Do not default 43 NFE Auto
text_image
Multi-screen Searching for devices... CANCEL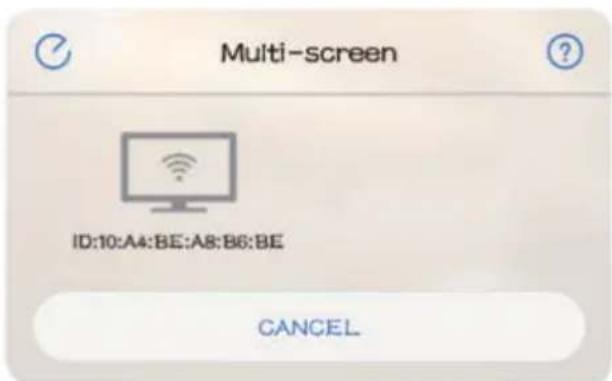
text_image
Multi-screen ID:10:A4:BE:A8:B6:BE CANCEL
text_image
Multi-screen Connecting to ID:10:A4:BE:A8:B6:BE… CANCEL.Multi-pantalla para iPhones
Demandas
text_image
Session's Setup Net Interface Wireless Wireless Enter Net State Enter OTA Enter
text_image
Network Setup Net Interface Windows Networks Net State Email OTA Email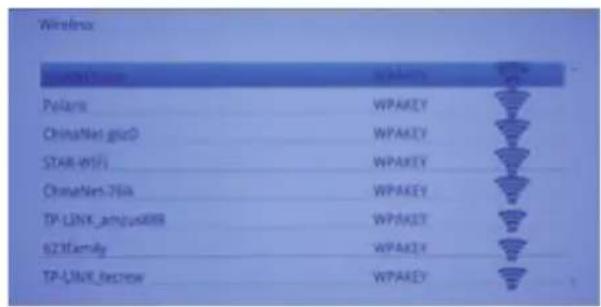
text_image
Wirefax Polaris ChinaNet grid0 STAR w61 ChinaNet-764 TP-LINK_amizusRIR 623family TP-LINK_becrowtext_image
AirPlay Mamoring AirDrop: Receiving Off Night Shift: Off Until 22:00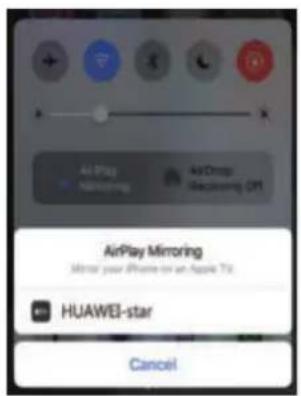
text_image
AirPlay AirPlay Mirroring AirPlay Clearing Off AirPlay Mirroring Mirror your iPhone on an Apple TX HUAWEI-star Cancelnatural_image
Three icons on a blue background: smartphone, audio jack, and monitor (no text or symbols)text_image
DEBUGGING USB debugging Debug mode when USB is connected Revoke USB debugging authorisations > Always prompt when connecting to USB Monitor apps installed by ADB
text_image
Allow USB debugging The computer's RSA key fingerprint is: B5:11:9F:64:EA:0C:26:4B:CE:0F:63:0B:FF:5F: 02:99 Always allow from this computer CANCEL OKnatural_image
Three icons on a blue background: smartphone, wireless router, and projector (no text or symbols)text_image
Trust This Computer? Your settings and data will be accessible from this computer when connected. Trust Don't Trust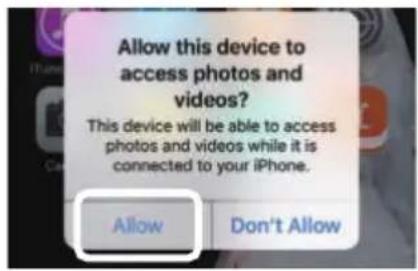
text_image
Allow this device to access photos and videos? This device will be able to access photos and videos while it is connected to your iPhone. Allow Don't AllowDATOS TÉCNICOS
Tecnología LCD
Contraste 1000:1
Resolución física 1280 x 720 (soportes 1920 x 1080)
Fuente de luz LED