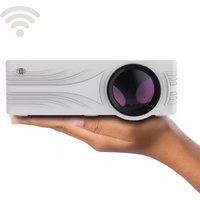
LV-HD240 - Projector LA VAGUE - Free user manual and instructions
Find the device manual for free LV-HD240 LA VAGUE in PDF.



| Product Type | LCD Video Projector |
| Brand | LA VAGUE |
| Model | LV-HD240 |
| Native Resolution | 1280 x 720 pixels (compatible with Full HD 1920 x 1080) |
| Light Source | LED |
| Brightness | 2000 Lumens |
| Projection Distance | 1.2 to 4 meters |
| Projection Size | 1 to 3.30 meters diagonal |
| Aspect Ratio | 16:9 / 4:3 |
| Keystone Correction | Manual ±15° |
| Wired Connectivity | HDMI, VGA, AV (3.5mm audio/video input), USB, microSD, 3.5mm audio output |
| Wireless Connectivity | Wi-Fi (Miracast for Android, AirPlay for iOS, Cablecast for iPhone) |
| Supported File Formats | Photo: JPEG, BMP, PNG; Music: MP3, WMA, AC3/WAV; Video: RM/RMVB, AVI, ASF, MP4, H264, MKV, FLV, PS, TS |
| Power Supply | 110-240 V ~ 50/60 Hz, 43 W |
| Dimensions (L x W x H) | 200 x 145 x 75 mm |
| Weight | 980 g |
| Main Functions | Playback from USB drive, microSD card, HDMI/VGA connection, wireless screen mirroring, focus and keystone adjustment |
| Safety | Do not look into the lens, do not open the device, avoid moisture, use a grounded outlet |
| Maintenance and Cleaning | Clean the exterior with a soft, dry cloth. Do not use solvents. Store in original packaging. |
| Spare Parts and Repairability | No user-serviceable parts. Contact the supplier for any repairs. |
Frequently Asked Questions - LV-HD240 LA VAGUE
User questions about LV-HD240 LA VAGUE
0 question about this device. Answer the ones you know or ask your own.
Ask a new question about this device
Download the instructions for your Projector in PDF format for free! Find your manual LV-HD240 - LA VAGUE and take your electronic device back in hand. On this page are published all the documents necessary for the use of your device. LV-HD240 by LA VAGUE.
USER MANUAL LV-HD240 LA VAGUE
natural_image
Technical line drawing of a projector unit with circular vent and mounting base (no text or symbols)natural_image
Line drawing of a multi-pin cable with three connectors (no text or symbols)

Apple iPhone / iPad


natural_image
Three icons on a blue background: smartphone, audio jack, and projector (no text or symbols)

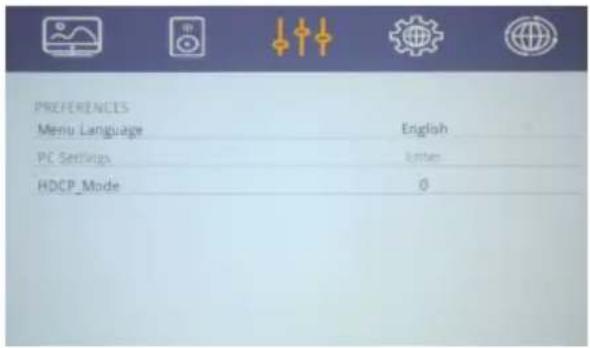
| PREFERENCES Menu Language | English |
| PC Settings | Enter |
| HDCP_Mode | 0 |

TECHNISCHE DATEN
Version 1.0 - Sept. 2020
INSTRUCTION MANUAL
PLEASE NOTE
- Please read the entire user manual carefully before using the projector.
- To ensure the stability of the power supply, use standard grounded power sockets.
- Only use a power source as indicated on the projector.
- Please do not open projector. There are no user-serviceable parts in the projector. Opening the projector will void warranty. If there is a problem with your projector contact your supplier.
- Please do not directly look into the projector lens. The bright light could damage your eyes.
- Please do not place projector on a surface that may block air flow from the vents. A soft fabric could prevent air flow. Place the projector on stable hard surface.
- Please keep projector away from any liquids. The projector is not water proof or water resistant and is not for use outside.
- To prevent electrical shock please keep projector away from moisture.
- Please turn off and unplug projector when not in use.
- Please use original packaging material when storing your projector.
PRODUCT OVERVIEW

1 Infrared receiver 7 Confirm
2 Status LED 8 Open menu
3 Menu up 9 Menu back
4 Menu right 10 Select source Increase volume 11 On / Off
5 Menu down 12 Focus
6 Menu left 13 Trapezoid correction Descrease volume
INTERFACES
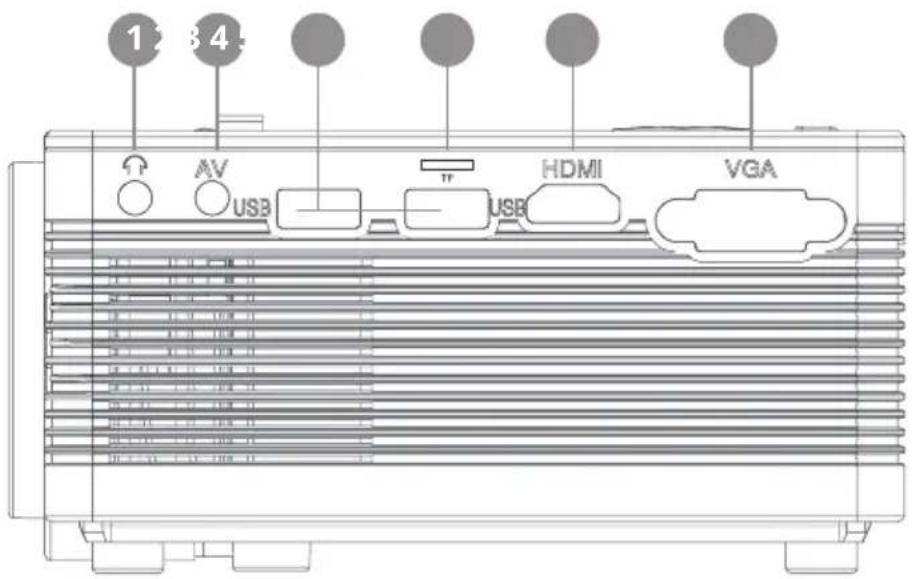
1 3,5mm Audio Output 4 microSD card input
2 3,5mm Audio/Video input 5 HDMI input
3 USB input 6 VGA input
REMOTE CONTROL

INITIAL STEPS
1. Connecting the power cable
Connect the power cable to the side of the projector and to a power outlet. If the indicator light at the top of the projector turns red, the projector is in standby mode
2. Power up
Remove the lens cap from the lens.
Press the „Power“ button on the top of the projector or the „Power“ button on the remote control. If the indicator light at the top of the projector is solid green, the projector is turned on. To turn off the projector, press the „Power“ button again - either on the projector or on the remote control.
3. Image Settings
To raise or lower the front of the projector, turn the adjustable foot located on the bottom of the projector.
Use the front adjustment wheel, also located on the top of the projector, to adjust the image focus. Use the rear keystone adjustment wheel, located at the top of the projector, to adjust the angle of the projector.

natural_image
Technical line drawing of a rectangular electronic device with a circular vent and mounting base (no text or symbols)
When the projector is ready for operation, the main menu appears.
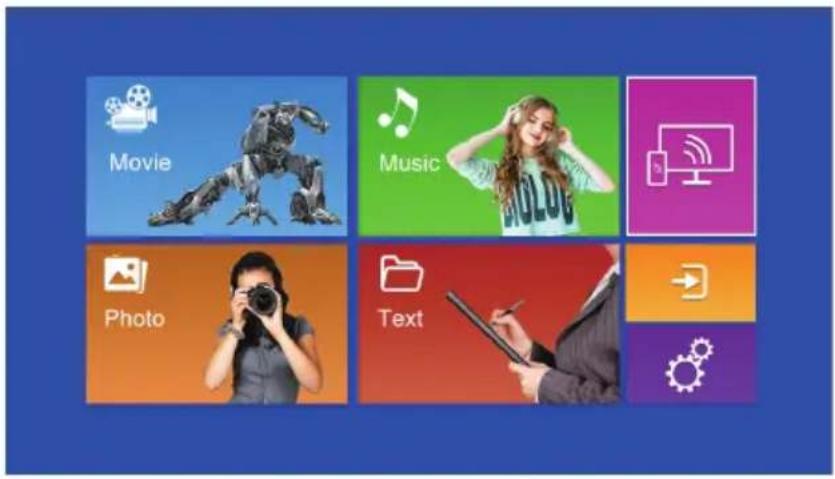
The following areas are available:
Playback of content on USB sticks / microSD cards

4. Playback from a cable signal source
Pressing the „S“ button on the projector, the „Source“ button on the remote control or the area in the main menu opens the input signal selection menu.
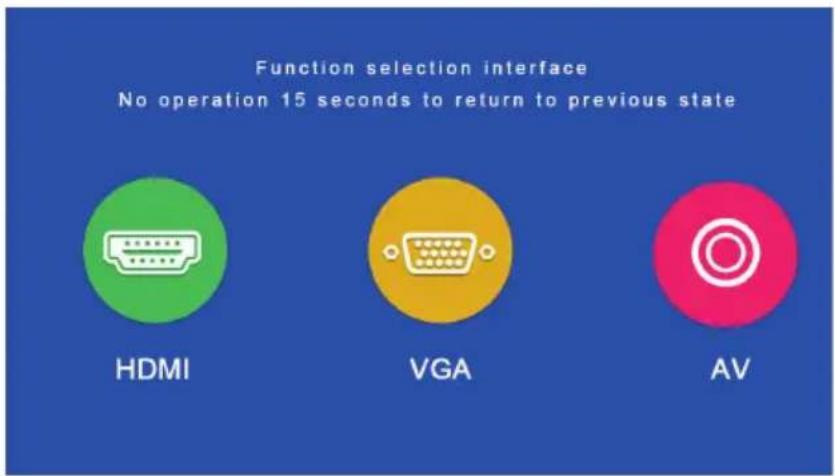
For the „AV input“, please connect the signal source with the AV cable supplied with the projector.

natural_image
Line drawing of a multi-pin broadband cable with three connectors (no text or symbols)5. Playback from a microSD card / USB stick
After you have inserted the microSD card or connected the USB stick, please select the desired medium in the main menu (movie/music/photo/text). After pressing „OK“, select the file(s) you want to view.
The following formats are supported:
| File Format File extension Codec | |||
| Picture | JPEG .jpg | ||
| BMP .bmp | |||
| PNG .png | |||
| Music | WMA .wma | ||
| MP3 .mp3 | |||
| AC3/WAV .ac3 / .wav | |||
| Movie | RM/RMVB .rm / .rmvb RV8 / 9 / 10 | ||
| AVI .avi | |||
| ASF .wmv / .asf | |||
| MP4 .mp4 / .mov / .3gp | |||
| H264 .mov MPEG 1,2,4 | |||
| MKV .mkv | |||
| FLV .flv | H.364 | ||
| PS | .mpg/.mpeg/.vro/.vob | vc1 | |
| TS | .ts | H.264 | |
6. Streaming via a smartphone
This allows the screen content of a smartphone or tablet to be displayed on the projector wirelessly or (for an Apple iPhone) via a USB cable.
Please note that not all content can be played back directly on the projector via a smartphone due to copy protection regulations of the respective app providers. Using an Amazon Fire Stick or Google Chromecast, content from e.g. Netflix, Amazon Prime or Disney+ should also be playable via the HDMI input of the projector.
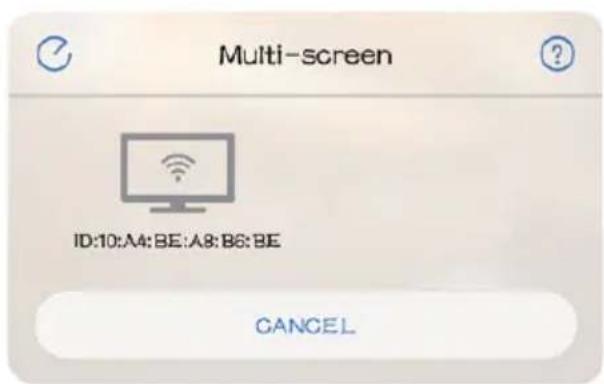
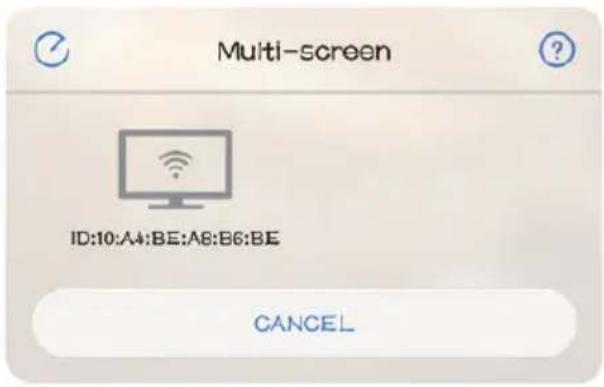
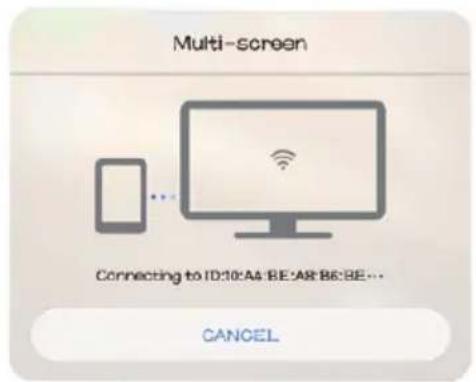
To access the multi-screen interface, select „Wifi Display“ on the main screen and press „OK“.
Android Smartphones
Requirements
Resolution WVGA 1080P
Memory At least 40 MB free space required
Step 1: From the menu, select „WiFi Display“ and then „Miracast“.


Step 2: Call up the Miracast / Wireless Display / Multiscreen function on your smartphone and connect to the projector via the SSID.


Apple iPhone / iPad
| Requirements |
| Supported versions iOS 7 und höher |
| iPhone 5 / iPod Generation 5 / iPad3 oder höher |
| Resolution iPhone: 480 x 320 / 1136 x 640 |
| iPad 1024 x 768 / 2048 x 1536 |
| Memory At least 40 MB free space required |
Step 1: Open the settings menu in your phone, turn on WiFi and connect to the WLAN.
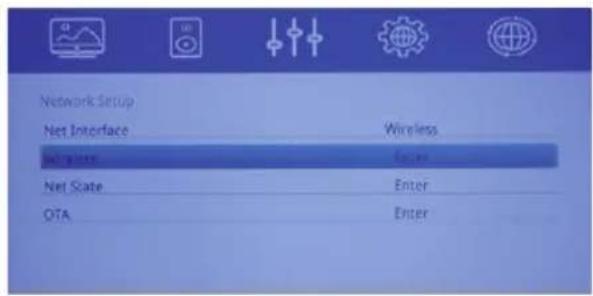
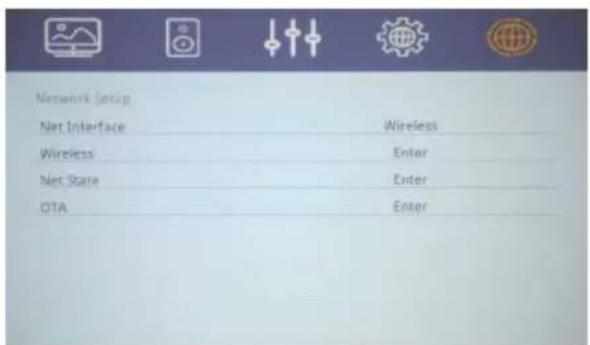
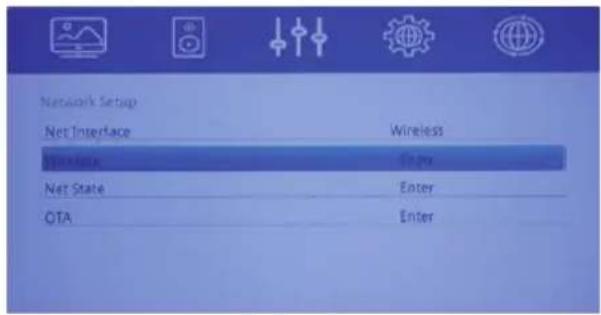
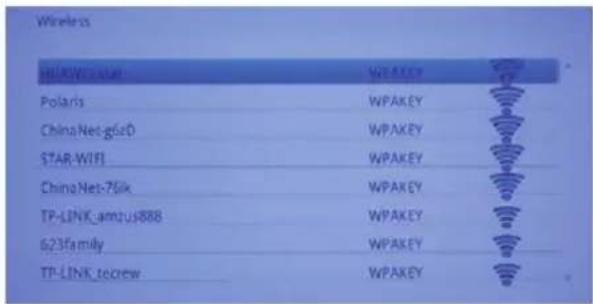
Step 2: Connect the projector to the same wireless LAN by selecting the icon in the „Settings“ section and then registering the projector to the wireless LAN as follows:
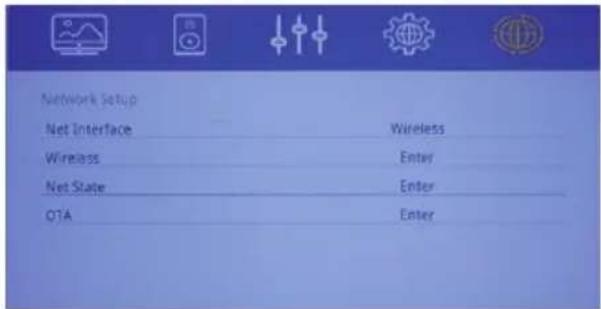


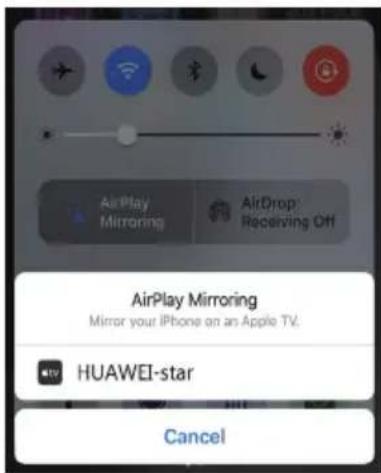
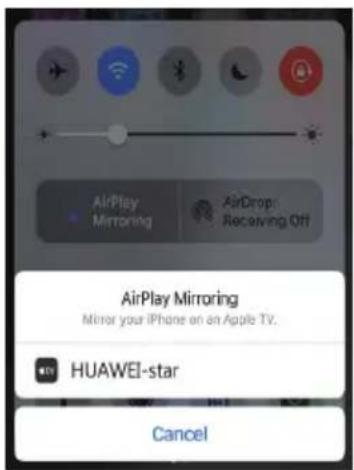
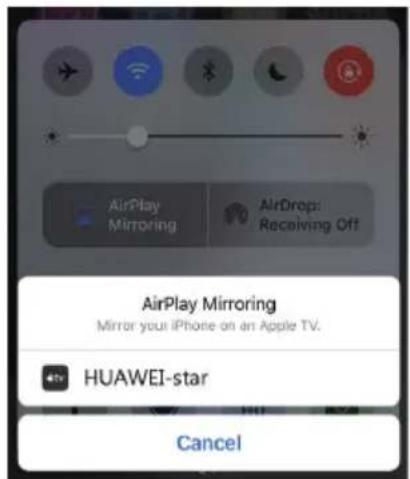
Step 3: Connect the iOS device to the Airplay function.


Step 4: Confirm Air-Play Mirroring by selecting the SSID on the iOS device.


Connecting via a cable connection (iOS)
Step 1: From the menu, select „WiFi Display“ and then „Cablecast“.


natural_image
Three icons on a blue background: smartphone, audio jack, and monitor (no text or symbols)Step 2: Confirm the connection with „Trust“. Only use original Apple USB cable.
Step 3: Click „Allow“ to start sharing multiple screens.


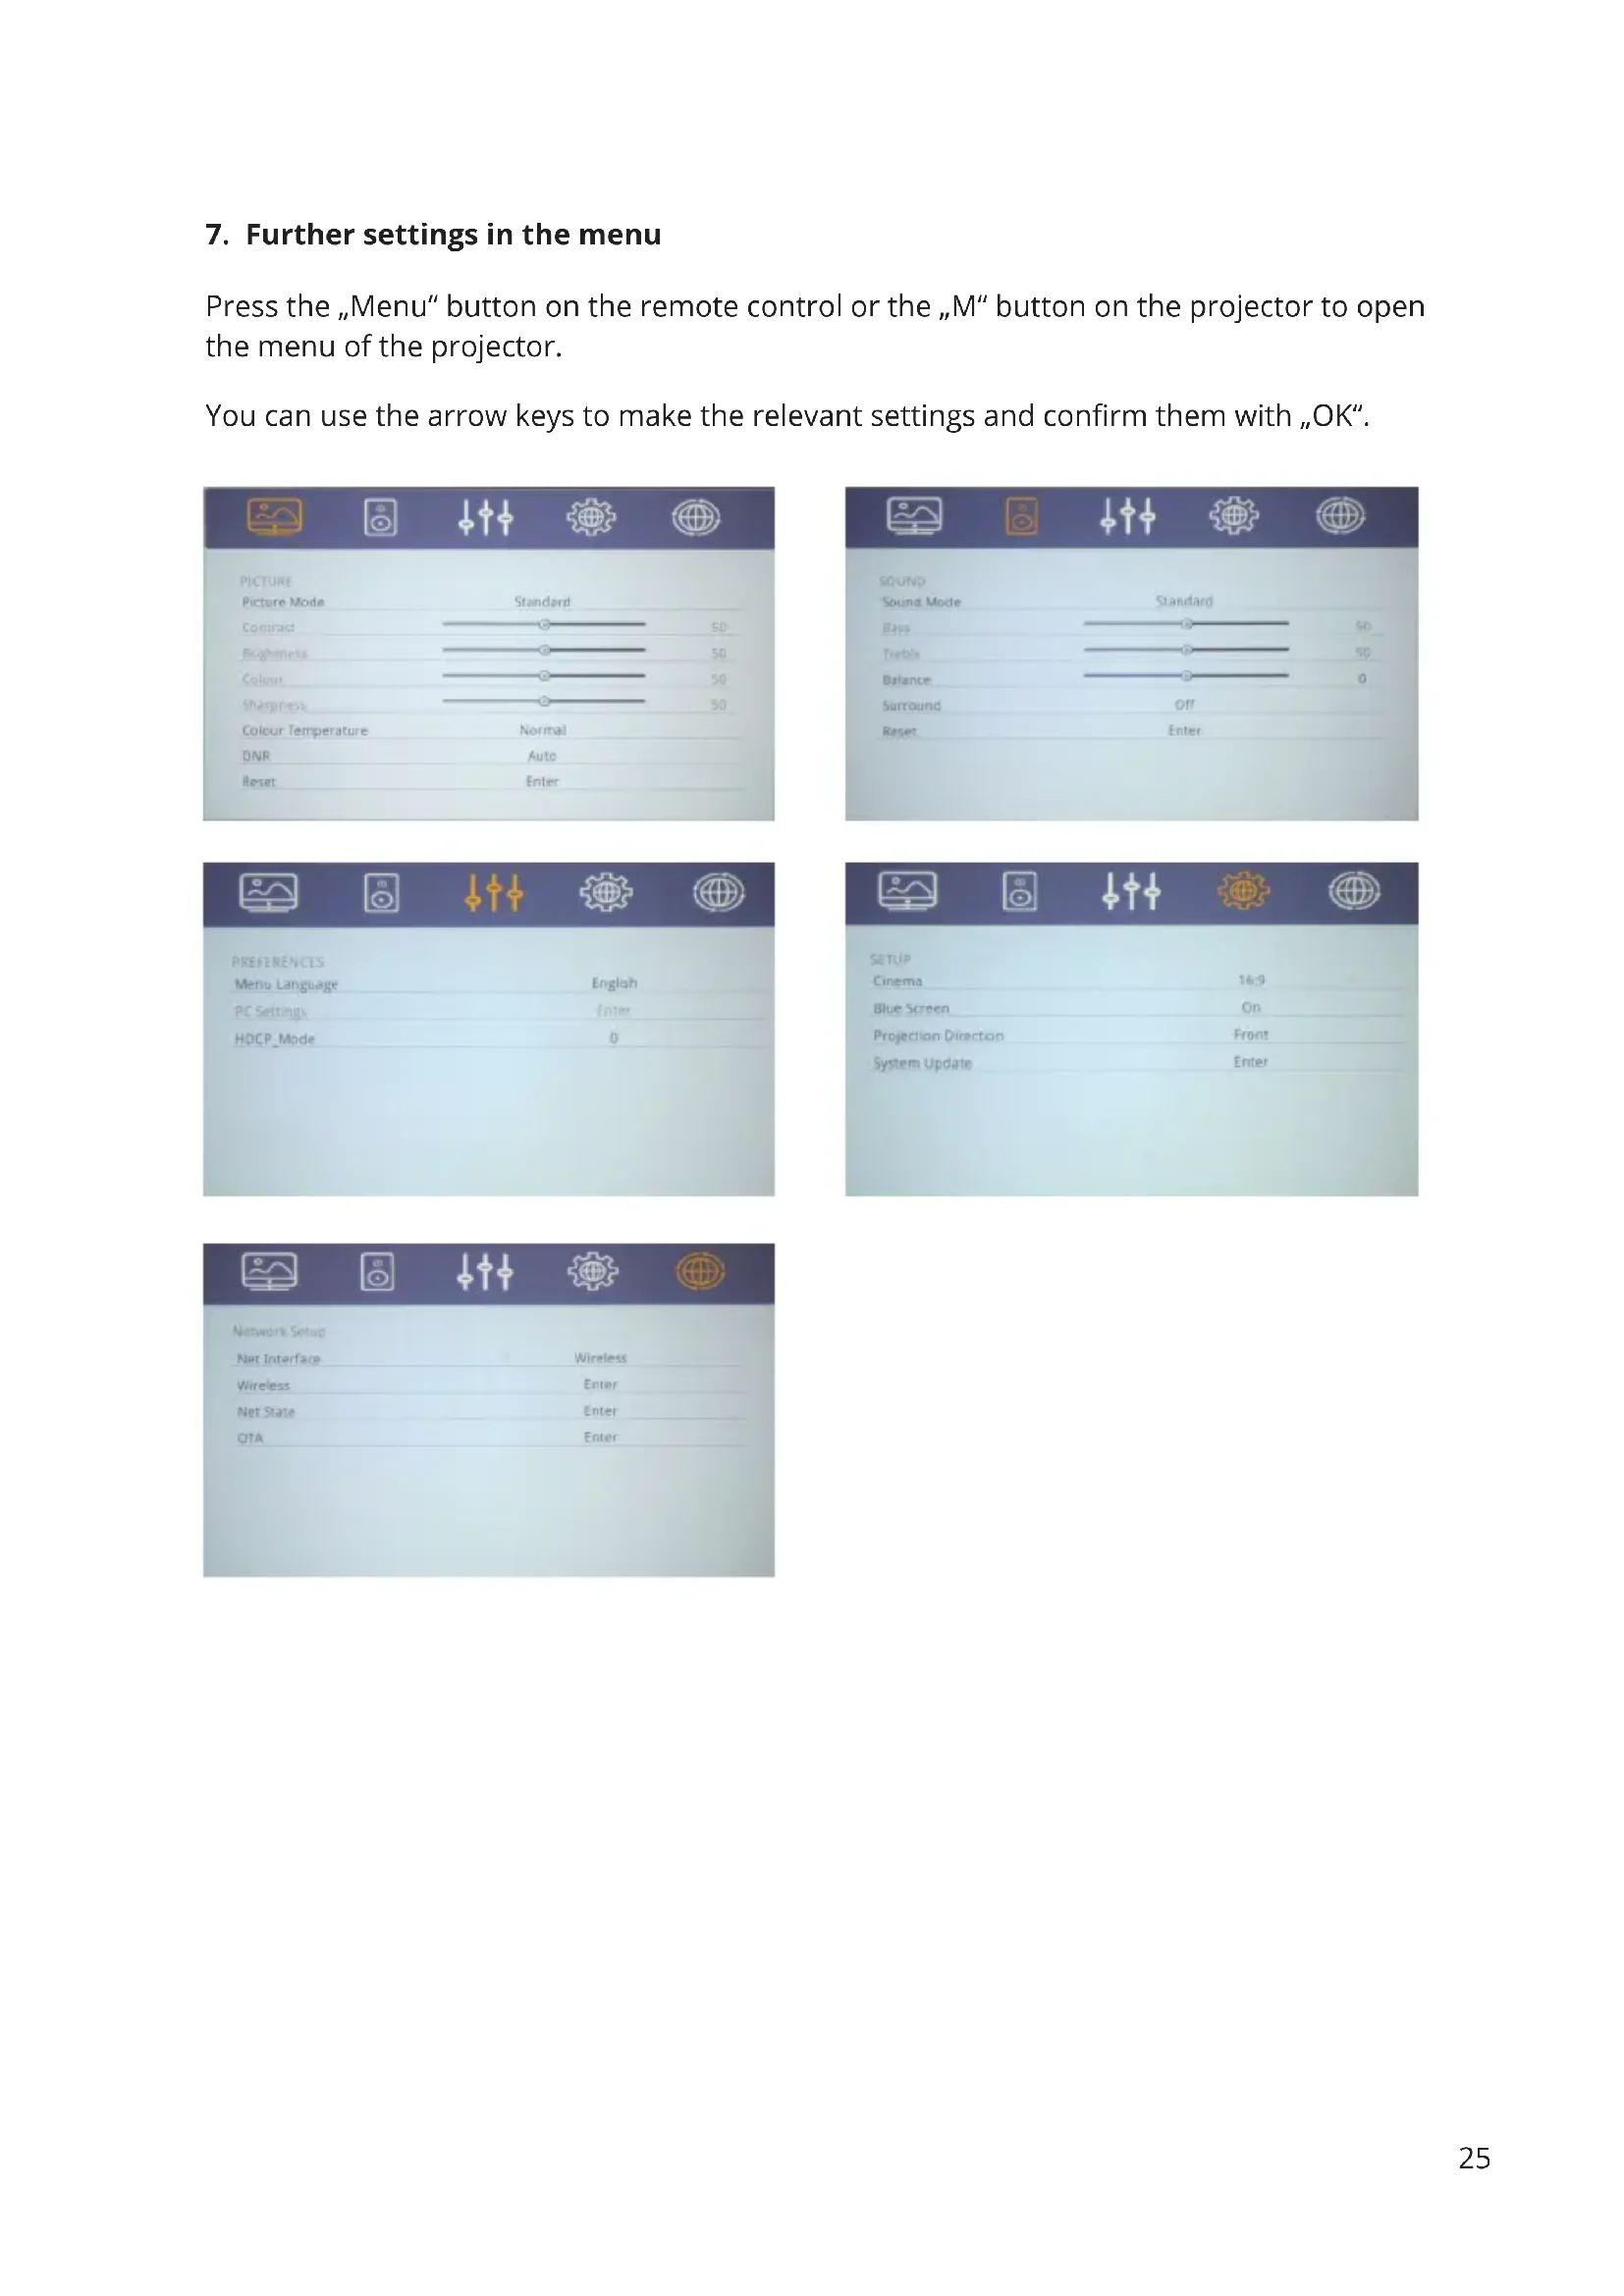
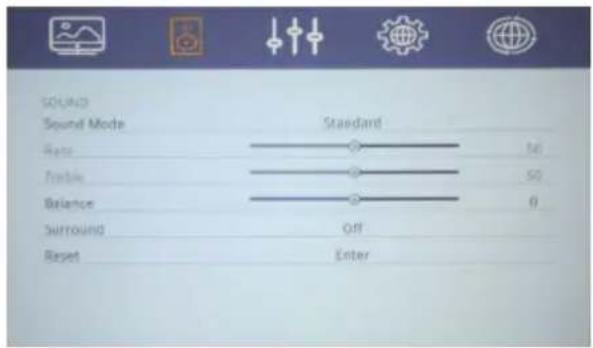
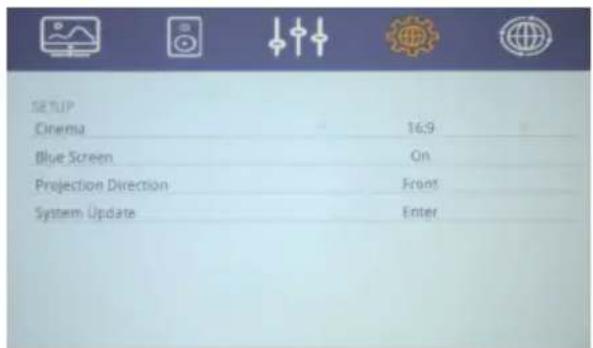
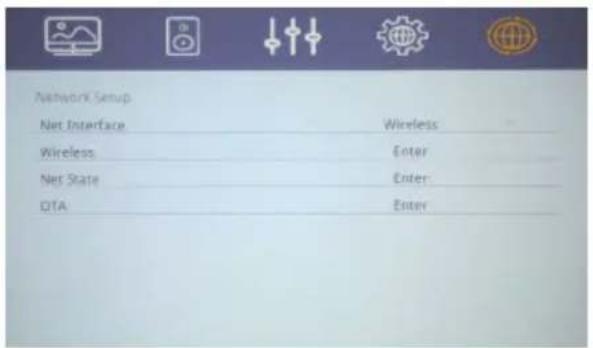
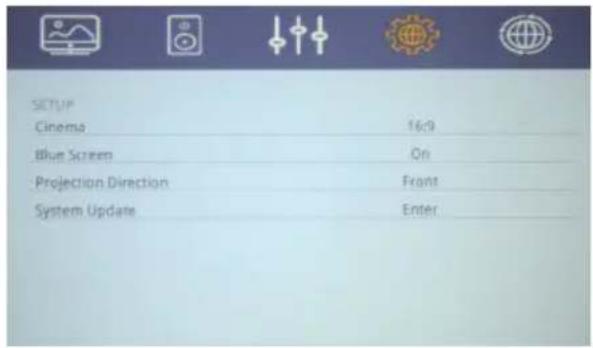
7. Further settings in the menu
Press the „Menu“ button on the remote control or the „M“ button on the projector to open the menu of the projector.
You can use the arrow keys to make the relevant settings and confirm them with „OK“.


| Network Setup | ||
| Net Interface | Wireless | |
| Wireless | Enter | |
| Net State | Enter | |
| QTA | Enter | |
TECHNICAL DATA
| Display method LCD |
| Physical resolution 1280 x 720 (supports 1920 x 1080) |
| Light source LED |
| Projection distance 1,2m - 4m |
| Projection diagonal 1m - 3,30m |
| Aspect ratio 16:9 / 4:3 |
| Brightness 2000 lumens |
| Power consumption 43W |
| Keystone correction ±15° manual |
| Power supply 110-240V ~ 50/60Hz |
| Input interfaces USB / microSD / HDMI / AV / VGA |
| Output interface Audio 3,5mm jack |
| Dimensions 200 x 145 x 75mm |
| Weight 980g |
DISPOSAL

This symbol indicates that this product is subject to the European Directive and must not be disposed of together with other household waste. Refer to and follow local regulations for separate collection of electrical and electronic equipment. Proper disposal of old products helps to avoid negative effects on the environment and health.
Manufacturer:
VEHNSGROUP
VEHNS GROUP GmbH
Changes and errors excepted.
The manufacturer accepts no liability for damage resulting from incorrect, improper or incompatible use of the product.
© VEHNS GROUP GmbH
Version 1.0 - Sep 2020
MANUEL D'UTILISATION
ATTENTION
natural_image
Technical line drawing of a rectangular electronic device with circular vent and mounting base (no text or symbols)natural_image
Line drawing of a multi-pin cable with three connectors (no text or symbols)


Apple iPhone / iPad


natural_image
Three icons on a blue background: smartphone, wireless cable, and monitor (no text or symbols)
| PREFERENCES Menu Language | English |
| PC Settings | Enter |
| HDCP_Mode | 0 |

CARACTÉRISTIQUES TECHNIQUES
Version 1.0 - Sep 2020
ISTRUZIONI PER L'USO
SI PREGA DI NOTARE:
natural_image
Line drawing of a projector with a circular vent and mounting base (no text or symbols)natural_image
Line drawing of three USB connectors with a coiled cable (no text or symbols)

Apple iPhone / iPad


natural_image
Illustration of a smartphone, audio jack, and monitor on a blue background (no text or symbols)


SPECIFICHE TECNICHE
Version 1.0 - Sep 2020
natural_image
Line drawing of three connected audio/video cables (no text or symbols)

Apple iPhone / iPad
natural_image
Three icons on a blue background: smartphone, audio jack, and monitor (no text or symbols)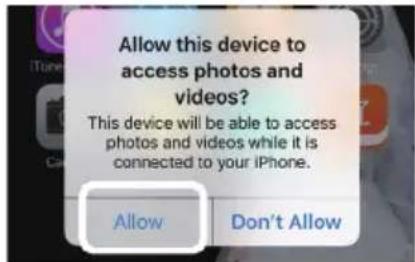

| Network Setup | ||
| Net Interface | Wireless | |
| Wireless | Enter | |
| Net State | Enter | |
| OTA | Enter | |
Version 1.0 - Sep 2020
La VAGUE
www.lavague.de
VEHNSGROUP
- Apple iPhone / iPad
- TECHNISCHE DATEN
- INSTRUCTION MANUAL
- PLEASE NOTE
- INITIAL STEPS
- Connecting the power cable
- Power up
- Image Settings
- Playback from a cable signal source
- Playback from a microSD card / USB stick
- Streaming via a smartphone
- Android Smartphones
- Requirements
- Connecting via a cable connection (iOS)
- Further settings in the menu
- TECHNICAL DATA
- DISPOSAL
- Manufacturer:
- VEHNSGROUP
- MANUEL D'UTILISATION
- ATTENTION
- CARACTÉRISTIQUES TECHNIQUES
- ISTRUZIONI PER L'USO
- SI PREGA DI NOTARE:
- SPECIFICHE TECNICHE
- La VAGUE
Brand : LA VAGUE
Model : LV-HD240
Category : Projector