CA-904W - Heating Clean Air Optima - Free user manual and instructions
Find the device manual for free CA-904W Clean Air Optima in PDF.
User questions about CA-904W Clean Air Optima
0 question about this device. Answer the ones you know or ask your own.
Ask a new question about this device
Download the instructions for your Heating in PDF format for free! Find your manual CA-904W - Clean Air Optima and take your electronic device back in hand. On this page are published all the documents necessary for the use of your device. CA-904W by Clean Air Optima.
USER MANUAL CA-904W Clean Air Optima
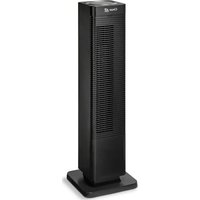
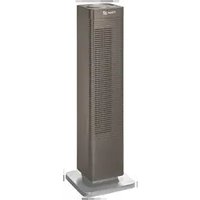
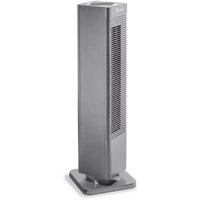
Design Fan Heater Clean Air Optima® CA-904W
User manual
Find more languages on: www.cleanairoptima.com/info/manuals
(DE) Gebrauchsanweisung
(NL) Gebruiksaanwijzing
(FR) Mode d'emploi
(ES) Manual del usuario
(NO) Brukermanual
(SE) Användarmanual
(FI) Ohjekirja
(DK) Brugermanual
(IT) Manuale d'uso
(PT) Manual do usuário
(BA) Uputstvo za upotrebu
(HR) Korisnički priručnik
(HU) Használati utasítás
(TR) Kullanım kılavuzu
(PL) Instrukcja obsługi
(CZ) Uživatelská příručka
(RO) Manual de utilizare
(LT) Naudotojo vadovas
(EE) Kasutusjuhend
(LV) Lietošanas pamācība
(RU) Руководство
пользователя
(MK) Прирачник
за користење
natural_image
White vertical air conditioner tower with ventilation slots against a blue background (no text or symbols visible)Read these instructions carefully before you start using the Design Fan Heater and keep the manual for later usage.
This product is only suitable for well insulated spaces or occasional use.
This product is not suitable for use as primary heating.
© Copyright: Clean Air Optima®
Clean Air Optima®
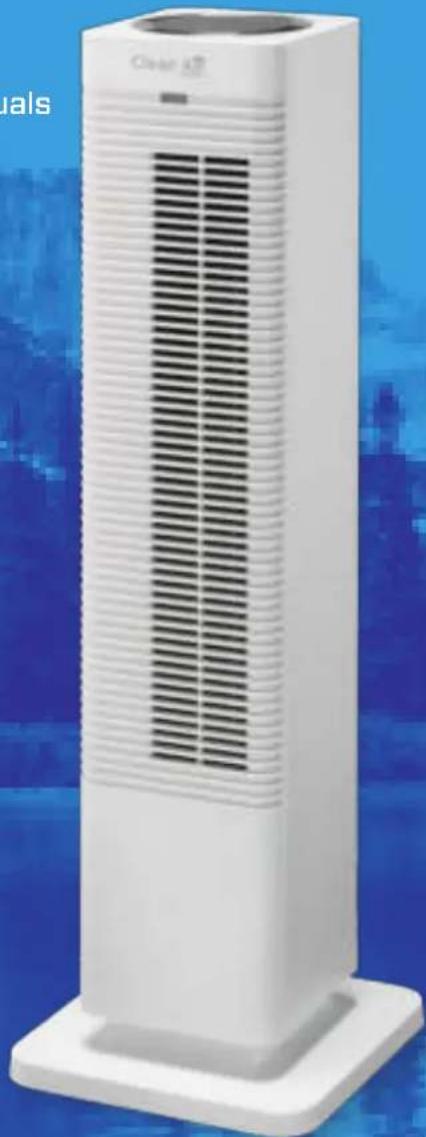
CA-904W / Main unit
text_image
01 02 03 04 L 10 07 08 09 11 05 06 12- Control panel
natural_image
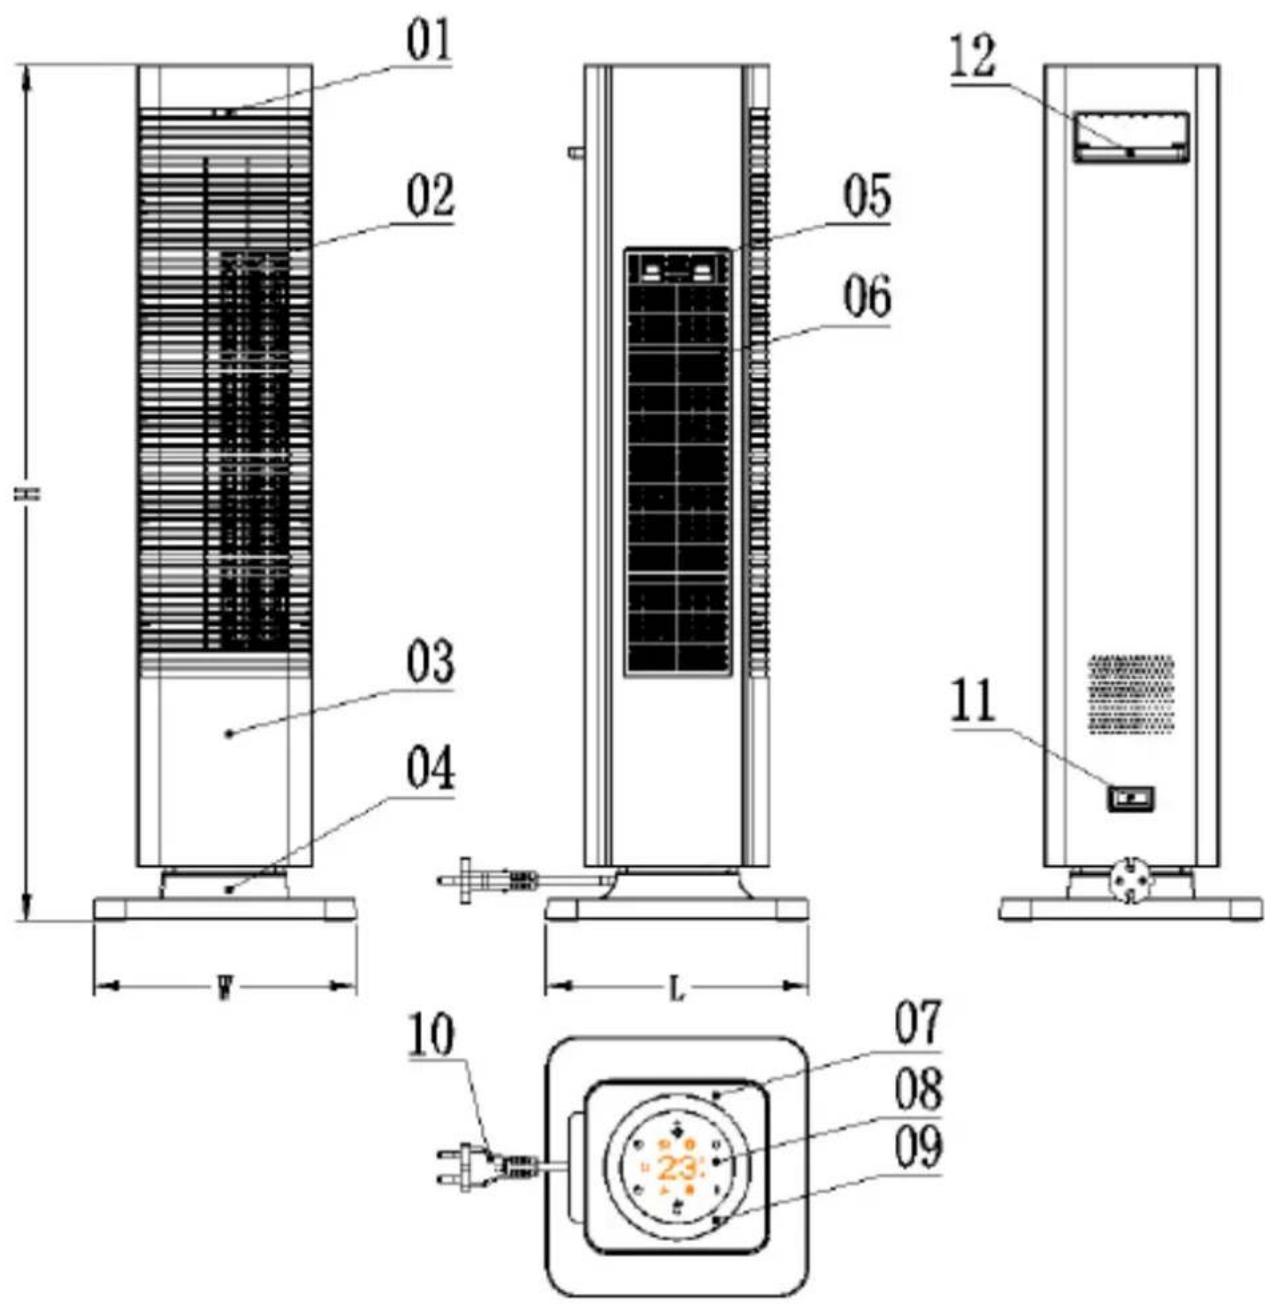
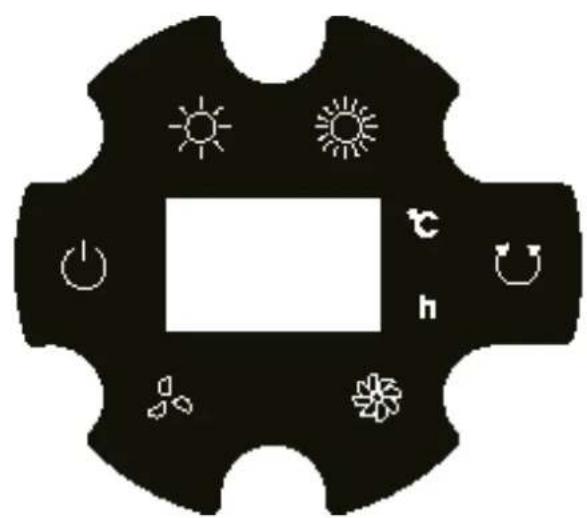
Circular diagram with directional icons including sun, clock, power, flower, thermometer, and refresh symbol (no text or labels)- Display panel
text_image
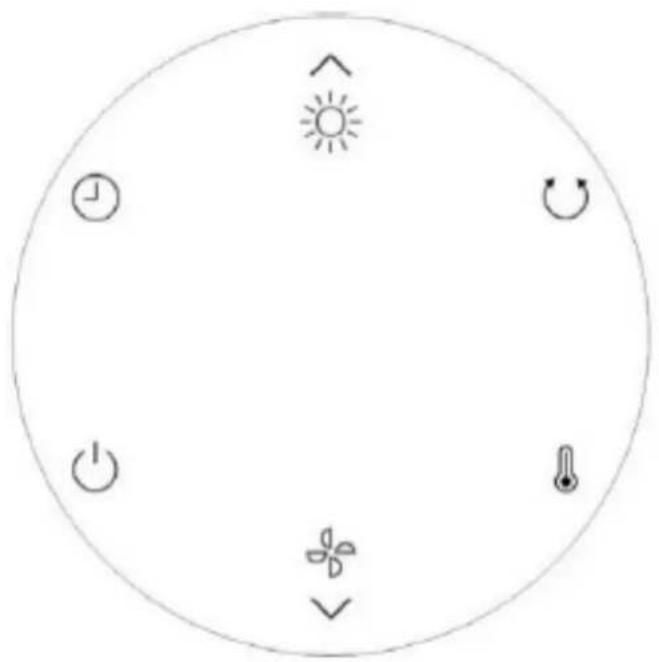
Diagram of a mechanical or electrical switch with icons for power, switches, and thermal symbolsClean Air Optima®
15. Remote control

text_image
Diagram showing directional control buttons including power, refresh, alarm, thermometer, sun, and flower symbolsEnglish
Thank you for purchasing the Clean Air Optima® Design Fan Heater CA-904W. We wish you many years of healthy indoor air with this efficient and effective product. This product is only suitable for well insulated spaces or occasional use. This product is not suitable for use as primary heating.
These instructions describe the safety precautions to be observed during operation. They are meant to prevent injuries and to avoid damaging the device.
Description of the device
The device consists of the following main components:
- Air outlet
- Front cover
- Base
- Filter cover
- Filter
- Top cover
- Control panel
- Decoration display ring
- Power cord
- Power switch
- Remote control holder
- Control panel
- Display panel
-
Remote control
-
Remote control signal receiver
Safety warnings
This device may only be used in accordance with these safety instructions. Take the following steps to minimize the risk of personal injury caused by for example electric shocks or fire.
- Only for indoor use. Do not use or store outdoors.
- The device is not intended to be used by children or persons with reduced physical-, sensory- or mental capabilities, unless they are supervised by a person responsible for their safety.
- Children should be kept away unless continuously supervised.
- CAUTION — Some parts of this product can become very hot and can cause burns.
Particular attention has to be given when children and vulnerable people are present.

Warning: in order to avoid overheating, do not cover the heater.
- The heater must not be placed immediately below a socket-outlet.
- Do not use the device when there is visible damage on the electrical cord or on the device itself. Do not repair the device yourself in case of damage. Never pull the device by its cord. If the power cord is damaged, then it must be replaced by an authorized service person to prevent electric shock or fire.
- Repairs may only be performed by authorized service personal. Do not try to repair the device yourself to prevent electric shock or fire.
- Always remove the plug from the socket when the device is not being used or when you clean internal or external parts of it.
- Only use power cords provided.
- To safely use the device, put it in a steady, horizontal position. Do not move while using.
- Do not use the device in rooms where inflammable liquids or gases are stored, close to heat sources or in particularly humid rooms like the bathroom, shower or swimming pool.
- To prevent malfunctions, never insert strange objects into the device.
- Never cover the air inlet and air outlet grid.
- Never dissemble or replace the device's inner parts.
- To prevent injury or damage to the heater, do not touch the air inlet and outlet grille while the device is running and do not insert the handle or any other object into the air outlet.
- Do not put heavy objects on the unit.
- Do not place the device in direct sunlight, to avoid that the device discolours.
- Never immerse the unit in water or other liquids.
- Do not touch the power cord with wet hands.
- Do not point the air outlet directly at a baby for a long time.
- Do not place the device close to walls, curtains or other combustible materials, it may cause a fire.
- When there is a unusual smell or unusual sound coming from the device, unplug the device from the power socket right away.
-
Do not use this heater if it has been dropped.
-
Do not use if there are visible signs of damage to the heater.
-
Use this heater on a horizontal and stable surface, or fix it to the wall, as applicable.
-
WARNING: Do not use this heater in small rooms when they are occupied by persons not capable of leaving the room on their own, unless constant supervision is provided.
-
This appliance can be used by children aged from 8 years and above and persons with reduced physical, sensory or mental capabilities or lack of experience and knowledge if they have been given supervision or instruction concerning use of the device in a safe way and understand the hazards involved. Children shall not play with the device.
-
Cleaning and user maintenance shall not be made by children without supervision.
-
Children of less than 3 years should be kept away unless continuously supervised.
-
Children aged from 3 years and less than 8 years shall only switch on/off the device provided that it has been placed or installed in its intended normal operating position and they have been given supervision or instruction concerning use of the device in a safe way and understand the hazards involved. Children aged from 3 years and less than 8 years shall not plug in, regulate and clean the device or perform user maintenance.
-
WARNING: To reduce the risk of fire, keep textiles, curtains, or any other flammable material a minimum distance of 1 m from the air outlet.
-
Use, maintain and clean the device as described in this manual.
Clean Air Optima®
Product Features
- Equipped with PTC ceramic heating element: this ensures that the air flow is automatically adjusted to the room temperature.
- Adjustable Air flow and temperature:
Airflow: low - high
Temperature: cool - warm
- Timer function (1-12h)
- Digital temperature control from 15°C to 35°C
- Equipped with a Cross flow fan for silent operation
- Tip-over safety protection, double over-heating protection
- With Infrared long distance remote control function
- Wide angel swing function
- Automatic air supply, gentle breeze, smooth heating.
Installation and Operation instruction
The package contains: Main device (the base cannot be removed), remote control and instruction manual.
Assembling the device
- Take out the device from the package.
- Carefully put the device on a stable surface in upright position.
- The device needs to be positioned at least 30 cm from walls and furniture.
Function of keys
-
Plug in the device: you will hear an acoustic sound and the power symbol ⏻ lights up.
-
In standby mode. Only the 🎨 icon lights up. Press the 🔊 key, the device starts working. Press it again, the device turns off.
The default situation after switching on:
a) PTC: Low heating power, icon lights up.
b) Swing: Swing off, the icon is off.
c) Timer: Oh(= no timer is set), the "h" icon is off.
d) Room temperature LED display “ ” lights up.
e) Fan switches on.
f) Temperature setting: default is set to 25^ C
- In operating condition, press the key to shift PTC from low heating power to high heating power. By pressing the key again, the PTC will switch back to low heating power.
a) If working at low heating power: the low heating power icon lights up (the high heating power icon is off).
b) If working at high heating power: the high heating power icon lights up. (high heating starts after 10 seconds).
- In operating condition, press the √ key to shift from low fan power to high fan power. By pressing the key again, the fan switches back to low power.
a) When working at low fan speed: the low fan power icon lights up.
b) When working at high fan speed: the high fan power icon lights up.
- In operating mode, you can press the ⬤ key to make the device oscillate or not.
a) Press the Swing key: the device will oscillate, the 🕒 icon lights up.
b) Press the Swing key again: the device will stop oscillating, the 🤒 icon will be off.
Note:
In warm airflow mode the PTC stops working when the room temperature is higher than the set temperature. The fan stops working after 10 seconds. During that time, the swing function is not available.
- In operating condition, press the ⏻ key to set the timer.
a) Go to the timer setting mode, press the ⏻ key, the LED time icon lights up and blinks every 0.5 seconds. During this time-frame, press the ⏻ or the key to set the timer (0-12 hours), with each key press the time will be added by 1 hour.
By pressing and holding the 🎨 or keys, the time can be set faster.
b) If no keys are pressed within 5 seconds (except for ⚙ and √), the LED indicator will show the room temperature.
c) Press the timer key to see the set time. If the value shows a number except for -0-, the timer will start timing (not shown), if the timer reaches value -0-, then the device will turn off at once.
d) If the value shows -O- in timer setting, then this means no time is set, the time icon will be off, the LED display will show the current room temperature.
Clean Air Optima®
- a) Press the ⚡ key, to change the temperature by pressing the ⚡ or ⚡ keys. The temperature range is from 15^ C \~ 35^ C, the temperature will change by 1^ C by every key press.
b) By pressing the ⚡ key again or if no key is pressed within 5 seconds, the temperature that you have set will be effected at once.
c) If no keys are pressed within 5 seconds (except for ☐ or ☑), the LED indicator will show the room temperature. When the temperature is ≤-10°C, the display shows "LO"; When the temperature is >40°C, the display shows "HI".
d) After switching on the device, it will start measuring the temperature within 10 seconds. If the ambient temperature is higher than the set temperature then the PTC heating function will turn off; the low/high heating power light will be off, and the fan will switch off after 10 seconds. The swing function will also stop, if you have set it before. All the other icons will not change. If the ambient temperature falls below 1^ C of the set temperature, the heating function will switches on again, as well as the fan & the swing function (if set before). The other icons will be on.
e) If both timer and room temperature are set, the values are alternately shown on the display (at an interval of 30 seconds).
-
Memory last setting: when switching on the device, the last settings will be activated.
-
After the device has been in operation for 1 minute, the display light of the keys will dim.
-
NTC over-heating protection function: At temperatures higher than 55^ C, the device will switch itself off. If the ambient temperature drops below 45^ C, the device can be switched on again manually. If the temperature raises above 45^ C again, the device will switch off again. After 12 hours of operation with no change in settings, the device will switch itself off.
Cleaning & Maintenance
Unplug the heater before each maintenance and make sure the heater has cooled down. If necessary you can use a soft cloth with a neutral cleaning product dissolved in warm water (below 50°C) to clean the outer side of the fan. Dry carefully.
To avoid damaging the device, do not use aggressive cleaning agents to clean the surface of the heater.
To store the heater, place it in a dry and ventilated place.
Remote control
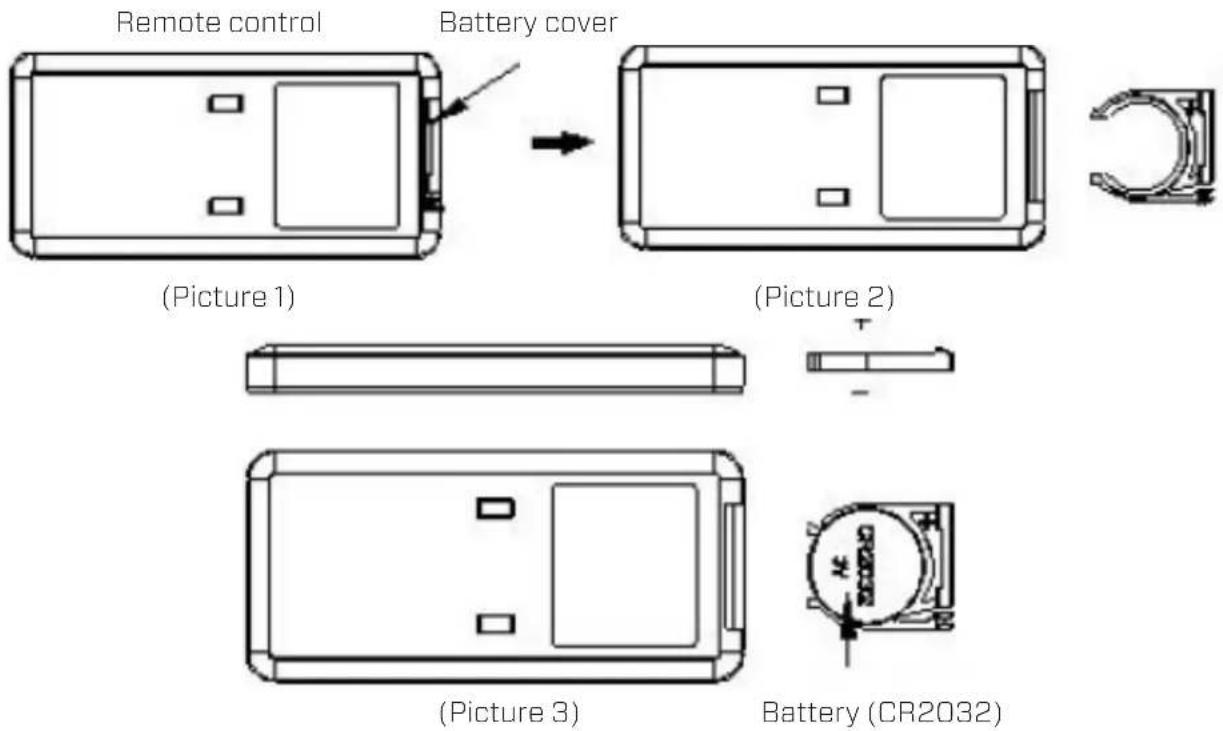
- Open the battery cover at the back side of remote control to place the battery. (see Picture 1).
- To place the battery: there is a "security tab" at the bottom of the remote control that you first have to slide to the right and then pull out the battery holder. (see Picture 2). Insert the battery with the correct polarity. (see Picture 3).
- Push the battery cover back into the remote control.
text_image
Remote control Battery cover (Picture 1) (Picture 2) (Picture 3) Battery (CR2032)Clean Air Optima®
Specifications
Model CA-904W
For rooms up to 40m^2/100m^3/430ft^2
Rated voltage 220V - 240V, 50Hz
Rated power 1000W - Max. 2000W
Nominal heat output 2000W
Minimum heat output 1000W
Maximum continuous heat output 2000W
Digital temperature control From 15 °C to 35°C
Fan function Air velocity: up to 5 meter/second
Turning circle Oscillation: 80
Sound level Silent fan < 35dB(A) Low
Dimensions 688 x 210 x 210mm
Weight 4,56kg
Colour White
Carried standard EN/IEC 60035-1,EN/IEC60335-2-30,EN/IEC60335-2-80
Complies with EU regulations CE/WEEE/RoHS
Ask your retailer or your municipality for updated information regarding the disposal of the packaging and of the device.
natural_image
Simple line drawing of a trash bin with crossed lines indicating no waste or restriction (no text or symbols)Information requirement for the electric local space heaters
| Model identifier: CA-904W | |||||
| Item Symbol | Value Unit | Item Unit | |||
| Heat output Type of heat input, for electric | storage local space heaters only (select one) | ||||
| Nominal heat output | Pnom 2.0 | kW Manual | heat charge | control, with integrated thermostat | No |
| Minimum heat output (indicative) | Pmin 1.0 | kW Manual | heat charge | control with room and/or outdoor temperature feedback | No |
| Maximum continuous heat output | Pmax,c | 2.0 | kW | Electronic heat charge control with room and/or outdoor temperature feedback | No |
| Auxiliary electricity consumption | --- | --- | --- | Fan assisted heat output No | |
| At nominal heat output | elmax | N/A | kW | Type of heat output/room temperature control (select one) | |
| At minimum heat output | elmin | N/A | kW | Single stage heat output and no room temperature control | No |
| In standby mode | eISB | 0.000 | kW | Two or more manual stages, no room temperature control | No |
| With mechanic thermostat room temperature control | No | ||||
| With electronic room temperature control | Yes | ||||
| Electronic room temperature control plus day timer | No | ||||
| Electronic room temperature control plus week timer | No | ||||
| Other control options (multiple selections possible) | |||||
| Room temperature control, with presence detection | No | ||||
| Room temperature control, with open window detection | No | ||||
| With distance control option | No | ||||
| With adaptive start control | No | ||||
| With operating time limit | No | ||||
| With black bulb sensor | No | ||||
| Contact details | Clean Air Optima International GmbH | ||||
Clean Air Optima®
Service
Warranty Certificate for the Clean Air Optima® Design Fan Heater CA-904W.
Date of purchase: ..... Customers name: ..... Address: ..... Telephone: ..... Email: ..... Seller's name: ..... Address: ....
-
Please fill in completely this Warranty Certificate. Send it with the invoice and the unit, postage pre-paid and using the original packing box, to your distributor. Make sure to include the appropriate return postage for the package.
-
Please enclose a short description of the damage, fault or malfunction, and the circumstances under which these problems arose.
The Clean Air Optima® Design Fan Heater CA-904W is subjected to strict testing procedures before leaving the factory. If within 2 years from the date of purchase the product does not perform according to the specifications, because of factory defects, the purchaser is entitled to free repairs or replacement of parts upon presentation of this warranty (provided that the malfunction or damage to the device and/or parts occurred under normal operating conditions). What is covered: All parts defective in material and workmanship. For how long: two years from purchase date. What we will do: Repair or replace any defective parts.
Other Conditions
The provisions of this warranty are in lieu of any other written warranty whether express or implied, written or oral, including any warranty of merchantability or fitness for a particular purpose. The manufacturer's maximum liability shall not exceed the actual purchase price paid by you for the product. In no event shall the manufacturer be liable for special, incidental, consequential, or indirect damages. This warranty does not cover a defect that has resulted from improper or unreasonable use or maintenance, faulty assembly, accident, natural catastrophes, improper packing, or unauthorized tampering, alteration, or modification as determined solely by us. This warranty is void if the label bearing the serial number has been removed or defaced.
Thank you for reading!

Share your feedback about the Clean Air Optima ^®
Design Fan Heater CA-904W on:
www.cleanairoptima.com

For frequently asked questions about the CA-904W go to:
www.cleanairoptima.com and search for the CA-904W.
Download PDF instruction manual on:
www.cleanairoptima.com/info/manuals

Watch all Clean Air Optima ^® Product
animation video's on:
www.youtube.com
Clean Air Optima International B.V. | David Ricardostraat 9-7 / 9-9 | 7559 SH Hengelo (ov)
The Netherlands | Phone: +31 (0) 74 - 2670145
Clean Air Optima Germany GmbH | Enschedestraße 14 | 48529 Nordhorn | Germany
Phone: +49 (0) 5921 879-121
E-mail: info@cleanairoptima.com
Internet: www.cleanairoptima.com
Clean Air Optima®
Deutsch
natural_image
Symbol of a trash bin with crossed lines and a blank rectangular base (no text or labels)natural_image
Symbol of a trash bin with crossed lines indicating no waste, and a solid black rectangle below (no text or labels)natural_image
Simple line drawing of a trash bin with crossed lines indicating no waste or restriction (no text or symbols)natural_image
Technical line drawing of a device rear panel with an arrow indicating transformation (no text or symbols)natural_image
Technical line drawing of a rectangular object with a side view showing internal structure (no text or symbols)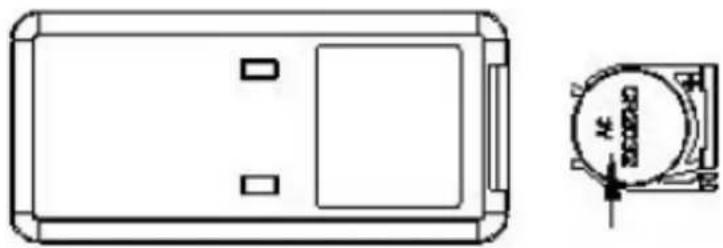
natural_image
Technical line drawing of a rectangular electronic device with two ports and an inset showing a circular component labeled 'COSCO' (no text or symbols beyond label)(imagen 3)
(imagen 2)
Pila (CR2032)
Clean Air Optima®
Especificaciones
Modelo CA-904W
natural_image
Simple line drawing of a trash bin with crossed lines indicating no waste or restriction, and a solid black rectangle below (no text or symbols)natural_image
Symbol of a trash bin with crossed lines indicating no waste or discharge, and a solid black rectangle below (no text or labels)natural_image
Technical line drawing of a rectangular device with internal compartments and an arrow indicating transformation (no text or symbols)natural_image
Technical line drawing of a rectangular object with a side view showing internal structure (no text or symbols)