Charge Manager 2016 - Battery charger VOLTCRAFT - Free user manual and instructions
Find the device manual for free Charge Manager 2016 VOLTCRAFT in PDF.
| Product type | Fast charger for rechargeable batteries |
| Brand | Voltcraft |
| Model | Charge Manager 2016 |
| Category | Battery charger |
| Dimensions (L x W x H) | 176 x 56 x 206 mm |
| Power supply | 12 V/DC power supply included (optional car adapter compatible, 21 W max) |
| Compatible battery types | NiMH/NiCd: AA, AAA, C, D, 9V; NiZn: AA, AAA |
| Number of slots | 4 for round batteries + 2 for 9V batteries |
| Charge current (slots 1-4) | 500, 1000, 1500, 2000 mA (selectable or automatic) |
| Discharge current (slots 1-4, NiMH/NiCd) | 150, 300, 450, 600 mA |
| Discharge current (slots 1-4, NiZn) | 200, 400, 600 mA |
| Charge current (9V) | max. 32 mA (22.5 mA effective) |
| Discharge current (9V) | 20 mA nominal (automatic) |
| Charge programs | Charge, Discharge, Test, Cycle, Activation (ALIVE) |
| Special functions | Automatic trickle charge, energy-saving mode, memory backup, automatic battery detection |
| Display | LCD screen with overview and detail view |
| Interface | USB-B for PC connection (downloadable software) |
| Safety | Overheat protection, defective battery detection, polarity protection |
| Operating temperature | 0 °C to +40 °C |
| Ambient humidity | 0 % to 85 % RH, non-condensing |
| Maintenance | Clean with a dry, soft cloth; do not use detergents |
| Disposal | Device and batteries: in accordance with local regulations |
Frequently Asked Questions - Charge Manager 2016 VOLTCRAFT
User questions about Charge Manager 2016 VOLTCRAFT
0 question about this device. Answer the ones you know or ask your own.
Ask a new question about this device
Download the instructions for your Battery charger in PDF format for free! Find your manual Charge Manager 2016 - VOLTCRAFT and take your electronic device back in hand. On this page are published all the documents necessary for the use of your device. Charge Manager 2016 by VOLTCRAFT.
USER MANUAL Charge Manager 2016 VOLTCRAFT
text_image
Technical diagram of a battery pack with numbered components and internal structure labelstext_image
USB 1 DC in 12 V = 1.75 A 2a) Ladeprogramme
| 1 | 2 | 3 | 4 |
| --- | --- | --- | --- |
| A | B | ||
| --- | CM2016 | --- | |
text_image
RDY 2 3 4 A NiMH B --- CM2016 ---Detailansicht:

text_image
SLOT1 C= 1684mAh NiMH D= 0.0mAh RDY U= 1.366V 01:14 I= 0.000A| 1 | 2 | 3 | 4 |
| TRI | --- | --- | --- |
| A | NiMH | B | |
| --- | CM2016 | --- | |
| ! | 2 | 3 | 4 |
| ERR | --- | --- | --- |
| A | NiMH | B | |
| --- | CM2016 | --- | |
- Introduction 29
- Scope of Delivery 29
- Intended Use 30
- Explanation of Symbols 30
- Safety Information 31
- Properties 36
- General Information 37
a) Definition of „C-Rate“ 37
b) Selection of the Suitable Charge and Discharge Current 38
c) Discharge current 39
- Display and Operating Elements 40
- Functions 41
a) Charge Programmes 41
b) Maintenance Charge 41
c) Energy Saving Mode 41
d) Memory-Backup 41
- Parameter Display 42
a) Battery Voltage 42
b) Charge Condition 42
c) Charge / Discharge Current 42
d) Time Measurement 42
e) Fed in and Removed Capacity 42
- Commissioning 43
- Operation 44
a) Selection of Battery Chemistry 44
b) Start of Battery Charging Programmes 44
c) Programme Cancellation 46
-
Display of Programmes and Battery Parameters 47
-
USB Data Interface 50
- Troubleshooting 50
-
Maintenance and Care 52
-
Disposal 52
a) General Information 52
b) Batteries and Rechargeable Batteries 52
- Technical Data 53
a) Charger „Charge Manager 2016“ 53
b) Mains adapter 53
1. INTRODUCTION
Dear Customer,
Thank you for making the excellent decision of purchasing this Voltcraft® product.
Voltcraft® - This name stands for above-average quality products in the areas of measuring, charging and grid technology, characterised by technical competence, extraordinary performance and permanent innovation.
Whether you are an ambitious hobby electronics technician or a professional user - a product of the Voltcraft® brand family will provide you with the best solution for even the most sophisticated of tasks. Special features: We offer the sophisticated technology and reliable quality of our Voltcraft® products at a near-unbeatable price/performance ratio. We lay the groundwork for long, good and successful cooperation.
Enjoy your new Voltcraft® product!
All company names and product names are trademarks of their respective owners. All rights reserved.
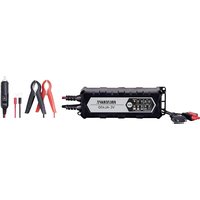
2. SCOPE OF DELIVERY
- Battery charger
- Mains adapter
- Operating instructions
3. INTENDED USE
This charger must only be used for simultaneous charging of up to four rechargeable NiMH or NiCd round cell batteries, types AA/mignon and AAA/micro, C/baby and D/mono.
This charger may be used to charge up to four rechargeable NiZn round cell batteries of the type AA/mignon and AAA/micro simultaneously as well. There also are two charging chutes for NiMH-/NiCd-9 V-block batteries.
A matching mains adapter is included in the delivery to supply the charger. Alternatively, the charger may also be operated via a suitable car adapter (not included in the delivery, can be ordered separately).
Any other use than the one described above will damage the product and cause danger, such as short-circuits, fire, electric shock, etc. No part of the product may be modified or converted and the casing must not be opened!
The safety notes and all other information in these operating instructions always have to be observed!
This product complies with the statutory national and European requirements. All company names and product names are trademarks of their respective owners. All rights reserved.
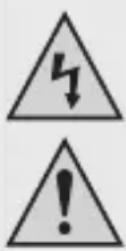
4. EXPLANATION OF SYMBOLS
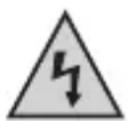
This symbol is used when your health is at risk, e.g. from an electric shock.

An exclamation mark in a triangle indicates important notes in these operating instructions that must be strictly observed.
→ The „arrow“ symbol can be found when there is special advice and notes regarding the operation.
In case of damage caused by non-compliance with these operating instructions, the warranty/guarantee will expire. We do not assume any liability for consequential damage!
We do not assume any liability for damage to property or personal injury caused by improper use or the failure to observe the safety instructions! In such cases the warranty/guarantee will expire.
Dear Customer, the following safety instructions are intended not only for the protection of your health but also for the protection of the product. Please read through the following attentively:
General Information
- The unauthorized conversion and/or modification of the product is prohibited for safety and approval reasons (CE). Never dismantle the product.
- The product is not a toy and must be kept out of the reach of children! The product must only be set up, used or stored in places that are not accessible to children. The same applies for rechargeable batteries.
Pay particular attention when children are present! Children may change the settings or short-circuit the battery/batteries, which may lead to fire or explosion. Danger to life!
- Maintenance, adjustments and repair work may only be carried out by a specialist/specialised workshop. The device contains no parts that require servicing or adjusting by you.
- In schools, training centres, hobby and self-help workshops, the use of the product must be supervised by responsible trained personnel.
- At industrial sites, the accident prevention regulations of the association of the industrial workers' societies for electrical equipment and utilities must be followed.
- Do not leave packaging material lying around carelessly. It might become a dangerous toy for children!
- Handle the product with care; impacts, shock or fall even from low heights will damage it.
Location for Installation
• The product is intended for dry indoor use only. The product must not become damp or wet. There is danger of a fatal electric shock!
- Choose a solid, flat, clean and sufficiently large surface for the charger.
Never place the charger on a flammable surface (e.g. carpet, tablecloth). Always use a suitable, non-flammable, heatproof surface. Keep the charger away from flammable or easily inflammable materials (e.g. curtains).
- Ensure that the cables are not crushed or damaged by sharp edges. Install the connection cable between the mains adapter and the charger so that no one can trip over it.
- Do not place any containers filled with liquid, e.g. vases or plants, on or next to the product.
When these liquids get into the charger, the charger will be destroyed and there is great danger of fire or explosion.
In this case, immediately disconnect the product from the power supply, then remove any inserted batteries. Do not use the charger again - bring it to a specialist workshop.
If any liquids get into the mains adapter, power down the mains socket to which the mains adapter is connected. For this, turn off the corresponding circuit breaker or unscrew the fuse. Then unplug the mains adapter from the mains socket. Do not use the mains adapter anymore and take it to a specialized workshop or dispose of it according to the legal provisions.
- Do not place the charger on any valuable furniture surfaces without using a suitable protection.
Operation
- This charger may be used to charge up to four rechargeable NiMH and NiCd batteries of the sizes AA/Mignon and AAA/Micro, C/Baby and D/Mono simultaneously. This charger may be used to charge up to four rechargeable NiZn round cell batteries of the type AA/mignon and AAA/micro simultaneously as well. There also are two charging chutes for NiMH-/NiCd-9 V-block batteries
Never insert any other rechargeable batteries (e.g. lithium batteries) or even non-rechargeable batteries into the charger. There is great danger of fire or explosion!
- Ensure that there is sufficient ventilation during operation. Never cover up the charger or the mains adapter. Leave enough of a distance (at least 20 cm) between charger and other objects. Overheating causes a danger of fire!
- The charger may only be connected to a stabilised direct current voltage of 12 V/DC as voltage/current supply (e.g. via the included mains adapter).
- Do not operate the product unattended. Despite a considerable number of protective circuits, it is impossible to exclude the possibility of malfunctions or problems during the charging process.
- Do not wear any metal or conductive materials, such as jewellery (necklaces, bracelets, rings, etc.) while you are working with the charger or batteries. Short-circuit poses a danger of burns and explosion.
- Never place metal lines and contacts between the rechargeable battery and the charging slot!
- Only operate the product in moderate climate, never in tropical climate. For more information on acceptable environmental conditions, see the chapter "Technical Data".
- Never operate the device immediately after it was taken from a cold room to a warm room. The resulting condensation may lead to malfunctions or damage! The mains adapter poses a danger of potentially fatal electric shock!
Let the product reach room temperature before taking it into operation again. This may take several hours!
- Avoid operation in direct proximity of strong magnetic or electromagnetic fields, transmitter aerials or HF generators. This can affect the control electronics.
- If you have reason to believe that the device can no longer be operated safely, disconnect it immediately and make sure it is not unintentionally operated. Then disconnect the charger from the voltage supply and unplug the mains adapter from the mains outlet.
Do not use the product anymore after this, but take it to a specialized workshop or dispose of it in an environmentally compatible manner.
It can be assumed that operation without danger is no longer possible if the device has any visible damage, the device no longer works, after extended storage under unsuitable conditions or after difficult transport conditions.
- If the product is not to be used for an extended period of time (e.g. storage), remove any battery inserted in the charger, disconnect the charger from the operating voltage, pull the mains adapter from the mains socket.
Handling rechargeable batteries
- Rechargeable batteries are no toys. Always keep batteries out of the reach of children.
- Do not leave rechargeable batteries lying around openly. Children or pets may swallow them. If swallowed, consult a doctor immediately!
- Rechargeable batteries must not be short-circuited, taken apart or thrown into fire. There is a risk of fire and explosion!
- Leaking or damaged rechargeable batteries may cause caustic burns if they come into contact with skin. Therefore you should use suitable protective gloves for this.
- Do not recharge normal, non-rechargeable batteries. There is a risk of fire and explosion!
Non-rechargeable batteries are meant to be used once only and must be disposed of properly when empty.
• Batteries must not get damp or wet.
- Never leave the charging/discharging batteries unattended.

- Please observe the correct polarity (plus/+ and minus/-) when inserting batteries into the charger.
- Do not charge/discharge any battery that is still hot (e.g. caused by high charge/discharge currents). Allow the battery to cool down to room temperature before attempting to charge or discharge it.
- Never charge/discharge damaged, leaking or deformed batteries. This can result in a fire or explosion! Dispose of any unusable rechargeable batteries in an environmentally compatible fashion. Do not continue to use them.
- Recharge standard rechargeable batteries about every 3 months and batteries with low self-discharge every three years. Otherwise, so-called deep discharge may result, rendering the rechargeable batteries useless.
- Never damage the exterior cover of a battery. There is a risk of fire and explosion!
If you are not sure about the correct operation or if questions arise which are not covered by the operating instructions, please do not hesitate to contact us or another specialist.
Voltcraft®, Lindenweg 15, D-92242 Hirschau, Phone +49 180/586 582 7.
6. PROPERTIES
The „Charge Manager 2016“ is a quick-charger for perfect maintenance of rechargeable NiCd, NiMH and NiZn batteries type AA/Mignon and AAA/Micro, C/Baby, D/Mono and 9 V block. All charging and care programmes are also available for NiZn batteries of the build AA/Mignon and AAA/Micro.
The microcomputer-controlled quick-charging process charges NiMH/NiCd/NiZn batteries to 100%.
100% means up to 115% of the capacity indicated for new rechargeable batteries and less than 100% of the capacity indicated for older ones.
For batteries with a capacity of less than 750 mAh, the discharge capacity (D) may not reach 100%; this discharge value, however, must be greater than 80%. Otherwise the battery is defective (preferably test with the „ALV“ („ALIVE“) programme).
This charging set does not require a discharge before starting the recharge process. The battery is charged to the currently possible 100% from its current charge condition.
The recharging and discharging cycle is microcomputer-controlled independently of the charge status of the battery.
Both the available charge currents and the discharge current are selected to fit the practical conditions.
The charger has an automatic maintenance charge and energy saving mode.
The charger has an automatic battery monitoring system (charge current and charge amount). The automatic battery detection registers if a battery is inserted or removed.
No memory effect occurs when charging (charge and discharge current are clocked). This reduces a high internal resistance of the battery and increases its current carrying capacity.
The efficiency of the batteries is improved (ratio of the required charge quantity to the capacity that can be delivered).
7. GENERAL INFORMATION
Rechargeable batteries consist of two electrodes put into an electrolyte; thus, a rechargeable battery is a chemical element. Chemical processes are running inside this element. Since these processes are reversible it is possible to recharge batteries.
To charge a rechargeable battery, a so-called charge voltage is required. It must exceed the cell voltage. Moreover, the energy (mAh) supplied for charging must be higher than the one that can be delivered afterwards. This ratio of the energy supplied to the energy drawn is called efficiency.
The capacity that can be delivered mainly depends on the discharge current; it is decisive for the condition of the battery. The supplied charge cannot be used as a measure, because a proportion of it will be lost (for example converted into heat).
The capacity data given by the manufacturer is the maximum theoretical quantity of current which can be delivered by the battery. That means that for example a battery of 2000 mAh can theoretically deliver a current of 1000 mA (= 1 A) for two hours. This value considerably depends on many factors (condition of the battery, discharge current, temperature, etc.).
This is a factor (multiplier) delivering the value of the permissible charge or discharge current independently of the battery capacity. The multiplier is the battery capacity.
The following applies: Battery capacity (in mAh) x C-Rate = Value (charge/discharge current in mA)
Examples with rechargeable batteries at 1000 mAh and 2700 mAh:
$$ \mathrm{C-Rate} = 1 \mathrm{CC-Rate} = 2 \mathrm{C} $$
$$ 1 0 0 0 \mathrm{mAh} \times 1 = 1 0 0 0 \mathrm{mA} 1 0 0 0 \mathrm{mAh} \times 2 = 2 0 0 0 \mathrm{mA} $$
$$ 2 7 0 0 \mathrm{mAh} \times 1 = 2 7 0 0 \mathrm{mA} 2 7 0 0 \mathrm{mAh} \times 2 = 5 4 0 0 \mathrm{mA} $$
b) Selection of the Suitable Charge and Discharge Current
The „Charge Manager 2016“ automatically adjusts the charge current.
For NiMH, NiCd batteries, you can also set the charge current manually. There are four charge currents selected according to practical requirements: 500 mA, 1000 mA, 1500 mA and 2000 mA.
For NiZn–batteries, the correct charge current is selected automatically.
A charge current of 500 mA is recommended for:
- Batteries without information on charge type and a capacity of less than 3000 mAh
- Rechargeable batteries with the print „Standard charge: 12 - 15 hours at xxx mA“ („Standard charge: 12 - 15h at xxx mA“)
A charge current of 0.5 C is recommended for:
- Rechargeable batteries with the print „Fast charge: 4 - 5 hours at xxx mA“ („Fast charge: 4 - 5h at xxx mA“)
- Rechargeable batteries with the print „Fast rechargeable“ or „Quick charging possible“
The example batteries from chapter 7. a) would result in the following charge currents:
$$ 1 0 0 0 \mathrm{mAh} \times 0. 5 = 5 0 0 \mathrm{mA} $$
$$ 2 7 0 0 \mathrm{mAh} \times 0. 5 = 1 3 5 0 \mathrm{mA} $$
→ The „Charge Manager 2016“ does not always offer the precisely fitting charge current.
In such cases, the next lower current range is the correct choice. For the 2700 mAh rechargeable battery, this means a charge current of 1000 mA.
A charge current of 1 C is recommended for:
- Rechargeable batteries with the print „Rapid charge: 60 - 70 minutes at xxx mA“ or „Rapid charge“ or „Rapid charging possible“
→ The 2700 mAh rechargeable battery is charged at 2,000 mA here.
When charging a battery with a charge rate of 0.5 C or 1 C, the battery will heat up noticeably towards the end of the charging process. This is not an error!
c) Discharge Current
In the „Charge Manager 2016“, a discharge current of 150, 300, 450 and 600 mA is available for NiMH- and NiCd-batteries; for NiZn-batteries, 200, 400 or 600 mA can be selected.
For 9 V-block batteries, the discharge current is selected automatically. It is at a rated current of 20 mA.
Long-term determination of a battery's capacity can be used to determine its current condition (capacity loss).
The delivered capacity depends strongly on the discharge current: The lower the discharge current the higher the capacity that can be delivered.
Since the battery is discharged via resistors, the actual discharge current depends on the current battery voltage. This is, of course, also considered in the capacity calculation (DCAP) of the „Charge Manager 2016“.
Normatively, the battery capacity is determined at a discharge current of 0.2 C. For the example batteries, this means:
$$ 1 0 0 0 \mathrm{mAh} \times 0. 2 = 2 0 0 \mathrm{mA} $$
$$ 2 7 0 0 \mathrm{mAh} \times 0. 2 = 5 4 0 \mathrm{mA} $$
The discharge current must be chosen that comes closest to the calculated value. For the example 1000 mAh battery, these are 150 mA, and for the 2700 mAh batteries, a discharge current of 600 mA results.
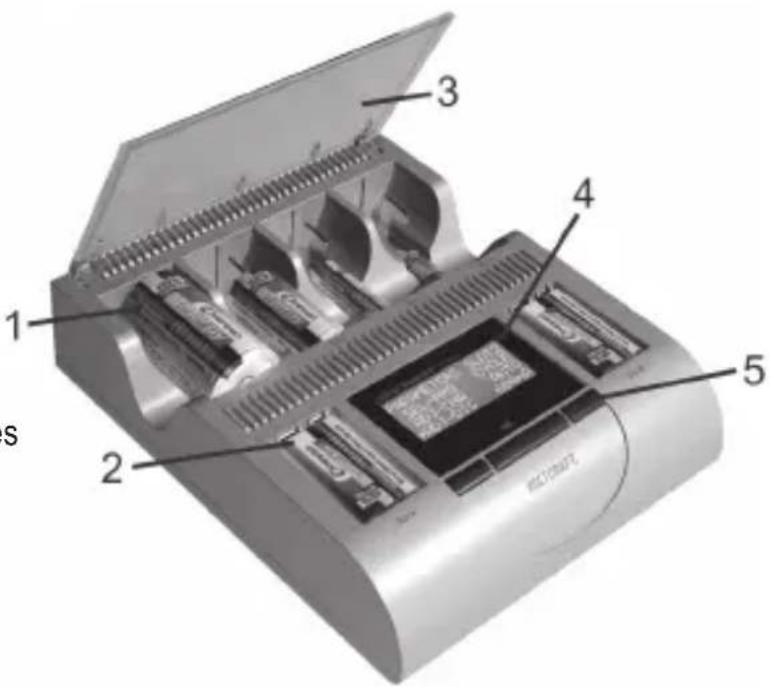
8. DISPLAY AND OPERATING ELEMENTS
1 Charge slots S1-S4 for round cell batteries
2 Charging chutes for 9 V block batteries
3 Charge chute cover (removable)
4 Display for:
- Input menu
- Overview of running programmes
- Cell/loading parameters
5 Operating buttons
„<“ (left) and „>“ (right) for input / selection
„OK“ to confirm
text_image
1 2 3 4 5 S→ The two operating buttons „<“ and „>“ are designated as selection buttons in the further course of these instructions.
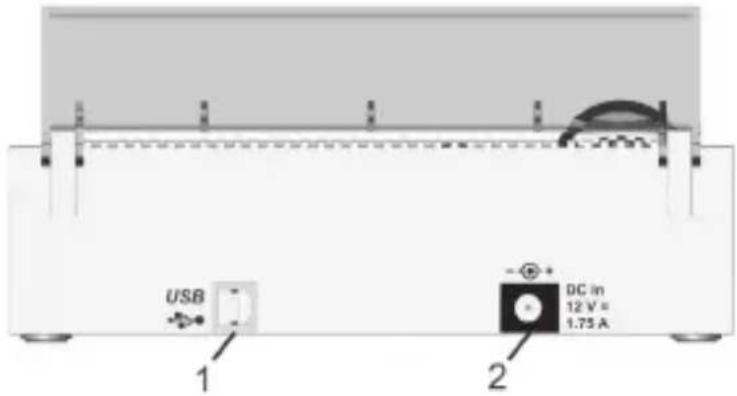
Connection (back of the device):
1 Data interface (USB-B socket)
2 Voltage supply connection (12 V/DC, hollow-plug socket, plus pole/+ inner pins, minus pole/-/GND outer pins)
text_image
USB 1 DC in 12 V = 1.75 A 2a) Charge Programmes
The „Charge Manager 2016“ provides a total of five programmes for processing the rechargeable batteries:
- Charging ("CHA" = "CHARGE")
- Discharge („DIS“ = „DISCHARGE“)
- Test (,,CHK" = ,,CHECK")
- Cycle („CYC“ = „CYCLE“)
- Revive („ALV“ = „ALIVE“)
b) Maintenance Charge
If the rechargeable battery is left in the charger and it is required, the maintenance programme „TRICKLE“ (display „TRI“) is started automatically.
c) Energy Saving Mode
If all programmes are processed (display „RDY“) and no button was pressed, the device switches into energy saving mode after approx. one minute. The display is also switched off in this.
Pressing a button, inserting another cell, possibly removing cells or starting the maintenance charge will lead to leaving of the energy savings mode.
→ Automatic recognition of deep-discharged 9 V blocks is not included here, since this is contradictory to maximum energy efficiency. If this situation occurs, the device must be activated by „OK“ button. After several seconds of „Auto-Refresh“, the battery is recognised and the programmes are available.
d) Memory-Backup
This charger has a memory backup; this means that programmes and the accumulated capacity values of batteries are retained for up to one week without power supply.

Never change the battery when powered down! The charger no longer assumes the valid data and there would be incorrect values and damage to the new battery!
Continuous and programmes is only possible if the installed buffer memory was loaded. For this, the charger must be connected to the voltage supply for at least two hours.
10. PARAMETER DISPLAY
a) Battery Voltage
The voltage of the battery is indicated in the unloaded condition (and can therefore not be measured during operation).
b) Charge Condition
To give you a general idea of the state of the rechargeable battery this device displays a battery symbol („”). This symbol only serves to estimate how far the charge or discharge process has progressed. When charging the battery icon fills from the bottom to the top while it empties from top down when discharging.
During automatic multi-step charging of NiZn batteries, the bar graph display (battery icon) indicates the progress of the respective charge condition.
Conclusions regarding the expected time remaining until the end of the programme are not possible from it.
c) Charge/Discharge Current
When charging and discharging the current flowing into the battery „I“ is displayed. If no current is flowing (e.g. in the mode „RDY“ („READY“) or „ERR“ („ERROR“), the display shows „I = 0.000A“.
d) Time Measurement
The display shows the time in hours and minutes („HH:MM“) over which the battery was charged and discharged. The time required for maintenance charge (operating mode „TRI“ = „TRICKLE“) is not considered.
e) Fed in and Removed Capacity
The capacity (C) charged into the battery, as well as the discharged capacity (D) is stated in milliampere hours (mAh).
In programmes with several charge and discharge cycles, only the current values are displayed. Data of the previous cycle are deleted. No calculation, display or addition of the capacity of a maintenance charge („TRICKLE“) are performed.
11. COMMISSIONING
First connect the voltage supply.
Always connect the low-voltage plug (hollow plug) first to the connection cable of the mains adapter to the DC input socket of the charger. Then the mains adapter must be connected to the corresponding mains socket.
→ As an alternative to the included mains adapter, the charger can also be supplied with power using a suitable car adapter (not included in the delivery, can be ordered separately), which supplies an output voltage of 12 V/DC and has an output power of 21 W.
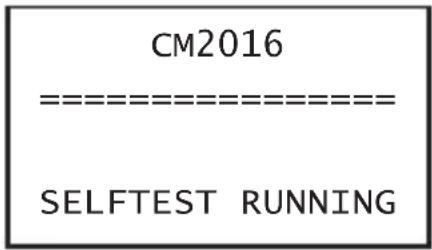
The display shows the following message for approx. two seconds:
text_image
CM2016 ===================== SELFTEST RUNNINGDuring this time, the charging device carries out a self-test and checks for any existing batteries.
The charger is now ready for operation.
Readiness is displayed now if no batteries are inserted:
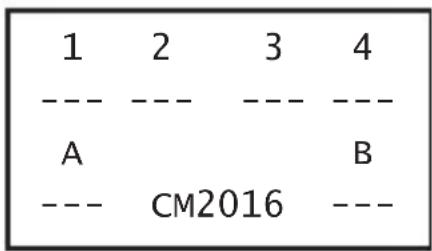
text_image
1 2 3 4 --- --- --- --- A B --- CM2016 ---The displays „1“ to „4“ represent the four round cell battery charging chutes „A“ and „B“ for the two 9 V block battery charging chutes. The alignment on the display corresponds to that of the ’charging chutes of the charger.
a) Selection of Battery Chemistry
After inserting the first battery into chute 1-4, the following display appears:
VOLTCRAFT CM2016
TYPE OF BATTERY?
SLOTS S1-4: NiMH
According to the voltage of the inserted battery, NiMH or NiZn mode is suggested. For deep-discharged batteries, the active battery chemistry may have to be changed manually. Select the battery chemistry with the selection buttons and confirm with „OK“. If no button is pushed, the current automatic selection is assumed after about 6 seconds.

Always use the correct battery chemistry for the battery inserted.
Mixed equipment with NiMH/NiCd and NiZn batteries is not permitted! There is a danger of damage to your batteries!
Only NiMH or NiCd batteries must be inserted into the 9 V chutes A and B.
b) Start of Battery Charging Programmes
Display after battery chemistry selection:
PARAMETERS SLOT1
SEL-PRG CHARGE
ADJ-CHA AUTO
ADJ-DIS ---mA
→ The input currently required is indicated by a flashing cursor, >" in front of "SEL-PRG" and, depending on the respective programme, in front of "ADJ-CHA" or "ADJ-DIS".
Within the next 6 seconds, the charge program can be selected with the selection buttons, with the time extending by another 6 seconds with every push of a button. Only after this period will the settings be assumed.
Briefly pushing „OK“ suffices to confirm at once.
If no input is made, the programme „CHARGE“ starts automatically with the automatic charging current setting after approx. 6 seconds.
The desired programme is selected with the selection buttons. Five different programmes are available.
„SET CHARGE“ = Charging
„SET DISCHARGE“ = Discharge (no maintenance charge!)
„SET CHECK“ = Discharge -> charge
„SET CYCLE“ = Charge -> discharge -> charge
„SET ALIVE“ = Charge -> discharge -> charge -> discharge -> charge
Description:
- „CHA“ („CHARGE“) means that the inserted battery is being charged.
- „DIS“ („DISCHARGE“) means that the inserted battery will only be discharged. There is no maintenance charge.
- „CHK“ („CHECK“) means that a charge follows the discharge.
- „CYC“ („CYCLE“) means that the inserted battery will be first charged, then discharged and finally recharged.
- „ALV“ („ALIVE“) means that the battery must go through several charge and discharge cycles. The „ALIVE“ programme is used for activating new batteries and batteries that were stored for an extended period of time.
Depending on the selected programme and battery type, the charge or discharge current may also be selectable. Otherwise, the programme starts automatically with the pre-settings.
Entry of Charge / Discharge Current
PARAMETERS SLOT1 SEL-PRG CYCLE
ADJ-CHA AUTO ADJ-DIS 300mA
The selection buttons „<“ and „>“ can be used to select the charge current („ADJ-CHA“) first and then the discharge current („ADJ-DIS“). This is also either assumed by the button „OK“ or automatically after 6 seconds.
In the above example, the „Charge Manager 2016“ starts with automatic charge current adjustment and discharge current pre-settings of 300 mA if no input is made.
Starting additional batteries
When adding additional batteries, the last programme selected and possibly values for discharge and charge current are suggested.
1/4 If several batteries of the same programme are processed, it is sufficient to select the parameters for the first battery detected. After a waiting time of 6 seconds each, these values are automatically accepted without any button pressed.
The selection buttons „<“ and „>“ can be used to call another programme.
c) Programme Cancellation
To cancel a running programme, the battery has to be removed from the charging chute.
13. DISPLAY OF PROGRAMMES AND BATTERY PARAMETERS
Total overview:
Here a display shows all the inserted batteries with their associated programme and charging condition (battery symbol).
The „--“ lines mean that no battery is inserted in these slots.
2 3 4
CHA --- --- ---
A NiMH
--- CM2016 RDY
If the battery is being processed, the battery symbol or an arrow are displayed alternatingly. During charging, the arrow points up; during discharging, it points down. The currently active programme continues to be displayed.
If there are batteries in the chutes 1 to 4, line 3 shows the battery chemistry („NiMH“ for NiCd/NiMH batteries or „NiZn“).
Detailed view:
Use the selection buttons to request details of all available battery data. Push the button „OK“ to return to the total overview.
SLOT1>C=136.4mAh
NiMH D= 0.0mAh
CHA U= 1.366V
00:08 I= 1.026A
The first line contains the charge slot number („SLOT“) and the charge capacity (C).
The second line displays the battery chemistry and discharge capacity (D).
In the third line, the currently performed programme (e.g. „CHA“ for „CHARGE“) is displayed, as well as a battery icon (,) that indicates the approximate charging condition. Furthermore, this line shows the current battery voltage.
The fourth line shows the elapsed processing time in the format „HH:MM“ (hour:minute) and the current charge or discharge current with which the „Charge Manager 2016“ treats the inserted battery.
During charging, an arrow flashes in front of „C“, during discharging, the arrow flashes in front of „D“.
Charge programme end („RDY“)
If the „Charge Manager 2016“ has successfully completed the charge process, the display shows „RDY“ (= „READY“).
Display in the overview:
2 3 4
RDY --- --- ---
A NiMH B
--- CM2016 ---
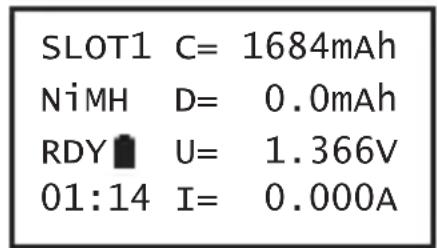
Detailed view:
SLOT1 C= 1684mAh
NiMH D= 0.0mAh
RDY U= 1.366V
01:14 I= 0.000A
^1/_4 The charge process is completed, the battery can be removed from the charge slot.
Batteries discharge over time. This property is known as self-discharge.
To balance out this loss, the „Charge Manager 2016“ starts the maintenance charge programme „TRI“ („TRICKLE“) automatically if needed.
Of course, this does not apply if the battery was only discharged with the programme „DIS“ („DISCHARGE“). The capacity (C) of the recharge („TRICKLE“) and the time required for this process („HH:MM“) will not be indicated or summed up. Only voltage and current are updated. Therefore, the charging capacity, if applicable the discharging capacity and the time only refer to the programme processed previously.
Display in the overview:
| 1 | 2 | 3 | 4 |
| TRI | --- | --- | --- |
| A | NiMH | B | |
| --- | CM2016 | --- | |
Defective battery / wrong battery chemistry („ERR“, „ERROR“)
If the charge or discharge process is unsuccessful, the error message „ERR“ („ERROR“) is output (see chapter 15). The charger will no longer process this battery.
Display in the overview:
| ! | 2 | 3 | 4 |
| ERR | --- | --- | --- |
| A | NiMH | B | |
| --- | CM2016 | --- | |
14. USB DATA INTERFACE
The „Charge Manager 2016“ has a USB interface on the rear of the device (USB-B socket).
This USB interface can be used to connect the „Charge Manager 2016“ to a PC and to submit all displayed battery data and parameters to a PC.
The corresponding Windows software can be downloaded free of charge at the item page for the „Charge Manager 2016“, www.conrad.com.
15. TROUBLESHOOTING
By purchasing this charging device you have acquired a product that has been designed to the state of the art and is operationally reliable. Nevertheless, problems or errors may occur. Therefore, we would like to describe to you how to remove possible interferences.
No function or no display
- Is the hollow plug of the mains adapter correctly plugged into the charger socket?
- Is the mains adapter correctly plugged into the mains socket and is the mains voltage present?
- Device in power saving mode - push the „OK“ button
No battery identified
- Are the contacts of the charge slot or battery contaminated? If required, clean it with a clean, dry cloth.
- The battery has not been inserted properly. Observe polarity!
Device temperature too high (display „OVERTEMP!!! Please Wait“)
- The charger is overheated. After the cooling phase, the programme is continued automatically. If required, ensure a cooler ambience temperature (e.g. do not operate the charger at direct sun irradiation).
Display „ERR“ („ERROR“) for one or several inserted batteries
- A non-rechargeable battery or impermissible battery was inserted accidentally.
- The wrong battery chemistry was selected
- The rechargeable battery is defective.
- If „ERR“ is displayed at the same time for several cells, remove all cells from the charger and charge the cells individually to detect the defective battery.
Immediate display „RDY“ („READY“) in programme „DIS“ (DISCHARGE“) or immediate commencement of charging at programme „CHK“) („CHECK“)
- The inserted battery is deep-discharged. Therefore, the discharge process is cancelled to protect the battery.
Low charge capacity (C) although the battery was discharged
- Process battery with the „ALV“ („ALIVE“) programme. If the charge capacity „C“ is still too low, the battery is defective.
No display in the device display and/or no reaction due to EMC impulses, electrostatic discharge = ESD, surge impulses or line-conveyed interference resistance
- Disconnect the charger from the mains for several seconds and reconnect it.
Significant warming on the casing
- The high performance of the device results in heating of the top and bottom of the casing; this is no fault. Ensure good ventilation of the charger.
16. MAINTENANCE AND CARE
The product does not require any maintenance, never take it apart. Repair or maintenance work must be carried out by a specialist.
Disconnect the charger from the power supply before cleaning it. First remove all rechargeable batteries from the charge slots and then pull the mains adapter from the socket.
The outside of the product should only be cleaned with a clean, soft, dry cloth. Dust can be removed easily with a soft, clean brush and a vacuum cleaner.
Never use any aggressive cleaning agents or chemical solutions. They may damage the surface of the casing (discolourations).
17. DISPOSAL
a) General Information
At the end of its service life, dispose of the product according to the relevant statutory regulations.
b) Batteries and Rechargeable Batteries
You as the end user are required by law (Battery Ordinance) to return all used batteries/rechargeable batteries. Disposing of them in the household waste is prohibited!
Batteries/rechargeable batteries that contain any hazardous substances are labelled with the adjacent icon to indicate that disposal in domestic waste is forbidden. The descriptions for the respective heavy metal are: Cd=cadmium, Hg=mercury, Pb=lead (the names are indicated on the battery/rechargeable battery e.g. below the rubbish bin symbol shown to the left).
You may return used batteries/rechargeable batteries free of charge at the official collection points of your community, in our stores, or wherever batteries/rechargeable batteries are sold.
You thus fulfil your statutory obligations and contribute to the protection of the environment.
18. TECHNICAL DATA
a) Charger „Charge Manager 2016“
Input voltage (stabilised) 12 V/DC (rated)
Input voltage range 10.8...14.4 V/DC
Power input .... max. 1.75 A
Power consumption .... max. 21 W (in the power savings condition type. <300 mW)
Charge current slots 1 - 4 .... each max. 2200 mA (adjustable 500, 1000, 1500, 2000 mA)
Discharge current slots 1 - 4 .... max. 870 mA (adjustable 150, 300, 450, 600 for NiMH/NiCd and 200, 400, 600 mA for NiZn)
Charge current 9 V block .... max. 32 mA (effective 22.5 mA)
Discharge current 9 V block ...... rated 20 mA
Voltage at the battery contacts .... max. 8.75 V/DC (chute 1 - 4) max. 14.1 V/DC (chute A/B)
Protection type IP20
Ambient temperature/operation ..... 0 °C to +40 °C
Ambient humidity/operation .... 0 to 85% relative humidity, non-condensing
Dimensions (L x W x H) 176 x 56 x 206 mm
b) Mains Adapter
Input voltage 100 - 240 V/DC, 50/60 Hz
Output voltage 12 V/DC
Output performance .... max. 22 W
Page
text_image
USB 1 DC in 12 V = 1.75 A 2text_image
CM2016 ===================== SELFTEST RUNNINGtext_image
1 2 3 4 --- --- --- --- A B --- CM2016 ---text_image
RDY 2 3 4 A NiMH B --- CM2016 ---Vue détaillée :
text_image
SLOT1 C= 1684mAh NiMH D= 0.0mAh RDY U= 1.366V 01:14 I= 0.000A| 1 | 2 | 3 | 4 |
| TRI | --- | --- | --- |
| A | NiMH | B | |
| --- | CM2016 | --- | |
| ! | 2 | 3 | 4 |
| ERR | --- | --- | --- |
| A | NiMH | B | |
| --- | CM2016 | --- | |
14. INTERFACE DE DONNÉES USB
text_image
Technical diagram of a battery pack with numbered components and internal structure labelstext_image
USB 1 2 DC in 12 V = 1.75 Aa) Laadprogramma
text_image
CM2016 ===================== SELFTEST RUNNINGtext_image
1 2 3 4 --- --- --- --- A B --- CM2016 ---text_image
RDY 2 3 4 A NiMH B --- CM2016 ---Detailaanzicht:

text_image
SLOT1 C= 1684mAh NiMH D= 0.0mAh RDY U= 1.366V 01:14 I= 0.000A| 1 | 2 | 3 | 4 |
| TRI | --- | --- | --- |
| A | NiMH | B | |
| --- | CM2016 | --- | |
| ! | 2 | 3 | 4 |
| ERR | --- | --- | --- |
| A | NiMH | B | |
| --- | CM2016 | --- | |
14. USB-DATA-INTERFACE
© Copyright 2012 by Voltcraft®.

Legal Notice
These operating instructions are a publication by Voltcraft®, Lindenweg 15, D-92242 Hirschau/Germany, Phone +49 180/586 582 7 (www.voltcraft.de).
All rights including translation reserved. Reproduction by any method, e.g. photocopy, microfilming, or the capture in electronic data processing systems require the prior written approval by the editor. Reprinting, also in part, is prohibited. These operating instructions represent the technical status at the time of printing. Changes in technology and equipment reserved.
© Copyright 2012 by Voltcraft®.

Information légales
© Copyright 2012 by Voltcraft®. V1_0912_01