BR57605 - Surveillance Camera BRAUN - Free user manual and instructions
Find the device manual for free BR57605 BRAUN in PDF.
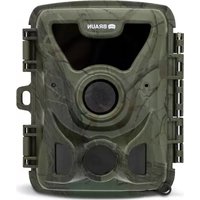
| Product Type | Surveillance camera (DVR built-in) |
| Brand | Braun |
| Model | BR57605 |
| Screen | 3-inch TFT LCD screen |
| Video resolution (front lens) | 1920×1080P (30 fps), 1280×720P (30 fps), 848×480P (30 fps), 640×480 (30 fps) |
| Video resolution (rear lens) | 1280×720P (30 fps) |
| Photo resolution | 12 M, 10 M, 8 M, 5 M, 3 M, 2 M, HD, VGA, 1.3 M |
| Viewing angle (front/rear) | 170°/120° (diagonal) |
| Video format | MOV |
| Photo format | JPG |
| Power supply | 5V/1A via car cigarette lighter charger or micro USB |
| Battery | Lithium-ion 600 mAh |
| Storage capacity | Micro SD card up to 64 GB (class 6 or higher recommended) |
| Main features | Loop video recording, motion detection, G-sensor, parking mode, GPS, license plate tracking, interval recording, SOS |
| Care and cleaning | Regularly clean the windshield and lens with a soft cloth |
| Safety | Do not use in humid or dusty environments; avoid prolonged sun exposure; operating temperature -10°C to 50°C |
| Available languages | English, French, Spanish, Portuguese, German, Italian, Simplified Chinese, Traditional Chinese, Russian, Japanese |
| Included accessories | Cigarette lighter charger, integrated GPS mount, USB cable, user manual |
Frequently Asked Questions - BR57605 BRAUN
User questions about BR57605 BRAUN
0 question about this device. Answer the ones you know or ask your own.
Ask a new question about this device
Download the instructions for your Surveillance Camera in PDF format for free! Find your manual BR57605 - BRAUN and take your electronic device back in hand. On this page are published all the documents necessary for the use of your device. BR57605 by BRAUN.
USER MANUAL BR57605 BRAUN
text_image
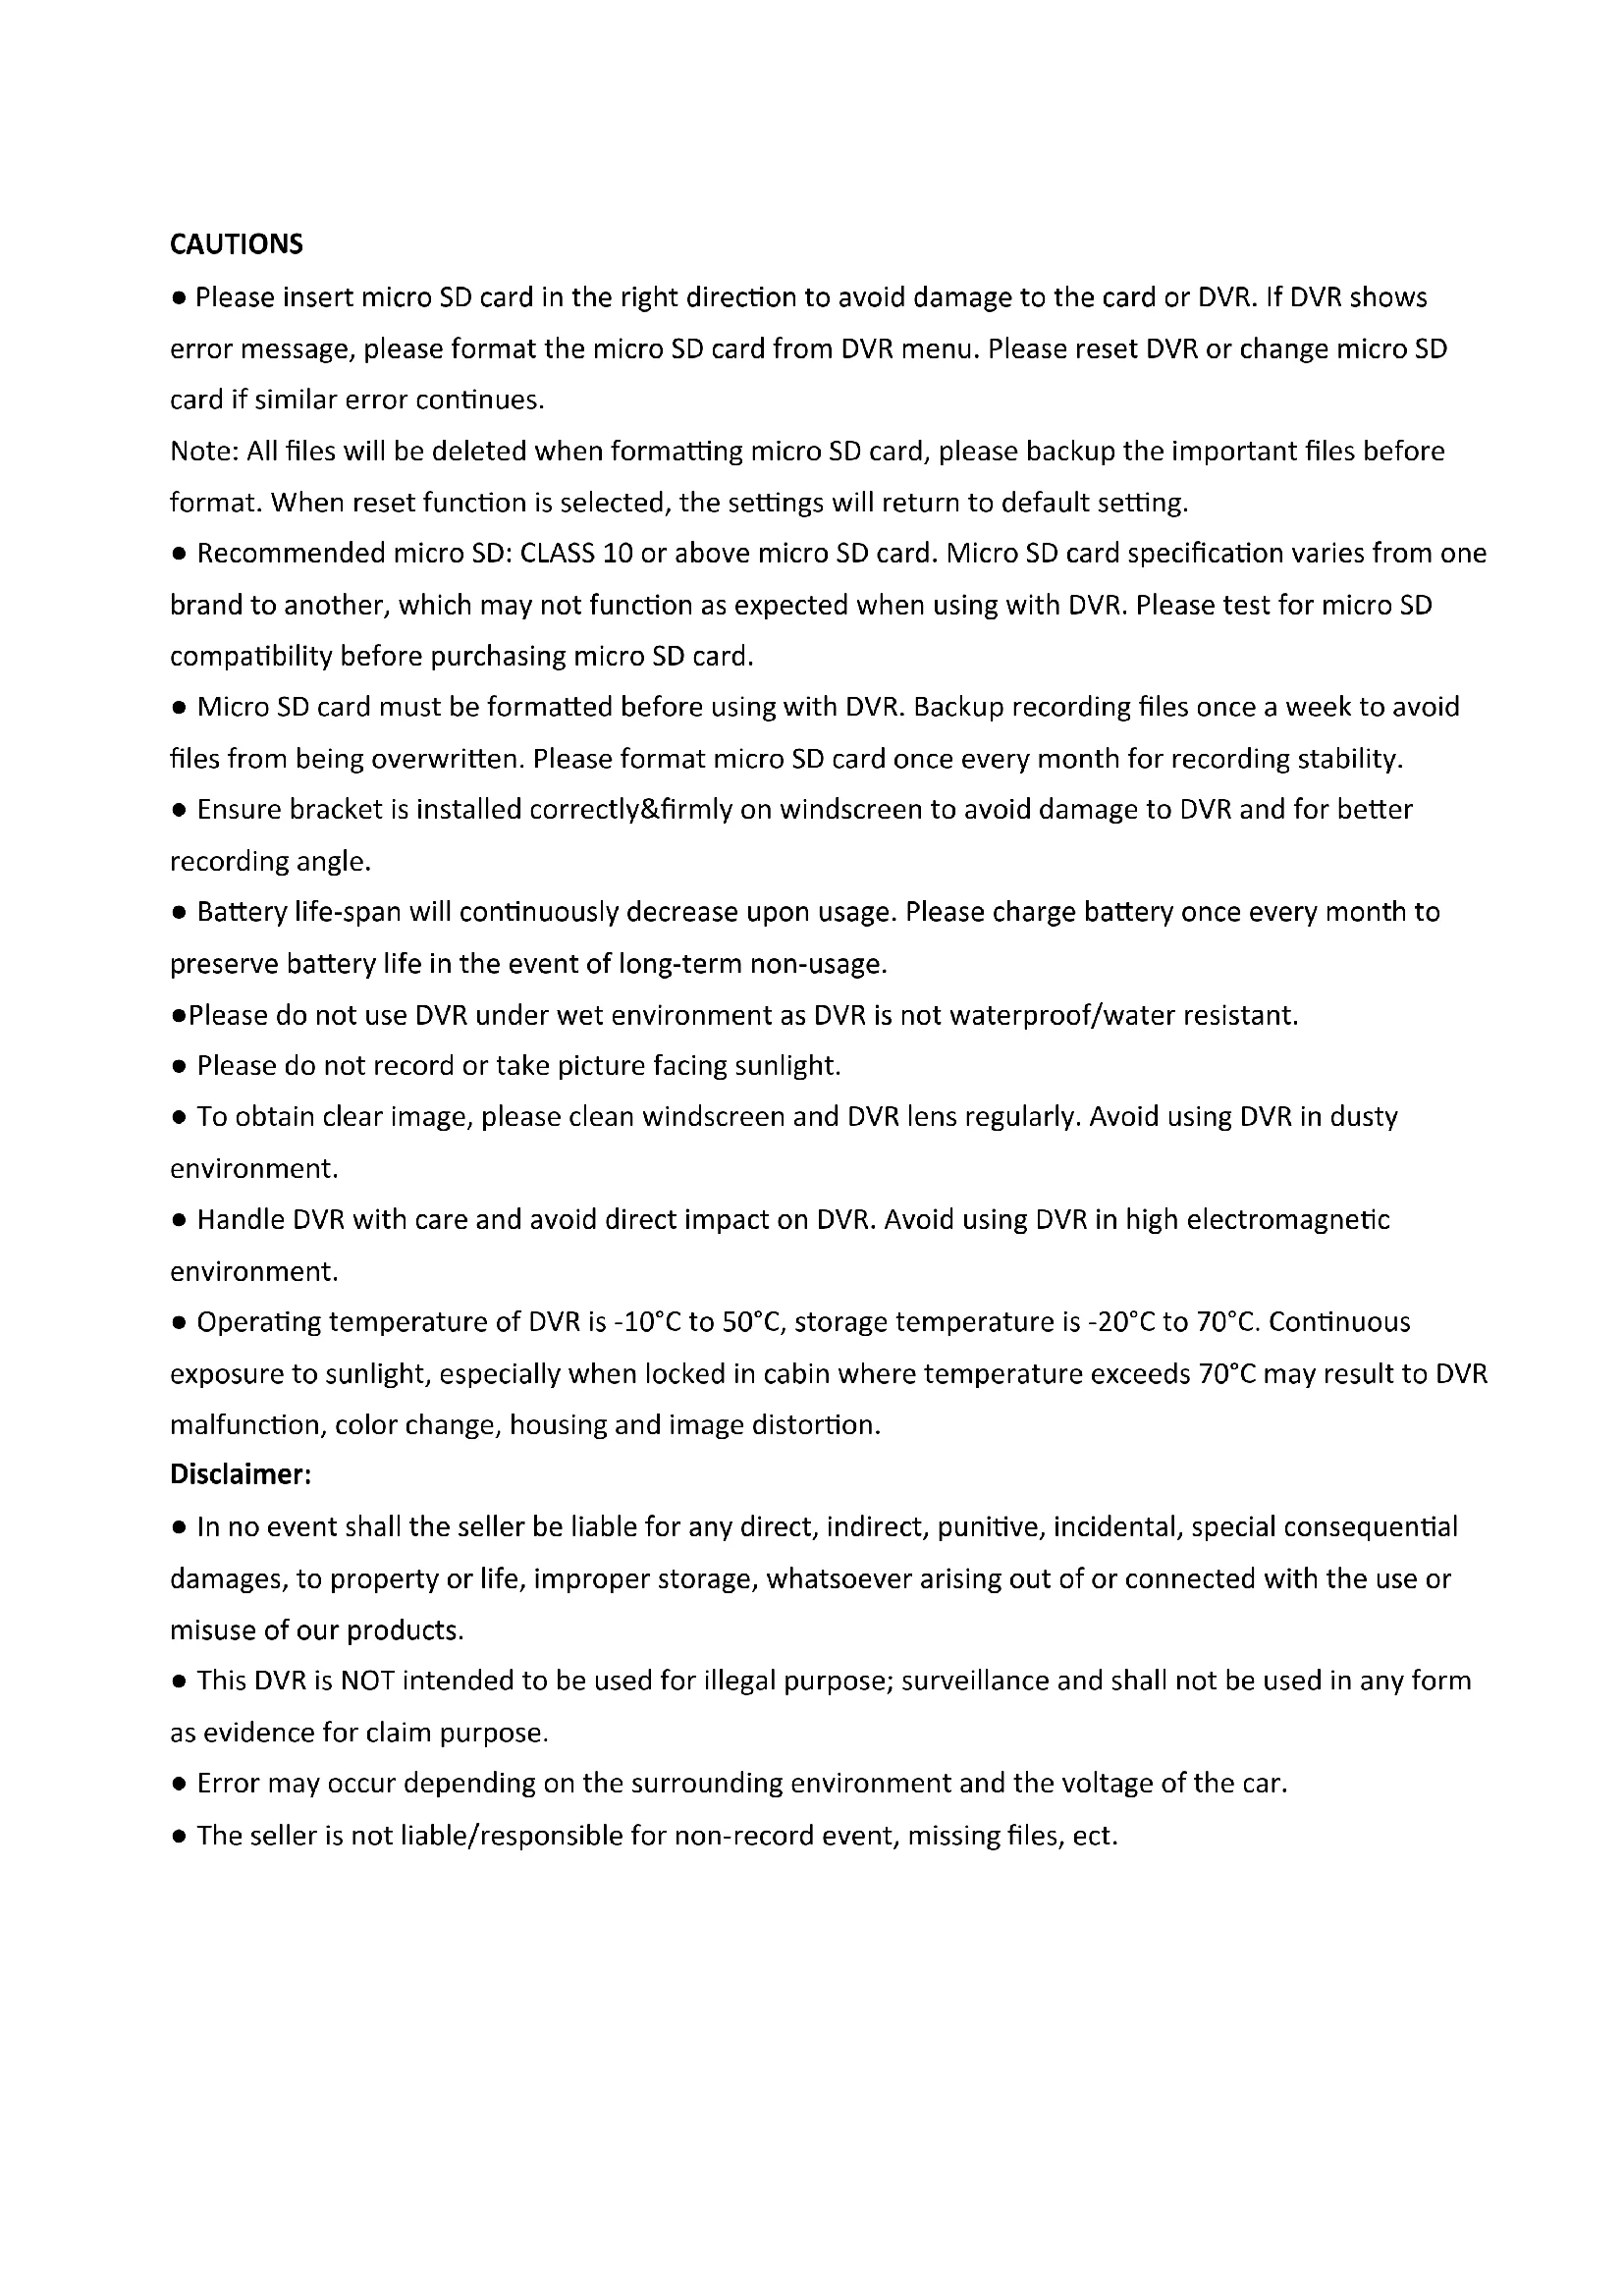
Technical diagram of a camera with numbered parts for identification and assembly reference.- Please insert micro SD card in the right direction to avoid damage to the card or DVR. If DVR shows error message, please format the micro SD card from DVR menu. Please reset DVR or change micro SD card if similar error continues.
Note: All files will be deleted when formatting micro SD card, please backup the important files before format. When reset function is selected, the settings will return to default setting. - Recommended micro SD: CLASS 10 or above micro SD card. Micro SD card specification varies from one brand to another, which may not function as expected when using with DVR. Please test for micro SD compatibility before purchasing micro SD card.
- Micro SD card must be formatted before using with DVR. Backup recording files once a week to avoid files from being overwritten. Please format micro SD card once every month for recording stability.
- Ensure bracket is installed correctly&firmly on windscreen to avoid damage to DVR and for better recording angle.
- Battery life-span will continuously decrease upon usage. Please charge battery once every month to preserve battery life in the event of long-term non-usage.
- Please do not use DVR under wet environment as DVR is not waterproof/water resistant.
- Please do not record or take picture facing sunlight.
- To obtain clear image, please clean windscreen and DVR lens regularly. Avoid using DVR in dusty environment.
- Handle DVR with care and avoid direct impact on DVR. Avoid using DVR in high electromagnetic environment.
- Operating temperature of DVR is -10°C to 50°C, storage temperature is -20°C to 70°C. Continuous exposure to sunlight, especially when locked in cabin where temperature exceeds 70°C may result to DVR malfunction, color change, housing and image distortion.
Disclaimer:
- In no event shall the seller be liable for any direct, indirect, punitive, incidental, special consequential damages, to property or life, improper storage, whatsoever arising out of or connected with the use or misuse of our products.
- This DVR is NOT intended to be used for illegal purpose; surveillance and shall not be used in any form as evidence for claim purpose.
- Error may occur depending on the surrounding environment and the voltage of the car.
- The seller is not liable/responsible for non-record event, missing files, ect.
1. Structure

1.OK/REC
2.Menu
3.Up
- Down
5.Mode
6.ON/OFF
- Reset Hole
8.TF Card Slot
-
USB Port
-
Rearview lens
-
GPS Port
-
Speaker
-
Front lens
-
LCD screen Module
-
Working Indicator
-
Recording Indicator
-
Charging Indicator
-
GPS
2. Function
A. On/Off
1.Power On
In the off state, long press, DVR enters into video mode and start recording automatically.
Or DVR is connected with car charger in the off state to enter video mode and start recording automatically. When unplug the charger, DVR will automatically save the current file and shut down in 5 seconds delay.
Note: LCD screen writes ‘Please insert SD card’ if Micro SD card not inserted. If the Micro SD card is inserted with DVR in working state, DVR will automatically power off.
2.Power Off
In work state, long press
power off DVR.
Note: In low battery state, DVR display writes 'Low Battery' and automatically saves the current file and
shuts down.
B. Battery Charging
In the charging state, charging indicator will be steady on. After full charge, it is off.
C. Video
Press ⏻ to power on DVR and enter into video mode automatically. Press to stop recording and save the current file, then DVR goes into standby mode. In standby mode, press OK button to restart recording, press again to pause.
In video mode, short press → to turn on or turn off sounds.
text_image
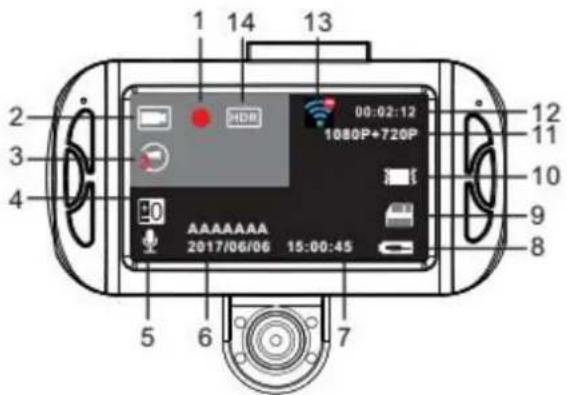
1 14 13 2 00:02:12 3 1080P+720P 4 AAAAAAA 2017/06/06 15:00:45 5 6 7 12 11 10 9 81.Recording 2.Video 3.Loop Recording 4.Exposure 5.Voice/Mute 6.Date 7.Time
8.Charging Icon 9.Micro SD Card in 10.G-sensor 11.Video Resolution 12.Recording Time
13.GPS Status Icon 14.HDR
D.Photo
Press ↩ enter into photo mode, press ● to take photo with sounds prompt.
text_image
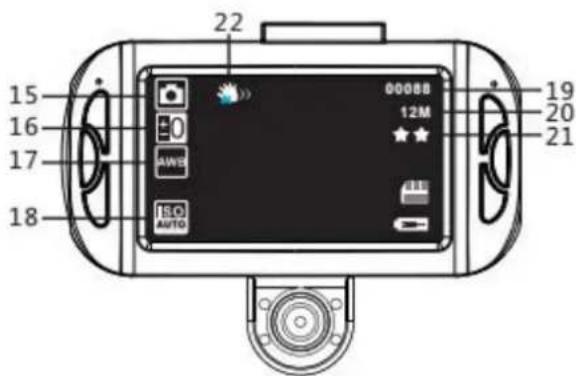
22 15 16 17 18 000BB 12M * 21 19 20 TECO AUTO- Photo 16. Exposure 17. White Balance 18. ISO 19. Photo Quantity 20. Image Resolution 21. Image Quality 22. Anti-Shaking
E. Playback and Delete
In video standby mode, short press twice to enter into playback mode. Press ▲/▼ to select the file. ● is used for play or pause. When the video is playing ,press → to stop too and short press ▲/▼ to fast forward or reverse. Short press ▲/▼ every time, DVR will fast forward or reverse for 2x, 4x and max. is 8x. If you want to delete files, please stop the play first and press ■ be in Delete Menu.
Press ▲/ ▼ to select 'delete current' or 'delete all' and press ● to confirm. Press ■ to exit and go back to playback mode.
F.G-Sensor
When car brakes suddenly or being hit heavily, G-sensor will activate to save and protect the current video clip from overwritten automatically. Three grades setting (high, medium, low) is to cater for different car owners.
G.SOS
In recording, short press manually to save the current video from being overwritten.

text_image
SOS 00:02:12 1080P+720P AAAAAAA 2017/06/06 15:00:45H. Digital Zoom
In photo mode, short press ▲ zoom in max. 4x . Press to zoom out min. 1:1.
I.Switch Lens
In recording/standby mode, press ⏻ to switch lens.
J.Parking Monitor
Parking monitor is for security monitoring in parking.
Please set Parking Monitor ON in settings menu. There will be a ☐ on the screen. (If Parking Monitor OFF, ☐ will be not there). After the car engines off, DVR will power off accordingly. If DVR detects vibration, it will power on to record automatically for 10 seconds and then power off. If it is continuous vibration, DVR will keep recording.
Long press to turn on/off parking monitor after DVR powers on.
K.Time Lapse Record
Time lapse record is to save memory capacity.
In standby mode, short press ■■ to enter into setting menu and press ▲/▼ to select Time-lapse Record. Press ● to select “Off/100ms/200ms/500ms” to activate this function. Short press ■■ to exit setting menu.
L. Motion Detection
In video standby mode, short press ■ to enter into setting menu, then press ▲/▼ to select motion detection and press to turn on motion detection.
When DVR detects movement, it starts to record with green indicator flash. If there is no movement for 10 seconds, DVR stops to record and back to video standby mode. Factory default OFF and please turn on if needed.
M. Car License Plate Number
Go to car license plate number setting menu to input correct numbers. The first character can only be alphabet. The following characters can be alphabets or numbers. Press ▲/▼ to select among 0-9 or A-Z. Press to confirm and go to the next one. Press to exit.
N. GPS Tracking
A. Insert G-MOUSE into camera.
B. There will be a icon on the top of screen, when DVR don't receive GPS signal successfully. When icon appears on the top of screen, DVR locates GPS successfully.
C. Please use professional players to play video files. The current driving track and coordinates will be displayed on the player.
Go to Update time of GPS setting menu to select time zones. When DVR locates GPS successfully, DVR's current time will be synchronized with GPS satellite time. Please use GPS function at outdoor, DVR may not receive GPS signal at indoor.
O. System Setting
In standby mode, press ■■ to enter into system setting. Press ▲/▼ to select the setting item and press ● confirm. Press again to exit.
| System Setting | Mode | Category | Sub-Category | Remarks |
| Video | Resolution | 1080P 1440x1080 | Factory default: 1080FHD | |
| 720P 1280x720 | ||||
| Loop Recording | Off /3mins/5mins/10mins | Factory default: 3mins | ||
| Time Lapse Record | Off/100MS/200MS/500MS | Factory default: Off | ||
| HDR | Off/On | Factory default: On | ||
| Exposure | +2.0、+5/3、+4/3、+1.0、+2/3、+1/3、+0.0, -1/3,-2/3,-1.0,-4/3,-5/3,-2.0 | Factory default:+0.0 | ||
| Motion Detection | Off/On | Factory default: Off | ||
| Record Audio | Off/On | Factory default:On | ||
| Date Stamp | Off/On | Factory default:On | ||
| Plate Number | Off/On | Factory default:On | ||
| Gravity Sensor | Off/Low sensitivity/Medium sensitivity/ High sensitivity | Factory default: Mediumsensitivity | ||
| Parking Monitor | Off/On | Factory default: Off | ||
| GPS | Off/On | Factory default: On | ||
| Daylight Saving Time | Off/On | Factory default: Off | ||
| Update time of GPS | Off/GMT-12:00/GMT-11:00/GMT-10:00/GMT-09:00/GMT-08:00/GMT-07:00/GMT-06:00/GMT-05:00/GMT-04:30/GMT-04:00/GMT-03:30/GMT-03:00/GMT-02:00/GMT-01:00/GMT+00:00/GMT+01:00/GMT+02:00/GMT+03:00/GMT+03:30/GMT+04:00/GMT+04:30/GMT+05:00/GMT+05:30/GMT+05:45/GMT+06:00/GMT+06:30/GMT+07:00/GMT+08:00/GMT+09:00/GMT+09:30/GMT+10:00/GMT+11:00/GMT+12:00/GMT+13:00 | |||
| Photo | Capture Mode | Single/2sec/5sec/10sec | Factory default: Single | |
| Resolution | 12M/10M/8M/5M/3M/2MHD/VGA/1.3M | Factory default: 5M | ||
| Sequence | Off/On | Factory default: Off | ||
| Quality | Fine/Normal/Economy | Factory default: Normal | ||
| Sharpness | Strong/Normal/Soft | Factory default: Normal | ||
| White Balance | Auto/daylight/cloudy/tungsten | Factory | ||
| /Fluorescent | default:Auto | |||
| Color | Color/Black & White/Sepia | Factory default:Color | ||
| ISO | Auto/100/200/400 | Factory default:Auto | ||
| Exposure | +0.0, -1/3, -2/3, -1.0, -4/3, -5/3, -2.0, +2.0, +5/3, +4/3, +1.0, +2/3, +1/3 | Factory default: +0.0 | ||
| Anti-shaking | Off/On | Factory default: Off | ||
| Quick Review | Off/2seconds/5seconds | Factory default: Off | ||
| Date Stamp | Off,Date,Date/Time | Factory default:Date/Time | ||
| Playback | Delete | Delete current/Delete all | ||
| Protect | Lock Current/Unlock Current/Lock A II/Unlock All | |||
| Slide Play | 2sec/5sec/8sec | |||
| System Setting | Date/Time | MM/DD/YY,DD/MM/YY,YY/MM/DD | Factory default:MM/DD /YY | |
| Auto Power Off | Off/3mins/5mins/10mins | Factory default:Off | ||
| Beep Sound | Off/On | Factory default: On | ||
| Language | English/Français/ Español/Português/Deutsch/Italiano/简体中文/繁體中文/Русский/日本語/ | Factory default: English | ||
| Frequency | 50Hz/60Hz | Factory default: 50Hz | ||
| Format | All data will be deleted/Cancel/OK | |||
| Screen Saver | Off/30sec/1min/2mins | Factory default: 1min | ||
| Lamp setting | Day Mode/Night Mode | Factory default: Day Mode | ||
| Delay Shutdown | Off/5s/10s/30s | Factory default: 5s | ||
| Default Setting | Return menu setting to defaults/Cancel/OK | |||
| Version | Current version | |||
P. Computer Connection
Video and Photo Download
- When computer and DVR connected with USB cable, the screen pops up an option- Mass Storage and PC Camera.
- If select Mass Storage and DVR will detect inserted Micro SD card to show files.
- When select PC Camera, DVR can be used as PC Camera.
Note: Incorrect operation can leads to system crash. Please use small hard objects to press the reset hole to restart.
3. Specification
Specification may update without prior notice.
| Screen | 3.0”TFT LCD screen |
| Video Resolution | Single lens recording: 1920*1080P 30fps\1280*720P 30fps\848*480P30fps\640*480 30fps(front lens); 1280*720P 30fps(rearview lens)Dual lens recording: 1440*1080P 30fps(front lens); 1280*720P30fps(rearview lens) |
| Lens | 170 diagonal for front lens; 120 diagonal for rearview lens |
| Video Format | MOV |
| Photo Resolution | 12M/10M/8M/5M/3M/2MHD/VGA/1.3M |
| Photo Format | JPG |
| G-sensor | Support |
| SOS | support |
| GPS Tracking | Support |
| Motion Detection | Support |
| Parking Monitoring | Support |
| Loop Recording | Support |
| Car Licence Plate | Support |
| Microphone/Speaker | Support |
| Memory Card Capacity | Max. support 64GB( class 6 or class 10 or above suggested) |
| Frequency | 50HZ/60HZ |
| Output | 5V/1A |
| USB Type | Micro USB |
| Battery Capacity | 600mAh |
| Language | English/Français/Espanol/Português/Deutsch/Italiano/简体中文/繁體中文/Русский/日 |
תְרָה
4. Accessory
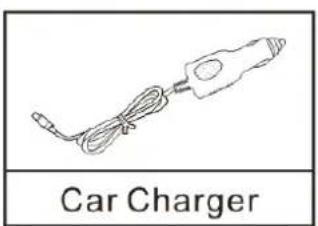
text_image
Car Charger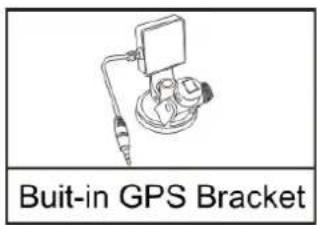
text_image
Built-in GPS Bracket
text_image
USB Cable
text_image
User Manual User Manualtext_image
Technical diagram of a camera with numbered parts for identification and assembly reference.text_image
SOS 00:02:12 1080P+720P AAAAAAA 2017/06/06 15:00:45H. Zoom numérique
natural_image
Simple line drawing of a coiled cable or wire with connectors, no text or symbols present
text_image
Technical diagram of a camera with numbered parts for identification and assembly reference.text_image
SOS 00:02:12 1080P+720P AAAAAAA 2017/06/06 15:00:45H. Zoom digital
text_image
Technical diagram of a camera with numbered parts for identification and assembly reference.text_image
SOS 00:02:12 1080P+720P AAAAAAA 2017/06/06 15:00:45H. Zoom digitale
natural_image
Simple line drawing of a coiled cable or wire with connectors, no text or symbols present