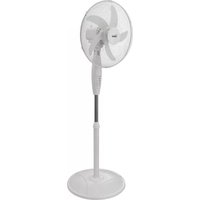
USER MANUAL VD220 Bimar
natural_image
Technical line drawing of a circular fan or impeller with internal grid pattern and a pointer (no text or symbols)
Batteria
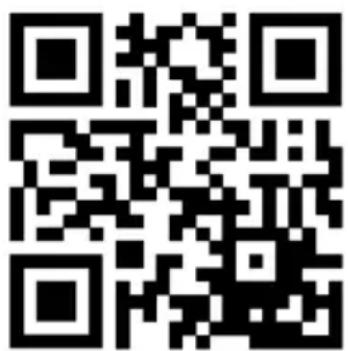
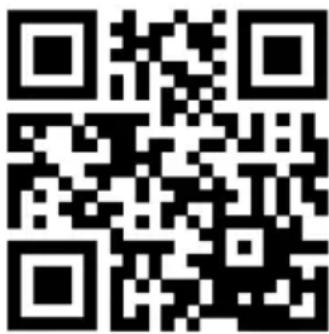
Scan the QR code to access the quick guide of its features.
Please read these instructions carefully before using the appliance, and instruct other persons using it, too, when necessary. Keep booklet and for further use.
If when reading this instructions manual certain parts should remain difficult to understand, or if there is any confusion, contact the company indicated on the last page before using the product.
This symbol highlights instructions and precautions for safe use. Warnings and appliance installation, use, cleaning and maintenance procedures may be updated slightly from those described in this manual; for further details, please consult the updated on-line manual at www.bimaritaly.it.
GENERAL NOTICES
- This device is intended for home use only, to ventilate internal rock and outdoor on condition that the appliance is not exposed directly atmospheric agents (sun, rain, high humidity, wind, etc.): do not use any other purpose. Any other use is to be considered inappropriate therefore dangerous. The manufacturer cannot be held responsible for eventual damage caused by inappropriate, improper or irresponsible use and/or for repairs made to the product by unauthorised personnel. This appliance is intended to be used in household and similar applications such as:
- staff kitchen in shops, offices and other working environments;
- farm houses
- by clients in hotels, motels and other residential type environments
- bed and breakfast type environments
- This is a radio appliance that intentionally emits and/or receives r waves for radiocommunication and/or radiodetermination purposes.
- Do not touch the appliance with wet hands or feet.
- Do not insert any tool, or your fingers, into the grille protecting the
- This appliance can be used by children aged from 8 years and at and persons with reduced physical, sensory or mental capabilities lack of experience and knowledge if they have been given superv or instruction concerning use of the appliance in a safe way and if understand the hazards involved. Children shall not play with appliance. Cleaning and user maintenance shall not be made by children without supervision.
- The appliance must be kept out of children's reach.
- This appliance can be used by children aged 8 and older and by persons with reduced physical, sensory or mental capabilities or life experience and knowledge if they are properly supervised or if the received instructions regarding the safe use of the appliance and I understood the related dangers. Children should not play with a appliance. Cleaning and maintenance should not be performed by children unless they are older than 8 years of age and are supervised.
- Ensure that the fan is switched off from the supply mains to removing the guard.
- Attention: when using electric appliances, the basic safety precautions must always be observed to avoid risks of fire, electric shocks and physical injury.
- Do not use the appliance if it is not operating correctly or see damaged; if in doubt, contact professionally qualified personnel.
- Make sure that the appliance is working correctly: if not, turn appliance off and have it checked by professionally qualified personnel.
- Do not move the appliance when it is operating.
- Do not use the device at room temperatures above 40 °C.
- Do not move the appliance when it is in function.
- Do not leave the device exposed to the weather (sun, rain, etc.).
-
Do not pull on the cord to disconnect the plug from the socket of the adapter
-
If the electric cord is damaged, it has to be replaced by the suppli authorized service center or a professionally qualified, to avoid an
- Do not use the appliance with a timer or a programmer or with a set that can switch on the appliance automatically, to avoid risk of fire, a fire risk exists if the heater is covered or positioned incorrectly.
- In the event of a breakdown or poor operation, turn the fan heater ask for professionally qualified help: repairs made by unqualified persons can be dangerous and render void the warranty.
- Ensure that the fan is switched off from the s mains before removing the guard, with screw

Battery
- Do not overcharge (an excessively long charge cycle of more than 4 hours) or over-discharge the battery, as this may damage the battery and shorten its life.
- Make sure that the batteries do not reach temperatures above 50^ C, or below 10^ C for a long period of time.
- Recharge your fan in an indoor environment, dry and well ventilated (ideal temperature: 20-25°C). Do not charge the fan if it is exposed to the elements (sun, rain, etc.) or in damp and wet environments.
- When charging, make sure the fan is not near other heat sources, flammable materials (curtains, upholstery, etc.), flammable gases or explosive materials (spray cans). Check that there is 80cm of free space to the front, back and the sides.
- Make sure the battery is charged at regular intervals, even if you are not using electric fan for a long time. This is to prevent battery damage caused by low voltage for an extended period of time.
- If the fan is not being used continuously, please recharge the battery at least once 3 months.
- A fully charged battery will run out even if the fan is not used for a certain period of time.
- Battery life depends on various environmental, storage and usage factors.
- If the charger is not in use, unplug it from the power outlet.
- Do not touch the charger with wet hands or feet.
- Do not pull on the power cord to disconnect the plug from the charger's power socket.
- Do not pull on the charger cable to move the fan.
- Do not charge the battery and use the fan if the battery starts to emit odours, overheats or starts to leak. Do not touch any leaking substances or breathe in the fumes from them. Seek immediate medical attention if you are exposed to any substance emitted from the battery. The manufacturer cannot be held responsible for any damage resulting from improper use (such as tampering with the battery), incorrect and irresponsible use and/or repairs carried out by unqualified persons.
- When charging the battery, make sure that it does not come into contact with water or other liquids. If it inadvertently gets wet or is immersed in liquid, first deactivate the power socket by turning off the switch on the electrical panel, and only then remove the plug from the power socket. Carefully dry both the plug and the socket, and only then turn on the power at the socket. Insert the plug into the power outlet again, and you can then use the appliance. In case of doubt, contact professionally qualified personnel.
INSTALLATION
- After removing the packing materials, check the integrity of the heater; if you are unsure, do not use it and ask for qualified professional help. The packing materials (plastic bags, polystyrene foam, nails, etc.) must be kept out the reach of children because they are potential sources of danger. Attention: any stickers or advertising material applied to the grid removed before using the appliance. The manufacturer declines all responsibility in case this is not safe working practices will be respected.
- Before connecting the appliance, check that the voltage shown on the data plate of the adapter matches that of your electricity. In the event of incompatibility between the electric outlet and the plug of the appliance, have the outlet replaced with another more suitable type by professionally qualified personnel, who will make sure that the section of the wires of the adapter is appropriate for the absorbed power of the appliance. In general, the use of adapters or extension cords is not recommended; if their use is indispensable, they must conform to existing safety standards and their current capacity (amperes) must not be less that the maximum of the appliance.
- The power socket must be easy to reach so the plug can be removed quickly in case of emergency.
- Do not place the fan on a shelf and/or near sinks or other container of liquids (minimum distance of 2 meters) to avoid the risk of it falling in.
- Keep the fan far away from fabrics (curtains, etc.) or unstable materials that could obstruct the air intake grille; make sure that the front is free of unstable materials (dust, etc.).
- Make sure that the electric cord is not touching rough, hot or moving surfaces and not twisted or wrapped around the appliance.
- Stand the appliance on a horizontal, flat surface or table; do not stand on a inclined plane (the appliance could upset).
- Do not place the appliance near an open flame, cooking or other heating appliance.
- This appliance must only be used with the adapter supplied.
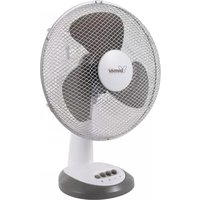
DESCRIPTION
Wi-fi device, usable via Smartphone using an App with Android or iOS operating systems.
- Selections are adjustable via the app: on/off; speed; Natural mode; left/right oscillation; weekly programming.
- Check that the router is for domestic use, that there are no access restrictions except the password, that the Wi-Fi network is 2.4 GHz, and that there is a strong, uniform Wi-Fi signal in the room where the device is to be installed.
- Make sure that the smartphone is connected to the wi-fi network to be used for the appliance.
First Installation/Setup
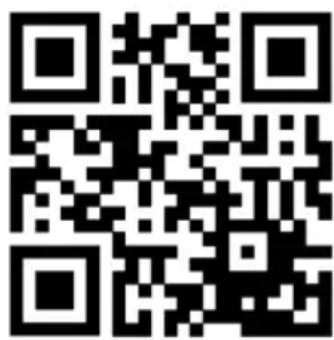
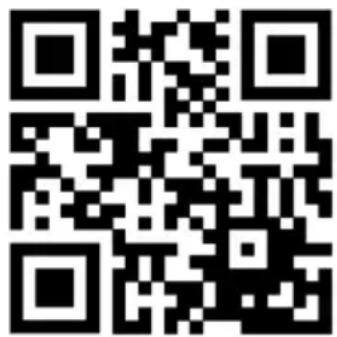
1.1 Install the "BIMAR life Smart" App via Google Play (Android) or AppStore (iOS), or scan the QR code provided here.
For Android
For iOS
1.2 Once installed, the app icon appears. Click the "Bimar Live Smart" icon to run the app.

1.3 The first time the app is started, register and enter your credentials:
- click "Register" and confirm the "Privacy Policy Statement" with "I agree" to continue
- enter your phone number or email address (select the mode in the top right-hand corner)
- click "Get check code", wait a few moments and then enter the code received in the registration email or text message in the "Check code" field (also check in the Spam folder if you cannot find the email in your "Incoming Mail" folder).
1.4 Enter the password required and click "Done".
1.5 A screen will open: click "Create Family".
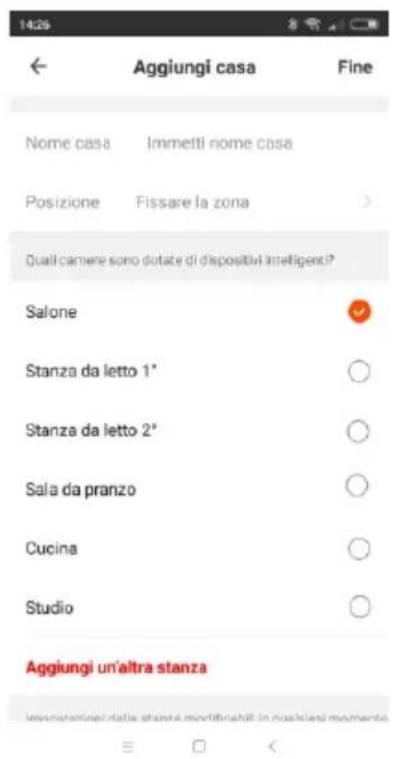
1.6 A screen (as shown on the right) appears where you can customise the home (name, position and name of room). Confirm when done.
1.7 Once you have customised the app correctly, the main screen appears. It contains the following functions:
- List and control of devices, subdivided by room “”
- List and control of scenarios

- User profile management

- Pairing of new devices

2. To pair new devices with the smartphone
2.1 Press the “☐” button to switch on, again press the “☐” button for about five seconds: the light flashes quickly; release the button.
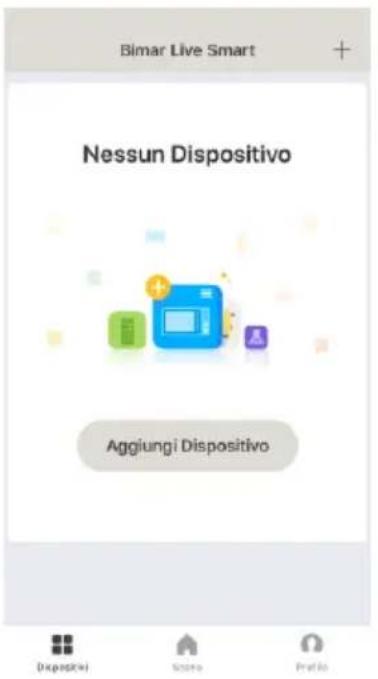
2.2 Open APP on the smartphone: in the first screen, click "ADD DEVICE" or click "+” in the top right corner.
2.3 In the next screen, click "Ventilatore"
2.4 In the next screen, click" /Check that the LED flashes quickly.
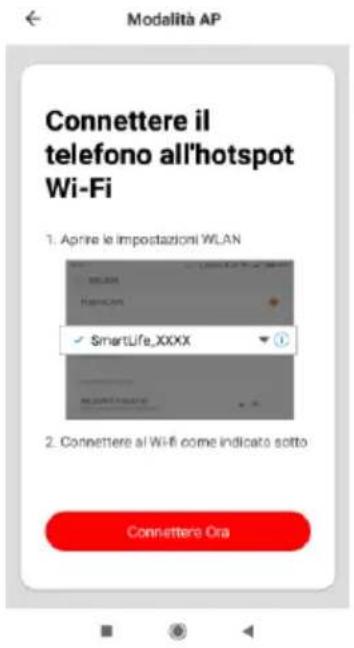
The device can also be paired in the "AP Mode",
press the " " button for about five seconds: the light flashes quickly; release the button.
. Access the smartphone WI-FI settings and connect to the "Bimar Live Smart xxx" or "Smart Life xxx" network, then press "connect now".
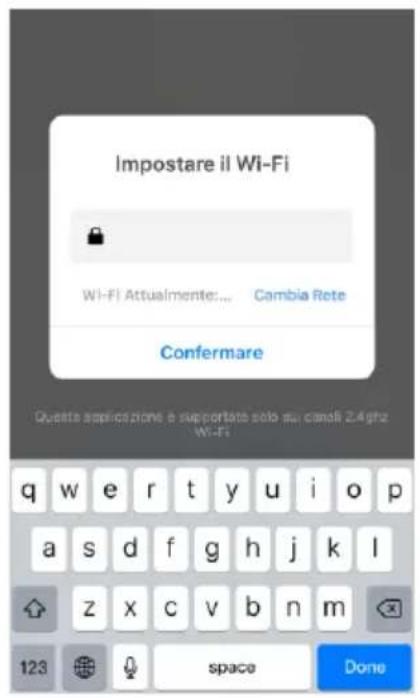
2.5 In the next screen, "Set Wi-Fi" (see below), type the PASSWORD of your Wi-Fi network and click the "confirm" symbol to activate the connection. The countdown (see below) starts and will be interrupted as soon as the smartphone has connected to the device.
2.6 The first screen reappears with the added option "FAN" (see right); click "DONE" to activate the appliance.
The device can also be shared with other users. (See next section: Description of appliance control panel or Use via smartphone).
If the above operations do not proceed correctly, to reset the WIFI function, press the "button for about five seconds: the light flashes quickly; release the button.
Settings and customizations.
Open the smartphone screen and press following functions:

in the bottom right corner to customize the
- Home management
- Message centre
- Assistance centre
- Configure (audio, alerts, info, cache memory clear)
Press in the bottom centre to customise operation of the device to suit the various scenarios or operating situations provided by the APP (for example: Back home, Leaving home, Dawn, Goodnight, Temperature, Humidity, Weather, Air quality, Dawn/dusk) or in combination with other devices.
Press

in the bottom left corner and top of the screen, for example:

Soleggiato

to customise (update and/or were permitted) the appliance's the outdoor wind speed, air humidity and temperature (see
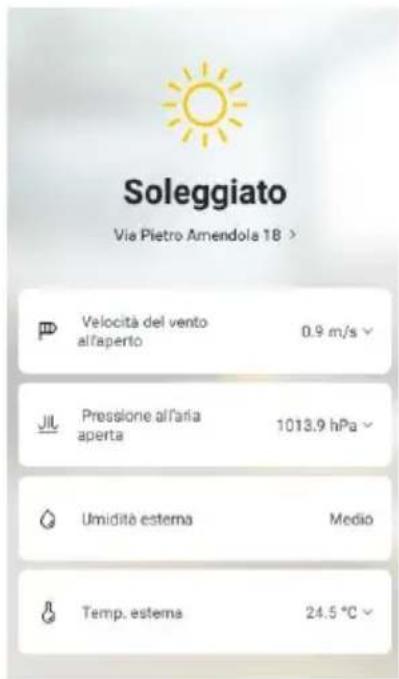
Press top right to customise the following:
- Change Device name-Device position-Check Network
- Third-party devices supported: Amazon Alexa, Google Assistant for device switch-on and switch-off.
- Device sharing, Create a Comment group, Device Info
- Feedback, Update Firmware, Remove device, Restore ,Factory Settings
The smartphone must be connected to Wi-Fi or cellular data network for remote control.
Voice control
The device is compatible with Amazon Alexa and Google Assistant voice controls. Open the corresponding App (make sure that the account and password used are the same as those of the "Bimar Live Smart" app) and follow the settings.
Google Home: some basic vocal commands are:
- "OK Google" or "Hey Google", turn on XX (name of the device)
- "OK Google" or "Hey Google", turn off XX (name of the device)
- etc.
Amazon Alexa: some basic vocal commands are:
- "Alexa", turn on XX (name of the device)
- "Alexa", turn off XX (name of the device)
- etc.
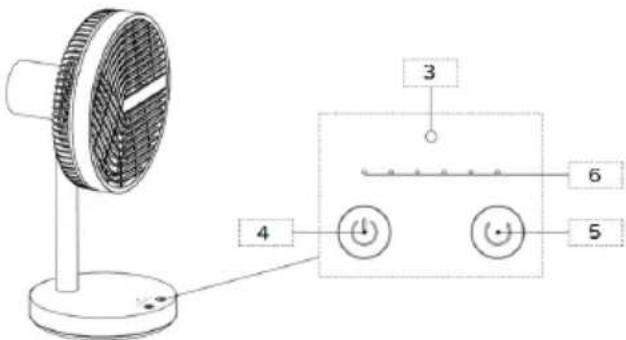
Description
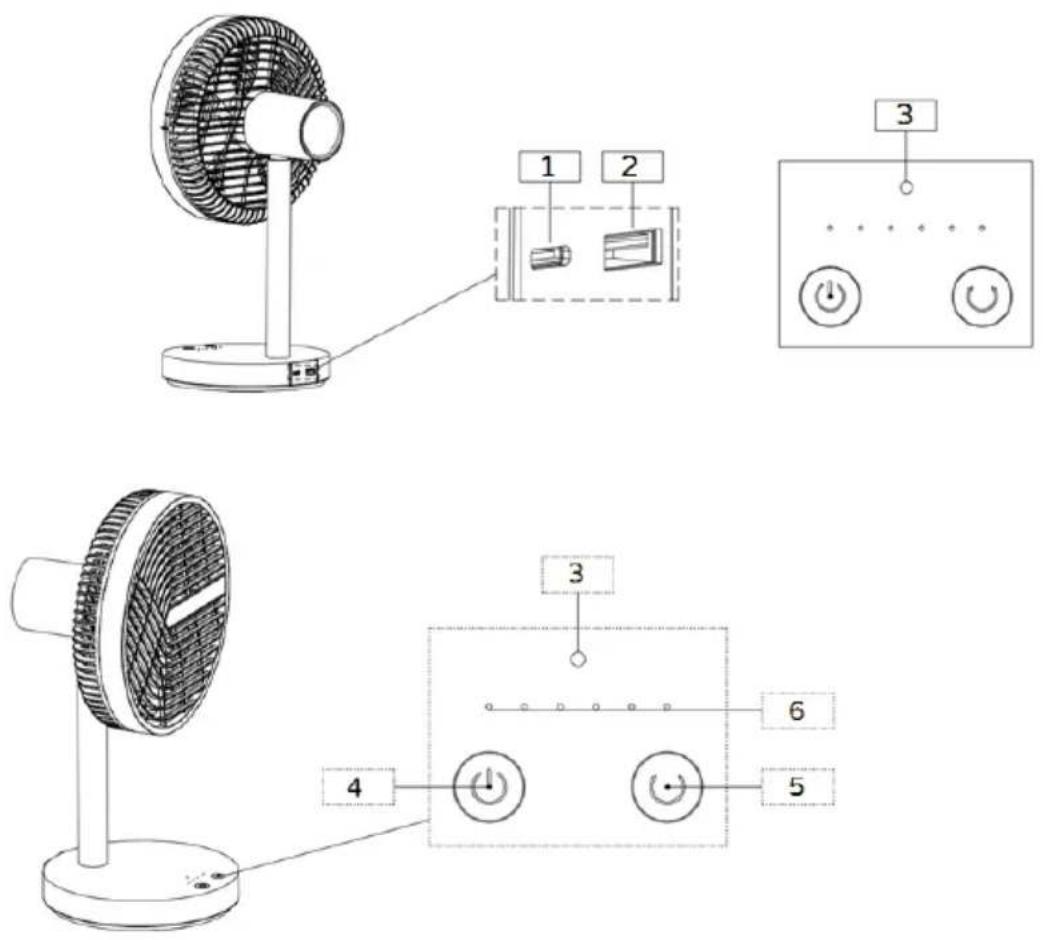
The appliance is equipped with the following control elements and accessories:
Battery: this is located inside the base. To recharge it, proceed as described:
- place the fan on a flat, stable surface
- Insert the cable connector into port C (1).
- Insert the USB plug into the adapter (not included in the package), taking care to correctly guide the plug into the USB socket, and insert the adapter plug into the power outlet.
- The battery takes around 4 hours to completely recharge. A red LED indicates the charge status, while a green LED indicates that the battery is fully charged. When charging is complete, remove the adapter plug from the socket, and the connector from the port.
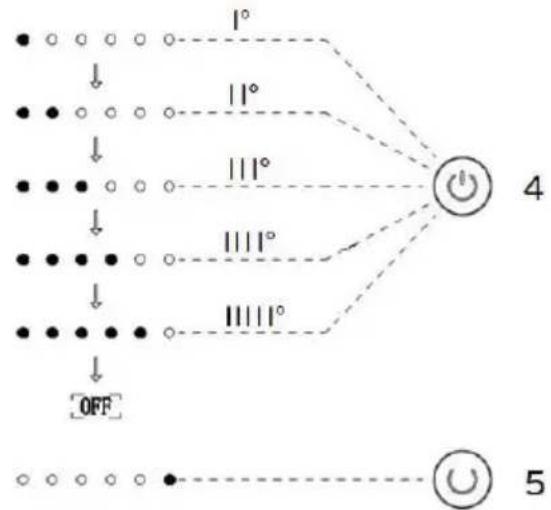
" ⏻ " button (4): To switch on, select the desired functions (speed and Natural mode), or switch off the fan. Press the button repeatedly; each press scrolls through:
I° (first): the fan turns on and runs at the minimum speed
I I° (second): the fan runs at the second speed
III° (third): the fan runs at the third speed
III I° (fourth): the fan runs at maximum speed
1111° (fifth): the fan operates in "Natural" mode (intermittent ventilation)
11111° (sixth): the fan switches off and the corresponding LED lights up.
Press for around three seconds to stop any mode of operation, and to switch the unit off.
" Ⓞ " button (5): oscillation (right-left) is active when the unit is switched on. Press once to activate (corresponding LED will be on) or deactivate (corresponding LED will be off).
flowchart
graph TD
    A["●"] --> B["○"]
    C["●"] --> D["○"]
    E["●"] --> F["○"]
    G["●"] --> H["○"]
    I["●"] --> J["○"]
    K["●"] --> L["○"]
    M["●"] --> N["○"]
    O["●"] --> P["○"]
    Q["●"] --> R["○"]
    S["●"] --> T["○"]
    U["●"] --> V["○"]
    W["●"] --> X["○"]
    Y["●"] --> Z["○"]
    AA["○"] --> AB["○"]
    AC["○"] --> AD["○"]
    AE["○"] --> AF["○"]
    AG["○"] --> AH["○"]
    AI["○"] --> AJ["○"]
    AK["○"] --> AL["○"]
    AM["○"] --> AN["○"]
    AO["○"] --> AP["○"]
    AQ["○"] --> AR["○"]
    AS["○"] --> AT["○"]
    AU["○"] --> AV["○"]
    AW["○"] --> AX["○"]
    AY["1°"] --> Z
    AZ["11°"] --> Z
    BA["111°"] --> Z
    BB["1111°"] --> Z
    BC["4"] --> AD
    AD --> AE
    AE --> AF
    AF --> AG
    AG --> AH
    AH --> AI
    AI --> AJ
Switch off the wifi function: press the oscillation button “ ⭕ ” for 2 seconds: led from green colour to blue colour (for about 1 second)
Switch on the wifi function: press the oscillation button “☐” for 10 seconds: led from green colour to blue colour (for about 1 second)
Vertical inclination (high-low): is selected by directing the motor housing in the desired direction (high-horizontal-low).
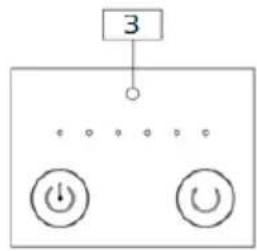
Led (3), during operation the red LED:
- is in a fixed position, but after about 1 minute an auto power off and power on again will be activated at the first selection
- blinks: this indicates that the battery charge is below 25%. The unit will run for some time, but it will then turn off. To charge it, see Battery description.
Autonomy (fully charged battery): if the fan runs at minimum speed it can run continuously for up to a maximum of around 7/8 hours. If it runs at maximum speed it can run continuously up to a maximum of around 2/3 hours. It is advisable to completely discharge the fan battery to ensure a longer life.
Power bank function: the fan battery (first check the charge status) can be charged using an electronic device (smartphone, tablet, etc.) via the USB port (2).
CLEANING AND MAINTENANCE
Attention: before normal cleaning, remove the plug from the socket of the adapter.
- Clean the body with soft, slightly damp, cloth; do not use abrasive or corrosive products.
- Do not immerse any part of the fan in water or other liquid: if this should happen, do not put your hand in the liquid, but first remove the plug from the socket. Carefully dry the appliance and make sure that all the electrical parts are dry: in the case of doubt, ask for professionally qualified help.
- If the fan will not be used for long periods, it must be protected from dust and humidity; we recommend storing it in its original packaging.
- Should you decide not to use the appliance any more, we recommend making it inoperative by cutting the power cord (after making sure you have disconnected the plug from the socket) and make dangerous parts harmless if children are allowed to play with them (such as the cable).
- The old battery must be disposed of at an appropriate collection centre in your area or in special bins. This assures full compliance with legal regulations.
At the end of its working life, the product must not be disposed of as urban waste. It must be taken to a special local authority differentiated waste collection centre or to a dealer providing this service. Disposing of a household appliance separately avoids possible negative consequences for the environment and health deriving from inappropriate disposal and enables the constituent materials to be recovered to obtain significant savings in energy and resources. As a reminder of the need to dispose of household appliances separately, the product is marked with a crossed-out wheeled dustbin.

natural_image
Cross-sectional diagram of a circular fan or blade structure with internal grid pattern (no text or symbols)
Akku

- Gestion maison
- Centre messages
- Centre assistance
- Configurer (audio, notifications, infos, effacer)
natural_image
Diagram of a circular fan or impeller with internal grid pattern and pointer (no text or symbols)
Batería
Para iOS
flowchart
graph TD
    A["3"] --> B["●"]
    B --> C["●"]
    C --> D["●"]
    D --> E["●"]
    E --> F["●"]
    F --> G["●"]
    G --> H["●"]
    H --> I["●"]
    I --> J["●"]
    J --> K["●"]
    K --> L["●"]
    L --> M["●"]
    M --> N["●"]
    N --> O["●"]
    O --> P["●"]
    P --> Q["●"]
    Q --> R["●"]
    R --> S["●"]
    S --> T["●"]
    T --> U["●"]
    U --> V["●"]
    V --> W["●"]
    W --> X["●"]
    X --> Y["●"]
    Y --> Z["●"]
Descripción