PABSW 10 8 - Drill PARKSIDE - Free user manual and instructions
Find the device manual for free PABSW 10 8 PARKSIDE in PDF.

User questions about PABSW 10 8 PARKSIDE
0 question about this device. Answer the ones you know or ask your own.
Ask a new question about this device
Download the instructions for your Drill in PDF format for free! Find your manual PABSW 10 8 - PARKSIDE and take your electronic device back in hand. On this page are published all the documents necessary for the use of your device. PABSW 10 8 by PARKSIDE.
USER MANUAL PABSW 10 8 PARKSIDE
= dB (A); guaranteed L
= dB (A); guaranteed L
= dB (A); guaranteed L
= dB (A); guaranteed L
Caution - Read the operating instructions to reduce the risk of inquiry Wear ear-muffs. The impact of noise can cause damage to hearing. Wear safety goggles. Sparks generated during working or splinters, chips and dust emitted by the device can cause loss of sight. Wear a breathing mask. Dust which is injurious to health can be generated when working on wood and other materials. Never use the device to work on any materials containing asbestos! Change the gear only when the drill is at a standstill. If you fail to observe this point, the gearing may be damaged. Anl_4513640.indb 66Anl_4513640.indb 66 27.11.12 13:4927.11.12 13:49GB
Congratulations on your new purchase. You have decided in favor of a high-quality pro- duct. The operating instructions are a part of this product. They contain information of importance for your safety, for the use of the product and for its disposal. Before you use the product, acquaint yourself with all the information concerning its operation and safety. Use the product only as described and only for the listed areas of applica- tion. If you hand on the product to other people, give them all the documentation as well.
2. Safet y regulations
Caution! Read all safety regulations and instruc- tions. Any errors made in following the safety regu- lations and instructions may result in an electric shock, fi re and/or serious injury. Keep all safety regulations and instruc- tions in a safe place for future use. The term “electric tool” used in the safety inst- ructions refers to electric tools operated from the mains power supply (with a power cable) and to battery operated electric tools (without a power cable).
a) Keep your work area clean and well illuminated. Untidy or unlit work areas can result in accidents. b) Do not operate the electric tool in an environment where there is a risk of explosions and where there are infl ammable liquids, gases or dust. Electric tools produce sparks which could set the dust or vapours alight. c) Keep the electric tool out of the reach of children and other persons. If there is a distraction, you may lose control of the appliance.
2. Electrical safety
a) The connector plug from this electric tool must fi t into the socket. The plug should never be altered in any way. Never use adapter plugs together with earthed electric tools. Unaltered plugs and correct sockets reduce the risk of an electric shock. b) Avoid bodily contact with earthed surfaces such as pipes, heating, ovens and fridges. The risk of electric shock is in- creased if your body is earthed. c) Keep the tool out of the rain and away from moisture. The ingress of water into an electric tool increases the risk of an electric shock. d) Do not use the cable to carry the elec- tric tool, to hang it up or to pull it out of the socket. Keep the cable away from heat, oil, sharp edges and mo- ving parts of the appliance. Damaged or entangled cables increase the risk of an electric shock. e) If you are working outdoors with an electric tool, only use extension cables which are designed specifi cally for this purpose. Using specially designed outdoor extension cables, the risk of electric shock is reduced. f) If operation of the electric tool in a damp environment can not be avo- ided, use a earth-leakage circuit- breaker. The earth-leakage circuit-breaker reduces the risk of an electric shock.
3. Safety of persons
a) Be careful, watch what you are doing and use an electric tool sensibly. Do not use the tool if you are tired or un- der the infl uence of drugs, alcohol or medication. A moment of inattention when using the electric tool can result in serious inju- ries. b) Wear personal protection equipment and always wear safety goggles. Wearing personal protection (such as dust masks, non-slip safety shoes, safety helmet or ear protection, depending upon the type Anl_4513640.indb 67Anl_4513640.indb 67 27.11.12 13:4927.11.12 13:49GB
and use of the electric tool) reduces the risk of injury. c) Make sure that the appliance cannot start up accidentally. Ensure that the electric tool is switched off before you con- nect it to the power supply and/or insert the battery, or pick up or carry the tool. If your fi nger is on the switch whilst carrying the electric tool or if you connect the appliance to the mains when it is switched on, this can lead to accidents. d) Remove keys and wrenches before switching on the electric tool. A tool or key which comes into contact with rotating parts of the appliance can lead to injuries. e) Avoid abnormal working postures. Make sure you stand squarely and keep your balance at all times. In this way, you can control the electric tool better in unexpected circumstances. f) Wear suitable work clothes. Do not wear loose clothing or jewellery. Keep hair, clothes and gloves away from moving parts. Loose clothing, jewel- lery or long hair can get trapped in moving parts. g) If vacuuming devices and draining devices can be fi tted, make sure that these are correctly attached and cor- rectly used. The use of a dust extraction system can reduce the danger posed by dust.
4. Usage and treatment of the electric
tool a) Do not overload the appliance. Use the correct tool for your work. You will be able to work better and more safely within the given performance boundaries. b) Do not use an electric tool with a de- fective switch. An electric tool that cannot be switched on or off is dangerous and must be repaired. c) Pull the plug out of the socket and/ or remove the battery before making any adjustments to the appliance, changing accessories or put the appli- ance down. This safety measure prevents starting the electric tool unintentionally. d) Keep unused electric tools out of the reach of children. Do not allow people who are not familiar with the appli- ance or who have not read these ins- tructions to use the appliance. Electric tools are dangerous if they are used by inex- perienced people. e) Clean your electric tool carefully. Check whether moving parts are functioning properly and not jam- ming, whether parts are broken or damaged enough that the functioning of this electric tool is affected. Have damaged parts repaired before using the appliance. Many accidents are caused by badly maintained electric tools. f) Keep your cutting tools sharp and clean. Carefully maintained cutting tools with sharp cutting edges will jam less and are ea- sier to control. g) Make sure to use electric tools, ac- cessories, attachments, etc. in ac- cordance with these instructions. Take the conditions in your work area and the job in hand into account. Using electric tools for any purpose other than the one for which they are intended can lead to dangerous situations.
5. Using and handling the cordless tool
a) Only charge the batteries in chargers that are recommended by the manu- facturer. A charger that is designed for a certain type of battery may pose a fi re risk if it is used with other types of battery. b) Use only the correct batteries in the electric tools. The use of other batteries may result in injuries and a fi re risk. c) Keep unused batteries away from paper clips, coins, keys, nails, screws and other metallic objects that could cause a short circuit between the con- tacts. A short circuit between the battery contacts may cause burns or a fi re. d) In case of incorrect use, fl uid may es- cape from the battery. Avoid contact with it. If you touch it by accident, rin- se the affected area with water. If you Anl_4513640.indb 68Anl_4513640.indb 68 27.11.12 13:4927.11.12 13:49GB
get the fl uid in your eyes, also seek medical advice. Leaking battery fl uid can cause skin irritation or burns.
a) Have your electric tool repaired only by trained personnel using only genu- ine spare parts. This will ensure that your electric tool remains safe to use. Hold the equipment by the insulated handles when carrying out work during which the screw or the plug-in tool could strike concealed power cables. Contact with a live cable may also make the metal parts of the equipment live and cause an electric shock. Additional safety instructions We pay a great deal of attention to the design of every battery pack to ensure that we supply you with batteries which feature maximum power den- sity, durability and safety. The battery cells have a wide range of safety devices. Each individual cell is initially formatted and its electrical characteristic curves are recorded. These data are then used ex- clusively to be able to assemble the best possible battery packs. Despite all the safety precau- tions, caution must always be exercised when handling batteries. The following points must be obeyed at all times to en- sure safe use. Safe use can only be guaranteed if unda- maged cells are used. Incorrect handling can cause cell damage. Important: Analyses confi rm that incorrect use and poor care are the main causes of the damage caused by high performance batteries. Information about the battery
The battery pack supplied with your cordless tool is not charged. The battery pack has to be charged before you use the tool for the first time.
For optimum battery performance avoid low discharge cycles. Charge the battery pack frequently.
Store the battery pack in a cool place, ideally at 15°C and charged to at least 40%.
Lithium-ion batteries are subject to a natural ageing process. The battery pack must be replaced at the latest when its capacity falls to just 80% of its capacity when new. Wea- kened cells in an aged battery pack are no longer capable of meeting the high power requirements and therefore pose a safety risk.
Do not throw battery packs into an open fire. There is a risk of explosion!
Do not ignite the battery pack or expose it to fire.
Do not exhaustively discharge bat- teries. Exhaustive discharge will damage the battery cells. The most common cause of exhaustive discharge is lengthy storage or non-use of partly discharged batteries. Stop working as soon as the performance of the battery falls noticeably or the electronic pro- tection system triggers. Place the battery pack in storage only after it has been fully charged.
Protect batteries and the tool from overloads. Overloads will quickly result in overheating and cell damage inside the bat- tery housing without this overheating actually being apparent externally.
Avoid damage and shocks. Replace bat- teries which have been dropped from a height of more than one meter or which have been exposed to violent shocks without delay, even if the housing of the battery pack appears to be undamaged. The battery cells inside the battery may have suffered serious damage. In this respect, please also read the waste dispo- sal information.
If the battery pack suffers overloading and overheating, the integrated protective cut-off will switch off the equipment for safety rea- sons. Important. Do not press the ON/OFF switch any more if the protective cut-off has actuated. This may damage the battery pack.
Use only original battery packs. The use of other batteries may result in injuries, explosion and a fire risk.
Information on chargers and the charging process
Do not use the supplied battery charger to charge non-rechargeable batteries.
Please check the data marked on the rating plate of the battery charger. Be sure to con- nect the battery charger to a power supply with the voltage marked on the rating plate. Never connect it to a different mains voltage.
Protect the battery charger and its cable from damage and sharp edges. Have damaged cables or plugs repaired without delay by a qualified electrician.
This battery charger is not designed to be used by people (including children) with limi- ted physical, sensory or mental capacities or those with no experience and/or knowledge unless they are supervised by a person who is responsible for their safety or they have recei- ved instructions from such a person in how to use the equipment safely.
Children must always be supervised in order to ensure that they do not play with the equip- ment.
Do not use damaged battery chargers.
Do not use the supplied battery charger to charge other cordless tools.
In heavy use the battery pack will become warm. Allow the battery pack to cool to room temperature before commencing with the charging.
Do not over-charge batteries. Do not exceed the maximum charging times. These charging times only apply to discharged batteries. Frequent insertion of a charged or partly charged battery pack will result in over-charging and cell damage. Do not leave batteries in the charger for days on end.
Never use or charge batteries if you suspect that the last time they were charged was more than 12 months previously. There is a high probability that the battery pack has already suffered dange- rous damage (exhaustive discharge).
Charging batteries at a temperature below 10°C will cause chemical damage to the cell and may cause a fire.
Do not use batteries which have heated du- ring the charging process, as the battery cells may have suffered dangerous damage.
Do not use batteries which have suffered curvature or deformation during the charging process or which show other non-typical sym- ptoms (gassing, hissing, cracking,…)
Never fully discharge the battery pack (re- commended depth of discharge max. 80%) A complete discharge of the battery pack will lead to premature ageing of the battery cells.
Never charge the batteries unsupervised. Protection from environmental infl uences
Wear suitable work clothes. Wear safety goggles.
Protect your cordless tool and the bat- tery charger from moisture and rain. Moisture and rain can cause dangerous cell damage.
Do not use the cordless tool or the battery charger near vapors and inflammable liquids.
Use the battery charger and cordless tools only in dry conditions and an ambient tempe- rature of 10-40°C.
Do not keep the battery charger in places where the temperature is liable to reach over 40°C. In particular, do not leave the battery charger in a car that is parked in the sunshine.
Protect batteries from overheating. Overloads, over-charging and exposure to direct sunlight will result in overheating and cell damage. Never charge or work with bat- teries which have been overheated – replace them immediately if possible.
Storage of batteries, battery chargers and cordless tools. Store the charger and your cordless tool only in dry places with an ambient temperature of 10-40°C. Store your lithium-ion battery pack in a cool, dry place at a temperature of 10-20°C. Protect them from humidity and direct sunlight. Only place fully charged batteries in storage (charged at least 40%).
Prevent the lithium-ion battery pack from free- zing. Battery packs which were stored below 0°C for more than 60 minutes must be dispo- sed of.
static charge: Electrostatic discharges cause damage of the electronic protection system and the battery cells. Avoid electrostatic char- ging and never touch the battery poles. Rechargeable batteries and cordless electric machines and tools contain materials that are po- tentially harmful to the environment. Never place any cordless electric machines or tools in your household refuse. When cordless electric machi- nes or tools become defective or worn, remove the rechargeable batteries and return them to iSC GmbH (address: Eschenstrasse 6, D-94405, Ger- many). If the rechargeable batteries cannot be removed, return the complete cordless machine or tool. You can then be sure that the equipment will be correctly disposed of by the manufacturer. When shipping or disposing of batteries and cordless tools, always ensure that they are packed individually in plastic bags to prevent short circuits and fi res. Do not lose these safety instructions
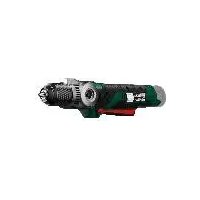
3. Layout and items supplied
2. Selector switch for 1st gear - 2nd gear
9. Integrated magnetic bit mount
Open the packaging and take out the equip- ment with care.
Remove the packaging material and any packaging and/or transportation braces (if available).
Check to see if all items are supplied.
Inspect the equipment and accessories for transport damage.
If possible, please keep the packaging until the end of the guarantee period. Important! The equipment and packaging material are not toys. Do not let children play with plastic bags, foils or small parts. There is a danger of swallowing or suffocating!
The cordless drill is designed for tightening and undoing screws, as well as for drilling in wood, metal and plastic. The equipment is to be used only for its prescribed purpose. Any other use is deemed to be a case of misuse. The user / operator and not the manufac- turer will be liable for any damage or injuries of any kind caused as a result of this. Please note that our equipment has not been de- signed for use in commercial, trade or industrial applications. Our warranty will be voided if the machine is used in commercial, trade or industrial businesses or for equivalent purposes.
uncertainty ................................................3 dB Wear ear-muffs. The impact of noise can cause damage to hea- ring. Total vibration values (vector sum of three direc- tions) determined in accordance with EN 60745. Drilling in metal Vibration emission value a
Warning! The specifi ed vibration value was established in accordance with a standardized testing method. It may change according to how the electric equip- ment is used and may exceed the specifi ed value in exceptional circumstances. The specifi ed vibration value can be used to compare the equipment with other electric power tools. The specifi ed vibration value can be used for initi- al assessment of a harmful effect. Keep the noise emissions and vibrations to a minimum.
Only use appliances which are in perfect working order.
Service and clean the appliance regularly.
Adapt your working style to suit the appli- ance.
Do not overload the appliance.
Have the appliance serviced whenever ne- cessary.
Switch the appliance off when it is not in use.
For the protection of the operator it is essential to specify safety measures which are based on an estimate of the exposure during the actual condi- tions of use (all stages of the operating cycle must be considered, e.g. times in which the electric tools are switched off and times in which the tool is switched on but operates without load). Residual risks Even if you use this electric power tool in accordance with instructions, certain residual risks cannot be rules out. The fol- lowing hazards may arise in connection with the equipment’s construction and layout:
3. Health damage caused by hand-arm vib-
rations if the equipment is used over a pro- longed period or is not properly guided and maintained.
6. Before starting the
equipment Be sure to read the following information before you use your cordless screwdriver for the fi rst time:
1. Charge the battery pack with the charger
supplied. An empty battery pack requires a charging period of approximately one hour.
2. Only ever use sharp drill bits and screwdriver
bits which are suitable for the purpose and in faultless condition.
3. Always check for concealed electric cables
and gas and water pipes when drilling and screwing in walls.
7.1 Charging the LI battery pack (Fig. 2-3)
The battery is protected from exhaustive dischar- ge. An integrated protective circuit automatically switches off the equipment when the battery is fl at. In this case the bit chuck will cease to turn. Warning! Do not press the ON/OFF switch any more if the protective circuit has actuated. This may damage the battery.
1. Remove the battery pack (5) from the handle,
pressing the pushlock buttons (6) on the left and right sides to do so.
2. Check that your mains voltage is the same as
that marked on the rating plate of the battery charger. Insert the power plug of the charger (11) into the mains socket outlet. The green LED will then begin to fl ash.
3. Insert the battery pack (5) into the battery
fi nd a table with an explanation of the LED indicator on the charger. If the battery pack fails to become charged, ple- ase check
whether there is voltage at the socket-outlet
whether there is proper contact with the char- ging contacts in the battery charger (11). If the battery still fails to become charged, please return
the charger and charging adapter
the battery pack to our Customer Service Department. To ensure that the LI battery pack provides long service you should take care to recharge it promptly. You must recharge the battery pack when you notice that the power of the cordless screwdriver drops. Anl_4513640.indb 73Anl_4513640.indb 73 27.11.12 13:4927.11.12 13:49GB
The cordless screwdriver is fi tted with a mechani- cal torque selector. The torque for a specifi c size of screw is selected with the set-collar (1). The correct torque depends on several factors:
on the type and hardness of material in ques- tion
on the type and length screws used
on the requirements needing to be met by the screwed joint. The clutch disengages with a grating sound to in- dicate when the set torque is reached. Important! The tool must be at a standstill when you set the torque with the setting ring.
7.3 Drilling (Fig. 4 / Item 1)
For drilling purposes, move the set-collar to the last step „Drill“. In this setting the slip clutch is in- active. The maximum torque is available in drilling mode.
7.4 Selecting 1st gear to 2nd gear
(Fig. 4/Item 2) By adjusting the selector switch, you can work with a faster or slower turning speed. Change the gear only when the drill is at a standstill. If you fail to observe this point, the gearing may be damaged.
7.5 Battery capacity indicator
(Fig. 4/Item. 3) Press the button for the battery capacity indicator (a). The battery capacity indicator (3) indicates the charge state of the battery on 3 coloured LEDs.
7.6 Forward/Reverse switch
(Fig. 5 / Item 4) With the slide switch above the On/Off switch you can select the direction of rotation of the battery-powered drill/screwdriver and secure it against being switched on accidentally. You can choose between clockwise and anticlockwise rotation. To avoid causing damage to the gearing it is advisable to change the direction of rotation only when the tool is at a standstill. The On/Off switch is blocked when the slide switch is in centre position.
7.7 On/Off switch (Fig. 5 / Item 7)
Infi nitely variable speed control is possible with the On/Off switch. The further you press the switch, the higher the speed of the battery-powe- red drill/screwdriver.
7.8 LED lamp (Fig. 5/Item 8)
The LED lamp (8) can be used in poor lighting conditions to illuminate the area where you want to drill or screw. The LED lamp (8) will be lit au- tomatically as soon as you press the ON/OFF switch (7).
7.9 Changing the tool (Fig. 6)
Important. Set the changeover switch (4) to its centre position whenever you carry out any work (for example changing the tool, maintenance work, etc.) on the cordless screwdriver.
The cordless screwdriver is fitted with a quick- action chuck (10) with an automatic spindle stop.
Open the chuck (10). The chuck opening (b) must be large enough to hold the tool (drill bit or screwdriver bit).
Select the suitable tool. Push the tool as far as possible into the chuck opening (b).
Tighten the chuck (10) and then check that the tool is secure.
We recommend using self-centering screws (e.g. Torx screws, recessed head screws) designed for reliable working. Be sure to use a bit that matches the screw in shape and size. Set the torque, as de- scribed elsewhere in these operating instructions, to suit the size of screw.
7.11 Integrated magnetic bit mount
(Fig. 7-8) The cordless drill/screwdriver has an integrated magnetic bit mount (9) for 1/4-inch (6.35mm) bit inserts. Anl_4513640.indb 74Anl_4513640.indb 74 27.11.12 13:4927.11.12 13:49GB
To use it, remove the quick-change drill chuck (10) by pressing the rear drill chuck sleeve (c) towards the drill chuck. You can now plug a suitable bit insert into the inte- grated magnetic bit mount (9). To mount the drill chuck again, plug it onto the bit mount and turn it slightly until it can be pushed on completely. Lock the drill chuck in place by pushing the drill chuck sleeve (c) towards the machine.
8. Cleaning, maintenance and
ordering of spare parts Always pull out the mains power plug before star- ting any cleaning work.
Keep all safety devices, air vents and the motor housing free of dirt and dust as far as possible. Wipe the equipment with a clean cloth or blow it with compressed air at low pressure.
We recommend that you clean the device immediately each time you have finished using it.
Clean the equipment regularly with a moist cloth and some soft soap. Do not use cleaning agents or solvents; these could attack the plastic parts of the equipment. Ensure that no water can seep into the device.
There are no parts inside the equipment which require additional maintenance.
8.3 Ordering replacement parts:
Please quote the following data when ordering replacement parts:
Article number of the machine
Identification number of the machine For our latest prices and information please go to www.isc-gmbh.info
9. Disposal and recycling
The unit is supplied in packaging to prevent its being damaged in transit. This packaging is raw material and can therefore be reused or can be returned to the raw material system. The unit and its accessories are made of various types of material, such as metal and plastic. De- fective components must be disposed of as spe- cial waste. Ask your dealer or your local council. For EU countries only Never place any electric power tools in your household refuse. To comply with European Directive 2002/96/EC concerning old electric and electronic equipment and its implementation in national laws, old elec- tric power tools have to be separated from other waste and disposed of in an environment-friendly fashion, e.g. by taking to a recycling depot. Recycling alternative to the return request: As an alternative to returning the equipment to the manufacturer, the owner of the electrical equip- ment must make sure that the equipment is proper- ly disposed of if he no longer wants to keep the equipment. The old equipment can be returned to a suitable collection point that will dispose of the equipment in accordance with the national recyc- ling and waste disposal regulations. This does not apply to any accessories or aids without electrical components supplied with the old equipment. Anl_4513640.indb 75Anl_4513640.indb 75 27.11.12 13:4927.11.12 13:49GB
Indicator status Explanations and actions Red LED Green LED Off Flashing Ready for use The charger is connected to the mains and is ready for use; there is no battery pack in the charger. On Off Charging The charger is charging the battery pack in quick charge mode. Off On The battery pack is fully charged (charging completed). Action: Take the battery pack out of the charger. Disconnect the charger from the mains supply. Flashing Flashing Fault Charging is no longer possible. The battery pack is defective. Action: Never charge a defective battery pack. Take the battery pack out of the charger. On On Temperature fault The battery pack is too hot (e.g. due to direct sunshine) or too cold (below 0° C). Action: Remove the battery pack and keep it at room temperature (approx. 20° C) for one day. Anl_4513640.indb 76Anl_4513640.indb 76 27.11.12 13:4927.11.12 13:49GB
11. Declaration of conformity
= dB (A); guaranteed L
Dear Customer, All of our products undergo strict quality checks to ensure that they reach you in perfect condition. In the unlikely event that your device develops a fault, please contact our service department at the address shown on this guarantee card. Of course, if you would prefer to call us then we are also happy to offer our assistance under the service number prin- ted below. Please note the following terms under which guarantee claims can be made:
1. These guarantee terms cover additional guarantee rights and do not affect your statutory warranty rights. We do
not charge you for this guarantee.
2. Our guarantee only covers problems caused by material or manufacturing defects, and it is restricted to the rec-
tifi cation of these defects or replacement of the device. Please note that our devices have not been designed for use in commercial, trade or industrial applications. Consequently, the guarantee is invalidated if the equipment is used in commercial, trade or industrial applications or for other equivalent activities. The following are also excluded from our guarantee: compensation for transport damage, damage caused by failure to comply with the installation/assembly instructions or damage caused by unprofessional installation, failure to comply with the operating instructions (e.g. connection to the wrong mains voltage or current type), misuse or inappropriate use (such as overloading of the device or use of non-approved tools or accessories), failure to comply with the main- tenance and safety regulations, ingress of foreign bodies into the device (e.g. sand, stones or dust), effects of force or external infl uences (e.g. damage caused by the device being dropped) and normal wear resulting from proper operation of the device. This applies in particular to rechargeable batteries for which we nevertheless issue a guarantee period of 12 months. The guarantee is rendered null and void if any attempt is made to tamper with the device.
3. The guarantee is valid for a period of 3 years starting from the purchase date of the device. Guarantee claims
should be submitted before the end of the guarantee period within two weeks of the defect being noticed. No guarantee claims will be accepted after the end of the guarantee period. The original guarantee period remains applicable to the device even if repairs are carried out or parts are replaced. In such cases, the work performed or parts fi tted will not result in an extension of the guarantee period, and no new guarantee will become active for the work performed or parts fi tted. This also applies when an on-site service is used.
4. In order to assert your guarantee claim, please send your defective device postage-free to the address shown
below. Please enclose either the original or a copy of your sales receipt or another dated proof of purchase. Please keep your sales receipt in a safe place, as it is your proof of purchase. It would help us if you could de- scribe the nature of the problem in as much detail as possible. If the defect is covered by our guarantee then your device will either be repaired immediately and returned to you, or we will send you a new device. Of course, we are also happy offer a chargeable repair service for any defects which are not covered by the scope of this guarantee or for units which are no longer covered. To take advantage of this service, please send the device to our service address.