Vita Pro - Deep fryer Klarstein - Free user manual and instructions
Find the device manual for free Vita Pro Klarstein in PDF.
User questions about Vita Pro Klarstein
0 question about this device. Answer the ones you know or ask your own.
Ask a new question about this device
Download the instructions for your Deep fryer in PDF format for free! Find your manual Vita Pro - Klarstein and take your electronic device back in hand. On this page are published all the documents necessary for the use of your device. Vita Pro by Klarstein.
USER MANUAL Vita Pro Klarstein
text_image
QR code image containing encoded data, no visible human-readable textINHALT
Technische Daten 4
natural_image
Technical line drawing of a mechanical device with internal components and a separate view of its housing (no text or symbols)Hinweise
Member of Berlin Brands Group
Handwerkerstr. 11
15366 Dahlwitz-Hoppegarten
Deutschland
natural_image
Symbol of a trash bin crossed with a diagonal line, representing no waste or discharge (no text or labels)Berlin Brands Group UK Ltd
PO Box 1145
Oxford, OX1 9UW
United Kingdom
Dear Customer,
Congratulations on purchasing this device. Please read the following instructions carefully and follow them to prevent possible damages. We assume no liability for damage caused by disregard of the instructions and improper use. Scan the QR code to get access to the latest user manual and more product information.

text_image
QR code image containing encoded data, no visible human-readable textCONTENTS
Technical Data 28
Safety Instructions 29
Product Description 31
Getting Started 35
Operation 37
Preset Parameters and Adjustment Range 40
Cleaning and Maintenance 43
Common Problems and Solutions 44
Circuit Principle Diagram 46
Disposal Considerations 47
Manufacturer & Importer (UK) 47
TECHNICAL DATA
| Item number 10041333, 10041334 | |
| Power supply 220-240 V ~ 50-60 Hz | |
| Power rating 2450 W | |
| Temperature range 50-230 °C | |
| Pot capacity 18 l | |
| Water tank capacity 800 ml | |
| Weight 14.5 kg | |
SAFETY INSTRUCTIONS
General information
- Never wash the cabinet with running water to prevent damage to the electrical components.
- To prevent electric shock, do not allow water or other liquids to enter the unit.
- This device may be only used by children 8 years old or older and persons with limited physical, sensory and mental capabilities and / or lack of experience and knowledge, provided that they have been instructed in use of the device by a responsible person who understands the associated risks.
- Before use, check the voltage on the device's sticker. Only connect the device to sockets that correspond to the voltage of the device.
- Do not use this product if the plug, power cord, or product is damaged.
- If the power cord or plug is damaged, it must be replaced by the manufacturer, an authorized service centre, or a similarly qualified person.
- Do not allow children to play with the product.
- Do not handle the plug or control panel with wet hands.
- Do not place this product on or near tablecloths, curtains, or other combustible materials.
- Allow at least 10cm of space around the product on all sides. Do not place any objects on top of the unit.
- Do not leave the unit unattended during use.

CAUTION
Danger of burns! Hot steam may escape when the oven door is opened. Keep a safe distance to avoid scalding.
- Danger of burns! Hot steam may escape when the oven door is opened. Keep a safe distance to avoid scalding.
- Do not insert any foreign bodies into the openings of the appliance.
- Do not use a steam cleaner for cleaning.
- Make sure that the appliance is switched off before replacing the lamp to avoid electric shock.
- Do not install the unit in a cabinet, as it may overheat.
Instructions for safe use

CAUTION
Danger of burns! The appliance becomes hot during use. Take care not to touch the heating elements inside the oven and use oven gloves.
- Before cleaning, unplug the appliance from the wall outlet and allow it to cool completely.
• Install the appliance on a dry, fl at surface and leave at least 10 cm of space around the appliance in all directions so that the air can circulate sufficiently. - Do not plug the appliance into an outlet that is already connected to other kitchen appliances.
- Do not place the appliance near fl ammable objects. Install it away from window curtains, door curtains, wallpaper, and similar objects to prevent fire. Do not place or place any objects on the unit.
- Clean the door panel of the stove with a soft and damp cloth. Do not use abrasives or metal scrapers as they will scratch the surface.
- Do not connect the unit to external timers or remotely controlled power sockets.
- Before use, check that your cookware is suitable for this product. We recommend that you use heat-resistant glass containers or ceramic containers. Fill the container to a maximum of two thirds.
- Do not overfi ll the water tank. When fi lling, use the MAX mark in the tank as a guide.
- Do not place any containers on the open oven door.
- Do not heat food in a sealed container, otherwise the container may explode. Transfer the food into a heat-resistant container before heating.
The following phenomena are normal:
- Air inlet spray water: the frequency of water supply is fast, the air inlet sometimes spray a small amount of water, it's normal.
- The steam condenses at the air outlet: the excess steam in the chamber is quickly cooled and discharged through the exhaust port during cooking, but a small amount of steam will condense at the louver exhaust port, it's normal.
- Voltage fl ectuation will affect cooking time and effect: When the voltage fluctuates from -10% to +5%, the steam air fryer can still work, but it is affected by the higher or lower voltage, and the output power is relatively increased or decreased, so the cooking time and effect will different, it's normal.
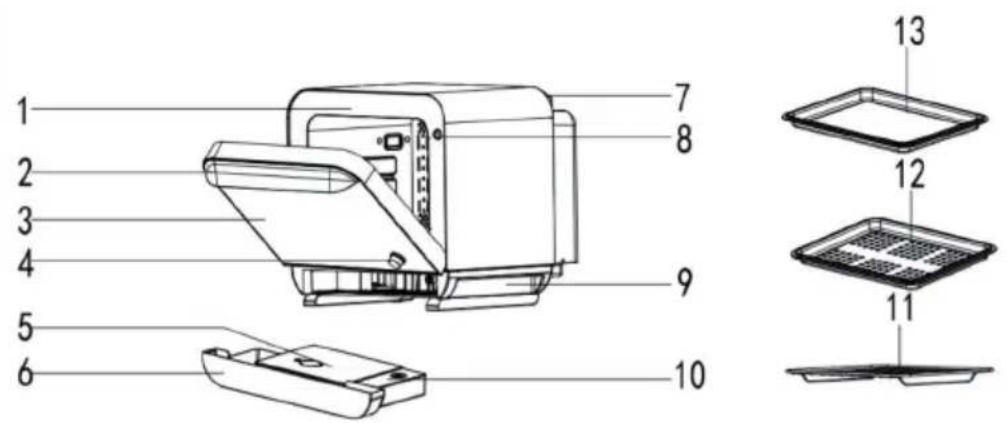
PRODUCT DESCRIPTION
Product components
text_image
1 2 3 4 5 6 7 8 9 10 11 12 13| 1 Door frame Fixes the whole machine. | |
| 2 Handle Used for open/close the door. | |
| 3 Glass observe the internal food state. | |
| 4 Knob used for adjust the function. | |
| 5 Water tank used to store water that produces steam. | |
| 6 Condensate tray collect excess water during cooking. | |
| 7 Air outlet used to exhaust excess steam from the air fryer. | |
| 8 Door control switch | Ensure that the oven door is closed, then the appliance can run. |
| 9 Handle Used to move the appliance. | |
| 10 Water tray Collect excess water during cooking. | |
| 11 Shelf loading baking tray and other baking moulds | |
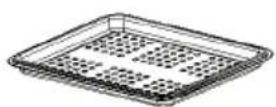
| 12 Steaming plate Used for loading waterless food to be cooked. | |
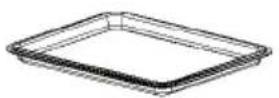
| 13 Baking tray Used for loading food with soup / biscuit etc. | |
Control panel

text_image
88:88 MIN 888 °C CHIPS FISH DECOIN SHOWER PIZZA VEIGER SOUT DIFFED ONLY STORE STREAM FRYA COMME DISCAI TEMP TIME MENU LIGHT WARM POWER| Diagram Function | description Working mode | |
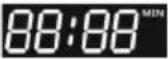 | Time Displays the set time | while working. |
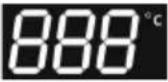 | Temperature Displays the | set temperature while working. |
 | Water shortage This icon | flickers and the buzzer sounds for a long time, indicating that the water tank is short of water. |
 | (Chips) Automatic menu mode | Automatic menu, time and temperature can be adjusted during operation. |
 | (FISH) Automatic menu mode | Automatic menu, time and temperature can be adjusted during operation. |
 | (CHICKEN) Automatic menu mode | Automatic menu, time and temperature can be adjusted during operation. |
 | (SKEWER) Automatic menu mode | Automatic menu, time and temperature can be adjusted during operation. |
 | (PIZZA) Automatic menu mode | Automatic menu, time and temperature can be adjusted during operation. |
 | (VEGGIE) Automatic menu mode | Automatic menu, time and temperature can be adjusted during operation. |
 | (SOUP) Automatic menu mode | Automatic menu, time and temperature cannot be adjusted. |
 | (DEFROST) Automatic menu mode | Automatic menu, time and temperature can be adjusted during operation. |
 | (DEHYDRATE) Automatic menu mode | Automatic menu, time and temperature can be adjusted during operation. |
 | Sterilize mode Steam sterilization | |
 | Low temperature steaming mode | Submenu mode |
 | Barbecue / baking mode Submenu mode | |
 | High temperature steaming and baking mode | Submenu mode |
 | Descaling mode This icon lights up and the buzzer sounds for a long time when this mode is chosen. | |
 | Temperature button Press this button, rotate the adjustment knob, to set temperature. | |
 | Menu button Press this button to enter the built-in menu settings. | |
 | Heat preservation button | Press this button, preset 65 °C, 20 min. The time is adjustable up to 180 min. |
 | Time button Press this button, rotate the adjustment knob, to set time. | |
 | LAMP button Press this button, the built-in light lights up. | |
 | Standby button Press this | button, enter standby mode or off mode. |
 | Adjustment knob Rotate to | adjust temperature, time, menu, press the knob to start / pause. |
GETTING STARTED
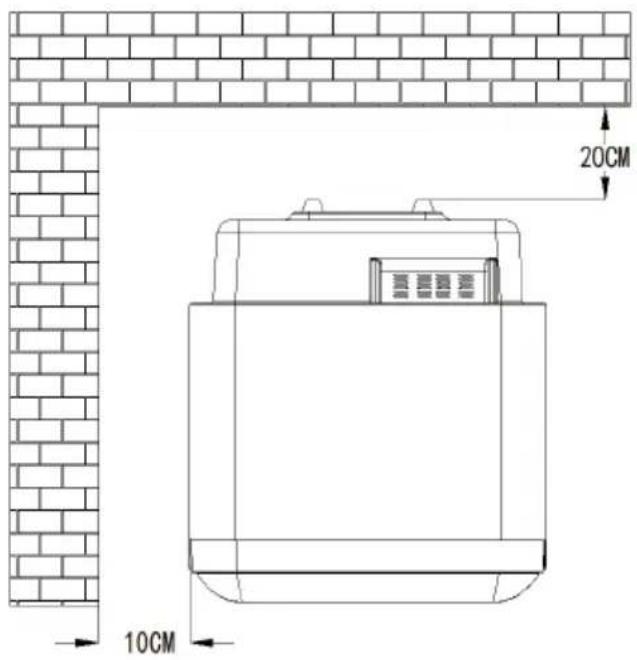
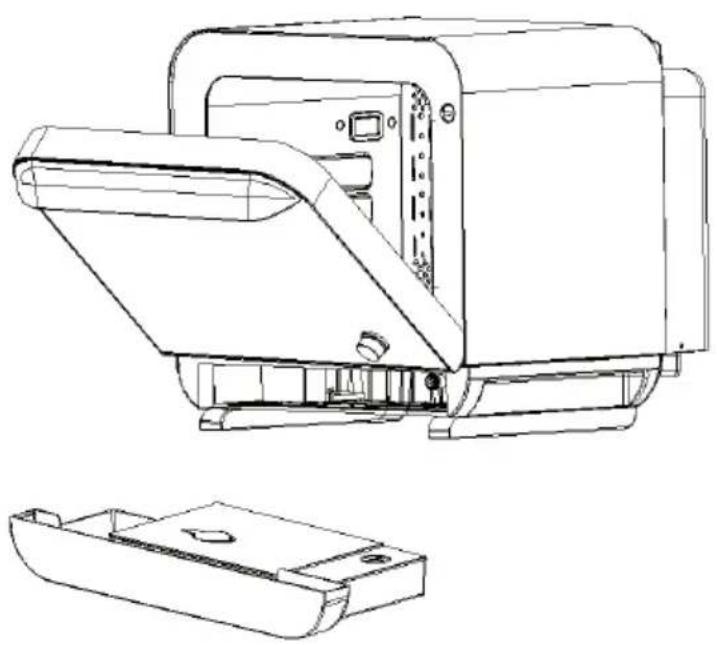
- After unpacking, fasten the partition wall block to the back of the machine.
Place the machine on a stable horizontal surface. Leave not less than 20 cm in the back and not less than 10 cm on both sides of the space, and pay attention to keep away from curtains, wall cloth and other combustible materials, as picture shows.
text_image
20CM 10CM- Put the corresponding food on the corresponding accessories, and then push into the housing, as picture shows.

- Take out the water tank, empty the condensate tray and water tray, fill the tank with water and tighten the water tank lid, then put it into the houst. As picture shows.
natural_image
Technical line drawing of a mechanical device with internal components and a separate 2D view (no text or symbols)Note
- Different cooking options, different accessories.
• After cooking done, remove the steaming plate, baking tray, rack or cake plate from the oven with gloves or other anti scald tools. - Only when the oven door is closed can the machine work properly, or the display will flash.
Before fi rst use
- Remove all packaging materials, place the machine on a stable horizontal surface.
- Clean the baking tray, steaming plate, rack, cake plate and other accessories with hot water, liquid detergent and non-abrasive sponge.
- Fill the tank with water (distilled or purified water).
- Wipe the inside and outside of the appliance with a cloth.
- First use, please don't put any food in the pot, fill the tank with purified water, use preset function - "STEAM" to run one cycle, which time may smell a slight smell and smoke, don't worry, it's a normal phenomenon.
OPERATION
Power on
When the product is powered on, there will have a "Bi" sound, the digital screen and all indicator lights flicker and then turn off, only the ON/OFF button indicator light flashes slowly, indicating that the appliance is power on state (the power on state is the standby mode), press ON/OFF button, all lights on the control panel light up, then press the MENU button to enter the function selection interface.
Function selection
The steam air fryer defaults to high temperature steaming mode, press the MENU button, turn the knob to the right, select the menu of the interface in turn, which can be selected circularly.
Temperature adjustment
Press the TEMP button, turn the knob to adjust the temperature. During working, in addition to the automatic menu, press the temperature button to adjust the temperature, after adjustment, it will enter the working mode automatically or press the start knob.
Time adjustment
Press the TIME time button, turn the knob to adjust the time. During working, in addition to the automatic menu, press the time button to adjust the time, after adjustment, it will enter the working mode automatically or press the start knob.
Defrost function introduction
Press the ON/OFF button after power on, all lights on the control panel light up, then press the MENU button to enter the function selection interface. Turn the knob to defrost mode, defrost icon flashes, other icons light on; press the TEMP button and the buzzer will ring, defrost icon lights on, other icons are off; rotate the knob to select the required temperature for defrost, press the TIME button, the buzzer will ring, rotate the knob to select the required time for defrosting, press the knob to start working. The screen displays the set temperature and the remaining time. This function can be used to thaw frozen food and so on.
Sterilize function introduction
Press the ON/OFF button after power on, all lights on the control panel light up, then press the MENU button to enter the function selection interface. Turn the knob to Sterilize mode, the Sterilize icon flashes, other icons light on. Press the TIME button and the buzzer will ring, Sterelize icon lights on, other icons are off. Rotate the knob to select the required time for Sterilizing, press the knob to start working. The screen displays the set temperature and the remaining time.
Water shortage function introduction
If the water tank is short of water, the icon flashes. "Time" flashes. The work is suspended, and the buzzer will ring. Press the "start" button to continue the baking process automatically after adding water: During working, insert the water tank to run directly. Alarm water shortage when just start-up the steam function.
After adding water, should press the start knob to continue the baking process.
Menu function introduction
Press the ON/OFF button after powering on. All lights on the control panel light up. Then press the MENU button to enter the menu mode. Rotate the selection knob, the menu is cycling on the digital screen. After selecting the desired menu, set the temperature and time, and press the selection knob to start. To cancel the menu, press the knob again, press the menu button and rotate the selection knob to select the menu again.
Descaling function introduction
The steam function accumulates to 80H, and enter the initial interface. The icon "DESCSAL" lights up first, other icons are off, reminder the user to clean. Add citric acid into the water tank and pour in more than 600ml purified water, close the door ,press the selection knob directly, the descaling function is started. As the descaling function is divided into three stages: descaling (30 minutes), primary cleaning (10 minutes) and secondary cleaning (10 minutes), the appliance alarm will "dididi" sound after the descaling function working for 30 minutes, at this time, pour out the water from the waste water box and water tank, and add new purified water into the water tank. After putting the water tank into the housing, close the door to start the primary cleaning step, 10 minutes later, the appliance alarm will "dididi" sound again, at this time, pour out the water from the waste water box and water tank, and add new purified water into the water tank. After putting the water tank into the housing, close the door to start the secondary cleaning. After the above operation, the descaling is completed.
If the user does not clean, can turn the knob or press other buttons except the start button to enter the normal initial state. But if the user does not clean, the descaling will still be reminded by next time when it's power on. The buzzer rings for a long time until the user selects this mode or enter the normal operation interface.
Note:
Need unplug after descaling, you can continue to use it only when the appliance cool down, the descaling time is 50 minutes.
Mode change
Long press the selection knob (3 seconds) to cancel the operation, and then turn the knob to change the mode.
Lamp function
Press the ON/OFF button after power on, all lights on the control panel light up, press the lamp button ⏻ to turn on the lamp. The lamp can be turned on or off at any time under any operation mode.
Heat preservation function introduction
Press the ON/OFF button after power on, all lights on the control panel light up, then press the 📄 button to start the heat preservation function ,press the TEMP button and the buzzer will ring, the "K-WARM" icon lights on, other icons are off; rotate the knob to select the required temperature for heat preservation, press the "time" button, the buzzer will ring, rotate the knob to select the required time for heat preservation, press the knob to start working. The screen displays the set temperature and the remaining time.
Notes
- The above settings are all directional, we can't guarantee the best setting of your ingredients when the origin, shape, size and brand of ingredients are different; You can set it according to the actual situation, the larger the amount of food you cook, the longer time it takes.
- During cooking some food, pulling out the pot and turning over the food can help to cook more evenly and cook better.
- If the ingredients are not well cooked enough, it can be put back to the pot directly and cooked with an appropriate time.
- Marinate food should penetrate into the interior of the food, to taste better and more delicious.
PRESET PARAMETERS AND ADJUSTMENT RANGE
| Menu Icon Cook | mode | Default temperature | Temperature adjustment range | Default time (HH:MM) | Time adjustment range | |
| Steam | STEAM | Submenu mode | ||||
| Fryer | FRYER | |||||
| Steam & Fryer | COMBI | |||||
| Sterilize / 110 °C | STER. | adjust | 0:30 min 10 min - 2 h | |||
| Descaling | DESCAL | // Can't | adjust | 0:50 min Can't adjust | ||
| Keep warm | / 65 °C | 50-80 °C 0:20 min 1 min - 3 h | ||||
| Chips | CHIPS | Fryer 220 °C | 200-230 °C | 0:25 min 15-35 min | ||
| Fish | FISH | Fryer 190 °C | 170-200 °C | 0:40 min 1-50 min | ||
| Chicken | CHICKEN | Steam with Fryer | 210-230 °C | 0:45 min 1 min - 1 h | ||
| Skewer | SKEWER | Fryer 200 °C | 180-220 °C | 0:15 min 15-35 min | ||
| Pizza | PIZZA | Fryer 180 °C | 170-190 °C | 0:20 min 1-30 min | ||
| Veggie | VEGGIE | Steam 100 °C | 95-130 °C | 0:10 min 1-20 min | ||
| Soup | SOUP | Fryer 200 °C + 110 °C + 150 °C | Can't adjust | 0:30 + 170 + 0:10 min | Can't adjust | |
| Defrost | DEFROST | Fryer 45 °C | 35-70 °C | 1:00 h 1 min - 8 h | ||
| Dehydrate | DHY | Fryer 70 °C | 70 °C - 95 °C | 8:00 h 1 min - 8 h | ||
Sub-menus
| Pure Steam Mode | |||||
| Menu code | Menus Time | HH:MM | Temp. (°C) | Time range (min) | Temp. range (°C) |
| 01 Steamed eggs 00:15 100 | 1-20 90-110 | ||||
| 02 Steamed scallops with garlic and fans | 00:15 100 | 1-20 90-110 | |||
| 03 Heat up pastry 00:15 110 | 1-20 110-120 | ||||
| 04 Steamed crab 00:18 100 | 1-25 90-110 | ||||
| 05 Steamed bun 00:20 110 | 1-30 110-130 | ||||
| 06 Steamed pork ribs 00:28 | 110 1-35 110-130 | ||||
| 07 Steam sweet potato 00:40 | 100 1-50 90-120 | ||||
| 08 Baby warm milk 00:13 90 | 1-35 90-110 | ||||
| 09 DIY | 01:00 130 1-60 | 90-130 | |||
| Pure Fryer Mode | |||||
| Menu code | Menus Time Temp. | (°C) | Time range (min) | Temp. range (°C) | |
| 01 Chicken wings | 00:20 180 1-35 | 170-200 | |||
| 02 Whole duck | 01:00 200 | 1 min -2 h | 180-220 | ||
| 03 Roast beef | 0:20 | 190 1-35 | 180-220 | ||
| 04 Roast sweet potato | 00:40 230 1-50 | 200-230 | |||
| 05 Baked corn | 00:25 200 1-30 | 180-220 | |||
| 06 Cookies | 00:30 150 1-50 | 140-190 | |||
| 07 Roast egg tart | 00:20 200 1-35 | 180-220 | |||
| 08 Roasted chestnuts | 00:30 180 1-50 | 180-220 | |||
| 09 Chiffon cake | 0:20 + 0:10 | 130 +160 | 15-25 + 7-13 | 100-140 + 140-180 | |
| 10 Bagel 00:20 190 1-30 180-220 | |||||
| 11 Macaron 00:15 150 1-30 140-190 | |||||
| 12 Chips 00:18 200 1-30 180-220 | |||||
| 13 Crisp toast 00:10 200 1-20 180-220 | |||||
| 14 Crispy baked buns 00:07 180 1-20 170-200 | |||||
| 15 DIY 01:00 230 1-60 35-230 | |||||
| Steam + Fryer Combination Mode | |||||
| Menu code | Menus Time | HH:MM | Temp. (°C) | Time range (min) | Temp. range (°C) |
| 01 Steak 0:15 190 | 1-20 | 180-220 | |||
| 02 Fish | Steam 0:10+ Fryer 0:20 | Steam 100+ Fryer 180 | Steam 5-13+ Fryer 15-30 | 100-120+ 170-200 | |
| 03 Chicken | 00:50 | 190 °C Steam+ Fryer | 30 min - 1 h | 180-220 | |
| 04 Red-cooked pork | Steam 0:20+ Fryer0:15 | Steam 110+ Fryer 200 | Steam 10-30+ Fryer 5-20 | 100-120+170-220 | |
| 05 Reheat bread (refrigerator) | Steam 0:08+ Steam+ Fryer 0:07 | Steam 80+ Steam+ Fryer 180 | Steam 5-10+ Steam+ Fryer 5-10 | 80-100+170-200 | |
| 06 Reheat bread (room temperature) | Steam 0:06+ Steam+ Fryer 0:07 | Steam 80+ Steam+ Fryer 180 | Steam 5-10+ Steam+ Fryer 5-10 | 80-100+ 170-200 | |
| 07 | DIY | 01:00 | 200 | 1-60 | 50-220 |
Note: For steaming, roasting, and selecting the corresponding main menu, the menu light flashes. Press the knob to enter the submenu mode. At this time, the corresponding number will appear when you turn the knob. For example, steaming---01 is the steamed eggs point. Press the knob to confirm this menu, enter to adjust the temperature and time, set the temperature and time, and press the knob to confirm. At this time, the time counts down, and the corresponding main menu and corresponding number light up. If you want to view the set temperature, press the temperature key at this time. The number will switch to the set temperature, and the 30-second internal operation will automatically switch to the corresponding submenu code.
CLEANING AND MAINTENANCE
Notes
- Do not use any corrosive detergent, gasoline, abrasive powder or metal brush to clean any part of the appliance.
- The appliance may have some peculiar smell after a long time of use, can put 5-6 slices of lemon into the chamber, and use the low-temperature steaming function to run 15-20 minutes with 100^ , the peculiar smell can be removed.
- Turn off the appliance and unplug from the outlet before cleaning.
- Always keep the chamber clean, when food or soup splashes on the inner wall of the chamber, it can be wiped off with a wet cloth. It is not suitable to clean with hard materials. If the chamber is dirty, please use soft detergent instead of rough and abrasive detergent.
- Use distilled or purified water when cooking, as minerals in tap-water will cause scale in the chamber.
- The water tank shall be inspected at least once a month. Can take out the water tank to clean if necessary, and then put back to its original place.
- Clean the water tray, water tank and residual water in chamber in time after each use.
- Should clean the sealing edge of the door with soft dry cloth frequently.
- If the control panel and knob are wet, please wipe with a soft dry cloth instead of rough and abrasive detergent. When wiping the control panel and knob, please cut off the power supply to avoid misoperation.
- If the appliance is not used for a long time, unplug the appliance, clean the chamber, and place it in a ventilated, dry and no corrosive environment.
- Do not use rough detergent or sharp metal scraper to clean the appliance glass door or its edge, as it is easy to cause the glass broken.
- When cleaning the food plates, oil receiving plates and other utensils, please use soft materials (such as cloth materials) to clean. Do not use hard materials (such as metal materials) to avoid scratching utensils and damaging the protective layer.
- Should comply with the local environmental regulations when disposal this product.
- If the appliance breaks down, it must be repaired by the designated professional maintenance personnel. It's dangerous for anyone else to repair it.
COMMON PROBLEMS AND SOLUTIONS
| Problem Matters to be | confirmed | Solution |
| The product have a prompt sound when does not work, and the screen can display when it is plugged in. | Correct operation or not. | Read the manual carefully. |
| If the components damaged or not. | Please contact customer service. | |
| The product have no a prompt sound when does not work, and the screen can't display when it is plugged in. | If plug the power cord or not. | Plug the power cord into the socket. |
| If the power socket in good contact or not. | Replace the power socket. | |
| If the components damaged or not. | Please contact customer service. | |
| The lamp doesn't light up. | The lamp is damaged. Please contact customer service. | |
| Smoke comes out of the oven for first use. | It's a normal phenomenon, please feel free to use. | For the first use, the grease in the oven must be heated and burned, and there is smoke during this operation. |
| Peculiar smell. | After a period of use. Put 5-6 slices of lemon into the appliance, and use the low-temperature steaming function to run 15-20 minutes with 100 °C. | |
| If the accessories in the chamber are cleaned. | Clean and dry the accessories. | |
| If there any debris in the chamber. | Remove the debris before using. | |
| If the power cord is damaged or not. | Keep the power cord away from hot parts, and please contact after-sales service. | |
| Food is not completely cooked. | The setting mode does not match the required temperature and time of the food. | Set time and temperature based on combining recipes and personal experience. |
Error alarm
| Error code Cause Solution | ||
| E1 | Over temperature or short circuit of the furnace NTC. | Excessive temperature or damage, please contact after-sales service. |
| E4 | Open circuit of the furnace NTC. | NTC fall off, please contact after-sales service. |
| E2 | Over temperature or short circuit of the evaporator 1 NTC. | Excessive temperature or damage, please contact after-sales service. |
| E5 | Open circuit of the evaporator 1 NTC. | NTC fall off, please contact after-sales service. |
| E3 | Over temperature or short circuit of the evaporator 2 NTC. | Excessive temperature or damage, please contact after-sales service. |
| E6 | Open circuit of the evaporator 2 NTC. | NTC fall off, please contact after-sales service. |
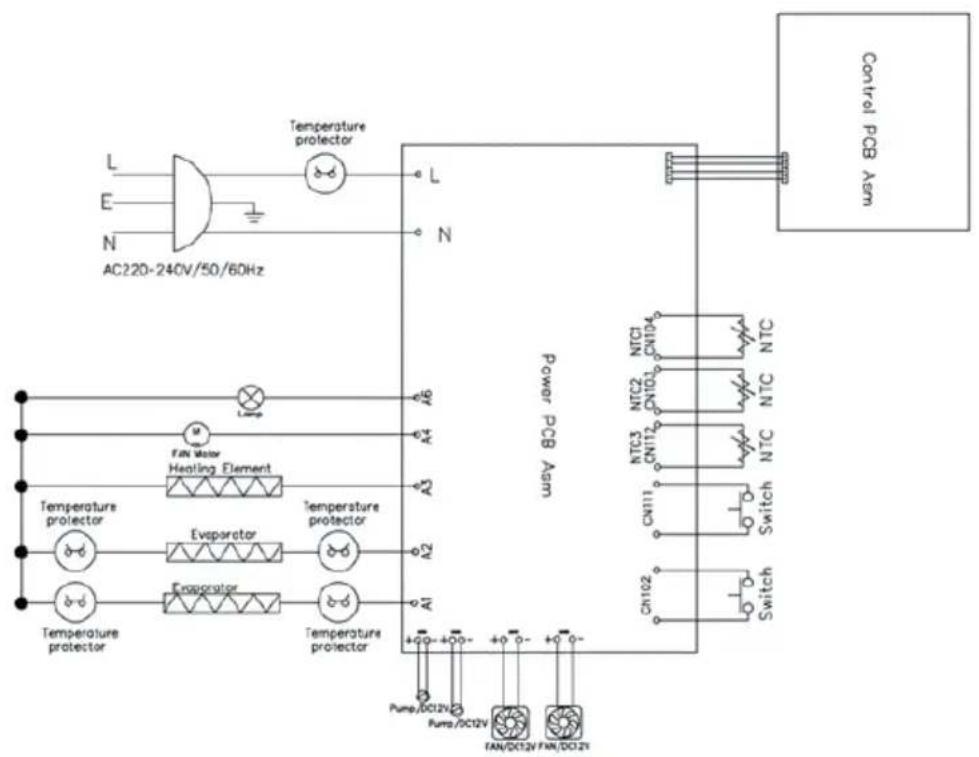
CIRCUIT PRINCIPLE DIAGRAM
flowchart
graph TD
    A["AC220-240V/50/60Hz"] --> B["Temperature protector"]
    B --> C["Power PCB Arm"]
    C --> D["Control PCB Arm"]
    subgraph Power_PCB_Arm
        E["AC220-240V/50/60Hz"] --> F["L"]
        G["AC220-240V/50/60Hz"] --> H["E"]
        I["AC220-240V/50/60Hz"] --> J["N"]
    end
    subgraph Control_PCB_Arm
        K["AC220-240V/50/60Hz"] --> L["L"]
        M["AC220-240V/50/60Hz"] --> N["E"]
        O["AC220-240V/50/60Hz"] --> P["N"]
    end
    subgraph Control_PCB_Arm
        Q["AC220-240V/50/60Hz"] --> R["L"]
        S["AC220-240V/50/60Hz"] --> T["E"]
        U["AC220-240V/50/60Hz"] --> V["N"]
    end
    subgraph Control_PCB_Arm
        W["AC220-240V/50/60Hz"] --> X["L"]
        Y["AC220-240V/50/60Hz"] --> Z["E"]
        AA["AC220-240V/50/60Hz"] --> AB["N"]
    end
    subgraph Control_PCB_Arm
        AC["AC220-240V/50/60Hz"] --> AD["L"]
        AE["AC220-240V/50/60Hz"] --> AF["E"]
        AG["AC220-240V/50/60Hz"] --> AH["N"]
    end
    subgraph Control_PCB_Arm
        AI["AC220-240V/50/60Hz"] --> AJ["L"]
        AK["AC220-240V/50/60Hz"] --> AL["E"]
        AM["AC220-240V/50/60Hz"] --> AN["N"]
    end
    subgraph Control_PCB_Arm
        AO["AC220-240V/50/60Hz"] --> AP["L"]
        AQ["AC220-240V/50/60Hz"] --> AR["E"]
        AS["AC220-240V/50/60Hz"] --> AT["N"]
    end
    subgraph Control_PCB_Arm
        AU["AC220-240V/50/60Hz"] --> AV["L"]
        AW["AC220-240V/50/60Hz"] --> AX["E"]
        AY["AC220-240V/50/60Hz"] --> AZ["N"]
    end
DISPOSAL CONSIDERATIONS

natural_image
Symbol of a trash bin crossed with a diagonal line, no text or numbers presentIf there is a legal regulation for the disposal of electrical and electronic devices in your country, this symbol on the product or on the packaging indicates that this product must not be disposed of with household waste. Instead, it must be taken to a collection point for the recycling of electrical and electronic equipment. By disposing of it in accordance with the rules, you are protecting the environment and the health of your fellow human beings from negative consequences. For information about the recycling and disposal of this product, please contact your local authority or your household waste disposal service.
MANUFACTURER & IMPORTER (UK)
Manufacturer:
Chal-Tec GmbH, Wallstrasse 16, 10179 Berlin, Germany.
Importer for Great Britain:
Berlin Brands Group UK Ltd
PO Box 1145
Oxford, OX1 9UW
United Kingdom
Cher client, chère cliente,
text_image
QR code image containing encoded data, no visible human-readable textSOMMAIRE
Fiche technique 50
natural_image
Technical line drawing of a mechanical device with internal components and a separate view of its housing (no text or symbols)Remarque
natural_image
Symbol of a trash bin crossed with a diagonal line, no text or numbers presentBerlin Brands Group UK Ltd
PO Box 1145
Oxford, OX1 9UW
United Kingdom
Estimado cliente:
text_image
QR code image containing encoded data, no visible human-readable textCONTENIDO
Datos técnicos 72
natural_image
Technical line drawing of a mechanical device with internal components and a separate view of its housing (no text or symbols)Indicaciones
natural_image
Symbol of a trash bin crossed with a diagonal line, no text or numbers presentBerlin Brands Group UK Ltd
PO Box 1145
Oxford, OX1 9UW
United Kingdom
Gentile cliente,
text_image
QR code image containing encoded data, no visible human-readable textINDICE
Dati tecnici 94
natural_image
Technical line drawing of a mechanical device with internal components and a separate view of its housing (no text or symbols)Nota
natural_image
Symbol of a trash bin crossed with a diagonal line, no text or numbers presentPRODUTTORE E IMPORTATORE (UK)
Produttore:
Chal-Tec GmbH, Wallstraße 16, 10179 Berlino, Germania.
Berlin Brands Group UK Ltd
PO Box 1145
Oxford, OX1 9UW
United Kingdom

area
| Category | Value | |---|---| | 1 | 100 | | 2 | 100 | | 3 | 100 | | 4 | 100 | | 5 | 100 | | 6 | 100 | | 7 | 100 | | 8 | 100 | | 9 | 100 | | 10 | 100 | | 11 | 100 | | 12 | 100 | | 13 | 100 | | 14 | 100 | | 15 | 100 | | 16 | 100 | | 17 | 100 | | 18 | 100 | | 19 | 100 | | 20 | 100 | | 21 | 100 | | 22 | 100 | | 23 | 100 | | 24 | 100 | | 25 | 100 | | 26 | 100 | | 27 | 100 | | 28 | 100 | | 29 | 100 | | 30 | 100 | | 31 | 100 | | 32 | 100 | | 33 | 100 | | 34 | 100 | | 35 | 100 | | 36 | 100 | | 37 | 100 | | 38 | 100 | | 39 | 100 | | 40 | 100 | | 41 | 100 | | 42 | 100 | | 43 | 100 | | 44 | 100 | | 45 | 100 | | 46 | 100 | | 47 | 100 | | 48 | 100 | | 49 | 100 | | 50 | 100 | | 51 | 100 | | 52 | 100 | | 53 | 100 | | 54 | 100 | | 55 | 100 | | 56 | 100 | | 57 | 100 | | 58 | 100 | | 59 | 100 | | 60 | 100 | | 61 | 100 | | 62 | 100 | | 63 | 100 | | 64 | 100 | | 65 | 100 | | 66 | 100 | | 67 | 100 | | 68 | 100 | | 69 | 100 | | 70 | 100 | | 71 | 100 | | 72 | 100 | | 73 | 100 | | 74 | 100 | | 75 | 100 | | 76 | 100 | | 77 | 100 | | 78 | 100 | | 79 | 100 | | 80 | 100 | | 81 | 100 | | 82 | 100 | | 83 | 100 | | 84 | 100 | | 85 | 100 | | 86 | 100 | | 87 | 100 | | 88 | 100 | | 89 | 100 | | 90 | 100 | | 91 | 100 | | 92 | 100 | | 93 | 100 | | 94 | 100 | | 95 | 100 | | 96 | 100 | | 97 | 100 | | 98 | 100 | | 99 | 100 | | Note: The actual values in the 'Value' column are not provided in the code. I have used the label 'The Region' to represent the 'Region'. The values are estimated based on the provided code.