
Franklin - Cd player/recorder Auna - Free user manual and instructions
Find the device manual for free Franklin Auna in PDF.
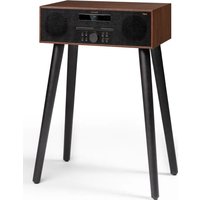
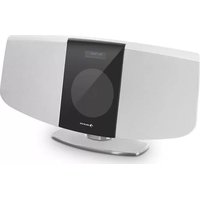
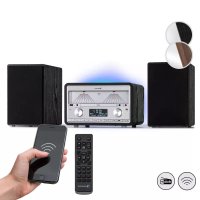
| Product type | Stereo system with CD player/recorder, turntable, dual cassette, FM tuner, USB, Bluetooth |
| Brand | Auna |
| Model | Franklin |
| Item numbers | 10040148, 10040149 |
| Power supply | 230 V ~ 50 Hz |
| FM radio frequency | 87.5 – 108 MHz |
| Bluetooth frequency | 2402-2480 MHz |
| Bluetooth transmission power (max) | 4 dBm |
| Dimensions (approx.) | 430 x 310 x 250 mm (width x depth x height) |
| Weight (approx.) | 5.5 kg |
| Main functions | 3-CD player, 33/45 RPM turntable, dual cassette (record and copy), FM tuner, USB MP3, Bluetooth, AUX input, headphone jack, equalizer (Flat/Jazz/Rock/Classic/Pop), X-Bass, sleep timer, alarm/clock |
| Remote control | Yes (requires 2 AAA batteries not included) |
| Care and cleaning | Wipe CDs from center to edge with a soft cloth; do not use solvents; avoid direct sunlight and moisture |
| Safety | Class 1 laser product; do not open the casing; do not look into the lens; moderate volume to protect hearing; keep batteries away from children |
| General information | Manual available in multiple languages; recycling according to EU directives; imported by Chal-Tec GmbH |
Frequently Asked Questions - Franklin Auna
User questions about Franklin Auna
0 question about this device. Answer the ones you know or ask your own.
Ask a new question about this device
Download the instructions for your Cd player/recorder in PDF format for free! Find your manual Franklin - Auna and take your electronic device back in hand. On this page are published all the documents necessary for the use of your device. Franklin by Auna.
USER MANUAL Franklin Auna
INHALTSVERZEICHNIS
natural_image
Technical line drawing of a mechanical component with two cylindrical parts and an internal channel (no text or symbols)
natural_image
Illustration of a hand holding a thin wire with an arrow indicating force or movement (no text or symbols)natural_image
Line drawing of a device with a control panel and a scroll, no text or symbols presentMember of Berlin Brands Group
Handwerkerstr. 11
15366 Dahlwitz-Hoppegarten
Deutschland
natural_image
Symbol of a trash bin crossed with a diagonal line, representing no waste or discharge (no text or labels)Congratulations on the purchase of your device. Please read the following instructions carefully and follow them to prevent potential damage. We accept no liability for damage caused by disregarding the instructions or improper use. Please scan the QR code to access the latest operating instructions and for further information about the product.

CONTENTS
Safety Instructions 28
Device Overview 30
Remote control 32
Getting Started 34
Radio mode 35
Record mode 36
CD mode 37
Cassette mode 39
USB mode 41
BT mode 42
AUX mode 43
Other functions 43
Troubleshooting 46
Cleaning and Care 47
Disposal Considerations 48
Declaration of conformity 48
TECHNICAL DATA
| Article number 10040148, 10040149 | |
| Power supply 230 V ~ 50 Hz | |
| FM frequency 87.5 - 108 MHz | |
| BT frequency 2402 - 2480 MHz | |
| BT transmission power (max.) 4 dBm |
SAFETY INSTRUCTIONS
General Safety Instructions

CAUTION
Risk of injury! Do not listen to music at excessively high volumes as this may cause hearing damage.
- Children over 8 years as well as mentally, sensory and physically impaired persons may only use the device if they have been informed in detail about the functions and safety precautions by a supervisor responsible for them beforehand and understand the associated risks.
- Only place CDs in the CD compartment.
- Never open the unit cover and never attempt to carry out repairs to the unit yourself.
- Contact qualified personnel for repairs. The device does not contain any user serviceable parts.
- Improper handling may damage the unit and invalidate the warranty.
Power connection
- Only use the power supply unit included in the scope of delivery. The use of any other power supply may invalidate the warranty and/or cause irreparable damage to the unit.
- Unplug the appliance during thunderstorms.
- Make sure that the unit has been switched off before unplugging it from the mains.
- If you are using a power strip or the plug as a disconnecting device, make sure that they are always easily accessible and ready for use.
- Never throw batteries into an open fire and never try to open their outer casing.
- Batteries are hazardous to health if swallowed and should therefore be stored out of the reach of small children.
Ventilation
- Do not block or cover the air vents, holes or openings of the device with objects such as rugs, cloths and the like, otherwise the functionality and/or ventilation cannot be guaranteed for safe use.
- The bottom of the unit may become warm if the unit is used for a long period of time. This is normal.
Location
- Make sure that the unit is placed on a flat and stable surface.
- Place the unit no more than 1.4 metres from the nearest power socket. Make sure that the mains power cable and the speaker cables cannot become a trip hazard.
- Place the unit at least one metre away from other electrical equipment to avoid noise interference.
- Position the unit so that it is within range of external BT devices (for example, iPod/ iPhone/iPad/ Android devices/ computers, etc.). The maximum range (without obstacles) is 10 metres (33 feet).
- Make sure that the unit has enough space upwards so that the antenna can be properly aligned.
- Never place the appliance directly on antique or polished surfaces.
Notes on the laser

CAUTION
Risk of injury! Never touch or look into the optical lens in the CD compartment.
• This unit is a class 1 laser product
- Use of controls other than those specified in the instruction manual, or unauthorised modification of the unit, may result in harmful exposure to laser radiation.
DEVICE OVERVIEW
View from the front

| 1 Dust cover 16 | Control buttons for the cassette deck 1● Recording▶ Playback◀◀ Rewind▶▶ Fast forward■▲ Stop / EjectII Pause | |
| 2 Display 17 3-disc CD changer | ||
| 3 Volume up ▲/ down▼ | 18 USB connection | |
| 4 Button for additional bass control 19 Headphone connection | ||
| 5 Standby LED display 20 Remote control sensor | ||
| 6 FMmode / dubbing speed selector switch | 21 Equaliser | |
| 7 Switch on / Standby 22 | Play and pause CD / USB ▶II | |
| 8 Stop CD / USB 23■ | Switch to the next CD | |
| 9 USBbutton 24 | Function selection button: cassette / BT / AUX / radio / tape | |
| 10 CD button 25 CD door open / close | ||
| 11 Set sleep timer / timer 26 | Skip / search / search stations downwards | |
| 12 Skip / search / search stations upwards | 27 | +10 skip forward / skip up to a preset station |
| 13 Repeat / shuffle / recall stored stations | 28 Cassette deck 2 | |
| 14 Storing radio stations / setting the clock | 29 | Control buttons for the cassette deck 2 |
| 15 Cassette deck 1 | ||
Record player and side view

| 30 Spindle adapter 34 Connection for the speaker cable | |
| 31 Speed selector 33/45 rpm 35 AUX-in connection | |
| 32 Auto-stop switch 36 FM antenna | |
| 33 Tone arm holder 37 Power cable | |
REMOTE CONTROL
Note: The remote control requires 2 AAA batteries for operation. Batteries are not included in the scope of delivery.
To insert the batteries:
- Remove the battery compartment door by pressing the tab and lifting it up.
- Insert 2 AAA size batteries (not included) into the battery compartment, paying attention to the polarity markings in the battery compartment.
- Reinstall the door of the battery compartment.

natural_image
Technical line drawing of a mechanical component with cylindrical parts and internal channels (no text or symbols)
| POWER Press to switch to standby mode | |
| OPEN/CLOSE Press to open / close the CD door | |
| DISC 1/2/3 Press to play a desired CD directly | |
| DISC-SKIP Press to move to the next CD and rotate the CD drive | |
| SLEEP Press to set the sleep timer | |
| TIMER Press to switch the alarm on and off | |
| PHONO/BT/AUX Press to select the desired mode (turntable / BT / AUX) | |
| EQ Press to set the equaliser | |
| USB Press to start USB mode | |
| CD Press to start CD mode | |
| TAPE Press to start cassette mode | |
| TUNER Press to start radio mode | |
| VOLUME -/+ Press to decrease / increase the volume | |
| PLAY/PAUSE ▶II | In CD/USB mode, press once to start playback. Press again to temporarily stop playback |
| STOP ■ | In CD/USB mode, press once to end playback. |
| SKIP UP/DOWN • In CD mode: selection of the previous/next CD track• In radio mode: switch frequency up/down• In clock/timer mode: set the time | |
| REP/RAN/PRE-DN • | In CD mode: activate repeat/random function• In radio mode: call up stored stations downwards |
| +10/PRE-UP | • In CD/USB mode: skip forward 10 tracks• In radio mode: call up stored stations upwards |
| MEMORY/CLK-ADJ | • In standby mode: set the clock• In radio mode: store radio stations |
| MODE To check and set the on and off time for the alarm | |
GETTING STARTED
Installation
- Unpack all parts and remove the protective material.
- Do not connect the unit to the mains until you have checked the mains voltage and made all other connections.
- Do not cover any ventilation openings and ensure that there is a clearance of several centimetres around the unit for ventilation.
Connection
- Connect the mains cable to a power socket and switch on the main switch on the back of the unit.
- When you connect the unit to the mains for the first time, the unit switches to standby mode.
- Connect the speaker cable to the speaker connector on the back of the unit.
- Switch the unit on by pressing the POWER button.
Setting the clock
- Switch the unit to standby mode.
- Press the button MEM/CLK-ADJ. The first two digits of the display flash [00]. Press the button repeatedly to set the current hour. Press the MEM/CLK-ADJ button again to save the current hour.
- The third and fourth digits flash [00]. Press the or button repeatedly to set the current minute. Press the MEM/CLK-ADJ button again to save the current minute.
- To switch between 12-hour and 24-hour mode, press the STOP button.
Note: In the event of a power failure or if the plug is pulled out, the time must be completely reset. We therefore recommend that you switch the system to standby mode and not disconnect it completely from the mains.
RADIO MODE
Manual station search
- Press the TUNER button and select the desired frequency range.
- Press the button or to select the desired station.
- Adjust the volume with the volume control to the desired loudness.
Automatic station search
- Press the TUNER button and select the desired frequency range.
- Press and hold the or button for 1-2 seconds and then release it.
- The unit automatically starts scanning and stops when a radio station is found.
- Repeat steps 3 and 4 until you have found the desired radio station.
- Adjust the volume with the volume control to the desired loudness.
Save a radio station
Up to 20 radio stations can be stored in the station memory.
- Press the TUNER button and select the desired frequency range.
- Select the desired radio station using the manual or automatic search.
- Press the MEM/CLK-ADJ key to activate the programming mode.
- Press the REP/RAN/PRE-DN or +10/PRE-UP button to select the desired memory location for storage.
- Press the MEM/CLK-ADJ button again to confirm the setting.
- Repeat steps 2 to 5 to save more stations.
- To recall a stored station, press the REP/RAN/PRE-DN or +10/PRE-UP button repeatedly until you find the desired station.
Note: In the event of a power failure or if the plug is pulled out, all stored stations are deleted. We therefore recommend that you switch the system to standby mode and not disconnect it completely from the mains.
Notes on the radio mode
- Set the FM selector switch to the HI position. Stations are then received in mono. This is especially recommended for weak stereo reception.
- Set the FM selector switch to the NOR position to receive stations in stereo. The ST indicator appears on the display and shows that the station is being received in stereo.
- The radio receiver has a built-in wire antenna that hangs from the back of the housing. This cable should be unwound completely for optimal reception.
RECORD MODE
- Remove the needle guard.
- Make sure that the tone arm is detached from the tone arm rest before operation and then reattached.

- Set the function switch to PHONO (record).
- Set the speed control to the correct speed depending on the record to be played.
- Place the record on the turntable (use the spindle adapter if necessary).
- Lift the tone arm out of the holder and slowly move it to the record side. The turntable starts to spin.

natural_image
Illustration of a hand holding a thin wire with an arrow indicating force or movement (no text or symbols)- Raise the tone arm to the desired position on the record.
- Adjust the volume to the desired level.
- At the end of the record, the turntable automatically stops spinning. Lift the tone arm from the record and place it back in the rest position.
- To manually stop, lift the tone arm from the record and place it in the rest position.
CD MODE
Insert CD
- Press the CD button.
- Press the open / close button to open the CDdoor.
- Insert a CD with the printed side up in the compartment.
- Press the button or DISC-CH to rotate the CD tray and insert the other CDs.
- Press the open / close button to close the CD door.
- The CD search starts and the display shows the total number of tracks on the current CD.
Note on CD playback
- When track 1-100 is selected for playback, the track number flashes while the playback time is shown in the display during playback.
- If a CD contains more than 100 tracks and a track higher than 100 is selected for playback, the track number flashes during playback while the playback time flashes in pause mode.
Stop title
If the STOP button is pressed during playback or in pause mode, playback is cancelled.
Skip forward and back within the CD
- If you press the button during playback or in pause mode, the unit skips to the next track, displays the track number and then remains in playback or pause mode.
- If the button is pressed during play or pause, the unit skips to the previous track, displays the track number, and then stays in play or pause mode.
Fast-forward and rewind within a track or within the CD
- If you press and hold the button during playback, the unit will fast-forward within the track or within the CD.
- If you press and hold the button during playback, the unit will rewind within the track or within the CD.
Repeat tracks or CDs
This function allows you to repeat 1 single track, 1 single CD or all CDs. Press the REP/RAN/PRE-DN button several times to select the desired function:
REP.ALL DISC (repeat all CDs) >> REP.1 DISC (repeat 1 CD) >> REP.1 TRACK (repeat 1 track) >> REP.OFF (repeat function off)
Note: Repeating individual titles is possible during normal or programmed playback. Repeating a CD or all CDs is only possible during normal playback.
Random playback
This function allows you to listen to all tracks of all available CDs in random order.
- Press and hold the REP/RAN/PRE-DN button and the unit will play all CDs in random order. Press and hold the and button again until RANDOM and ONE appear on the display. The unit will then play one CD in random order.
- Press the ▶II button to start random playback.
- All tracks on all CDs or all tracks on one CD are played in random order.
- Press the REP/RAN/PRE-DN button again to exit random mode.
CD programming
Up to 60 tracks can be programmed to play in the desired order from one CD or all CDs in the CD changer.
- Stop playback.
- Press the button MEM/CLK-ADJ.
- Press the buttons, DISC 1, DISC 2 or DISC 3 to select the desired CD.
- Press the button SKIP UP/DOWN button to select the desired title.
- Press the MEM/CLK-ADJ button to store the track in memory.
- Repeat steps 2 to 4 to save more titles.
- Press the button to start playback in the desired running order.
- Press the STOP button once to stop playback, and press the STOP button twice to delete all programmed tracks.
CASSETTE MODE
General button functions
- Record
▶ Playback
Rewind
▶ Fast forward
■△ Stop / Eject
II Pause
Listen to tapes
- Press the TAPE button to activate the cassette function.
- Insert the cassette.
- Press the play button to start playback.
- Adjust the desired volume.
- Press the pause button if you want to temporarily interrupt playback.
- Press the Stop / Eject button when you have finished.
Copy cassettes (from deck 2 to deck 1)
Note: with this unit you can copy a recorded cassette to another (blank) cassette. Copying is done in one direction only, from deck 2 ( playback) to deck 1 (recording).
Copying at normal speed
- Press the TAPE button.
- Place a recorded cassette in deck 2 and a blank cassette in deck 1.
- Press the Pause button, then the Record and Play buttons on the deck 1 control panel.
- Press the play button on the deck 2 control panel to start playback on deck 2, then press the pause button on deck 1 to start dubbing.
- Press the Pause button on deck 1 and the Stop button on deck 2 when you are finished.
Copying at higher speed
This machine is equipped with a high-speed copying system that can reduce dubbing time by 2/3 compared to normal speed.
- Press the record dubbing button to the HI position and then proceed as for copying at normal speed.
- When copying a recorded cassette at high speed, a chattering sound can be heard. To avoid this, set the volume control to a minimum.
Note: During dubbing, do not activate/deactivate the HI-NOR button as this may vary the recording speed and damage the cassette tape.
Recording cassettes from the radio
- Press the RADIO button to activate the radio mode.
- Tune to the desired station and insert a blank cassette into deck 1.
- Press the Record and Playback buttons to start recording.
- Press the Pause button and the Stop button when you are finished.
Recording cassettes from CD
- Press the CD button.
- Insert a blank cassette into deck 1.
- Press the Pause button first, then the Record and Play buttons on the tape deck. The recording function is now switched to standby.
- Switch on the CD player and then press the Pause button on the cassette deck to start recording.
- To stop recording, first press the stop button on the CD player. Then press the ▶ button and then the Stop / Eject button on the cassette deck.
Recording cassettes from a record
- Press the PHONO button to activate the record mode.
- Insert a blank cassette into deck 1.
- Press the Record and Playback buttons on the cassette deck to start recording.
- Select the desired recording on the record and start playback.
- When you are finished, press the ▶II button and then the Stop / Eject button on the cassette deck.
USB MODE
The system is able to decode and play MP3 files stored on a storage medium with a USB connection.
- Press the USB button to select USB mode.
- Plug in the USB stick and make sure it is fully inserted. Insert it straight without bending it.

natural_image
Line drawing of a refrigerator interior with a control panel and upward arrow (no text or symbols)Note: If you connect the USB stick upside down, the audio system or the USB stick may be damaged. Check that the direction is correct before connecting.
- The system automatically starts reading the storage medium after it has been connected. The display shows the total number of MP3 files and the total number of albums recognised.
- Repeat the same procedure as for playing a CD/MP3 CD. The button functions are the same.
Note on playback from USB
- When track 1-100 is selected for playback, the track number flashes while the playback time is shown in the display during playback.
- If a USB stick contains more than 100 tracks and a track higher than 100 is selected for playback, the track number flashes during playback while the playback time flashes in pause mode.
- The system can only recognise and read files in MP3 format via the USB connection.
- If you connect the system to an MP3 player via the USB connection, some MP3 players may not be able to be played via the USB connection due to variations in the MP3 encoding format. This is not a malfunction of the system.
- The USB connection does not support connection with a USB extension cable and is not designed for direct communication with a computer.
Removing the USB stick
To remove the USB stick, first switch off the unit or switch the function mode to CD, AUX or TUNER. Then pull the USB stick directly out of the USB connector.
BT MODE
- Select the BT mode via the PHONO/BT/AUX button.
- BT flashes on the display, which means that the BT unit is in search mode.
- Switch on the BT function of your external BT device (e.g. smartphone) and select the BT device "Franklin" to establish the connection.
- As soon as the connection has been successfully established, the word BT will light up continuously on the display.
- Start playback on your external BT device and enjoy the music via the stereo system.
- To disconnect the BT connection, press and hold the button.
AUX MODE
- Select the AUX mode via the PHONO/BT/AUX button.
- Connect an external audio device (such as a portable CD player or MP3player) to this system using a 3.5 mm jack to RCA plug (not included).
- Connect one end of this cable (3.5 mm jack plug) to the headphone jack of the external audio device and the other end (RCA) to the AUX-in jack on the back of the unit.
- When both units are connected, you can play the music from the connected unit or record the music on cassette.
OTHER FUNCTIONS
Setting the sleep timer
This sleep function allows you to set a countdown timer after which the unit automatically switches to standby mode.
- Press and hold the SLEEP/TIMER button to activate the sleep timer and set it in the sequence 90 > 80 > 70 > ... > 10 minutes.
- The system will automatically turn off after the set time and go into standby mode.
- To end the sleep timer, press and hold the SLEEP/TIMER button until the SLEEP indicator disappears.
Setting the alarm
With this function, the system automatically switches on and wakes you up with soft CD music or radio. Repeatedly press the MODE button on the remote control. The display shows the settings in the following order:
| 1 | Current time | |
| 2 | Start time | Press the CLK-ADJ button and then the ◀◀◀ or ▶button to set the start time. Then press the CLK-ADJ button again to save the alarm start time. |
| 3 | Switch-off time | Press the CLK-ADJ button and then the ◀◀◀ or ▶button to set the switch-off time. Then press the CLK-ADJ button again to save the alarm switch-off time. |
| 4 | Mode | Press CLK-ADJ and then the button ◀◀◀ or ▶to set the mode (CD/USB/TUNER/TAPE/PHONO). Press the CLK-ADJ button again to complete the setting. |
- Programming is automatically cancelled if no button is pressed within about 10 seconds.
- If there is no CD in the selected CD drawer, the system selects the next available CD.
- If no music source is detected when the preset time is reached, the system automatically selects the radio mode (TUNER).
Activating and deactivating the alarm
- Press the SLEEP/TIMER button once and the timer indicator appears on the display.
- To cancel the alarm function, press the SLEEP/TIMER button again until the timer display 🔒 goes out.
Equaliser settings
This unit offers 5 different sound modes to enhance your listening experience. You can select the desired effect by repeatedly pressing the EQ button in the following order:
FLAT >> JAZZ >> ROCK >> CLASSIC >> POP
X-Bass function
Press the X-Bass selector to increase the bass effect during music playback. Press the X-Bass selector again to deactivate the effect.
Headphone connection
You can connect headphones with a 3.5 mm jack plug to the headphone socket on the front of the unit. If headphones are connected, the speakers are deactivated. To reactivate the speakers, simply disconnect the headphone jack.
TROUBLESHOOTING
| Problem Possible cause and solution | ||
| The CD will not play Make sure that the device is in CD mode. Press the Mode button several times to change the mode. | ||
| No sound/power Increase the volume using the Volume + button on the unit or the Vol. + button on the remote control. | ||
| BT connection cannot be established | Make sure that the device is in BT mode. | |
| Make sure your mobile device is within range (10 metres/ 33 feet or less). | ||
| Disable BT on other mobile devices and make sure there are no other electrical devices nearby that could cause interference. | ||
| The function keys do not respond. | Make sure that the mains socket used for the unit has power and that the radio is not in standby mode. | |
| Check whether the buttons you are using are available at all in the respective mode. | ||
CLEANING AND CARE
CD care
- Never touch the underside of the CD.
- Do not stick paper, tape or other materials on the CD.
- Fingerprints and dust on the CD can lead to sound degradation. Rub the CD from the centre outwards with a soft cloth. Always keep CDs clean.
- If the dust cannot be removed with a dry cloth, moisten it and remove the dust. Rub the CD dry before use.
- Do not use solvents, commercially available cleaners or anti-static spray for vinyl as this may damage the CD.
- Do not store CDs in direct sunlight or near sources of heat.
- Do not store CDs in damp or dusty areas, such as bathrooms or near a humidifier.
- Always store CDs vertically in the CD case. Stacking multiple CDs or placing objects on the CD may cause the CD to warp.
DISPOSAL CONSIDERATIONS

natural_image
Symbol of a trash bin crossed with a diagonal line, representing no waste or discharge (no text or labels)If there is a legal regulation in your country regarding the disposal of electrical and electronic equipment, this symbol on the product or on the packaging indicates that this product must not be disposed of with household waste. Instead, it must be taken to a collection point for the recycling of electrical and electronic equipment. By disposing of this product in accordance with the regulations, you protect the environment and the health of those around you from negative consequences. For information on recycling and disposal of this product, contact your local government or household waste disposal service.
This product contains batteries. If there is a legal regulation in your country regarding the disposal of batteries, the batteries must not be disposed of in household waste. Consult your local regulations for the disposal of batteries. By disposing of this product in accordance with the regulations, you are protecting the environment and the health of those around you from negative consequences.
DECLARATION OF CONFORMITY

Manufacturer:
Chal-Tec GmbH, Wallstraße 16, 10179 Berlin, Germany.
Importer for Great Britain:
Berlin Brands Group UK Ltd
PO Box 1145
Oxford, OX1 9UW
United Kingdom
Chal-Tec GmbH hereby declares that the radio equipment type Franklin complies with Directive 2014/53/EU. The complete text of the EU declaration of conformity is available at the following internet address: use.berlin/10040149
Cher client, chère cliente,
SOMMAIRE
natural_image
Diagram of a mechanical component with cylindrical parts and internal structure, no text or symbols present
natural_image
Illustration of a hand holding a thin wire with an arrow indicating force or movement (no text or symbols)natural_image
Diagram of a device with a control panel and a small screen, no text or symbols presentnatural_image
Symbol of a trash bin crossed with a diagonal line, representing no waste or discharge (no text or labels)DÉCLARATION DE CONFORMITÉ

Fabricant :
Chal-Tec GmbH, Wallstraße 16, 10179 Berlin, Allemagne.
Berlin Brands Group UK Ltd
PO Box 1145
Oxford, OX1 9UW
United Kingdom
ÍNDICE
natural_image
Diagram of a mechanical component with cylindrical parts and internal structure, no text or symbols present
natural_image
Illustration of a hand holding a thin wire with an arrow indicating force or movement (no text or symbols)natural_image
Technical line drawing of a mechanical component or housing with no visible text or symbolsnatural_image
Symbol of a trash bin crossed with a diagonal line, no text or labels presentBerlin Brands Group UK Ltd
PO Box 1145
Oxford, OX1 9UW
Reino Unido
INDICE
natural_image
Illustration of a hand holding a thin wire with an arrow indicating force or movement (no text or symbols)MODALITÀ AUDIOCASSETTA
natural_image
Line drawing of a roof-mounted air conditioner unit with a control panel and fan (no text or symbols)natural_image
Symbol of a trash bin crossed with a diagonal line, representing no waste or discharge (no text or labels)Berlin Brands Group UK Ltd
PO Box 1145
Oxford, OX1 9UW
United Kingdom
natural_image
Abstract white logo design on dark background, resembling stylized letter 'S' or wave form (no text or symbols)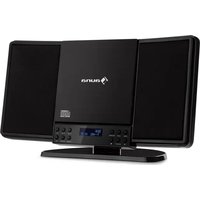
- INHALTSVERZEICHNIS
- Member of Berlin Brands Group
- Handwerkerstr. 11
- Dahlwitz-Hoppegarten
- Deutschland
- CONTENTS
- TECHNICAL DATA
- SAFETY INSTRUCTIONS
- General Safety Instructions
- CAUTION
- Power connection
- Ventilation
- Location
- Notes on the laser
- DEVICE OVERVIEW
- Record player and side view
- REMOTE CONTROL
- To insert the batteries:
- GETTING STARTED
- Installation
- Connection
- Setting the clock
- RADIO MODE
- Manual station search
- Automatic station search
- Save a radio station
- Notes on the radio mode
- RECORD MODE
- CD MODE
- Insert CD
- Note on CD playback
- Stop title
- Skip forward and back within the CD
- Fast-forward and rewind within a track or within the CD
- Repeat tracks or CDs
- Random playback
- CD programming
- CASSETTE MODE
- General button functions
- Listen to tapes
- Copy cassettes (from deck 2 to deck 1)
- Copying at normal speed
- Copying at higher speed
- Recording cassettes from the radio
- Recording cassettes from CD
- Recording cassettes from a record
- USB MODE
- Note on playback from USB
- Removing the USB stick
- BT MODE
- AUX MODE
- OTHER FUNCTIONS
- Setting the sleep timer
- Setting the alarm
- Activating and deactivating the alarm
- Equaliser settings
- X-Bass function
- Headphone connection
- TROUBLESHOOTING
- CLEANING AND CARE
- CD care
- DISPOSAL CONSIDERATIONS
- DECLARATION OF CONFORMITY
- Manufacturer:
- Importer for Great Britain:
- Cher client, chère cliente,
- SOMMAIRE
- DÉCLARATION DE CONFORMITÉ
- Fabricant :
- ÍNDICE
- INDICE
- MODALITÀ AUDIOCASSETTA
Brand : Auna
Model : Franklin
Category : Cd player/recorder