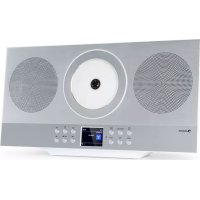
Black Star CD-DAB - Cd player/recorder Auna - Free user manual and instructions
Find the device manual for free Black Star CD-DAB Auna in PDF.

User questions about Black Star CD-DAB Auna
0 question about this device. Answer the ones you know or ask your own.
Ask a new question about this device
Download the instructions for your Cd player/recorder in PDF format for free! Find your manual Black Star CD-DAB - Auna and take your electronic device back in hand. On this page are published all the documents necessary for the use of your device. Black Star CD-DAB by Auna.
USER MANUAL Black Star CD-DAB Auna
text_image
QR code image containing encoded data, no visible human-readable textINHALT
Technische Daten 3
text_image
Technical diagram of an electronic device rear panel with labeled ports and mounting flangesGerät
text_image
Scanning... 0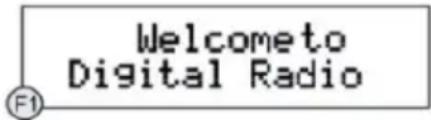
text_image
Welcometo Digital RadioEin: High – Medium – Low
Gedimmt: High – Medium – Low
Verfügbare Sprachen
97.75MHz Scanning...
FM – Anzeigemodi
Member of Berlin Brands Group
Handwerkerstr. 11
15366 Dahlwitz-Hoppegarten
Deutschland
natural_image
Symbol of a trash bin crossed with a diagonal line, representing no waste or discharge (no text or labels)Berlin Brands Group UK Ltd
PO Box 1145
Oxford, OX1 9UW
United Kingdom
Congratulations on purchasing this equipment. Please read this manual carefully and take care of the following hints to avoid damages. Any failure caused by ignoring the items and cautions mentioned in the instruction manual are not covered by our warranty and any liability. Scan the QR code to get access to the latest user manual and other information about the product.

text_image
QR code image containing encoded data, no visible human-readable textCONTENTS
Technical Data 19
Notes on Assembling 20
Product Description 21
Initial Use 23
Disposal Considerations 32
Declaration of Conformity 32
TECHNICAL DATA
| Item number 10038421, 10038422 | |
| Power adaptor Output: DC 12 V 2 A | Input: AC 100-240 V |
| Output power 2 x 10 W | |
| Frequency range DAB 174-240 MHz | FM 87.5-108 MHz |
| BT specificationsFrequency bandMaximum radio-frequency power | 2402–2480 MHz17 dBm |
| CD function |
NOTES ON ASSEMBLING
This DAB/CD player comes with four feet with built-in screws that fit into the corresponding threaded sleeves on the bottom of the unit.
- Screw the silicone pad to the end of the foot (the narrower side).
- Place the speaker face down on a clean, flat, soft surface (such as a soft blanket) with the base of the foot facing up.
- Align the screw at the end of the feet with the threaded bases on the underside of the table and carefully screw the feet into place. Be careful not to screw the screws in crosswise. Make sure all four legs are screwed firmly into the threaded bases, then place the table upright near an electrical outlet to charge it.
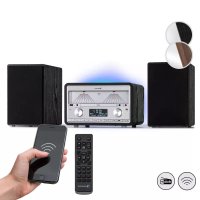
PRODUCT DESCRIPTION
text_image
BAS+ 7 auna 0 wide front wide door door 2 3 4 5 6 7 8 9 10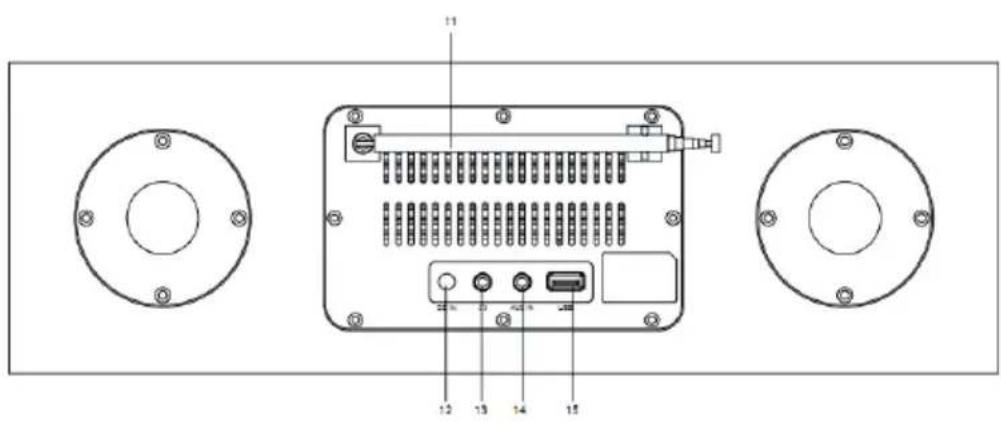
text_image
Technical diagram of an electronic device rear panel with labeled ports and mounting flangesMain keys
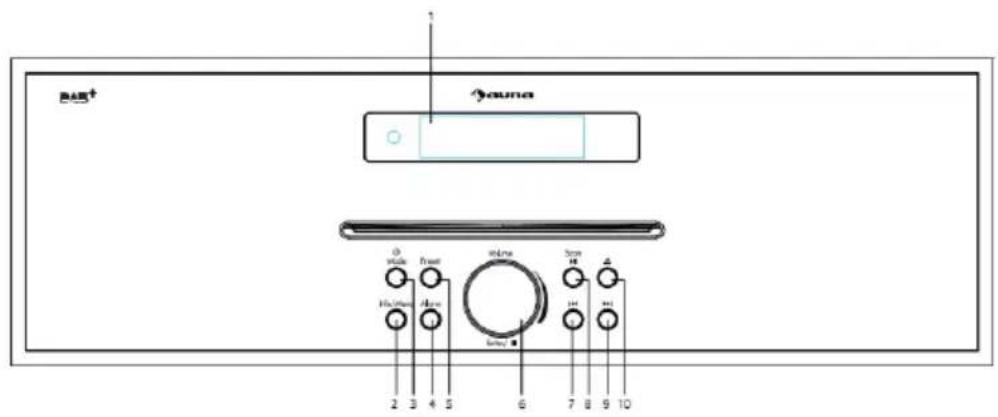
| 1 LCD display 9 ➕ - Next button | |
| 2 Info/Menu button 10 Eject button | |
| 3 Power/Mode button 11 Telescopic Antenna | |
| 4 Alarm button 12 DC in socket | |
| 5 Preset button 13 Headphone jack | |
| 6 Vol- / Vol+ / Enter/ ■ Stop knob(hold to stop CD playback) | 14 Aux in jack |
| 7 ➕ - Previous button 15 USB port | |
| 8 Scan/Play/Pause button |
Remote control
text_image
1 2 3 7 8 6 4 5 9 11 10 ModeMenu 12 14 13 17 16 Sleep Alarm Dim 15 18 1 2 3 ABC DEF 4 5 6 GHI JKL MNO 7 8 9 POS TUV WXYZ EQ 0 Preset 20 21 auna| 1 Standby/on 12 Mute button | |
| 2 Ejection- press for CD ejection 13 Sleep button | |
| 3 Up button 14 Alarm button | |
| 4 Left button 15 Dimmer button | |
| 5 Down button 16 ▶ - Backward button | |
| 6 Right button 17 Play/pause button | |
| 7 OK button/ CD Stop button (hold to stop CD playback) | 18 ▶ - Forward button |
| 8 Vol + 19 Number buttons | |
| 9 Vol - 20 EQ button | |
| 10 Mode button 21 Preset button | |
| 11 Menu button | |
Before operation
- Before operation, please make sure that VOLTAGE mentioned on the power supply is same as the voltage of your local area.
- Use the supplied mains adaptor to connect the device to a household mains socket.
Basic operation-getting started
- Connect the mains adaptor to the DC jack, fully extend the telescopic antenna, plug in and switch on at the mains.
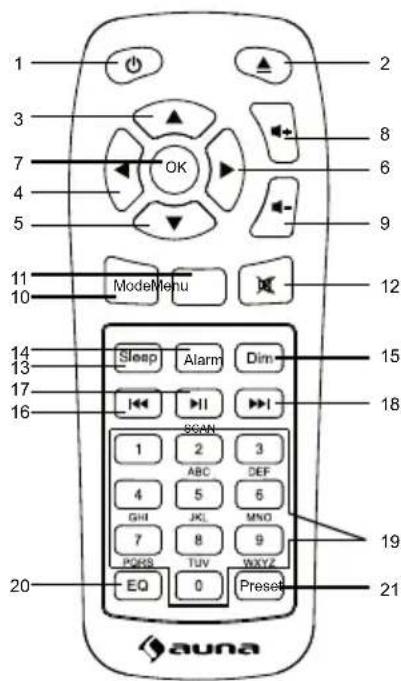
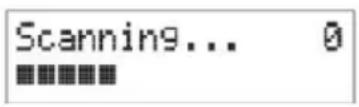
- The display backlight will illuminate for a few seconds, a welcome message "Welcome to Digital Radio" will appear in the display briefly and the clock(00:00:00) will flash in the display. The DAB mode will automatically be selected and the first time the radio is connected to the supply the radio will perform a quick scan. The display will show 'Scanning' a slide bar that indicates the progress of the scan, the name of the last station found and the total number of stations found so far.
text_image
F1 Welcometo Digital Radio- When the scan is finished the radio will play the first alphanumerically found station. If the radio does not find any stations, 'No DAB Station' displayed.
- Adjust the volume to the desired level using the VOL(+/-) knob.
- Press the Previous or Next buttons ◀◀/▶◀ to scroll through the located stations. Once the station of choice is located, press the Enter knob to select the station.
- To switch your radio between DAB, FM, BT, CD, USB and Aux in mode, press Mode button repeatedly.
- Press and hold the Power/Mode button will go into 'Standby' mode
Using the radio- DAB mode
DAB differs from analogue radio; the separate signals from a number of stations are grouped together and transmitted as a single frequency. These groups are referred to as multiplexes and ensembles. Each time a group has been found the name of the group will be shown on the lower half of the display
DAB Mode- Auto tune
This function allows the radio to search automatically for DAB, Band III channels.
-
In DAB mode, press the 'Scan' button to begin a local search for stations. The display will change to 'Scanning...' A progress bar will show the progress of the scan and the number of stations found during the scan will also be displayed.
-
When the scan is finished, the radio will return to the station played before the scan was initiated but any new stations found will have been added.
DAB Mode- Full scan
This function allows the radio to search all DAB stations in local area.
- In DAB mode, press and hold Info/Menu button and press the Previous or Next buttons ◀◀ ▶▶. Until "Full scan" is displayed, press Enter button to accept.
DAB Mode- Manual tune
This function allows a specific or new ensemble to be manually added to the stations already available on the radio.
-
In DAB mode, press and hold Info/Menu button and press the Previous or Next buttons ◀▶ until "Manual tune" is displayed, press Enter button to accept.
-
Use the Previous or Next buttons ◀◀ ▶ until the desired frequency shown in the display and then press the Enter button, the frequency and name of the ensemble and the signal strength will be displayed in displayed. Press the Enter button again to add the ensemble and automatically tune to the station.
DAB Mode-Prune
This function allows unavailable stations to be removed from the station list. Press and hold Info/Menu button into tuning menu.
-
Press the Previous or Next buttons ◀/▶ until "Prune" is displayed and press the Enter button to confirm.
-
Rotate the knob to select (yes) to confirm and delete. If (No) is select the operation will be cancelled.
DAB Mode- DRC
This function allows unavailable stations to be removed from the station list.
- In DAB mode, press and hold Info/Menu button, the press the Previous or Next buttons ◀/▶ until "DRC" is displayed and press the Enter button to confirm.
- Press the Previous or Next buttons ◀/▶ to cycle, off, high, low level then press Enter button to confirm your choice.
DAB Mode- display mode
This function allows information relating to the current station to be shown in the second line of the display.
Press the Info/Menu button repeatedly to scroll through the following.
- DLS(dynamic label segment)/ Radio text- The broadcaster may include a scrolling message about the current program.
- Ensemble/Multiplex(Group name)- The ensemble/multiplex is a group of station that are bundled and transmitted together in a single frequency. There are national and local multiplexes, local ones contain stations that are specific to the local area.
- Signal strength- the display will show a slide bar to indicate the strength of the signal. The stronger the signal, the longer the bar.
- Frequency- the display will show the frequency of the station being broadcast.
- Signal error- This is displayed as number between 0-99. It would not be possible to satisfactorily listen to a radio station with a signal error rate of 30 or above.
- Audio bit rate- The display will show the digital audio bit rate being received.
- Program type- this describes the style of the program. If the information is not available the display will show '[No PTY]',
- Time and date- the time and date will be automatically updated by the radio.
DAB mode- System
Sleep: Use knob to rotate to choose Sleep off-15 minutes-30 minutes-45 mintues-60 minutes-90 minutes
Equalizer: Use knob to rotate to choose My EQ-Normal-Classic-Jazz-Pop-Rock-Speech
Time: Use knob to rotate to choose Set Time/Date-Auto update-Set 12/24 hour-Set date format.
Set Time/Date:
- Press Enter button, the hour digit will flash, rotate knob to choose correct hour and press Enter to confirm.
- Minute digit will flash, rotate knob to choose correct minute and press Enter to confirm.
- Date digit will flash, rotate knob to choose correct date and press Enter to confirm.
- Month digit will flash, rotate knob to choose correct month and press Enter to confirm.
- Year digit will flash, rotate knob to choose correct year and press Enter to confirm. Now time and date was saved.
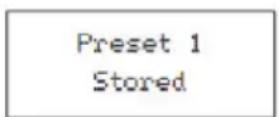
Using the radio- Programmed Station Function
- This function allows up to 10 stations to be programmed into the memory and stored in the DAB and FM modes.
Storing DAB station as preset
- Follow the directions above to select a radio station
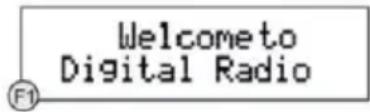
- Press and hold the 'Preset' button. 'X(Empty)' is displayed. If no previous station has been stored.
-
Press the Previous or Next ◀▶▶ buttons to scroll through the preset location that you would like to store the radio stations to (1-10).
-
Press the Enter knob to store the station. The message "Preset XX saved" will appear on the display.
Recalling DAB Stations Preset
- You could recall your presets by pressing the Preset button, then using Previous or Next buttons ◀◀ ▶▶ browse through your presets and press the Enter to tune to the station you choose.
- If you choose a preset that has not been allocated a station, then "preset empty" will be displayed.
Auto update
- Choose update from any-update from DAB-update from FM-No update
Set 12/24 hour
Rotate knob to choose set 24 hour or set 12 hour.
Set date format
Rotate knob to choose DD-MM-YYYY or MM-DD-YYYY.
Backlight
Timeout: on-10 sec-20 sec-30 sec-45 sec-60 sec-90 sec-120 sec-180 sec On level: High-Medium-Low Dim level: High-Medium-Low
Language
English, French, Dutch, Italian, Norsk, Polski, Portugues, Espanol, Svenska, Turkish, Dansk, Nederlands, Suomi
Factory reset
- Press Enter and choose 'Yes' to start factory reset.
SW version
- Press Enter to view system version.
Using the radio- FM MODE
- Turn the radio on, press Mode/Power button repeatedly and select the FM mode. The display will show 'FM' and the radio will automatically tune to the nearest station and then display will show the station name, or frequency if RDS not available.
- To search manually, press the Previous or Next buttons ◀▶▶, each press will increment the frequency by 0.05 MHz
- To achieve auto search, press and hold Previous or Next buttons ◀◀ or press scan button, and the radio starts to scan down or up the frequency band, the display will show "Scanning...", and it will stop automatically once station has been found.
97.75MHz Scanning...
FM Display Modes
This function allows information relating to the current station to be shown in the display, press the Info/Menu button repeatedly to scroll through the following:
- RDS (scrolling text): The broadcaster may include a scrolling message about the current program.
- Program type: This describes the style of the program being broadcast.
• Station name: such as BBC RD
• Audio Mode: the display will show if the station being received is stereo or mono - Time/date: the time and date will be automatically updated by the radio time signal (if RDS is available).
FM mode- Scan setting
- Press Previous or Next button ◀◀ ▶▶ to choose 'Strong station only' or 'All stations'.
- Press Enter knob to confirm.
- If choose 'Strong station only', the radio will only scan and play stations with a strong signal.
- If selecting 'All stations', the radio will also scan and play stations with a weak signal.
FM mode- Audio setting
- Press Previous or Next button ◀◀ ▶▶ to choose 'Forced mono' or 'Stereo allowed'
- If signal is weak, please choose Forced mono to get better sound quality.
FM mode-System
- Sleep: Use knob to rotate to choose Sleep off-15 minutes-30 minutes-45 minutes-60 minutes-90 minutes
- Equalizer: Use knob to rotate to choose My EQ-Normal-Classic-Jazz-Pop-Rock-Speech
- Time-Use knob to rotate to choose Set Time/Date-Auto update-Set 12/24 hour-Set date format.
BT
- Press Mode until the display shows BT.
-
Search the pairing name 'Silver Star CD-DAB' in your phone and click it to pair.
-
It will have reminding sound after paired successfully. You now can play music via BT;
- You can adjust volume from the radio or your phone.
AUX (Line input)
Aux in mode plays audio from an external source such as an MP3 player. To play audio with Aux in mode:
- Turn the volume low on both the Radio and if adjustable, the audio source device.
- Connect the external audio source to the AUX IN 3.5 mm stereo socket.
- Press MODE until the display shows Aux In.
- Adjust the volume of the Radio (and, if necessary, the audio source device) as required.
USB
- Press Mode until the display shows USB.
- Plug the USB sticks into USB port and it will play first track automatically.
- Use Previous ◀ or Next button ▶ to switch to next track.
- The display shows file name.
Note: The USB port does not support charging or data transfer with computer.
CD
- Press Mode until the display shows CD.
- The display screen for the CD function will now show "Reading..." followed by "No Disc".
- Select the Open/Close CD function on the radio or the remote. Insert your CD slightly and drive will take CD into the system to play.
- The first song on the CD will now begin to play
CD Functions
- To skip between songs, use the '◀◀' or '▶◀' buttons on the radio or the remote. Pause/Play using the button on the radio or remote.
- To skip rewind/forward through a song playing, hold down the '◀' or '▶' buttons on remote control and release when you wish to stop skipping.
- To eject the CD, press the Open/Close CD function on the radio or on the remote, as per the guidance to enter the CD.
- Press and hold 'Enter' knob on main unit or 'OK' button on remote control button to stop the album. This will also display how many songs are on the album and total playing time. Press 'Play/Pause' to begin listening again.
Arrange a CD song program
- When the CD is put into 'Stop', you can program the CD player to play songs in a particular order.
- Simply follow by pressing the "Preset" button on the main unit or remote to step into the state of programming.
- Once in program settings, the display will show T01 to display the first song on the CD as P01. You can now choose what song you would like as program number P01 by using the '◀◀' and '▶◀' buttons to scroll through to the song you would like to choose. Once on the chosen song for P01, press the 'Enter' knob to select, and be taken to choose your next programmed song.
- For the next song, the display will show P02 to show the program 2. Now use the '◀' and '▶' buttons to scroll through to the song you would like to choose. Once on the chosen for program 2, press the 'Enter' knob to select, and be taken to choose your next programmed song.
- After you have finished program song selection, press the 'Play/Pause' button to play the songs which have been programmed. The display shows 'Program playing'.
- When the program playback is activated, press "Eject" button, then it will exit the program playback mode
Alarm Setting
Note: Check that the radio has the correct time and date before you set an alarm.
In DAB, FM, BT, CD, USB or Aux in mode:
- Press the 'Alarm' button on the front of the radio, 'Alarm 1 Setup' is displayed. Press Enter.
Note: Press the 'Alarm' button twice to enter the Alarm 2 setup. - Alarm 1 Wizard' is displayed and the hour digits for the alarm will flash.
- Use Previous or Next button to scroll to the hour for the alarm. Press Enter to confirm.
- Use Previous or Next button to scroll minute for the alarm. Press Enter to confirm.
- Use Previous or Next button to scroll to the duration for the alarm. You can choose from 15, 30, 45, 60, 90 and 120 minutes. Press Enter to confirm.
- Use Previous or Next button to scroll to the sound source for the Alarm. You can choose from Buzzer, DAB or FM. Press Enter to confirm. For FM or DAB mode you can choose between your preset or "Last listened" radio stations using Previous or Next button and Enter to confirm.
- Use Previous or Next button to scroll to the frequency for the Alarm. You can choose from Daily, Once, Weekends or Weekdays. Press Enter to confirm.
-
Use Previous or Next buttons to set the volume for your alarm. Press Enter to confirm.
-
Use the Previous or Next button to turn the alarm On or Off. Press the Enter to save your alarm.
- Alarm 2 Setting please repeat 2-9 steps.
Note: The alarm volume will increase progressively until it reaches the alarm volume you have set.
Turn off the Alarm
In Standby mode: Briefly press the 'Alarm' button repeatedly to turn Alarm 1 and Alarm 2 'On' or 'Off'.
Snooze Function
When the alarm sounds, you can press any button(except power button) to go to snooze. The default time for this function is 9 minutes. Note: You can press the 'Power/Mode' button to stop the Snooze function.
DISPOSAL CONSIDERATIONS

natural_image
Symbol of a trash bin crossed with a diagonal line, representing no waste or discharge (no text or labels)If there is a legal regulation for the disposal of electrical and electronic devices in your country, this symbol on the product or on the packaging indicates that this product must not be disposed of with household waste. Instead, it must be taken to a collection point for the recycling of electrical and electronic equipment. By disposing of it in accordance with the rules, you are protecting the environment and the health of your fellow human beings from negative consequences. For information about the recycling and disposal of this product, please contact your local authority or your household waste disposal service.
This product contains batteries. If there is a legal regulation for the disposal of batteries in your country, the batteries must not be disposed of with household waste. Find out about local regulations for disposing of batteries. By disposing of them in accordance with the rules, you are protecting the environment and the health of your fellow human beings from negative consequences.
DECLARATION OF CONFORMITY

text_image
CE UK CAManufacturer:
Chal-Tec GmbH, Wallstrasse 16, 10179 Berlin, Germany.
Importer for Great Britain:
Berlin Brands Group UK Ltd PO Box 1145 Oxford, OX1 9UW United Kingdom
Hereby, Chal-Tec GmbH declares that the radio equipment type Silver Star is in compliance with Directive 2014/53/EU. The full text of the EU declaration of conformity is available at the following internet address: use.berlin/10038421
For Great Britain: Hereby, Chal-Tec GmbH declares that the radio equipment type Silver Star is in compliance with the relevant statutory requirements. The full text of the declaration of conformity is available at the following internet address: use.berlin/10038421
Chère cliente, cher client,
text_image
QR code image containing encoded data, no visible human-readable textSOMMAIRE
Fiche technique 33
text_image
Technical diagram of an electronic device rear panel with labeled ports and mounting flangesAppareil
text_image
Scanning... 0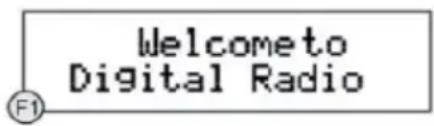
text_image
Welcometo Digital Radio97.75MHz Scanning...
natural_image
Symbol of a trash bin crossed with a diagonal line, no text or numbers presentDÉCLARATION DE CONFORMITÉ

text_image
CE UK CAFabricant :
Chal-Tec GmbH, Wallstraße 16, 10179 Berlin, Allemagne.
text_image
QR code image containing encoded data, no visible human-readable textÍNDICE
Datos técnicos 47
text_image
Technical diagram of an electronic device rear panel with labeled ports and mounting flangesDispositivo
text_image
Scanning... 0
text_image
Welcometo Digital Radio97.75MHz Scanning...
natural_image
Symbol of a trash bin crossed with a diagonal line, no text or numbers presentBerlin Brands Group UK Ltd
PO Box 1145
Oxford, OX1 9UW
United Kingdom
text_image
QR code image containing encoded data, no visible human-readable textINDICE
Dati tecnici 61
text_image
Technical diagram of an electronic device rear panel with labeled ports and mounting flangesDispositivo
text_image
Scanning... 0
text_image
Welcometo Digital RadioTimeout: on -10 sec - 20 sec - 30 sec - 45 sec - 60 sec - 90 sec - 120 sec - 180 sec
On: High – Medium – Low
Dimmer: High – Medium – Low
Lingue disponibili
97.75MHz Scanning...