
Vertico Swing DAB - Radio Auna - Free user manual and instructions
Find the device manual for free Vertico Swing DAB Auna in PDF.
User questions about Vertico Swing DAB Auna
0 question about this device. Answer the ones you know or ask your own.
Ask a new question about this device
Download the instructions for your Radio in PDF format for free! Find your manual Vertico Swing DAB - Auna and take your electronic device back in hand. On this page are published all the documents necessary for the use of your device. Vertico Swing DAB by Auna.
USER MANUAL Vertico Swing DAB Auna
INHALTSVERZEICHNIS
Technische Daten 4
Software-Version (SW version)
Member of Berlin Brands Group
Handwerkerstr. 11
15366 Dahlwitz-Hoppegarten
Deutschland
natural_image
Symbol of a trash bin crossed with a diagonal line, representing no waste or discharge (no text or labels)Congratulations on your purchase. Please read the following instructions carefully and follow them to prevent potential damage. We accept no liability for damage caused by disregarding the instructions or improper use. Please scan the QR code to access the latest operating instructions and for further information about the product.

CONTENTS
Technical data 26
Safety instructions 27
Device overview 28
Remote control 30
Setup and operation 31
DAB+ radio 35
FM radio 37
Station memory (DAB+/FM radio) 39
BT 39
AUX input 40
USB connection 40
CD playback 40
Snooze function 41
Disposal considerations 42
Declaration of conformity 42
TECHNICAL DATA
| Article number 10041137, 10041138 | |
| Power supply 220-240 V ~ 50/60 Hz | |
| Input power 2 A | |
| Output power 2 x 10 W RMS | |
| Power consumption (standby) < 1 W | |
| DAB frequency 174.928-239.200 MHz | |
| FM frequency 87.5 - 108.0 MHz | |
| WiFi standard | 802.11 b/g/n |
| WiFi frequency | 2402-2480 MHz |
| WiFi transmission power (max.) | < 20 dBm |
| BT Version 5.0 | |
| BT frequency 2402-2480 MHz | |
| BT transmission power (max.) 2 dBm |
SAFETY INSTRUCTIONS
Protection from moisture
- To reduce the risk of fire or electric shock, do not expose this product to water or moisture.
- Do not use it in places where it could fall into water or be splashed by water.
Do not open unit
- To avoid contact with high voltage components or hazardous radiation exposure, do not attempt to open the unit.
Electrostatic discharge
- If an electrostatic discharge (ESD) occurs on the front panel or near any part or button of this unit, there is a possibility that the unit will stop operating and/or shut down immediately. This is a normal condition and serves to protect the unit and internal components from damage. In such a case, please reset the unit (by switching the radio off and on again) to resume normal operation.
Protection from heat
- This radio shall not be exposed to excessive heat such as sunshine, fire or similar.
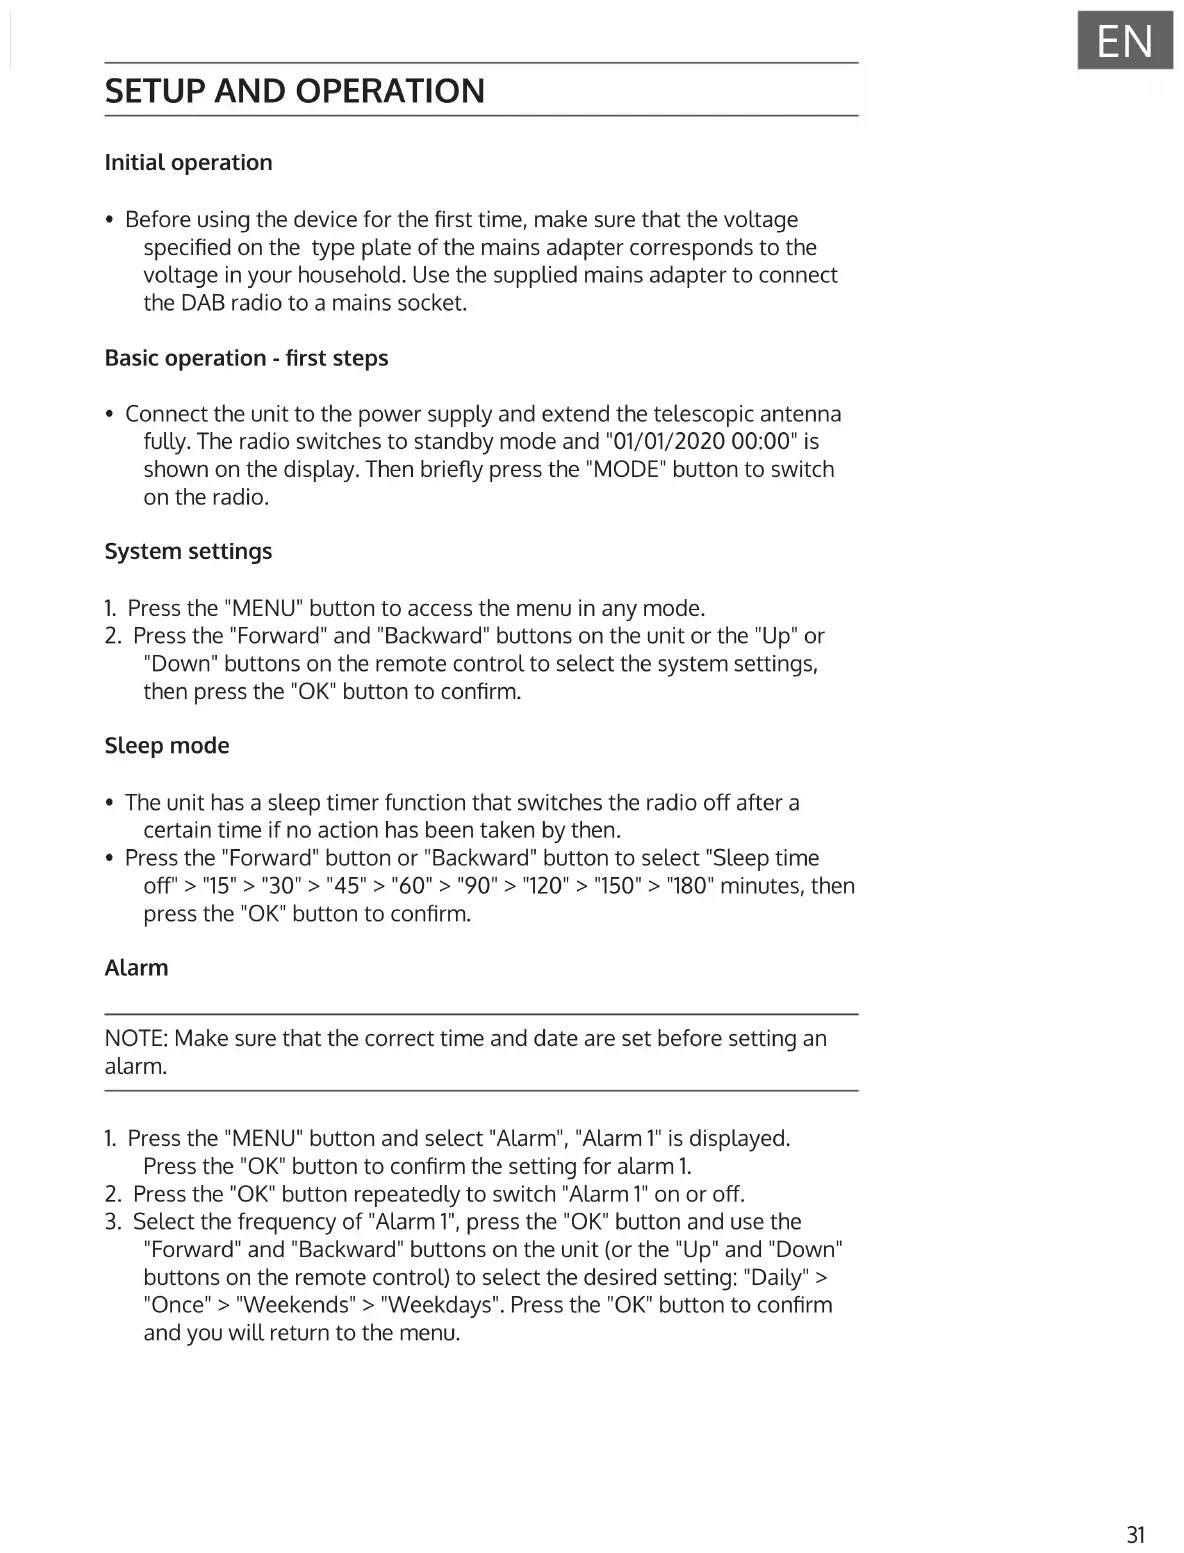
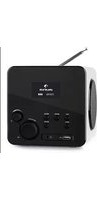
DEVICE OVERVIEW


1 LCD display
2 Power supply connection (DC)
3 Antenna

4 AUX input
5 ON button
6 Play/pause button
7 Info/stop button
8 Backward button
9 Forward button
10 OK button
11 Eject button (CD eject)
12 Headphone jack
13 Mode button
14 Menu button
15 Volume (-) button: Decrease volume
16 Volume (+) button: Increase volume
17 Menu back button
18 Favourites button
19 USB connection
REMOTE CONTROL

1 Standby button
2 Eject button (CD eject): Press to open/ close the CD door
3 Equaliser button
4 Dimmer button
5 Sleep button
6 Program button
7 Backward/Previous track
8 Stop button
9 Forward/next track
10 Info button
11 Mode button
12 Menu/Back button
13 Up cursor button
14 Left cursor button
15 OK and Play/Pause button
16 Down cursor button
17 Right cursor button
18 Volume (-) button
19 Volume (+) button
20 Input letters and numbers
21 FAV button
22 Mute button
SETUP AND OPERATION
Initial operation
- Before using the device for the first time, make sure that the voltage specified on the type plate of the mains adapter corresponds to the voltage in your household. Use the supplied mains adapter to connect the DAB radio to a mains socket.
Basic operation - first steps
- Connect the unit to the power supply and extend the telescopic antenna fully. The radio switches to standby mode and "01/01/2020 00:00" is shown on the display. Then briefly press the "MODE" button to switch on the radio.
System settings
-
Press the "MENU" button to access the menu in any mode.
-
Press the "Forward" and "Backward" buttons on the unit or the "Up" or "Down" buttons on the remote control to select the system settings, then press the "OK" button to confirm.
Sleep mode
- The unit has a sleep timer function that switches the radio off after a certain time if no action has been taken by then.
- Press the "Forward" button or "Backward" button to select "Sleep time off" > "15" > "30" > "45" > "60" > "90" > "120" > "150" > "180" minutes, then press the "OK" button to confirm.
Alarm
NOTE: Make sure that the correct time and date are set before setting an alarm.
-
Press the "MENU" button and select "Alarm", "Alarm 1" is displayed. Press the "OK" button to confirm the setting for alarm 1.
-
Press the "OK" button repeatedly to switch "Alarm 1" on or off.
-
Select the frequency of "Alarm 1", press the "OK" button and use the "Forward" and "Backward" buttons on the unit (or the "Up" and "Down" buttons on the remote control) to select the desired setting: "Daily" > "Once" > "Weekends" > "Weekdays". Press the "OK" button to confirm and you will return to the menu.
-
Set the alarm time: Press the "Forward" and "Backward" buttons on the device (or the "Up" and "Down" buttons on the remote control) to select "hour" and press the "OK" button to confirm. Press the "Forward" and "Backward" buttons on the device (or the "Up" and "Down" buttons on the remote control) to select "minutes" and press the "OK" button to confirm.
- Select the alarm source: Press the "OK" button and use the "Forward" and "Backward" buttons on the device (or the "Up" and "Down" buttons on the remote control) to select the desired setting from: "Buzzer" (summer) > "Digital Radio" > "FM Radio". Press the "OK" button to confirm and you will return to the menu.
- Select the duration of the alarm: Press the "OK" button and use the "Forward" and "Backward" buttons on the device (or the "Up" and "Down" buttons on the remote control) to select the desired setting from: "15" > "30" > "45" > "60" > "90" > "120" minutes. Press the "OK" button to confirm and you will return to the menu.
- Select "Volume" and press the "OK" button to adjust the volume of the alarm.
- "Alarm 2": To set "Alarm 2", please repeat steps 1-7.
NOTE: The alarm volume will gradually increase until it reaches the alarm volume you set.
Stop alarm
- When the alarm sounds, you can stop it immediately by pressing the "ON" button.
- When the alarm sounds, you can press any button (except the "ON" button) to activate the snooze function. The default time for this function is 9 minutes.
NOTE: Press the "ON" button to stop the snooze function.
Equaliser
- Under "EQUALISER" you can select a standard sound format or configure your own. Select one of the following sound formats: "Normal" > "Classic" > "Jazz" > "Pop" > "Rock" > "Speech" > "My EQ" and confirm with the "OK" button. The setting takes effect immediately.
- If you have selected a personalised sound format under the following entry, select "My EQ" to apply the sound format directly. Then go into the "My EQ" settings to adjust treble and bass.
Time/date
Press the "Forward" and "Backward" buttons on the unit (or the "Up" and "Down" buttons on the remote control) to select the desired menu items: "Time/Date" > "Auto update" > "Set 12/24 hour" > "Set date format". Press the "OK" button to make the individual settings.
Setting time/date manually:
- Press the "OK" button, now the date digit will start flashing. Press the "Forward" and "Backward" buttons on the device (or the "Up" and "Down" buttons on the remote control) to select the current date and press the "OK" button to confirm.
- Then the month digit will start flashing. Press the "Forward" and "Backward" buttons on the device (or the "Up" and "Down" buttons on the remote control) to select the current month and press the "OK" button to confirm.
- Then the year digit will start flashing. Press the "Forward" and "Backward" buttons on the device (or the "Up" and "Down" buttons on the remote control) to select the current year and press the "OK" button to confirm.
- Then the "hour digit" will start flashing. Press the "Forward" and "Backward" buttons on the device (or the "Up" and "Down" buttons on the remote control) to select the current hour and press the "OK" button to confirm.
- Press the "Forward" and "Backward" buttons on the device (or the "Up" and "Down" buttons on the remote control) to select the current minute and press the "OK" button to confirm. Now the time and date are set and saved.
Auto time update: You can choose "from Any", "from Digital Radio", "from FM", or "No Update" in the system setting.
Automatic update: Select "Update from any" > Update from DAB" > "Update from FM" > "No update" and confirm with the "OK" button.
Set 12/24 hours: Press the "Forward" and "Backward" buttons on the unit (or the "Up" and "Down" buttons on the remote control) to select "set 24 hour" or "set 12 hour". Press the "OK" button to confirm.
Set the date format: Press the "Forward" and "Backward" buttons on the unit (or the "Up" and "Down" buttons on the remote control) to select "DD-MM-YYYY" (DD-MM-YYYY) or "MM-DD-YYYY" (MM-DD-YYYY). Press the "OK" button to confirm.
Backlight
Under "BACKLIGHT" you can set the illumination of the display:
- Dim the display in standby mode after a certain time.
- Set the display brightness.
Setting the dimming time: select "Timeout" > "On" > "10" > "20" > "30" > "45" > "60" > "90" > "120" > "180" seconds and press the "OK" button to confirm.
Display brightness during operation: Select "On" and then the desired setting: "High" > "Medium" > "Low". Confirm your selection with the "OK" button.
Display brightness in standby mode: Select the "DIM" level and then select the desired setting: "High" > "Medium" > "Low". Confirm your selection with the "OK" button.
Language
- You can set the menu language under "LANGUAGE".
- In operating mode, press and hold the "MENU" button to access the system settings. Use the "Forward" and "Backward" buttons on the device (or the "Up" and "Down" buttons on the remote control to select "LANGUAGE" and press the "OK" button to confirm.
- The following languages can be selected: English, French, German, Italian, Norwegian, Polish, Portuguese, Spanish, Swedish, Turkish, Danish, Dutch, Finnish.
Restoring factory settings
To restore the factory settings of the unit, please proceed as follows:
- In radio mode, press the MENU button until "System setting" appears on the display. Press the "Forward" and "Backward" buttons on the device (or the "Up" and "Down" buttons on the remote control) to select the "FACTORY RESET" submenu.
- Press the "OK" button and confirm the following query with "YES".
- The unit is now reset to the factory settings, i.e. all alarm times, sleep timer settings etc. are lost.
Software version
Press the "OK" button to display the system software version if required.
DAB+ RADIO
- DAB mode is automatically selected and when the radio is connected to the power supply for the first time, the radio performs a full scan. The display shows "Scanning" and a bar indicating the progress of the scan and the total number of stations found so far.
- When the search is finished, the radio plays the first alphanumeric station found. Set the volume to the desired value using the "VOL+" and "VOL-" buttons.
Channel list
- In DAB mode, press the "MENU" button to enter the DAB menu.
- Press the "Backward" button or the "Forward" button to select the channel list, and then press the "OK" button to confirm.
- A list of DAB stations is shown on the display. Once you have found the desired station, press the "OK" button to select the station.
Full channel scan
This function allows the radio to search for all DAB stations in your area.
- In DAB mode, press the "MENU" button to enter the DAB menu. Press the "Backward" button or the "Forward" button to select "Full Scan", press the "OK" button to start the full scan.
Manual station selection
With this function, a specific station or a new station can be added manually to the stations already available on the radio.
- In DAB mode, press and hold the "MENU" button to enter the DAB menu and press the "Backward" button or the "Forward" button to select "Manual tune". Press the "OK" button to confirm the selection.
- Press the "Backward" button or the "Forward" button until the desired frequency is shown in the display and then press the "OK" button. The frequency and the name of the radio station as well as the signal strength are shown in the display.
- Press the "OK" button again to add the radio station to the station list and start it automatically.
Delete station
This function allows you to delete stations from the station list that are either no longer broadcasting or have changed frequency.
- Press and hold the "MENU" button to switch to the station settings menu.
- Press the "Backward" button or the "Forward" button until "Prune Invalid" is displayed and confirm with the "OK" button.
- Press the "Backward" button or the "Forward" button to select "YES" to confirm and delete. If you select "NO", the process is cancelled.
DRC (Dynamic Range Control)
This function allows you to remove unavailable channels from the channel list.
- In "DAB" mode, press and hold the "MENU" button, then press the "Backward" button or the "Forward" button until "DRC" is displayed. Press the "OK" button to confirm.
- Press the "Backward" button or the "Forward" button to switch between the levels "Off", "High" and "Low". Press the "OK" button to confirm the selection.
Recalling DAB station presets
- You can recall your preset stations by pressing the "FAV" button. Then press the "Backward" or "Forward" buttons on the unit (or the "Up" and "Down" buttons on the remote control) to scroll through the preset stations. Press the "OK" button to listen to the selected radio station.
- If you select a preset to which no radio station has been assigned, the message "Preset empty" is displayed.
FM RADIO
- Switch on the radio, press the "MODE" button several times and select "FM mode". The display shows "FM" and the radio automatically tunes to the next FM radio station. The station name (RDS) or the frequency is displayed if RDS is not available.
- To search manually for any radio station, press the "Backward" button or the "Forward" button. Each time the button is pressed, the frequency changes by 0.05 MHz.
- In FM mode, press and hold the "MENU" button and then press the "Forward" and "Backward" buttons on the unit (or the "Up" and "Down" buttons on the remote control) until "Scan" is displayed. Then press the "OK" button to confirm the start of the search. The radio now starts searching the frequency band downwards or upwards and stops automatically when a radio station is found.
- In FM mode, press and hold the "MENU" button, and then press the "Forward" and "Backward" buttons on the unit (or the "Up" and "Down" buttons on the remote control) until "Auto Scan" is displayed. Press the "OK" button to confirm and start the automatic search. The radio starts searching the entire FM band (87.5-108 MHz) and automatically stores all found radio stations in the "Preset list memory".
NOTE: Each time you perform an "Auto scan" and scan the entire frequency band, the station list in the "Preset list memory" is automatically updated.
Station information in FM mode
With this function, information about the current station can be shown in the display. By pressing the "MENU" button several times, you can scroll through the following information:
RDS (scrolling text): The station can display a scrolling text message about the current programme.
Programme type: This describes the type of programme being broadcast.
Audio mode: The display shows whether the received radio station is broadcast in stereo or mono.
Time/date (time/date): The time and date are automatically updated by the radio's time signal (if RDS is available).
Search setting (how to search for radio stations)
- In FM mode, press and hold the "MENU" button and then press the "Forward" and "Backward" buttons on the unit (or the "Up" and "Down" buttons on the remote control) to switch select the "Scan" setting and press the "OK" button to start the scan.
- Press the "Forward" and "Backward" buttons on the unit (or the "Up" and "Down" buttons on the remote control) to select "Strong station only" or "All stations". Then press the "OK" button to confirm the start of the search. If you select "Strong station only", the radio will only search and play stations with a strong signal. If you select "All stations", the radio also searches for stations with a weak signal and plays them.
Audio settings
- In FM mode, press and hold the "MENU" button and then press the "Forward" and "Backward" buttons on the unit (or the "Up" and "Down" buttons on the remote control) to switch to select "Auto" and press the "OK" button to confirm the setting.
- Press the "Forward" and "Backward" buttons on the unit (or the "Up" and "Down" buttons on the remote control) to select "Forced mono" or "Stereo allowed". If the radio signal is weak, please select "Forced mono" to get better sound quality.
STATION MEMORY (DAB+/FM RADIO)
Memory for preset radio stations
This function allows up to 99 radio stations to be programmed into memory and stored in DAB and FM mode.
Storing DAB/FM stations as preset stations
- Follow the instructions in the user manual to select a radio station.
- Then press and hold the "FAV" button. The display shows "X (Empty)" if no previous station has been stored in the preset memory.
- Press the "Forward" and "Backward" buttons on the device (or the "Up" and "Down" buttons on the remote control) to scroll through the preset numbers and select the radio station preset you want. You can choose between the memory locations 1-99.
- Press the "OK" button to save to the radio station. The message "Preset XX saved" appears on the display.
Recalling favourite stations
The "FAV" button allows you to recall your favourite stations. Press the FAV button to call up the list of favourite stations you have preset. When listening to the radio, press the "FAV" button and then the "OK" button to preset the current station as one of your favourite stations.
BT
To connect the DAB radio to your smartphone:
- Press the "MODE" button until "BT" appears in the display.
- Then switch on the BT function on your smartphone, search for the pairing name "Vertico Swing DAB" and select it to connect your smartphone to the DAB radio.
- After the two devices have been successfully paired, a notification tone sounds. You can now play music via the BT connection and adjust the volume, both via the radio and your smartphone.
AUX INPUT
In "AUX IN" mode, audio signals are played back from an external source connected via an audio cable, e.g. from an MP3 player. To play back audio signals via the "AUX IN" mode:
- First turn down the volume on the radio. Then connect the external audio source to the AUX-In 3.5 mm stereo jack.
- Press the "MODE" button until "AUX in" appears in the display.
- Now adjust the volume of the radio (and, if necessary, the volume of the audio source device).
USB CONNECTION
- Press the "MODE" button until the display shows "USB" to play music from a USB stick.
- Insert the USB stick into the USB port and the unit automatically starts playing the first track on the USB stick.
- Use the "Backward" button or the "Forward" button to play the previous or next track.
- The file name is shown on the display.
NOTE: The USB port does not support device charging or data transfer from a computer.
CD PLAYBACK
- Press the "MODE" button until the display shows "CD" to play music from a CD.
- The radio display will now show "Reading..." followed by "No disc".
- Press the "Eject" button on the device or on the remote control to open the CD compartment. Insert the CD into the tray and press the "Eject" button again. The CD compartment closes again and the first track on the CD is now played.
CD functions
- To jump between titles, use the "Backward" button or the "Forward" button on the unit or on the remote control
-
Play and pause the music by pressing the "Play/pause" button on the unit or on the remote control.
-
To skip forward or back during playback of a track, press and hold the "Backward" button or the "Forward" button on the remote control and release the button when you want to stop skipping.
- To eject the CD again, press the "Eject" button on the device or on the remote control to open the CD compartment.
- Press and hold the "OK" button on the unit or on the remote control to stop the music playback of the CD. This also shows how many tracks are on the CD and how long the playback will take in total. Press the "Play/pause" button to restart music playback from the CD.
Putting together a CD track programme
- When the CD is stopped and no music is playing, you can programme the CD player to play the tracks in a specific order.
- To do this, simply press the "FAV" button on the unit or on the remote control to enter "Programming mode".
- Once you have activated "Programming mode", the display will show "T001" to indicate the first track on the CD as "P01". You can now select which title you want to save as programme number "P01" in the playlist by scrolling to the title you want to select with the "<<" and ">>" buttons. When you have found the title you selected for "P01", press the "OK" button to select the title and you will be prompted to select the next programmed title.
- For the next song, the display shows "P02" to indicate programme 2. Now use the "Backward" button or the "Forward" button to scroll to the song you want to select as "P02". When you have found the track for programme 2, press the "OK"" button to select the track and you will then be prompted to select the next programmed track.
- After you have completed the full programming of your track selection, press the "Play/pause" button to play the programmed tracks.
- When programme playback is activated, press the "Eject" button to exit programme playback mode again.
SNOOZE FUNCTION
When the alarm sounds, you can press any button (except the "ON" button) to activate the snooze function. The default time for this function is 9 minutes.
NOTE: Press the "ON/standby" button to stop the snooze function.
DISPOSAL CONSIDERATIONS

natural_image
Symbol of a trash bin crossed with a diagonal line, representing no waste or discharge (no text or labels)If there is a legal regulation in your country regarding the disposal of electrical and electronic equipment, this symbol on the product or on the packaging indicates that this product must not be disposed of with household waste. Instead, it must be taken to a collection point for the recycling of electrical and electronic equipment. By disposing of this product in accordance with the regulations, you protect the environment and the health of those around you from negative consequences. For information on recycling and disposal of this product, contact your local government or household waste disposal service.
This product contains batteries. If there is a legal regulation in your country regarding the disposal of batteries, the batteries must not be disposed of in household waste. Consult your local regulations for the disposal of batteries. By disposing of this product in accordance with the regulations, you are protecting the environment and the health of those around you from negative consequences.
DECLARATION OF CONFORMITY

Manufacturer:
Chal-Tec GmbH, Wallstrasse 16, 10179 Berlin, Germany.
Importer for Great Britain:
Berlin Brands Group UK Ltd PO Box 1145
Oxford, OX1 9UW
United Kingdom
Chal-Tec GmbH hereby declares that the radio equipment type Vertico Swing DAB is in compliance with Directive 2014/53/EU. The complete text of the EU declaration of conformity is available at the following internet address: use.berlin/10041137
Cher client, chère cliente,
SOMMAIRE
Fiche technique 44
natural_image
Symbol of a trash bin crossed with a diagonal line, no text or numbers presentDÉCLARATION DE CONFORMITÉ

Fabricant :
Chal-Tec GmbH, Wallstraße 16, 10179 Berlin, Allemagne.
Berlin Brands Group UK Ltd
PO Box 1145
Oxford, OX1 9UW
United Kingdom
ÍNDICE
Datos técnicos 64
natural_image
Symbol of a trash bin crossed with a diagonal line, no text or labels presentBerlin Brands Group UK Ltd
PO Box 1145
Oxford, OX1 9UW
Reino Unido
INDICE
Dati tecnici 84
natural_image
Symbol of a trash bin crossed with a diagonal line, representing no waste or discharge (no text or labels)Berlin Brands Group UK Ltd
PO Box 1145
Oxford, OX1 9UW
United Kingdom
natural_image
Abstract white logo design on dark background, resembling stylized letter 'S' or wave form (no text or symbols)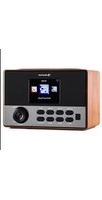


- INHALTSVERZEICHNIS
- Software-Version (SW version)
- Member of Berlin Brands Group
- CONTENTS
- SAFETY INSTRUCTIONS
- Protection from moisture
- Do not open unit
- Electrostatic discharge
- Protection from heat
- DEVICE OVERVIEW
- REMOTE CONTROL
- SETUP AND OPERATION
- Initial operation
- Basic operation - first steps
- System settings
- Sleep mode
- Alarm
- Stop alarm
- Equaliser
- Time/date
- Setting time/date manually:
- Backlight
- Language
- Restoring factory settings
- Software version
- DAB+ RADIO
- Channel list
- Full channel scan
- Manual station selection
- Delete station
- DRC (Dynamic Range Control)
- Recalling DAB station presets
- FM RADIO
- Station information in FM mode
- Search setting (how to search for radio stations)
- Audio settings
- STATION MEMORY (DAB+/FM RADIO)
- Memory for preset radio stations
- Storing DAB/FM stations as preset stations
- Recalling favourite stations
- BT
- AUX INPUT
- USB CONNECTION
- CD PLAYBACK
- CD functions
- Putting together a CD track programme
- SNOOZE FUNCTION
- DISPOSAL CONSIDERATIONS
- DECLARATION OF CONFORMITY
- Manufacturer:
- Importer for Great Britain:
- Cher client, chère cliente,
- SOMMAIRE
- DÉCLARATION DE CONFORMITÉ
- Fabricant :
- ÍNDICE
- INDICE
Brand : Auna
Model : Vertico Swing DAB
Category : Radio