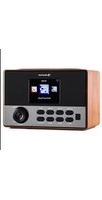
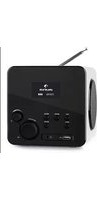
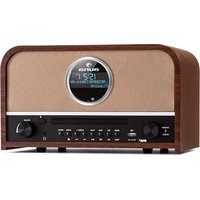
USER MANUAL Nizza Auna
natural_image
Line drawing of a portable radio with ventilation grille and two buttons (no text or symbols)
Gerät

natural_image
Coiled cable and plug with three leads, no visible text or symbols
Netzteil

Fernbedienung

Batterie
Sicherheitshinweise
WARNUNG
Bedienelemente
natural_image
Simple line drawing of a trash bin with a cross symbol on its side (no text or labels)
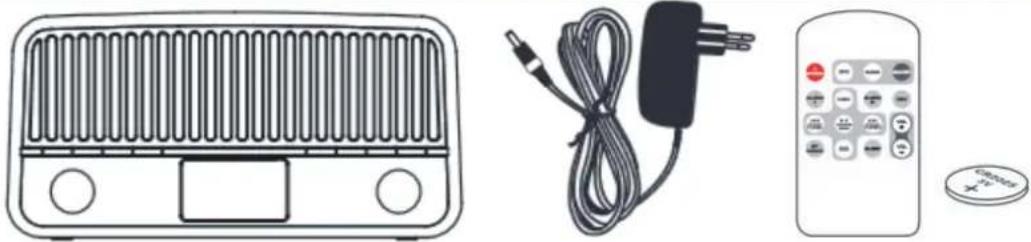
Main device
Remote control + battery
Manual
IMPORTANT SAFETY INSTRUCTIONS
- Read all instructions before using.
- Before connecting the device to the power supply, check that the voltage indicated on the appliance (underside the device) corresponds with the voltage in your home. If this is not the case, contact your dealer and do not use the device.
- Do not let the cord hang over edge of table counter or touch hot surface.
- Do not place on or near a hot gas or electric burner or in a heated oven.
- To protect against a fire, electric shock or personal injury, do not immerse cord, electric plugs or device in water or other liquids.
- To avoid all risk of electrocution, do not open the cover. Repairs to this appliance should only be carried out by qualified persons.
- If liquid penetrates inside the cover, unplug the appliance and have it checked by a qualified technician before it is used again.
- Do not place the appliance in full sunlight, close to heating equipment or any heat source, or in a location subjected to excessive dust or mechanical shocks.
- Do not expose the appliance to extreme temperatures. The appliance shall be used in moderate climates.
- Do not place any object that produces heat (candle, ash tray, etc.) close to the appliance.
- Place the appliance on a surface that is flat, rigid and stable.
- Install the appliance in a location with sufficient ventilation to avoid internal overheating. Avoid restricted spaces such as bookcases, cabinets, etc.
- Do not obstruct the appliance's ventilation openings. Do not install the appliance on a soft surface, such as a carpet or blanket that might block the ventilation openings.
- Disconnect the appliance from the power source if it is not going to be used for a long time, if there is a thunderstorm or if it isn't working properly.
- The use of attachments that are not recommended by the appliance manufacturer may result in fire, electric shock or personal injury.
-
If the supply cord is damaged, it must be replaced by the manufacturer or its service agent or a similarly qualified person in order to avoid a hazard.
-
This appliance is not intended for use by persons (including children) with reduced physical, sensory or mental capabilities, or lack of experience and knowledge, unless they have been given supervision or instruction concerning use of the appliances by a person responsible for their safety.
- Children should be supervised to ensure that they do not play with the appliance.
- The appliance is not a toy. Do not let the children play it. Never let children insert foreign objects into the appliance.
- Do not use the appliance for other than intended use. This appliance has been designed solely for domestic use; the manufacturer's liability shall not be engaged in the event of any professional use, by any misuse or by any use not complying with the operating instructions.
- Save these instructions.
- Use this appliance only with the supplied AC Adaptor.
- Using non-approved power supplies will void the warranty.
- Mains Supply: The mains operating voltage of this unit is marked on a rating plate on the AC adaptor.
The means of disconnecting this appliance from the mains supply is the mains plug/AC adaptor. This should be unobstructed and readily operable at all times.
First Use
Connect the mains adapter (included) to the 5V DC Socket on the back of the unit and then plug into the mains socket and switch on.
Insert the battery (CR2025) as shown below. Make sure the '+' sign is facing up.

Controls
Front 1. Power / Standby

- Function
- Pairing (Play) / Scan
- EQ / ST / MO
- Sleep / Dim / Snooze
- Prog / Pre
- Info/Menu
- Alarm
- Volume knob
- Display
- IR Sensor
- Tune / Select
Rear 1. USB Port
Provides 5V 1A charging function
- AUX IN
3.5mm AUX IN jack for connecting auxiliary devices
- DC IN 5V
Connect the power adaptor here
AUX IN DC IN 5V

Remote control

- FUNC
Press to select FM, DAB, AUX or BT
-
Power/Standby
-
INFO / MENU
Show station information. Hold to enter menu.
- ALARM 1/2
Activate and edit the alarms.
- SELECT
6.
- ▶ Pairing / Scan
BT mode: Short press to playback; hold 2 secs to activate pairing. DAB/FM modes: Scan for radio stations.
- ST / MONO
Choose between mono or stereo (FM mode)
- PRESET
Press to recall a preset station; press and hold to store recently chosen station.
- SNOOZE
Press to snooze your alarm clock for 9 minutes.
- EQ
Enter the bass and treble sound settings.
- DIM
Dim the display.
13.
- VOL +
Increase the volume level.
- SLEEP
Press to set the sleep timer. Each press increases the sleep time by 10 minutes.
- VOL -
Reduce the volume level.
Display
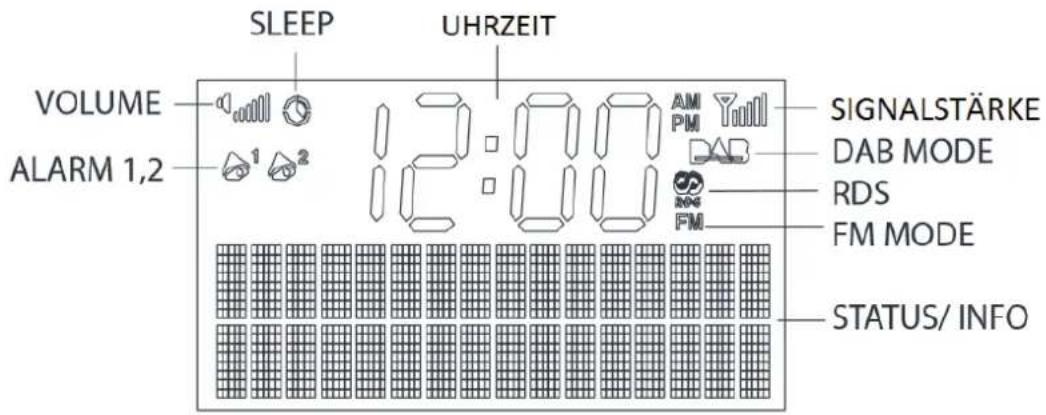
Setting Time and Date
The first time you plug your unit in, the clock on the display will show "0:00". The clock will automatically set when you first tune in any DAB station. Nevertheless, if there is no DAB station available, the clock may be set manually via the MENU system. To set the time and date manually:
- Switch on the unit, press and hold INFO/ MENU for 2 secs to enter MENU mode.
- Turn the TUNE knob then enter "Set Time/Date" by following path:
Main menu > System setup > Time setup > Set Time/Date
Each step need to press Select, you will enter to below interface on display.
- Turn the TUNE knob to set the hour, then press to confirm.
- Turn the TUNE knob to set the minute, then press to confirm.
- Follow the same routine to set the date.
FM Radio
For optimal reception, fully extend the antenna and adjust its position. You can store a maximum of 10 FM radio stations.
- Press the FUNCTION button on the device or FUNC on the RC to select FM mode.
- Press PAIR/ SCAN. The unit will automatically start searching radio station. When a station is found it will stop searching and you will hear the station.
- If the station needs to be fine tuned to ensure the best reception turn the TUNE knob. Each turn will change the radio frequency by 0.05MHz
The radio will search and the tuning frequency will be displayed whilst searching. When a useable station is detected the radio will stop tuning and play the station. If RDS data is present, the station name and scrolling radio text will be displayed. If RDS data is not present, display will show [No Radio Text].
Stereo/Mono reception
You can set your unit to switch between Auto and mono FM reception. Press and hold ST / MO to select audio mode "Auto" (turns to Stereo signal automatically upon receipt) or Mono.
Storing radio stations (FM)
You can store any preset 1-10
- Search for a station you want to store and then press and hold PROG / PRE button.
• Display will show „Preset Stored“, turn the TUNE knob to -find the preset number (1-10) which you want to store
- The display will show (Empty) if no station is stored on the particular slot.
- Press SELECT to confirm if you want to store the station in the displayed preset number.
- To listen to stored stations, press PROG/PRE to recall 1-10. Press SELECT to play the preset selection.
There are some menu settings specifically fit for FM radio operation. These may be changed through the settings menu.
- Set to FM mode.
- Press and hold the MENU button for 2 seconds (front panel). You will gain access to the settings: Scan setting – Audio setting – Set time/date – Factory reset – Sw version
SCAN SETTING: With this menu option you can set the Scanning sensitivity of the FM radio to two different levels- "Strong stations only" or "All stations." Setting to "Strong stations only" will exclude weaker stations resulting in a quicker scan. If you set to "All stations" the scan will stop at every station detect, even if the signal is weak.
AUDIO SETTINGS: This option enables you to set the radio to receive FM in Auto mode (Mono/Stereo) or in Mono only. This may be useful if the signal is weak and the broadcast is noisy.
SET TIME/DATE: This main option enables the clock to be set manually if there is no available DAB transmission.
FACTORY RESET: This option will restore all settings to "factory original". All clock, station lists and any stored preset stations will be cleared. After factory reset the radio will automatically re-scan the DAB.
SW VERSION: This option will display the version number of the control software currently installed in your radio. This might be helpful to a technician who is servicing the radio.
DAB Radio
Initial scan
When your radio is switched on for the first time the scanning display will be shown while the scanning process takes place: The radio scans all usable stations (full scan) and stores them in alphanumeric order. The initial scan will take a few minutes. After the scan, the clock will be set and the radio will play the first station in the sequence. To browse for another station, refer to the next section
Re-scanning for DAB stations
When used first, your radio scanned the DAB band for available stations. The station services found were then stored in your system's memory. You can re-scan the band at any time if you move to a different area or just to refresh the stored list of available stations. To scan for DAB stations manually:
- Select the DAB band.
- Press the PAIR/ SCAN button on the front panel. The scanning process will take a few minutes. The number of services found during the scan will be shown at the right side of the display.
• After the scan, the radio will re-tune to the station in the station list to play if it is available.
Browsing for a station
- Turn the TUNE knob. will be displayed.
- Turn the TUNE knob to browse the station list.
- Press the SELECT knob to select the station displayed. After short delay, the radio will tune to the station
DAB settings
Your radio has some additional features and options that may be reached through the Settings menu. To enter the DAB settings Menu from the top panel controls:
- Set to DAB mode.
- Press and hold the INFO/MENU button for 2 seconds.
- To scroll through available options, turn the TUNE knob to choose an option from the menu.
- Press SELECT to confirm.
FULL SCAN: Select full scan to re-scan the entire DAB band and refresh the station list.
MANUAL TUNE: Manual tuning enables you to search the band manually, stepping through the multiplex numbers to check if any have usable signal strength. Manual tuning is not necessary in normal operation where scanning will have automatically established a station list of all useable stations.
PRUNE: If your station list includes stations that you can no longer receive (you may have moved to a different area), you can select the 'Prune' option to remove any stations that can no longer be received from the Station List.
DAB display mode options
The bottom line of the display can be switched to show different items of information that may be transmitted with a DAB station. For choosing the information display:
- Press INFO/MENU on the front panel repeatedly to change the information displayed while playing a DAB radio station. The full range of display options are shown below. Some stations may not broadcast all of these options.
DLS (Dynamic Label Segment): This is a scrolling message giving real-time information-song titles, news headlines, etc.
PROGRAMME TYPE : This describes the style of the program being broadcast.
MULTIPLEX NAME: DAB Digital radio stations are broadcast in multiplexes. Each multiplex is a bundle of radio stations transmitted in a signal frequency. There are national and local multiplexes; local ones contain stations specific to your area. This option displays the name of the multiplex name that contains the station you are listening to.
SIGNAL STRENGTH: This setting will display a signal strength bar graph. The longer the bargraph, the stronger the signal. Setting the display to show signal strength is useful when setting up the aerial for the strongest signal.
TIME: Time and date are updated by broadcasted information.
MULTIPLEX NUMBER/FREQ: This option will display the multiplex number and frequency that contains the station you are listening to.
BIT RATE: DAB allows broadcasters to vary the BIT RATE (or the amount by which an audio signal can be compressed) depending on the type of broadcast. This enables the amount of stations on a multiplex to be maximized. Speech and News are often broadcast at a lower Bit Rate; music needs a higher Bit Rate for good fidelity.
Storing radio stations (DAB)
You can store up to 10 stations as presets.
- Search for a station you want to store and then press and hold PROG / PRE button.
- Display will show "Preset Stored", turn the TUNE knob to find the preset number (1-10) which you want to store
- The display will show (Empty) if no station is stored on the particular slot.
- Press SELECT to confirm if you want to store the station in the displayed preset number.
BT
You can listen to tracks from a media device if it is connected to the unit via BT. To connect your device to the unit via BT follow the steps below:
- While the unit is on, press FUNCTION repeatedly on the unit or FUNC on remote control.
- This unit will automatically activate BT. When successfully paired, the [BT] icon will show steadily.
- Search for the system with your BT device and you should see „Auna_Nizza“ Enter password „0000“ if required. When connected, the [BT] icon will keep showing steadily.
Note: When the unit has found the last paired BT device, it will connect automatically.
For manual Pairing, press and hold PAIR/SCAN for 3 seconds - now you are able to see the device „Auna_Nizza“ on your BT device. The operating range of the BT for this unit is 10 meters without obstruction. Walls, structures and other objects can have a negative effect the BT range
AUX-IN
Connect your auxiliary device to the 3.5mm AUX IN socket on the back of the unit. An auxiliary device could be a MP3 player, a CD walkman or a personal computer etc.
- Press the FUNCTION button to select AUX mode.
- Set the auxiliary device to play. You may need to adjust the volume levels on both devices
EQ
Bass setting: Press EQ button on main unit or remote control, display shown "L: 00". Turn the TUNE knob to adjust the Bass level.
Treble setting: Press EQ button on main unit or remote control, display shown "H: 00". Turn the TUNE knob to adjust the Treble level.
Alarm and Sleep Timer
Your unit has 2 alarms that you can set to wake you up with a buzzer or music from the radio. The volume level can also be set.
Setting alarm
• Press the ALARM button, display show Alarm1 Setup. Turn the TUNE knob to select Alarm1 or Alarm2, then press to confirm.
- Set the Alarm on time, then press SELECT to enter the Alarm Wizard.
- Set the Duration: 15, 30, 45, 60, 90.
- Set the wake up source: DAB, FM, Buzzer.
- Set the alarm period: Daily, week days, weekends, once.
- Set the alarm sound level.
- The alarm bell symbol will also be displayed with number 1 next to it.
Setting alarm 2: Press the ALARM button, then repeat the instructions above.
Cancelling and deactivate the alarm
- Press Alarm button then select Alarm 1 or 2, choose Alarm on then press SELECT to confirm.
- Press the SNOOZE button to stop the alarm temporarily, the alarm will stop and ring up again after 9 minutes.
- Press STANDBY button to deactivate the alarm sound.
Environment Concerns

According to the European waste regulation 2002/96/EG this symbol on the product or on its packaging indicates that this product may not be treated as household waste. Instead it should be taken to the appropriate collection point for the recycling of electrical and electronic equipment. By ensuring this product is disposed of correctly, you will help prevent potential negative consequences for the environment and human health, which could otherwise be caused by inappropriate waste handling of this product. For more detailed information about recycling of this product, please contact your local council or your household waste disposal service.
This product is conform to the following European Directives:

1999/05/EG (R&TTE)
2011/65/EG (RoHS)