
A11s Pro - Robot vacuum ZACO - Free user manual and instructions
Find the device manual for free A11s Pro ZACO in PDF.

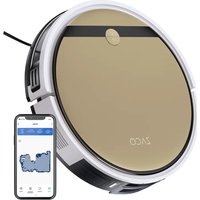
| Product type | Robot vacuum |
| Brand | ZACO |
| Model | A11s Pro |
| Dimensions (L x W x H) | 353 x 353 x 96 mm |
| Weight | 3.4 kg |
| Battery | Lithium-ion 5200 mAh |
| Runtime | About 150 minutes |
| Charging time | 250-300 minutes |
| Power | 50 W |
| Connectivity | Wi-Fi IEEE 802.11b/g/n 2.4 GHz |
| Cleaning functions | Spot cleaning, edge cleaning, MAX cleaning, daily scheduling, vibrating mop, zone and targeted cleaning |
| Navigation | Laser radar + 3D ToF sensor + visual recognition |
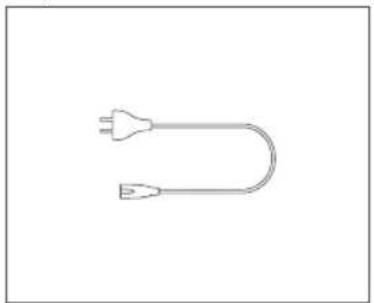
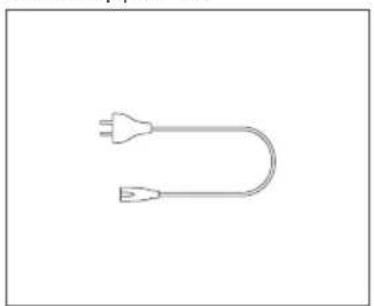
| Box contents | Robot, charging station, power cable, 2-in-1 water tank, mop holder, mop, user manual |
| Maintenance | Regular cleaning of dustbin, filter, brushes and sensors |
| Safety | Anti-drop sensors, Class 1 laser, collision sensor |
| Spare parts | Main brush, side brushes, water tank, filter, mop |
| Warranty | Contact ZACO customer service |
| Customer service | Toll-free number: 00800-42377961, email: support@zaco.eu |
Frequently Asked Questions - A11s Pro ZACO
User questions about A11s Pro ZACO
0 question about this device. Answer the ones you know or ask your own.
Ask a new question about this device
Download the instructions for your Robot vacuum in PDF format for free! Find your manual A11s Pro - ZACO and take your electronic device back in hand. On this page are published all the documents necessary for the use of your device. A11s Pro by ZACO.
USER MANUAL A11s Pro ZACO
Robot Vacuum Cleaner and mop
User Manual

natural_image
Top-down line drawing of a circular device with a central circular center and two small buttons on top (no text or symbols)English
Deutsch
Español
Français
Italiano
Find more information at
www.zaco.eu
ZACO
Dear Customer,
Thank you for purchasing ZACO A11s Pro robot vacuum cleaner! You are now part of the ZACO Family! You've joined the millions of people who clean with ZACO.
Please take a few moments to read this manual and get acquainted with your robot, to get the best performance from your robot. If you have any problem, please don't worry, please contact our customer service first or visit our website at www.zaco.eu for more information.
ZACO Customer Service
ZACO Customer Service
Customer Service Number
00800-42377961 (European Free Call)
0209-513038-38 (Direct Line - DE)
support@zaco.eu | www.zaco.eu
Robovox Distributions GmbH
Hamburger Straße 11 | 45889 Gelsenkirchen | Germany
Social Media

RobovoxZACO

zaco_robot

ACO Robot
Contents
Safety Instructions 4
Use Instructions 4
Battery and charging 6
Environmental Implications 6
Battery Removal 7
Product Overview 8
Box contents 8
Introduction of Robot and Accessories 9
Dustbin 10
2in1 Water tank 10
Mop plate 10
Charging station 11
Status of the robot 11
How to use 12
Charging station Installation 12
Install dustbin 13
Installation of clean water tank and mop 14
Operation 15
APP Download 19
Maintenance 20
Dustbin 20
2in1 Water tank 21
Main Brush & Side Brush 22
Troubleshooting 25
Product Specification 28
Frequency Band 29
EU Declaration of Conformity 29
Safety Instructions
WARNING
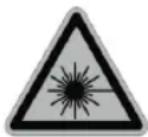
The Navigation Sensor contains a Class 1 rotating laser per IEC/EN 60825-1 during all procedures of operation.
- Never aim the laser at other people.
- Never look directly at the laser or reflected beam.
- Always switch the robot vacuum off during any maintenance tasks.
- Modifications (changes) or attempts to repair the robot vacuum cleaner or the navigation sensor are strictly prohibited and may result in hazardous exposure and loss of warranty.
Use Instructions
- The product is for home use only. Please do not use it in outdoor, non-floor, or commercial / industrial environments. This can impact the warranty.
- This product may not be used by people with physical, sensory, or intellectual disabilities and people without relevant experience and knowledge (including children), unless there is an adult present to ensure that they can use this product safely.
- Please do not allow children to play with the robot as a toy. When the robot is in operation, please make sure children and pets are as far away from the product as possible.
- If the power cable is broken, it must be replaced by the manufacturer or maintenance department.
- Please do not put children or pets or any objects on the robot at any time.
- Please make sure the cleaning brush remains inaccessible to children.
-
Please do not use the laser cover as a handle to lift the robot.
-
Please do not use the product in a suspended environment (such as double floors, open balconies, or tops of furniture) without protective rails or barriers.
- Please do not use the product when the ambient temperature is higher than 35^ C or lower than 0^ C or when the floor has any liquid or dope on it.
- Please do not use the robot to clean any object on fire.
- Before use, please remove or tidy all wires on the floor to avoid dragging during operation.
- Please remove fragile objects and sundries on the floor (such as vases, plastic bags, etc.) to avoid damaging the precious articles due to obstruction or mild collision during operation.
- Please do not use the mopping mode on carpet. When cleaning the floor, please set up virtual walls or no-go areas around the carpeted area.
- Please ensure the robot does not suck up rigid or sharp objects (e.g. decoration wastes, glasses, iron nails, etc.)
- Please clean and maintain the robot and the charging station when the power is off.
- Please do not put the robot upside down on the floor.
- Please follow the product manual or quick guide to use the product. In case of any loss due to improper use, the user shall take the consequences on his / her own.
- Before transportation, please make sure the robot is switched off.
Battery and charging
- Do not use any third-party battery or power cable.
- Do not disassemble, repair, or refit the battery or charging station yourself.
- Do not put the charging base near heat sources (radiators, etc.).
- Before scrapping the robot, turn the power off and remove the battery.
- If the product is to be stored for a long time, charge it fully and store in a dry area in the shade.
- It is recommended to charge it at least once every 3 months to avoid battery damage.
Environmental Implications
The chemicals contained in the built-in lithium-ion battery may pollute the environment. Before scrapping remove the battery and dispose of responsibly and carefully according to local rules and regulations.
Battery Removal
The instructions below apply only when storing the robotic vacuum cleaner. It is not for routine operations:
- Run the robot until the battery is too low to work.
- Switch off.
- Remove the bottom shell of the robotic vacuum cleaner.
- Press the buckle to pull out the connector plug and remove the battery.
Note
- Please remove the entire the battery pack as a whole and avoid damaging its shell in case of short circuits or hazardous substance leakage.
- If the battery leaks and the user is accidentally exposed to it, please rinse with a large amount of water immediately and seek medical advice.
Product Overview
Box contents
natural_image
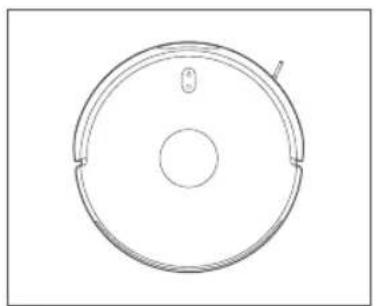
Simple line drawing of a circular device with a central hole and a small protrusion (no text or symbols)Robot

natural_image
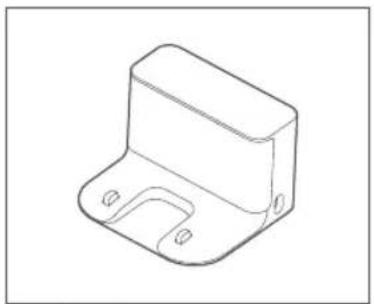
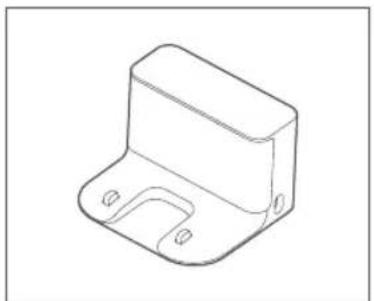
Line drawing of a 3D mechanical bracket component (no text or symbols)Charging Station
natural_image
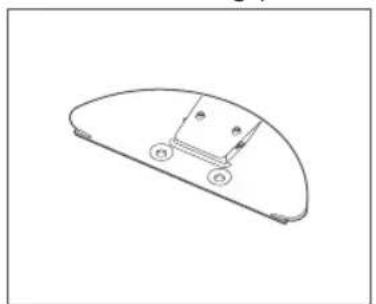
Line drawing of a mechanical component with a flanged body and mounting holes (no text or symbols)2in1 Water Tank

natural_image
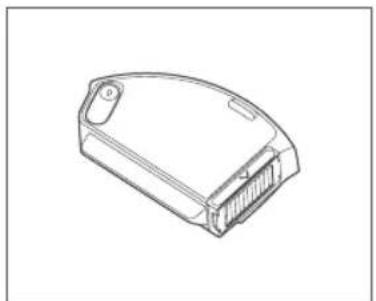
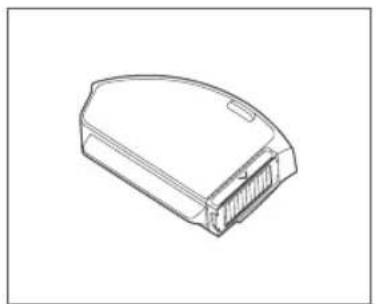
Line drawing of a rectangular electronic component with a recessed top and side slots (no text or symbols)Dustbin
natural_image
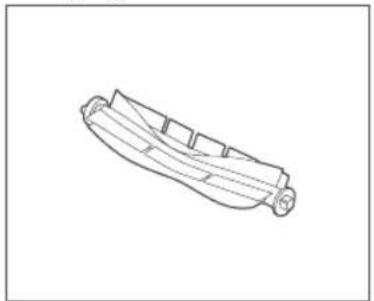
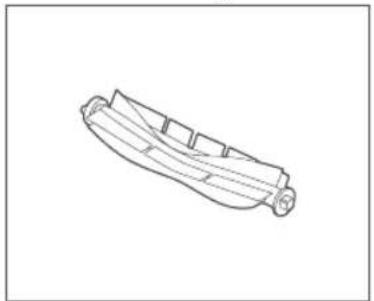
Line drawing of a boat hull with visible ribs and hull, no text or symbols presentMain Brush

natural_image
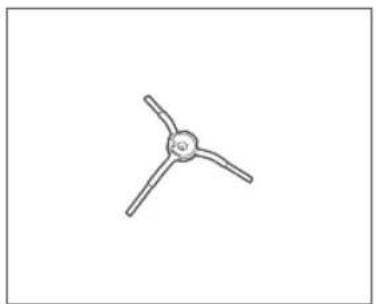
Simple line drawing of a three-blade propeller (no text or symbols)Side Brush
natural_image
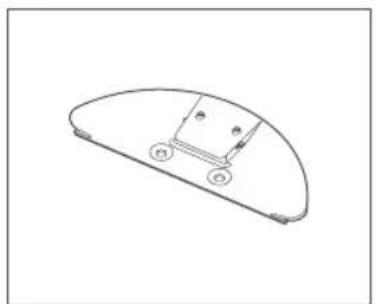
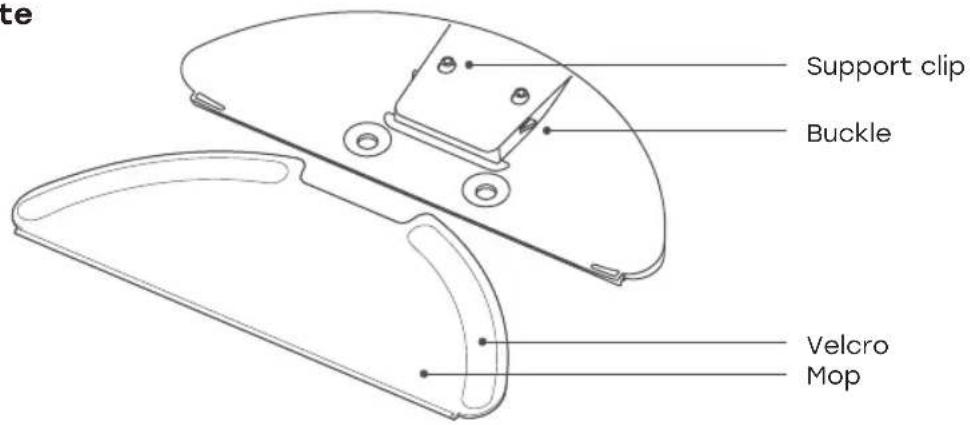
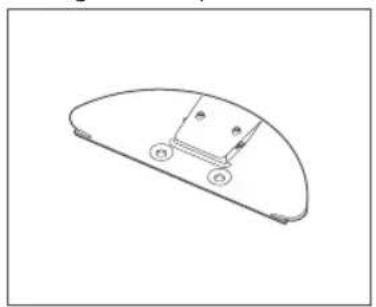
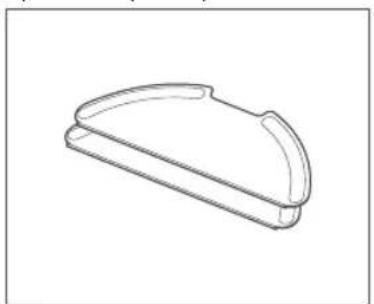
Simple line drawing of a curved mechanical component with labeled parts (no text or symbols)Mop Plate

natural_image
Simple line drawing of a curved mechanical component or bracket (no text or symbols)Mop 2x

natural_image
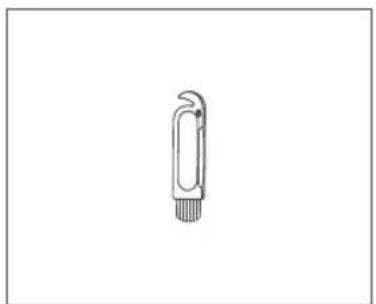
Simple line drawing of a mechanical clip or connector (no text or symbols)Cleaning tool
User manual
natural_image
Simple line drawing of a U-shaped electrical plug (no text or symbols)Power cable
Product Overview
Introduction of Robot and Accessories

Product Overview
Dustbin

2in1 Water tank

Mop plate
Product Overview
Charging station
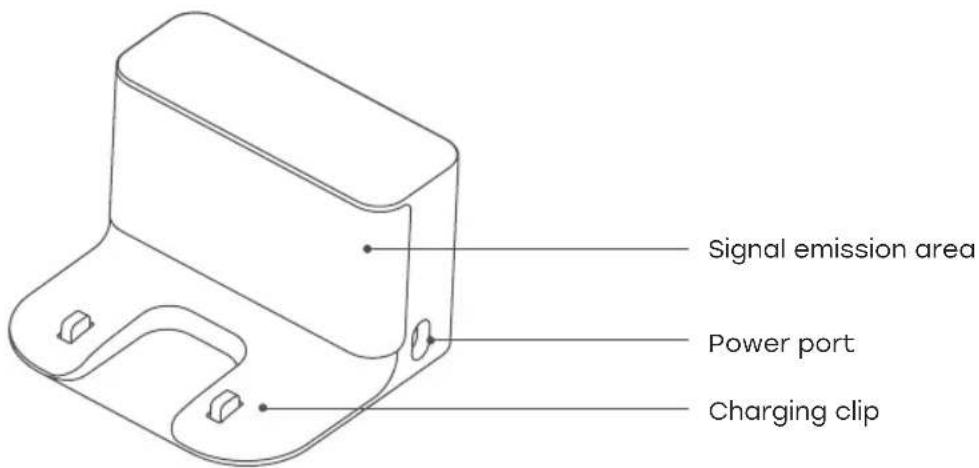
Status of the robot
| Light signal Solution | |
| Yellow light is constantly on Wi-Fi is not connected | |
| Yellow light is pulsing Charging (battery <15 %) | |
| Yellow light is pulsing | Low battery/abnormal/Wi-Fi needs to be connected |
| Blue light is blinking Wi-Fi disconnected when | battery is full |
| White light is constantly on | Start complete/working normally /charging complete / Wi-Fi connected |
| White light is pulsing | Charging (battery ≥15 %) /firmware refreshing |
| White light is blinking Returning (battery >15 %) |
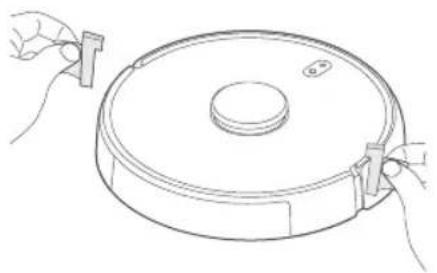
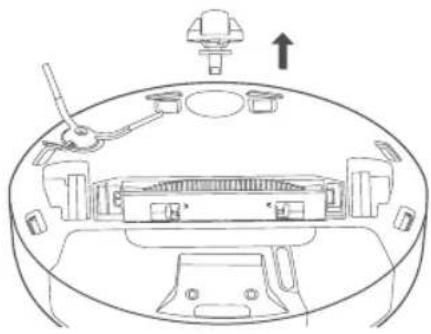
How to use
Install Charging station
- Place the charging base against the wall and insert the power cable as shown.

Note
- Please do not expose the charging base to direct sunlight.
- Make sure there is a room of at least 1.5m to the front and at least 0.5m to both sides of the charging base.
-
Safely store the power cable in a tidy way; or it might be dragged by the robot and cause displacement or power-off.
-
Remove the anti-collision bars.
natural_image
Line drawing of a circular device with two hands adjusting its top edge (no text or symbols)How to use
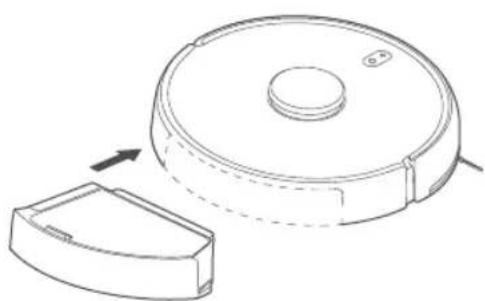
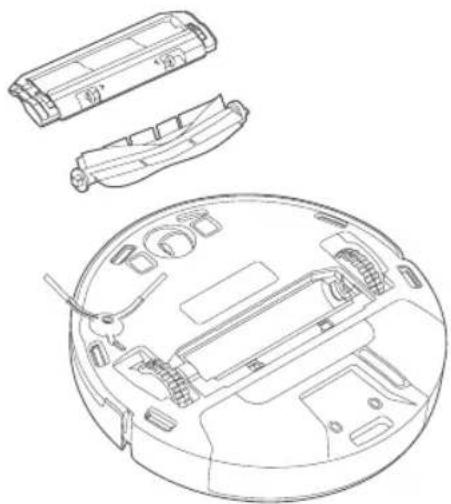
Install Dustbin
- Push the dustbin horizontally into the robot. It is installed in place when you hear a "click".
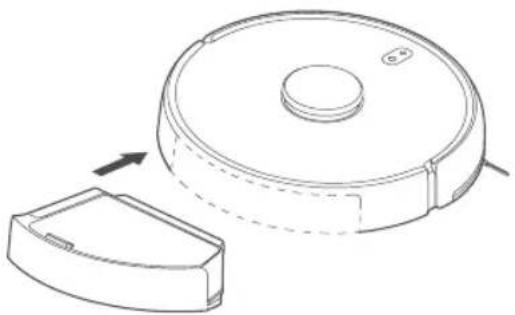
natural_image
Line drawing of a robotic vacuum cleaner with a side panel and circular housing (no text or symbols)Note
-
Installation of either a dustbin or a water tank will enable operation. It will not operate without one.
-
Clean the dust collector or water tank on a regular basis to avoid stains and maintain top cleaning performance.
How to use
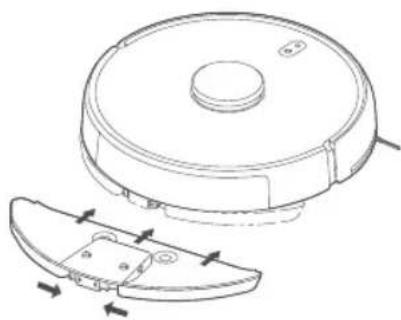
Installation of clean water tank and mop
- Open the cover of the water tank and fill water in it. Then close the tank cover.
natural_image
Line drawing of a mechanical device casing with ports and mounting features (no text or symbols)Note
-
Please fill the water tank with tap water.
-
Do not rinse or soak the water tank. Do not use detergent, disinfectant, solid detergent, or other cleaning products on it to avoid corrosion or damage.
-
Push the water tank horizontally into the robot. It is in place when you hear a "click".
natural_image
Line drawing of a robotic vacuum cleaner with a side view showing internal components (no text or symbols)How to use
Installation of clean water tank and mop
- Insert the mop along the slot on the mop plate and attach it to the velcro.

natural_image
Line drawing of hands holding a device with a curved handle and a car outline, no text or symbols present- Hold two release buttons on the mop plate and push it into the bottom of the water tank horizontally in accordance with the direction demonstrated below.
natural_image
Technical line drawing of a robotic vacuum cleaner with internal components and mounting features (no text or symbols)Note
-
Please set virtual walls or no-go areas around the carpeted area when mopping.
-
Please clean up the water, if any, on the ground before sweeping mopping.
-
You can set up the level of water to be used in the APP based on actual demands.
How to use
Operation
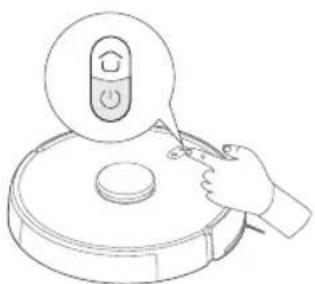
1. Power On/Off
Press and hold the "○" until the robot turns on or off.
natural_image
Line drawing of a hand using a vacuum cleaner to clean a circular object (no text or symbols)2. Sweeping & Mopping
When the robot is switched on, press “💡 and the robot will automatically enter the cleaning mode in accordance with the different accessories installed.
3. Pause
Press the " 🔊 " button to pause cleaning or continue cleaning.
4. Memory map
The robot will save a map to your APP automatically after it has successfully completed a cleaning run and returned to the base for recharging.
5. Vibration Mop Mode
The vibrating mopping mode is activated by default in the APP. This mode will provide greater cleaning performance.
6. Mode / Level Selection
Activate electrolysis mode from the APP to customize the cleaning / sterilization effect. Other cleaning modes and water distribution amounts are customizable to.
How to use
Operation
7. Do-not-disturb Mode (DND)
When in DND mode the robot will not function or clean. The default DND setting is on from 23:00 to 9:00. User may customize the DND mode from the APP.
8. Default Cleaning
If no map is saved, select the default cleaning mode. The robot will clean up in square zones of 6m x 6m. After a map is saved in the APP, activate default cleaning, and the robot will automatically plan a route to clean room by room, and return to the charging base when it finishes.
9. Edgewise Cleaning
If edgewise cleaning is activated from the APP and after the robot has automatically identified the area to be cleaned, it will perform edgewise cleaning. After the cleaning has finished, it will automatically return to the charging base.
10. Targeted Cleaning
Choose “Targeted Cleaning” mode from the APP. Define a target point you want to clean in the map. The robot will automatically plan a route to the target point and clean an area of 2m x 2m.
11. Area-based Cleaning
You can set up area-based cleaning from the APP. The robot will clean based on the defined areas.
Note
During cleaning, the robot may move beyond the planned area. Please remove any obstacle on the floor around the planned area since area planning cannot safely restrict the robot's movements.
How to use
Operation
12. Scheduled Cleaning
You can schedule cleaning to start at a certain time from the APP. The robot will automatically start at the scheduled timing to clean and return to the charging base after it has finished.
Note
If the DND mode is activated, scheduled cleaning will be disabled during the DND period.
13. Virtual Walls / No-go Areas
Use APP to set up virtual walls or no-go areas to prevent the robot from entering undesired areas.
Note
- A map should be saved in APP before you may use the function.
- Moving the robot or significantly changing the home environment might invalidate the original map and cause the virtual walls or no-go areas to be missing.
14. Intelligent Identification
The product can automatically identify bedroom, living room, kitchen, restroom, and other scenarios. It can also identify the floor material for better cleaning.
APP Download
1. ZACO Home App
Scan the QR code below to download and install the APP.


ZACOHome APP


ZACOHome APP
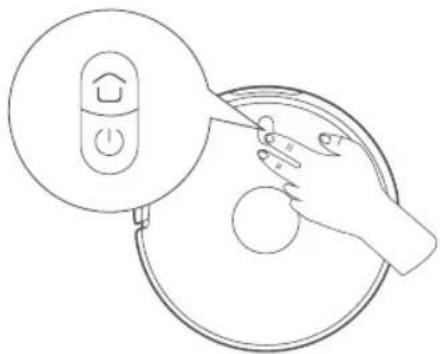
2. Network configuration
Press and hold the ⏻ and buttons for 7s to access pairing mode with the network.
natural_image
Line drawing of a hand holding a circular device with a button labeled 'Home' and a power button, no text or symbols present.3. Network configuration
Please check that your Wi-Fi name does not contain any special characters.
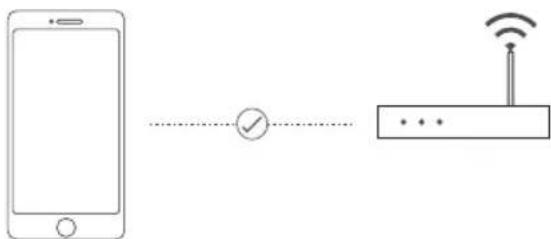
flowchart
graph LR
    A["Smartphone"] --> B{Checkmark}
    B --> C["Router"]
    C --> D["Wireless Signal"]
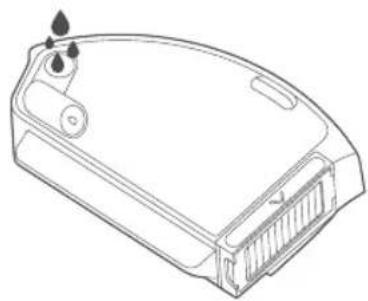
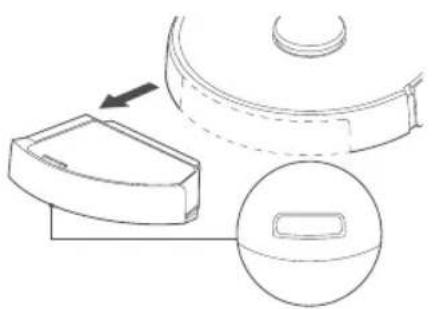
Maintenance
Dustbin
-
Hold the release button on the dustbin and remove it from the bottom of the robot.
-
Tilt the robot in the direction shown above to remove the parts from the dustbin.
natural_image
Technical line drawing of a mechanical component with a circular base and an arrow indicating direction (no text or symbols)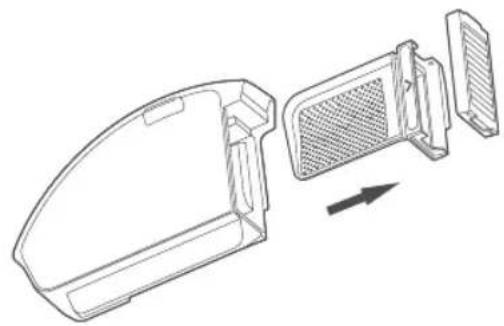
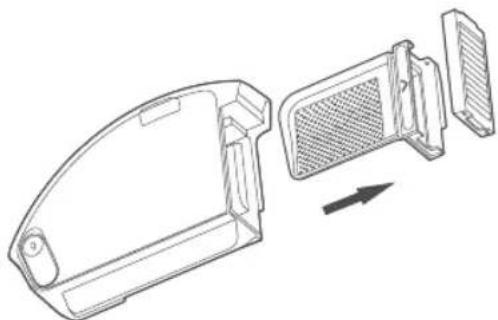
natural_image
Technical line drawing of a device casing with internal components and an arrow indicating direction (no text or symbols)- Empty the waste from the dustbin and use the cleaning brush to clean up the dustbin, filter, and mesh. Wash it with clean water. Put it back after it has dried.

natural_image
Three-step illustration showing a kitchen cleaning process: dropping into a bowl, pouring liquid into a grater, and adding granular material into a container (no text or symbols)Note
It is recommended to clean up the dustbin thoroughly at least once per week. Please dry (for at least 24h) the dustbin, filter, and mesh before using them again.
Maintenance
2in1 Water tank
- Tilt the robot as shown above to remove the parts from the 2in1 water tank.
natural_image
Technical line drawing of a device housing with internal components and an arrow indicating direction (no text or symbols)- Empty the waste from the 2in1 water tank and clean it up with a cleaning brush. Open the tank cover to pour out the residual water.

natural_image
Two technical line drawings showing a device being poured into a container, with no visible text or symbols.- Clean the filter and the mesh with a cleaning brush and water. Dry thoroughly (for at least 24 hours) before reinstalling.

natural_image
Illustration showing a hand pouring liquid into a container and another faucet pouring liquid into a gridded dish (no text or symbols)Maintenance
Main Brush & Side Brush
Main brush

natural_image
Technical line drawing of a circular mechanical device with internal components and mounting holes (no text or symbols)- Turn the robot upside down and hold both release buttons to remove the main brush cover.
- Pull the main brush upwards.
- Use the knife on the cleaning tool to cut off any hair and dirt attached.
- Restore the main brush and its cover. Press the main brush cover to fix it in place.
Side brush

natural_image
Line drawing of a hand using a tool to press down an electronic device component (no text or symbols)- Turn the robot upside down and remove the screw on the side brush.
- Remove and clean up the side brush.
- Restore the side brush and fasten the screw.
Maintenance
Main Brush & Side Brush
Front wheel
natural_image
Top-down schematic of a vehicle dashboard with no visible text or symbols-
Turn over the robot and pull the front wheel upwards to remove.
-
Clean and then reinstall the front wheel.
Cliff sensors

natural_image
Technical line drawing of a circular device interior with internal components and three circular insets showing different parts (no text or symbols)- Clean the cliff sensors with soft and dry cloth at least every month.
Maintenance
Main Brush & Side Brush
3D ToF sensor, visual identity sensor and IR-edge sensor

natural_image
Line drawing of a robotic vacuum cleaner with a hand adjusting its lid (no text or symbols)- These sensors will get dirty from time to time and will need to be cleaned. Use a soft and clean cloth at least once per month to maintain optimum performance.
Note
- Do not use detergent or spray or other chemicals for cleaning.
- The AI algorithm can directly identify image objects on the robot and will not upload them to the cloud due to privacy concerns.
Troubleshooting
| Fault Message Solution | |
| Unable to turn on the robot Low battery; please charge it full before use. | |
| Unable to start cleaning Low battery; please charge it full before use. | |
| Unable to return 1. Too many barriers around charging station. Place charging station as described earlier in this manual.2. The robot is too far away from charging station. Place robot near the charging station and try again. | |
| Abnormal operations Please shut down and restart the robot. | |
| Strange noise when cleaning Exterior parts might have been attached to the main brush, side brush, or left / right wheel. Please turn the robot off and clean it. | |
| Cleaning effect reduces or dirt leaks 1. The dustbin is full. Please clean up the dustbin.2. The mesh is blocked. Please clean it up.3. The brush is attached by exterior parts. Please clean it up. | |
| The robotic vacuum cleaner is offline 1. Weak Wi-Fi signals. Make sure the robot is in range of the Wi-Fi signal and check your network settings.2. Reset Wi-Fi connection, download the latest APP and try again. | |
| Unable to resume cleaning after stopping 1. Please confirm the robot is not in DND mode.2. The robot will not resume cleaning when a return command is given, when the re-turn button is pressed, or when the robot is placed back at the charging base. | |
Troubleshooting
| Unable to charge Make sure there is enough | space aroundthe charging station and there is no dust or obstacle on the surface of charging station contact points. |
| Scheduled cleaning does not work 1. Please | confirm the robot is connectedto the internet. If not, the timed cleaning task may not be synchronized.2. Please confirm the robot is not in DND mode, or it will not support scheduled cleaning. |
| The robot is always offline Please make sure | the robot is success-fully connected to the Internet, and within Wi-Fi coverage. |
| Unable to connect to APP Please make sure | the charging sta-tion and the robot are in range of Wi-Fi coverage with a good signal. Reset Wi-Fi in accordance with the manual and try again. |
| Please confirm the laser sensor is unblocked and start the robot | The laser sensor is blocked or stuck by exterior parts. Please carefully remove the blockage or exterior parts. If not possible, please move the robot to a new place and start it again. |
| Please clean the cliff sensor and move the robot to a new place and start it again | The robot is suspended in the air. Please move it to a new place and start it again. If the cliff sensor is too dirty, it may cause the fault, too. Please wipe the cliff sensor clean. |
| Please check and clean up exterior parts in the collision sensor | The collision sensor is blocked. Please tap it multiple times to remove the exterior parts. Please move the robot to a new place and start it again. |
| Please start the robot on horizontal floor The | robot is not on a flat surface. Please put the robot on a flat surface and start it again; or restart it after it is levelled on APP. |
Troubleshooting
| Please confirm the dustbin is fixed in place | The dustbin is not in place. Please rein-stall it and make sure it is in place. |
| Please remove the obstacles around the robot and try again | The robot might be stuck or trapped. Please remove all obstacles around it. |
| Please wipe the IR edge sensor The IR edge sensor might be dirty. Please wipe them clean. | |
| Please confirm the visual identity sensor is unblocked | The visual identity sensor is blocked by an object. Please remove the blockade. |
| Please confirm the water tank is installed properly | Please fix the water tank back in place and fasten the buckle. |
| Please confirm the mop is installed properly | Please check the mop support and the mop and fasten the buckle. |
| Please place the robot back to the charging station | The robot cannot sense the charging station. Please place it back at the charging station and review charge station location. |
| Low battery. Please charge. The battery is too low. The robot cannot start automatically. Please place it back at the charging station. | |
Product Specification
A11s Pro
| Classification Item Detail | ||
| Mechanical specifications Size 353 x 353 x 96 mm | ||
| Weight 3,4 kg | ||
| Electrical specifications Power 50 W | ||
| Battery type 5200 mAh | ||
| Charging type Auto charging | ||
| Cleaning specifications Cleaning | mode Spot, Edge, MAX, Daily schedule | |
| Charging time 250-300 Min | ||
| Cleaning time ≈ 150 Min | ||
| Main Body Button Type - | Mechanical button | |
| Wireless connection | - | Wi-Fi IEEE 802.11b/g/n2.4GHz |
Frequency Band
Frequency Band and Output Power
| TX Frequency 2.4 ~ 2.4835 GHz | |
| RX Frequency 2.4 ~ 2.4835 GHz | |
| Antenna Gain 2.6 dBi | |
| RF Output Power | 802.11b 17+-2 dBm802.11g 17+-1.5 dBm802.11n 16+-1.5 dBm |
EU Declaration of Conformity
Robovox Distributions GmbH hereby declares that the ZACO A11s Pro radio complies with Directive 2014/53/EU.
The full text of the EU Declaration of Conformity can be found on the Internet address https://conformity.zaco.eu/download/A11sPro.pdf
ZACO Customer Service
Customer Service Number
natural_image
Simple line drawing of a circular device with a central hole and a small protrusion (no text or symbols)Roboter

natural_image
Line drawing of a 3D mechanical bracket component (no text or symbols)Ladestation

natural_image
Line drawing of a mechanical component with no visible text or symbols2in1 Wassertank
natural_image
Line drawing of a rectangular electronic component or housing (no text or symbols)Staubtank

natural_image
Line drawing of a boat hull with visible ribs and hull edges (no text or symbols)Hauptbürste
natural_image
Simple line drawing of a three-bladed propeller or fan (no text or symbols)Seitenbürste

natural_image
Simple line drawing of a curved mechanical component with two circular features and a small protrusion (no text or symbols)Wischplatte

natural_image
Simple line drawing of a mechanical component or bracket (no text or symbols)Wischlappen 2x

natural_image
Simple line drawing of a mechanical clip or connector (no text or symbols)Reinigungswerkzeug

Bedienungsanleitung
natural_image
Simple line drawing of a U-shaped electrical plug with two leads (no text or symbols)Netzkabel
Produktübersicht
natural_image
Line drawing of a circular device with hands adjusting its top edge (no text or symbols)Verwendung
natural_image
Line drawing of a robotic vacuum cleaner with a side panel and arrow indicating motion (no text or symbols)Anmerkung
natural_image
Line drawing of a mechanical device with ports and a base (no text or symbols)Anmerkung
natural_image
Line drawing of a robotic vacuum cleaner with a side view showing the lid and base (no text or symbols)Verwendung
natural_image
Line drawing of hands holding a device with a curved handle and a magnified view showing internal components (no text or symbols)natural_image
Technical line drawing of a robotic vacuum cleaner with internal components and directional arrows indicating assembly (no text or symbols)Anmerkung
natural_image
Line drawing of a hand using a vacuum cleaner to clean a circular object (no text or symbols)
ZACOHome APP
natural_image
Line drawing of a hand using a tool to clean or inspect a circular component with a control knob (no text or symbols)natural_image
Technical line drawing of a mechanical component with a circular base and an arrow indicating direction (no text or symbols)
natural_image
Technical line drawing of a device casing with internal components and an arrow indicating direction (no text or symbols)natural_image
Three-step illustration showing a kitchen tool pouring food into a bowl, a water tap pouring liquid into a grater, and a hand using a brush to add granular material into a bowl (no text or symbols)Anmerkung
natural_image
Technical line drawing of a device housing with internal components and an arrow indicating direction (no text or symbols)natural_image
Two technical line drawings showing a device being poured into a container, with no visible text or symbols.natural_image
Illustration showing a hand pouring liquid into a container, and a faucet pouring liquid into a grater (no text or symbols)Pflege
natural_image
Technical line drawing of a circular device with internal components and a separate view (no text or symbols)natural_image
Line drawing of a hand using a tool to press or install electronic components on a device (no text or symbols)natural_image
Top-down schematic of a vehicle dashboard with no visible text or symbolsnatural_image
Technical line drawing of a circular device interior with internal components and three circular insets showing different parts (no text or symbols)natural_image
Line drawing of a robotic vacuum cleaner with a hand adjusting its lid (no text or symbols)natural_image
Simple line drawing of a circular device with a central hole and a small protrusion (no text or symbols)Robot

natural_image
Line drawing of a 3D mechanical bracket component (no text or symbols)Estación de carga

natural_image
Line drawing of a mechanical component with no visible text or symbolsnatural_image
Line drawing of a rectangular electronic component or housing (no text or symbols)Recogedor de polvo

natural_image
Line drawing of a boat hull with visible ribs and hull, no text or symbols presentCepillo principal

natural_image
Simple line drawing of a three-blade propeller or fan (no text or symbols)Cepillo lateral
natural_image
Simple line drawing of a curved mechanical component with two circular features and a small protrusion (no text or symbols)Placa de la mopa

natural_image
Simple line drawing of a curved mechanical component or bracket (no text or symbols)Mopa 2x

natural_image
Simple line drawing of a mechanical component with a curved handle and threaded base (no text or symbols)natural_image
Simple line drawing of a U-shaped electrical plug (no text or symbols)natural_image
Line drawing of a circular device with a lid and two hands adjusting its side (no text or symbols)Modo de uso
natural_image
Line drawing of a robotic vacuum cleaner with a side panel and circular housing (no text or symbols)Nota
natural_image
Line drawing of a mechanical device with no visible text or symbolsNota
natural_image
Line drawing of a robotic vacuum cleaner with a side view showing the lid and base (no text or symbols)Modo de uso
Installation of clean water tank and mop
natural_image
Line drawing of hands holding a car interior panel with an arrow indicating direction (no text or symbols)natural_image
Technical line drawing of a robotic vacuum cleaner with internal components and external housing (no text or symbols)Nota
natural_image
Line drawing of a hand using a vacuum cleaner to clean a circular object (no text or symbols)
ZACOHome APP
natural_image
Line drawing of a hand using a power button to interact with a circular device (no text or symbols)natural_image
Technical line drawing of a mechanical component with a circular base and an arrow indicating direction (no text or symbols)
natural_image
Technical line drawing of a device casing with internal components and an arrow indicating direction (no text or symbols)natural_image
Three-step illustration showing a kitchen cleaning process: pouring powder into a bowl, pouring liquid into a grater, and using a tool to remove granules in a bowl (no text or symbols)Nota
natural_image
Technical line drawing of a device casing with internal components and an arrow indicating assembly (no text or symbols)natural_image
Diagram showing two mechanical components pouring particles into a container (no text or symbols)natural_image
Illustration showing a hand pouring granular material into a bowl, and a faucet pouring liquid into a grater (no text or symbols)Mantenimiento
Cepillo principal y cepillo lateral
Cepillo principal
natural_image
Technical line drawing of a circular mechanical device with internal components and mounting holes (no text or symbols)natural_image
Line drawing of a hand using a tool to press down an electronic device component (no text or symbols visible)natural_image
Top-down schematic of a vehicle dashboard with no text or symbolsnatural_image
Technical line drawing of a circular device interior with internal components and three circular insets showing different parts (no text or symbols)natural_image
Line drawing of a robotic vacuum cleaner with a hand adjusting its lid (no text or symbols)Introduction of Robot and Accessories 9
Station de charge 12
EU Declaration of Conformity 29
natural_image
Simple line drawing of a circular device with a central hole and a small protrusion (no text or symbols)Robot
natural_image
Line drawing of a 3D mechanical bracket component (no text or symbols)Station de chargement

natural_image
Line drawing of a mechanical component with no visible text or symbolsnatural_image
Line drawing of a rectangular electronic component with a recessed top and side slots (no text or symbols)Bac de récupération
natural_image
Line drawing of a boat hull with visible ribs and hull edges (no text or symbols)Brosse principale

natural_image
Simple line drawing of a three-blade propeller or fan (no text or symbols)Bosse latérale

natural_image
Simple line drawing of a curved mechanical component with labeled parts (no text or symbols)natural_image
Simple line drawing of a curved mechanical component or bracket (no text or symbols)Serpillère 2x
natural_image
Simple line drawing of a mechanical component with a curved handle and flange (no text or symbols)Outils de nettoyage

natural_image
Simple line drawing of a U-shaped electrical plug (no text or symbols)Introduction of Robot and Accessories

natural_image
Line drawing of a circular device with two hands adjusting its top edge (no text or symbols)Mode d'emploi
natural_image
Line drawing of a robotic vacuum cleaner with a side panel and arrow indicating motion (no text or symbols)Note
natural_image
Line drawing of a mechanical device with ports and a base (no text or symbols)Note
natural_image
Line drawing of a robotic vacuum cleaner with a side view showing the lid and base (no text or symbols)Mode d'emploi
natural_image
Line drawing of hands holding a car interior panel with an arrow indicating direction (no text or symbols)natural_image
Technical line drawing of a robotic vacuum cleaner with internal components and external housing (no text or symbols)Note
natural_image
Line drawing of a hand using a vacuum cleaner to clean a circular object (no text or symbols)2. Balayage & serpillère

ZACOHome APP
natural_image
Line drawing of a hand holding a circular device with a control panel and a magnifying glass (no text or symbols)natural_image
Technical line drawing of a mechanical component with a circular base and an arrow indicating direction (no text or symbols)
natural_image
Technical line drawing of a device casing with internal components and an arrow indicating direction (no text or symbols)natural_image
Three-step illustration showing a kitchen cleaning process: dropping into a bowl, pouring liquid into a grater, and adding granular material into a container (no text or symbols)Note
natural_image
Technical line drawing of a device housing with internal components and an arrow indicating direction (no text or symbols)natural_image
Two technical line drawings showing a device being poured into a container, with no visible text or symbols.natural_image
Illustration showing a hand pouring liquid into a container and another faucet pouring liquid into a gridded dish (no text or symbols)Maintenance
natural_image
Technical line drawing of a circular device with internal components and a separate view (no text or symbols)natural_image
Line drawing of a hand using a tool to press or install electronic components on a device (no text or symbols visible)natural_image
Top-down schematic of a vehicle dashboard with no visible text or symbolsnatural_image
Technical line drawing of a circular device interior with internal components and three circular insets showing different parts (no text or symbols)natural_image
Line drawing of a robotic vacuum cleaner with a hand adjusting its lid (no text or symbols)natural_image
Simple line drawing of a circular device with a central hole and a small protrusion (no text or symbols)Robot
natural_image
Line drawing of a 3D mechanical bracket component (no text or symbols)natural_image
Line drawing of a mechanical component or housing (no text or symbols)natural_image
Line drawing of a rectangular electronic component or housing (no text or symbols)natural_image
Line drawing of a mechanical component or housing (no text or symbols)Spazzola principale

natural_image
Simple line drawing of a three-bladed propeller or fan (no text or symbols)Spazzola laterale
natural_image
Simple line drawing of a curved mechanical component with labeled parts (no text or symbols)Piastra per mocio
natural_image
Simple line drawing of a curved mechanical component or bracket (no text or symbols)Mocio 2x

natural_image
Simple line drawing of a mechanical component with a curved handle and flange (no text or symbols)natural_image
Simple line drawing of a U-shaped cable with two leads (no text or symbols)natural_image
Line drawing of a circular device with two hands adjusting its top edge (no text or symbols)natural_image
Line drawing of a robotic vacuum cleaner with a side panel and arrow indicating rotation (no text or symbols)Nota
natural_image
Line drawing of a mechanical device casing with ports and mounting features (no text or symbols)Nota
natural_image
Line drawing of a robotic vacuum cleaner with a side view showing internal components (no text or symbols)natural_image
Line drawing of hands holding a device with a curved handle and a car outline, no text or symbols presentnatural_image
Technical line drawing of a robotic vacuum cleaner with internal components and mounting features (no text or symbols)Nota
natural_image
Line drawing of a hand using a vacuum cleaner to clean a circular object (no text or symbols)natural_image
Line drawing of a hand using a power tool to clean a circular device with a home control icon (no text or symbols)natural_image
Technical line drawing of a mechanical component with an arrow indicating direction (no text or symbols)
natural_image
Technical line drawing of a device casing with internal components and an arrow indicating direction (no text or symbols)natural_image
Three-step illustration showing a kitchen tool pouring food into a bowl, a drain pouring liquid with a faucet, and a hand using a brush to add granular material into a bowl (no text or symbols)Nota
natural_image
Technical line drawing of a device housing with internal components and an arrow indicating direction (no text or symbols)natural_image
Two technical line drawings showing a device being poured into a container, with no visible text or symbols.natural_image
Illustration showing a hand pouring liquid into a container and another faucet pouring liquid into a gridded dish (no text or symbols)Manutenzione
natural_image
Technical line drawing of a circular device with internal components and a separate view (no text or symbols)natural_image
Line drawing of a hand using a tool to press or install electronic components on a device (no text or symbols visible)natural_image
Top-down schematic of a vehicle dashboard with no text or symbolsnatural_image
Technical line drawing of a circular device interior with internal components and three circular insets showing different parts (no text or symbols)natural_image
Line drawing of a robotic vacuum cleaner with a hand adjusting its lid (no text or symbols)

- User Manual
- Dear Customer,
- ZACO Customer Service
- Contents
- Safety Instructions
- WARNING
- Use Instructions
- Battery and charging
- Environmental Implications
- Battery Removal
- Note
- Product Overview
- How to use
- Install Charging station
- Install Dustbin
- Installation of clean water tank and mop
- Operation
- Power On/Off
- Sweeping & Mopping
- Pause
- Memory map
- Vibration Mop Mode
- Mode / Level Selection
- Do-not-disturb Mode (DND)
- Default Cleaning
- Edgewise Cleaning
- Targeted Cleaning
- Area-based Cleaning
- Scheduled Cleaning
- Virtual Walls / No-go Areas
- Intelligent Identification
- APP Download
- ZACO Home App
- Network configuration
- Network configuration
- Maintenance
- Dustbin
- 2in1 Water tank
- Main Brush & Side Brush
- Main brush
- Side brush
- Front wheel
- Cliff sensors
- Product Specification
- Frequency Band
- EU Declaration of Conformity
- Customer Service Number
- Produktübersicht
- Verwendung
- Anmerkung
- Pflege
- Modo de uso
- Nota
- Mantenimiento
- Cepillo principal y cepillo lateral
- Cepillo principal
- Mode d'emploi
- Balayage & serpillère
- Manutenzione
Brand : ZACO
Model : A11s Pro
Category : Robot vacuum