
V4 Max - Robot vacuum ZACO - Free user manual and instructions
Find the device manual for free V4 Max ZACO in PDF.


| Product type | Robot vacuum |
| Brand | Zaco |
| Model | V4 Max |
| Dimensions (L x W x H) | 34 x 34 x 9.5 cm |
| Weight | 3.5 kg |
| Power | Li-ion battery 14.4 V / 2600 mAh |
| Runtime | Up to 120 minutes |
| Charging time | About 5 hours |
| Dust bin capacity | 600 ml |
| Suction power | 2200 Pa |
| Noise level | About 55 dB |
| Navigation | Gyroscope and infrared sensors |
| Main functions | Automatic cleaning, scheduling, return to base |
| Cleaning modes | Random, spiral, along walls |
| Sensors | Anti-drop, anti-collision, dirt sensor |
| Maintenance and cleaning | Washable HEPA filter, removable brushes |
| Safety | Automatic shutdown in case of overheating, anti-drop protection |
| Spare parts and repairability | Brushes, filters, battery available online |
| Included accessories | Charging station, adapter, side brush, replacement filter |
| Warranty | 2 years |
Frequently Asked Questions - V4 Max ZACO
User questions about V4 Max ZACO
0 question about this device. Answer the ones you know or ask your own.
Ask a new question about this device
Download the instructions for your Robot vacuum in PDF format for free! Find your manual V4 Max - ZACO and take your electronic device back in hand. On this page are published all the documents necessary for the use of your device. V4 Max by ZACO.
USER MANUAL V4 Max ZACO
Robot Vacuum Cleaner
User Manual

natural_image
Pure diagram of a circular device with a play button and double arrow, no text or symbols presentEN English
DE Deutsch
ES Español
FR Français
IT Italiano
Dear Customer,
thank you for choosing the ZACO V4 Max robotic vacuum cleaner! You are now among the millions of people who clean with robots – the smarter way to get things done.
Please take a few minutes to read this manual and familiarize yourself with your robot so you can get the best performance out of it. If you have a problem, please contact the ZACO customer service first or visit our website www.zaco.eu for more information.
Best regards,
ZACO Customer Service
ZACO Customer Service
Customer Service Number
00800-42377961 (European Free Call)
0209-513038-38 (Direct Line - DE)
support@zaco.eu | www.zaco.eu
Robovox Distributions GmbH
Hamburger Straße 11 | 45889 Gelsenkirchen | Germany
Social Media

RobovoxZACO zao_robot ZACO Robot
Contents
Safety instructions 4
Warnings 4
Product Composition 6
Scope of delivery 6
V4 Max Introduction 7
Robot button status 7
Dustbin 9
Charging Station 9
Product Operation 10
Remote Control Operating 10
Selecting Cleaning Modes 13
Placement of Charging Station 15
Starting up / Pause / Sleep 17
Scheduling 18
App Download & Connection 19
Maintenance 21
Troubleshooting 23
Product Specification 24
ErP information 25
Frequency Band 26
EU Declaration of Conformity 26
Safety instructions
Warnings
- This robot must not be used by children under the age of 8 years or mentally handicapped persons if they are not supervised. Children must not sit on the robot or use it as a toy.
- Attend to the robot immediately if an error occurs during cleaning. Before using the robot, remove all power cords and small objects on the floor. Tuck the fringes under the carpet and make sure that curtains and tablecloths do not come in contact with the floor.
- If there are hanging steps or stairs, please test whether the robot can detect them before use. If not, please set up barriers to avoid falling and make sure that the barriers cause no harm to people.
- Follow the instructions in this user manual. Only use accessories approved or recommended by the manufacturer.
- Make sure that the voltage of the charging station is compatible with the voltage of the power supply.
- Use the robot indoor and in a domestic environment only. Do not use it outdoors or in commercial or industrial spaces.
- Only use adapters and charging stations approved by the manufacturer. Do not use non-rechargeable batteries. Details of the battery standards can be found in the "Product specifications" section.
- Do not immerse the robot in water or rinse it under the water tap.
- Do not clean the robot with a dripping wet cloth.
- Do not use the robot on floors with standing water.
- Do not use the robot near fire or fragile objects.
- Keep cloth, human hair, fingers and other body parts away from the suction opening and drive system of the robot.
Safety instructions
- Do not use the robot on floors with decorative stones or whether there is a lot of paper lying around so that these do not get stuck and damage the robot.
- Do not use the robot in areas with flammable substances such as petrol, toner, etc. Also, do not use the robot to clean up burning objects such as cigarettes, ashes or matches or other things that could cause a fire.
- Do not use a damaged charging station.
- Do not lift the robot or the charging station by the power cord, keep the power cords away from heat and avoid pinching the power cord on doors, sharp edges or corners.
- Damaged power cords must be repaired by manufacturer's repair service or by certified technicians.
• Install dustbin and filters properly before using the robot. - Do not use damaged power cords or charging stations to recharge the robot.
- Do not use the robot if it has been damaged by being dropped or immersed in water.
- Switch the robot off at the power switch if the robot will not be used for a longer period of time.
- Switch the robot off at the power switch before cleaning or servicing it.
- Unplug the power cable from the charging station before cleaning or maintaining the robot.
- Remove the battery before disposing of the robot.
- Robot and battery are to be disposed in accordance with local safety regulations.
- Do not burn the robot to prevent an explosion..
- Follow the instructions in this user manual. Manufacturer is not liable for damage caused by improper use.
Product Composition
Scope of delivery
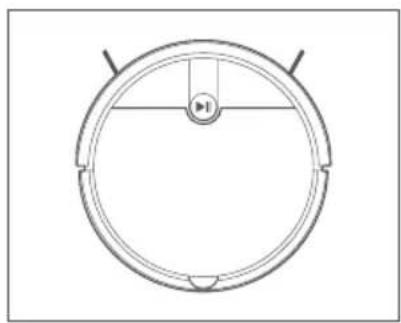
natural_image
Top-down schematic of a circular mechanical component with a central button and two side supports (no text or symbols)V4 Max

natural_image
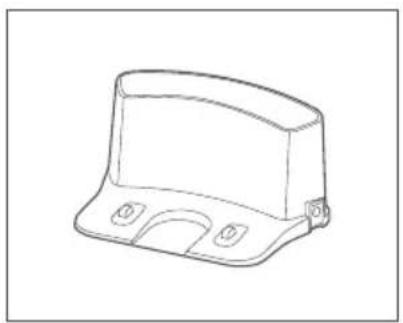
Line drawing of a mechanical bracket or housing component (no text or symbols)Charging station

natural_image
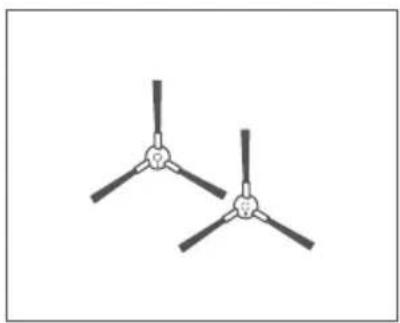
Two identical propeller blades arranged symmetrically (no text or symbols)Extra Side Brush (2x)

natural_image
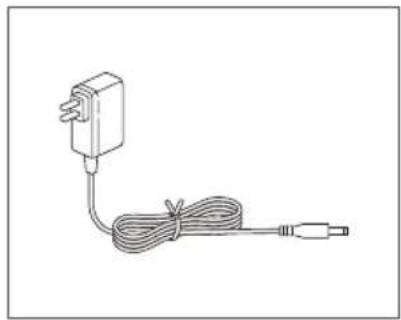
Simple line drawing of a connected electrical plug with cable (no text or symbols)Power Adapter

natural_image
Simple line drawing of a rectangular prism with vertical supports (no text or symbols)High Performance Filter

User Manual

natural_image
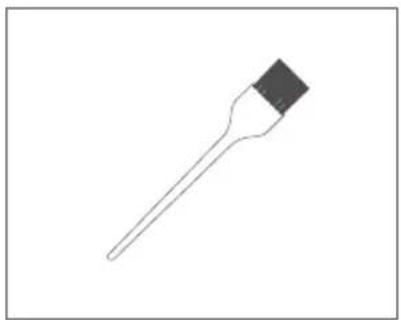
Simple line drawing of a laboratory pipette with a black tip (no text or symbols)Cleaning tool
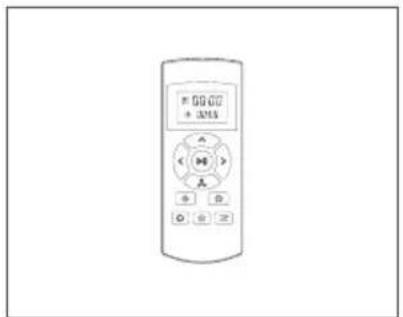
Remote Control (Battery not included)
Product Composition
V4 Max Introduction

Robot button status
| Start Button | Power on | Press and hold for 5 seconds | Turn on the robot |
| Press the button once Start / Pause Cleaning | |||
| Power off | Press and hold for 3 seconds | Turn off the robot | |
| Power indicator | Green Electricity > 20% |
| Orange Electricity < 20% | |
| Red Failure or abnormality |
Product Composition

Product Composition
Dustbin

Charging Station

Product Operation
Remote Control Operating

1. Starting up / Pause.
- Press this button to start cleaning.
- Press this button to stop cleaning.
- Press this button to exit sleep mode.
2. Directional buttons
A. "^\" button:
- Press this button to increase number in scheduling or clock mode;
- Press this button to make robot move forward in selection mode and the robot will stop when it hits any objects.
B. " √/ ✉" button:
- Press this button to change the time in scheduling mode or clock settings.
- Press this button to make the robot turn backward.
- In working mode, press this button to switch between "Standard / MAX" suction power.
Product Operation
C. "<" button:
- Press this button to exchange from minute to hour in scheduling mode or clock settings
- Press this button to make robot turn left.
D. " > " button:
- Press this button to exchange from hour to minute in scheduling mode or clock settings.
- Press this button to make robot turn right.
NOTE
All directional buttons ( , >, _1 , <) cannot be used during a cleaning cycle.
3. Scheduling button
- Press this button to enter scheduling mode when in selection mode or charging mode.
- Press this button to confirm the schedule in scheduling mode.
4. Clock settings
- Press this button to enter clock settings when in selection mode or charging mode.
- Press this button to confirm the time in clock settings.
5. Return to charging station button
- When robot is in selection mode or cleaning mode, press this button to send the robot to the charging station.
Product Operation
-
📞 Shows the scheduled cleaning time
-
Ⓛ Shows the time
NOTE
- Install two AAA type batteries into the remote control.
- Take out the batteries if the remote control is not used for long time
Product Operation
Selecting Cleaning Modes
1. Auto cleaning
The robot will clean a room automatically and adjust its cleaning according to the situation.
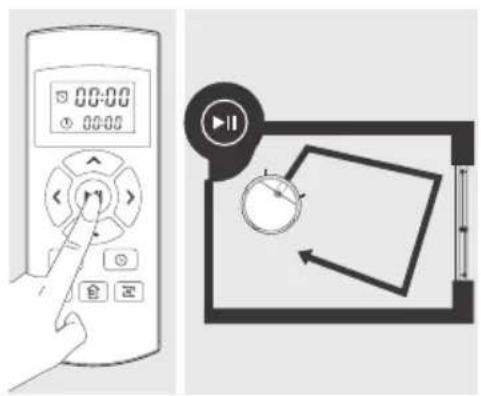
2. Spot mode
Place the robot near the required area, and then press the ⏻ button on the remote control to start cleaning in Spot Mode.

3. MAX mode
In automatic cleaning mode, press the button of the remote control to increase the suction power of the robot.

Product Operation
Selecting Cleaning Modes
4. Auto charge mode
The robot will return to recharge automatically when the battery is low or manually when the button is pressed on the remote control.

5. Edge mode
Press the ☒ button on the remote control to start cleaning in Edge Mode. The robot will clean along the walls in edge mode.

Product Operation
Placement of Charging Station
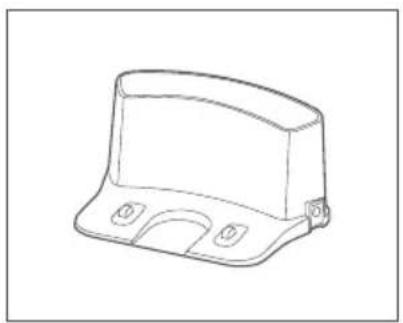
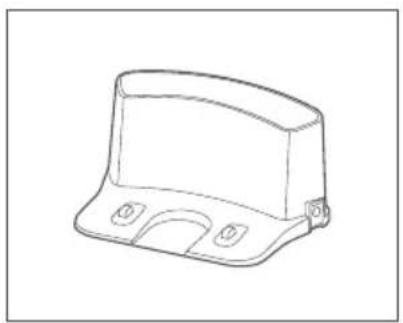
- Connect the adapter with the charging station.
- Place the charging station against the wall, there should be no objects on the left and right sides within a one-meter radius and none in front within two-meters. There should be no reflective objects such as a mirror around the station.
- Connect the power.

REMINDER
When the charging station is connected to the adapter, the signal lamp of the station will light up.
natural_image
Hand using a dial indicator to measure a circular component (no text or symbols visible)2. Turn on the robot
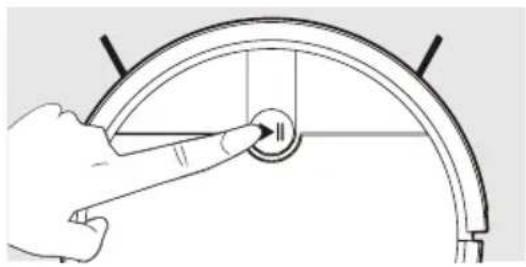
Press the Start button for 3 seconds to turn on, and hold it for 5 seconds to turn off.
NOTE
After the robot finishes its work, please do not turn it off, and fully recharge it for the next run.
Product Operation
3. Charging the robot
Automatic Charging
In cleaning mode, when the robot's battery is low, it will automatically start searching for the charging station to recharge.
To send the robot to the charging station, press the 📋 button on the remote control, and the robot will start searching for the charging station to recharge.

natural_image
Technical line drawing of a circular mechanical component with attached electrical outlet (no text or symbols)REMINDER
Please keep the charging pins clean to ensure a good charging connection.
REMINDER
- When using the robot for the first time, please charge it fully for 12 hours. After charging is complete, the display light will stay on constantly for a period and then turn off.
- Please leave the robot on the charging station for daily use and make sure that the charging station is plugged in.
- If you plan not to use the robot for a long time, please fully charge it, turn off the power and keep it in a well-ventilated dry place.
Product Operation
Starting up / Pause / Sleep
Sleep mode The Start button light is off, and the robot is charging.
Selection Mode The Start button light flashes, and the robot is charging and ready to be sent cleaning.
Cleaning mode The robot is in operation, and the Start button light stays on constantly.
Starting up
- Press and hold the Start button on the robot for 3 seconds to start up the robot.
- Press the Start button on the V4 Max or the start the robot. ▶ button on the remote control to
NOTE
If the robot is in sleep mode, press the Start button on the robot or the button on the remote control to wake up the robot and enter selection mode. Press again, and the robot will start cleaning automatically.
1. Pause
To switch the robot from cleaning mode to selection mode, you can press the Start button on the V4 Max or the Start button on the remote control to pause the robot.
2. Sleep Mode
To switch the robot from cleaning mode to selection mode, you can press the Start button on the V4 Max or the Start button on the remote control to pause the robot.
Product Operation
Scheduling
You can schedule to let the robot start cleaning from a certain time.
1. Ⓤ Setting the clock time
-
Point the remote control towards the robot (make sure the robot is turned on).
-
Press the ⏻ button on the remote control to enter clock settings and use the directional buttons to set the specific time.
-
Press the ⏻ button to save the setting.
2. Setting a schedule
Once the schedule is successfully set, the robot will start cleaning at the scheduled time every day. If the robot is turned off, the schedule will be cleared, and you need to set it up again.
- Point the remote control towards the robot (make sure the robot is turned on).
- Press the button on the remote control to enter scheduling settings
- Then use the directional buttons to set the specific cleaning time.
- Press the 📋 button to save the schedule.
NOTE
When you set the clock time or schedule, the final operation will be confirmed by beep from robot; If no tone is played, the setting was unsuccessful.
App Download & Connection
- Scan the QR code to install the app. Or search "ZACO Smart" in the iOS App Store or the Google Play Store and download the App.

- Click "Add a device" or "+" in the top right corner.

- Register and log in to the app.

- Select your device model.

App Download & Connection
- Select a 2.4GHz Wi-Fi network and enter the password.

-
Select the "SMARTlife-XXXX" WiFi on your mobile device to connect to the device.
-
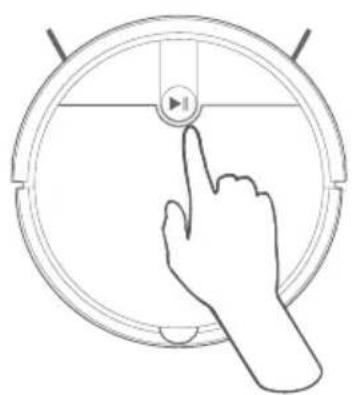
Press and hold both buttons (Home & Power Button) simultaneously for at least 3 sec., until you hear the voice prompt "AP mode" and the Wi-Fi indicator light flashes.
natural_image
Line drawing of a hand pressing a button on a circular device (no text or symbols)- Return to the ZACO Smart App.


Maintenance
REMINDER
Please keep the charging pins clean to ensure a good charging connection.
Cleaning side brushes
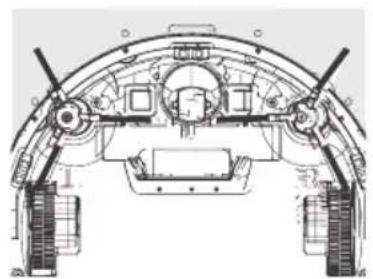
- Remove side brushes. Wipe clean with a clean cloth.
- When replacing the side brush, please distinguish the corresponding installation position of the "L" "R" side brush.
natural_image
Technical line drawing of a mechanical assembly with gears and housing (no text or symbols)
natural_image
Line drawing of a hand holding a small object, possibly a tool or device, with no visible text or symbols.Cleaning sensors & charging pins
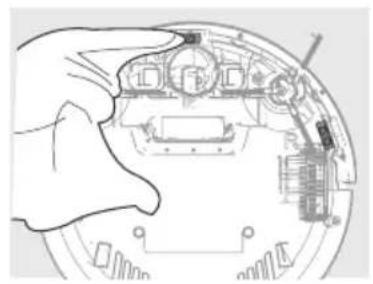
- Use cleaning tools or a soft cloth to clean the sensors and charging pins:
natural_image
Hand holding a device component with internal circuitry (no visible text or symbols)
natural_image
Hand holding a component inside a circular device, showing internal components and wiring (no text or symbols visible)
natural_image
Line drawing of a hand pressing a button on a device casing (no text or symbols)NOTE
Remove dust or foreign objects on sensors and charging pins on the charging station as soon as possible.
Maintenance
Cleaning Dustbin & Filter
Clean and empty the dust bin after each use, as follows.
- Open the Cover of the V4 Max
- Take out the Dustbin, using the handle.
- Remove the pre-filter.
- Empty the dust bin over a garbage can.
- Every 2-4 Weeks removed the high-performance filter and clean it.
- Use the cleaning tool to remove dust from the filters.
- Place the high-performance filter back in the dust bin.
- Place the dust bin back into the V4 Max

natural_image
Line drawing of a hand holding a circular object with a handle, no text or symbols present
natural_image
Illustration of a hand inserting a device into a device with an upward arrow (no text or symbols)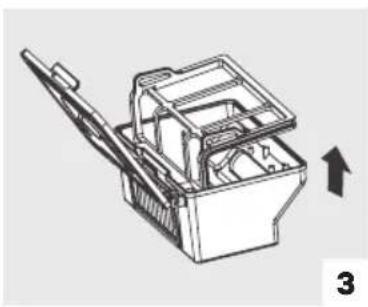
natural_image
Line drawing of a mechanical device with an arrow indicating direction (no text or symbols)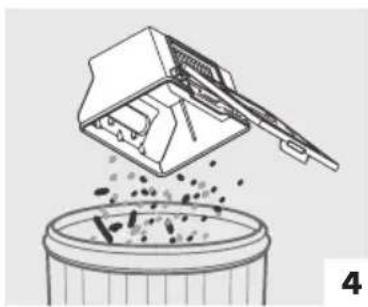
natural_image
Illustration of a mechanical device pouring liquid into a cylindrical container (no text or symbols)
natural_image
Technical line drawing of a mechanical device with a bracket and panel, showing an arrow indicating direction (no text or symbols)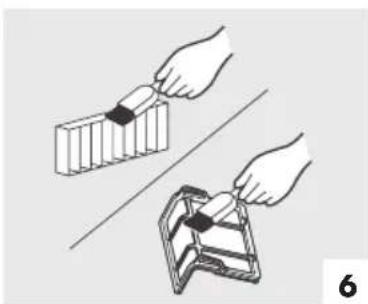
natural_image
Illustration of two hands using a tool to cut a rectangular object, no text or symbols present
natural_image
Technical line drawing of a mechanical device with a handle and panel, showing an arrow indicating direction (no text or symbols)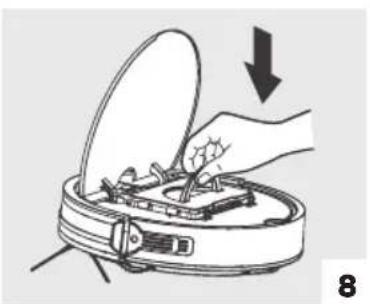
natural_image
Illustration of a hand using a vacuum cleaner to clean air, showing mechanical components and a downward arrow (no text or symbols)Troubleshooting
Error code sheet
When robot encounters common problems, it will play a short beep to signal a problem.
No Possible Cause What to do
| 01 | Wheels or side brushes do not work. | Check wheels or side brushes. |
| 02 | Cliff sensors or bumper sensors failure | Clean the cliff sensors and move the bumper slightly to check if there is something blocking the bumper. |
| 03 | The V4 Max gets stuck. | Move robot to another place close by and restart |
NOTE
If the solutions above don't resolve the issue, please try the following:
- Press 5 seconds to turn of the robot and press 3 seconds to restart it.
- If reset does not work, contact the Customer Service, and ask for help
Replace accessories regularly
Accessories Maintenance Replacement
| Dust bin Empty after every use - |
| Pre-Filter Clean Once a week - |
| High performance Filter Clean Once every 2-4 weeks Every 6 Months |
| Side brushes Clean Once a week Per demand |
| Charging station Clean Once a week - |
Product Specification
Main device
| Item Specification | |
| Diameter 310 mm | |
| Height 76 mm | |
| Weight 2.15 kg | |
| Power 30 W | |
| Battery type Li-ion | |
| Charging type Auto Charging / Manual Charging | |
| Dustbin capacity 0.3 L | |
| Cleaning mode Auto, Spot, MAX, Edge, Daily Schedule | |
| Charging time <300 mins | |
| Cleaning time 90~100 mins |
Note
The company reserves the right of final decision on the interpretation of these terms and conditions.
ErP information
| Manufacturer information Dongguan Guanjin | Electronics Technology Co., LtdBlock 16 Qiantou New Industrial Park, Niushan, Dongcheng District, 523128 Dongguan City, Guangdong |
| AC adapter Model identifier K12V190060G, K12V190060B | |
| Input voltage 220-240V | |
| Input AC frequency 50/60Hz | |
| Output voltage 19.0Vdc | |
| Output current 0.6A | |
| Output power 11.4W | |
| Average active efficiency 87.03 % | |
| Efficiency at low load (10%) 86.06 % | |
| No-load power consumption 0.1W | |
Percentage of nameplate output current
| Load condition 1 100%±2% | |
| Load condition 2 75%±2% | |
| Load condition 3 50%±2% | |
| Load condition 4 25%±2% | |
| Load condition 5 10%±1% |
Frequency Band
Frequency Band and Output Power
| TX Frequency 2.412 ~ 2.472 GHz | |
| RX Frequency 2.412 ~ 2.472 GHz | |
| Antenna Gain 0.86 dBi Max | |
| RF Output Power | 2.4G802.11b:17 dB802.11g:14 dB802.11n:13 dB |
EU Declaration of Conformity
Robovox Distributions GmbH hereby declares that the ZACO V4 Max radio complies with Directive 2014/53/EU. The full text of the EU Declaration of Conformity can be found on the Internet address https://conformity.zaco.eu/download/v4max.pdf
natural_image
Top-down schematic of a circular mechanical component with a central button and two side supports (no text or symbols)V4 Max
natural_image
Line drawing of a mechanical bracket or housing component (no text or symbols)Ladestation

natural_image
Two identical propeller blades arranged symmetrically (no text or symbols)natural_image
Simple line drawing of a connected electrical plug with cable (no text or symbols)Ladekabel

natural_image
Isometric line drawing of a rectangular prism with vertical supports (no text or symbols)High-performance Filter

Bedienungsanleitung
natural_image
Simple line drawing of a paintbrush with a square tip (no text or symbols)Reinigungswerkzeug

3. MAX Modus
Inbetriebnahme
4. Aufladen
5. Kanten Reinigung
Inbetriebnahme
Ladestation
natural_image
Line drawing of a portable electronic device with a cable and power outlet (no text or symbols)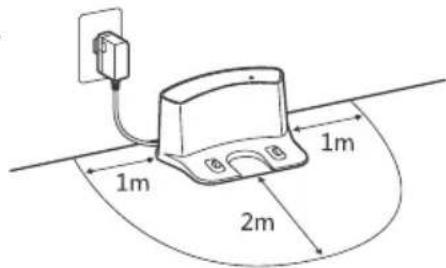
HINWEIS
natural_image
Hand using a tool to adjust a circular component on a curved gauge (no text or symbols visible)natural_image
Technical line drawing of a circular mechanical component with attached wires and a small rectangular component (no text or symbols)HINWEIS
App Download
natural_image
Hand pressing a button on a circular device with a play button (no text or symbols)
Wartung und Pflege
HINWEIS
natural_image
Technical line drawing of a vehicle's front view showing engine, wheels, and structural components (no text or labels)
natural_image
Line drawing of a hand holding a pen or wire (no text or symbols)natural_image
Hand holding a circular electronic component with internal circuitry and wiring (no visible text or symbols)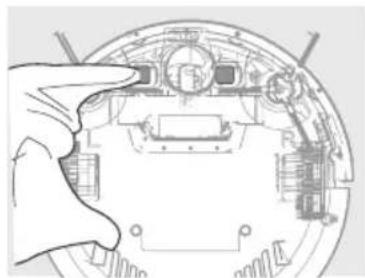
natural_image
Hand pointing to a mechanical component outline (no text or symbols visible)
natural_image
Line drawing of a hand holding a small electronic device with buttons (no text or symbols)ACHTUNG
natural_image
Line drawing of a hand inserting a circular device into a ring, with no text or symbols present.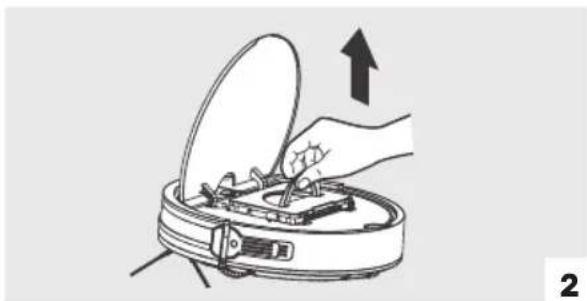
natural_image
Illustration of a hand inserting a device into a device with an upward arrow (no text or symbols)
natural_image
Technical line drawing of a mechanical device with an arrow indicating direction (no text or symbols)
natural_image
Illustration of a mechanical device pouring granular material into a cylindrical container (no text or symbols)
natural_image
Technical line drawing of a mechanical component with a bracket and mounting bracket, showing a left-pointing arrow (no text or symbols)
natural_image
Illustration of two hands holding a small object, one on a grid and the other in a wallet (no text or symbols)
natural_image
Technical line drawing of a mechanical device with a door and handle, showing an arrow indicating direction (no text or symbols)
natural_image
Illustration of a hand inserting a device into an open lid, with a downward arrow indicating action (no text or symbols present)Fehlerbehebung
Fehlerbehebung
natural_image
Top-down schematic of a circular device with a central button and two side connectors (no text or symbols)V4 Max

natural_image
Line drawing of a mechanical component with a curved top and flange (no text or symbols)Estación de carga
natural_image
Two identical propeller blades arranged symmetrically (no text or symbols)Cepillo lateral extra X2
natural_image
Simple line drawing of a connected electrical plug with a cable (no text or symbols)natural_image
Isometric line drawing of a rectangular prism with vertical supports (no text or symbols)natural_image
Simple line drawing of a paintbrush with a cap (no text or symbols)natural_image
Top-down schematic of a circular device with a play button and control panel (no text or symbols)2. Modo puntual
3. Modo MAX
5. Modo Edge
RECORDATORIO:
natural_image
Hand using a dial indicator to measure a circular component (no text or symbols visible)2. Enciende el robot
natural_image
Technical line drawing of a circular mechanical component with attached wires and a small rectangular component (no text or symbols)RECORDATORIO:
Descarga de la app
natural_image
Line drawing of a hand pressing a button on a circular device (no text or symbols)Mantenimiento
natural_image
Technical line drawing of a helicopter's front and side views, showing internal components and a hand adjusting the propeller (no text or symbols present)natural_image
Three technical line drawings showing hands operating a device casing, with no visible text or symbols.NOTA
natural_image
Line drawing of a hand holding a circular object with a handle, no text or symbols present
natural_image
Illustration of a hand inserting a device into a vacuum cleaner's air gap (no text or symbols)
natural_image
Technical line drawing of a mechanical component with an arrow indicating direction (no text or symbols)
natural_image
Illustration of a mechanical device pouring liquid into a cylindrical container (no text or symbols)
natural_image
Technical line drawing of a mechanical device with a side panel and directional arrow (no text or symbols)
natural_image
Illustration of two hands holding a tool over a grid-like object, with no visible text or symbols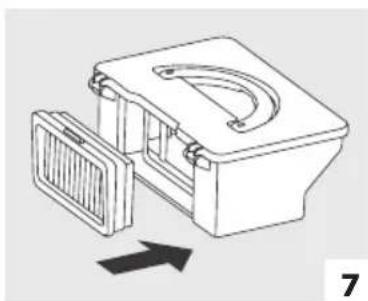
natural_image
Technical line drawing of a mechanical device with a handle and panel, showing an arrow indicating direction (no text or symbols present)
natural_image
Illustration of a hand opening a device into a box with an arrow indicating downward motion (no text or symbols)Scope of delivery 84
V4 Max Introduction 85
Robot button status 85
Bac à poussière 87
Station de charge 87
natural_image
Top-down schematic of a circular device with a central button and two side connectors (no text or symbols)V4 Max
natural_image
Line drawing of a mechanical bracket or housing component (no text or symbols)Station de charge

natural_image
Two identical propeller blades arranged symmetrically (no text or symbols)natural_image
Simple line drawing of a connected electrical plug with a cable (no text or symbols)natural_image
Isometric line drawing of a rectangular prism with vertical supports (no text or symbols)Filtre haute performance

natural_image
Simple line drawing of a paintbrush with a square tip (no text or symbols)Outil de nettoyage

Télécommande (pile non incluse)
2. Mode spot
3. Mode MAX
5. Mode bord (Edge)
RAPPEL
natural_image
Hand pointing at a circular component on a curved arc, no text or symbols visiblenatural_image
Technical line drawing of a circular mechanical component with attached wires and a small rectangular component (no text or symbols)RAPPEL
natural_image
Hand pressing a button on a circular device with a play button (no text or symbols)Entretien
RAPPEL
natural_image
Technical line drawing of a vehicle chassis with front wheel, rear wheels, and internal components (no text or labels)
natural_image
Line drawing of a hand holding a small object with a thin rod (no text or symbols)natural_image
Hand holding a device component with internal circuitry (no visible text or symbols)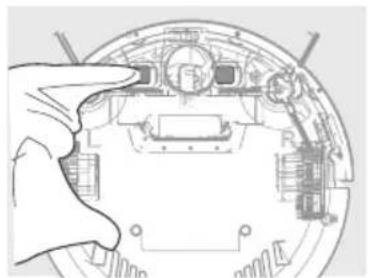
natural_image
Hand pointing to a mechanical component outline (no text or symbols visible)
natural_image
Line drawing of a hand pressing a button on a device panel (no text or symbols)NOTE
natural_image
Line drawing of a hand holding a circular object with a handle, no text or symbols present
natural_image
Illustration of a hand inserting a device into a device with an upward arrow (no text or symbols)
natural_image
Line drawing of a mechanical device with a lever and housing, showing an upward arrow (no text or symbols)
natural_image
Illustration of a mechanical device pouring liquid into a cylindrical container (no text or symbols)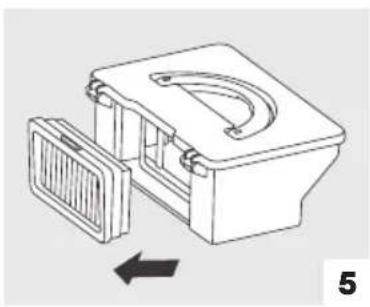
natural_image
Technical line drawing of a mechanical device with a bracket and panel, showing an arrow indicating direction (no text or symbols)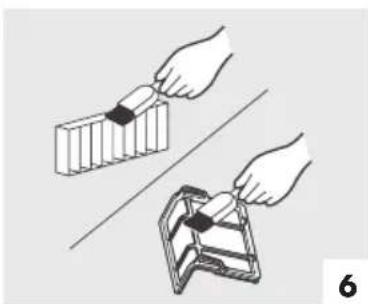
natural_image
Illustration of two hands holding a small object over a tray, with no visible text or symbols
natural_image
Technical line drawing of a mechanical device with a handle and panel, showing an arrow indicating direction (no text or symbols)
natural_image
Illustration of a hand inserting a device into a device with an open lid, showing mechanical components and a downward arrow (no text or symbols)Dépannage
Replace accessories regularly
Accessoires Entretien Remplacement
https://conformity.zaco.eu/download/v4max.pdf
Gentile cliente,
natural_image
Top-down schematic of a circular device with a central button and two side connectors (no text or symbols)V4 Max
natural_image
Line drawing of a mechanical bracket or housing component (no text or symbols)natural_image
Two identical propeller blades arranged symmetrically (no text or symbols)Spazzola laterale extra (2x)

natural_image
Simple line drawing of a connected electrical plug with a cable (no text or symbols)Cavo di ricarica

natural_image
Isometric line drawing of a rectangular prism with vertical supports (no text or symbols)natural_image
Simple line drawing of a paintbrush with a square tip (no text or symbols)2. Pulizia a punti
3. Modalità MAX
natural_image
Hand using a tool to adjust a circular component on a curved gauge (no text or symbols visible)natural_image
Technical line drawing of a circular mechanical component with attached electrical outlet (no text or symbols)SUGGERIMENTO
natural_image
Line drawing of a hand pressing a button on a circular device (no text or symbols)Manutenzione e cura
SUGGERIMENTO
natural_image
Technical line drawing of a vehicle's front view showing engine, wheels, and structural components (no text or labels)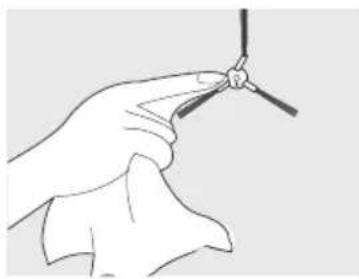
natural_image
Line drawing of a hand holding a pen or wire (no text or symbols)natural_image
Hand holding a device component with internal circuitry (no visible text or symbols)
natural_image
Hand pointing to a mechanical component outline (no text or symbols visible)
natural_image
Line drawing of a hand pressing a button on a device panel (no text or symbols)ATTENZIONE
natural_image
Line drawing of a hand pointing at a circular device with a lid, no text or symbols present
natural_image
Illustration of a hand inserting a device into a device with an upward arrow (no text or symbols)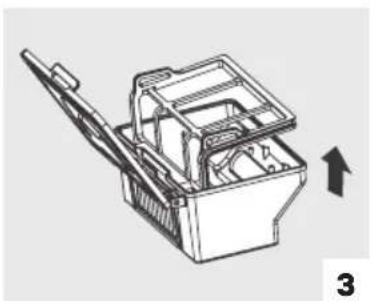
natural_image
Technical line drawing of a mechanical device with an arrow indicating direction (no text or symbols)
natural_image
Illustration of a mechanical device pouring granular material into a cylindrical container (no text or symbols)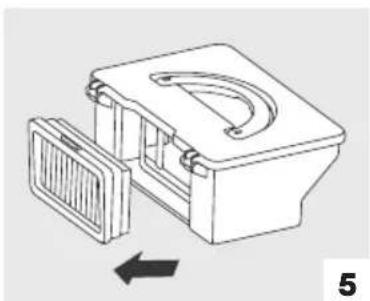
natural_image
Technical line drawing of a mechanical component with an arrow indicating direction (no text or symbols)
natural_image
Illustration of two hands using a tool to cut a rectangular object on a flat surface (no text or symbols)
natural_image
Technical line drawing of a mechanical device with a handle and panel, showing an arrow indicating direction (no text or symbols)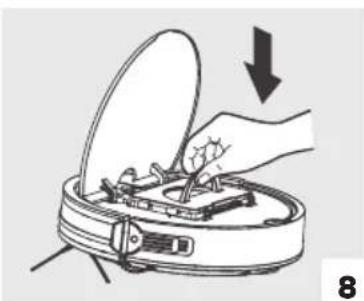
natural_image
Illustration of a hand opening a device into a box with an arrow indicating downward motion (no text or symbols)Manutenzione e cura



- User Manual
- Dear Customer,
- ZACO Customer Service
- Contents
- Safety instructions 4
- Product Composition 6
- Product Operation 10
- App Download & Connection 19
- Product Specification 24
- Safety instructions
- Warnings
- Product Composition
- Scope of delivery
- Dustbin
- Charging Station
- Product Operation
- Remote Control Operating
- Starting up / Pause.
- Directional buttons
- NOTE
- Scheduling button
- Clock settings
- Return to charging station button
- Selecting Cleaning Modes
- Auto cleaning
- Spot mode
- MAX mode
- Auto charge mode
- Edge mode
- Placement of Charging Station
- REMINDER
- Turn on the robot
- Charging the robot
- Starting up / Pause / Sleep
- Starting up
- Pause
- Sleep Mode
- Scheduling
- Ⓤ Setting the clock time
- Setting a schedule
- App Download & Connection
- Maintenance
- Cleaning side brushes
- Cleaning sensors & charging pins
- Cleaning Dustbin & Filter
- Troubleshooting
- Error code sheet
- Replace accessories regularly
- Product Specification
- ErP information
- Percentage of nameplate output current
- Frequency Band
- EU Declaration of Conformity
- MAX Modus
- Inbetriebnahme
- Aufladen
- Kanten Reinigung
- Ladestation
- HINWEIS
- App Download
- Wartung und Pflege
- ACHTUNG
- Fehlerbehebung
- Modo puntual
- Modo MAX
- Modo Edge
- RECORDATORIO:
- Enciende el robot
- Descarga de la app
- Mantenimiento
- NOTA
- Mode spot
- Mode MAX
- Mode bord (Edge)
- RAPPEL
- Entretien
- Dépannage
- Gentile cliente,
- Pulizia a punti
- Modalità MAX
- SUGGERIMENTO
- Manutenzione e cura
- ATTENZIONE
Brand : ZACO
Model : V4 Max
Category : Robot vacuum