
M1S - Vacuum Cleaner ZACO - Free user manual and instructions
Find the device manual for free M1S ZACO in PDF.

| Product type | Robot vacuum and mop |
| Brand | Zaco |
| Model | M1S |
| Dimensions (robot) | 353 x 353 x 96.5 mm |
| Weight (robot) | 4.1 kg |
| Dimensions (cleaning station) | 410 x 450 x 390 mm |
| Power | 40 W |
| Battery type | Lithium-ion 5200 mAh |
| Charging time | 250-300 min |
| Runtime | ≈180 min |
| Cleaning modes | Spot, Edge, MAX, Scheduled, Vibrating Mop |
| Connectivity | Wi-Fi 2.4 GHz, Bluetooth 4.2, RF 433 MHz |
| App | ZACO Home (iOS/Android) |
| Mapping | Yes, with saving and no-go zones |
| Automatic resume | Yes (returns to station when battery low, then resumes) |
| Carpet detection | Yes, automatically lifts mop |
| Virtual wall / no-go zones | Yes (via app) |
| Do not disturb mode | Yes (from 23h to 9h, can be disabled) |
| Box contents | Robot, cleaning station, clean/dirty water tank, 2 side brushes, mop plate, cleaning tool, power cable, manual |
| Safety | Class 1 laser sensor, anti-drop sensors, automatic stop if stuck |
| Maintenance | Empty dustbin, clean filter, brush, water tanks |
| Warranty | See Zaco website or customer service |
Frequently Asked Questions - M1S ZACO
User questions about M1S ZACO
0 question about this device. Answer the ones you know or ask your own.
Ask a new question about this device
Download the instructions for your Vacuum Cleaner in PDF format for free! Find your manual M1S - ZACO and take your electronic device back in hand. On this page are published all the documents necessary for the use of your device. M1S by ZACO.
USER MANUAL M1S ZACO
Robot Vacuum Cleaner
User Manual

natural_image
Line drawing of a circular robotic vacuum cleaner with a circular top and control buttons at the bottom (no text or symbols)English
Deutsch
Español
Français
Italiano
Find more information at
www.zaco.eu
ZACO
Dear Customer,
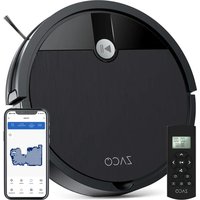
Thank you for purchasing ZACO M1S robot vacuum cleaner!
You are now part of the ZACO Family! You've joined the millions of people who clean with ZACO.
Please take a few moments to read this manual and get acquainted with your robot and to get the best performance from your robot. If you have any problem, please don't worry, please contact our customer service first or visit our website at www.zaco.eu for more information.
ZACO Customer Service
ZACO Customer Service
Customer Service Number
00800-42377961 (European Free Call)
0209-513038-38 (Direct Line - DE)
support@zaco.eu | www.zaco.eu
Robovox Distributions GmbH
Hamburger Straße 11 | 45889 Gelsenkirchen | Germany
Social Media

RobovoxZACO

zaco_robot

CO Robot
Contents
Safety Instructions 4
Use instructions 4
Environmental Implications / Battery Removal 6
Product Overview 8
Box contents 8
Robot 9
Cleaning station 10
Status of the robot / Status of the cleaning station 11
How to use 12
Cleaning station 12
Installing the dustbin 15
Installation of clean water tank and mop 16
Operation 17
App download 22
Maintenance 23
Dustbin 23
Dirty water tank / dirty water sieve 25
Main brush / side brush 26
Front wheel 27
Filter pipe of clean water tank 28
Troubleshooting 29
Product Specification 32
Frequency Band / EU Declaration of Conformity 33
Safety instructions
WARNING!
The Navigation Sensor contains a Class 1 rotating laser per IEC/EN 60825-1 during all procedures of operation.
- Never aim the laser at other people.
- Never look directly at the laser or reflected beam.
• Always switch the robot vacuum off during any maintenance tasks. - Modifications (changes) or attempts to repair the robot vacuum cleaner or the navigation sensor are strictly prohibited and may result in hazardous radiation exposure and loss of warranty.
Use instructions
- This product is only used for floor cleaning in home environment and should not be used in outdoor, non-floor, commercial or industrial environment.
- This product may not be used by people with physical, sensory, or intellectual disabilities and people without relevant experience and knowledge (including children), unless there is an adult present to ensure that they can use this product safely.
- Please do not allow children to play with the robot as a toy. When the robot is in operation, please make sure children and pets are as far away from the product as possible.
- If the power cable is broken, it must be replaced by the manufacturer or maintenance department.
- Please do not put children or pets or any objects on the robot at any time.
- Do not place the cleaning brush in the area where children can touch it.
Safety instructions
-
Please do not use the laser cover as a handle to lift the robot.
-
Please do not use the product in a suspended environment (such as double floors, open balconies, or tops of furniture) without protective rails or barriers.
-
Do not use it in an environment where the temperature is higher than 35^ C, lower than 0^ C or there are any liquids and sticky objects on the ground.
-
Do not use the robot to clean any burning objects.
-
Before use, please remove or tidy all wires on the floor to avoid dragging during operation.
-
Please remove fragile objects and sundries on the floor (such as vases, plastic bags, etc.) to avoid damaging the precious articles due to obstruction or mild collision during operation.
-
Please do not use the mopping mode on carpet. When cleaning the floor, please set up virtual walls or no-go areas around the carpeted area.
-
Do not let the robot vacuum hard objects or sharp objects (such as decoration waste, glass, and nails, etc.).
-
Please clean and maintain the robot and the charging station when the power is off.
-
Please do not put the robot upside down on the floor.
-
Please follow the product manual or quick guide to use the product. In case of any loss due to improper use, the user shall take the consequences on his / her own.
-
Before transportation, please make sure the robot is switched off.
Safety instructions
Use instructions
- Do not use any third-party battery, power cable or cleaning station.
- Do not disassemble, repair or modify the battery or cleaning station.
- Do not wipe or clean the charging points of the cleaning station with wet cloth or wet hands.
- Do not place the cleaning station near the heat source (such as radiator).
- Before scrapping the robot, turn the power off and remove the battery.
- If the product is to be stored for a long time, charge it fully and store in a dry area in the shade.
- It is recommended to charge it at least once every 3 months to avoid battery damage.
Environmental Implications
The chemicals contained in the built-in lithium-ion battery may pollute the environment. Before scrapping remove the battery and dispose of responsibly and carefully according to local rules and regulations.
Battery Removal
The instructions below apply only when storing the robotic vacuum cleaner. It is not for routine operations:
- Run the robot until the battery is too low to work.
- Switch off.
- Remove the bottom shell of the robotic vacuum cleaner.
- Press the buckle to pull out the connector plug and remove the battery.
Safety instructions
Note:
- Please remove the entire the battery pack as a whole and avoid damaging its shell in case of short circuits or hazardous substance leakage.
- If the battery leaks and the user is accidentally exposed to it, please rinse with a large amount of water immediately and seek medical advice.
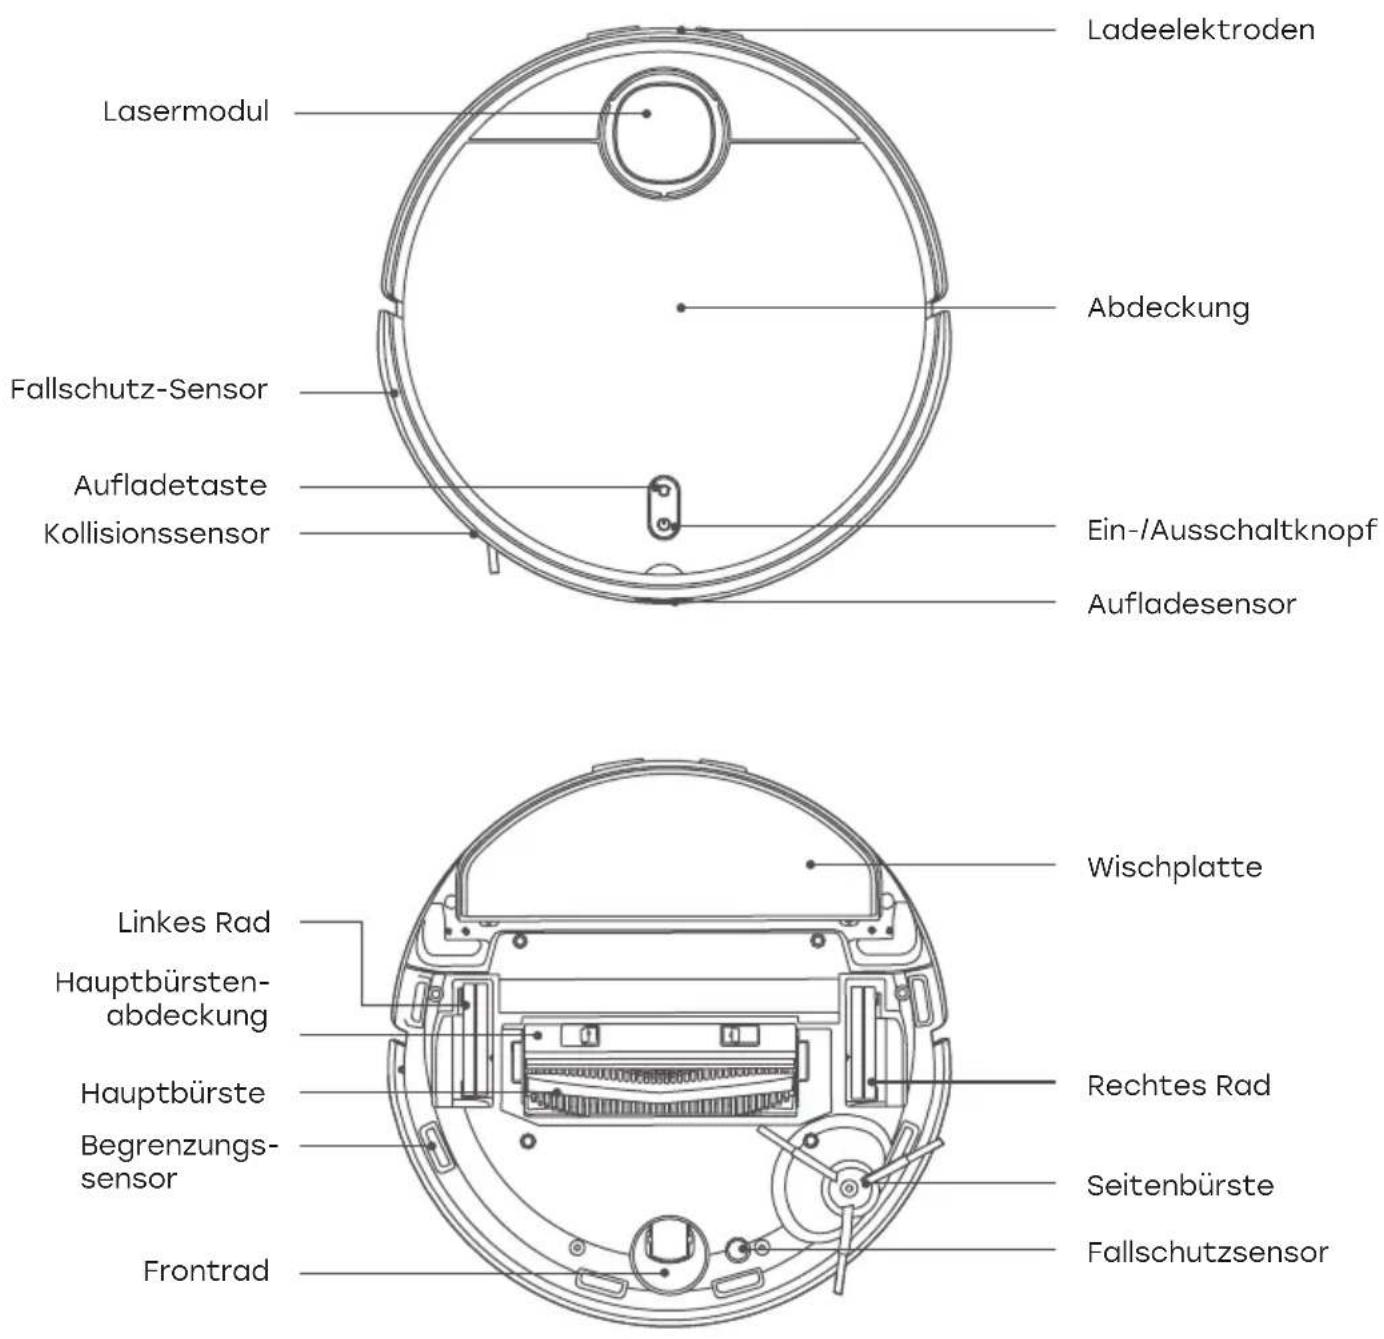
Product Overview
Box contents
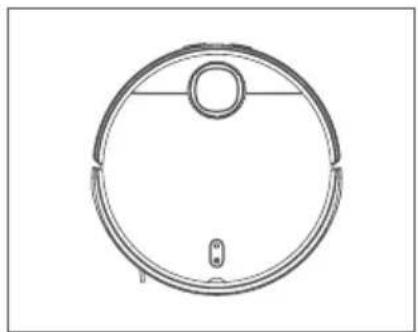
natural_image
Top-down line drawing of a circular robotic vacuum cleaner (no text or symbols)Robot

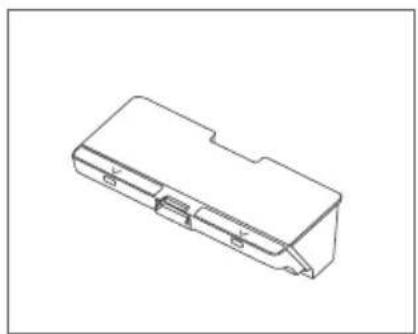
natural_image
Line drawing of a cylindrical device with internal components and mounting holes (no text or symbols)Cleaning station Clean & dirty water tank

natural_image
Line drawing of two identical plastic containers with lids and lids, no text or symbols present.water tank
natural_image
Isometric line drawing of a mechanical component or housing (no text or symbols)Dustbin

natural_image
Technical line drawing of a mechanical component with no visible text or symbolsMain brush cover Main brush

natural_image
Technical line drawing of a mechanical component with threaded ends and a central shaft (no text or symbols)[Non-Text]

natural_image
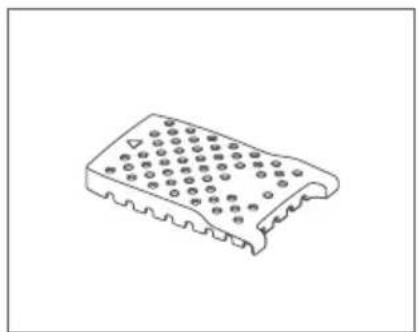
Isometric line drawing of a perforated metal plate with rivets and holes (no text or symbols)Dirty water sieve
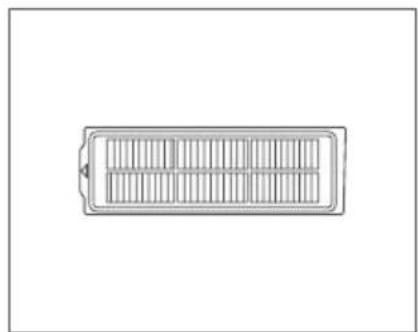
natural_image
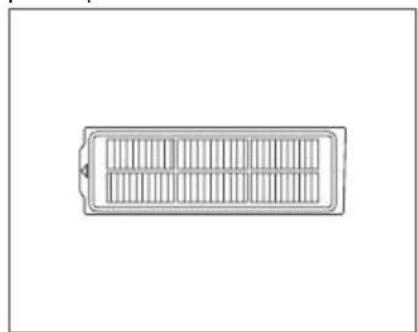
Simple line drawing of a rectangular battery with internal compartments (no text or symbols)Filter screen 2x Mop

natural_image
Simple line drawing of a semi-circular shape with a horizontal line inside, no text or symbols present.[Non-Text]

User manual Cleaning tool Power cable 2x Side brush

natural_image
Simple line drawing of a paperclip (no text or symbols)
natural_image
Simple line drawing of a paperclip (no text or symbols)
natural_image
Simple line drawing of a U-shaped plug with two leads (no text or symbols)
natural_image
Simple line drawing of a U-shaped plug with two leads (no text or symbols)
natural_image
Pure electrical circuit lines without any symbolsProduct Overview
Robot


Product Overview
Cleaning station


Product Overview
Status of the robot
| Light signal Solution | |
| White light is always on The robot is normal | |
| White light pulsing Robot is charging | |
| White light flashes Robot recharging / firmware upgrading | |
| Yellow light is always on Robot Wi-Fi is offline | |
| Yellow light flashes Robot error | |
| The light of robot is off Robot is off |
Status of the cleaning station
| Light signal Solution | |
| White light is always on Cleaning station is normal | |
| White light pulsing Robot is cleaning | |
| White light flashes Cleaning station error | |
How to use
Cleaning station
1. Installation
Place the charging station against the wall and insert the power cable.

Note
- Do not place the cleaning station in direct sunlight.
- Please ensure a space of at least 0.5m on both the left and right sides of the cleaning station, and a space of at least 1.5m in front of it as shown.
- Pay attention to the power cable, otherwise it may be dragged by the robot, causing the cleaning station to move or power off.
- The clean water tank, dirty water tank, and rinsing plate must be installed in place.
How to use
Cleaning station
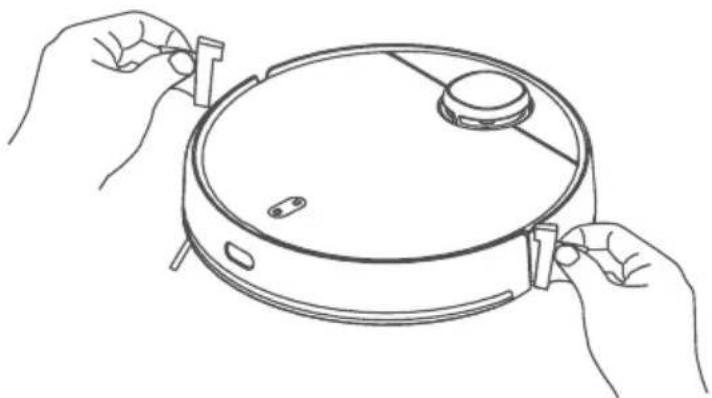
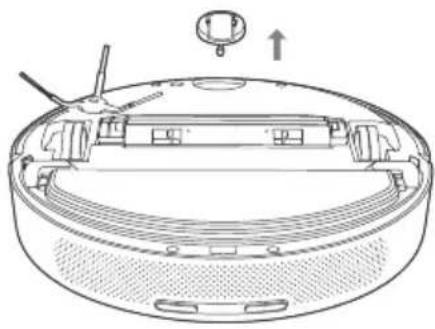
2. Remove the anti-collision bars
Before use, be sure to remove the anti-collision bars on both sides of the robot.
natural_image
Line drawing of two hands holding a circular device with a lid and handle (no text or symbols)3. Power on and charging
When using for the first time, please place the robot to the charging contacts of the cleaning station to charge. In daily use, directly press the cleaning station home button to start charging.

natural_image
Line drawing of a modern coffee maker with a power cord and outlet (no text or symbols)How to use
Cleaning station

Start/pause button
- In stand-by mode push to start cleaning.
- While cleaning push to pause cleaning.
- Press to stop recharging.

Cleaning station home button
- When the robot is in the cleaning station press for a short time to start/pause rinsing.
- When the robot is in operation, press to return to the cleaning station and recharge
- Robot in station on stand-by press for a long time to start/stop air drying.
Note
- The robot will start up automatically after docking with the cleaning station and cannot be shut down during charging.
- The clean water tank, dirty water tank, and rinsing plate must be installed in place.
How to use
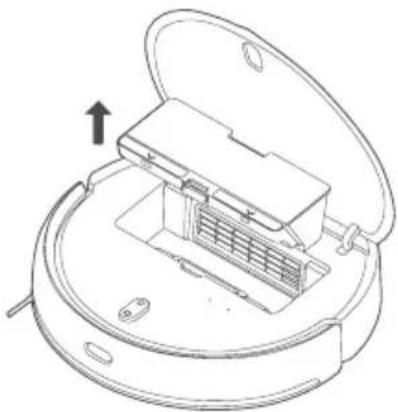
Installing the dustbin
Open the top cover at the opening, put the dustbin into the robot and make sure that the latch is secure.
Note
Clean the dustbin regularly to maintain peak cleaning performance.

natural_image
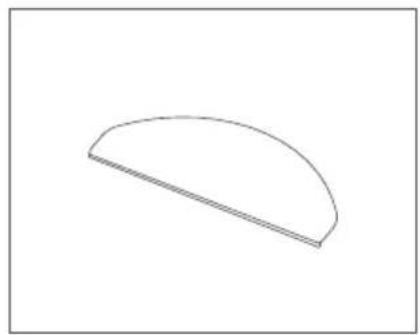
Line drawing of a robotic vacuum cleaner with internal components and an open lid (no text or symbols)Installation of clean water tank and mop
- As above, insert the mop cloth from the open side of the mop plate. Press mop down securely.

natural_image
Technical line drawing of a mechanical device interior showing internal components and a curved housing (no text or symbols)How to use
Installation of clean water tank and mop
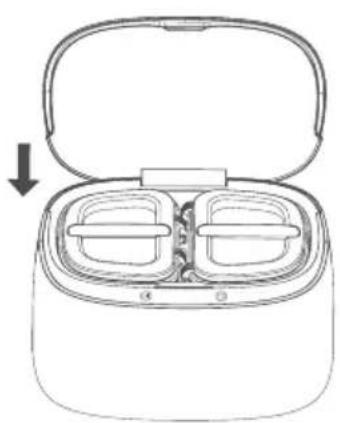
- Take out the clean water tank and add tap water below the maximum water level as shown.

Note
Please check the dirty water tank regularly. If full then empty.
- Install the clean water tank and dirty water tank into the cleaning station and close the cover.
natural_image
Line drawing of a closed appliance with two side compartments and a handle, showing internal structure (no text or symbols)Note
- Do not use sterilized water or detergents.
- Do not use hot water in the clean water tank.
- Please clean up any excess water in the cleaning station regularly.
How to use
Operation
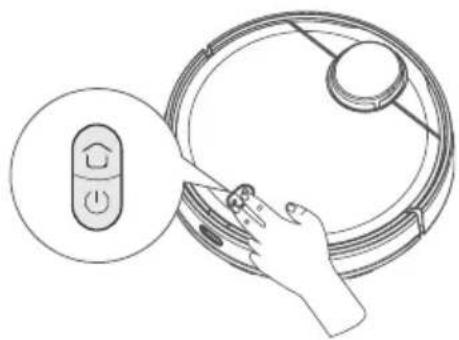
1. Power on/off
Press and hold the ⏻ until the robot turns on or off.
2. To start cleaning
Press ⏻ to start cleaning.
3. Pause
When the robot is running, press the ⏻button to pause cleaning or continue cleaning.

natural_image
Line drawing of a robotic vacuum cleaner with a hand interacting with the device (no text or symbols)4. Memory map
The robot will save a map to your APP automatically after it has successfully completed a cleaning run and returned to the base for recharging. With this map you can create zones, name rooms and much more.
5. Vibrating mop mode
Vibrating mopping mode is activated by default in the APP. This mode will provide greater cleaning performance.
6. Model / level selection
In the APP, a variety of cleaning modes and power levels can be selected.
7. Robot recharging
After the robot has completed cleaning, it will automatically recharge, and determine whether to clean the mop according to the cleaning mode. If the robot is outside of the station, press the ⬇ button of the robot to start recharging.
How to use
Operation
8. Filling and emptying the water tanks when applicable
Please fill the clean water tank with tap water before starting the robot. Please empty the dirty water tank regularly.
Note
Do not to use cleaning products such as detergent, disinfectant, and solid detergent to avoid corrosion and damage to the equipment.
9. Scheduled cleaning
From the APP you can set up a cleaning schedule so the robot will automatically clean on certain days and times.
Note
Scheduled cleaning will not be carried out during the time when non-disturbance mode is activated from the APP.
10. Equipment recharge
During operation, the robot will automatically return to the cleaning station to clean the mop cloth regularly. After rinsing is completed, the robot will automatically return to the point where it let off to continue cleaning. While the robot is cleaning, press the button of the cleaning station for a short period of time, and the robot will return to the cleaning station and rinse the mop cloth. While the robot is cleaning, press the button of the robot for a short period of time, and the robot will return to the cleaning station, rinse the mop cloth and then enter stand-by mode. While in stand-by mode, press the button of the cleaning station for a short period of time to rinse the mop cloth. After cleaning the robot will enter the stand-by mode.
How to use
Operation
11. Virtual wall / no-go areas
The user can define virtual wall/ no-go-areas within the APP for the robot.
Note
- Before using this function, you have to create and save a map in the APP.
- Moving the robot or changes within the indoor environment may lead to a loss of the original map and any virtual wall/ no-go areas.
12. Auto-Resume
This product has the function of auto-resume. During the cleaning process, when the power is low, the robot will automatically find the cleaning station to charge. After charging, the robot will return to the point where it left off to continue cleaning. If the cleaning is manually interrupted or the robot is moved or operated during recharging or charging, this auto-resume will be cancelled.
13. Default cleaning
When no map is stored, and if default cleaning is chosen, the robot will start cleaning in intervals of 6m×6m. Once a map is stored, if default cleaning is selected, the robot will start cleaning each room along the planned route.
When choosing edge cleaning in the APP, the robot will automatically start cleaning along the edges of your room.
Note
During cleaning, the robot may go beyond a defined area, so be sure to remove any obstacle on the floor within defined area since definition of any area will not ensure safe separation.
How to use
Operation
15. Spot-mode cleaning
When choosing spot-mode cleaning in the APP, the robot will clean selected area as a 2m x 2m square.
16. Non-Disturbance Mode
When non-disturbance mode is activated, scheduled cleaning and active voice reporting are unavailable. Non-disturbance mode is activated by default during the period from 23:00 to 9:00. Non-disturbance mode can be deactivated from the APP.
17. Carpet identification
If a carpet is identified during operation, the vacuum function will automatically turn on and the mop is lifted. This function can be turned off by using the carpet avoidance function in the APP. The robot will then automatically avoid carpets
Note
For children's floor mats, yoga mats, sponge mats and short pile carpets, there may be misjudgements, which will not affect the normal use. Virtual walls / no-go-areas can be set to prevent the robot from entering areas that do not need cleaning.
18. Stand-by mode
The robot will go to stand-by mode automatically when it is left idle for 5 minutes.
Note
Robot will not go to stand-by mode automatically on the cleaning station.
How to use
Operation
19. Resetting Wi-Fi
When your router or Wi-Fi access password has been changed, you have to reset your Wi-Fi connection by pressing and holding both ⏻ and ⏱ for 7 seconds while the robot is switched on. The Wi-Fi connection is reset successfully when a voice prompt "Wi-Fi reset and network configuration activated" is audible.
20. Resetting system
Press the reset button for 3s. When you hear “successfully reset the system”, the robot will restart automatically, and relevant settings such as scheduled cleaning and Wi-Fi will be reset to the factory state. Press the reset button for 10s. After you hear “successfully recover the system”, the robot will restart automatically, and the relevant settings such as scheduled cleaning and Wi-Fi will be reset to the factory state, and the system will be reset to the previous firmware version.
Note
After resetting the system, the robot needs to reconnect the APP, all previous settings in the APP are cleared.
APP Download
1. ZACO Home App
Scan the QR code below to download and install the APP.


ZACOHome APP


ZACOHome APP
2. Network configuration
Press and hold the ⏻ and buttons for 7s to access pairing mode with the network.
natural_image
Line drawing of a robotic vacuum cleaner with a hand interacting with the blade (no text or symbols)3. Network configuration
Please check that your Wi-Fi name does not contain any special characters.
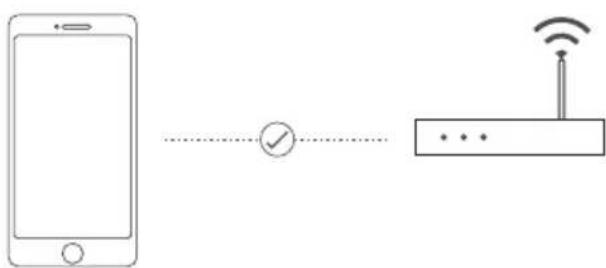
flowchart
graph LR
    A["Smartphone"] --> B{Checkmark}
    B --> C["Router"]
    C --> D["Wireless Sensor"]
Maintenance
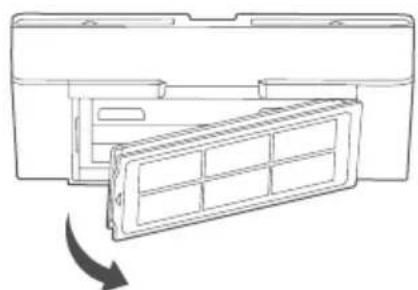
Dustbin
- Open the robot cover, press the dustbin release button, and take out the dustbin.
natural_image
Line drawing of a robotic vacuum cleaner with open lid and internal structure (no text or symbols)- Open the robot cover, press the dustbin release button, and take out the dustbin.

natural_image
Illustration showing a hand holding a folded device and its open case with internal components, alongside a close-up of the component being poured into a container (no text or symbols present)- Take out the filter screen as shown in the figure.
natural_image
Diagram of a mechanical component with a directional arrow indicating rotation or movement (no text or symbols present)Maintenance
Dustbin
- Clean the dustbin and filter screen with the cleaning brush.

natural_image
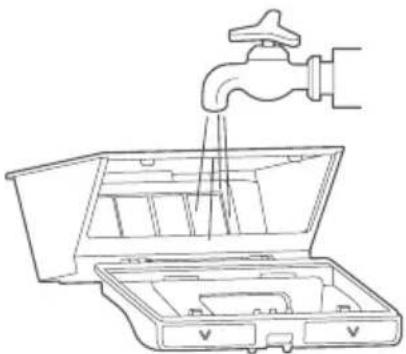
Illustration of a hand using a grater to remove granular material from a bowl (no text or symbols)- Clean it with clear water, dry it and put it back in.
natural_image
Line drawing of a faucet pouring liquid into an open toolbox (no text or symbols)Note
It is recommended to thoroughly clean the dustbin at least once a week. Please dry the dustbin and filter screen before use.
Maintenance
Dirty water tank / dirty water sieve
- Take out the dirty water tank and empty it.

natural_image
Line drawing of a container with liquid being poured into it (no text or symbols)- Lift up the rinsing grid and take out the dirty water sieve for cleaning.

natural_image
Line drawing of a smart air purifier with an inset showing internal components (no text or symbols)Maintenance
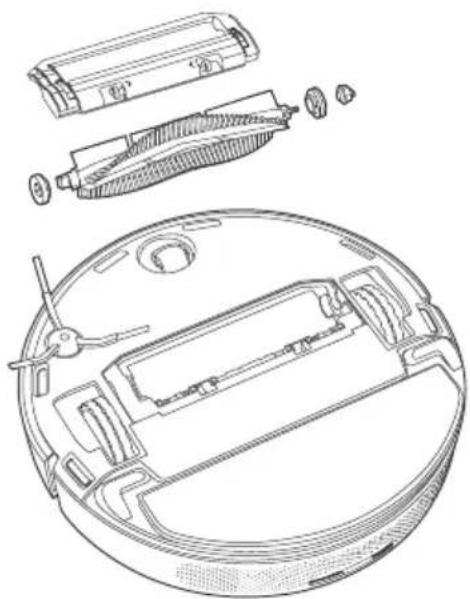
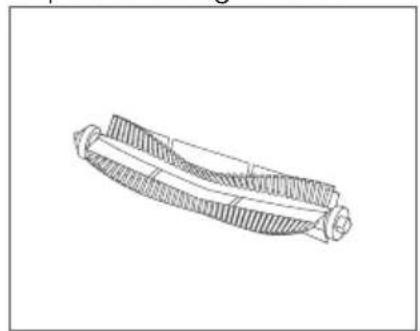
Main brush
- Turn over the robot and press the two release buttons to remove the main brush cover.
• Pull out the main brush upward. - Remove the main brush brackets at both ends of the main brush.
• To clean the main brush cut the hair wrapped on the brush with the cleaning tool and remove. - Assemble the individual parts of the brush.
- Replace the main brush and main brush cover.
natural_image
Technical line drawing of a vacuum cleaner internal components (no text or labels)Side brush
- Turn over the robot and remove the side brush fixing screw.
- Remove and clean the side brush.
- Replace the side brush and lock the screw.

natural_image
Line drawing of a mechanical component with a hand holding a pointer above it, no text or symbols presentMaintenance
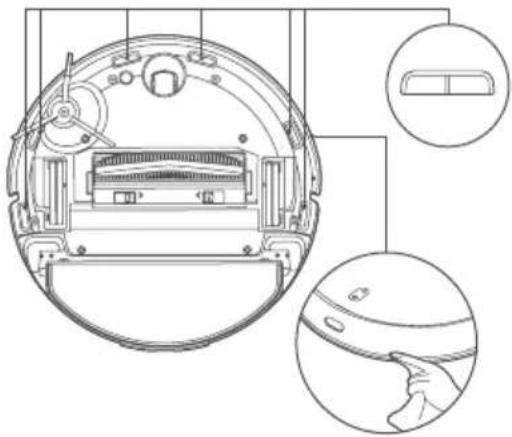
Front wheel
- Turn over the robot and pull the front wheel upwards.
- Clean and then reinstall the front wheel.
natural_image
Line drawing of a robotic vacuum cleaner with labeled components and an upward arrow indicating motion (no text or symbols present)Boundary sensor
- Please use a soft, dry cloth to clean the boundary sensors and IR sensors regularly.
Note
Do not use chemicals such as detergent or spray to clean the sensors.
natural_image
Technical line drawing of a circular device with internal components and two circular insets showing hand positioning (no text or symbols)Maintenance
Filter pipe of clean water tank
- Pull out the filter pipe in the clean water tank.

- Open the filter cover and clean the filter cover and sponge net.
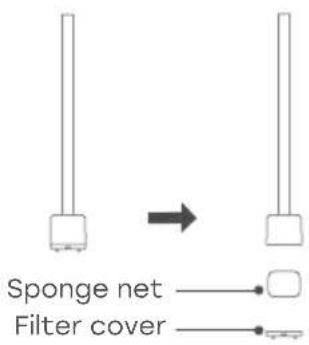
- Reinstall the filter pipe.

Troubleshooting
| Fault Prompt Solution | |
| Unable to power on. The battery is low. Please charge it before using. | |
| Robot fails to start cleaning. The battery is low. Please charge it before using. | |
| Robot cannot return for charging. 1. Too many barriers around the cleaning station. Place cleaning station as described earlier.2. Robot is too far away from cleaning station. Place robot near cleaning station and try again. | |
| Abnormal robot actions. Please shut down and restart the robot. | |
| Abnormal sound during cleaning. | Please check and clean the exterior parts on the main brush, side brush, left / right wheel after the robot is turned OFF. |
| Cleaning performance deteriorates or dust escapes. | 1. Dustbin is full. Please empty the bin.2. Filter screen is blocked. Please clean the filter screen.3. Main brush is blocked. Please clean the main brush. |
| Robot is offline. 1. Weak Wi-Fi signal. Make sure robot is in range of the Wi-Fi signal and check your network settings.2. Reset Wi-Fi connection, download the latest APP and try again. | |
| Robot fails to auto-resume. Make sure non-disturbance mode is not activated. | |
| Robot fails to charge. Make sure there is sufficient space around the cleaning station, and that there is no dust or blockage on the surface of electrodes of cleaning station. | |
Troubleshooting
| Fail to do scheduled cleaning. 1. If the robot is not connected to Wi-fi,the time settings cannot be synchronized,and the scheduled cleaning cannot start.2. Make sure the robot is not in non-disturbance mode, otherwise the scheduled cleaning is deactivated.3. Make sure the robot is not in lock mode, otherwise the scheduled cleaning is deactivated. |
| Robot is always offline. Please ensure that the robot network configuration is successful and that the robot is always within the range of Wi-Fi signal. |
| Robot fails to connect to APP. Ensure that the robot and the cleaning station are in area with good Wi-Fi signal;reset Wi-Fi according to the steps described; then pair again. |
| Failure to clean mop. 1. Check the clean water tank is not empty. If empty, please fill up.2. If the clean water tank is full, please check the drainage hole.3. Check the dirty water tank is not full. If so then please empty. |
| Make sure the laser sensor is not blocked. Laser ranging sensor is blocked or jammed. Remove the blockage carefully. |
| Clean boundary sensor and relocate robot. 1. Robot is unstable or off the ground. Relocate and restart robot.2. Boundary sensor is dirty. Clean the boundary sensor. |
| Check collision sensor and remove any foreign object on it. Collision sensor is jammed. Remove foreign object by tapping the sensor. If there is no foreign object, restart robot. |
Troubleshooting
| Place robot on horizontal ground and start it. | It is detected that robot is not on a flat surface. Place the robot on a flat surface and start it, or perform levelling in APP and then restart robot. |
| Put the robot on the ground to start. The wheels are suspended. Please move to a new position to start. | |
| Remove any obstacle around robot and try again. | 1. Robot may be jammed or trapped.Remove any barrier around it.2. Replace the dustbin and filter screen, and make sure that both are installed in place. |
| Make sure that the dustbin is mounted in place. | Check the dustbin and filter screen, and make sure that both are installed in place. |
| Make sure the clean water tank has been installed. | Please reinstall the clean water tank and make sure that it is in place. |
| Please make sure the dirty water tank has been installed. | Please reinstall the dirty water tank and make sure that it is in place. |
| Please make sure the sewage mesh has been installed. | Please clean the dirt water sieve and make sure that the sieve is in place. |
| The clean water tank is empty.Please add clean water in time. | Please check and refill the clean water tank. |
| The dirty water tank is full.Please clean it up in time. | Please empty out the water in the dirty water tank and clean it up regularly. |
| The dirty water tank is full.Please clean it up in time. | Please check and clean the tank. |
| Please move the robot back to the cleaning station. | The robot cannot locate the position of the cleaning station. Please put the robot back to the cleaning station for charging. |
| Low battery level. Please charge robot. The robot fails to locate charging station. Please manually place robot back to cleaning station. | |
Product Specification
M1S
| Classification Item Detail | ||
| Mechanical specifications Size 353 x 353 x 96,5 mm | ||
| Weight 4,1kg | ||
| Electrical specifications Power 40 W | ||
| Battery type 5200 mAh | ||
| Charging type Auto charging | ||
| Cleaning specifications Cleaning | mode Spot, Edge, MAX, Daily schedule | |
| Charging time 250-300 Min | ||
| Cleaning time ≈180 Min | ||
| Main Body Button Type - | Mechanical button | |
| Wireless connection | - | Wi-Fi IEEE 802.11b/g/n 2.4 GHzBluetooth 4.2, RF 433 MHz |
Cleaning station
| Classification Item Detail | ||
| Mechanical specifications Size 410 x 450 x 390 mm | ||
| Wireless Connection | RF 433 MHz | |
| Electrical specifications Rated input | 00-240 V~ 50/60 Hz | |
| Rated output | 20 V 3.25 A | |
| Charging input | 45 W | |
Frequency Band
Frequency Band and Output Power
| TX Frequency 2.4 ~ 2.4835 GHz | |
| RX Frequency 2.4 ~ 2.4835 GHz | |
| Antenna Gain 2.6 dBi | |
| RF Output Power | 802.11b 17+-2 dBm802.11g 17+-1.5 dBm802.11n 16+-1.5 dBm |
EU Declaration of Conformity
Robovox Distributions GmbH hereby declares that the ZACO M1S radio complies with Directive 2014/53/EU.
The full text of the EU Declaration of Conformity can be found on the Internet address https://conformity.zaco.eu/download/m1s.pdf
ZACO Customer Service
Customer Service Number
natural_image
Top-down line drawing of a circular robotic vacuum cleaner (no text or symbols)Roboter

natural_image
Line drawing of a closed air fryer with ventilation slots and base panel (no text or symbols)natural_image
Line drawing of two identical plastic containers with lids and handles (no text or symbols)Schmutzwassertank

natural_image
Isometric line drawing of a mechanical component or housing (no text or symbols)Staubtank

natural_image
Technical line drawing of a mechanical component with no visible text or symbolsnatural_image
Technical line drawing of a mechanical component with threaded ends and a central shaft (no text or symbols)
natural_image
Simple line drawing of a semi-circular shape with a horizontal line inside, no text or symbols present.
natural_image
Isometric line drawing of a perforated metal plate with rivets and holes (no text or symbols)Schmutzwassersieb

natural_image
Simple line drawing of a rectangular battery with three vertical slots and a small triangular head (no text or symbols)natural_image
Simple line drawing of a paperclip (no text or symbols)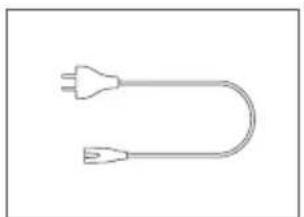
natural_image
Simple line drawing of a U-shaped electrical plug with two leads (no text or symbols)
natural_image
Pure electrical circuit lines without any symbolsProduktübersicht
Roboter
Anmerkung
natural_image
Line drawing of two hands holding a circular device with a lid and handle (no text or symbols)natural_image
Line drawing of a coffee maker with a power cord and outlet, shown in 3D perspective (no text or symbols)Verwendung
Reinigungsstation
Start/Pause-Taste
natural_image
Technical line drawing of a circular device interior with internal components and a curved lid (no text or symbols)Verwendung
Anmerkung
natural_image
Line drawing of a microwave oven with lid open and internal compartments, showing no text or symbolsAnmerkung
natural_image
Line drawing of a robotic vacuum cleaner with a hand interacting with the device (no text or symbols)3. Pause
natural_image
Line drawing of a robotic vacuum cleaner with a hand interacting with the blade (no text or symbols)natural_image
Technical line drawing of a robotic vacuum cleaner with internal components and an open lid (no text or symbols)natural_image
Illustration showing a hand holding a device with an open lid and its internal structure being processed into a container (no text or symbols present)natural_image
Diagram of a mechanical component with a highlighted internal structure and directional arrow (no text or symbols)Pflege
Staubtank
natural_image
Illustration of a hand using a grater to remove granular material from a bowl (no text or symbols)natural_image
Line drawing of a faucet pouring liquid into an open toolbox (no text or symbols)Anmerkung
natural_image
Line drawing of a container with liquid and droplets falling from inside (no text or symbols)natural_image
Line drawing of a smart air fryer with an inset showing its internal components (no text or symbols)Pflege
Hauptbürste
natural_image
Technical line drawing of a robotic vacuum cleaner with internal components and exploded view (no text or labels)Seitenbürste
natural_image
Line drawing of a device with a hand holding a small object above it, showing internal components and a handle (no text or symbols)Pflege
Frontrad
natural_image
Technical line drawing of a robotic vacuum cleaner with labeled components (no text or symbols)Begrenzungssensor
natural_image
Technical line drawing of a circular device interior with internal components and two circular insets showing hand positioning (no text or symbols)Pflege
natural_image
Top-down line drawing of a circular robotic vacuum cleaner (no text or symbols)Robot

natural_image
Line drawing of a cylindrical device with internal components and mounting holes (no text or symbols)natural_image
Line drawing of two identical cylindrical containers with lids and handles (no text or symbols)natural_image
Isometric line drawing of a mechanical component or housing (no text or symbols)Recogedor de polvo

natural_image
Technical line drawing of a mechanical component with no visible text or symbolsTapa del cepillo principal Cepillo principal
natural_image
Technical line drawing of a mechanical component with threaded ends and a central shaft (no text or symbols)
natural_image
Simple line drawing of a semi-circular shape with no text or symbols
natural_image
Isometric line drawing of a perforated metal plate with rivets and holes (no text or symbols)Tamiz de agua sucia

natural_image
Simple line drawing of a rectangular battery with three vertical slots and a small AC input (no text or symbols)Malla del filtro 2x Mopa
natural_image
Simple line drawing of a semi-circular shape with a horizontal line inside, no text or symbols present.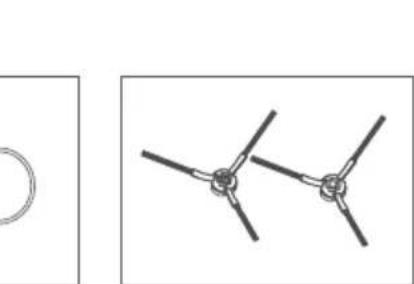
natural_image
Pure mechanical linkage diagram showing two connected components with no text or symbols
natural_image
Simple line drawing of a paperclip (no text or symbols)
natural_image
Simple line drawing of a U-shaped plug with two leads (no text or symbols)natural_image
Pure electrical circuit lines without any symbols2x Cepillo lateral
Nota
natural_image
Line drawing of two hands holding a circular device with a lid and connectors (no text or symbols)natural_image
Line drawing of a coffee maker with a wall-mounted power outlet (no text or symbols)Modo de uso
natural_image
Line drawing of a robotic vacuum cleaner with open lid and internal air vent (no text or symbols)natural_image
Technical line drawing of a mechanical device interior showing internal components and a curved housing (no text or symbols)Modo de uso
Nota
natural_image
Line drawing of a closed appliance with two compartments and a handle, showing internal structure (no text or symbols)Nota
natural_image
Line drawing of a robotic vacuum cleaner with a hand interacting with the device (no text or symbols present)4. Mapa de memoria
natural_image
Line drawing of a robotic vacuum cleaner with a hand interacting with the blade (no text or symbols)natural_image
Line drawing of a robotic vacuum cleaner with open lid and internal structure (no text or symbols)natural_image
Illustration showing a hand holding a device with an open case and its internal components being inserted into a container (no text or symbols present)natural_image
Technical line drawing of a mechanical component with a directional arrow indicating rotation (no text or symbols)Mantenimiento
Recogedor de polvo
natural_image
Illustration of a hand using a grater to remove granular material from a bowl (no text or symbols)natural_image
Line drawing of a faucet pouring liquid into an open toolbox (no text or symbols)Nota
natural_image
Line drawing of a container with liquid being poured into it, no text or symbols presentnatural_image
Line drawing of a smart air fryer with an inset showing its internal components (no text or symbols)Mantenimiento
Cepillo principal
natural_image
Technical line drawing of a vacuum cleaner internal components (no text or labels)Cepillo lateral
natural_image
Line drawing of a robotic vacuum cleaner with a hand operating the top component (no text or symbols)Mantenimiento
Rueda delantera
natural_image
Technical line drawing of a robotic vacuum cleaner with labeled components (no text or symbols)Sensor de límites
natural_image
Technical line drawing of a circular device with internal components and two circular insets showing hand positioning (no text or symbols)Mantenimiento
natural_image
Top-down line drawing of a circular robotic vacuum cleaner (no text or symbols)Robot

natural_image
Line drawing of a cylindrical device with internal components and mounting holes (no text or symbols)natural_image
Line drawing of two identical cylindrical containers with lids and handles (no text or symbols)natural_image
Isometric line drawing of a mechanical component or housing (no text or symbols)Bac de récupération

natural_image
Technical line drawing of a mechanical component with no visible text or symbolsnatural_image
Technical line drawing of a mechanical component with threaded ends and a central shaft (no text or symbols)Brosse principale

natural_image
Isometric line drawing of a perforated metal plate with rivets and holes (no text or symbols)natural_image
Simple line drawing of a rectangular battery with internal compartments (no text or symbols)Filtre Serpillière (2x)

natural_image
Simple line drawing of a semi-circular shape with a horizontal line inside, no text or symbols present.[Non-Text]

natural_image
Simple line drawing of a paperclip (no text or symbols)
natural_image
Simple line drawing of a paperclip (no text or symbols)
natural_image
Simple line drawing of a U-shaped plug with two leads (no text or symbols)
natural_image
Simple line drawing of a U-shaped plug with two leads (no text or symbols)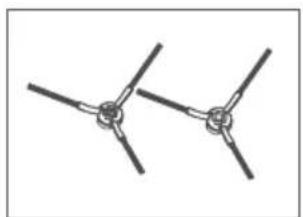
natural_image
Pure electrical circuit lines without any symbols
natural_image
Pure electrical circuit lines without any symbolsAperçu du produit
Robot

Note
natural_image
Line drawing of two hands holding a circular device with a lid and connectors (no text or symbols)natural_image
Line drawing of a coffee maker with a wall-mounted power outlet (no text or symbols)Mode d'emploi
Station de nettoyage
natural_image
Line drawing of a robotic vacuum cleaner with internal components and an open lid (no text or symbols)natural_image
Technical line drawing of a circular mechanical device with internal components and a curved lid (no text or symbols)Mode d'emploi
Note
natural_image
Line drawing of a two-chamber smart appliance with open lid and internal compartments (no text or symbols)Note
natural_image
Line drawing of a robotic vacuum cleaner with a hand interacting with the blade (no text or symbols)natural_image
Line drawing of a robotic vacuum cleaner with open lid and internal structure (no text or symbols)natural_image
Illustration showing a hand holding a folded paper or plastic sheet and then dropping into a container with granular material (no text or symbols present)natural_image
Diagram of a device's internal structure with a directional arrow indicating rotation (no text or symbols present)Maintenance
Cac à poussiere
natural_image
Illustration of a hand using a grater to remove granular material from a bowl (no text or symbols)natural_image
Line drawing of a faucet pouring liquid into an open toolbox (no text or symbols)Note
natural_image
Line drawing of a container with liquid and droplets falling from inside (no text or symbols)natural_image
Line drawing of a smart air fryer device with an inset showing its internal components (no text or symbols)Maintenance
Brosse principale
natural_image
Technical line drawing of a vacuum cleaner internal components (no text or labels)Brosse latérale
natural_image
Line drawing of a robotic vacuum cleaner with a hand operating the top component (no text or symbols)Maintenance
Roue avant
natural_image
Technical line drawing of a robotic vacuum cleaner with labeled components (no text or symbols)Capteur de bordures
natural_image
Technical diagram of a circular device with internal components and two circular insets showing different views (no text or symbols present)Maintenance
natural_image
Top-down line drawing of a circular robotic vacuum cleaner (no text or symbols)Robot

natural_image
Line drawing of a cylindrical device with internal components and mounting holes (no text or symbols)natural_image
Line drawing of two identical cylindrical containers with lids and handles (no text or symbols)natural_image
Isometric line drawing of a mechanical component or housing (no text or symbols)natural_image
Technical line drawing of a mechanical component with no visible text or symbolsnatural_image
Technical line drawing of a mechanical component with threaded ends and a central shaft (no text or symbols)Spazzola principale
natural_image
Isometric line drawing of a perforated metal plate with rivets and holes (no text or symbols)Vaglio acqua sporca
natural_image
Simple line drawing of a rectangular battery with internal compartments (no text or symbols)Vaglio filtro 2x Mocio

natural_image
Simple line drawing of a semi-circular shape with a horizontal line inside, no text or symbols present.[Non-Text]

natural_image
Simple line drawing of a paperclip (no text or symbols)ento per la pulizia

natural_image
Simple line drawing of a U-shaped plug with two leads (no text or symbols)natural_image
Pure electrical circuit lines without any symbolsNota
natural_image
Line drawing of two hands holding a circular device with a lid and adjustment clips (no text or symbols)natural_image
Line drawing of a coffee maker with a wall-mounted cable, shown in 3D perspective (no text or symbols)natural_image
Line drawing of a robotic vacuum cleaner with open lid and internal air vent (no text or symbols)natural_image
Technical line drawing of a circular device interior with internal components and a curved lid (no text or symbols)Nota
natural_image
Line drawing of a two-chamber smart appliance with open lid and internal compartments (no text or symbols)Nota
natural_image
Line drawing of a robotic vacuum cleaner with a hand interacting with the touchscreen (no text or symbols present)natural_image
Line drawing of a robotic vacuum cleaner with a hand interacting with the blade (no text or symbols)natural_image
Line drawing of a robotic vacuum cleaner with open lid and internal structure (no text or symbols)natural_image
Illustration showing a hand holding a folded paper or plastic sheet and then dropping into a container with granular material (no text or symbols present)natural_image
Diagram of a device's internal structure with a directional arrow indicating rotation (no text or symbols present)Manutenzione
natural_image
Illustration of a hand using a grater to remove granular material from a bowl (no text or symbols)natural_image
Line drawing of a faucet pouring liquid into an open toolbox (no text or symbols)Nota
natural_image
Line drawing of a container with liquid and droplets falling from inside (no text or symbols)natural_image
Line drawing of a smart air fryer device with an inset showing its internal components (no text or symbols)Manutenzione
Spazzola principale
natural_image
Technical line drawing of a vacuum cleaner internal components (no text or labels)Spazzola laterale
natural_image
Line drawing of a mechanical component with a hand holding a tool, no text or symbols presentManutenzione
Ruota anteriore
natural_image
Line drawing of a robotic vacuum cleaner with labeled components and an upward arrow indicating motion (no text or symbols present)Sensore perimetrale
natural_image
Technical line drawing of a circular device with internal components and two circular insets showing hand positioning (no text or symbols)Manutenzione


- Robot Vacuum Cleaner
- User Manual
- Dear Customer,
- ZACO Customer Service
- Contents
- Safety Instructions 4
- Product Overview 8
- How to use 12
- App download 22
- Maintenance 23
- Troubleshooting 29
- Product Specification 32
- Frequency Band / EU Declaration of Conformity 33
- Safety instructions
- WARNING!
- Use instructions
- Environmental Implications
- Battery Removal
- Note:
- Product Overview
- How to use
- Cleaning station
- Installation
- Note
- Remove the anti-collision bars
- Power on and charging
- Start/pause button
- Cleaning station home button
- Installing the dustbin
- Installation of clean water tank and mop
- Operation
- Power on/off
- To start cleaning
- Pause
- Memory map
- Vibrating mop mode
- Model / level selection
- Robot recharging
- Filling and emptying the water tanks when applicable
- Scheduled cleaning
- Equipment recharge
- Virtual wall / no-go areas
- Auto-Resume
- Default cleaning
- Spot-mode cleaning
- Non-Disturbance Mode
- Carpet identification
- Stand-by mode
- Resetting Wi-Fi
- Resetting system
- APP Download
- ZACO Home App
- Network configuration
- Network configuration
- Maintenance
- Dustbin
- Dirty water tank / dirty water sieve
- Main brush
- Side brush
- Front wheel
- Boundary sensor
- Filter pipe of clean water tank
- Troubleshooting
- Product Specification
- Frequency Band
- EU Declaration of Conformity
- Produktübersicht
- Anmerkung
- Verwendung
- Reinigungsstation
- Start/Pause-Taste
- Pflege
- Staubtank
- Hauptbürste
- Seitenbürste
- Frontrad
- Begrenzungssensor
- Nota
- Modo de uso
- Mapa de memoria
- Mantenimiento
- Recogedor de polvo
- Cepillo principal
- Cepillo lateral
- Rueda delantera
- Sensor de límites
- Aperçu du produit
- Mode d'emploi
- Station de nettoyage
- Cac à poussiere
- Brosse principale
- Brosse latérale
- Roue avant
- Capteur de bordures
- Manutenzione
- Spazzola principale
- Spazzola laterale
- Ruota anteriore
- Sensore perimetrale
Brand : ZACO
Model : M1S
Category : Vacuum Cleaner