LEDS10DRGB - Lighting Perel - Free user manual and instructions
Find the device manual for free LEDS10DRGB Perel in PDF.

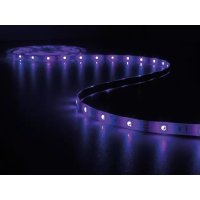
| Product type | Flexible RGB LED strip |
| Brand | Perel |
| Model | LEDS10DRGB |
| Dimensions | 5 m x 10 mm (length x width) |
| Weight | 450 g |
| Power supply | 12 VDC, 24 W (charger included) |
| Number of LEDs | 150 LEDs (type 5050) |
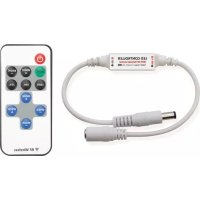
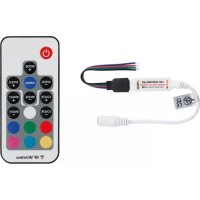
| Control | Infrared remote control with 164 programs |
| Functions | Fixed color, cycle, pulse, strobe, auto change, shooting star effect |
| Viewing angle | 120° |
| Protection rating | IP61 |
| Coating | Silicone |
| Color temperature | Warm/cool white (selectable) |
| Cutting possibility | Every 10 cm (every 3 LEDs) |
| Mounting | Self-adhesive |
| Usage | Indoor only, at least 0.5 m away from objects |
| Maintenance | Clean with a dry cloth, do not immerse |
| Spare parts | No user-serviceable parts, contact the dealer |
| Warranty | 24 months (Velleman conditions) |
Frequently Asked Questions - LEDS10DRGB Perel
User questions about LEDS10DRGB Perel
0 question about this device. Answer the ones you know or ask your own.
Ask a new question about this device
Download the instructions for your Lighting in PDF format for free! Find your manual LEDS10DRGB - Perel and take your electronic device back in hand. On this page are published all the documents necessary for the use of your device. LEDS10DRGB by Perel.
USER MANUAL LEDS10DRGB Perel
FLEXIBLE LED STRIP, CONTROLLER AND POWER SUPPLY FLEXIBELE LEDSTRIP, CONTROLLER EN VOEDING FLEXIBLE LED, CONTRÔLEUR ET ALIMENTATION CINTA DE LEDs FLEXIBLE, CONTROLADOR Y ADAPTADOR DE RED
FLEXIBLER LED-LEISTE, CONTROLLER UND NETZTEIL FAIXA LED FLEXÍVEL, CONTROLADOR E ALIMENTAÇÃO
natural_image
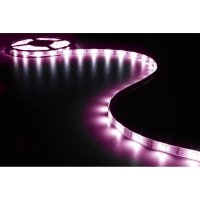
Nighttime aerial view of a curved illuminated structure with colorful light reflections (no text or symbols visible)USER MANUAL 4
GEBRUIKERSHANDLEIDING 9
MODE D'EMPLOI 14
MANUAL DEL USUARIO 19
natural_image
Technical line drawing of mechanical components and assembly (no text or symbols)A2
natural_image
Line drawing of electrical components including a plug, fuse, and meter (no text or symbols)A4
natural_image
Pure electrical circuit lines without any symbolsLEDS10DRGB
B1
flowchart
graph TD
    A["Step 1: Adding part"] --> B["Step 2: Splitting"]
    B --> C["Step 3: Adding circle component"]
B2
text_image
1 2 3 4 5 6 7 8 9 10 11 12 13 14USER MANUAL
1. Introduction
To all residents of the European Union Important environmental information about this product
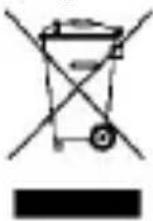
This symbol on the device or the package indicates that disposal of the device after its lifecycle could harm the environment. Do not dispose of the unit (or batteries) as unsorted municipal waste; it should be taken to a specialized company for recycling. This device should be returned to
your distributor or to a local recycling service. Respect the local environmental rules.
If in doubt, contact your local waste disposal authorities.
Thank you for choosing Perel! Please read the manual thoroughly before bringing this device into service. If the device was damaged in transit, do not install or use it and contact your dealer.
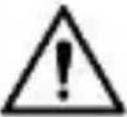
2. Safety Instructions
 | Keep this device away from children and unauthorized users. | |
 | There are no user-serviceable parts inside the device. Refer to an authorized dealer for service and/or spare parts. | |
 | Warning: Do not puncture the batteries or throw them in fire as they may explode. Do not attempt to recharge non-rechargeable (alkaline) batteries. Dispose of batteries in accordance with local regulations. Keep batteries away from children. | |
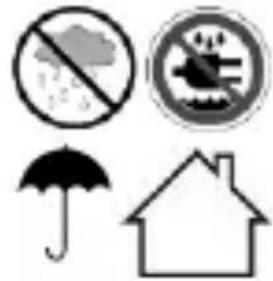 | Indoor use only. Keep this device away from rain, moisture, splashing and dripping liquids. | |
LEDS10DRGB
| 0.5m | Keep at a distance of at least 0,5 m from any illuminated object. |
| This is a Safety Class 3 device. |
3. General Guidelines
Refer to the Velleman® Service and Quality Warranty on the last pages of this manual.
- Keep away from dust and extreme temperatures.
- Protect form shocks and abuse. Avoid brute force when operating.
- Familiarise yourself with the functions of the device before actually using it.
- All modifications of the device are forbidden for safety reasons. Damage caused by user modifications to the device is not covered by the warranty.
- Only use the device for its intended purpose. Using the device in an unauthorised way will void the warranty.
- Damage caused by disregard of certain guidelines in this manual is not covered by the warranty and the dealer will not accept responsibility for any ensuing defects or problems.
- Keep this manual for future reference.
4. Features
- flexible PCB (white)
- contains 150 high brightness LEDs (type 5050)
- digital RGB controller with 164 different programs:
- fixed colour
- cycle, pulse, strobe effect, etc.
• controlled through infrared remote (incl.)
• can be cut every 3 LEDs (10 cm)
• power supply included
• for illuminated advertising and marking - self-adhesive
LEDS10DRGB
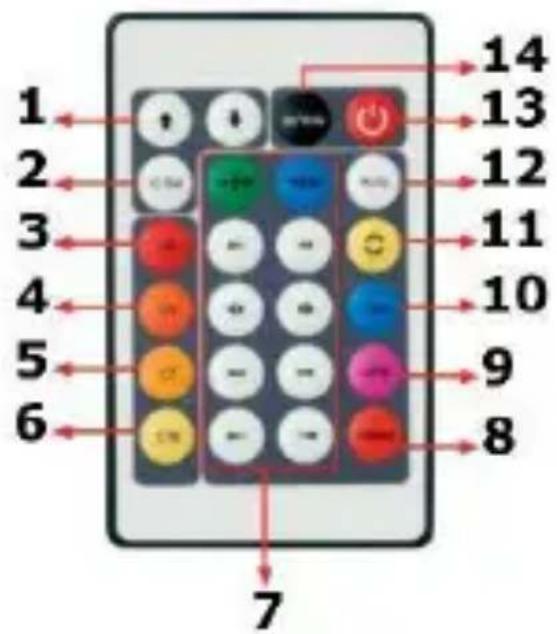
5. Remote Control Overview
Refer to illustration [B2] on page 3 of this manual.
| 1 | length, dimming and speed setting |
| 2 | length of the illuminated section |
| 3 | 8 constant colours |
| 4 | 3 colours simultaneously |
| 5 | 7 colours simultaneously |
| 6 | 16 colours simultaneously |
| 7 | different chase effects |
| 8 | shooting stars effect from left to right |
| 9 | automatic colour change, fast |
| 10 | automatic colour change, slow |
| 11 | smooth cycle effect |
| 12 | automatic run through all the programmes |
| 13 | on/off |
| 14 | warm/cold white |
6. Installation
Guidelines
- Avoid installing the LED strips near heat sources such as ovens, toasters, etc.
- Never use the LED strip when it is coiled up as this can cause overheating.
- Before mounting, ensure the desired surface is flat and clean of any grease, dirt or debris.
- Avoid tight bends in the LED strip.
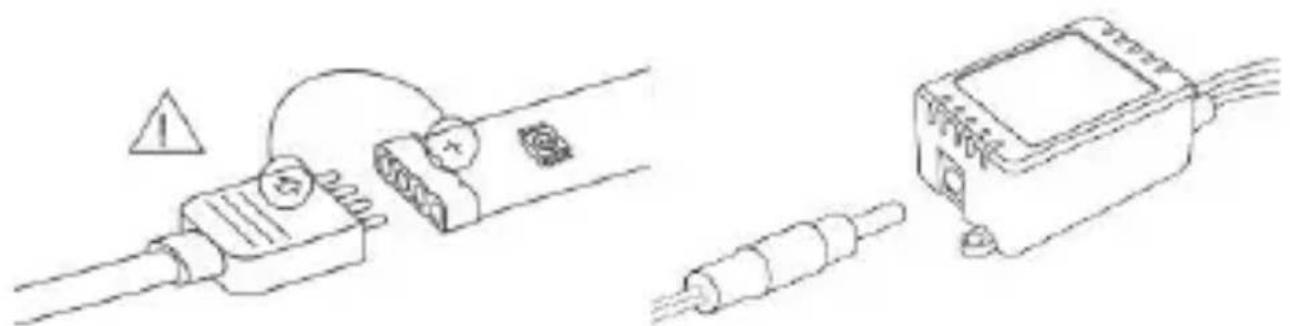
- Observe the correct polarity when re-joining cable sections. The polarity is marked at regular intervals along the LED strip.
- Cut the strip using sharp scissors or a craft knife with a fresh blade. Cut directly on the marked line. Never cut the LED strip when it is plugged in.
Installation
Refer to the illustrations on page 2 of this manual.
- Mount the LED strip in the desired location. The LED strip can be cut every 10 cm (see [A1]). Protect the cut ends to avoid short-circuits.
LEDS10DRGB
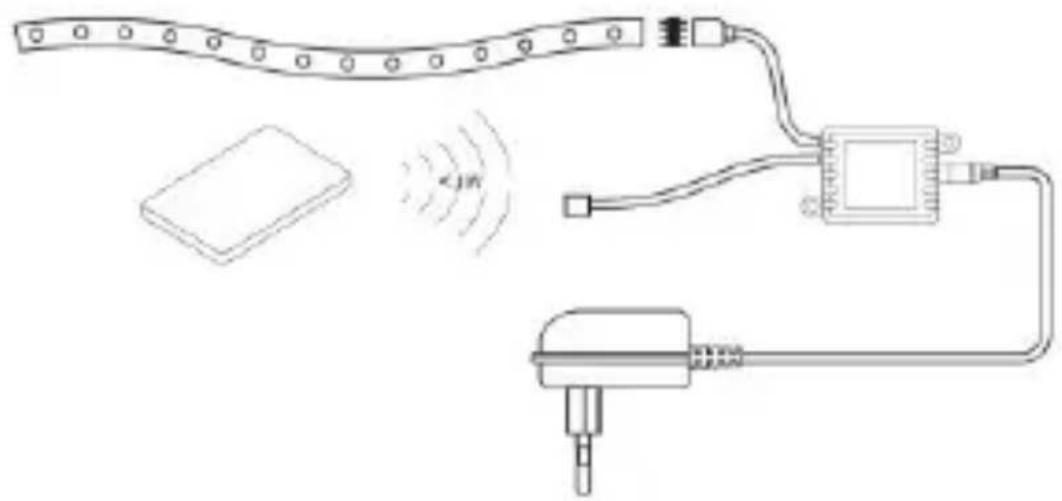
- Connect the LED strips to the controller (see [A2]). Make sure to connect matching wire colours and do not short-circuit any wires. Connecting tools are not included.
- Connect the included power adapter to the controller (see [A3]).
- Plug the adapter into the mains. Refer to illustration [A4] for a general connection scheme.
7. Remote Control
Battery
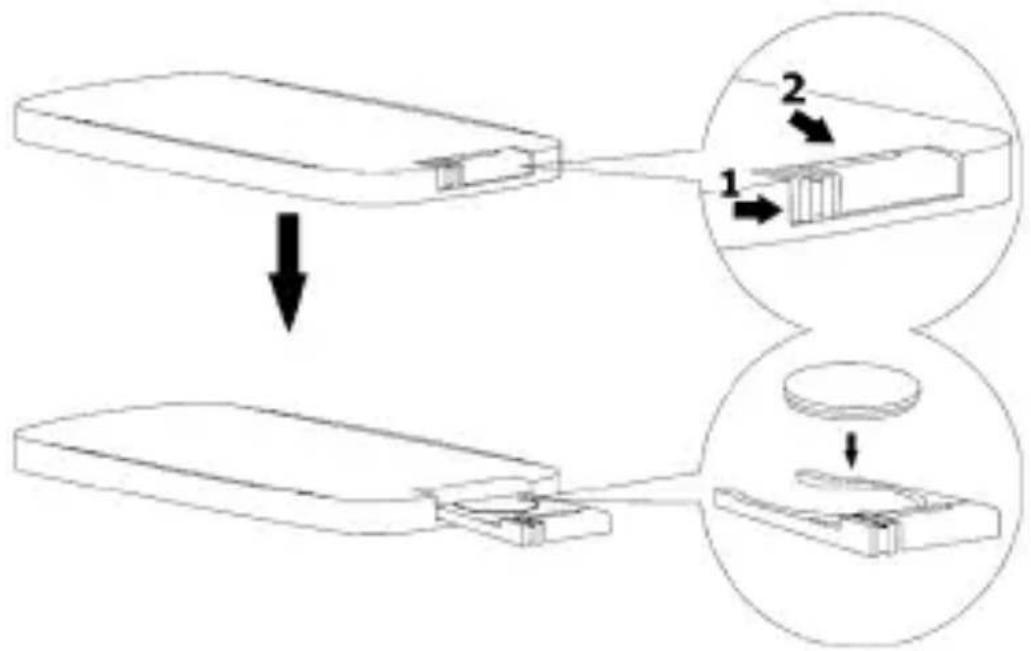
Refer to illustration [B1] on page 3 of this manual.
The remote control uses 1 battery type 3 V lithium CR2025 (included). Remove the tag from the battery compartment before use.
- To (re)place a battery, press on the side of the battery cover and pull to slide open.
- Insert the battery with the correct polarity and close the battery compartment by pushing back into the housing of the remote control until it snaps into place.
Operation
- Aim the remote control towards the IR LED of the controller to control the output of the LED strip.
- Switch on the LED strip with the ON button on the remote control. To switch it off again, press the OFF button.
- Refer to chapter 5. Overview for more information about operating the remote control.
8. Technical Specifications
| IP rating | IP61 | ||
| coating | silicone | ||
| colour | red/green/blue | ||
| wavelength | red | green | blue |
| 615-630 nm | 520-530 nm | 465-470 nm | |
| IC type | TM1804 | ||
| viewing angle | 120° | ||
| LED spacing | 33 mm | ||
| power supply | 12 VDC 24 W (adapter incl.) | ||
LEDS10DRGB
| dimensions | 5 m x 10 mm |
| weight | 450 g |
Use this device with original accessories only. Velleman nv cannot be held responsible in the event of damage or injury resulting from (incorrect) use of this device. For more info concerning this product and the latest version of this manual, please visit our website www.perel.eu. The information in this manual is subject to change without prior notice.
© COPYRIGHT NOTICE
The copyright to this manual is owned by Velleman nv. All worldwide rights reserved. No part of this manual may be copied, reproduced, translated or reduced to any electronic medium or otherwise without the prior written consent of the copyright holder.
GEBRUIKERSHANDLEIDING
1. Inleiding
Velleman® Service and Quality Warranty
Since its foundation in 1972, Velleman® acquired extensive experience in the electronics world and currently distributes its products in over 85 countries.
All our products fulfil strict quality requirements and legal stipulations in the EU. In order to ensure the quality, our products regularly go through an extra quality check, both by an internal quality department and by specialized external organisations. If, all precautionary measures notwithstanding, problems should occur, please make appeal to our warranty (see guarantee conditions).
General Warranty Conditions Concerning Consumer Products (for EU):
- All consumer products are subject to a 24-month warranty on production flaws and defective material as from the original date of purchase.
- Velleman® can decide to replace an article with an equivalent article, or to refund the retail value totally or partially when the complaint is valid and a free repair or replacement of the article is impossible, or if the expenses are out of proportion.
You will be delivered a replacing article or a refund at the value of 100% of the purchase price in case of a flaw occurred in the first year after the date of purchase and delivery, or a replacing article at 50% of the purchase price or a refund at the value of 50% of the retail value in case of a flaw occurred in the second year after the date of purchase and delivery.
• Not covered by warranty:
- all direct or indirect damage caused after delivery to the article (e.g. by oxidation, shocks, falls, dust, dirt, humidity...), and by the article, as well as its contents (e.g. data loss), compensation for loss of profits; - consumable goods, parts or accessories that are subject to an aging process during normal use, such as batteries (rechargeable, non-rechargeable, built-in or replaceable), lamps, rubber parts, drive belts... (unlimited list);
- flaws resulting from fire, water damage, lightning, accident, natural disaster, etc....;
- flaws caused deliberately, negligently or resulting from improper handling, negligent maintenance, abusive use or use contrary to the manufacturer's instructions;
- damage caused by a commercial, professional or collective use of the article (the warranty validity will be reduced to six (6) months when the article is used professionally);
- damage resulting from an inappropriate packing and shipping of the article;
- all damage caused by modification, repair or alteration performed by a third party without written permission by Velleman®.
- Articles to be repaired must be delivered to your Velleman® dealer, solidly packed (preferably in the original packaging), and be completed with the original receipt of purchase and a clear flaw description.
- Hint: In order to save on cost and time, please reread the manual and check if the flaw is caused by obvious causes prior to presenting the article for repair. Note that returning a non-defective article can also involve handling costs.
• Repairs occurring after warranty expiration are subject to shipping costs.
- The above conditions are without prejudice to all commercial warranties.
The above enumeration is subject to modification according to the article (see article's manual).