Scouting Cam Black 800 WiFi - Action camera BRAUN - Free user manual and instructions
Find the device manual for free Scouting Cam Black 800 WiFi BRAUN in PDF.
| Product Type | Trail Camera / Sportscam |
| Brand | Braun |
| Model | Scouting Cam Black 800 WiFi |
| Image Sensor | CMOS 8 MP |
| Photo Resolution | 24M, 20M, 16M, 12M, 10M, 8M, 5M, 3M, 2M |
| Video Resolution | 1296P, 1080P, 720P, WVGA, VGA |
| Lens | F2.5, f=3.6 mm |
| Display | LCD 2 inches |
| Memory | SD card (max. 32 GB, Class 6 or higher) |
| File Formats | JPG (photo), MP4 (video) |
| Power Supply | 8 AA batteries (6 V / 2 A DC adapter optional) |
| Connectivity | Built-in Wi-Fi, USB 2.0, AV output |
| PIR Detection Angle | 120° (side sensors), 90° (main sensor) |
| Infrared Range | 3 to 20 meters |
| PIR Interval | 5 s to 60 min (photo), 10 s to 60 min (video and photo+video) |
| Video Length | 5 to 180 seconds |
| Special Functions | Time lapse, programmable operating period, password protection, automatic Wi-Fi shutdown |
| Dimensions | 95 × 137.5 × 64 mm |
| Menu Languages | English, Chinese, German, French, Italian, Spanish, Portuguese, Dutch, Japanese, Danish, Swedish |
| Operating Temperature | Not specified in the manual (estimated -20°C to 60°C) |
Frequently Asked Questions - Scouting Cam Black 800 WiFi BRAUN
User questions about Scouting Cam Black 800 WiFi BRAUN
0 question about this device. Answer the ones you know or ask your own.
Ask a new question about this device
Download the instructions for your Action camera in PDF format for free! Find your manual Scouting Cam Black 800 WiFi - BRAUN and take your electronic device back in hand. On this page are published all the documents necessary for the use of your device. Scouting Cam Black 800 WiFi by BRAUN.
USER MANUAL Scouting Cam Black 800 WiFi BRAUN
Thank you for purchasing this hunting camera. This product is a digital camera dedicated to recording and observing wildlife. For your convenience and ease of operation, we have created a detailed manual. This manual instructs how to use the system on this hunting camera. Please read this manual carefully before use so that you can quickly and correctly master the method.
The contents of this manual are for reference only and use the latest information in the preparation of the manual. The screen displays, illustrations, etc. used in this manual are for a more detailed and intuitive explanation of the operation of the camera. Due to differences in technology development and production batches, they may differ slightly from the camera you actually use.
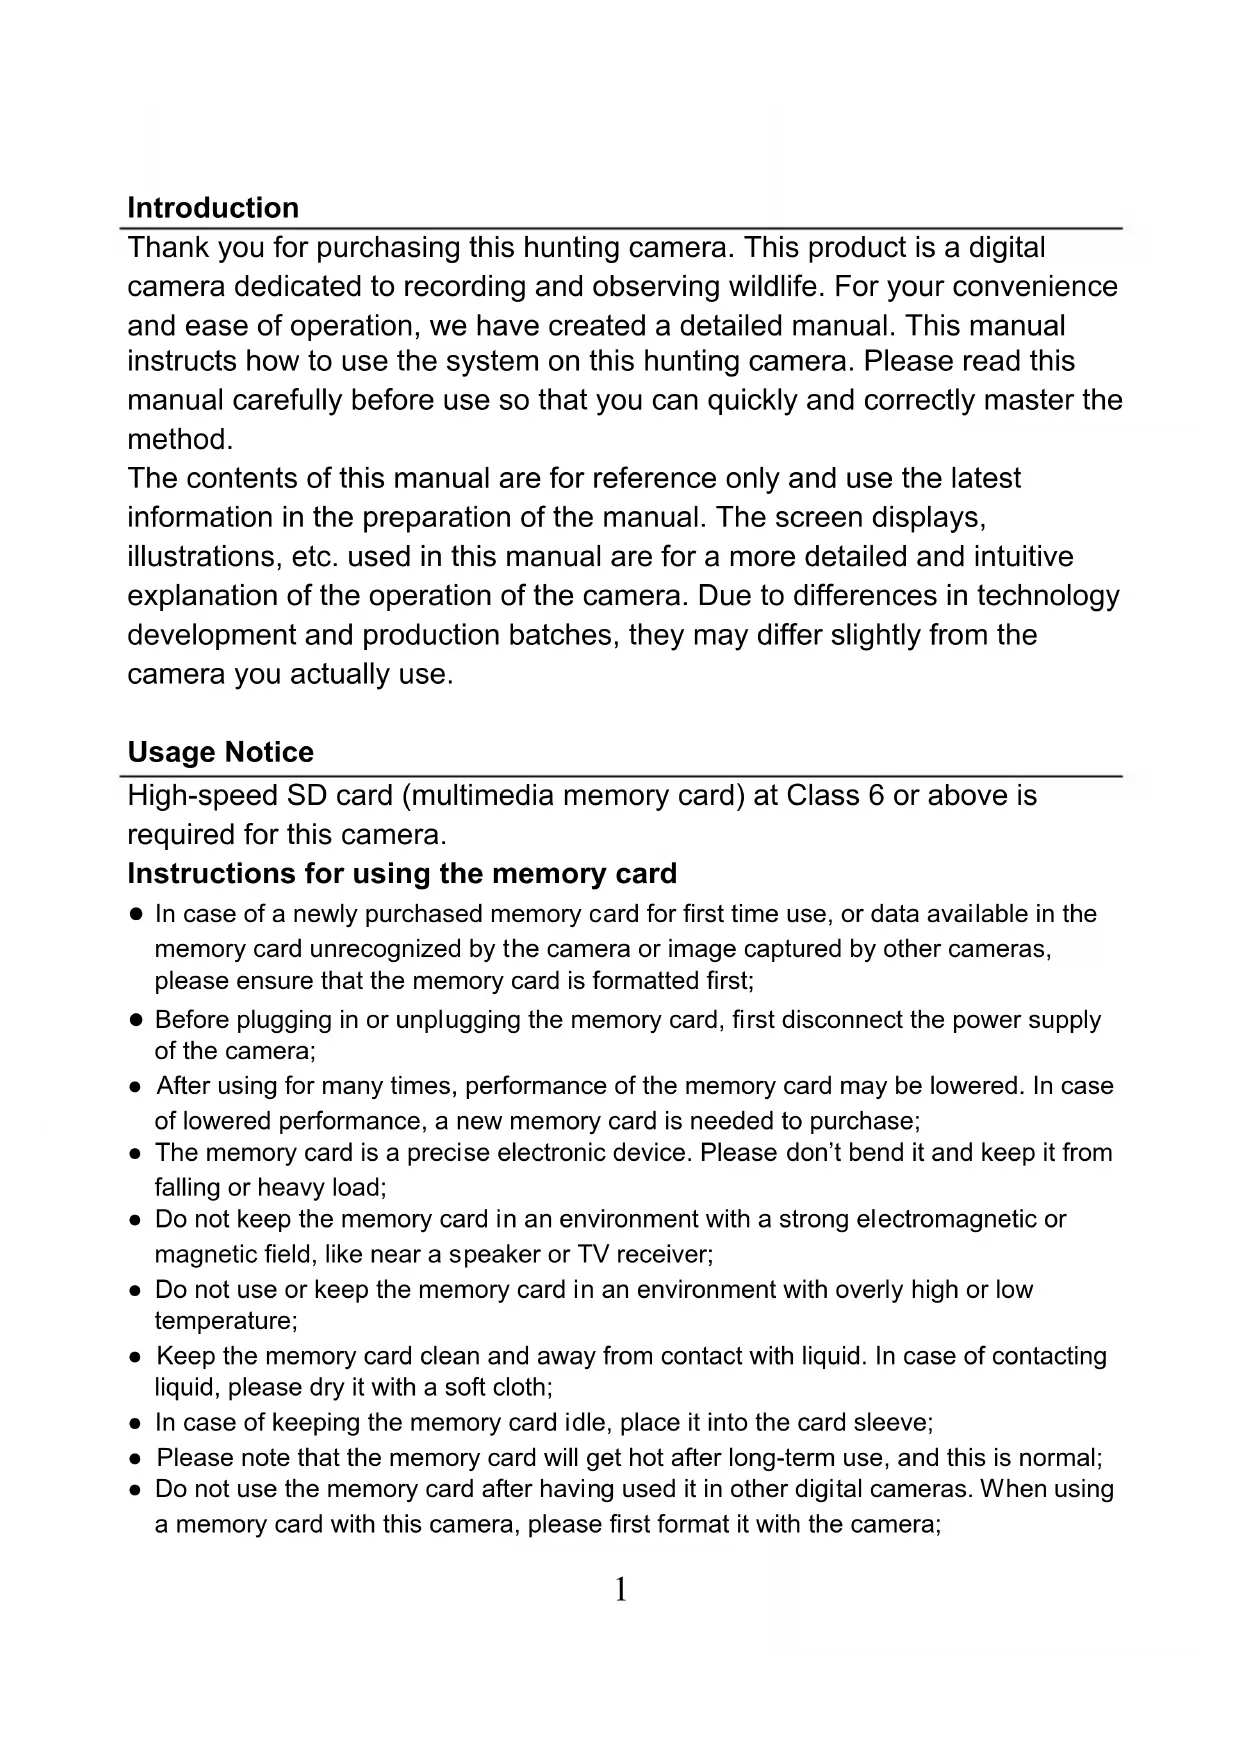
Usage Notice
High-speed SD card (multimedia memory card) at Class 6 or above is required for this camera.
Instructions for using the memory card
- In case of a newly purchased memory card for first time use, or data available in the memory card unrecognized by the camera or image captured by other cameras, please ensure that the memory card is formatted first;
- Before plugging in or unplugging the memory card, first disconnect the power supply of the camera;
- After using for many times, performance of the memory card may be lowered. In case of lowered performance, a new memory card is needed to purchase;
- The memory card is a precise electronic device. Please don't bend it and keep it from falling or heavy load;
- Do not keep the memory card in an environment with a strong electromagnetic or magnetic field, like near a speaker or TV receiver;
- Do not use or keep the memory card in an environment with overly high or low temperature;
- Keep the memory card clean and away from contact with liquid. In case of contacting liquid, please dry it with a soft cloth;
- In case of keeping the memory card idle, place it into the card sleeve;
- Please note that the memory card will get hot after long-term use, and this is normal;
-
Do not use the memory card after having used it in other digital cameras. When using a memory card with this camera, please first format it with the camera;
-
Do not use the memory card having formatted on another camera or card reader;
- In case of one of the following actions with the memory card, the recorded data may be damaged:
- Improper use of the memory card.
- Disconnecting the power supply or removing the memory card during recording, deleting (formatting) or reading.
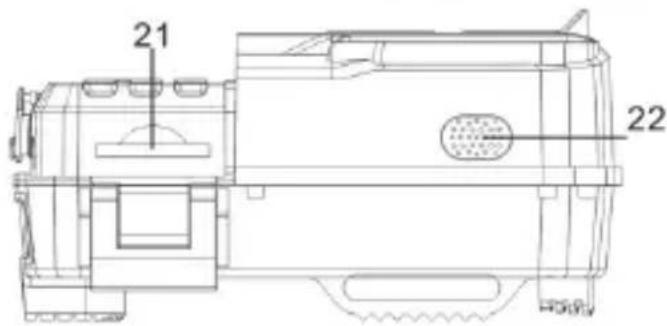
Appearance

Appearance
- Photosensitive sensor
- Secondary PIR indicator
- System indicator
- Main PIR indicator
- Lens
6.Left IR LED - Right IR LED
- Main sensor
- Left sensor
- Right Sensor
- MODE
12.Up button
13. LCD
14. OK/SHOT
15. Down button
16. OFF/SETUP/ON
17. Battery compartment cover
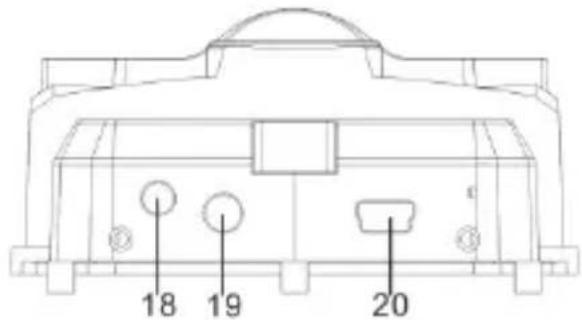
18. DC connector
19. AV connector
20. USB Port
21. SD Slot
22. Speaker
| Button | Functions |
| Power | Pull switch:1. OFF2. SETUP3. ON |
| MODE | 1. Short press to switch to recording, photo, playback and menu.2. In the submenu, short press to return to the previous menu.3. Short press on the password setup interface to enter the next setup option. |
| Up | 1. In the menu setting mode, you can select upwards.2. In the time setting or password protection interface, you can select numbers or characters upwards.3. Press and hold for 3 seconds to open or exit WIFI. |
| OK/SHOT | 1. In the video or photo interface, short press to take a photo or video.2. Under menu settings, short press to confirm.3. Under the time setting, short press to enter the next setting option. |
| Down | 1. In the menu setting mode, you can select down.2. In the time setting or password protection interface, you can select numbers or characters down.3. In playback mode, long press to pop up the delete menu window, delete files or lock protection files. |
Getting started
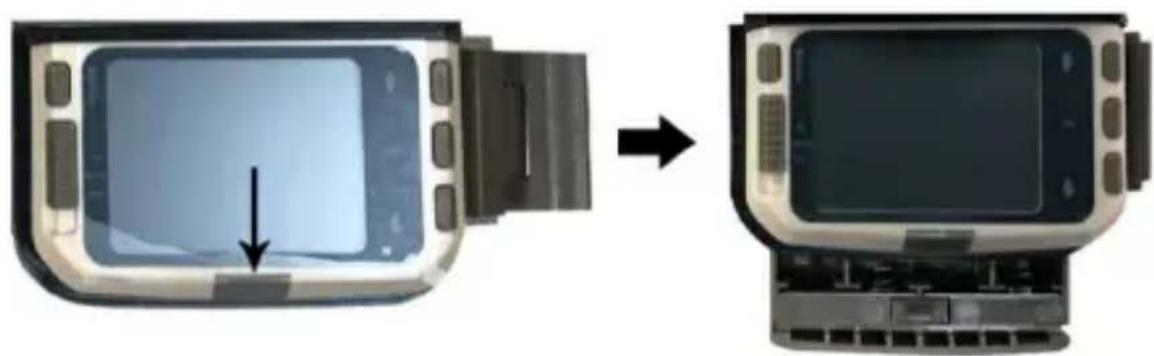
1. Battery/Adapter
Please make sure to place batteries in the camera before using.
1.1 First open the camera by swiveling the base plate. Find the battery compartment cover to open it. Insert 8pcs AA batteries into the battery slot.
1.2 When using the power adapter (not included in delivery), find the rubber seal on the bottom of the camera and open it, then plug it into the power supply (DC DC6V-2A).
2. Inserting memory card
2.1 Push the SD card into the card slot according to the instruction, and make sure the SD card is fully inserted.
2.2 To remove the memory card, gently press the edge of the memory card until it pops out.
Note: The camera does not have built-in memory. A memory card must be inserted into the camera before using. After inserting the memory card, make sure to format the memory card on the camera first.
1. Power on and off/System settings
After placing the batteries into the camera, put the operating mode selector switch to "SETUP" position to make the settings described on the following pages. In SETUP mode, the infrared lamp is closed.
1.1 To put the operating mode selector switch from "OFF" to "SETUP", the camera is on.
1.2 Press MODE button to switch to video, photo, playback and menu modes.
1.3 Press OK to save the Settings under menu Settings. In the interface of recording or photographing, short press to take pictures or record videos.
1.4 Press the MODE button one more time to return to previous menu or exit the menu settings.
1.5 Put the operator mode selector switch to "OFF" to power off the camera.
2. Working modes
There are three working modes in the camera: Photo mode, Video mode, Photo+ Video mode.
2.1 Photo mode
Select a photo resolution: 24M.20M.16M.12M.10M.8M.5M.3M.2M.The larger the file size is, the more detailed the photos are. However, the larger size files take more memory space to store.
2.2 Video mode
Select the video resolution: 1296P.1080P.720P.WVGA.VGA. The higher the resolution is, the more detailed the videos are. However, the larger size files take more memory space to store.
2.3 Photo+Video mode
In Photo+Video mode, the camera first takes a photo and then starts filming video.
Note: The camera will enter power save mode and screen turns off when recording. The screen can be turned on by pressing any key on the camera.
3. Video length
The video length is optional between 5-180 seconds. The longer the recording time selected, the shorter the operating time is. The preset video length is 5 seconds.
4. PIR Interval
The PIR interval setup. When different modes are selected, the set time period is different:
Photo: PIR interval setting time (between 5 seconds and 60 minutes)
Recording: PIR interval setting time (between 10 seconds and 60 minutes)
Photo+Video: PIR interval setting time (between 10 seconds and 60 minutes)
The camera does not record any images or videos during the selected time interval. This can prevent the memory card from storing too many files and taking up memory capacity.
5. PIR Sensitivity
Set the sensitivity of the main sensor: if the environment in the room is very small, you should choose "high sensitivity". When outdoors, select "medium sensitivity" for normal conditions. When the external environment has a great influence on shooting, select "Low Sensitivity" for cold environments.
6. IR LED
Set the camera IR LED light "Auto": the camera automatically adjusts the brightness of the infrared light according to the status of the battery capacity during the night. Under "Super fine "shooting mode, the IR LEDs will be the brightest and the power consumption is high. Under "Economy" shooting mode, the IR LEDs work in the weakest status, and therefore the power consumption is low.
Remarks: It is recommended to set to "Auto" mode, because the camera will adjust the IR LED light according to the battery capacity.
7. Timed shooting
Set the timed shooting of the camera. For example, if you want to observe the flowering process of a plant, apply this function and set the interval between each shot to record the whole process of flowering. Select timed shooting, press OK button to open this menu, select "On" to pop up a time, minute, second window to set up (when this function is turned on, PIR main and sub sensors do not work).
8. Monitoring period
Set the camera time to work. Select the "Monitor Period", and then press the OK button to select "On". You can set the start time and end time of the camera. After the setting is completed, the camera will only work for the sub-set time every day and the other time is in the standby state.
9. Date/Time
Set the camera date/time setting. Select "Date/Time option", press OK button to pop up the settings dialog box. Press the Up/Down button to change the number, press OK to confirm the current number and enter the next setting option. For the year/month/day format: press the up and down buttons to select the format (YY/MM/DD, MM/DD/YY, DD/MM/YY)
Time format: 12 or 24 hour system.
10. Password set up
Set the camera's power-on password. Open the menu and select "Password Settings", and then press the OK button, set the switch to the "on" position, set a 4-digit number between 0-9 or letter between a-z. When the first position is set, press the MODE button to enter the next password setting. After the setting is completed, press the OK button to return to the previous menu. If you forget the power-on password, the default password of the camera is: "1111", you can enter this password and make sure the mode button is adjusted to the SETUP mode. The camera can now be unlocked.
11. Turn off WIFI automatically
Set the time of the camera to turn off automatically. Select the "turn off the WIFI Automatically" option; press the OK button to open the menu for 1 minute/2 minutes/3 minutes. When the camera is in the monitor or SETUP mode, after opening WIFI or finished use the APP and the phone is disconnected from the camera, the camera automatically exits WIFI When the camera defaults to "Automatically turn off the WIFI" time. Then the camera will return to the ON or SETUP mode automatically.
12.Playback mode
12.1 Remove the camera from the installation position, switch the switch from "ON" to "SETUP", press the MODE button to switch to the playback mode, press the up/down button to view the captured picture or video, press the OK button to start playing, and press OK again to stop the video. During playback, press the up button to fast forward 2 times, 4 times, 8 times; press the down button to rewind -2 times, -4 times, -8 times. If you do not want to play the current video during playback, press the MODE button to exit the current playback.
12.2 Delete/Lock protection
In playback mode, long press the down button to pop up the delete window: Delete:
Press OK to enter the delete menu. You can delete the selected picture or video in the camera's memory card, select "Delete Single" and press OK to confirm. Select "Delete All" and press OK to confirm. Press MODE button during the setting process to return to the previous menu.
Protection:
Select "Lock current" to prevent the currently set document from being deleted accidentally.
Select "Unlock current" to release current document protection.
Select "Lock All" to prevent all documents on the memory card from being accidentally deleted.
Select "Unlock All" to remove all document protection.
13. WIFI APP connection
Before using the WiFi function, please install the APP on the smartphone. Please download and install the app from Google Play or the App Store by searching "Hunting Cam Pro".
Connection steps:
13.1 Turn on WiFi.
13.1.1 When the camera is in the SETUP mode, press and hold 3S up button in the video or camera mode. The screen displays the "WIFI" connection interface. The indicators flash alternately on the camera.
13.1.2 When the camera is in ON mode, use the remote control to turn on WIFI. When pressing "ON" on the remote control, the indicator light on the remote control is always on, press 3S and release to wake up the camera, then press "ON" on the remote control again after about 3S.
You will see that the indicator light on the remote controller flashes rapidly, indicating that the camera's WiFi has been successfully turned on. When the camera lights up alternately, the camera has open WIFI, the camera connection interface is as shown below:
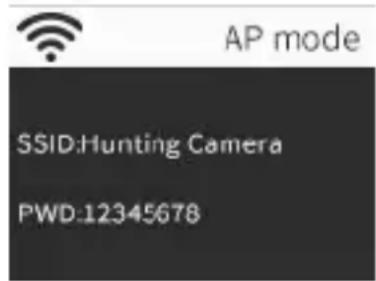
13.2 Open the phone "Settings", open the "WLAN" option in the settings, search for the camera's WIFI name "Hunting Camera", and enter the original password: 12345678, you will see the camera has a connection interface after the connection is successful. The screen will be turned off in about 2 minutes; if you press any button on the camera, the machine screen will light up again, and the connection success message will be displayed as shown below:

13.3 Open the "Hunting Cam Pro" APP and click the connect button on the APP interface.
13.3.1 The picture being taken can be previewed in real time on the APP, and can be recorded, photographed, menu set, and file playback/download/delete.
13.3.2 You can view files under the APP interface for photo or video which have been downloaded, you can also delete them.


14.Exit WIFI
14.1 Press and hold the UP button on the camera for 3 seconds to exit WIFI. The camera returns to the recording interface and the indicator light turns off.
14.2 Press "OFF" on the remote control. If you press the first time, you can see that the indicator light on the remote control is always on. Press a second time and you will see that the indicator light on the remote control flashes quickly, indicating that the WIFI has been successfully turned off. The camera will automatically enter the "ON" mode or SETUP mode.
14.3 After using the APP, you can select "Exit WIFI" in the APP menu. You can turn off WIFI and the camera will automatically enter "ON" mode or SETUP mode.
14.4 After the camera is turned on or the connected app is used, the camera and the mobile phone network are also disconnected when you forget to close or exit the camera WIFI. After the camera defaults to "automatically turn off the WIFI" time, the camera automatically exits WIFI and the camera automatically returns to the ON or SETUP mode.
15. APP ICON:
| Recoding mode | Photo Mode | ||
| Playback mode | APP menu setup | ||
| ← | Return to the previous menu | Multiple choice | |
| × | Turn off multiple choice | Download | |
| Delete | Share |
1. Aligning the camera
In the test (SETUP) mode, you can calculate the optimal shooting angle and camera range of the camera.
1.1 During alignment consider whether the use of the side motion sensors may be useful for attaining the desired observation results.
1.2 Align the camera as follows:
1.2.1 Fasten the camera to a tree or similar object at a height of 1-2 meters and align the camera in the desired direction. Then move slowly from one side of the target area to the other side. While doing this, monitor the motion display LEDs.
1.2.2 If this lights up in blue, you have been detected by one of the activated side motion sensors. If it lights up in red, you have been detected by the front motion sensor. In this way, you can work out the best alignment for the camera.
1.2.3 The motion display only lights up when operating mode selector switch is in the SETUP position and one of the motion sensors has detected movement. During normal operation, there will be no LED display in this area.
1.2.4 Make sure that the camera is not subject to unnecessary interference while it is working. Keep away from direct sunlight, hot objects or near branches. The sensor's detection range is about 120 degrees, and the lens can shoot about 90 degrees.
2. Normal working mode
In this mode, shooting is triggered by the sensor. Enter the monitor mode by switching to "ON" position, and the LED will go out after 5 seconds. The camera starts to operate independently and enters standby mode. Once an animal enters the detection area detected by the secondary sensor, the camera will be activated and motion will be detected. If the object continues to move to the area detected by the main sensor, the camera will automatically take a picture or video. If the animal leaves the area detected by the sensor, the camera will turn off and return to standby state.
3. Night working mode
3.1 During night the infrared LEDs on the front of the camera provide the required light for taking pictures. The LEDs make the camera to shoot pictures within 3m - 20m . However, reflective objects can cause overexposure.
3.2 Please note that pictures taken in night are black and white. When recording a video for a long time, the low voltage may have great influence on the stability of the camera. So in case of the low voltage, it better not to record in the evening.
1. TV connections
The camera can transfer the video signal to an external monitor or the video input of a television set. Please also follow the instructions of the respective playback device.
1.1 Open the TV, connect the TV with the camera through data cable.
1.2 Open the camera, and slide the operating mode selector switch to "SETUP".
1.3 After a successful connection, the camera is connected to the TV, the LCD screen will turn black, and the captured picture will be displayed on the TV screen.
2. Transferring recordings to a computer
After the camera is connected to the computer and enters the removable disk mode, a removable disk will be added in the "My Computer" window. The captured photos or videos are stored in the "DCIM" directory of the removable disk. There are two folders: MOVIE stores the captured video files, PHOTO stores the captured image files; enter these two directories to copy the file to your computer's hard disk.

Note: In case of data loss, please don't disconnect the cable or take out the memory card when copying photos/videos.
Technical Specifications
| Image sensor | 8MP CMOS sensor |
| Function modes | Video recording/Photo/Playback/Menu |
| Lens | F2.5 f=3.6mm |
| Screen | 2.0 inch LCD |
| Photo resolution | 24M/20M/16M/12M/10M/8M/5M/3M/2M |
| Video resolution | 1296P/1080P/720P/WVGA/VGA |
| Memory type | SD card(up to 32GB max) |
| format | JPG, MP4 |
| USB connection | USB 2.0 |
| Power | 8x AA Battery (DC 6.0V 2A optional) |
| language | English/Chinese/German/French/Italian/Spanish/Portuguese/Dutch/Japanese/Dansk/Svenska |
| Dimensions | 95×137.5×64mm |
Note: Specification could be subject to modification due to updates. Please regard the actual product as the standard form.