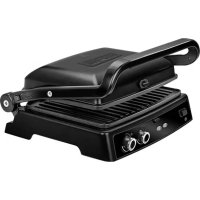
MGR12 - Grill plate MPM - Free user manual and instructions
Find the device manual for free MGR12 MPM in PDF.


| Brand | MPM |
| Model | MGR12 |
| Product type | Electric grill plate |
| Usage | Domestic |
| Power supply | 220-240 V, 50/60 Hz |
| Power cord length | 0.75 m |
| Cooking plate material | Non-stick coating |
| Main functions | Grill with closed or open plates, adjustable thermostat, timer 0-30 min, indicator lights |
| Cooking modes | Closed plates (double-sided cooking), open plates (extended grill surface) |
| Thermostat | Adjustable (MIN to MAX position) |
| Timer | 0 to 30 minutes or continuous operation |
| Grease collection tray | Integrated, removable |
| Removable cooking plates | Yes, interchangeable |
| Cleaning | Plates and grease tray dishwasher safe; exterior surface cleanable with a damp cloth |
| Safety | Hot surface (caution), lid lock, non-slip feet, steam burn protection |
| Special instructions | Do not immerse, do not use outdoors, supervision required for children |
| Included accessories | Cooking plates (2), grease tray |
Frequently Asked Questions - MGR12 MPM
User questions about MGR12 MPM
0 question about this device. Answer the ones you know or ask your own.
Ask a new question about this device
Download the instructions for your Grill plate in PDF format for free! Find your manual MGR12 - MPM and take your electronic device back in hand. On this page are published all the documents necessary for the use of your device. MGR12 by MPM.
USER MANUAL MGR12 MPM
natural_image
Black square grating with a flat top and side grater, no visible text or symbolsnatural_image
Black grating with open lid and control buttons (no visible text or symbols)natural_image
Close-up of a black flat-screen grater with control knobs and a dial, labeled 'rys. 1' (no other text or symbols visible)Before use thoroughly read the operation manual.
Extreme care is required in case of children presence in vicinity of the appliance!
Do not use this appliance for other than intended use.
Do not immerse the appliance, its cord and plug in water or any other fluids.
Do not leave the appliance without supervision in course of its operation.
▶ Always pull out the plug from the socket unless the appliance is used or before its cleaning.
Do not use the appliance in case of its damage, also if its cord or plug is damaged – in such case the appliance should be handed over to an authorized service shop for repair.
To avoid the risk of damage, fire or injury, always use the attachments recommended by the manufacturer.
Do not hang the cord on any sharp edges and prevent any contact with hot surfaces.
Do not place the appliance in vicinity of electric and gas cookers, burners, ovens, etc.
Do not touch any hot surfaces in course of roasting – open the roaster by means of holder designed for this purpose only.
When opening the appliance in course of roasting, proceed carefully owing to hot damp from the area under the heating panels!!
The appliance should be connected into the socket with grounding pin.
Place the appliance on a dry, flat and stable surface.
Place the press grill on a heat-resistant surface. Do not place the press grill on surfaces made or finished with plastic, vinyl, paint/varnish or other flammable materials.
Do not move the press grill when hot or in operation.
Before cleaning the press grill after use, wait for it to cool down, unplug the power cord from the mains and empty the fat drip pan.
The press grill is suitable for indoor use only.
Do not use the appliance outdoors.
The appliance is not intended to be operated by means of an external timer or separate remote-control system.
The device is intended for domestic use only.
This appliance is not intended for use by children under 8 years of age and individuals with reduced physical, sensory or mental capabilities, or lack of experience and knowledge, unless they have been given supervision or instruction concerning use of the appliance in a safe way and if they understand the hazards involved. Cleaning and user maintenance shall not be carried out by children without supervision.
- Ensure that children do not play with the appliance.
Store the appliance and its cord out of reach of children under 8 years of age.

NOTE! Hot surface!
The temperature of surfaces may be higher when the appliance is in use.
To avoid the risk of fire, do not place the appliance near flammable objects, such as curtains, tablecloths, etc.
Do not remove the plug from the mains by pulling by the cord.
Do not plug the power cord with wet hands.
In order to ensure your children's safety, please keep all pack aging (plastic bags, boxes, polystyrene etc.) out of their reach.
WARNING! Never let children play with plastic film or bags. Choking/asphyxiation hazard!
WARNING! Oils and fats may burn when overheated.
Please be careful!
PRESS GRILL OVERVIEW
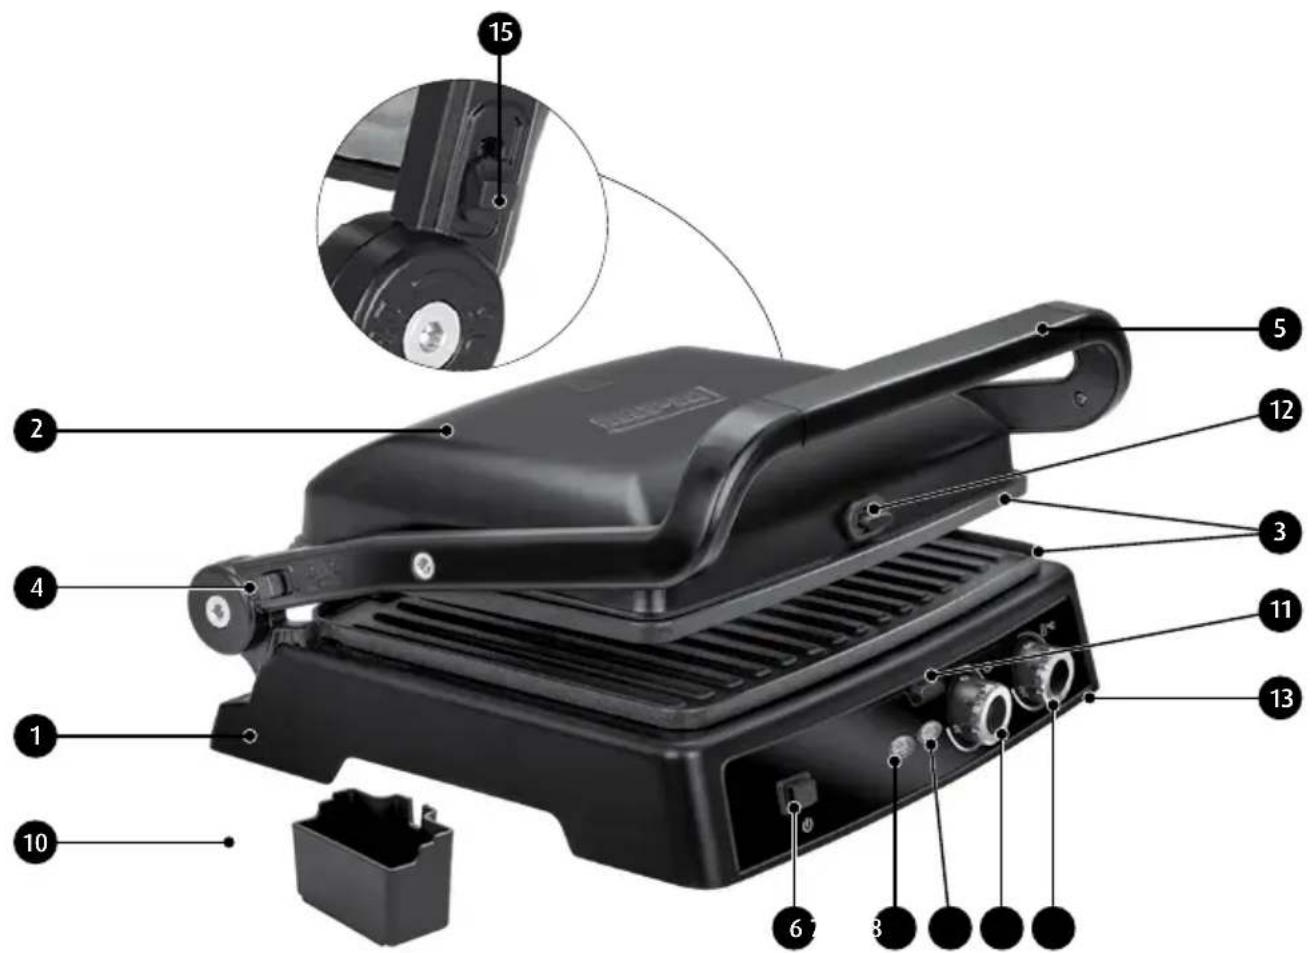
- Grill base
- Top lid
- Non-stick heating plates
- Top lid slider latch
- Top lid handle
- Switch on/off
- Operation status indicator light
- Thermostat indicator lamp
-
Thermostat slider
-
Fat drip pan
- Button of freeing the lower heating plate
- Button of freeing the upper heating plate
- Anti-slip feet
- Timer tuning knob
- Open mode slider
Depending on the recipe and/or the grilled food product and/or its size or quantity, the press grill can be used in two configurations:
With the hot plates closed: the top and down sides of food products are grilled at the same time; the food products are processed fast and with a well-controlled, nearly uniform doneness on both sides.
With the hot plates open: this configuration is the next best thing to natural grilling on an open flame; the grilling surface is two times bigger than when the hot plates are closed.
The grill is equipped with an opening lock of the top cover which facilitates storage and moving the equipment.
BEFORE FIRST USE
- Unpack the press grill and remove all plastic bags, labelling stickers, filling materials and transport locks.
- Verify that the power ratings on the rating plate of the press grill match your power mains system.
- Slide the top lid slider latch ④ open to the 'OPEN' mark and lift the top lid ② open. The top lid can be locked closed with the top lid slider latch at the 'LOCK' mark. Check if the heating plates ③ are correctly mounted in the device.
WARNING! Never start the appliance without properly installed heating plates.
- Clean the hot plates ③ and the fat drip pan ⑩ thoroughly with a wet cloth and wipe them dry.
- Carry out the pre-heating operation of the grill plates prior to a commencement of operating of the grill. In this regard, position the equipment on a hard, dry, horizontal and even surface, connect it to the power grid, switch on with the use of the switch ⑥ and adjust the thermostat tuning knob ⑨ to the MAX. position. Set the timer (14) for 5 minutes. After switching off, unplug from the power grid and wait until it has cooled down completely. A slight smoke emission may accompany the pre-heating of the plates, but will disappear during a further period of operation.
- Wipe the hot plates with a damp cloth and wipe them dry.
USING THE PRESS GRILL WITH CLOSED HOT PLATES
CAUTION! Before starting the press grill, make sure it is dry and that the room is well ventilated.
- Place the press grill on a firm, dry, level and smooth surface.
- Make sure that the fat container 10 is installed in the device.
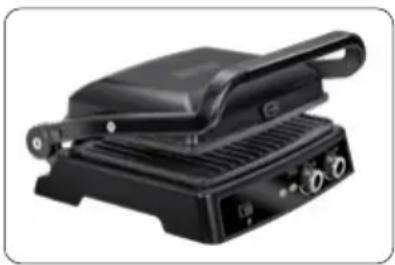
- Use the slider 4 to release the cover lock (slider in position ☐) and open the cover to the vertical position.
natural_image
Black grating with a handle and control panel (no visible text or symbols)CAUTION! Lift the top lid ② by the handle ⑤ only.
-
Spread some cooking fat on the heating plates ③. Close the top lid.
-
Connect the equipment to the power grid and switch on the unit with switch 6. The indicator light 7 will go on when the grill is activated. Use the thermostat tuning knob 9 to set the proper grilling temperature. When the grill reaches the set temperature, the thermostat indicator light 8 will light up in green. Use lower temperatures for quiet grilling of delicate foods and higher temperatures for meat.
-
Place the food to be grilled on both heating plates. The grilling time will depend on the type of food to be grilled. Periodically flip the food to the other side in order to fry it evenly. Depending on the results and your culinary tastes, adjust the grilling temperature. When placing food on the grill, make sure that you do not obstruct the grease flow into the grease container.
-
While grilling, the indicator light of thermostat ⑦ and ⑧ will go off and on several times to indicate that the equipment is maintaining the set temperature. Due to a greater heat exchange with the environment, the equipment will carry out this operation more often than when the cover is closed.
-
Hot steam may burst when opening and closing the top lid to check the doneness. This is a normal effect of processing food with heat. Adjust the grilling temperature with the thermo stat knob according to the desired grilling effect.
- The fat melted out of the food will flow for the fat drip pan 10. Empty the fat drip pan frequently to prevent overflow and spills.
CAUTION! Risk of burns! The fat flowing out to the fat drip pan is hot!
-
Remove the processed food from the press grill with grilling tongs or utensils made of wood. Do not use metal utensils, they might damage the non-stick coating of the hot plates.
-
When done grilling, you can either put another serving in the press grill, or turn off the press grill: slide the thermostat slider to 0, turn off switch ⑥ and unplug the power cord from the mains.
-
Leave the press grill to cool down and clean it as explained in Section "CLEANING AND MAINTENANCE".
USING THE GRILL WITH OPEN HOT PLATES
CAUTION! Before starting the press grill, make sure it is dry and that the room is well ventilated.
- Place the press grill on a firm, dry, level and smooth surface.
-
Make sure that the fat container 10 is installed in the device.
-
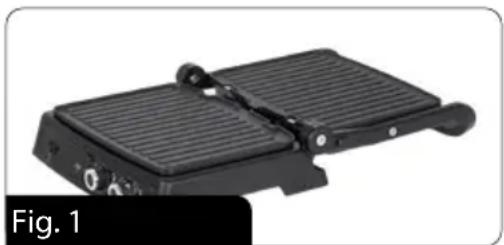
Use the slider ④ to release the cover lock (slider in position ☐) and open the cover to the vertical position. Move the slider ⑮ to the left and hold it while you use your other hand to grasp the handle ⑤ and tilt the top cover ② towards the back of the unit so that the cover ② rests with the handle ⑤ on the countertop. The heating plates will form a 180° angle (fig. 1).
natural_image
Black rectangular electronic device with a flat top and side-mounted legs, labeled 'Fig. 1' (no visible text or symbols on the device itself)CAUTION! Do not open the press grill completely when hot.
- Spread some cooking fat on the heating plates ③.
- Connect the equipment to the power grid and switch on the unit with switch ⑥. The indicator light ⑦ will go on when the grill is activated. Use the thermostat tuning knob ⑨ to set the proper grilling temperature. When the grill reaches the set temperature, the thermostat indicator light ⑧ will light up in green. Use lower temperatures for quiet grilling of delicate foods and higher temperatures for meat.
- Place the food to be grilled on both hot plates. The grilling type will depend on what food products you want to process. Flip the food over after some time to have it done even. Adjust the grilling temperature with the thermostat slider according to the desired grilling effect. When placing products, be careful not to block fat channels.
- While grilling, the indicator light of thermostat ⑦ and ⑧ will go off and on several times to indicate that the equipment is maintaining the set temperature.
- The fat melted out of the food will flow for the fat drip pan 10. Empty the fat drip pan frequently to prevent overflow and spills.
CAUTION! Risk of burns! The fat flowing out to the fat drip pan is hot!
CAUTION! The grilling process produces hot steam. Risk of burns.
- Remove the processed food from the press grill with grilling tongs or utensils made of wood. Do not use metal utensils, they might damage the non-stick coating of the hot plates.
- When done grilling, you can either put another serving in the press grill, or turn off the press grill: slide the thermostat slider to 0, turn off switch ⑥ and unplug the power cord from the mains.
- Leave the press grill to cool down and clean it as explained in Section "CLEANING AND MAINTENANCE".
CAUTION! Do not close the top lid until the press grill cools down completely. Risk of burns!
CLEANING AND MAINTENANCE
- Before attempting to clean the press grill (and when done grilling), turn off switch ⑥, unplug it from the mains and wait until it cools down.
CAUTION! Do not submerge the press grill in water or other liquids! Do not wipe the hot plates with rough scourers or sponges as you may damage the hot plates.
- Clean the hot plates of fat with paper tower. Remove the hot plates and wash them with warm water and a detergent. Thoroughly flush clean with water and dry. To remove the hot plates, press down the button 11 with one hand and take out the bottom hot plate with the other. Use the button 12 to remove the top hot plate likewise. Both hot plates are identical and interchangeable. Install each hot plate by engaging the two grooves in the hot plate with the two tabs in the hot plate seat; next, press down the hot plate until it is latched in place.
- The surface where the heating plates are mounted inside the device can be wiped with a paper towel.
- Wash the fat drip pan with lukewarm water and a mild dishwashing detergent, rinse them clean, and leave to dry.
- Clean the outer surfaces of the press grill with a damp cloth and wipe them dry.
- You can wash in dishwashers the hotplates ③ and fat container ⑩.
TECHNICAL SPECIFICATIONS
See the product's nameplate for technical specifications.
Length of the network cable: 0.75 m

PROPER DISPOSAL OF THE PRODUCT (waste electrical and electronic equipment)
Marking on the product indicates that after the service-life of the product expires, it should not be disposed with other type of municipal waste. Used equipment may have a negative impact on the environment and health of people due to potentially containing hazardous substances, mixtures and components. Mixing electric waste with other types of waste or disassembling those in an unprofessional manner may cause a release of substances that are hazardous to the environment and health. Used equipment should be handed-over to a point for collection of electric waste. In order to obtain detailed information regarding the electric waste collection points, the user should contact the municipal point of electric waste collection or used equipment processing department.
natural_image
Black grating with a flat lid and side-mounted control panel (no visible text or symbols)natural_image
Black rectangular electronic device with a flat top and control knob, labeled 'рис. 1' (no other text or symbols visible)natural_image
Black frying pan with grating and control knobs (no visible text or symbols)natural_image
Black grater with side-mounted legs and control knob, labeled 'Abb. 1' (no other text or symbols)natural_image
Black grating with a flat top and side outlets (no visible text or symbols)natural_image
Close-up of a black rectangular electronic device with a flat top and control knobs, labeled 'obr. 1' (no other text or symbols visible)natural_image
Black grating with a flat top and side control panel (no visible text or symbols)natural_image
Black grating device with a horizontal rod and control knob, labeled 'obr. 1' (no other text or symbols visible)natural_image
Black frying pan with control knobs and grilles (no visible text or symbols)natural_image
Black and white photo of a flat-screen grater with a handle, labeled 'figure 1' (no text on device itself)natural_image
Black frying pan with grating and control knobs (no visible text or symbols)natural_image
Black grater with side-mounted legs and control knob, labeled 'Fig. 1' (no other text or symbols)We wish you satisfaction from using the product and invite you to check a wide range of other MPM appliances
natural_image
Line drawing of a vacuum cleaner with a cat-shaped handle and circular base (no text or symbols)MPM agd S.A.
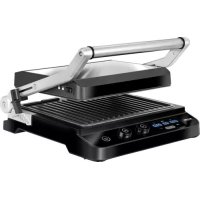
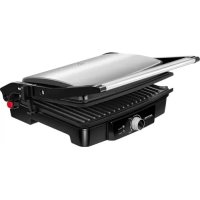
- NOTE! Hot surface!
- PRESS GRILL OVERVIEW
- BEFORE FIRST USE
- WARNING! Never start the appliance without properly installed heating plates.
- USING THE PRESS GRILL WITH CLOSED HOT PLATES
- CAUTION! Before starting the press grill, make sure it is dry and that the room is well ventilated.
- CAUTION! Lift the top lid ② by the handle ⑤ only.
- CAUTION! Risk of burns! The fat flowing out to the fat drip pan is hot!
- USING THE GRILL WITH OPEN HOT PLATES
- CAUTION! Do not open the press grill completely when hot.
- CLEANING AND MAINTENANCE
- TECHNICAL SPECIFICATIONS
- PROPER DISPOSAL OF THE PRODUCT (waste electrical and electronic equipment)
Brand : MPM
Model : MGR12
Category : Grill plate